• Modelers Alliance has updated the forum software on our website. We have migrated all post, content and user accounts but we could not migrate the passwords.
    This requires that you manually reset your password.
    Please click here, http://modelersalliance.org/forums/login to go to logon page and use the "Forgot your Password" option.

calling all puttyheads!

I'm trying to get the hang of using filler putty but most of the time it begins the process with a messy blob. :S How is it done where i see where it looks like it was put on with a brush and looks so neat. Is there some kind of applicator made for this where it comes out looking like a straight line? My putty is green squadron and have heard it's pretty good stuff.
 
Hiya Woodcutter.

There are lots of answers to those questions. And the right ones are the ones that you like most and find the easiest to use.


As far as application tools. Try your closest art store and look for metal oil painting spatulas. These are usually on a wooden handle and come in many shapes and sizes. I suggest the smallest and thinnest (flexible) ones you can find.

As far as thinning, the Squadron putty can be thinned with various liquid glues and solvents. But be warned that the more you thin your putty, the more it is going to shrink when it dries. There are other choices that you can use for "thinner" putty. My favorite is Mr Surfacer 500. That stuff can also be used for other uses, like simualting cast texture on pieces, and it dries fairly fast if used in thin layers. I also have not used "hobby" putty for over 20 years now, as I can get a huge tube for a fraction of the cost at almost any auto parts store. It is all pretty much the same thing.

And for applying in thin strips, try using masking tape just like you were painting. As soon as you have your putty down, lift the tape off, and you should have a thin narrow strip of putty right where you want it.

And one last tip is to try not to lay down to heavy a layer of putty all at once as this will tend to suffer from severe shrinking and cracking. If you need lots of putty on something try multiple layers allowing each layer to dry throughly.

Gary B)
 
Gary has given good advice above, particularly with regard to masking off the area which you intend to fill and using a spatula to apply it.

Never apply filler putty by squeezing from the tube directly to the area to be filled. When I use Squadron putty, I will often squeeze a little into a metal measuring spoon and thin with liquid cement (Testors "pink" liquid cement is great for this) or lacquer thinner. Thin to a soupy consistency and then apply where needed with a paintbrush. Yes, liquid cement/lacquer thinner can be aggressive to styrene, but when applied in this fashion, it flashes off so quickly that it's not an issue.

If you have masked either side of the seam, you can use the paintbrush and build it up till it's flush with the tape and you will have a paper-thin layer of putty. When dry, it will only take a few seconds to sand smooth with 400-600 grit wet and dry (used wet).

Avoid applying solvent based putties in a layer thicker than approx. 1/3 the thickness of the styrene you're applying it to - it needs to be thin enough for the solvents to evaporate through the putty so that it doesn't soften the underlying styrene. As Gary said, for heavier applications, apply multiple thin layers.
 
thanks guys for the quick replies. I don't use alot of filler so I'm guessing the tube will probably go bad long before I get through much of it. The Euro kits seem to call for it the most :eek:hmy: Pretty much all I use for glue is the liquid kind so I'm gonna be set :)
 
When wanting to fill and minimize the clean up after I use a one sided razor blade like the ones used with photoetch folding aids. Held at a 45 degree angle and pulled along the surface it gives a smoother finish than what I can get with purpose built applicators.
Although I guess that says more about my clumsy fingers than the spatulae. :laugh:

You don't need a large flat surface and I can negotiate my way around relatively fiddly parts but as you could imagine it does have it's limitations.Smaller areas I use an old micro chisel.

I tend to apply white Milliput turned into a slurry with a brush to fill small air bubbles and deformities. Gives a great smooth finish that requires next to no cleanup but you have to keep in mind that it will cure in water so time is ticking.

By brush my experience is limited to metal and some resin so I am not sure if it will work as well on plastic.
 
wood cutter here is an article i found online because i have been experimenting with putty myself B) http://www.swannysmodels.com/Seams.html
 
Hi Woody, I personally use Green Squadron and thin it with Tamiya Extra thin cement I also use this to attatch photoetch.
 
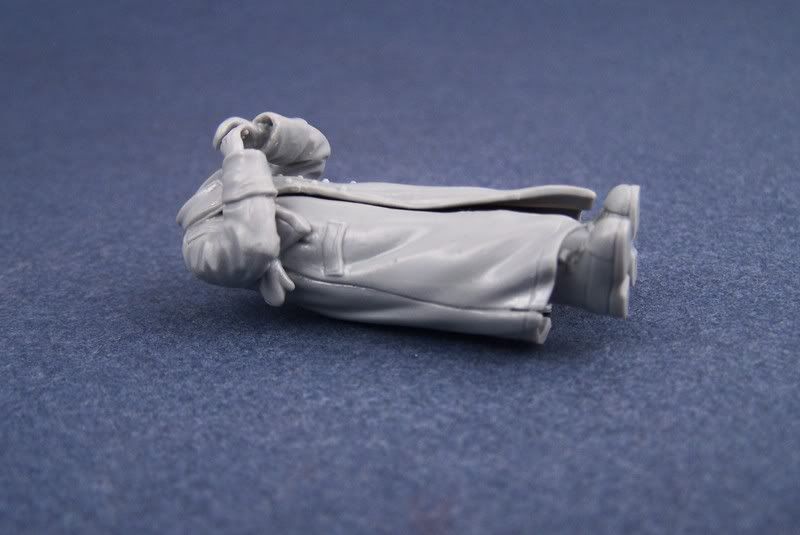
Sometimes, depending on the seam, I don't even use any putty. I'm not sure if this came about because I am a cheapskate or if it was out of necessity one day but it remains one of my favorite methods for filling seams.

seam.jpg


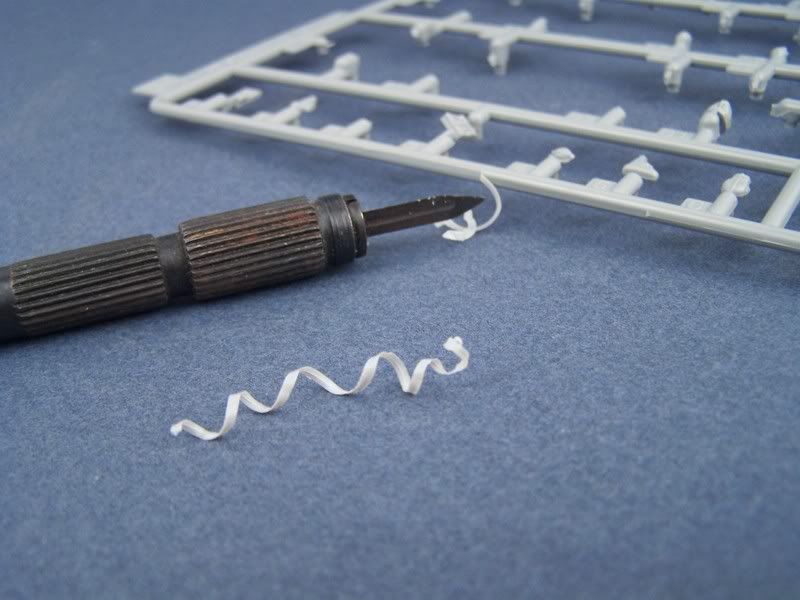
I will either used stretched sprue, or a shaving taken from the sprues like below:

seamscraper.jpg


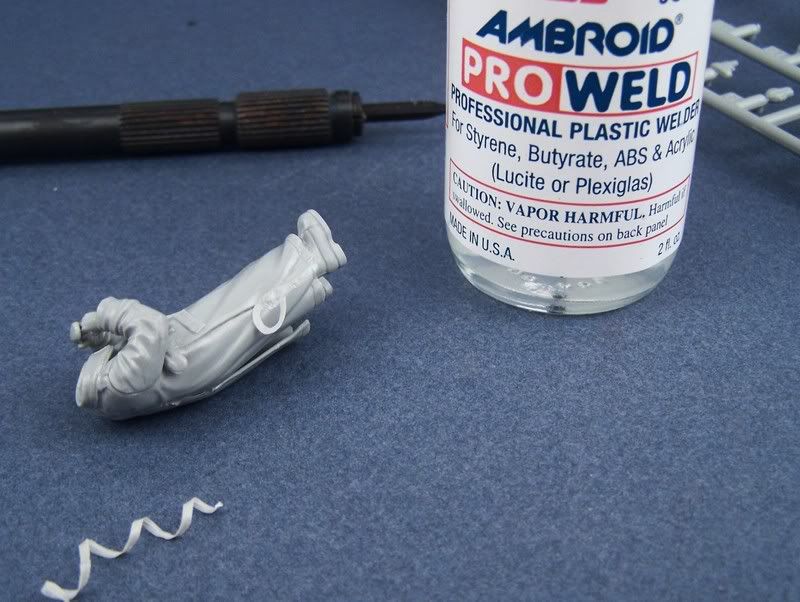
Then, using the liquid glue of your choice, apply:

seamapp.jpg


Since the glue will soften the sprue material, you can go back back over it a few times with the brush to makes sure it has settled down and filled all the gaps.

seam3.jpg


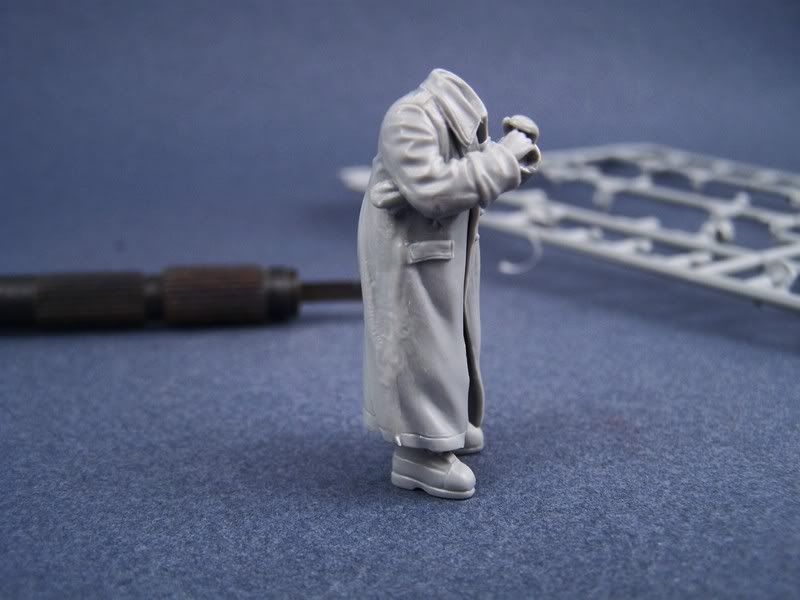
With a little sanding, presto, seam is gone. You may have to re-scribe some lines (as I did for the stitching at the bottom) and of course, make sure you sand well, (which after viewing this photo back then, I went back and finished):

seam4.jpg


No worries of cracking, shrinking, applying several coats etc. Nothing sticks to styrene like more styrene.

Hope that helps.

:peace
 
Well .... as always .... it's probably just me: I'm using wax as a filler for most of all filling jobs. It's not the average candle wax it's the wax dental technicians are using to build up the models for your third ones :) This wax you even can mill when hard. it melts at about 60 degree celsius (140F) and you can work with it at 75 C (167F) the average melting point of the styrol we are using is 80C (176F). So this ticks very well and you dont need to sand it it most cases.
 
Back
Top