• Modelers Alliance has updated the forum software on our website. We have migrated all post, content and user accounts but we could not migrate the passwords.
    This requires that you manually reset your password.
    Please click here, http://modelersalliance.org/forums/login to go to logon page and use the "Forgot your Password" option.

Call us the twins - Hasegawa 1/48 Ju87-G2

Phil

Active member
Hello again, I haven't been here for a while so thought I had better do something about that. :)

What I have been doing, is this intense build.

DSC_0651s.jpg


DSC_0452s.jpg


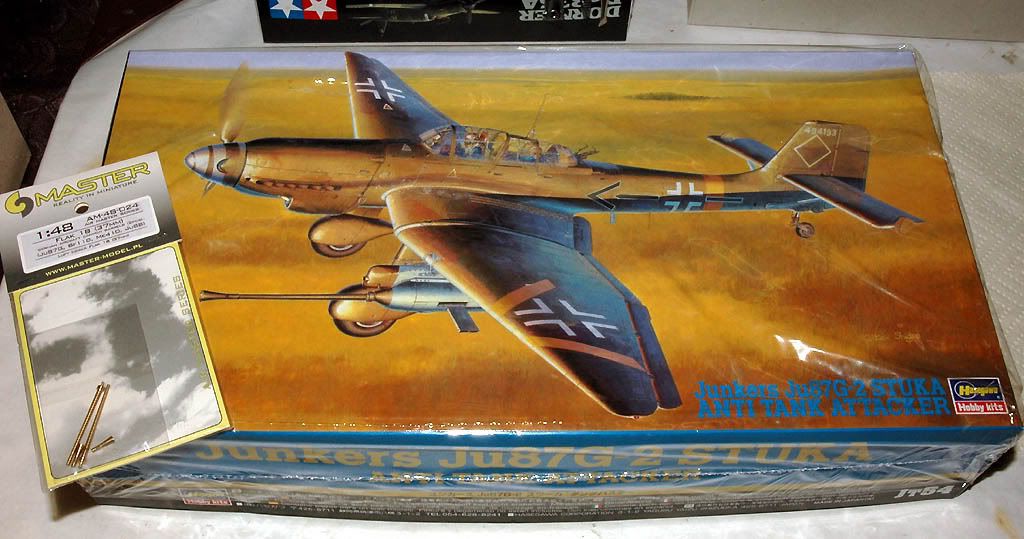
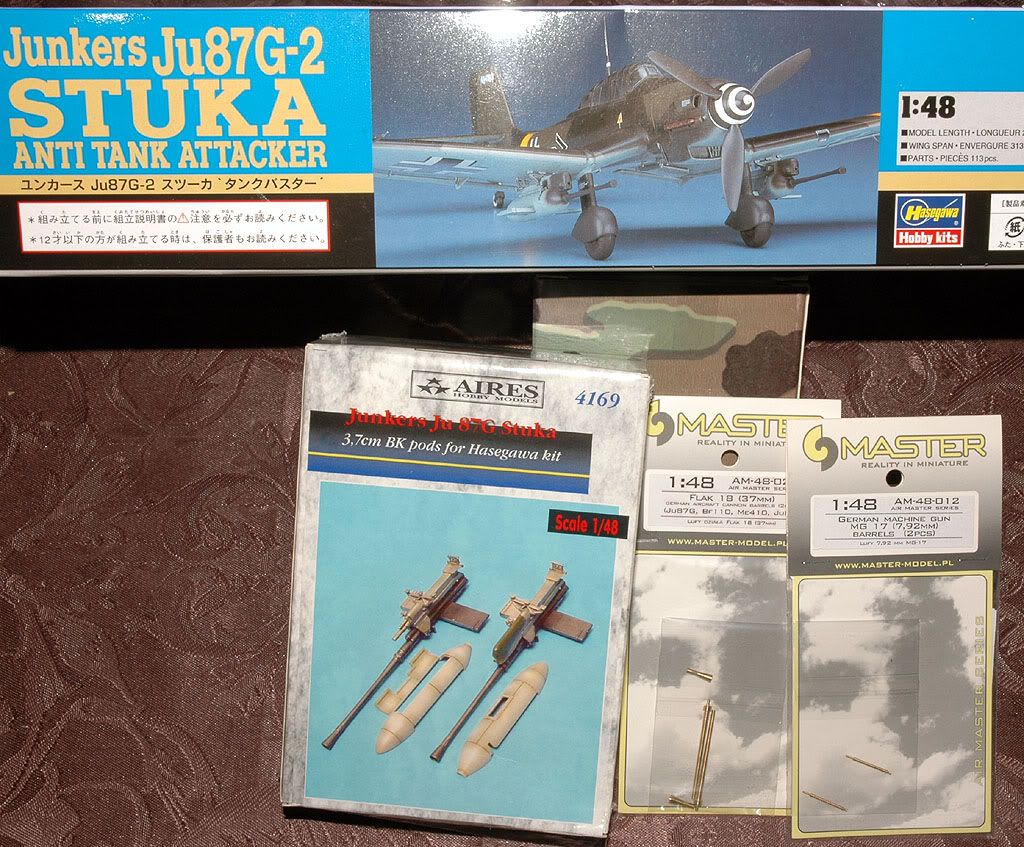
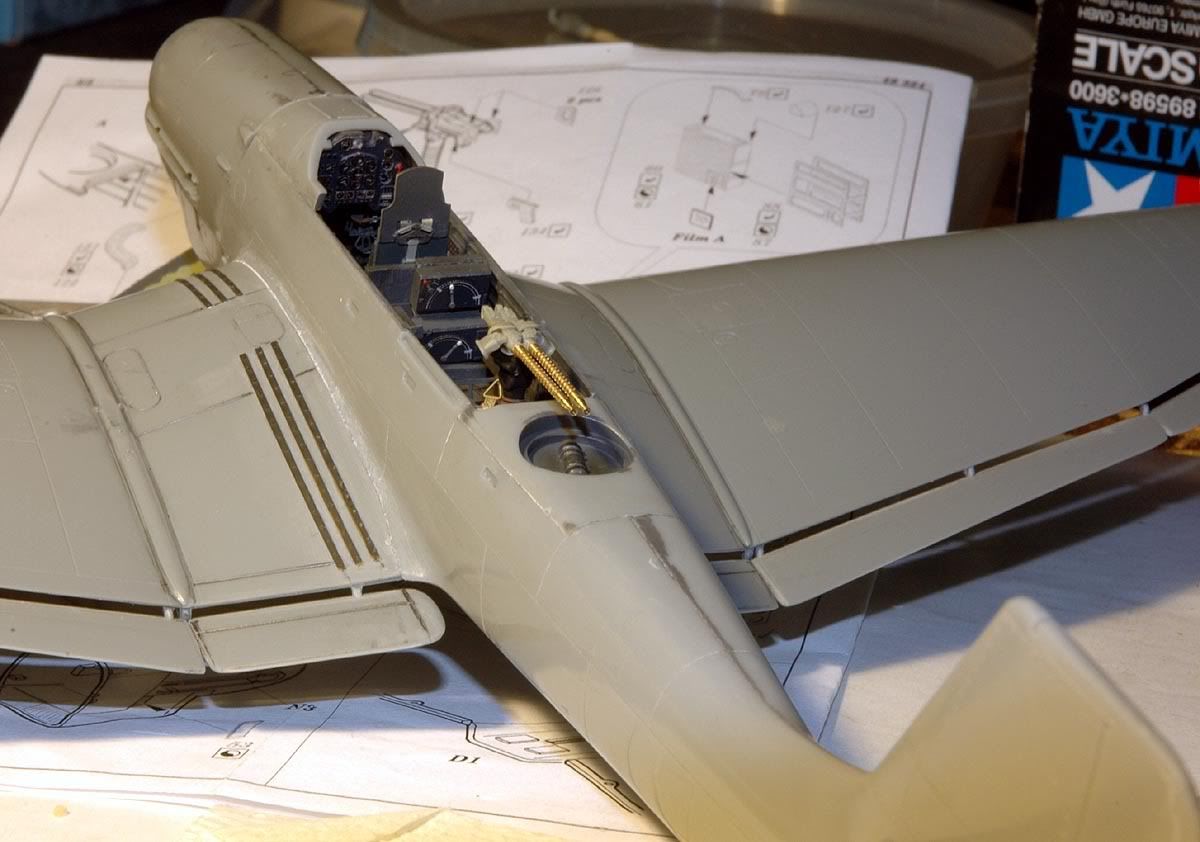
Colour Photo-etch for 1/48 Junkers Ju 87G-2 Stuka for Hasegawa kit - ED 49324 - totally Intense!

Aires 37mm Bordkannone Kit# 4169 - rubbish - pods would not close up - snapped while constructing - used kit pods

Ju 87D/G Stuka Exhausts - Ultracast 48102 - disappointing, last two exhaust tubes joined together in casting - may use kit ones yet and drill them out

1/48 German Aircraft Cannon 3.7cm Flakvierling 18 Gun Barrels (2pcs) Master Model 48-024 - just beautiful craftsmanship
and Master Model replacement rear gun barrels

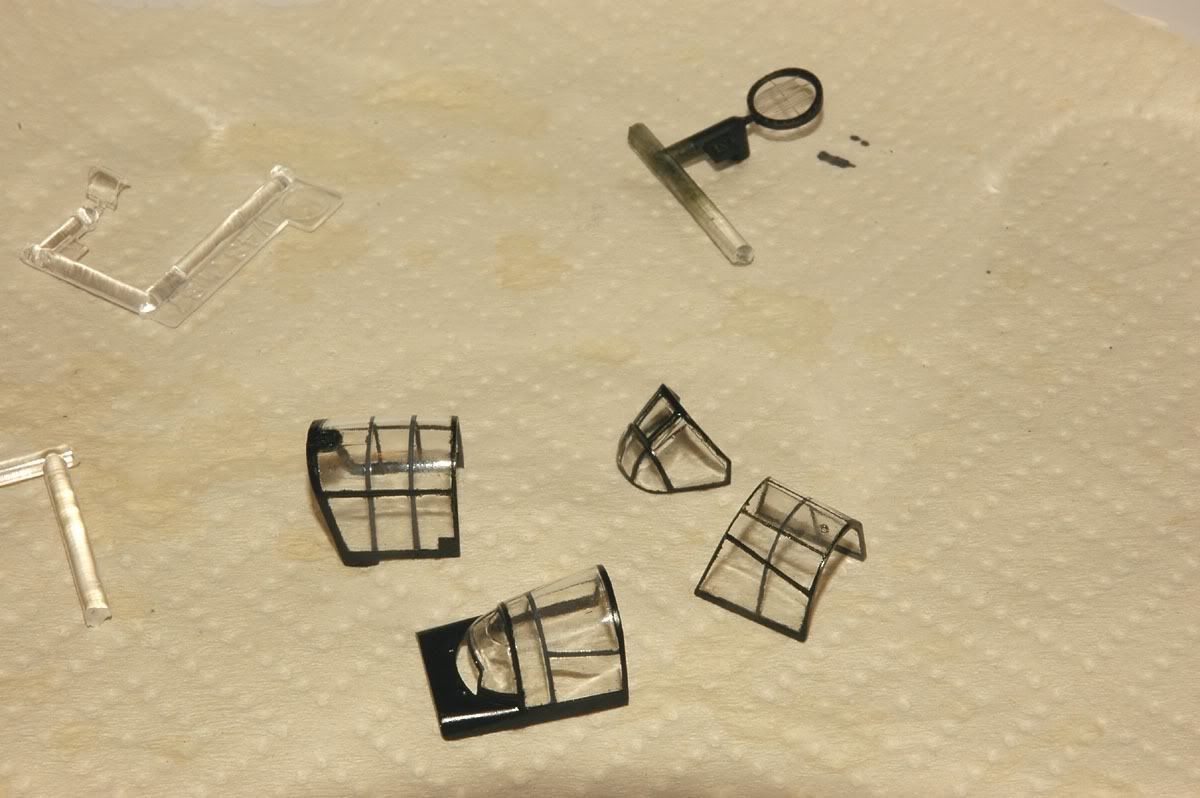
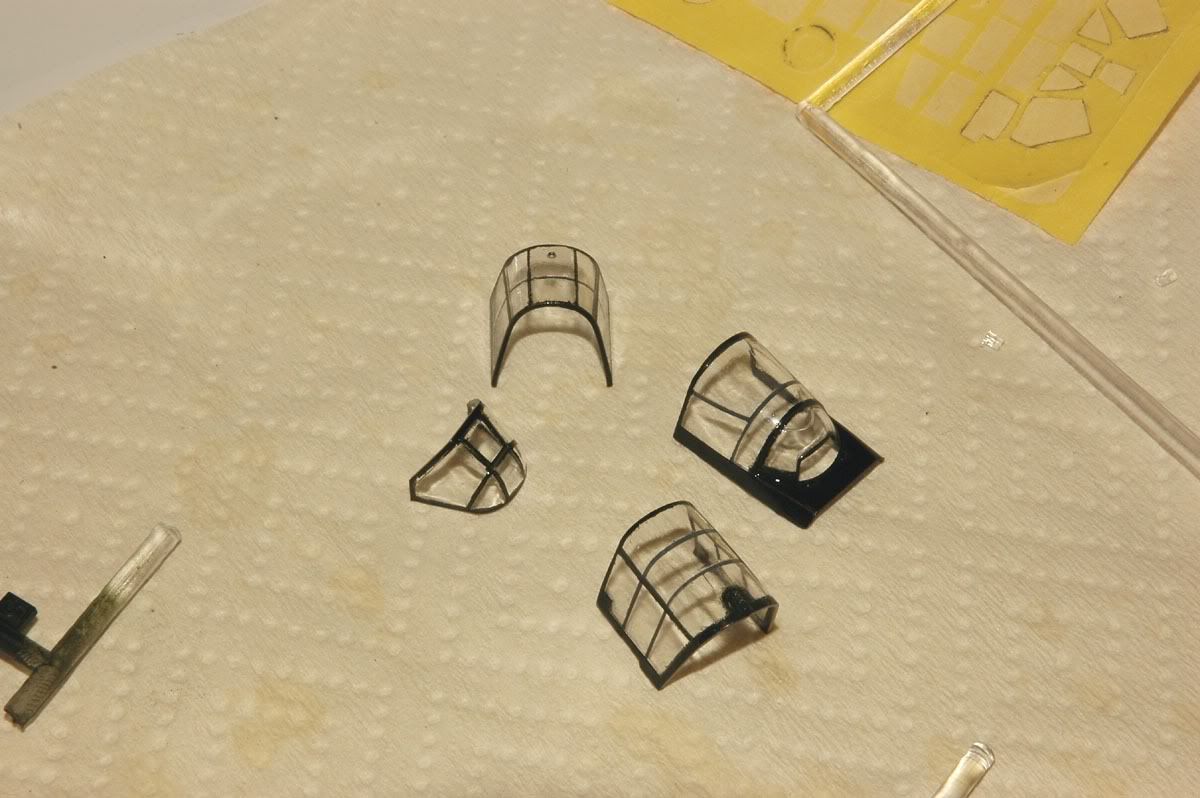
Ju 87D/G Stuka Paint Mask - A Moral Imperative !!!!!

After many nights on Pe duty...
DSC_2040xx.jpg


DSC_2041xx.jpg


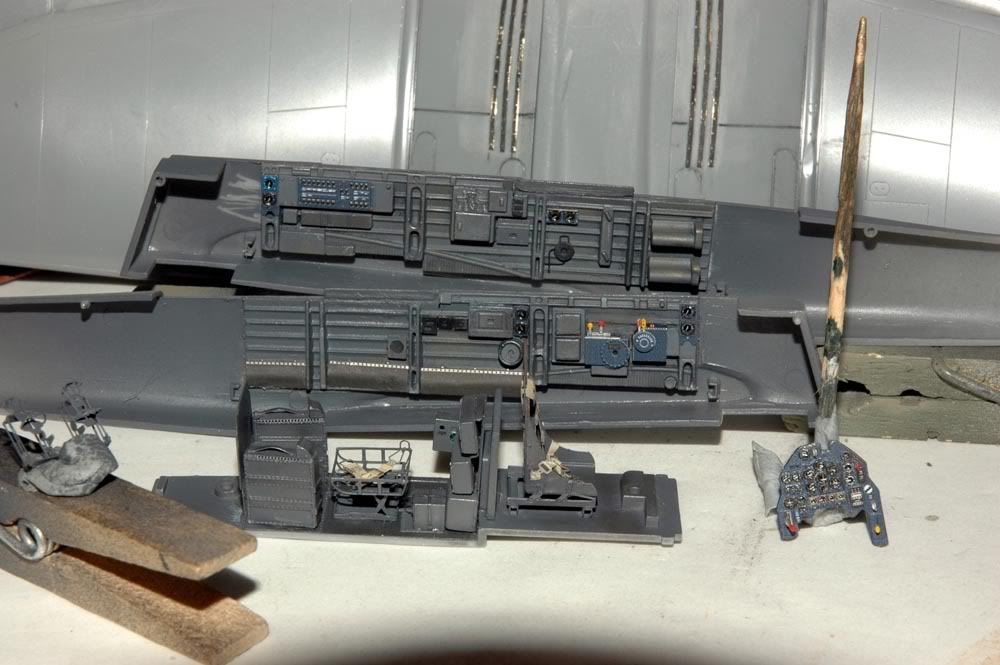
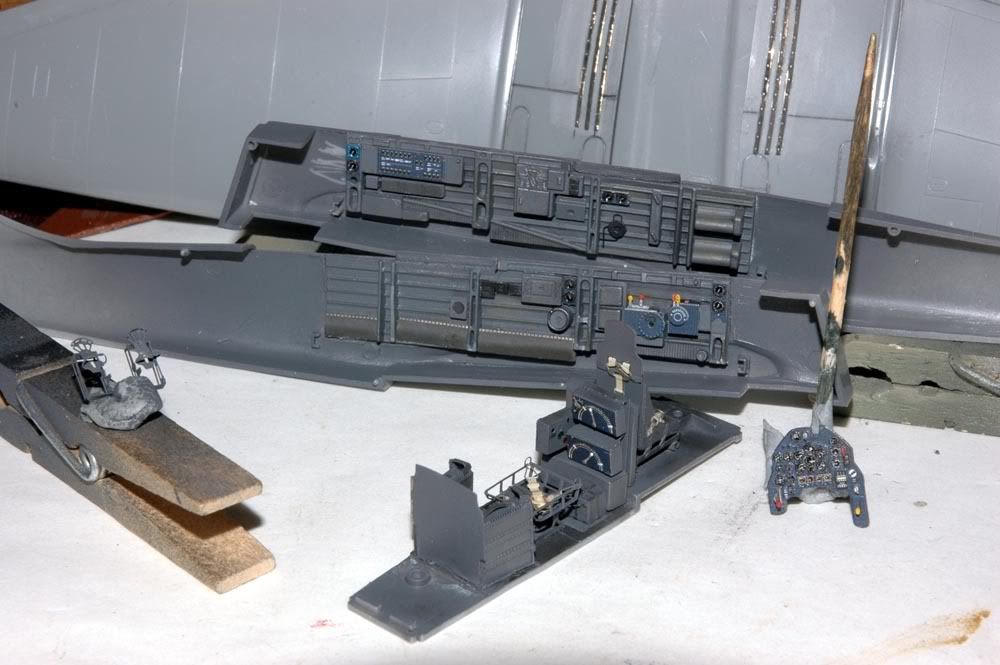
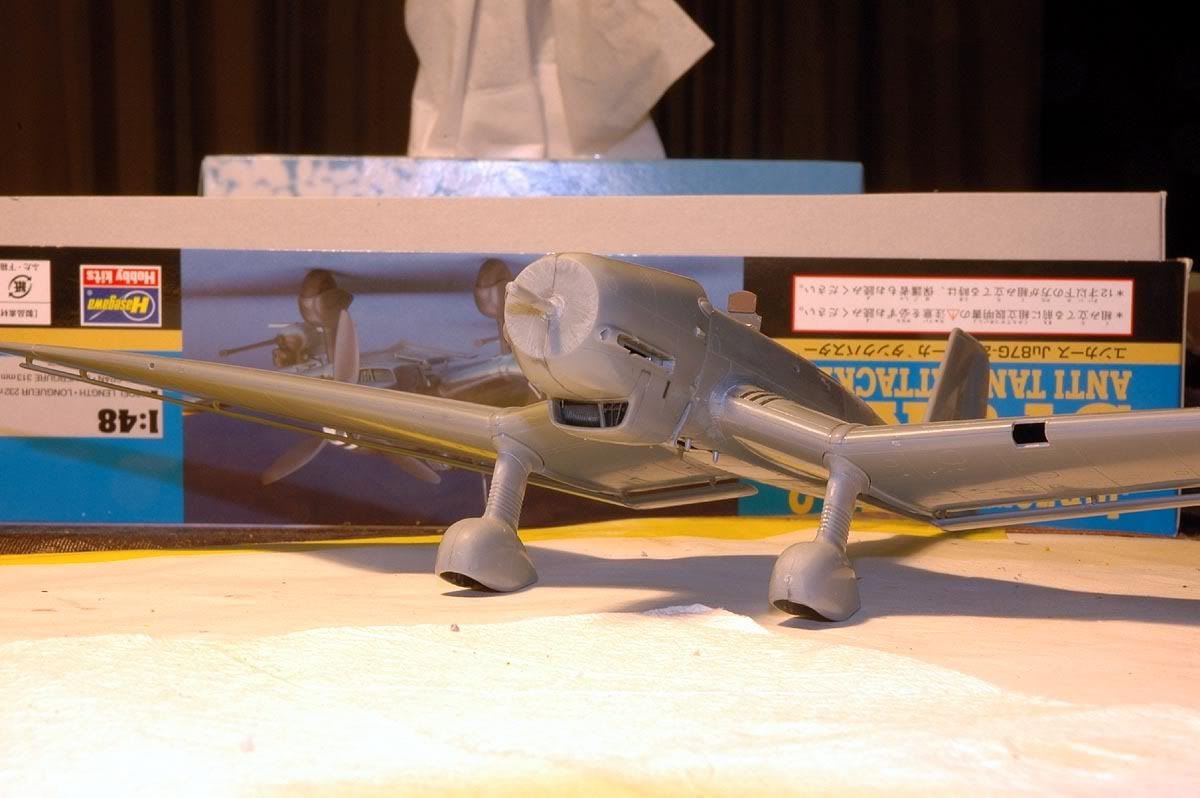
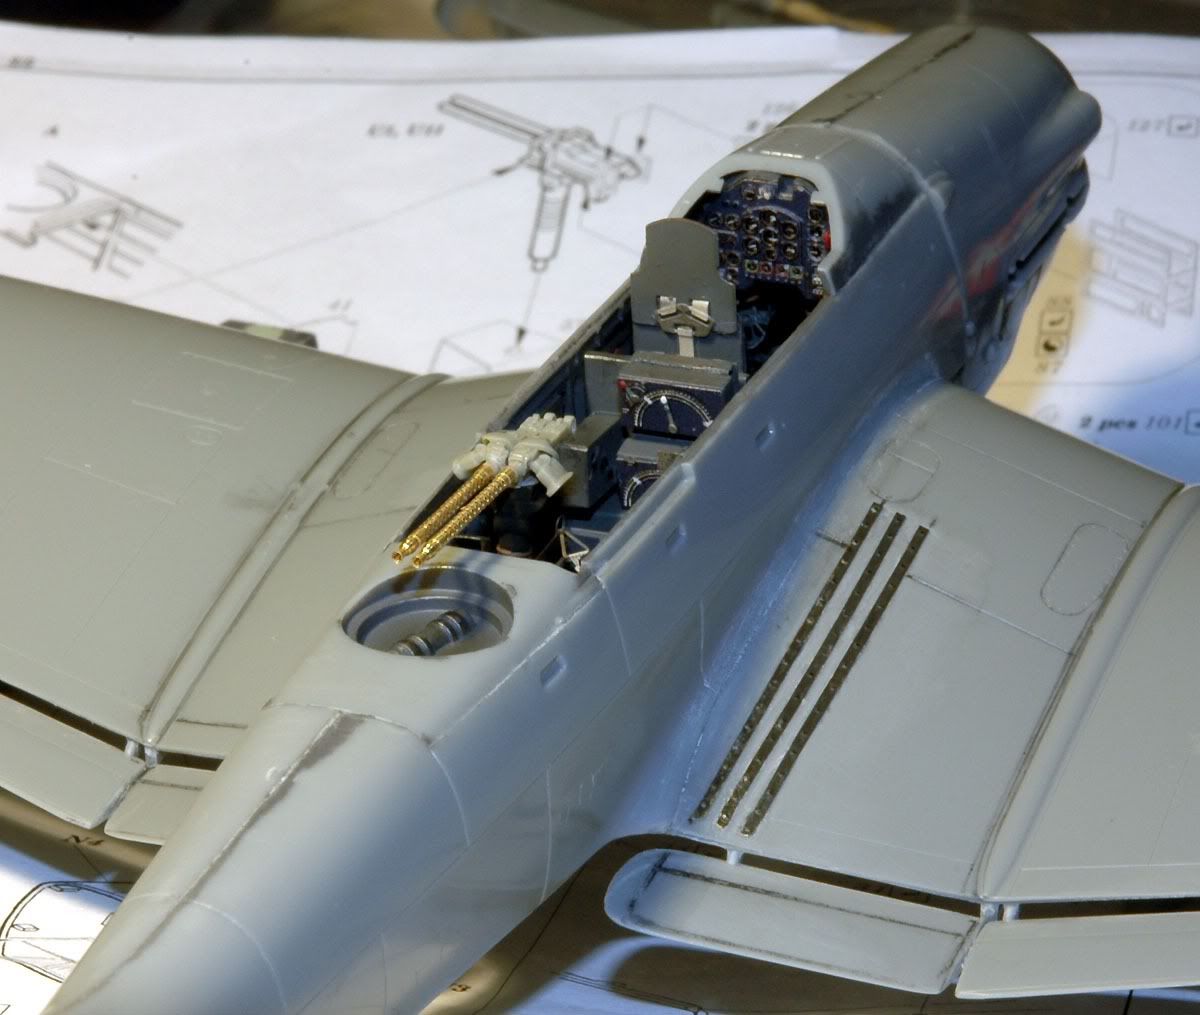
closed up with a few things still to be added
DSC_2058x1.jpg

Pe here there and almost everywhere
DSC_2053x1.jpg


DSC_2046x1.jpg


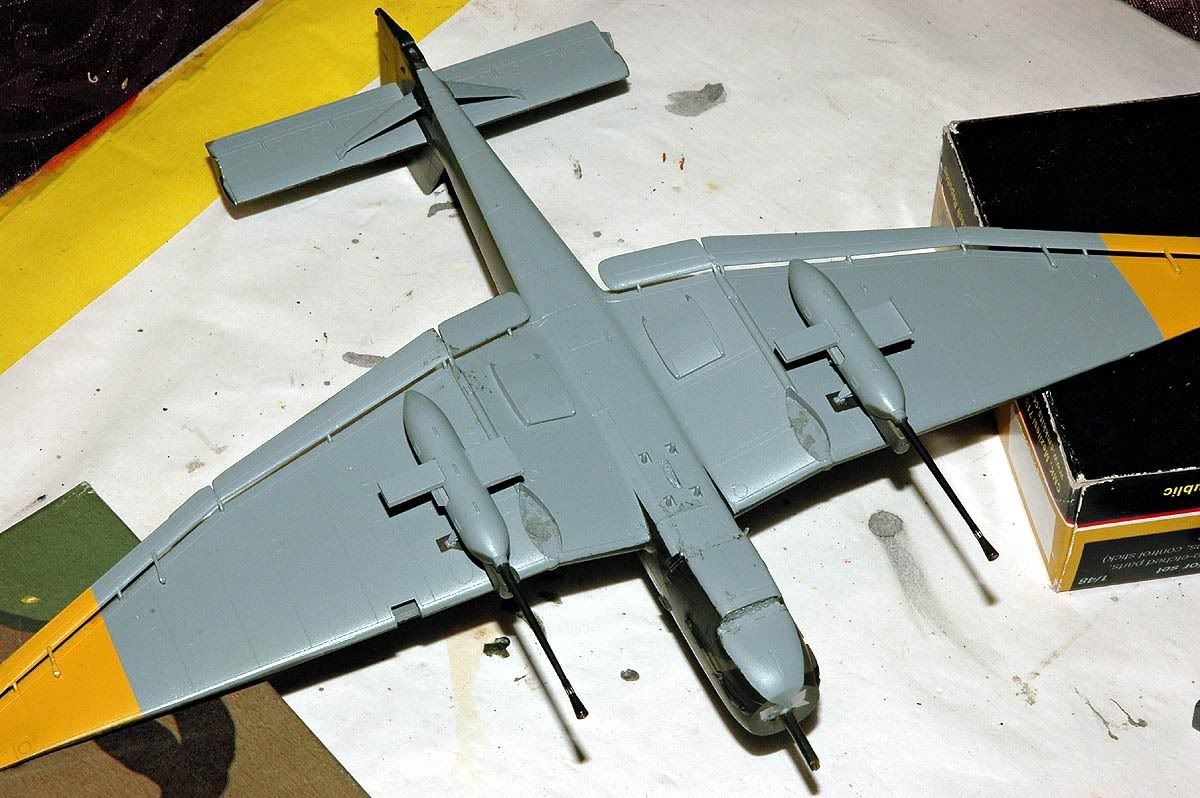
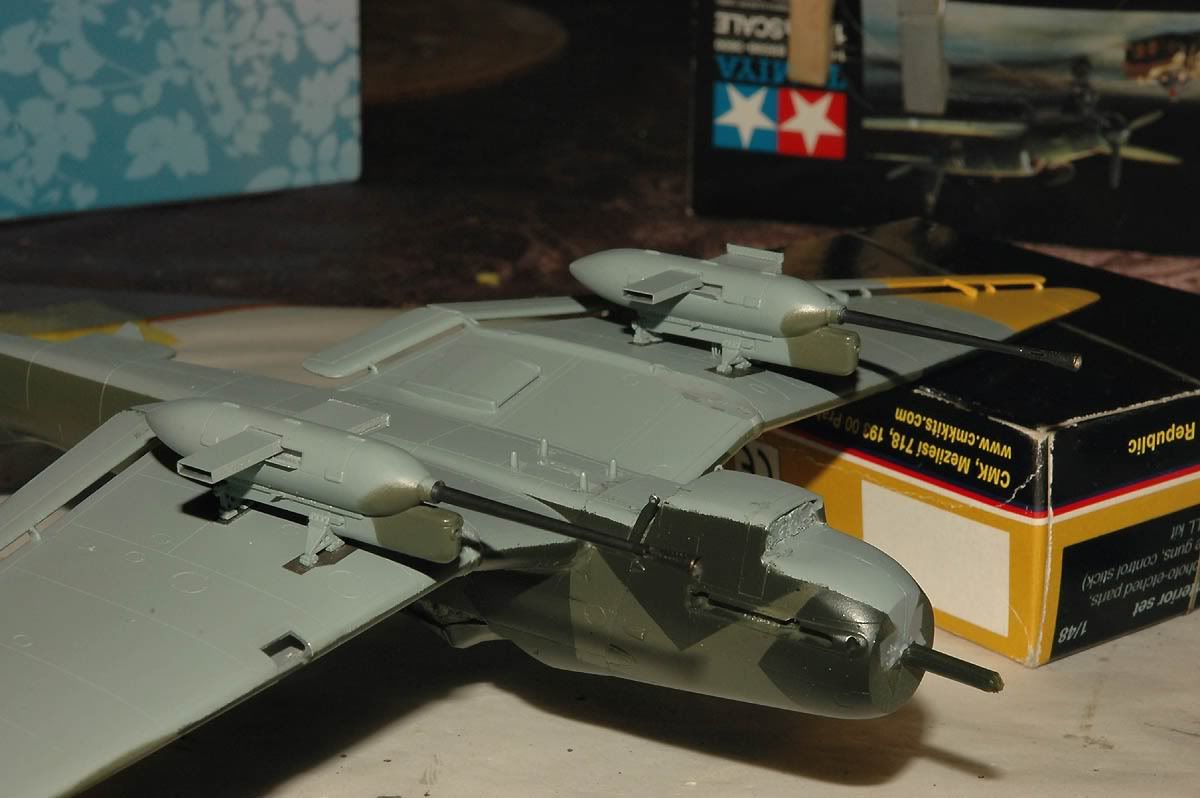
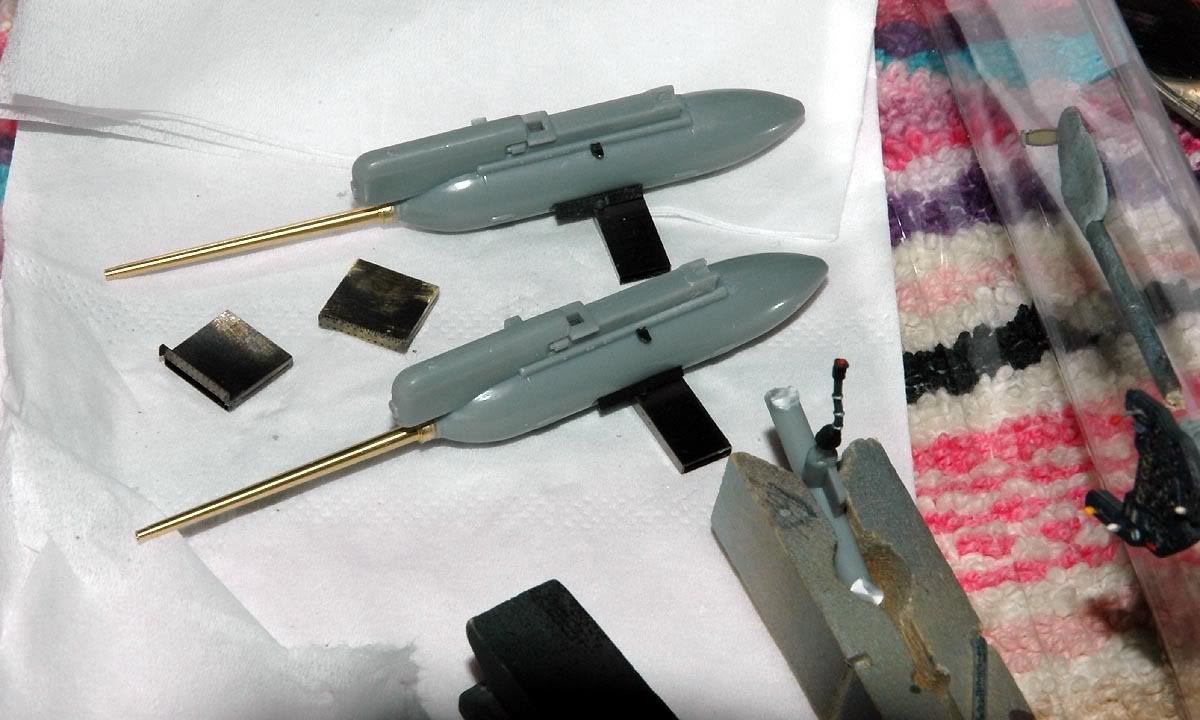
Started the gun pods, kit ones + Pe master model barrels on minus tips

The Aries resin pods were shockers, after much work getting them cleaned up, working them to fit around the resin guns
they simply did not fit or join up,both pods snapped at each end so binned them and used the kit pods.
DSC_2068x1.jpg


I received a package from Adam after he very kindly said he didn't need his spare Vector MG-81Z - Tops Adam!!

Here is that Awesome MG81 ! added Model Master brass barrels to further enhance this lil gem!
DSC_2072a.jpg


DSC_2073a.jpg


DSC_2074a.jpg


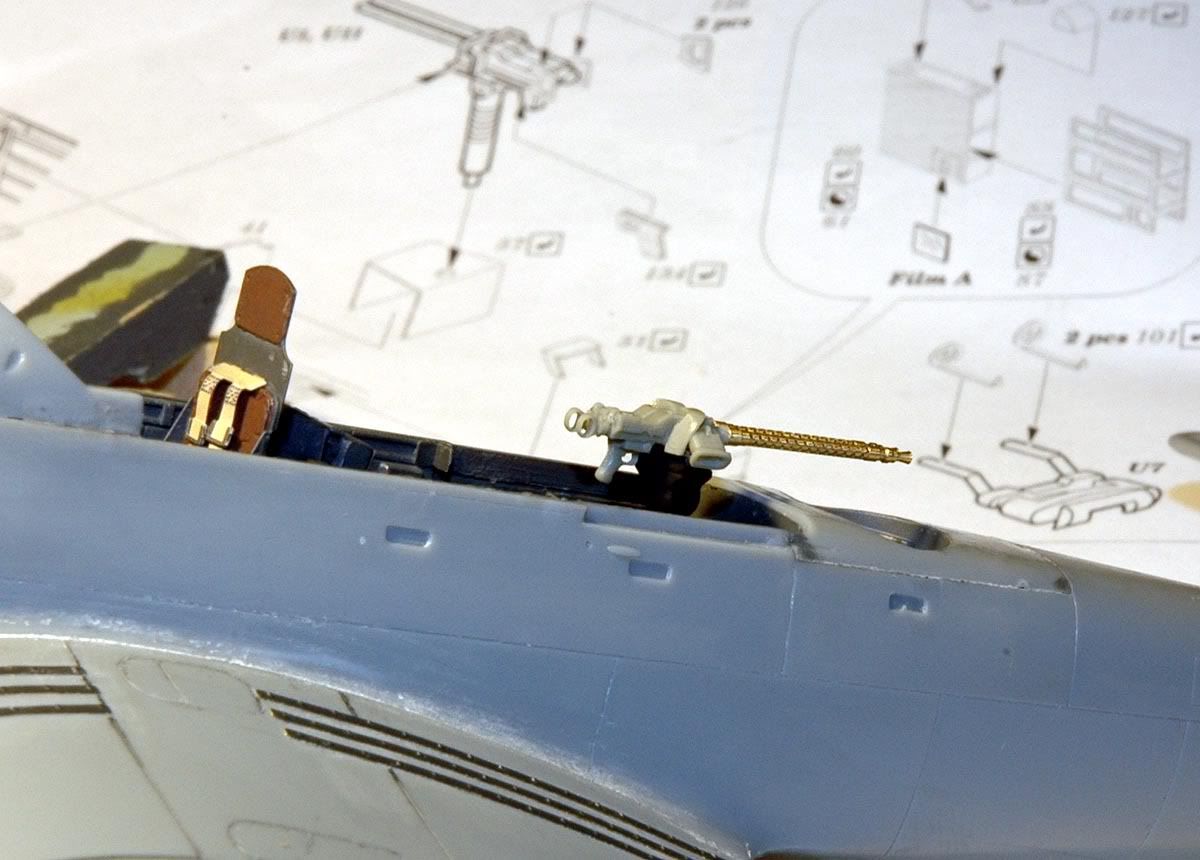
It's just blue tac holding it, this will be positioned at the end of the build when I fit the rear glass.

Painted the guns, primed very carefully, sprayed black, then Humbrol gunmetal wipe over with a Q-tip, then futured to seal, then flat coated but will still have to get an ultra fine point to open the 37mm muzzle holes... still looking for a suitable fix.

I've left the gun sights flat as they won't slide thru the gunners window if up straight.

DSC_2130j.jpg


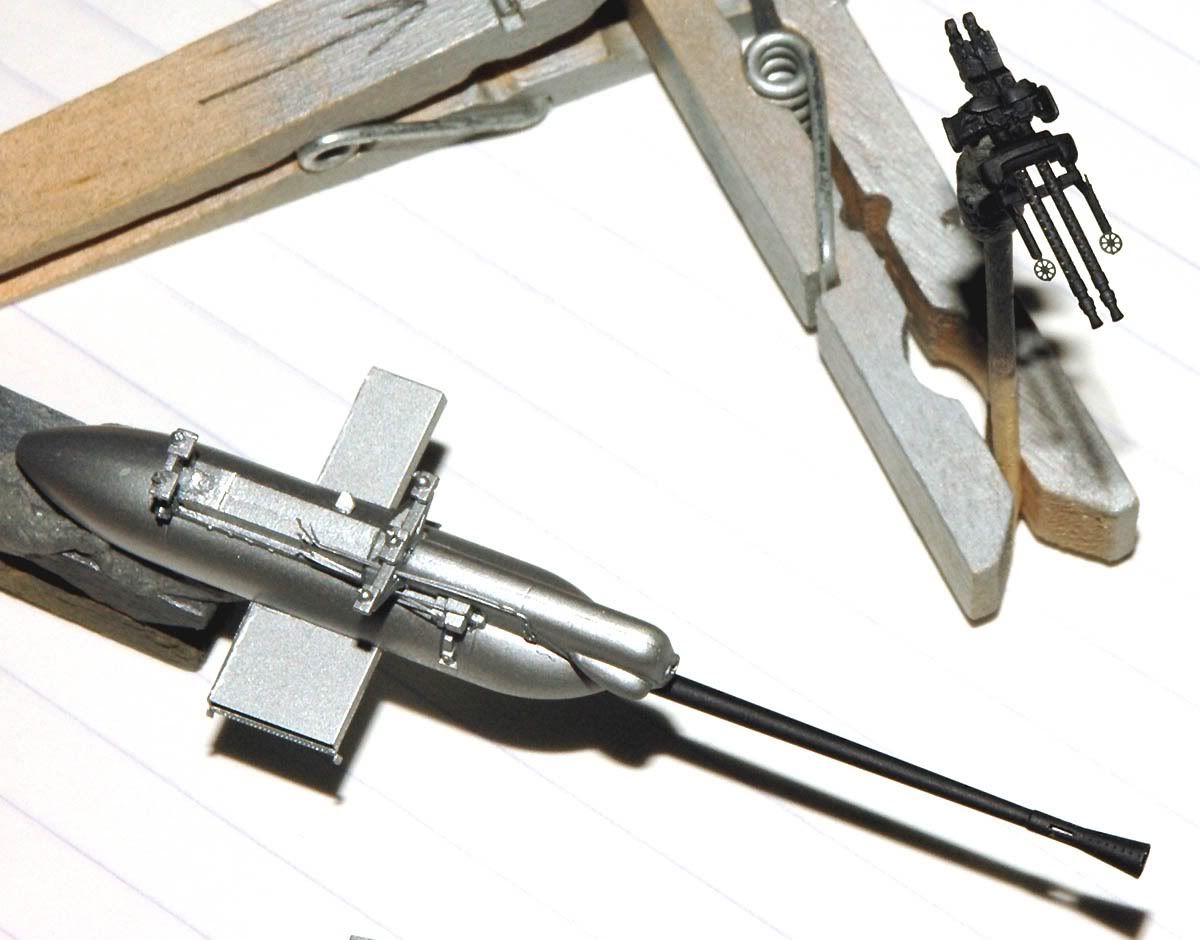
The barrels will get another light rub over with pencil lead later on.


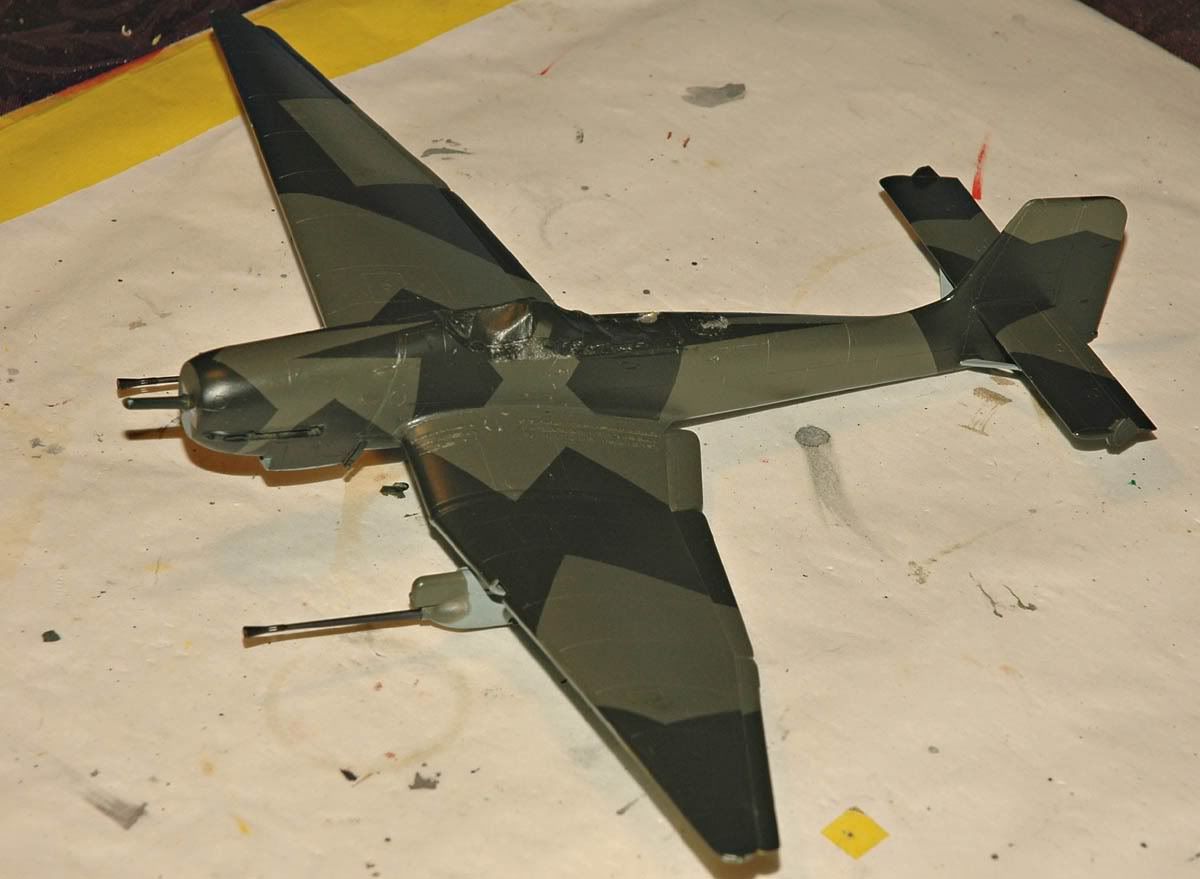
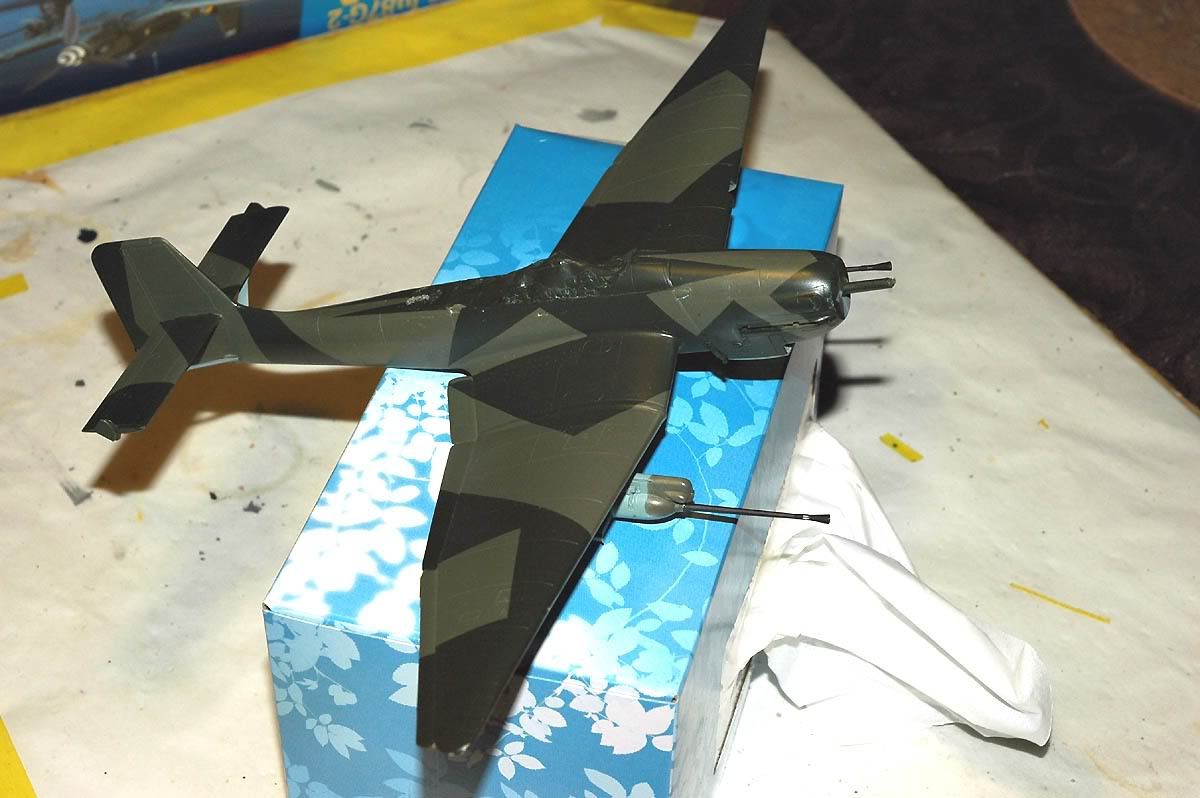
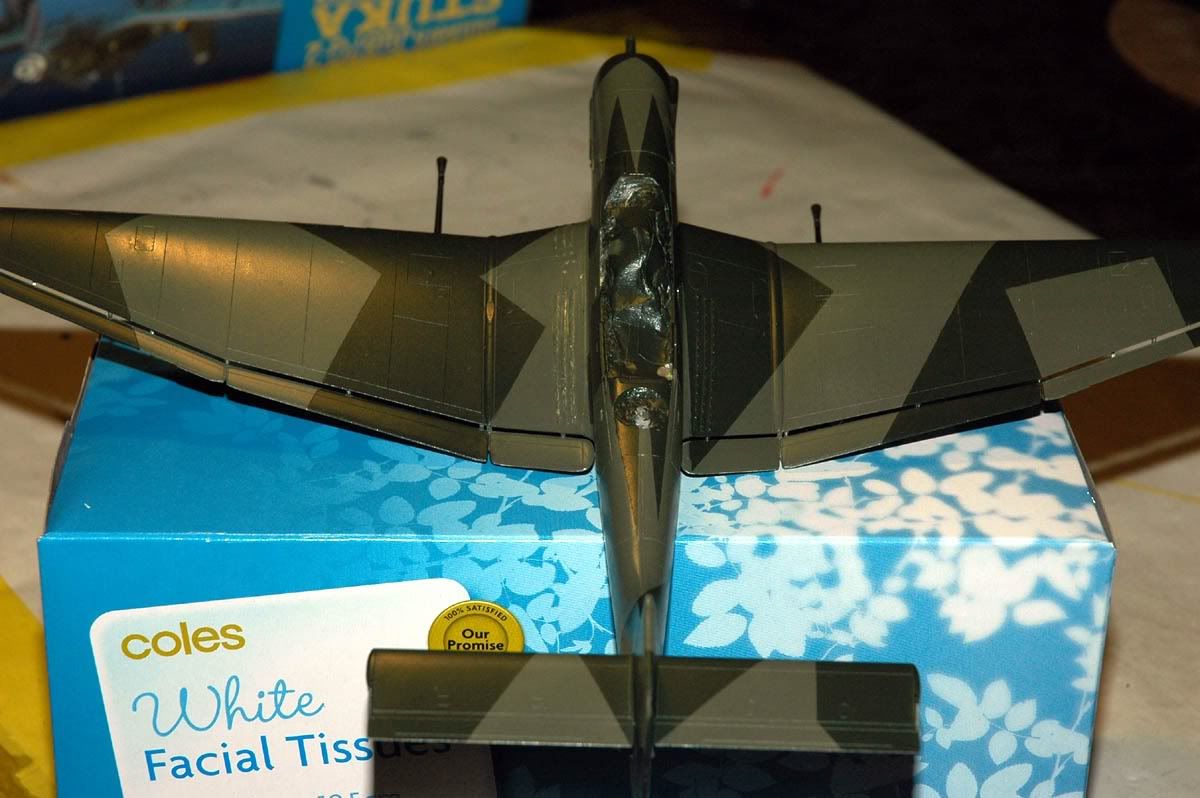
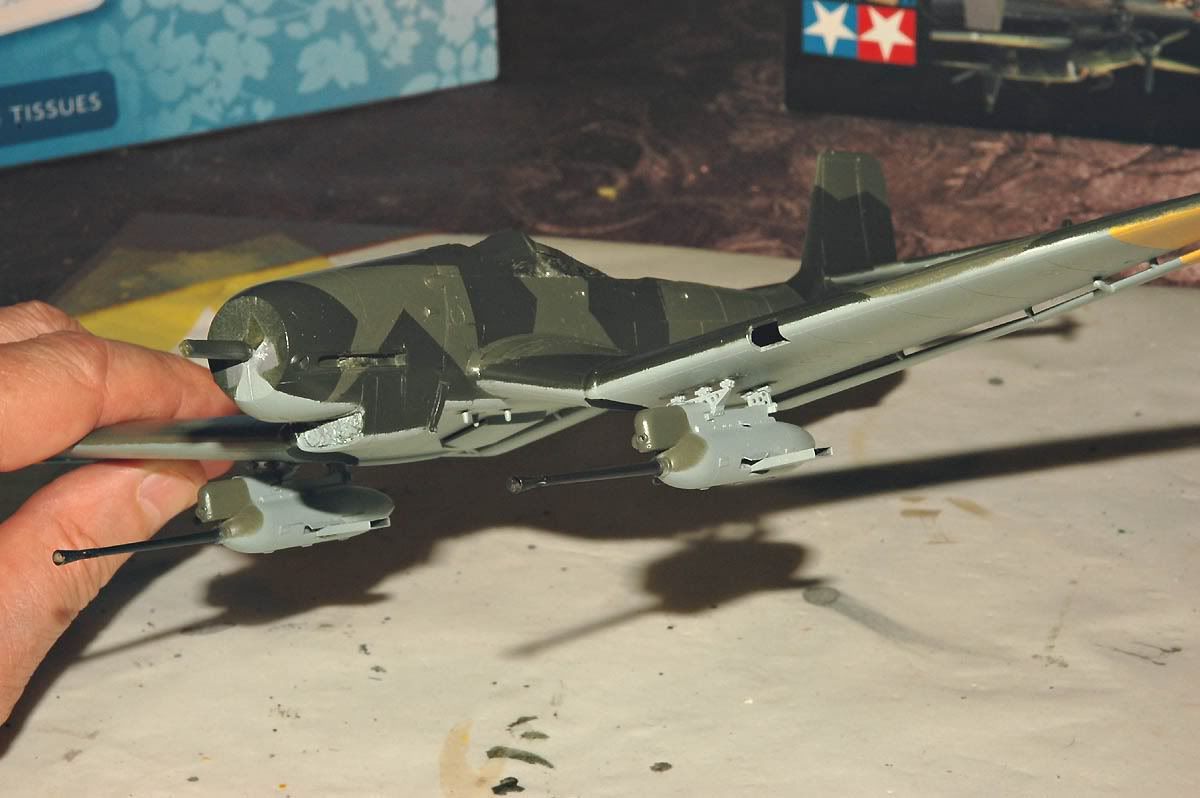
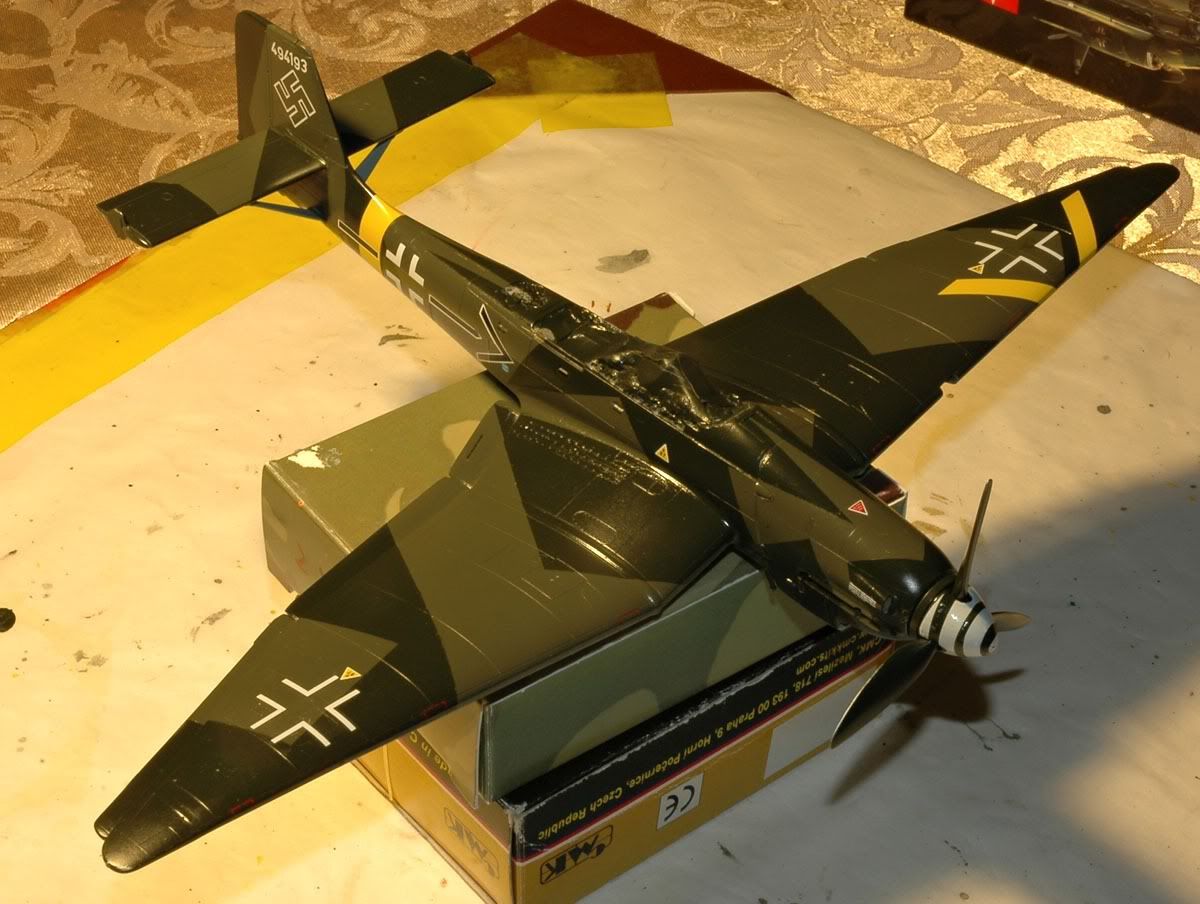
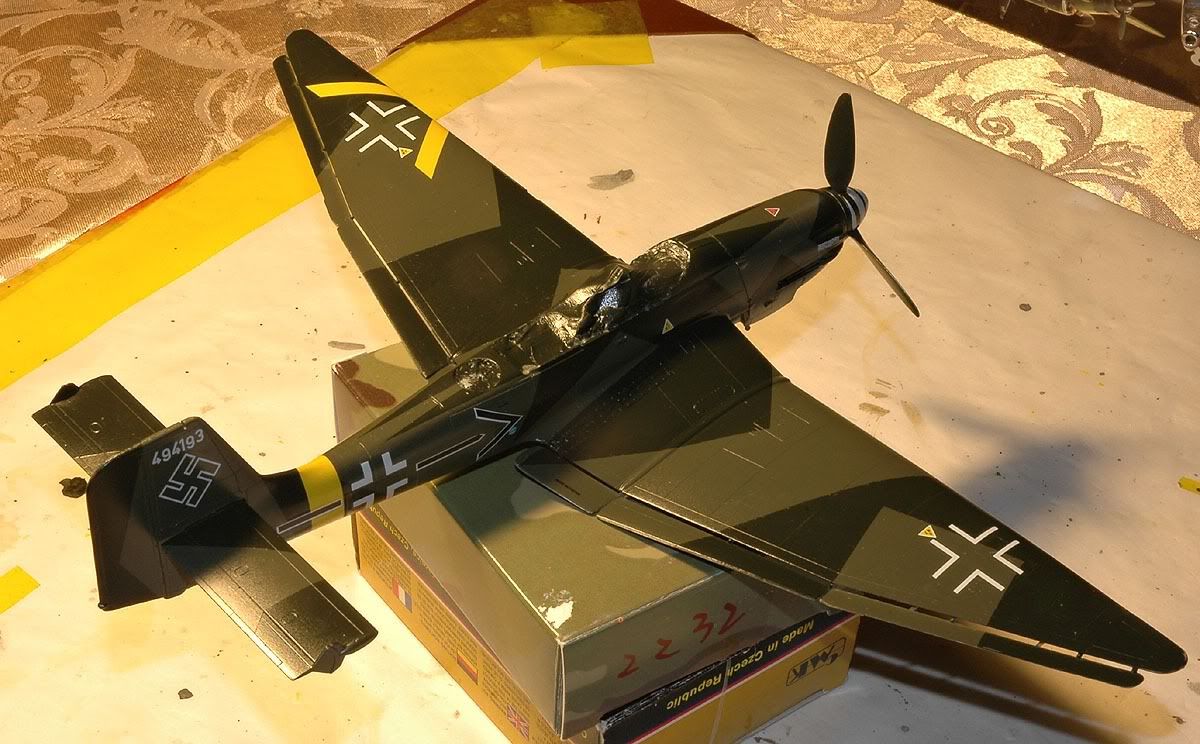
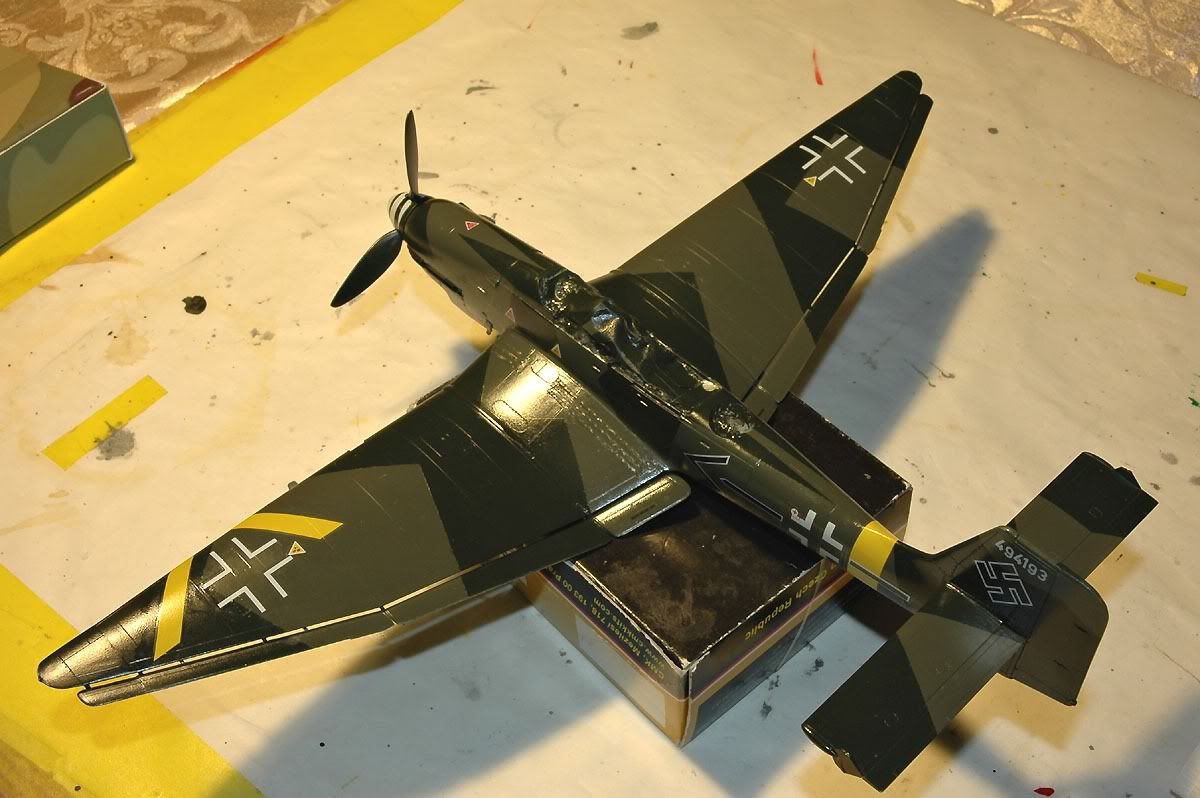
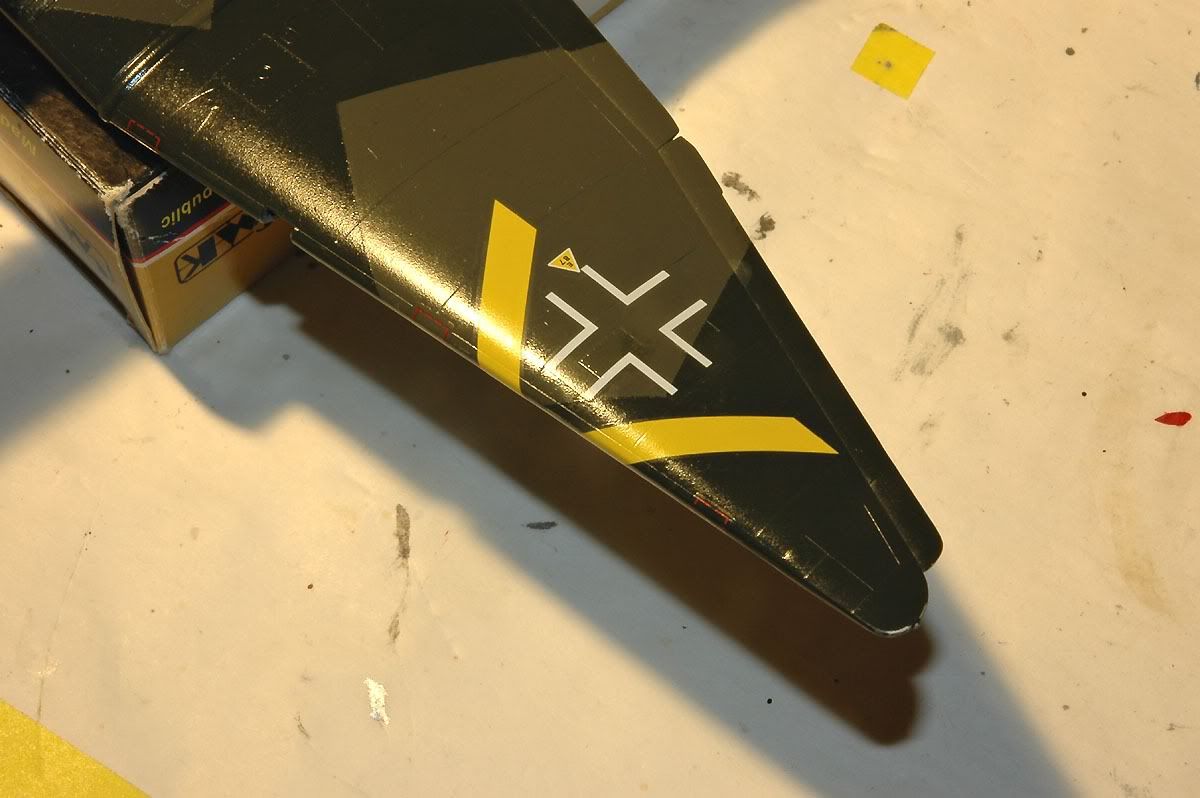
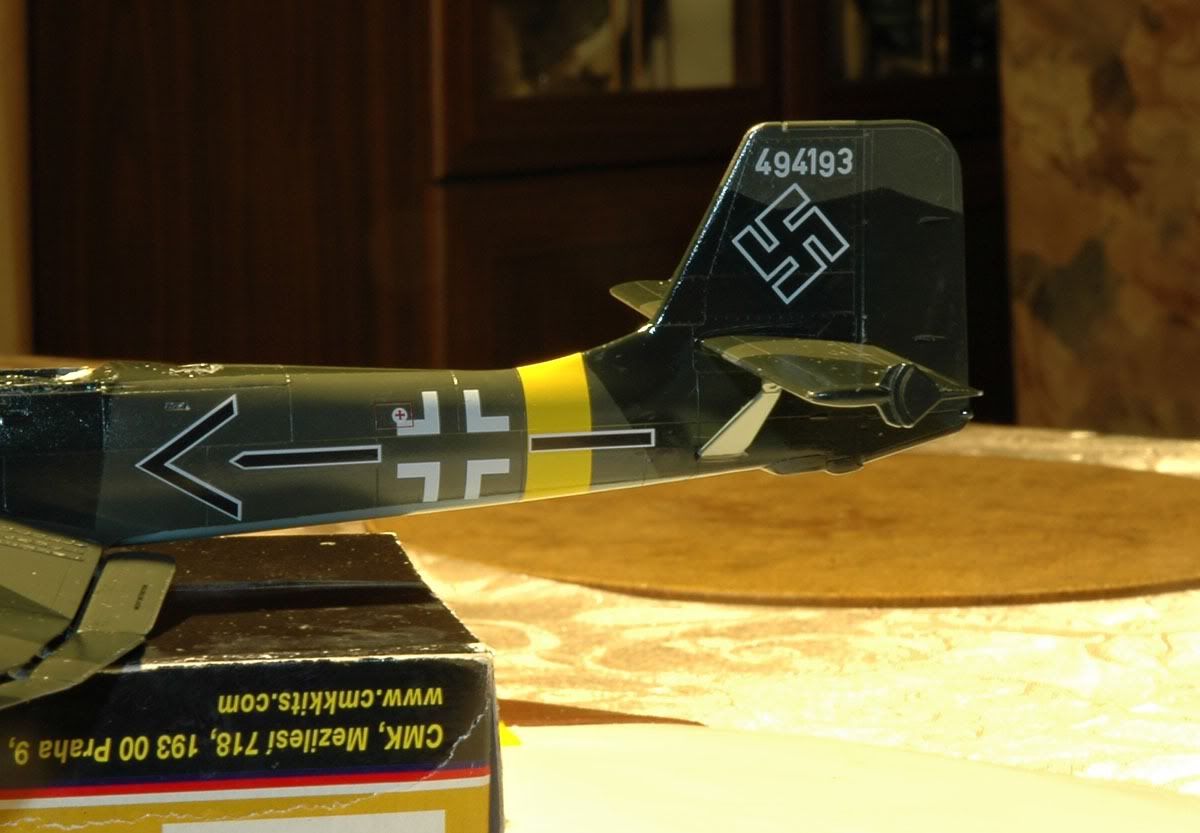
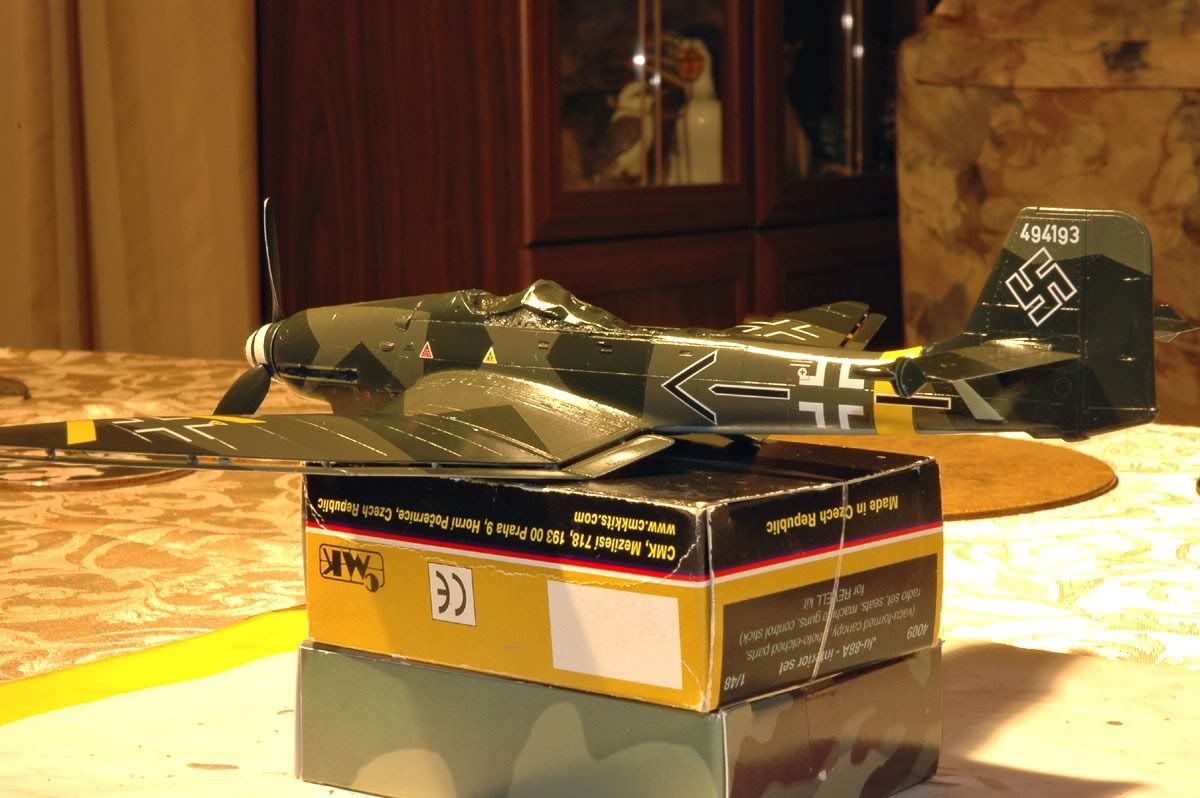
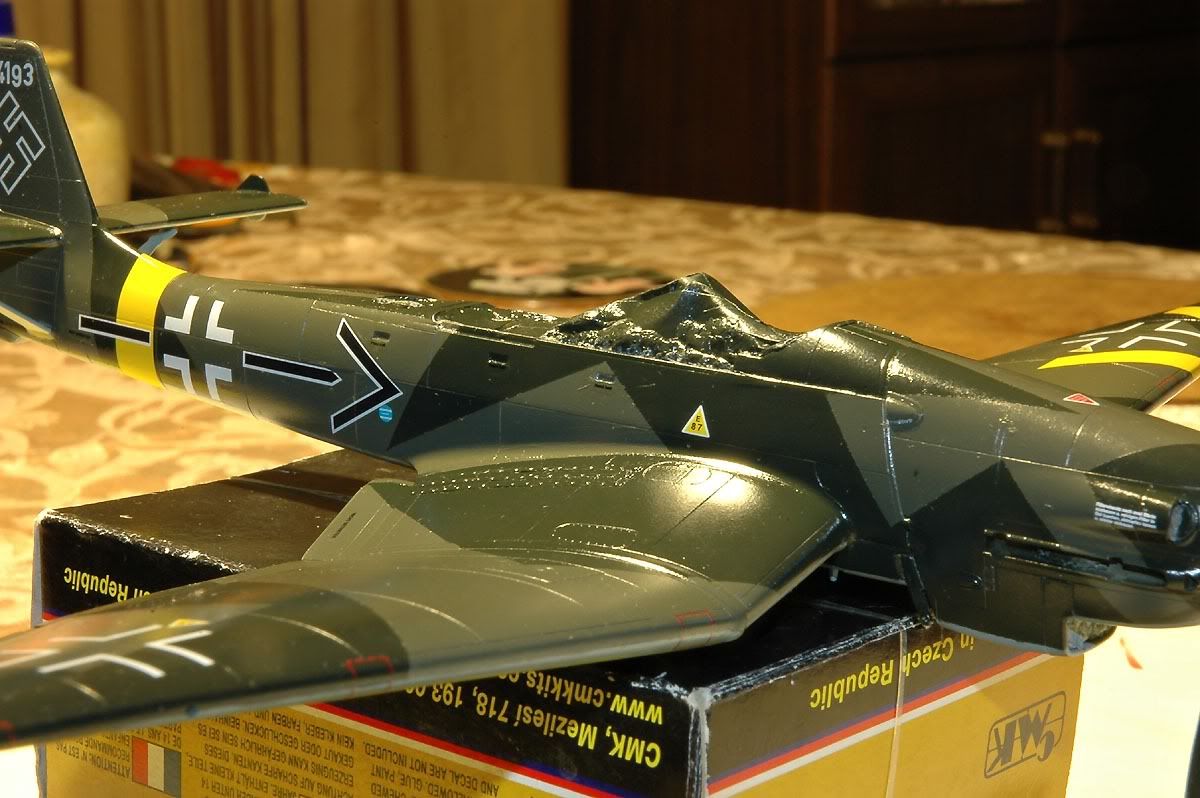
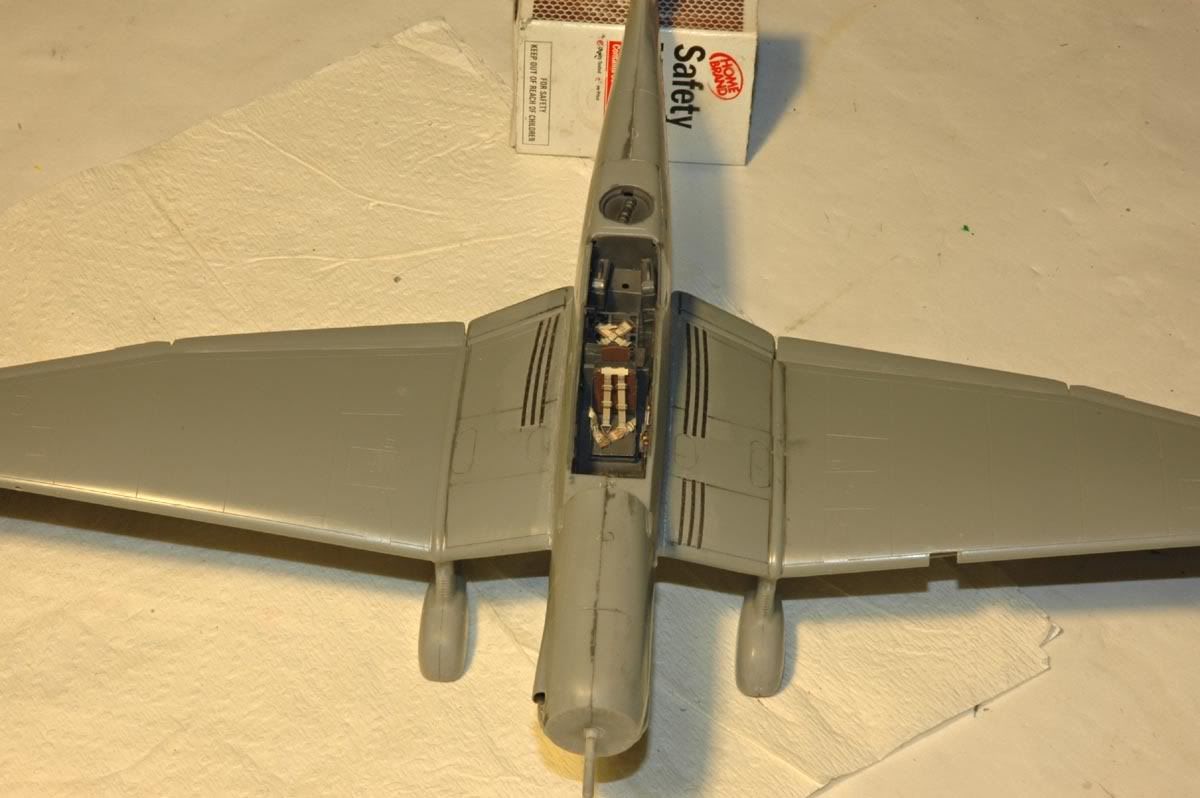
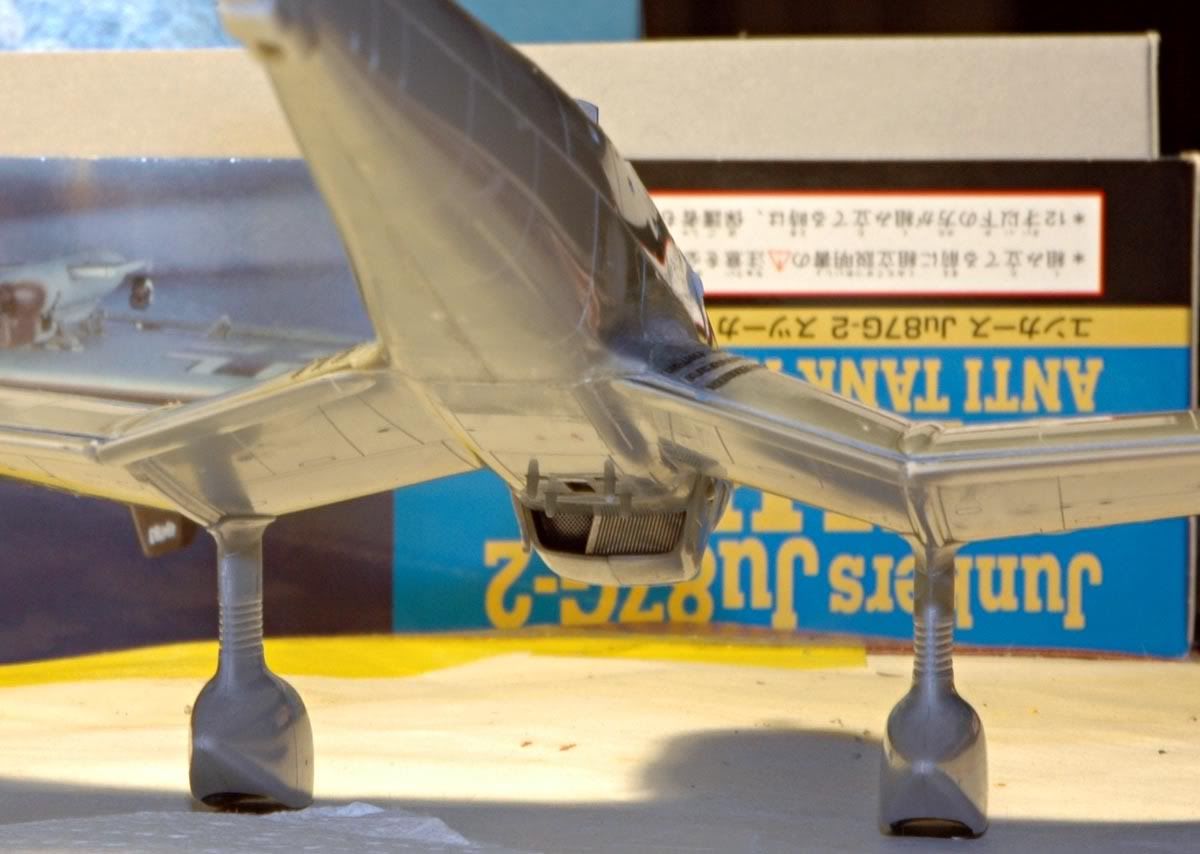
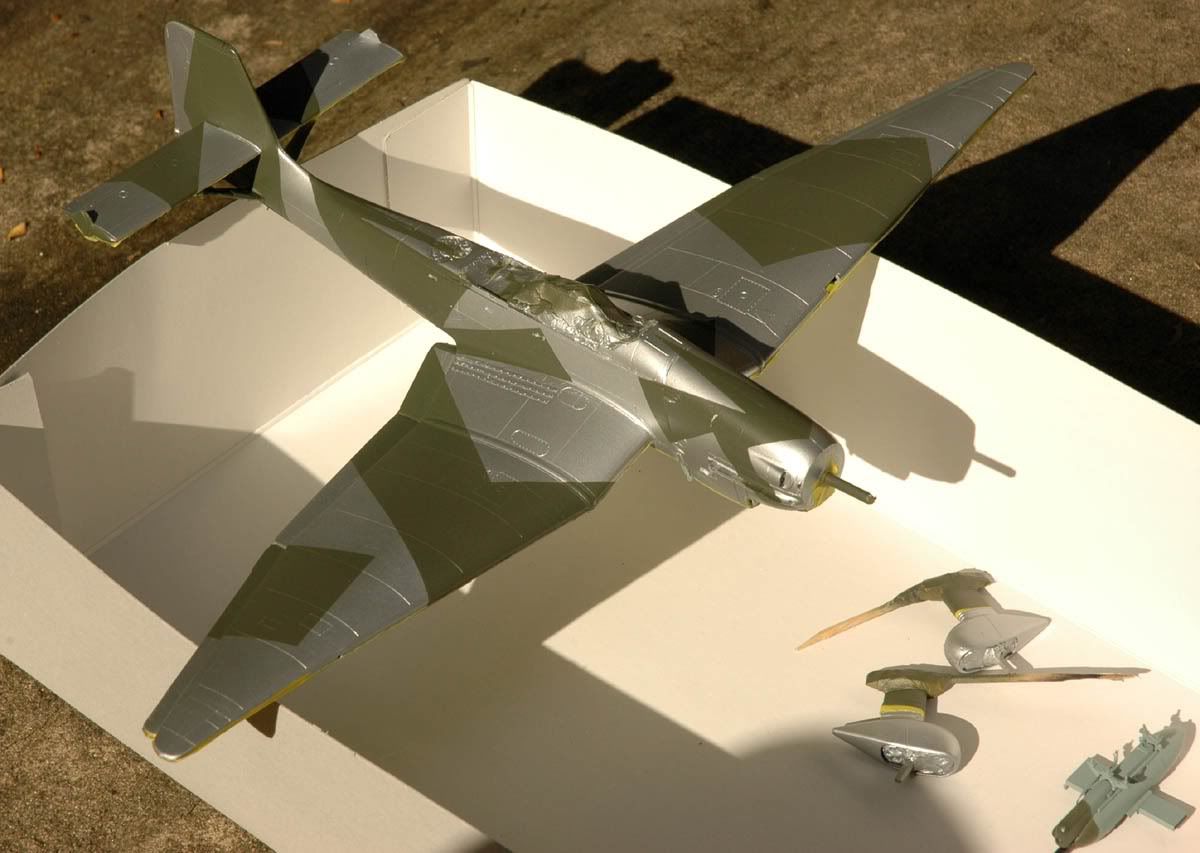
Latest update, underside painted, and first round of top colour, horrible wet and humid weather of late so waiting for
a half suitable day to do the black green. Yes that is sunlight! for a day!!!
DSC_2201gp.jpg


DSC_2199tp.jpg
 
Looks great Phill! I put that Hasegawa detail set into a Heller cockpit earlier and that was pure punishment, yours definitely went in better...
 
That's great Phil. You better watch your butt. I'm catching up. I put the RLM 65 on last night! :D
 
Neine, neine too many Stukas . They'll just burn holes in the ground ! :nothingtoad

Looking pretty good Phill. Cheers, Christian B)
 
Thankyou all for your kind comments.

DSC_2201gp.jpg


DSC_2199tp.jpg


that was about two weeks ago.
Waited a few days after that and masked this up thinking I'd get a break in the rain and humidity - not so.

Last Saturday no rain, no sun either, thought why not and decided to chance spraying the acrylic Black Green.

Note:
If you live in an area that does get hi humidity do not spray acrylics!

Test spray on the usual paper sheet backing to clear the raw thinners out first - paint flowed good no probs it seemed.

My usual paint/thinner mix turned instantly to what looked like a multi barrelled airbrush spraying droplets of paint much like liquid hundreds and thousands - paint seemed to start to smooth out and join, but weird all the same.
Added more thinner, same. added more paint -same.

I ended up rinsing the wing part under water and pat dry with clean tissues.

Decided to dump the mix straight back into the paint jar, shook it and then poured the straight mix back into the Krome's cup, sprayed again and it seemed to work a little better, but not the usual flawless way the acrylics usually spray.

End result - after discovering water trapped under some of the tamiya edged paper masks, which decided to run over certain areas of wet and drying paint as I sprayed ........ :bang head

finally got it to a point of respectability and held it in front of a pedestal fan to quicken the dry time

Wasn't until after spraying the black green I found a basic paint mistake on the pods...

DSC_2216fp.jpg

picked out that mistake yet?
DSC_2236fp.jpg

Pods are not glued on yet
DSC_2240fp.jpg


DSC_2211fp.jpg

my usual nice straight demarcation lines to the blue resulted in this jagged result.
DSC_2212fp.jpg


DSC_2213fp.jpg


After removing the masking tape I found that the two weeks have made a horrid stain where any piece of tape was. This does not show in the photos.

Hopefully copious amounts of flat cote will counter this stain

So to add the icing on the cake - tonight I removed the the tightly sealed masks off the canopies and there is paint bleed, stains from masking tape and lifted future - no pics as I'm highly annoyed by this and will have to salvage them as best as I can.

Ah the joys of modelling!!!
 
I'm sure you will get it all worked out. It's still wicked looking paint scheme.

B)
 
If there is tape residue then take another piece of tape and wrap it around you fingers sticky side out. Then press on and roll out (dont pull up). This should take it up just like if your delinting a suit. hth.
James
 
Thankyou all for your kind comments.

DSC_2201gp.jpg


DSC_2199tp.jpg


that was about two weeks ago.
Waited a few days after that and masked this up thinking I'd get a break in the rain and humidity - not so.

Last Saturday no rain, no sun either, thought why not and decided to chance spraying the acrylic Black Green.

Note:
If you live in an area that does get hi humidity do not spray acrylics!

Test spray on the usual paper sheet backing to clear the raw thinners out first - paint flowed good no probs it seemed.

My usual paint/thinner mix turned instantly to what looked like a multi barrelled airbrush spraying droplets of paint much like liquid hundreds and thousands - paint seemed to start to smooth out and join, but weird all the same.
Added more thinner, same. added more paint -same.

I ended up rinsing the wing part under water and pat dry with clean tissues.

Decided to dump the mix straight back into the paint jar, shook it and then poured the straight mix back into the Krome's cup, sprayed again and it seemed to work a little better, but not the usual flawless way the acrylics usually spray.

End result - after discovering water trapped under some of the tamiya edged paper masks, which decided to run over certain areas of wet and drying paint as I sprayed ........ :bang head

finally got it to a point of respectability and held it in front of a pedestal fan to quicken the dry time

Wasn't until after spraying the black green I found a basic paint mistake on the pods...

DSC_2216fp.jpg

picked out that mistake yet?
DSC_2236fp.jpg

Pods are not glued on yet
DSC_2240fp.jpg


DSC_2211fp.jpg

my usual nice straight demarcation lines to the blue resulted in this jagged result.
DSC_2212fp.jpg


DSC_2213fp.jpg


After removing the masking tape I found that the two weeks have made a horrid stain where any piece of tape was. This does not show in the photos.

Hopefully copious amounts of flat cote will counter this stain

So to add the icing on the cake - tonight I removed the the tightly sealed masks off the canopies and there is paint bleed, stains from masking tape and lifted future - no pics as I'm highly annoyed by this and will have to salvage them as best as I can.

Ah the joys of modelling!!!

Not sure what the problem was but you're looking good now.

Was the paint beading up like water on a waxed car hood?
 
Thanks all, I think I may of went to hard to fast, plus our weather was bad, humidity wise which caused the brainbox to overload when the black green was sprayed!

Another variable with the canopies is the One Go (Future) I have is an old bottle, it is unavailable in Australia and the company informed me they were waiting on an ingredient - then later - not sure if this product will be made again.

This may explain why the masks lifted the Future off or the adhesive from the mask tape dampened the Future causing the staining.

I have an empty washed out glass paint jar which is filled with Future to do decals, on the bottom of the glass is a white build-up, causing me to think if this is somehow reducing the strength of the Future.

I have about 1/4 of a bottle left, so this is reserved for canopies and decals.

DSC_2459s.jpg


DSC_2460s.jpg


here is the canopies - I've worked on them and got them to this point, re dipped in Future so this is as much as I can do with them.

15/3/12
Well,
Tonight finish the decals. Yay!!!

Obviously still all glossed! so here she is as she stands.

DSC_2529dc.jpg


DSC_2528dc.jpg


DSC_2541dc.jpg


DSC_2539dc.jpg


DSC_2535dc.jpg


DSC_2534dc.jpg


DSC_2537dc.jpg


The Hasegawa supplied decals went on just great, my usual method of Future under and over the decals sealed them very nicely.

Flat coat tomorrow if the weather permits.
 
Back
Top