-
Modelers Alliance has updated the forum software on our website. We have migrated all post, content and user accounts but we could not migrate the passwords.
This requires that you manually reset your password.
Please click here, http://modelersalliance.org/forums/login to go to logon page and use the "Forgot your Password" option.
You are using an out of date browser. It may not display this or other websites correctly.
You should upgrade or use an alternative browser.
You should upgrade or use an alternative browser.
Bristol 170 Freighter
- Thread starter Stoneboat
- Start date
Thanks for the comments fellas. 
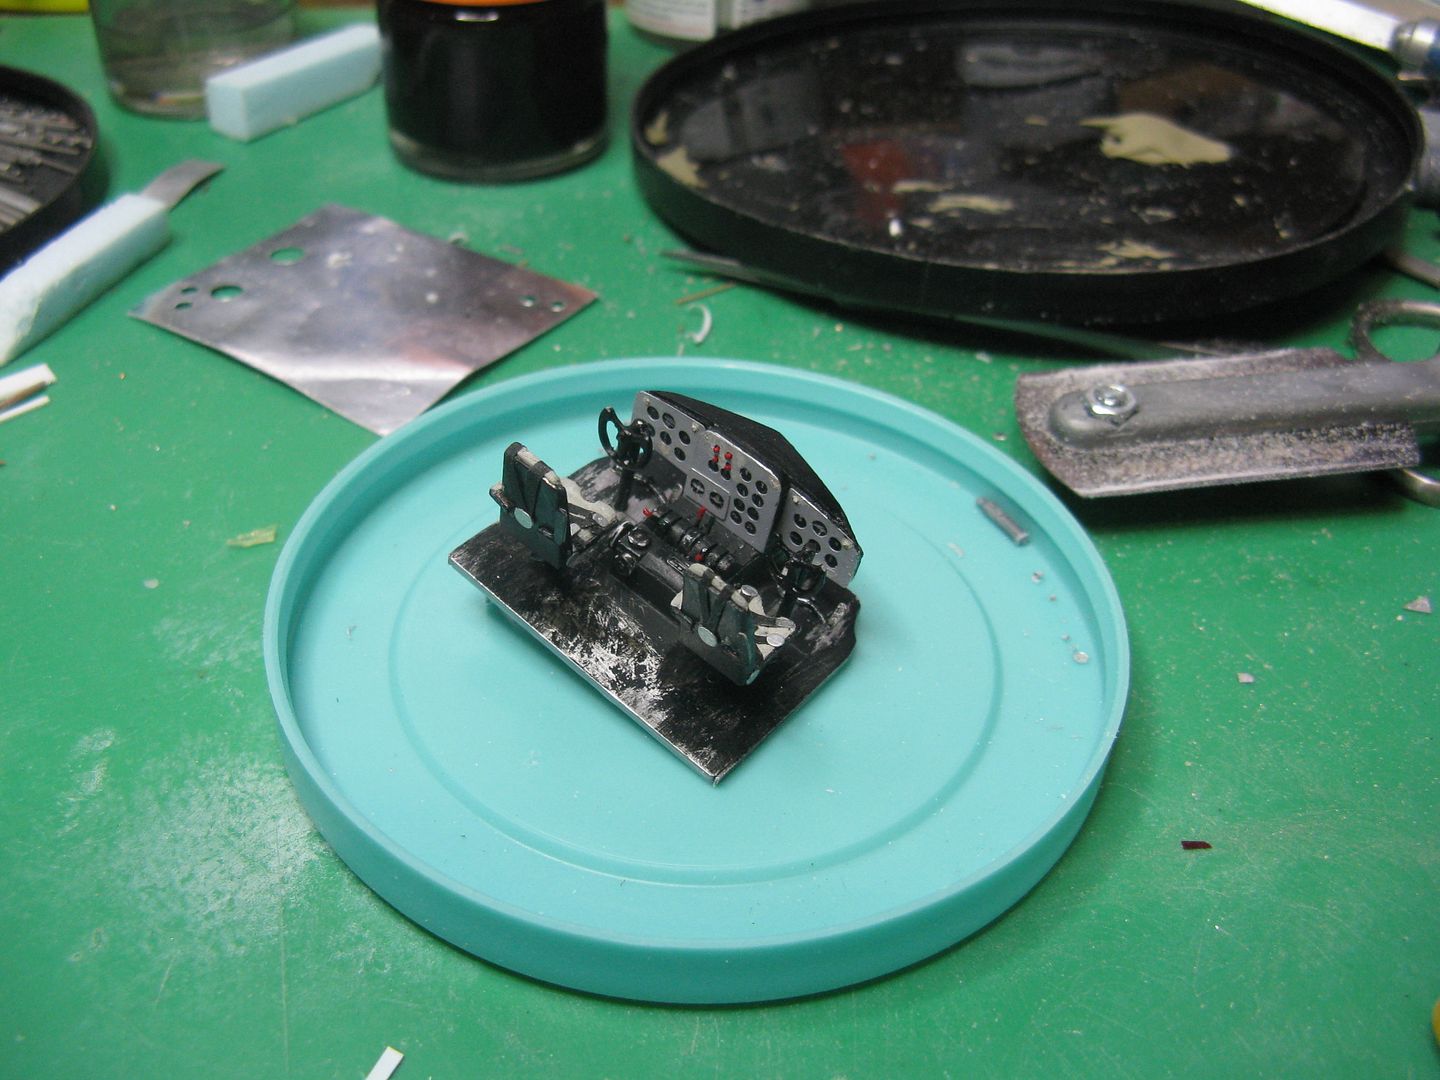
Well, I have the cockpit completed and the fuselage buttoned up. Here's how it went.
I redid the control columns. Here's the original...
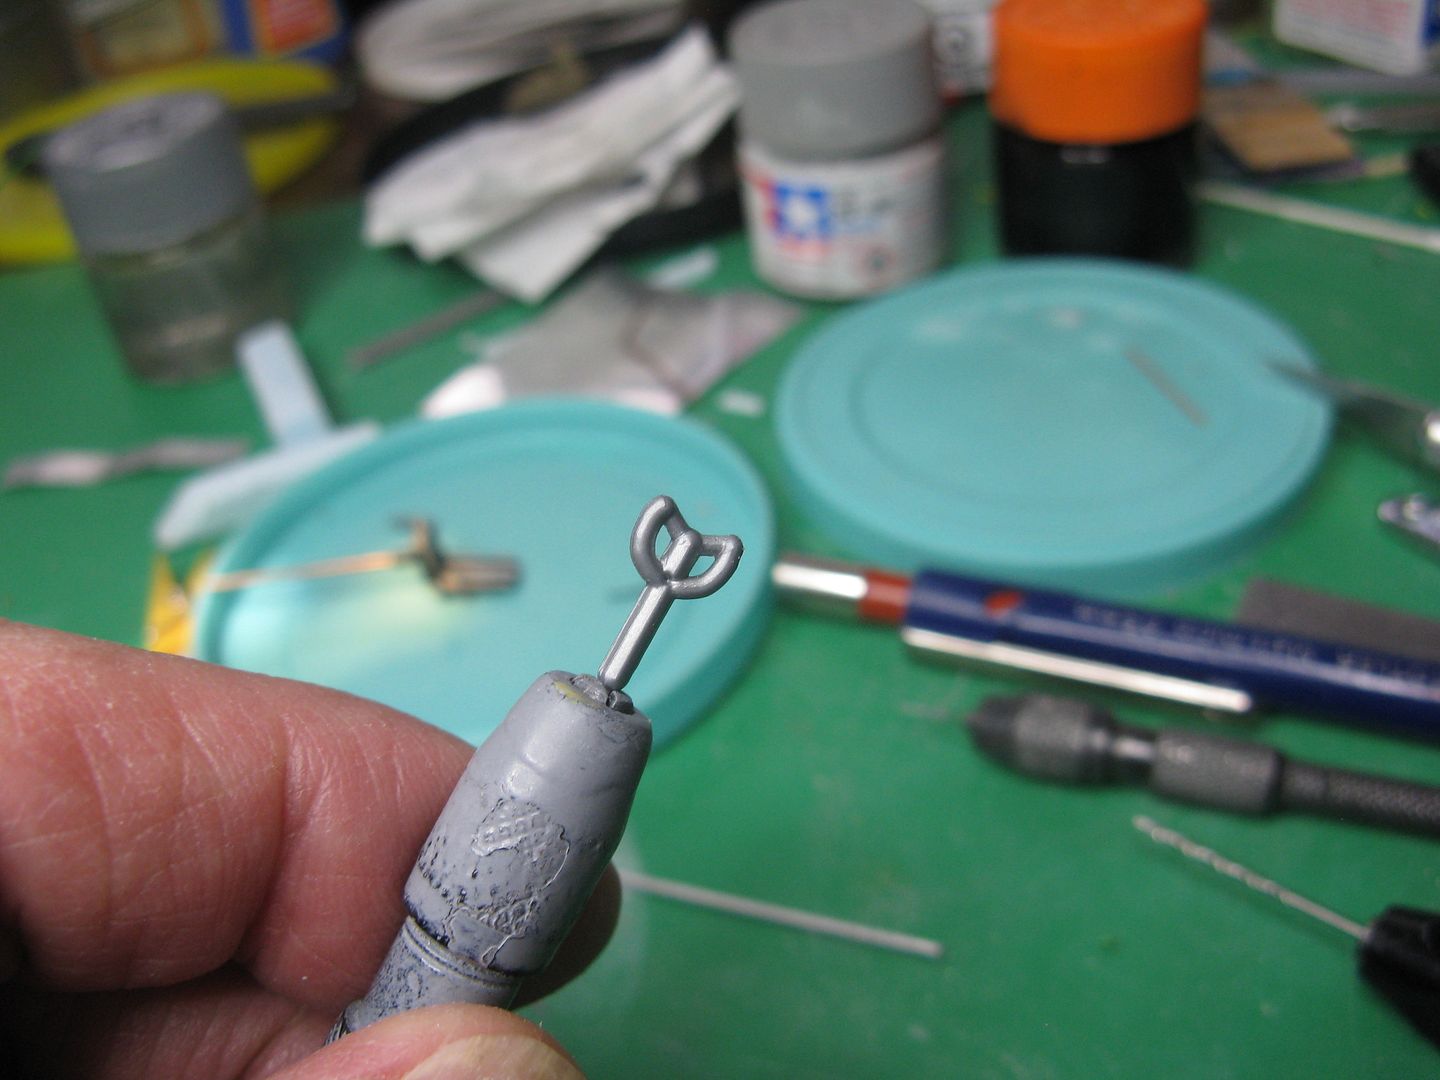
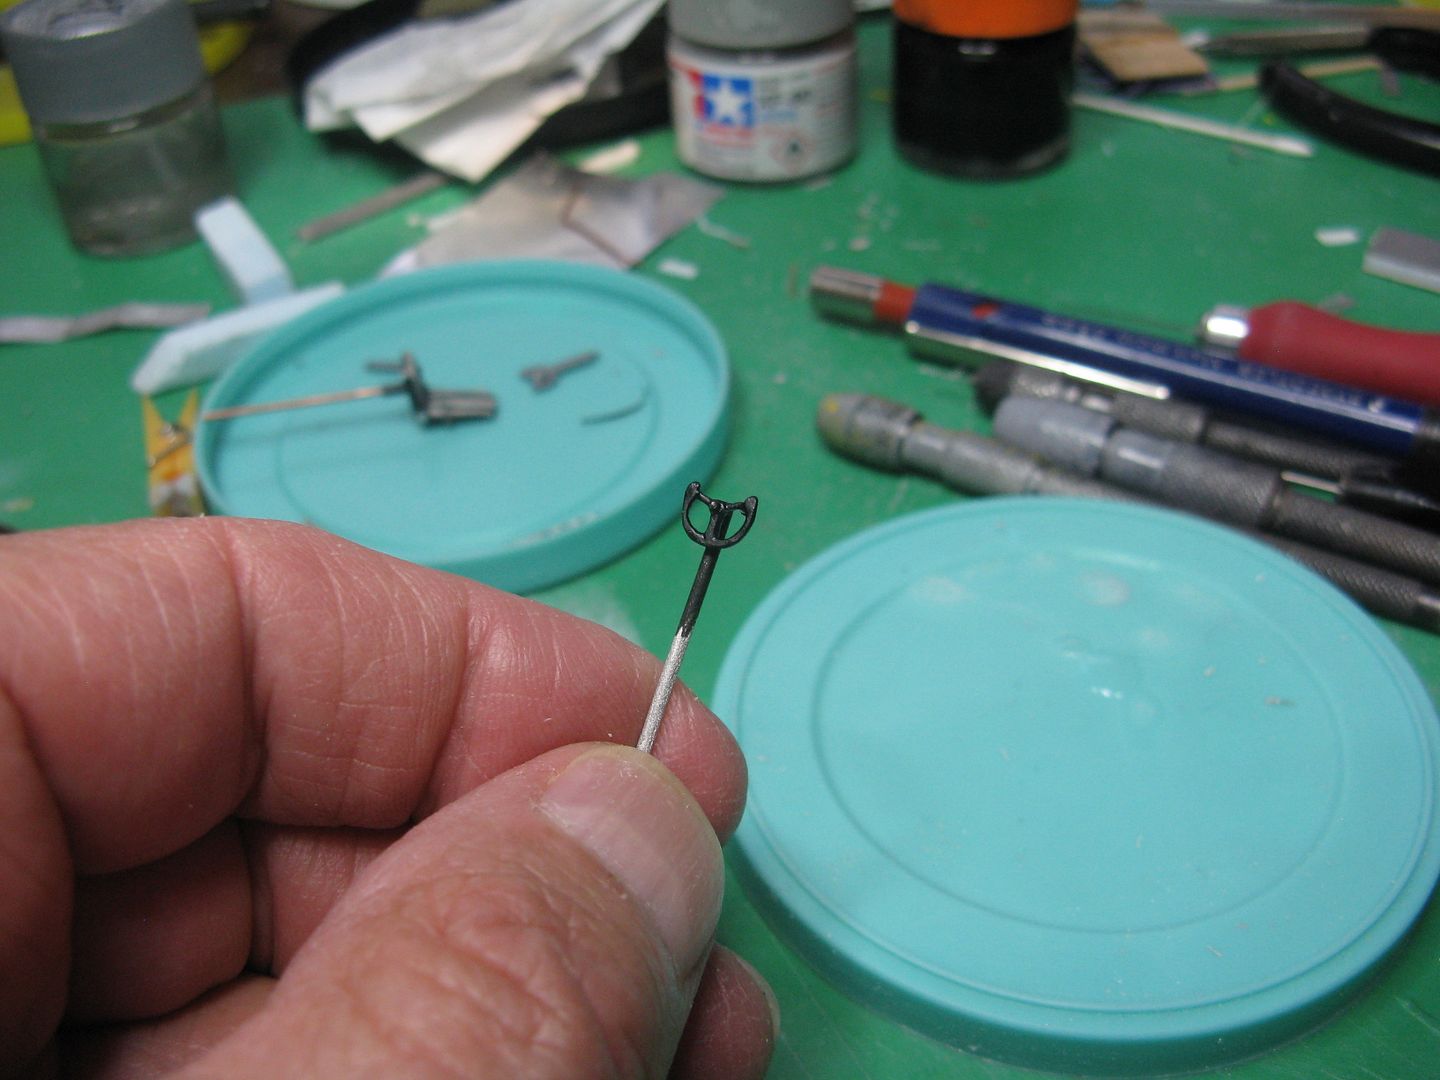
…And after a bit of firkytoodling with a bit of wire for the column.
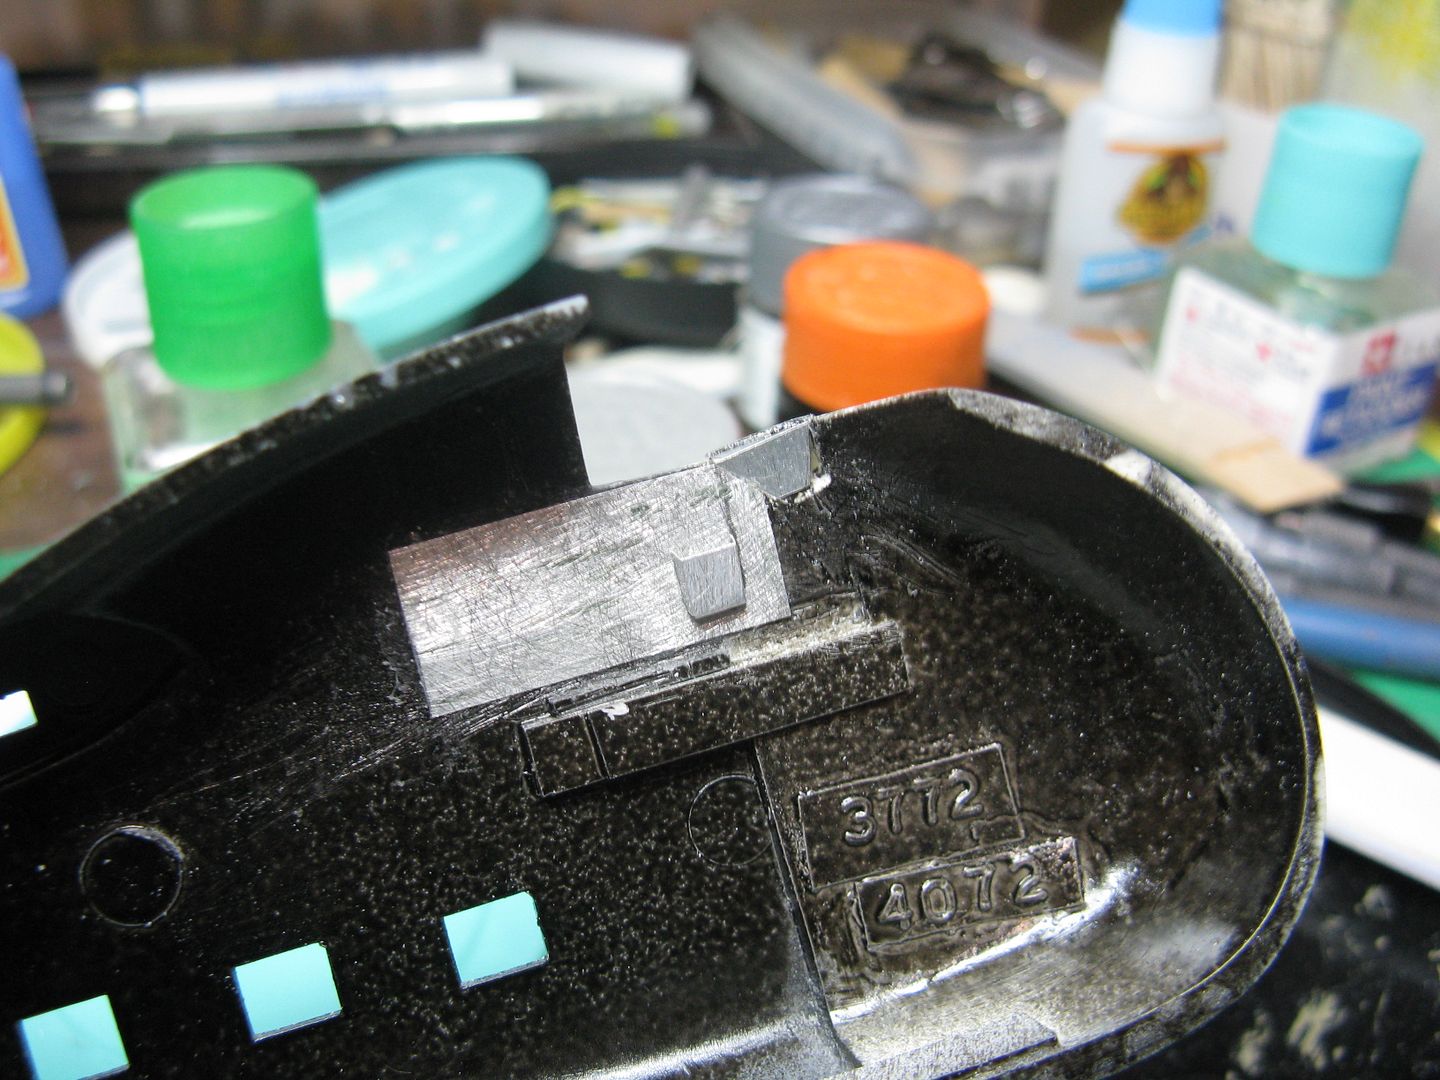
Since there will be no interior detail outside the cockpit, I painted the whole thing black, then added some cockpit sidewalls, complete with map pockets.

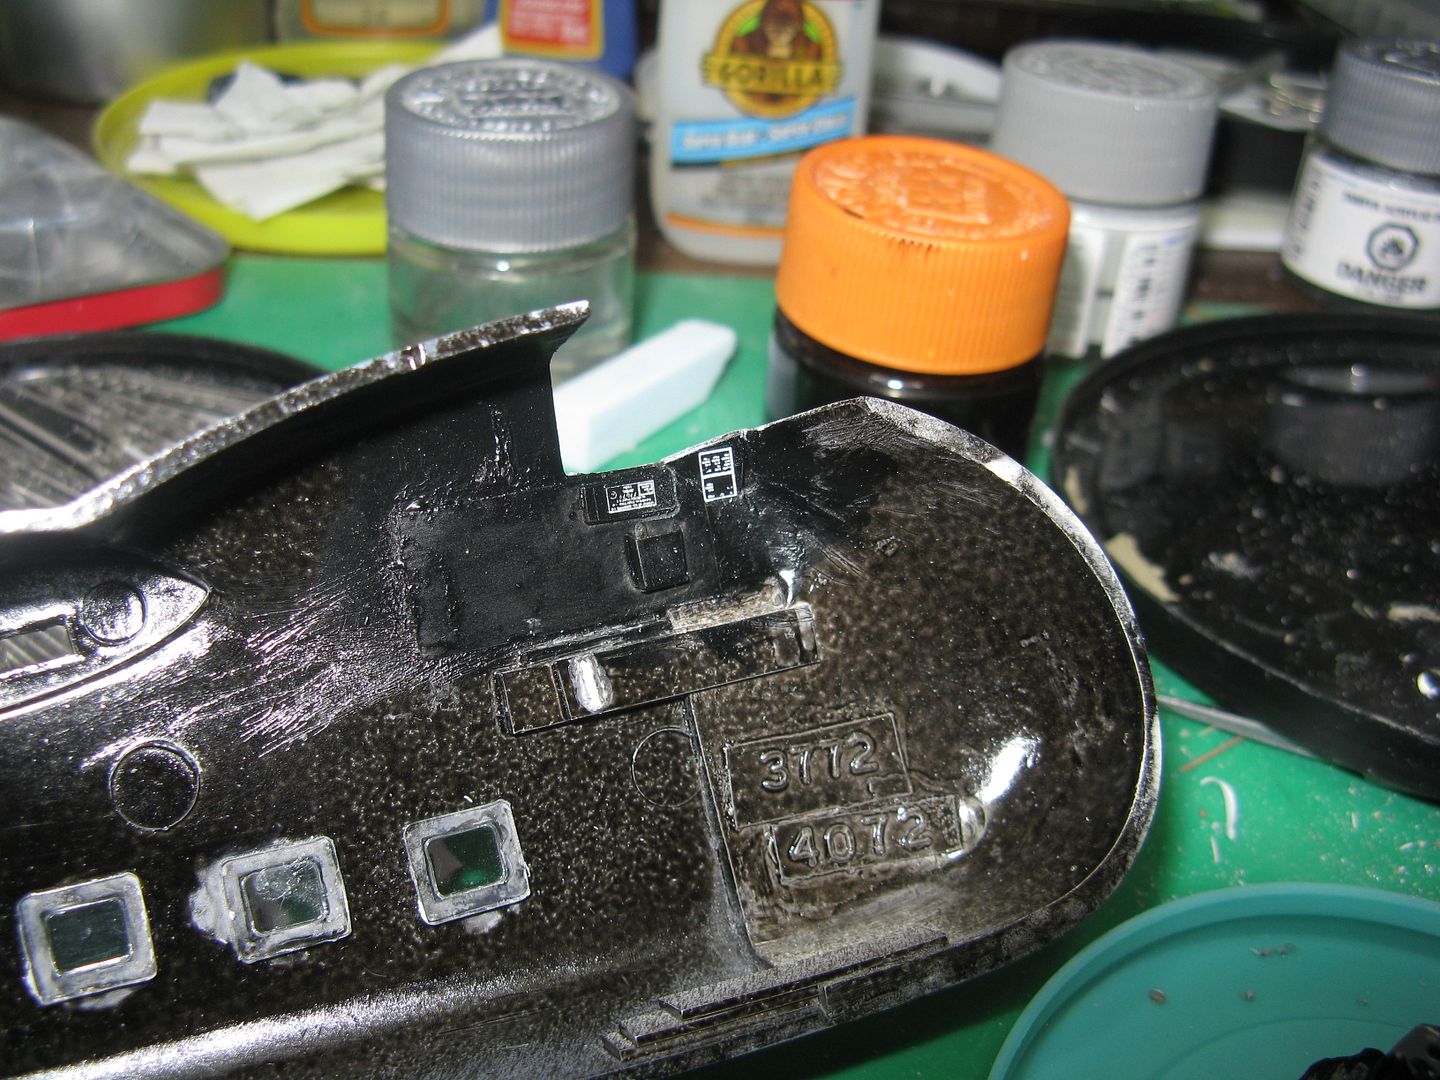
After they had been painted black, I added a bit of decal material from a locomotive decal set to represent the doodads on both the sidewall panels and the little quarter panel below the DV window.
Then I finished off the cockpit by adding the seats, the engine controls, the trim wheels, the aforementioned control columns and all that good stuff.
The fuselage went together well. I used Gorilla cyanoacrylate glue on the resin section and straight Tamiya liquid cement on the rest.
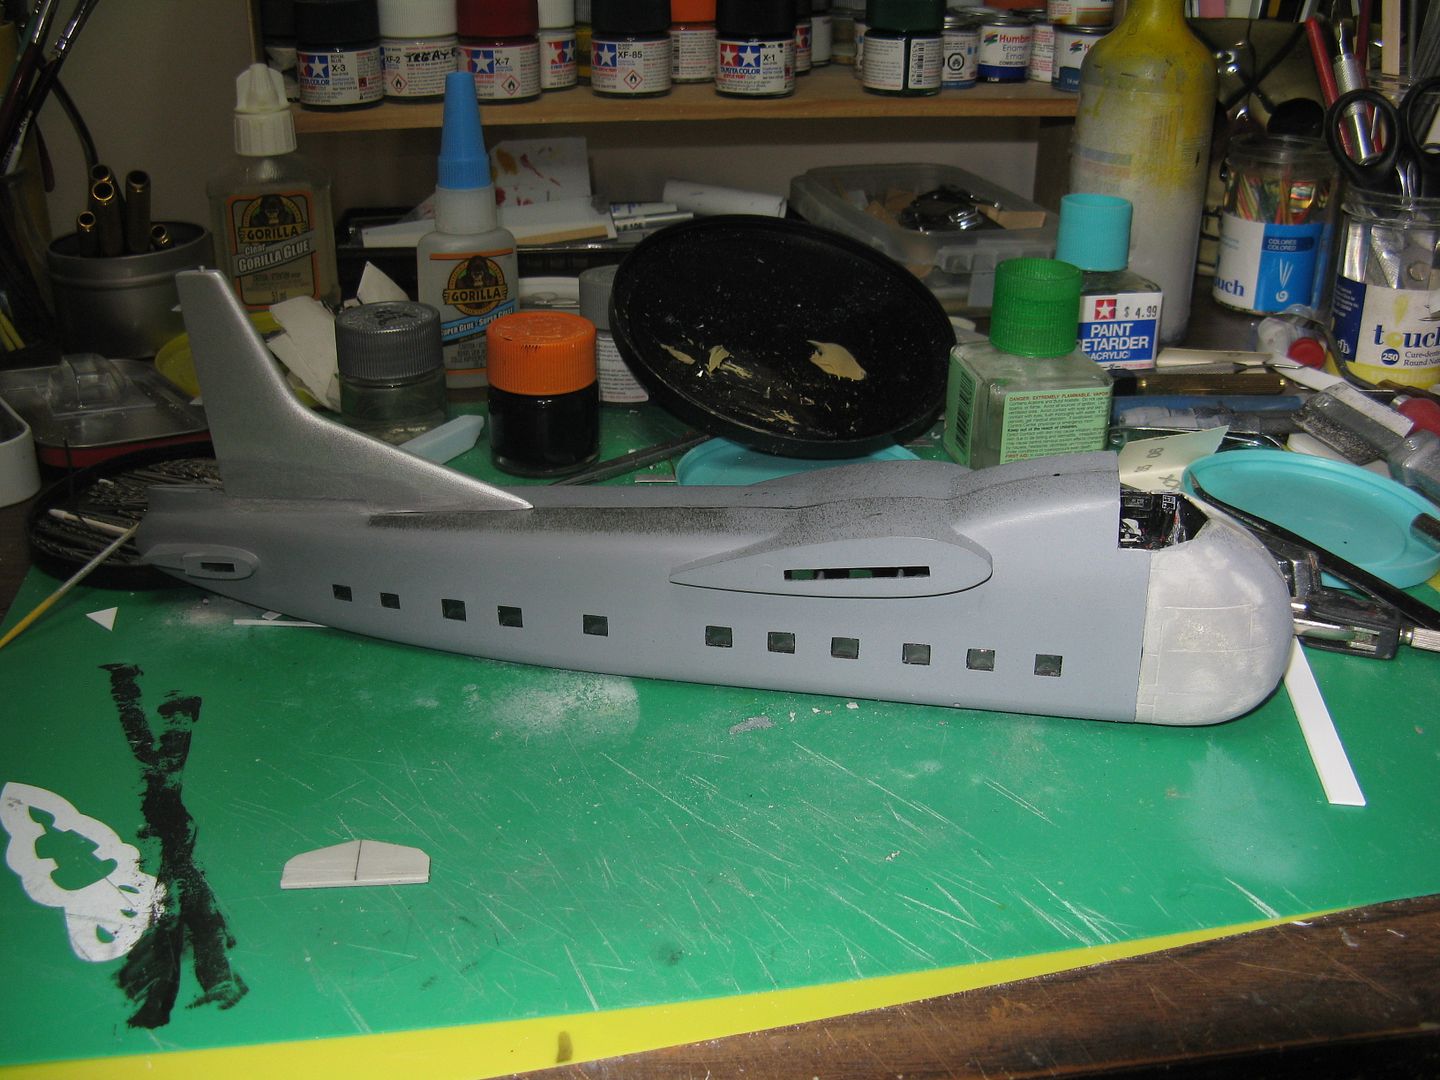
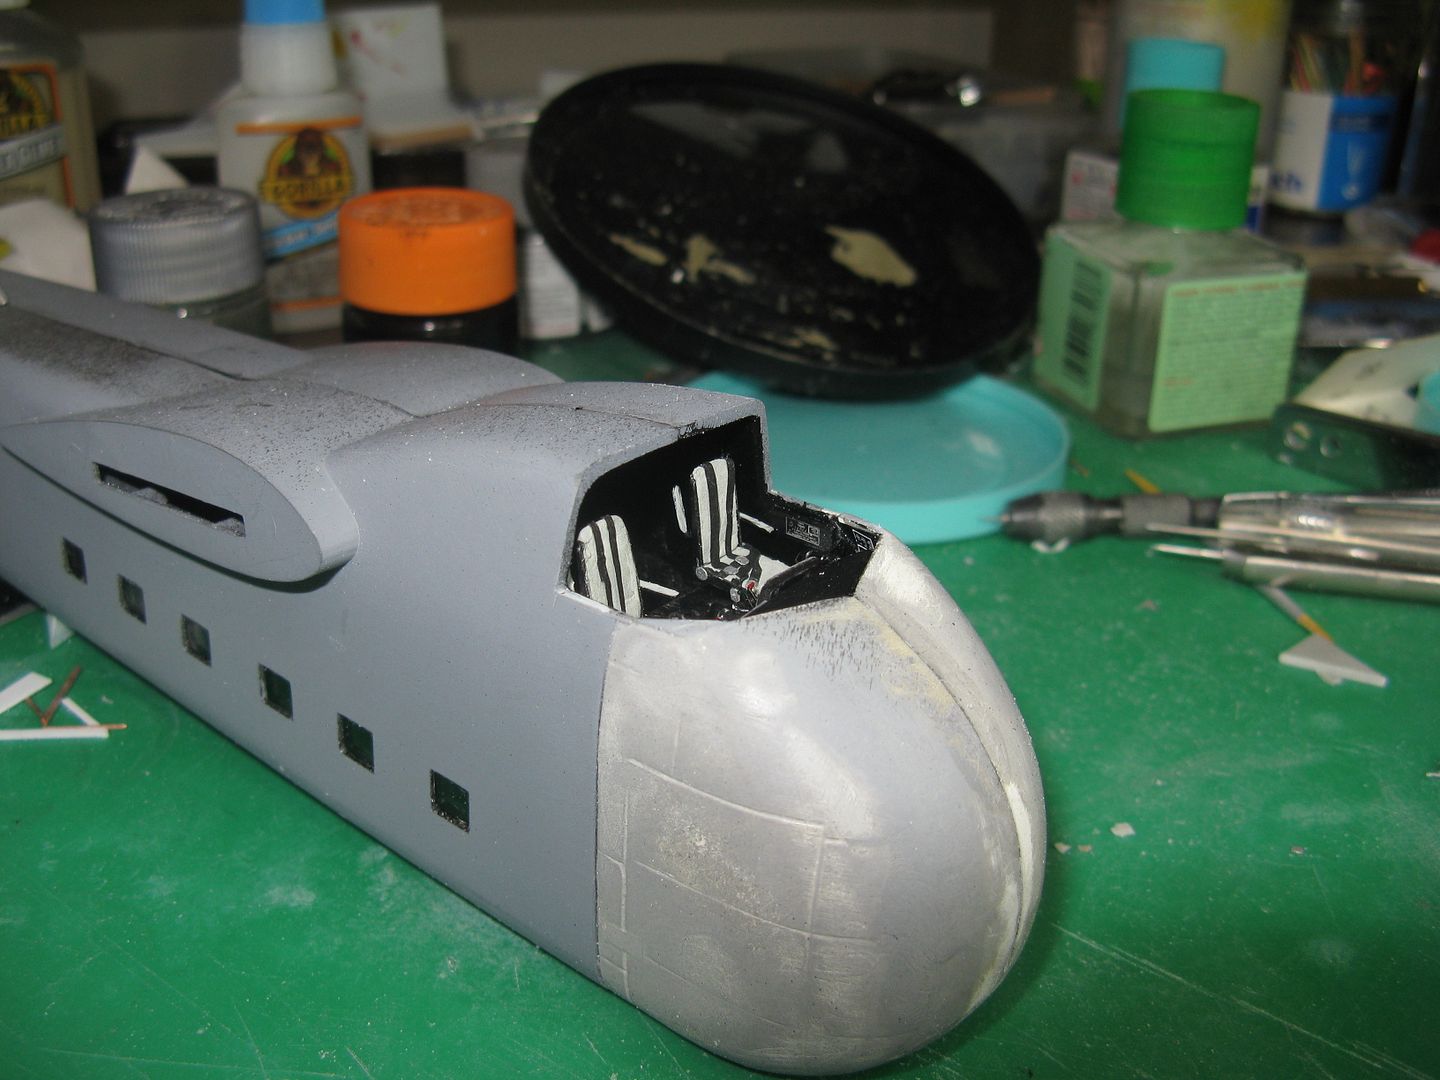
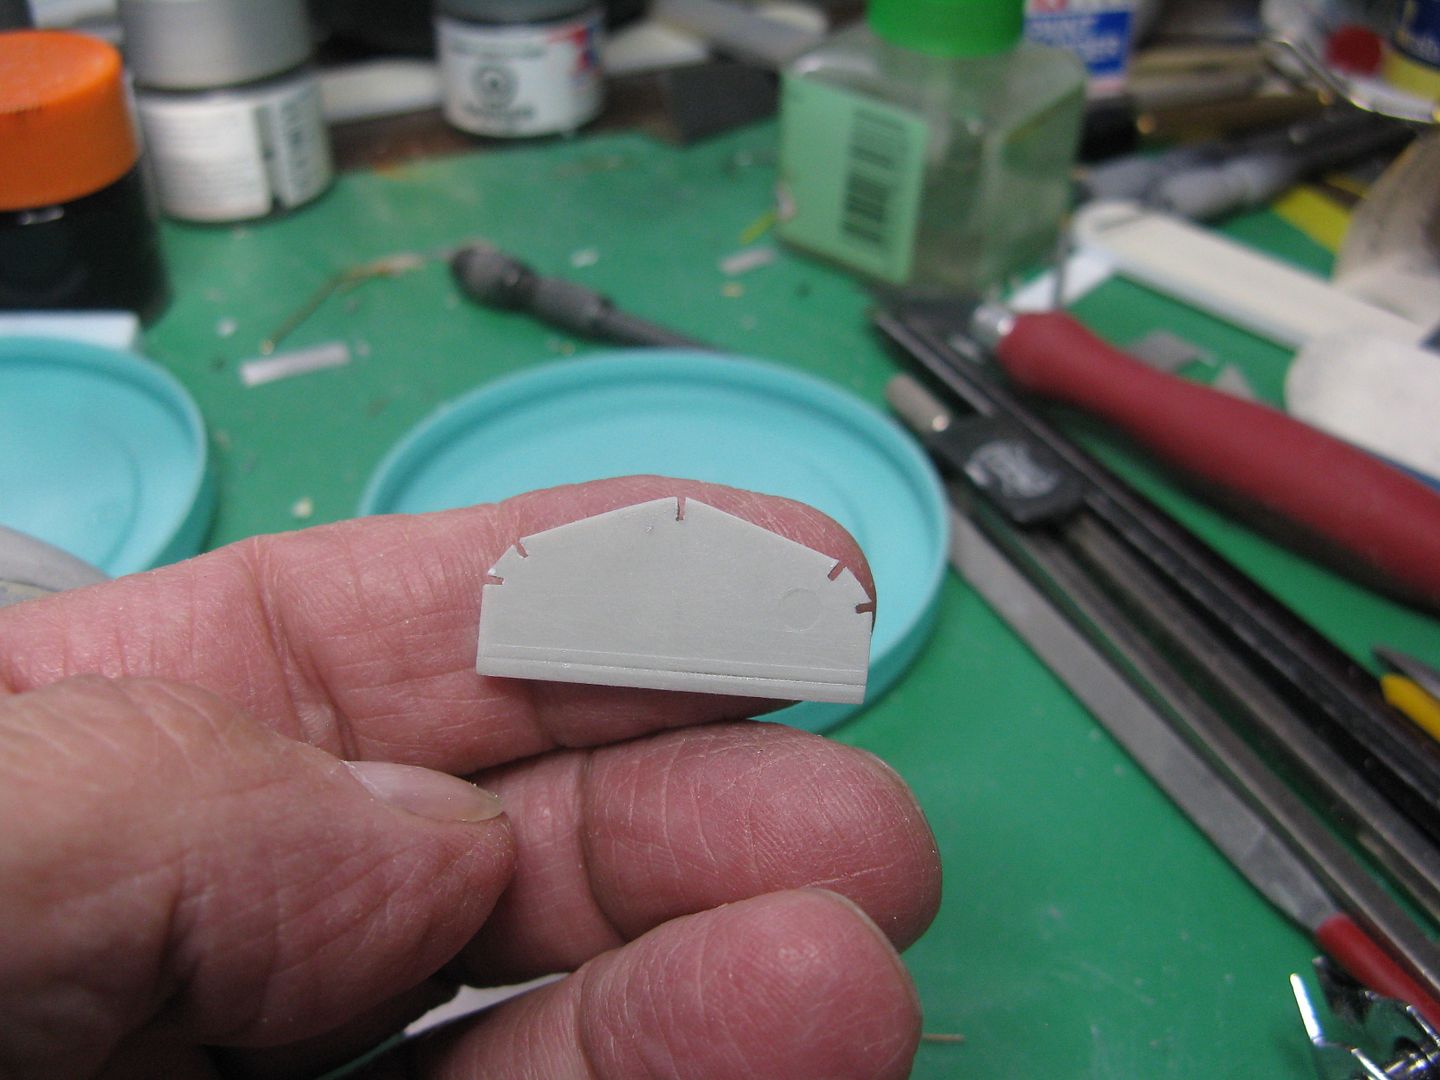
The resin kit instructions call for the removal of the plastic kit cockpit roof back as far as the cockpit side window rear sill. This seemed reasonable, but since I chose not to use the resin kit greenhouse and the plastic kit greenhouse would now no longer fit, I decided to create my own greenhouse effect and build a new one. First off, a new cockpit roof. I cut some .040 scrap plastic like so...
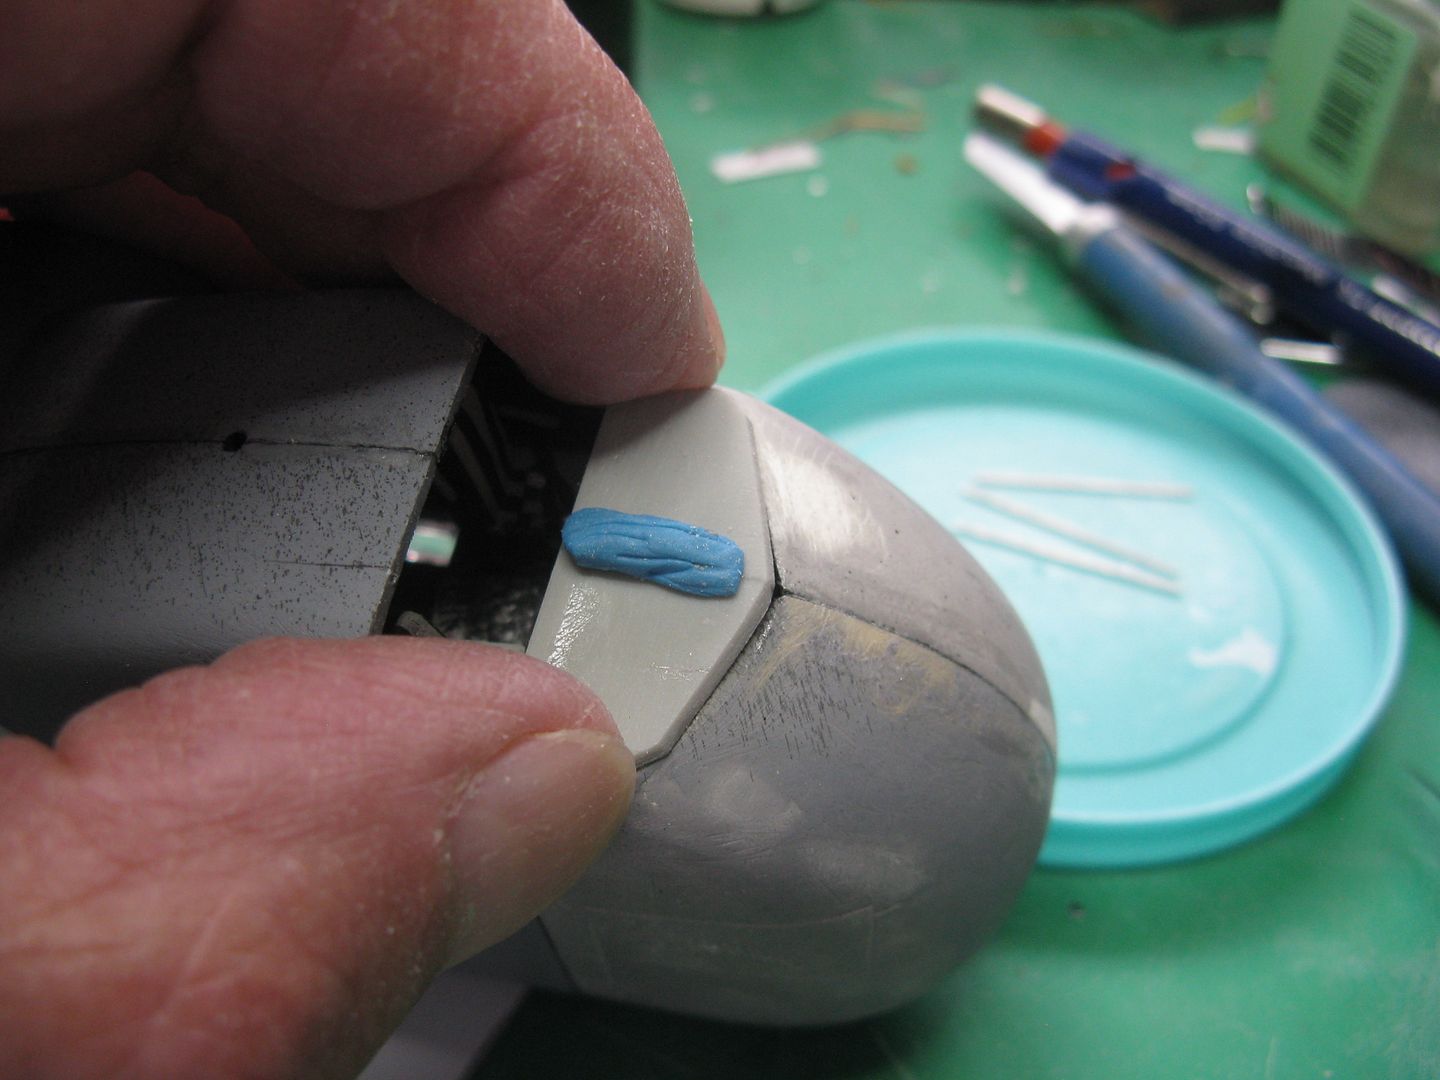
...Then carefully...err, make that very carefully, cut some notches in it where the window posts will be located. The sharp-eyed among you will notice a tiny white dot on the left center notch. That's where I wasn't careful enough and cut in the wrong place.
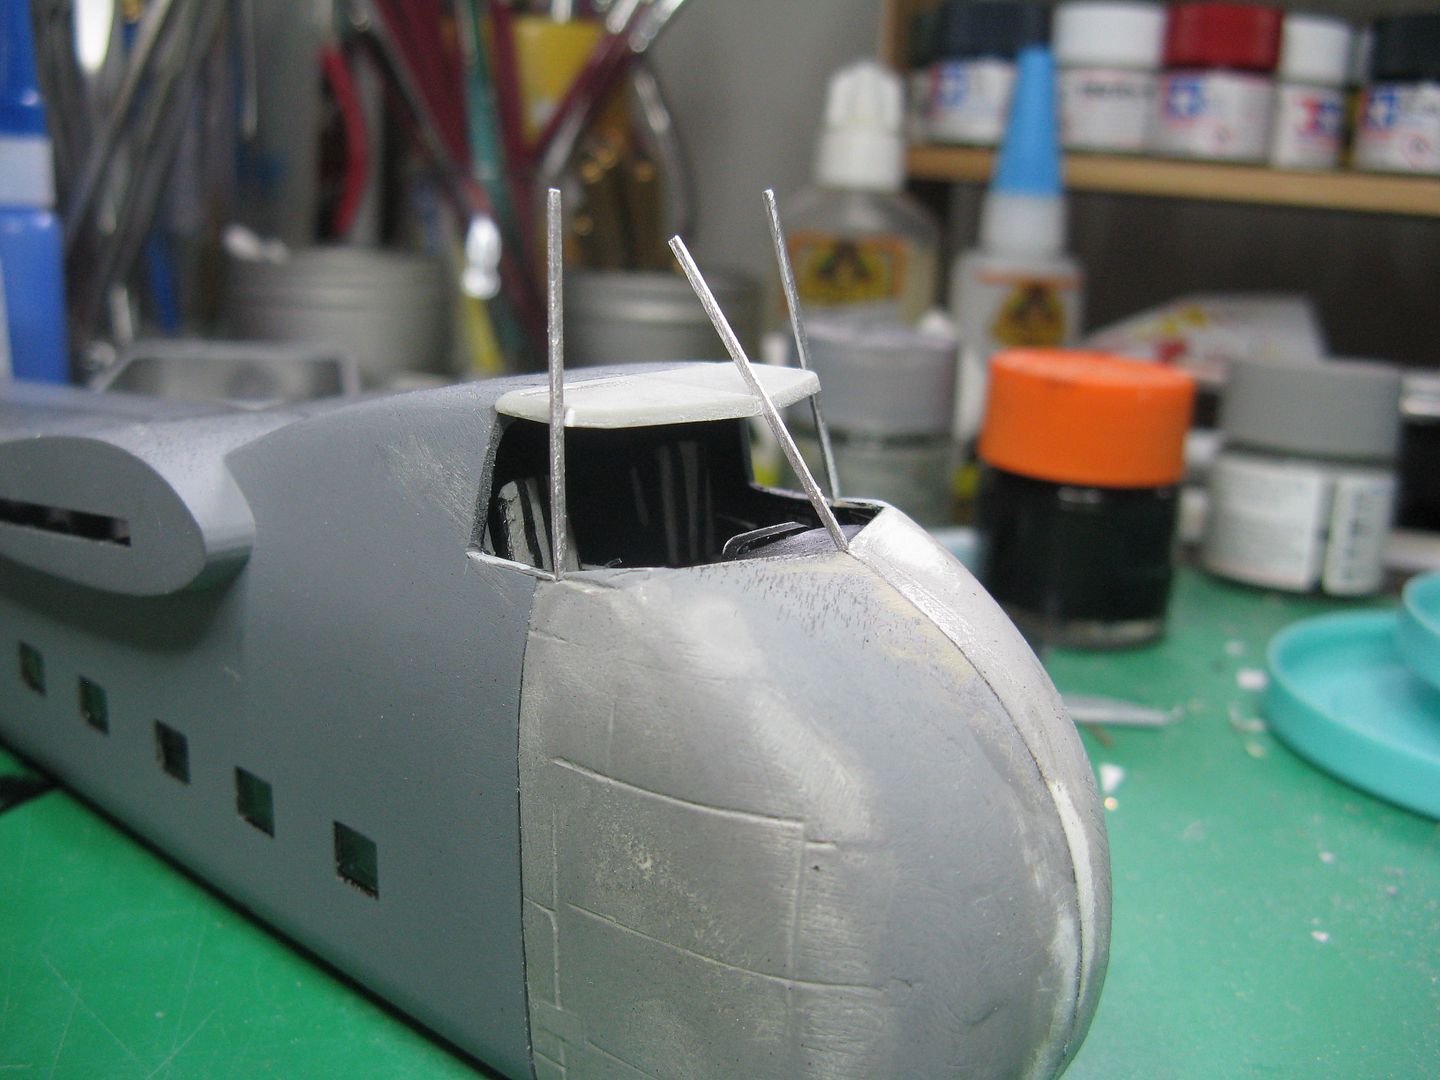
...And after cutting some scrap aluminum for the window frames, dry fit the thing together.
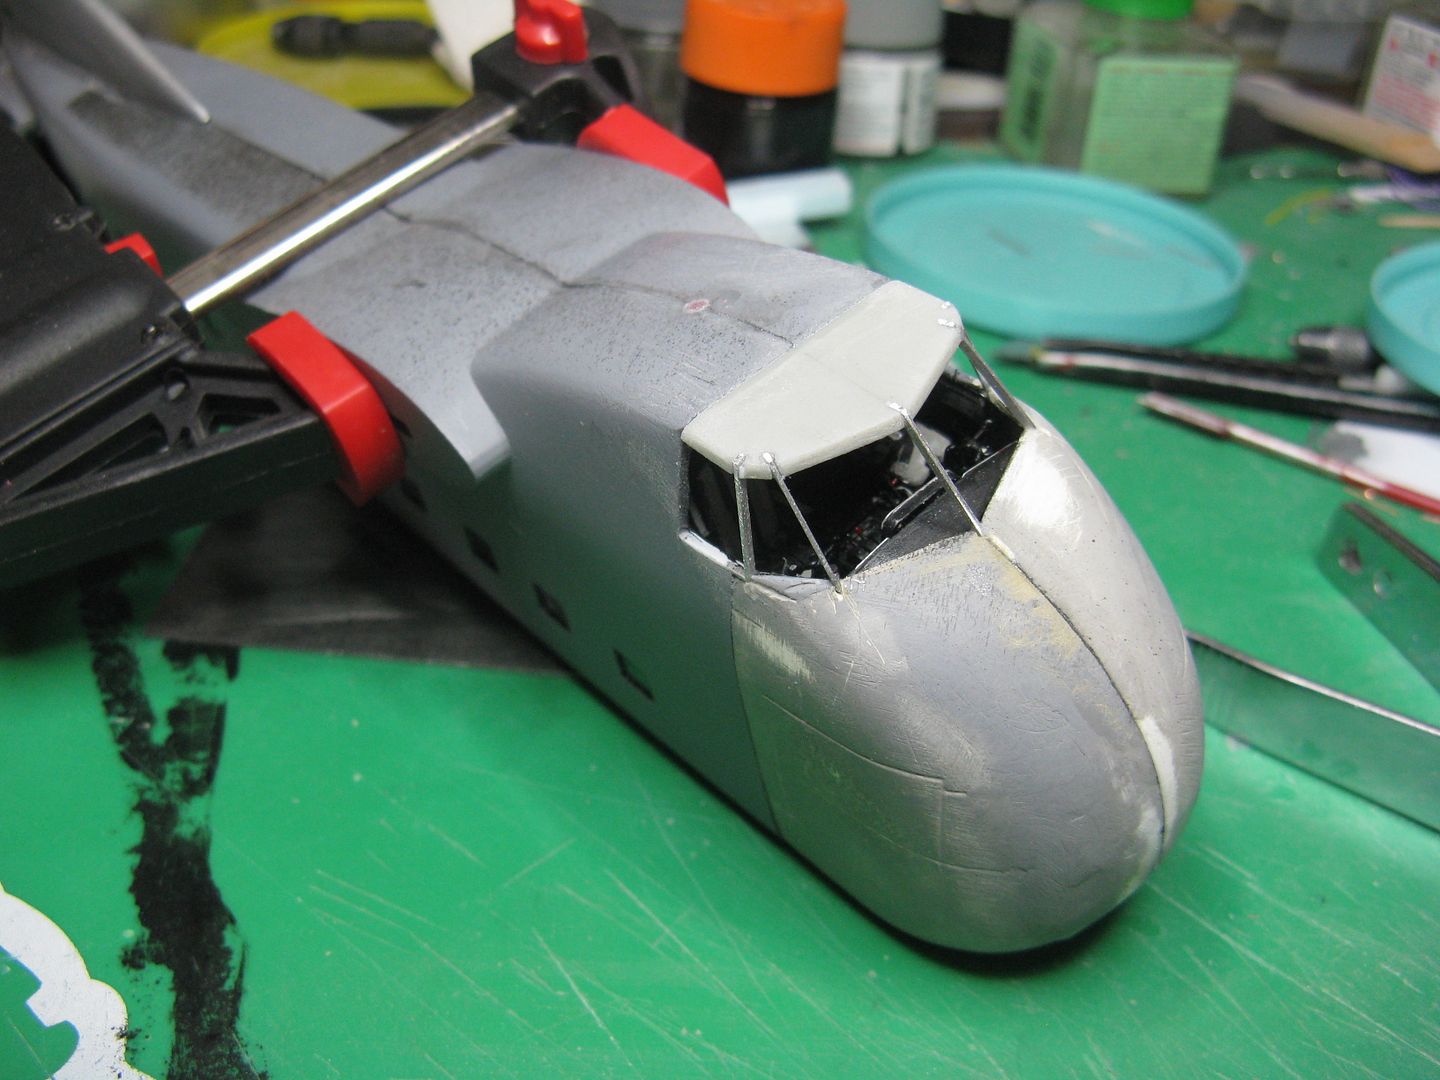
Spring has sprung and so did the center seam over the wing area, which required regluing.
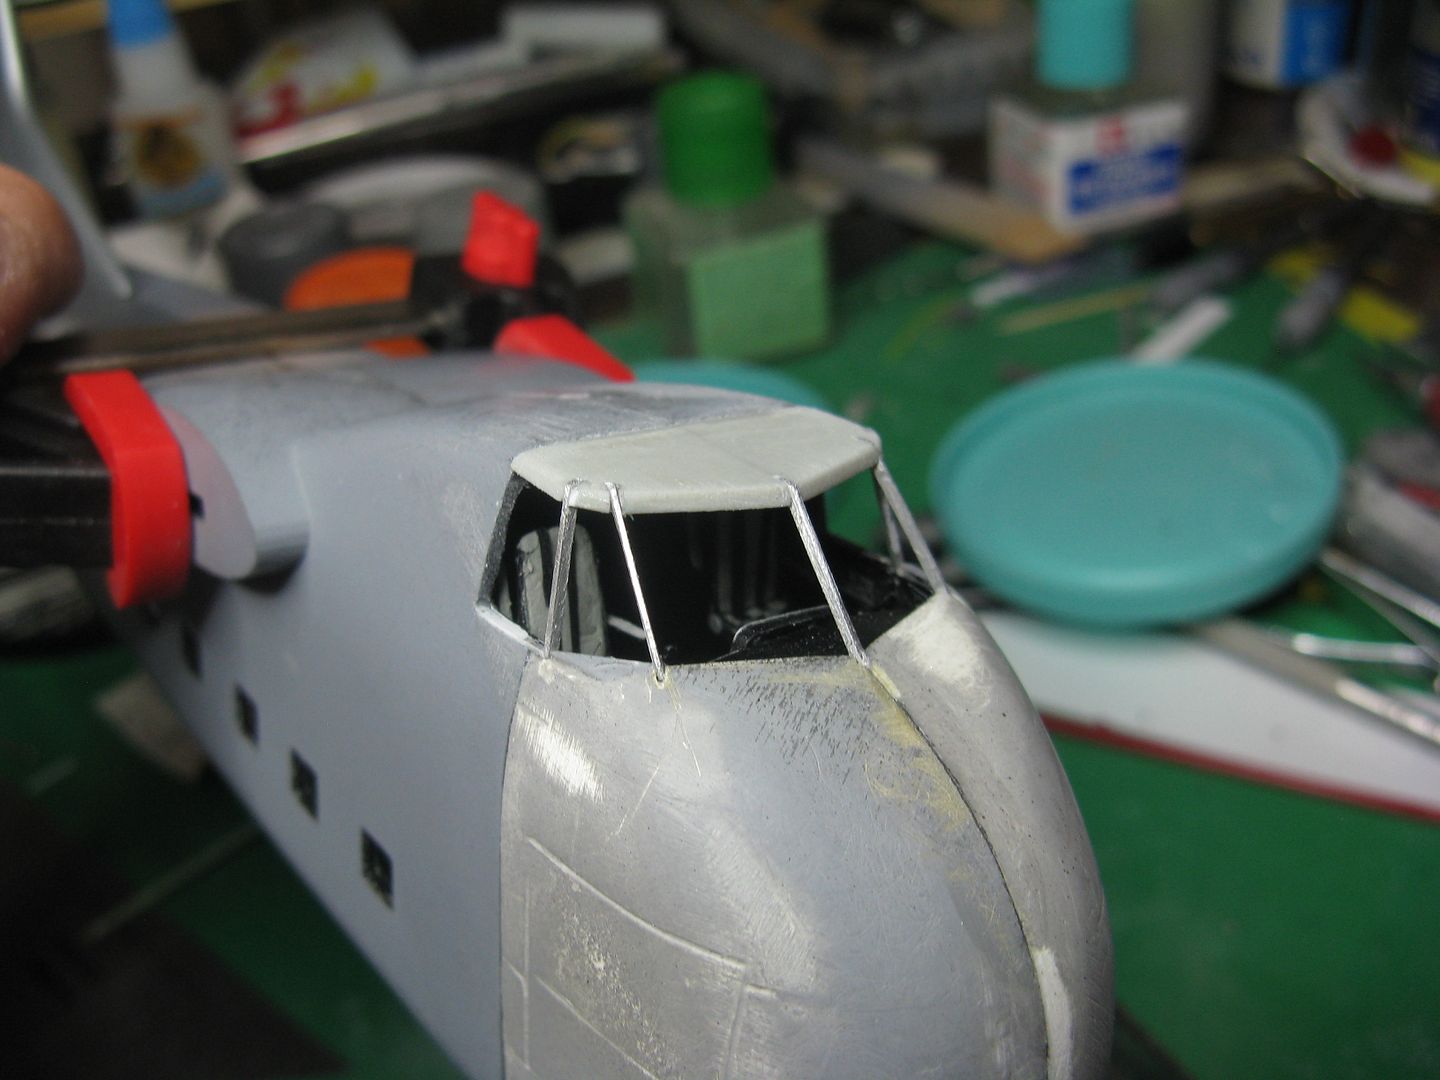
The new cockpit roof and window framing has been installed, and wonder of wonders, it looks ok. down to the correct rake angle. On to the windshields.
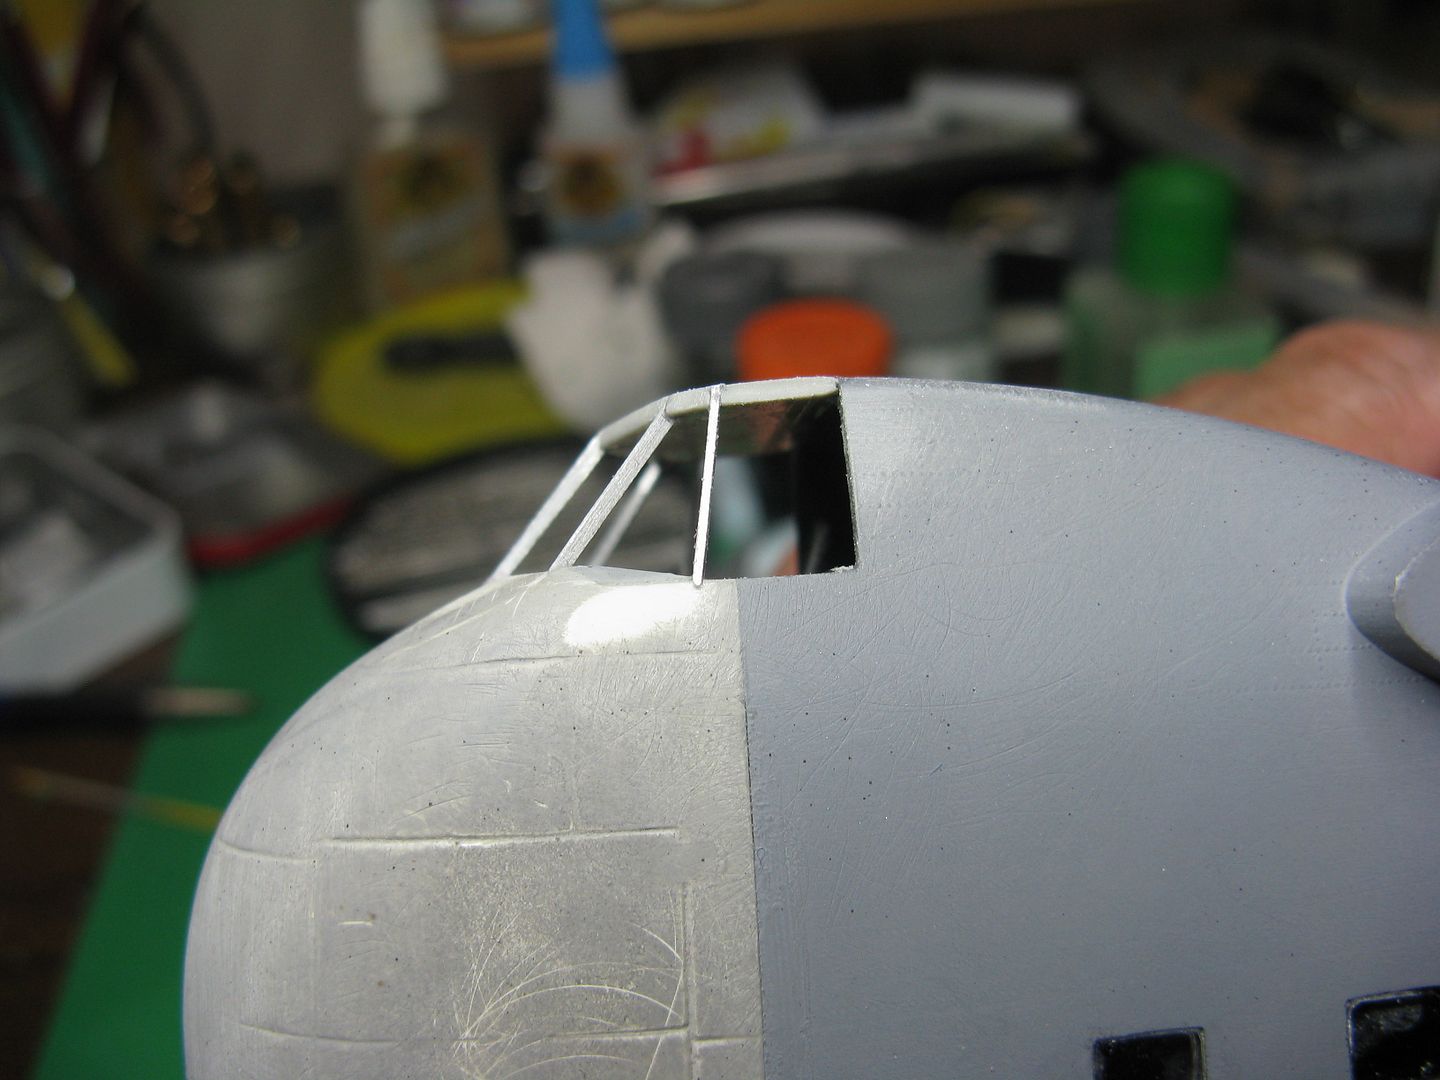
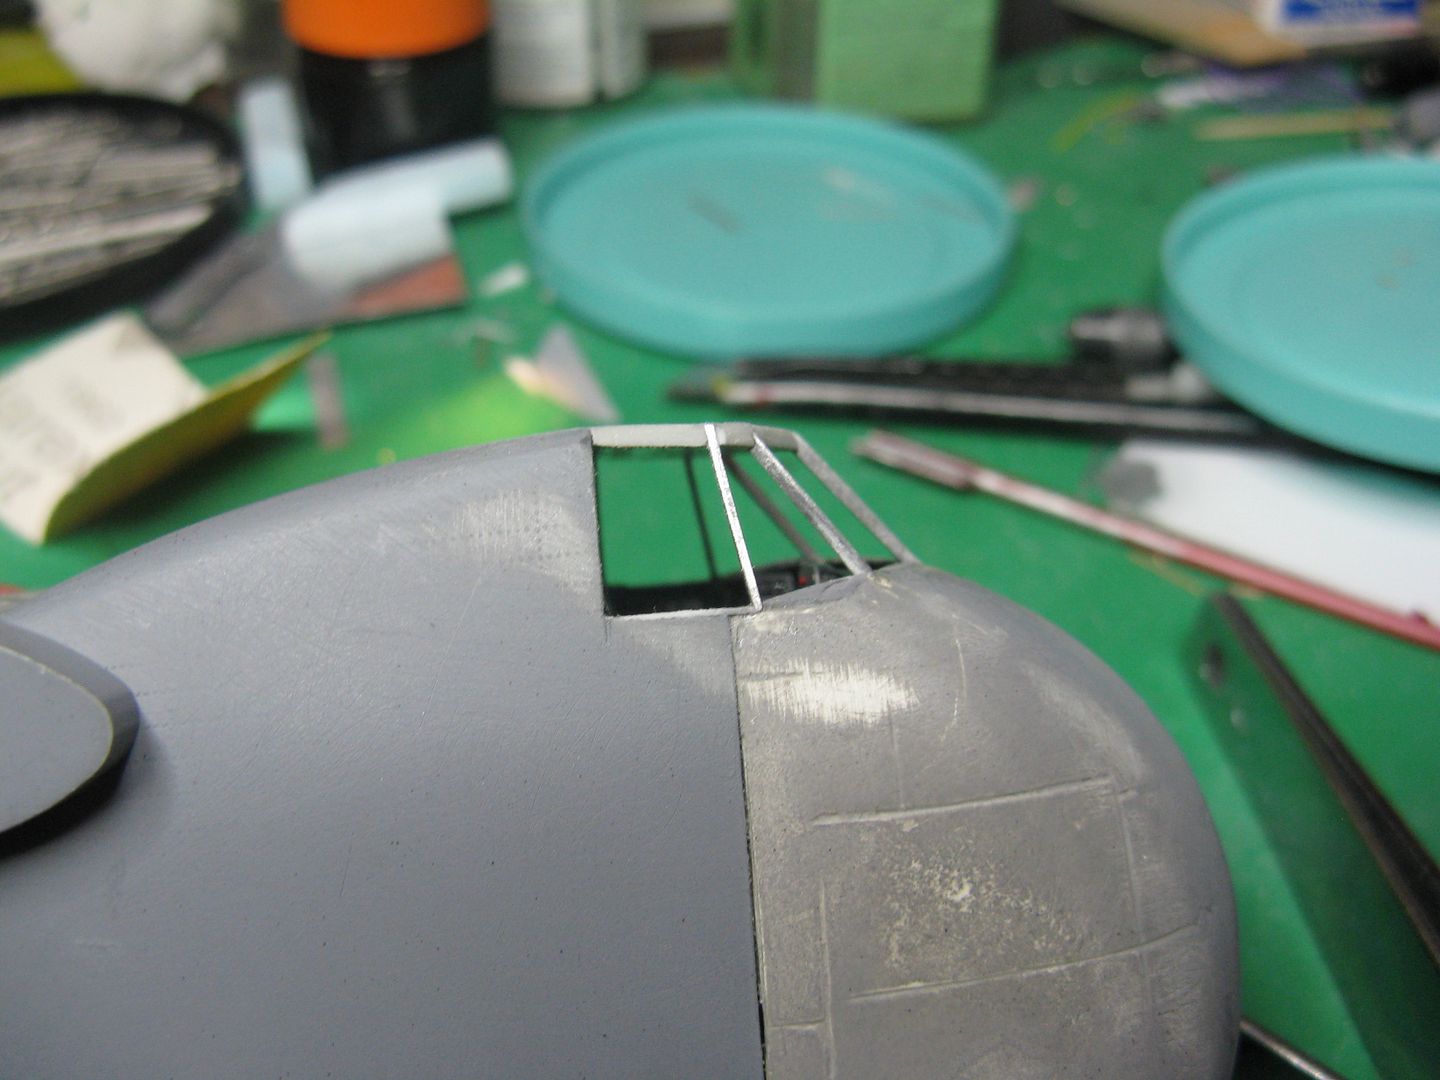
Well, I have the cockpit completed and the fuselage buttoned up. Here's how it went.
I redid the control columns. Here's the original...

…And after a bit of firkytoodling with a bit of wire for the column.

Since there will be no interior detail outside the cockpit, I painted the whole thing black, then added some cockpit sidewalls, complete with map pockets.


After they had been painted black, I added a bit of decal material from a locomotive decal set to represent the doodads on both the sidewall panels and the little quarter panel below the DV window.

Then I finished off the cockpit by adding the seats, the engine controls, the trim wheels, the aforementioned control columns and all that good stuff.

The fuselage went together well. I used Gorilla cyanoacrylate glue on the resin section and straight Tamiya liquid cement on the rest.


The resin kit instructions call for the removal of the plastic kit cockpit roof back as far as the cockpit side window rear sill. This seemed reasonable, but since I chose not to use the resin kit greenhouse and the plastic kit greenhouse would now no longer fit, I decided to create my own greenhouse effect and build a new one. First off, a new cockpit roof. I cut some .040 scrap plastic like so...

...Then carefully...err, make that very carefully, cut some notches in it where the window posts will be located. The sharp-eyed among you will notice a tiny white dot on the left center notch. That's where I wasn't careful enough and cut in the wrong place.

...And after cutting some scrap aluminum for the window frames, dry fit the thing together.

Spring has sprung and so did the center seam over the wing area, which required regluing.

The new cockpit roof and window framing has been installed, and wonder of wonders, it looks ok. down to the correct rake angle. On to the windshields.


phantom II
Master at Arms
 Wow
Wow Cheers, Christian B)
Genius 


chrispisme
Well-known member
I know hey?! He takes a poorly made badly fitting kit adds a worse fitting than the kit conversion and makes a silk purse out of the whole thing! and...to top it off builds and installs his own details that fit better than the kit parts. :hmmmYou are one scary dude.....I have enough trouble putting together a Tamiya kit without issues :frantic
:drinks
Plastik Smurff
Well-known member
All I can say is 


Rhino
Super Moderator
Somewhere in the Model World, the Vintage Airfix special interest group is gnashing their teeth and rending their clothes! The super-rare Superfreighter being built, with amazing Plastic Surgery! :drool :salute
Bravo Chris! That's what models are for! eBay be damned!
How about a 1/72 AIRFIX Short Skyvan next!? Rhodesian Gunship, perhaps?! :idonno
That Mushroom Cloud should be visible from across the Channel!
Bravo Chris! That's what models are for! eBay be damned!

How about a 1/72 AIRFIX Short Skyvan next!?
 Rhodesian Gunship, perhaps?! :idonno
 That Mushroom Cloud should be visible from across the Channel!
Heavens Eagle
Well-known member
I have a VERY old book from the 50's. Here is a scan from it.
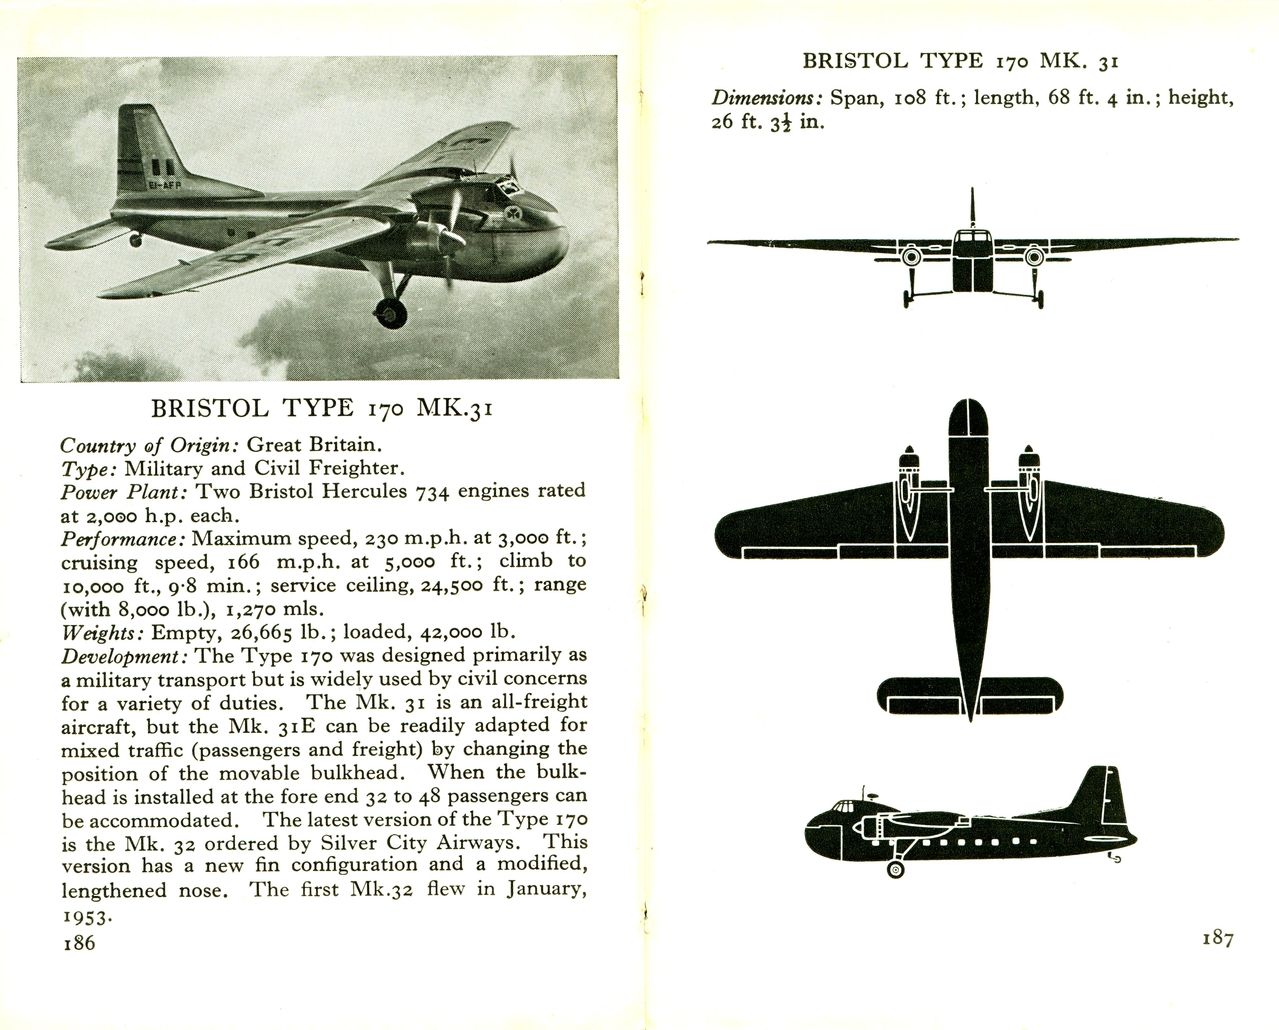

Thanks for the kind comments fellas, much appreciated. 
Rhino I have a 1:72 Shed in the stash, never thought of making a gunship outta it. :laugh:
Well, this thing proceeds apace. I have all the cabin windows reglued back in place and the fuselage primed. Wazzat reglued stuff, you ask? Let me explain. I had the fuselage prepped and sanded, ready for priming, and was applying tape to the cabin windows. There was a muted pop, and the window disappeared into the fuselage. This caused another "What are swearing at up there" moment. Lo and behold, with a bit of shaking and contortion, the wayward window fell out the slot where the wing tab goes. Of course this meant it had to be cut to size and glued in from the outside, but what the hey, I'm retired. More tape, and the next third window disappeared in the same way. You guessed it, another 'special' moment. I got that one out the same way as the first, but then realized there was no way I could keep shaking the stuffin out of the model trying to retrieve windows. Solution...
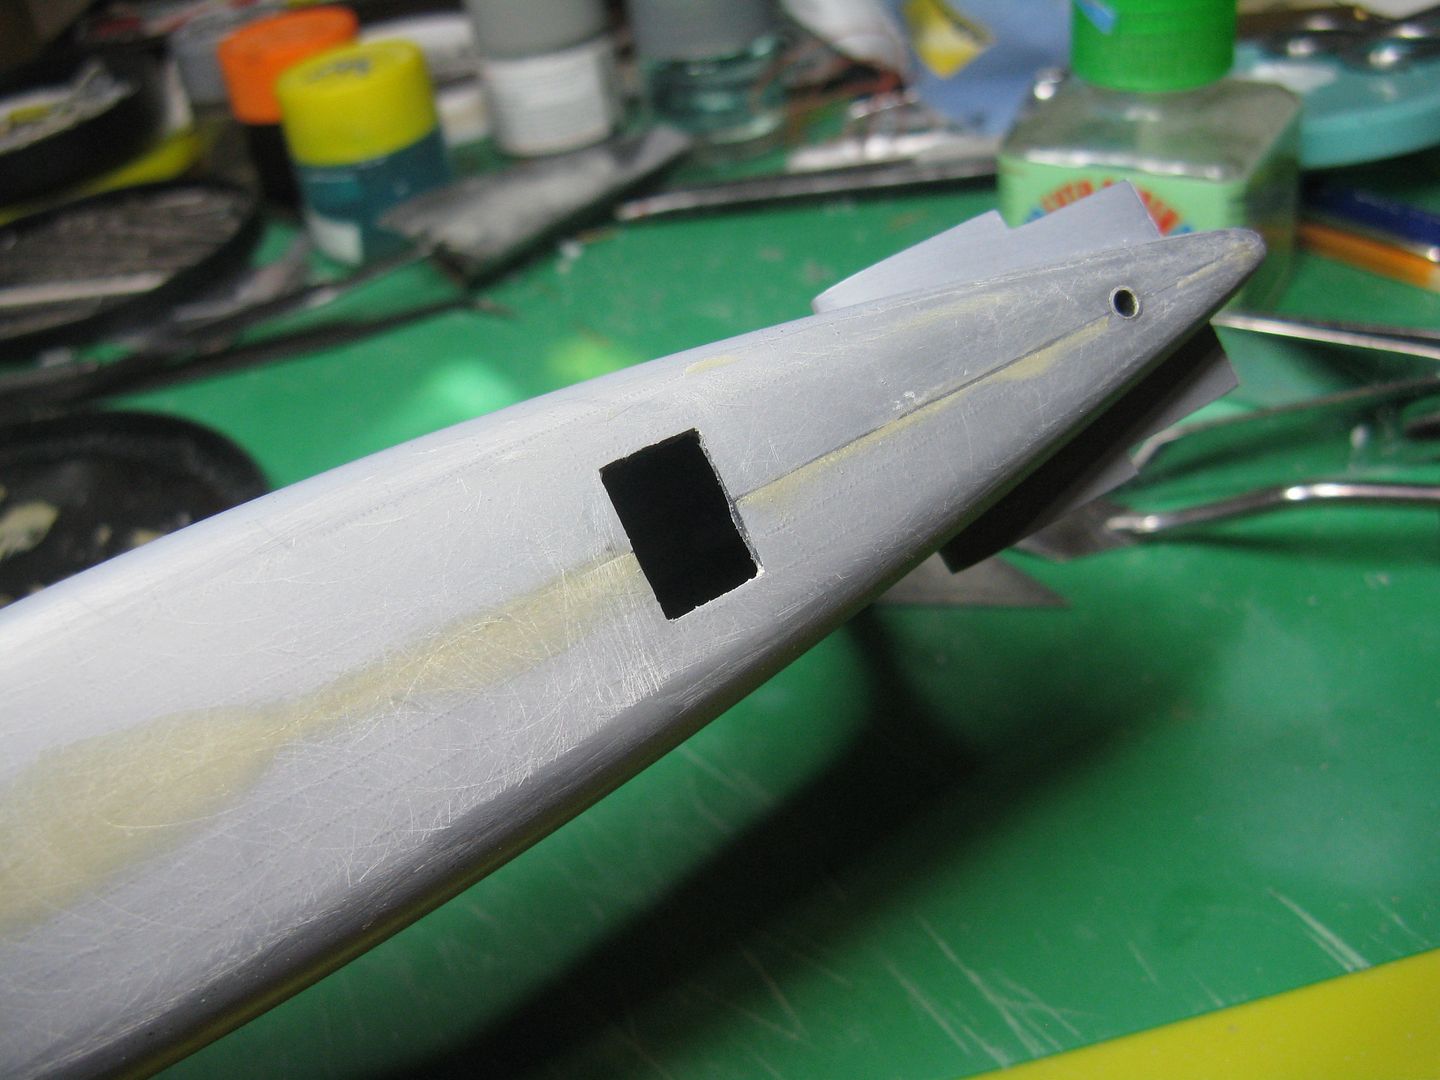
This is not a camera hatch. I drilled a 1/4" hole just forward of the tailwheel and enlarged it to accommodate several windows at the same time, then pushed every one of the furshlugginer things into the fuselage and shook them out the hole. Neato. Did I mention that as I drilled the 1/4" hole it caused the belly seam to pop, and as the old song says "She was split from stem to stern?" This required the belly seam to be reglued, reputtied and resanded. I then cut every one of the windows to fit into their openings from the outside. No fool I, I also waited until every freakin' one of them was installed and the glue had dried before closing the hole. Ha!
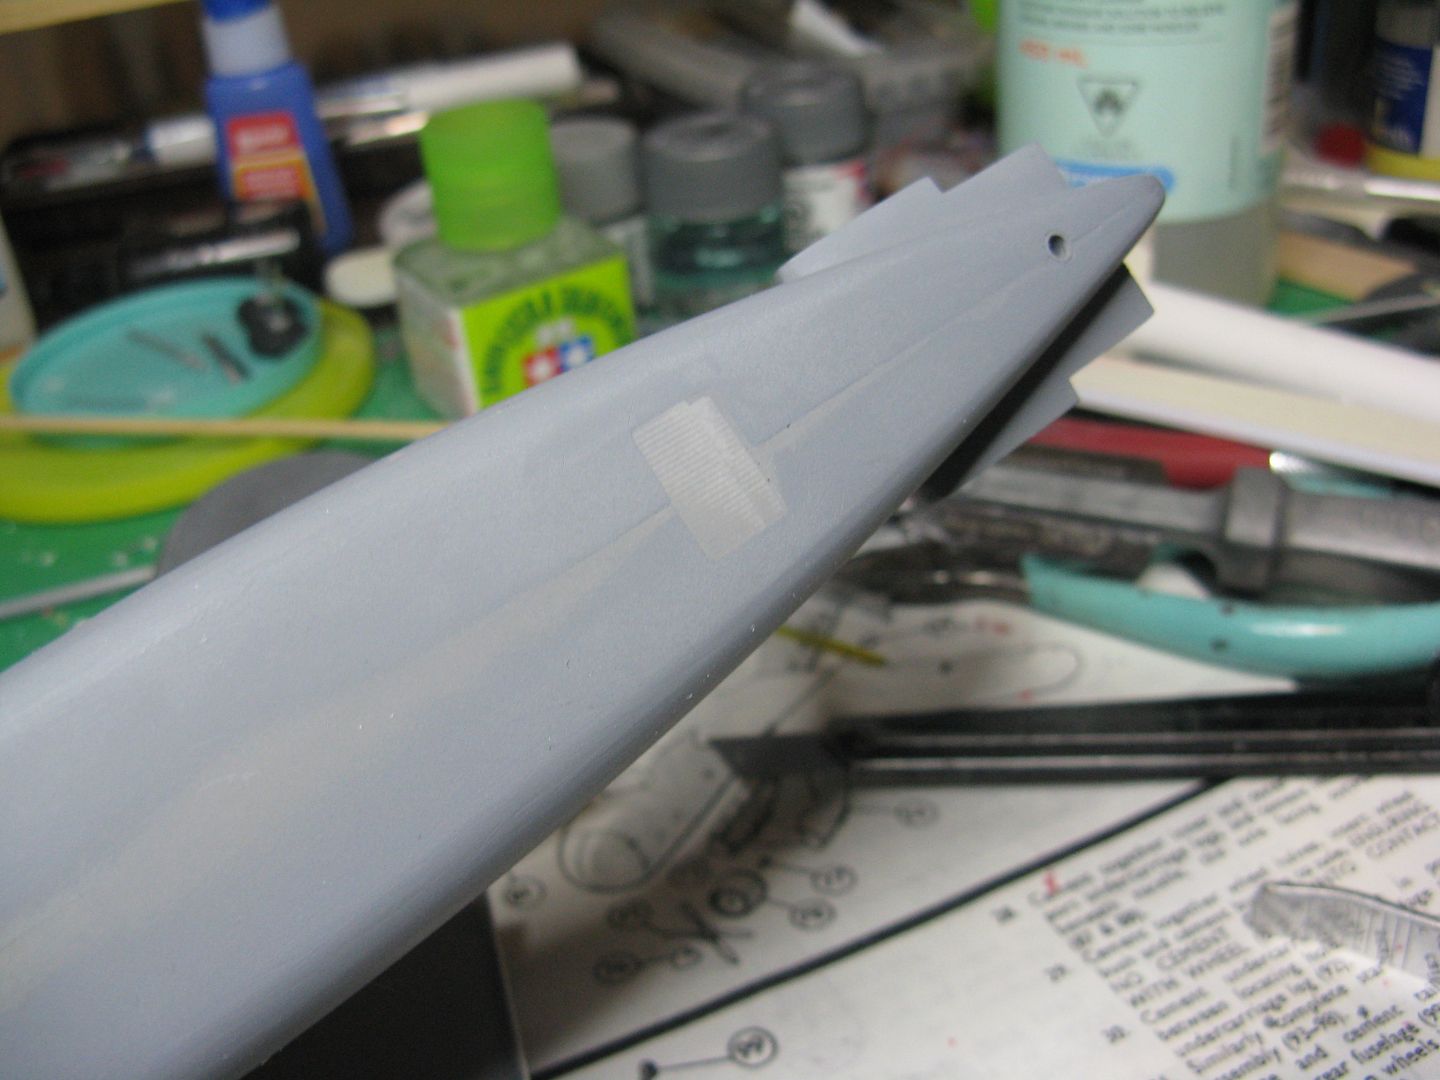
The trailing edges of both wings had a bend in 'em, enough that I thought there might be a slight bend between the inboard and outboard wing flaps. Close scrutiny to a few pictures showed this ain't so, therefore the trailing edge is warped, not to mention a scale foot thick.
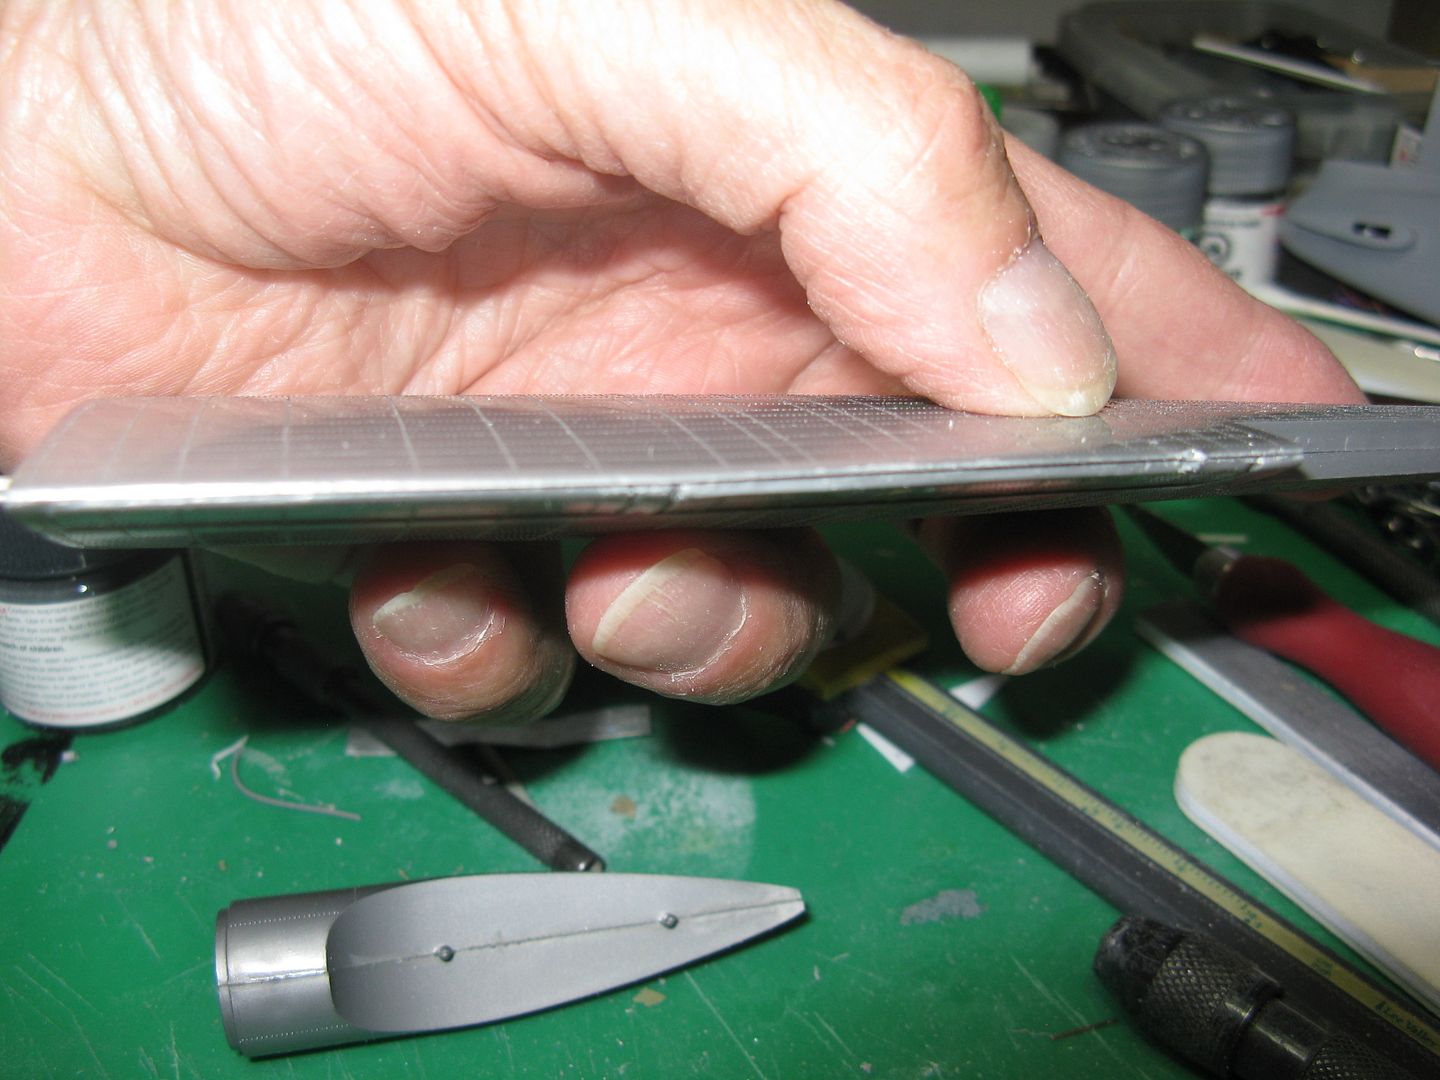
Much sanding is involved to thin down the trailing edge and once that was accomplished I added a strip of .010 x .020 styrene to create a nice crisp edge.
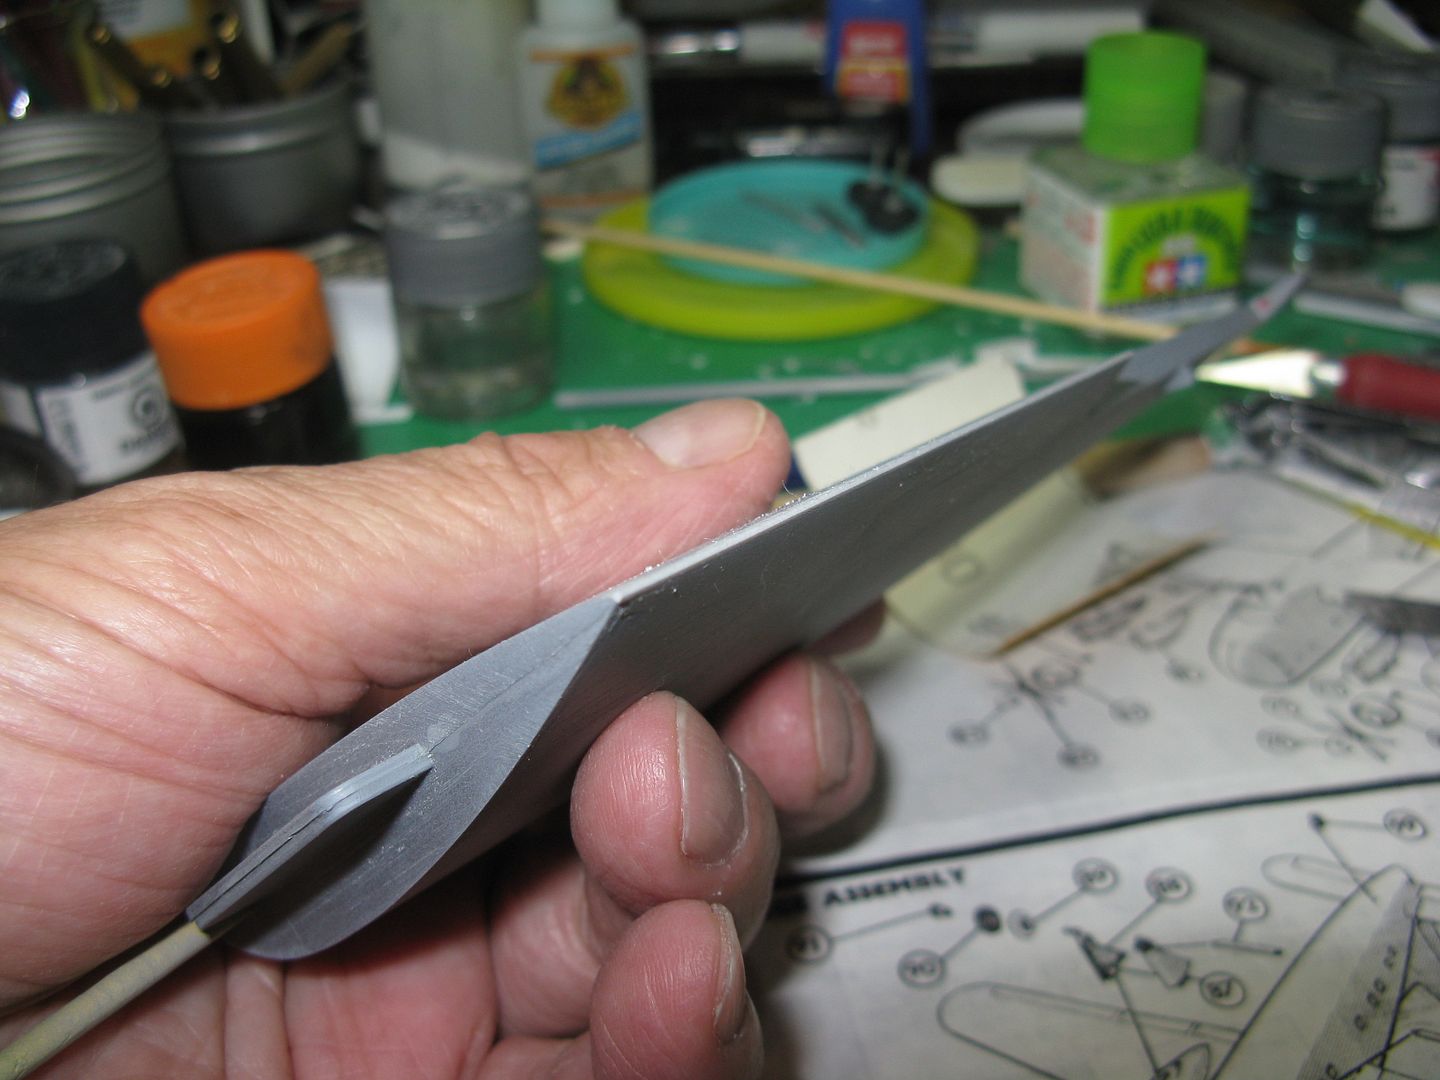
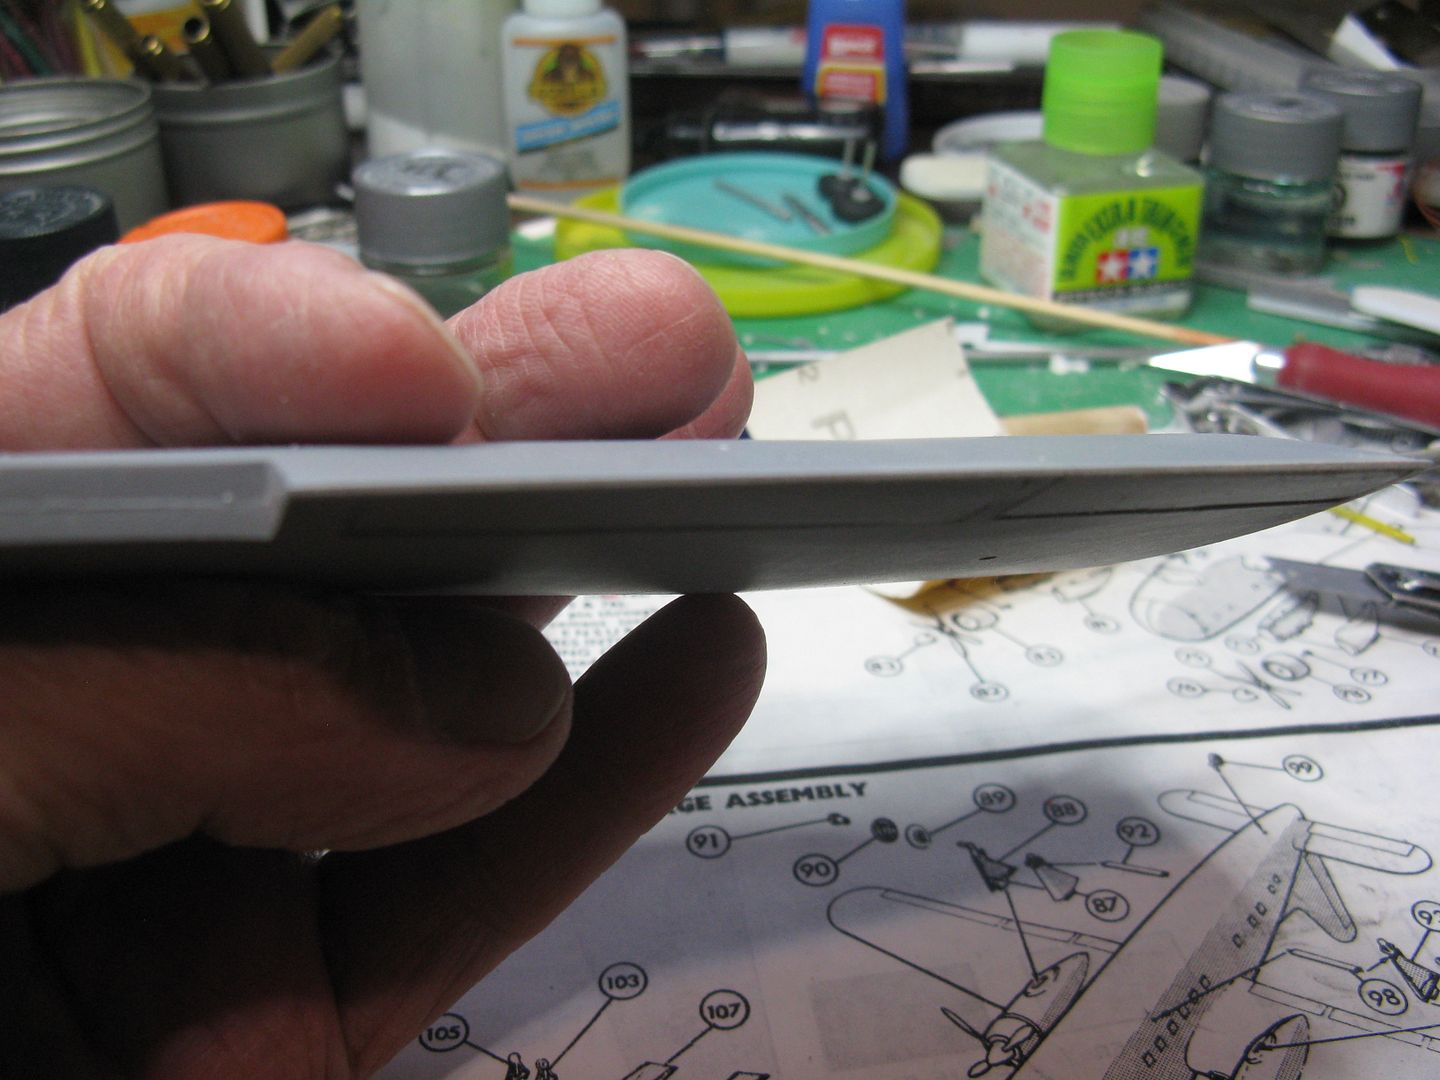
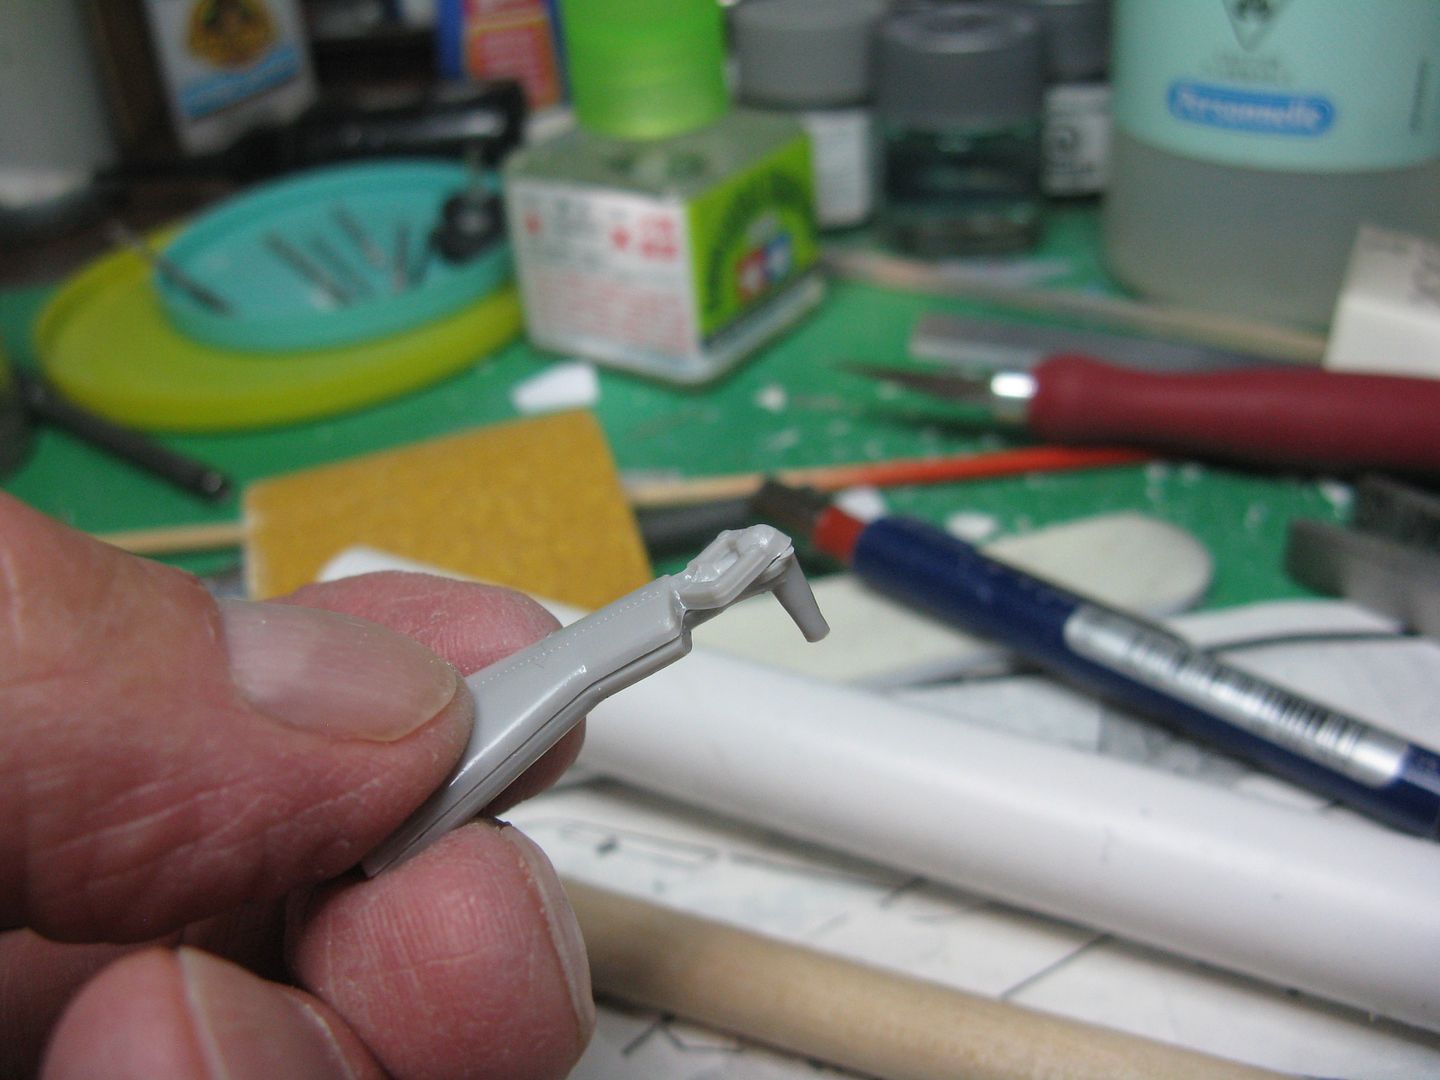
On to the main gear. Here's what the gear legs look like. That just screams "Cut me off and scratchbuild something!"
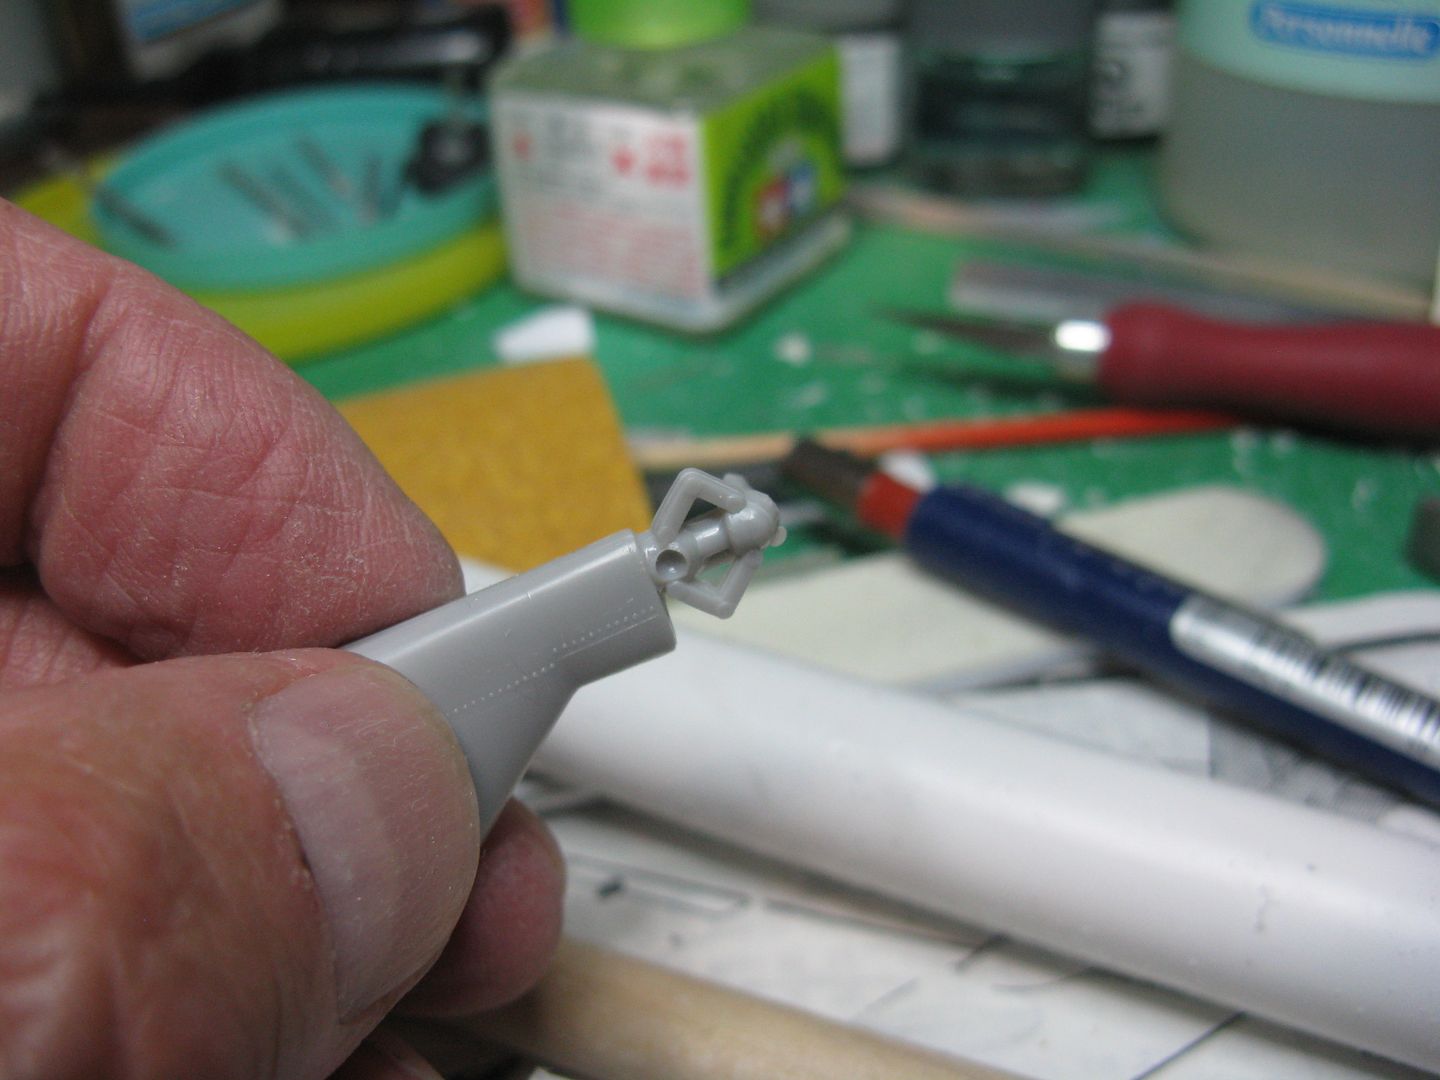
I cut the gear struts off flush with the bottom of that humongous fairing and drilled a 1/8" hole up through it to accept a length of 1/8" aluminum tube. This will be the new gear strut and the bit between the two little collars you see there will serve as the oleo strut. Devilishly clever, wot? Any fule can make one, but ya gotta make two, and they must be precisely alike because otherwise the airplane will list drunkenly to one side or the other when it's up on its feet.
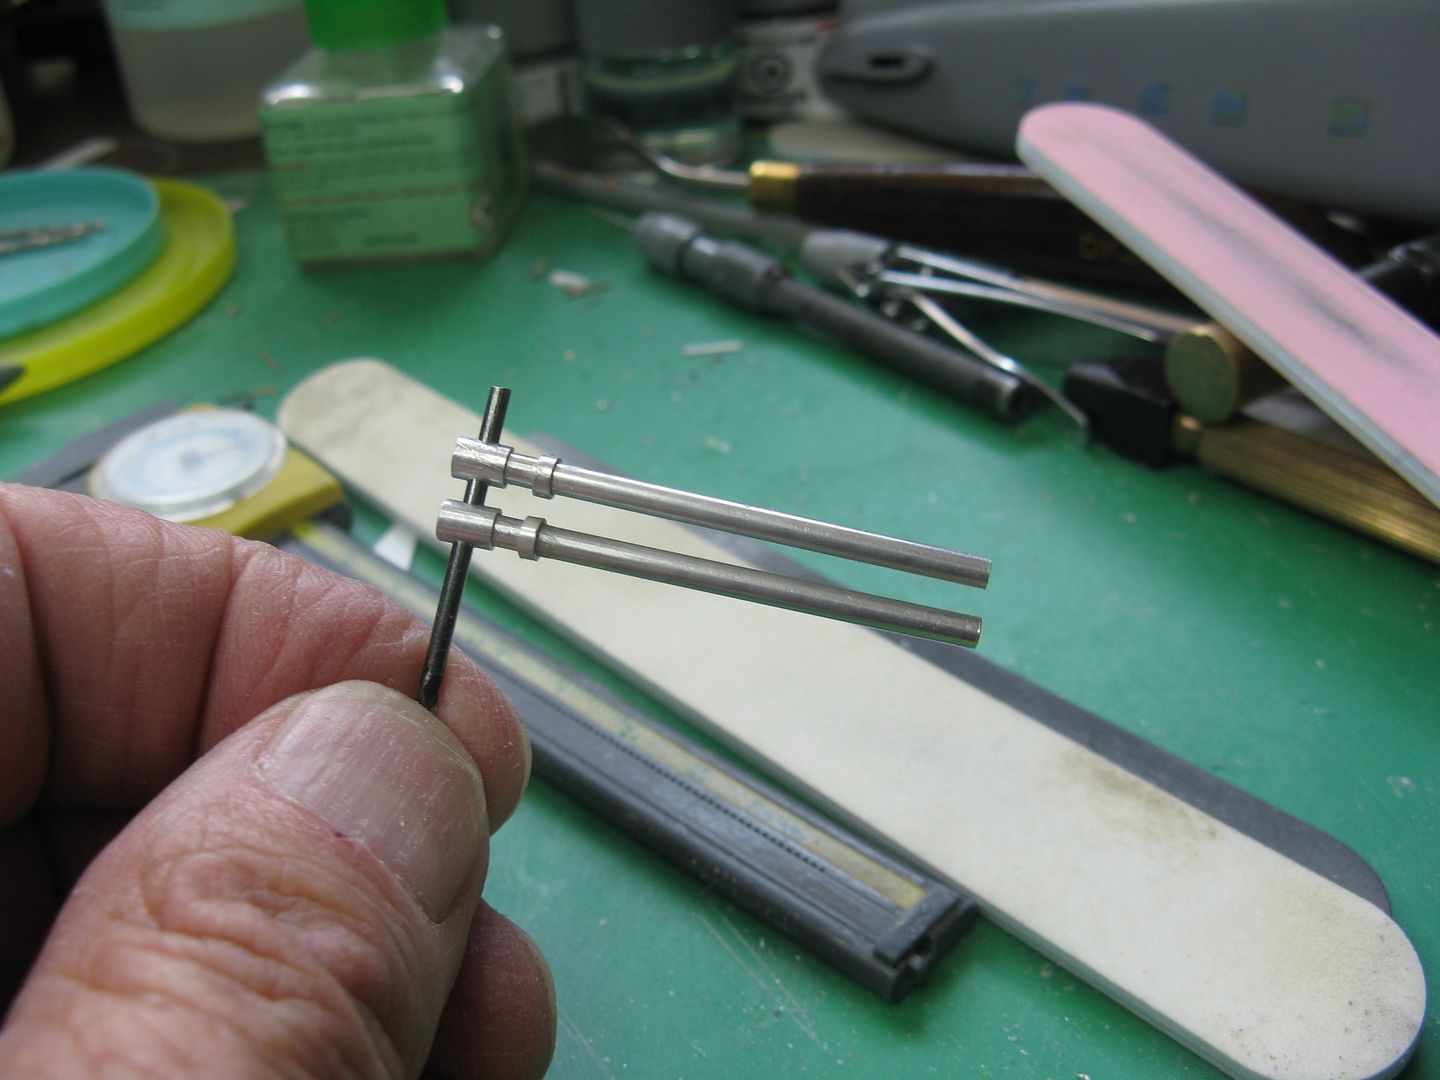
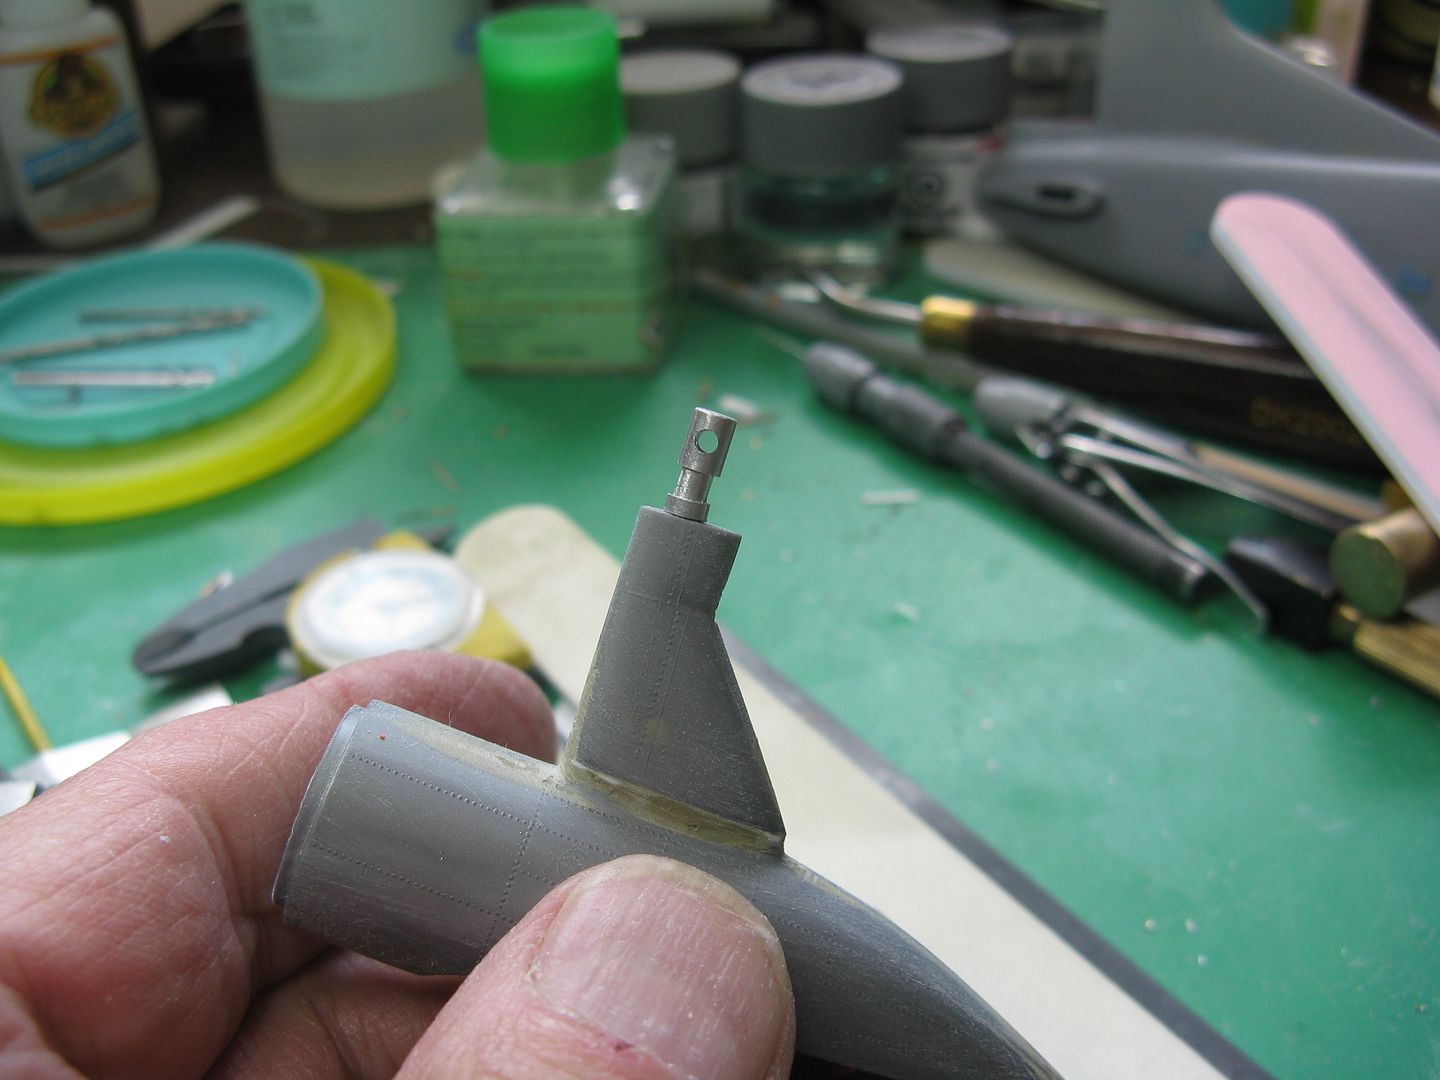
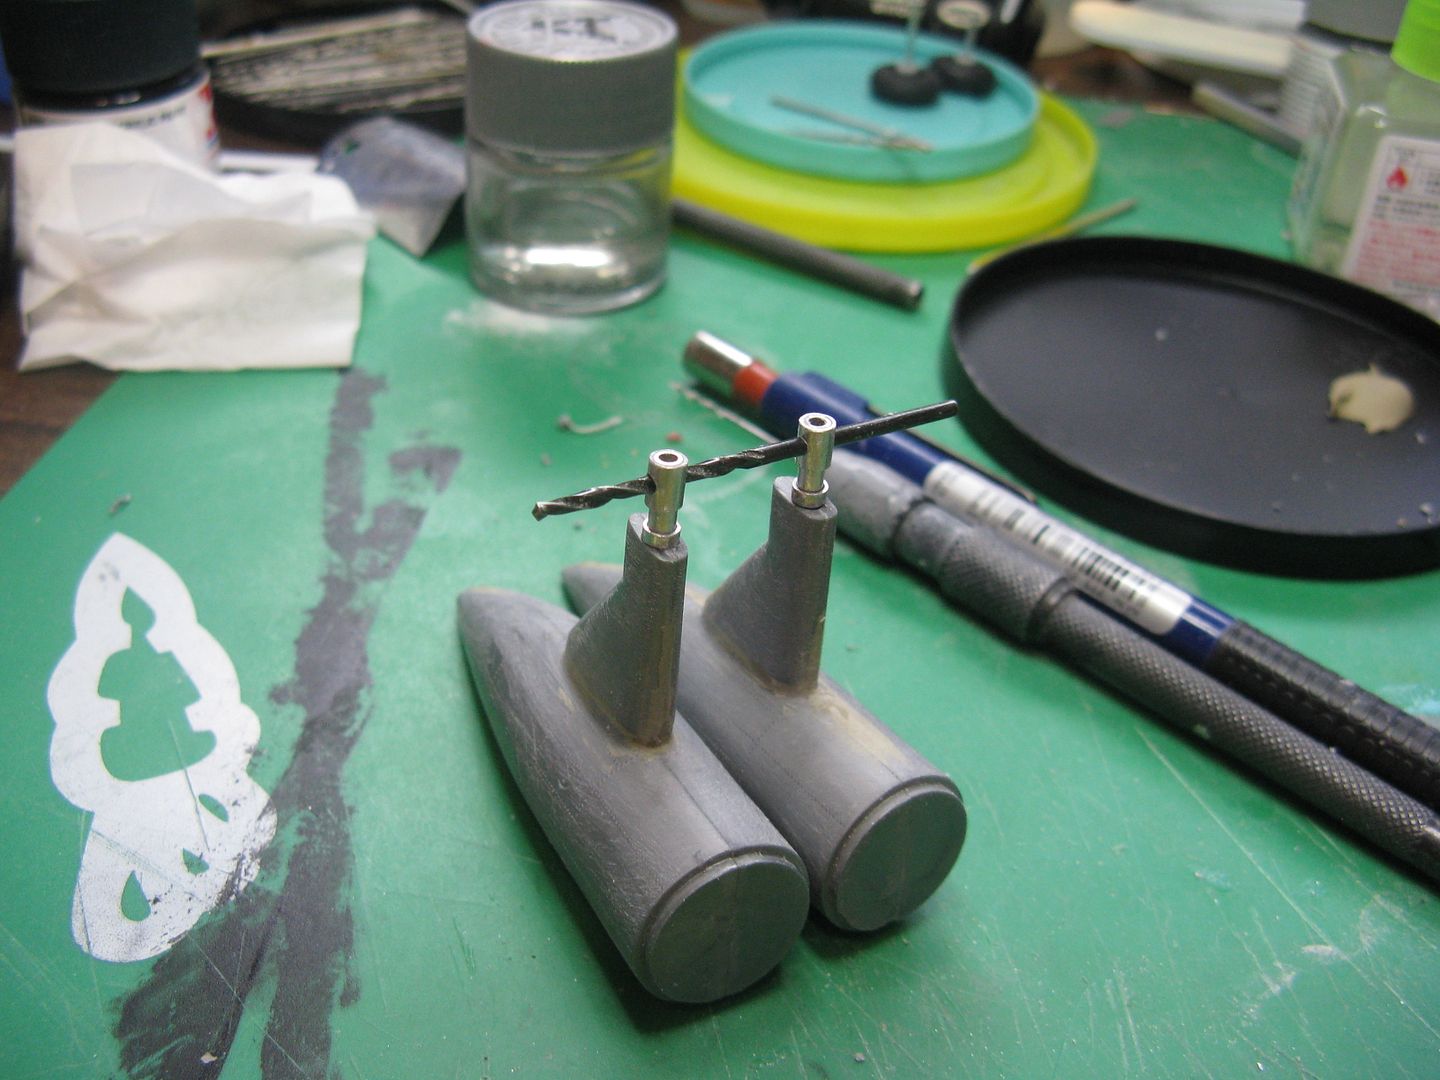
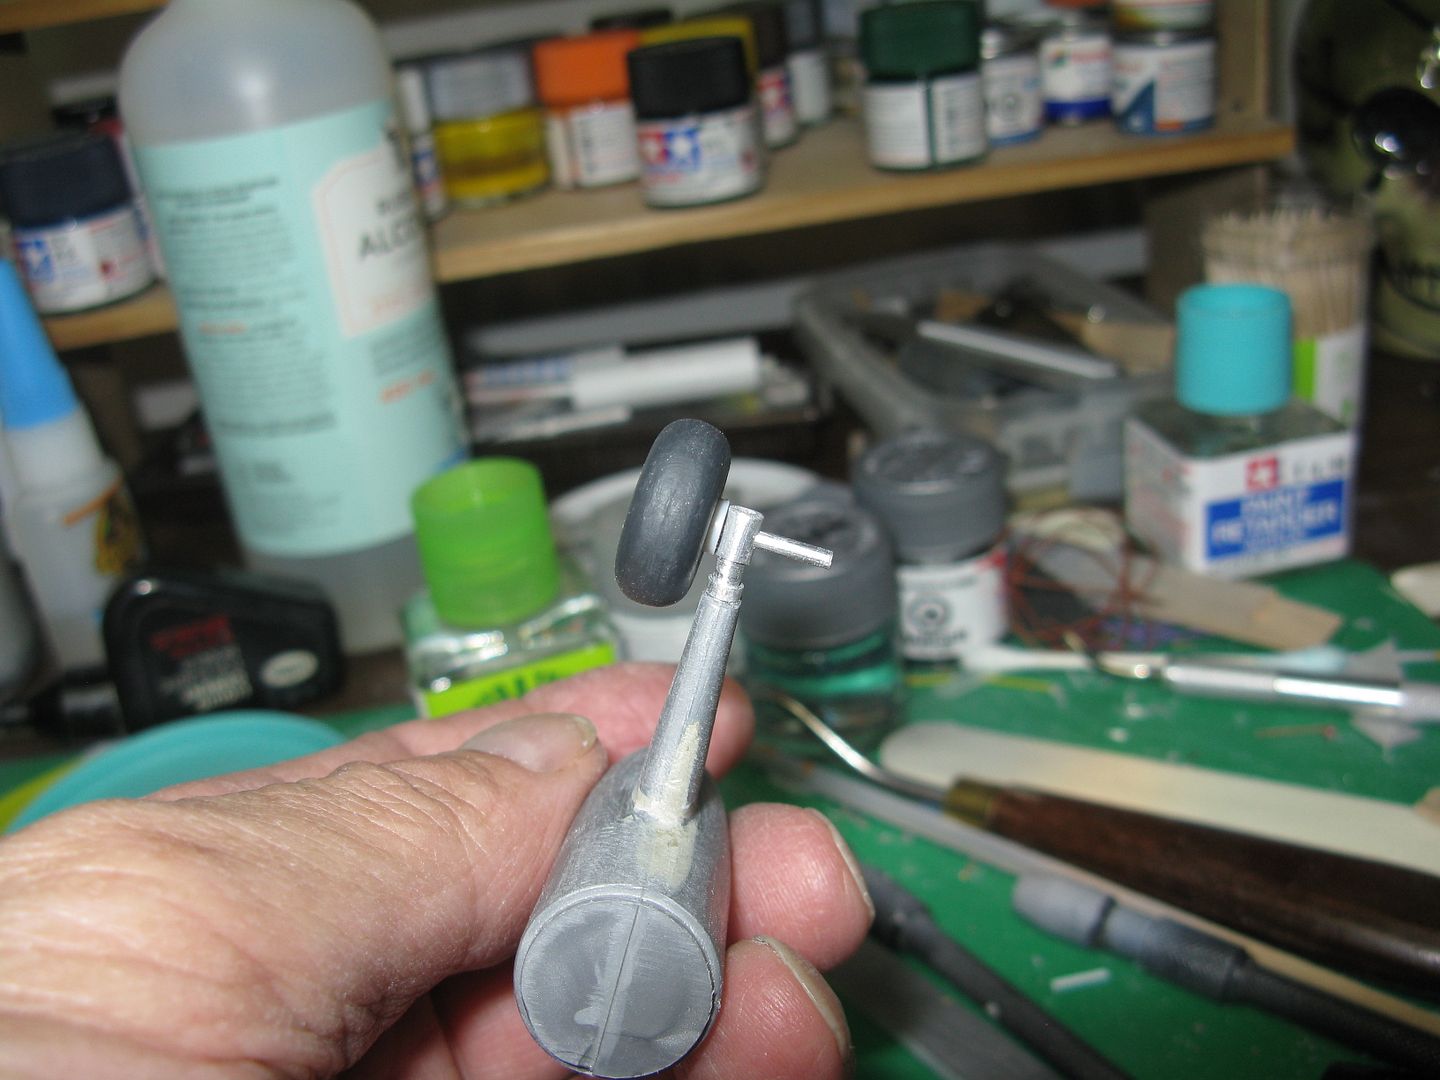
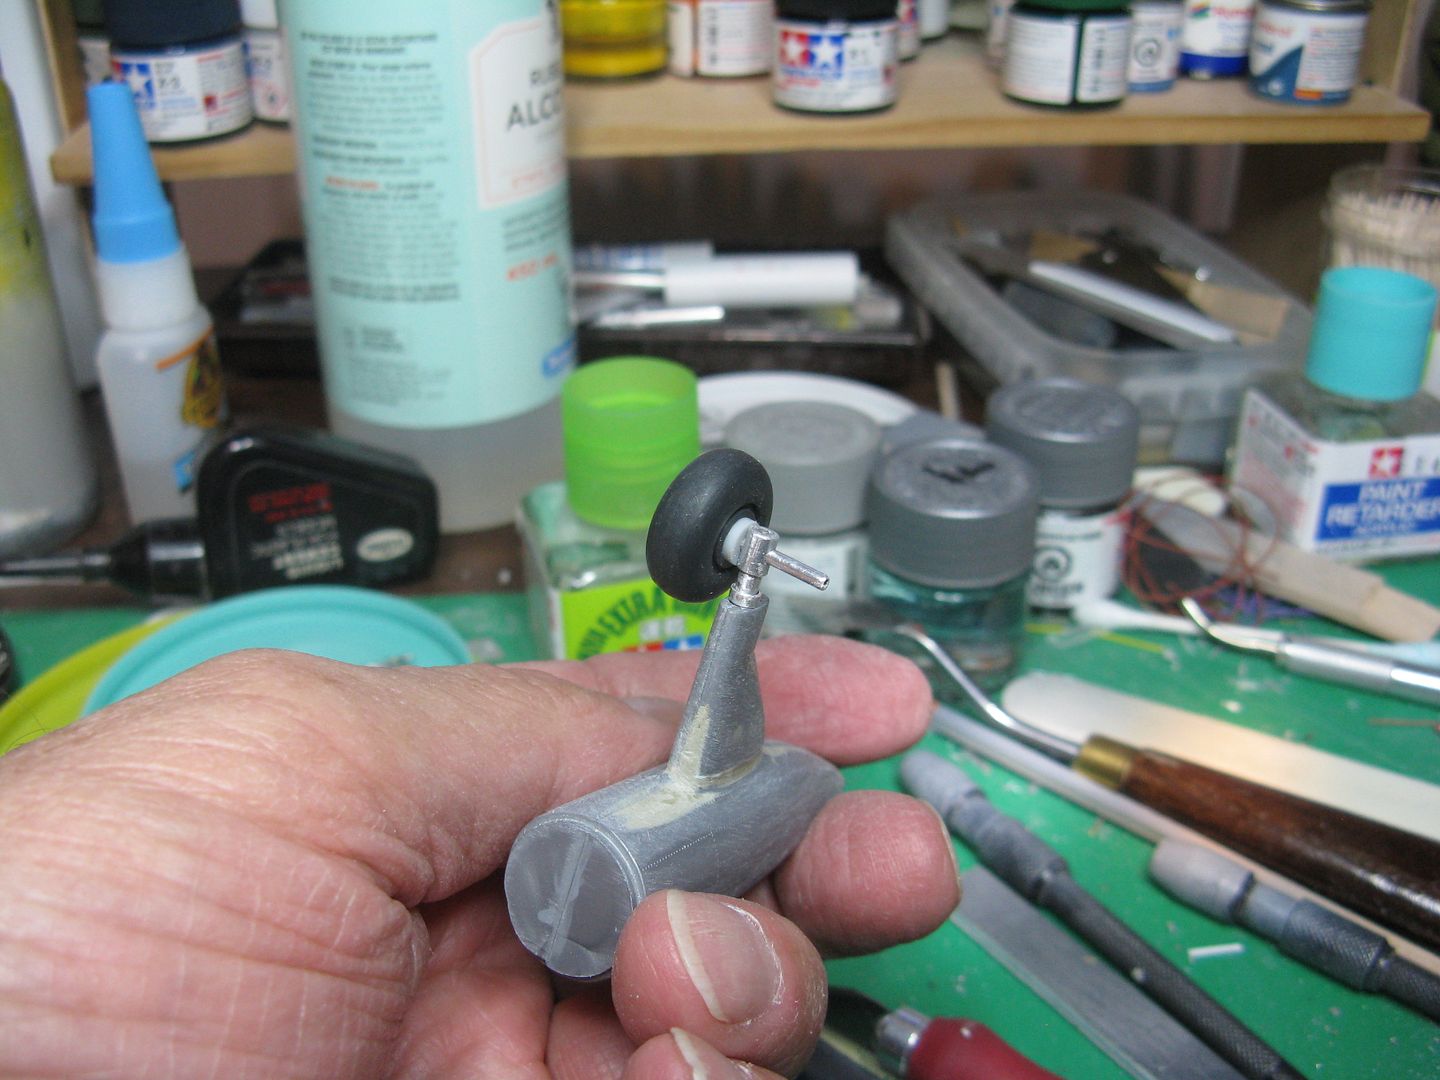
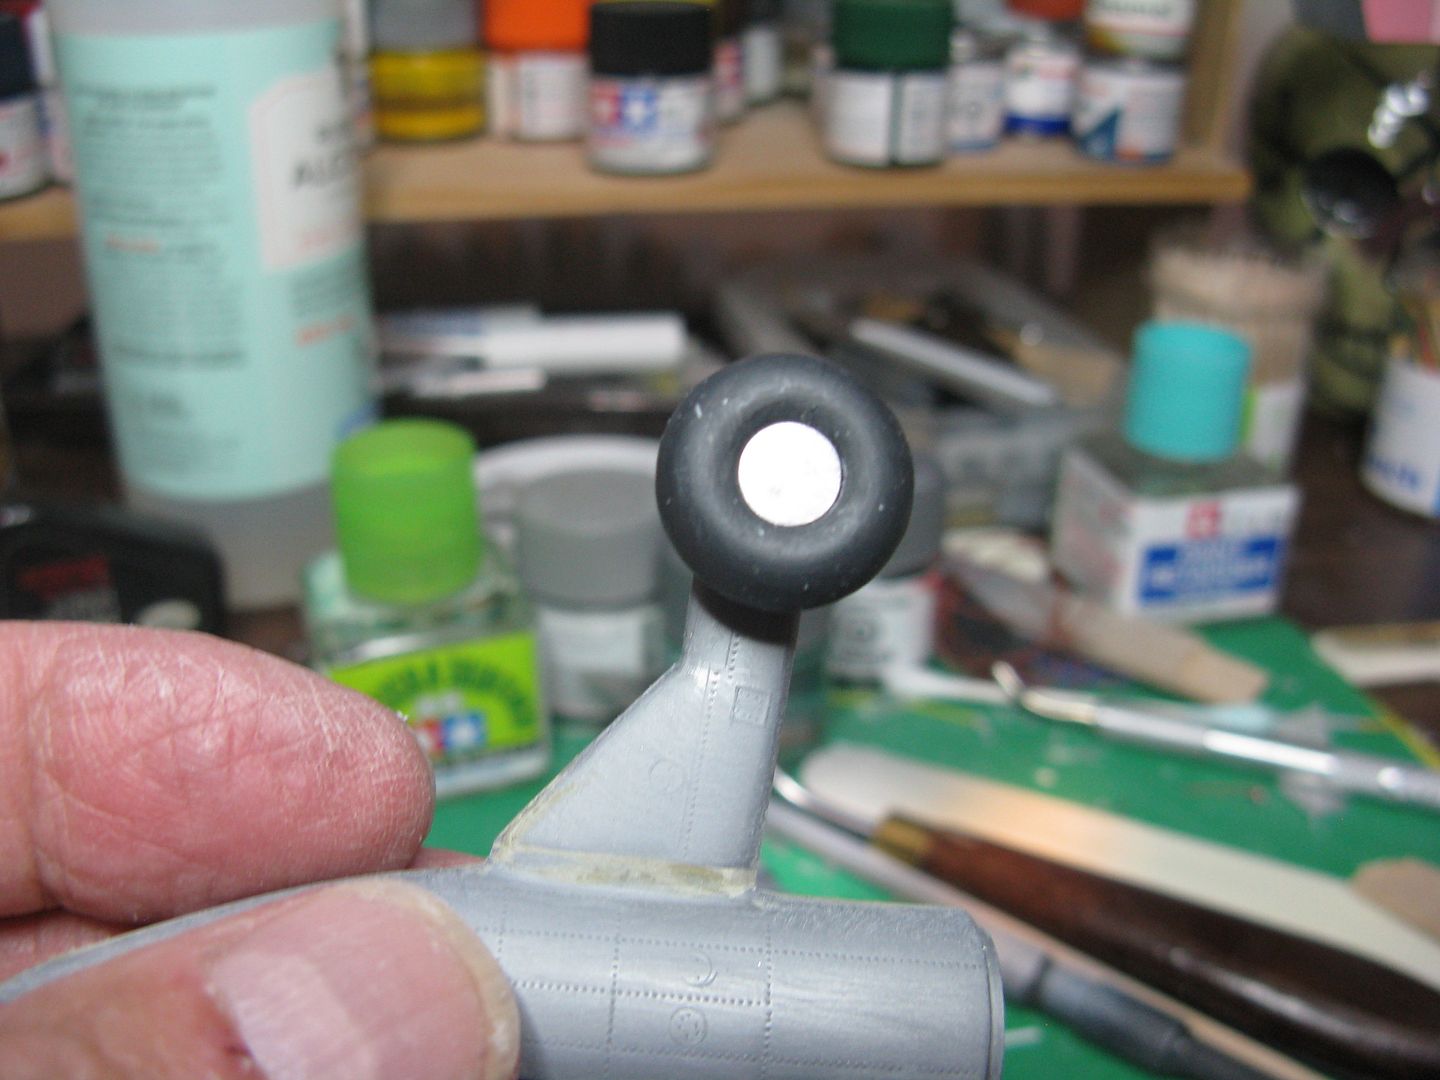
The hole in the lower collar where that drill goes through will accept the new axle that I made from a short length of 1/16" tubing. There are two gear scissors on each main gear leg, but I want to wait until I install the gear permanently before adding them. While I was down there I pounded out a round of beer..ahh.. beverage can with a Micro Mark punch to use as a wheel cover. No particular reason I just think it looks ok. I shall cut off the axle to an appropriate length after they are installed, and I may make some towing lugs for the ends. I have to check whether this airplane was towed via the tailwheel or the mains.
On to the engines. I decided to use the resin engines because they look better. They at least have rudimentary cowl flaps around the bottom of the cowlings. To use them, however meant having to remove a load of material off the back of the engine cowling. After much thought and not a few cold beverages, the engineering department came up with a wonderful idea. Create a tool to remove all that material, instead of paying twenty bucks for a 3/4" drill. But I'll save that for the next post.
Rhino I have a 1:72 Shed in the stash, never thought of making a gunship outta it. :laugh:
Well, this thing proceeds apace. I have all the cabin windows reglued back in place and the fuselage primed. Wazzat reglued stuff, you ask? Let me explain. I had the fuselage prepped and sanded, ready for priming, and was applying tape to the cabin windows. There was a muted pop, and the window disappeared into the fuselage. This caused another "What are swearing at up there" moment. Lo and behold, with a bit of shaking and contortion, the wayward window fell out the slot where the wing tab goes. Of course this meant it had to be cut to size and glued in from the outside, but what the hey, I'm retired. More tape, and the next third window disappeared in the same way. You guessed it, another 'special' moment. I got that one out the same way as the first, but then realized there was no way I could keep shaking the stuffin out of the model trying to retrieve windows. Solution...

This is not a camera hatch. I drilled a 1/4" hole just forward of the tailwheel and enlarged it to accommodate several windows at the same time, then pushed every one of the furshlugginer things into the fuselage and shook them out the hole. Neato. Did I mention that as I drilled the 1/4" hole it caused the belly seam to pop, and as the old song says "She was split from stem to stern?" This required the belly seam to be reglued, reputtied and resanded. I then cut every one of the windows to fit into their openings from the outside. No fool I, I also waited until every freakin' one of them was installed and the glue had dried before closing the hole. Ha!

The trailing edges of both wings had a bend in 'em, enough that I thought there might be a slight bend between the inboard and outboard wing flaps. Close scrutiny to a few pictures showed this ain't so, therefore the trailing edge is warped, not to mention a scale foot thick.

Much sanding is involved to thin down the trailing edge and once that was accomplished I added a strip of .010 x .020 styrene to create a nice crisp edge.


On to the main gear. Here's what the gear legs look like. That just screams "Cut me off and scratchbuild something!"


I cut the gear struts off flush with the bottom of that humongous fairing and drilled a 1/8" hole up through it to accept a length of 1/8" aluminum tube. This will be the new gear strut and the bit between the two little collars you see there will serve as the oleo strut. Devilishly clever, wot? Any fule can make one, but ya gotta make two, and they must be precisely alike because otherwise the airplane will list drunkenly to one side or the other when it's up on its feet.


The hole in the lower collar where that drill goes through will accept the new axle that I made from a short length of 1/16" tubing. There are two gear scissors on each main gear leg, but I want to wait until I install the gear permanently before adding them. While I was down there I pounded out a round of beer..ahh.. beverage can with a Micro Mark punch to use as a wheel cover. No particular reason I just think it looks ok. I shall cut off the axle to an appropriate length after they are installed, and I may make some towing lugs for the ends. I have to check whether this airplane was towed via the tailwheel or the mains.


On to the engines. I decided to use the resin engines because they look better. They at least have rudimentary cowl flaps around the bottom of the cowlings. To use them, however meant having to remove a load of material off the back of the engine cowling. After much thought and not a few cold beverages, the engineering department came up with a wonderful idea. Create a tool to remove all that material, instead of paying twenty bucks for a 3/4" drill. But I'll save that for the next post.
Heavens Eagle
Well-known member
Thanks fellas. 
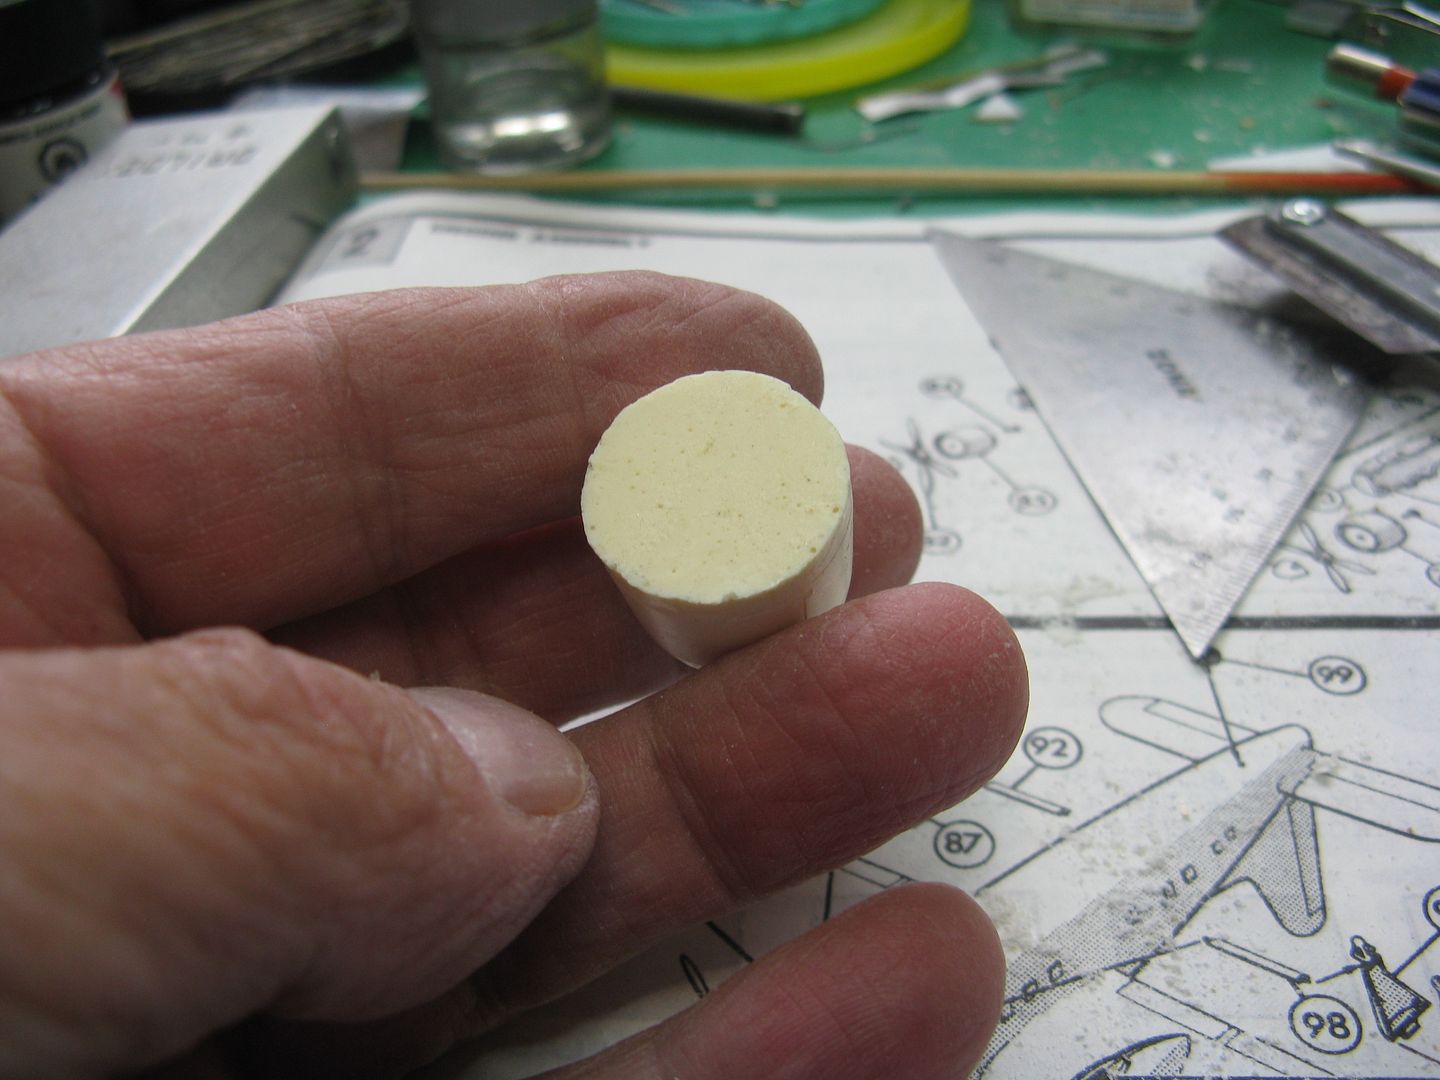
Here's what the resin engines look like, back...
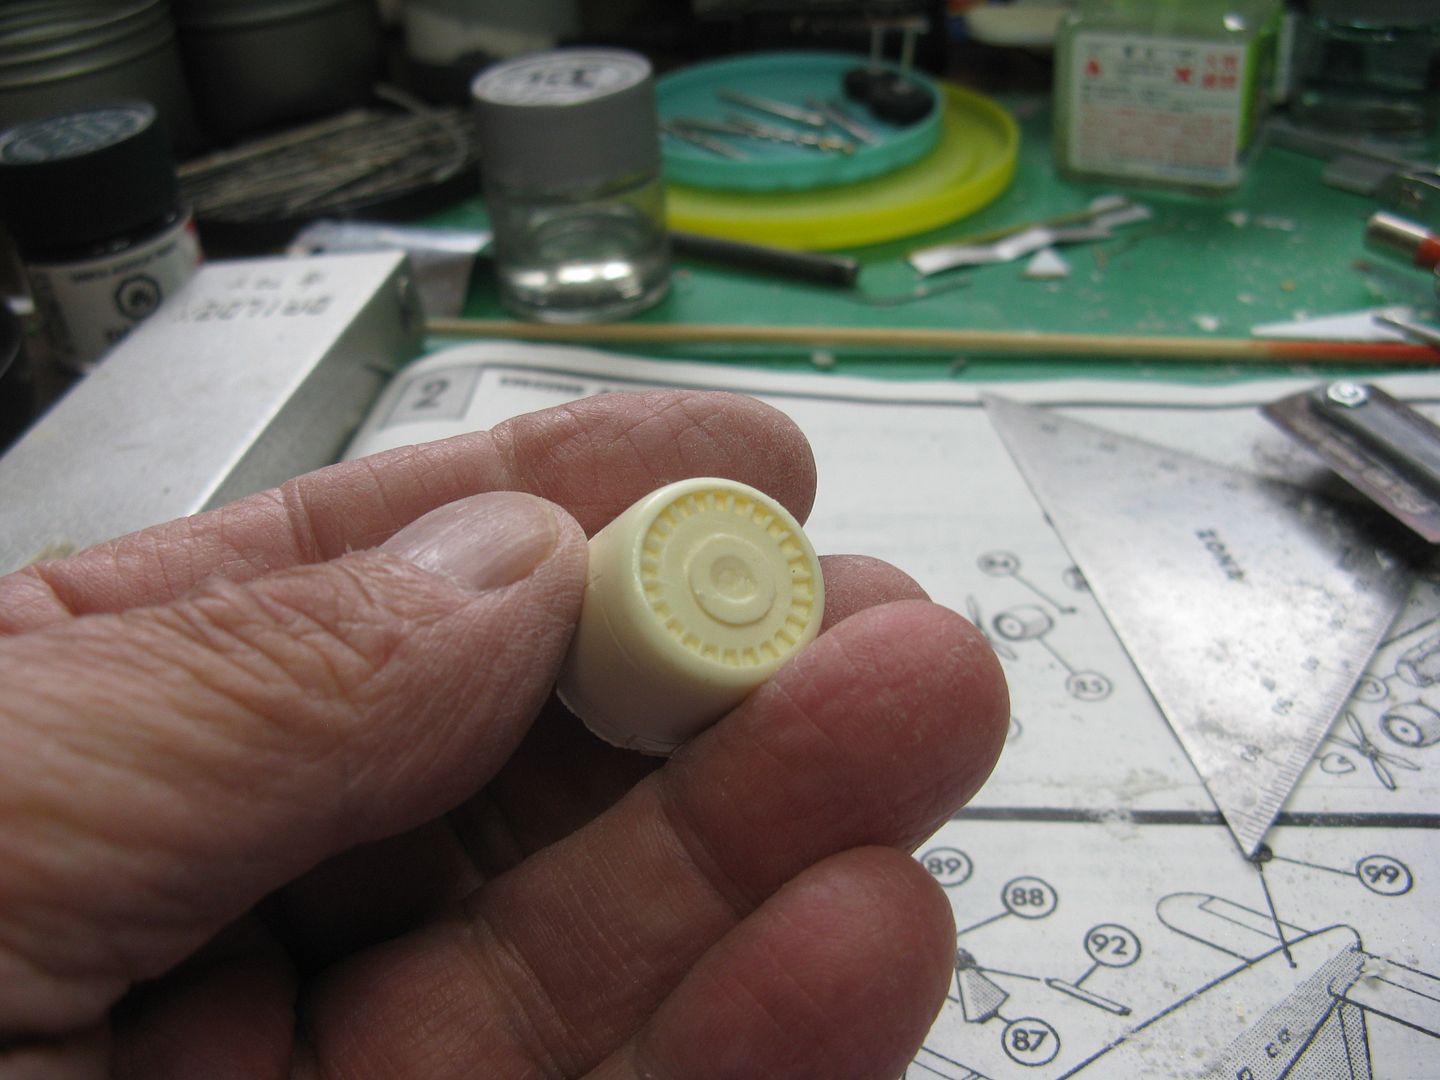
…and front. There is no engine detail on either the resin or the kit engines. The front has a shrouded fan that presumably aids in engine cooling.
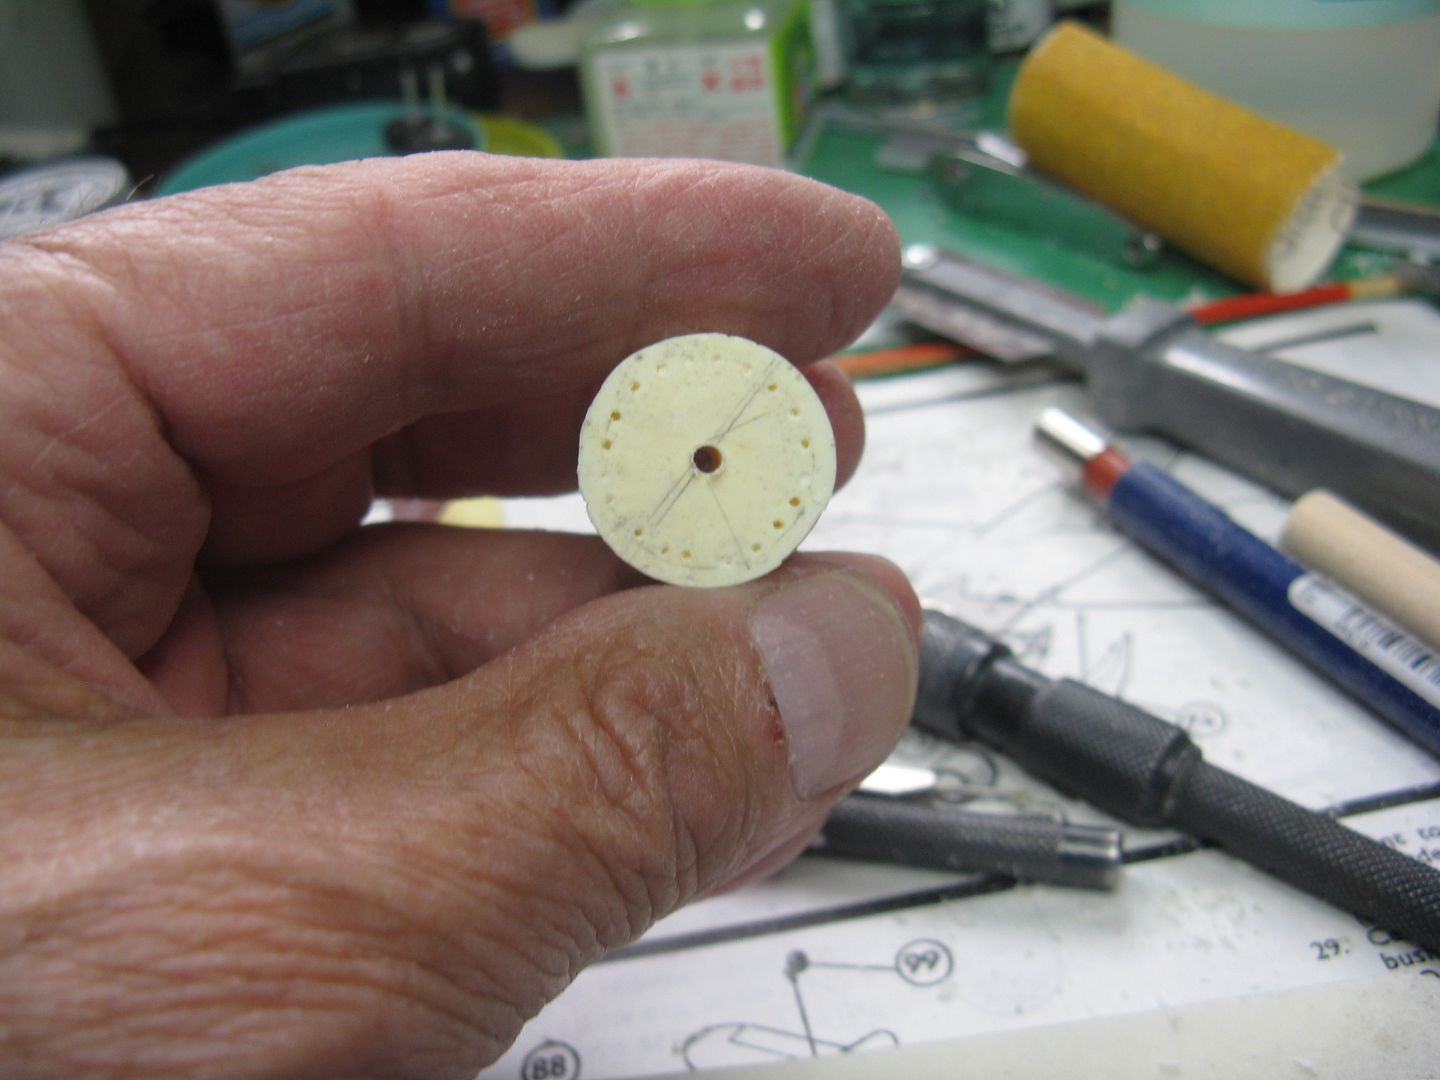
To get the material off the back end so's the engine will sit on the nacelle properly, I first drilled a bunch of pilot holes about 1/16" inside the circumference to a dept of 4mm, which equals the length of the cowl flaps...
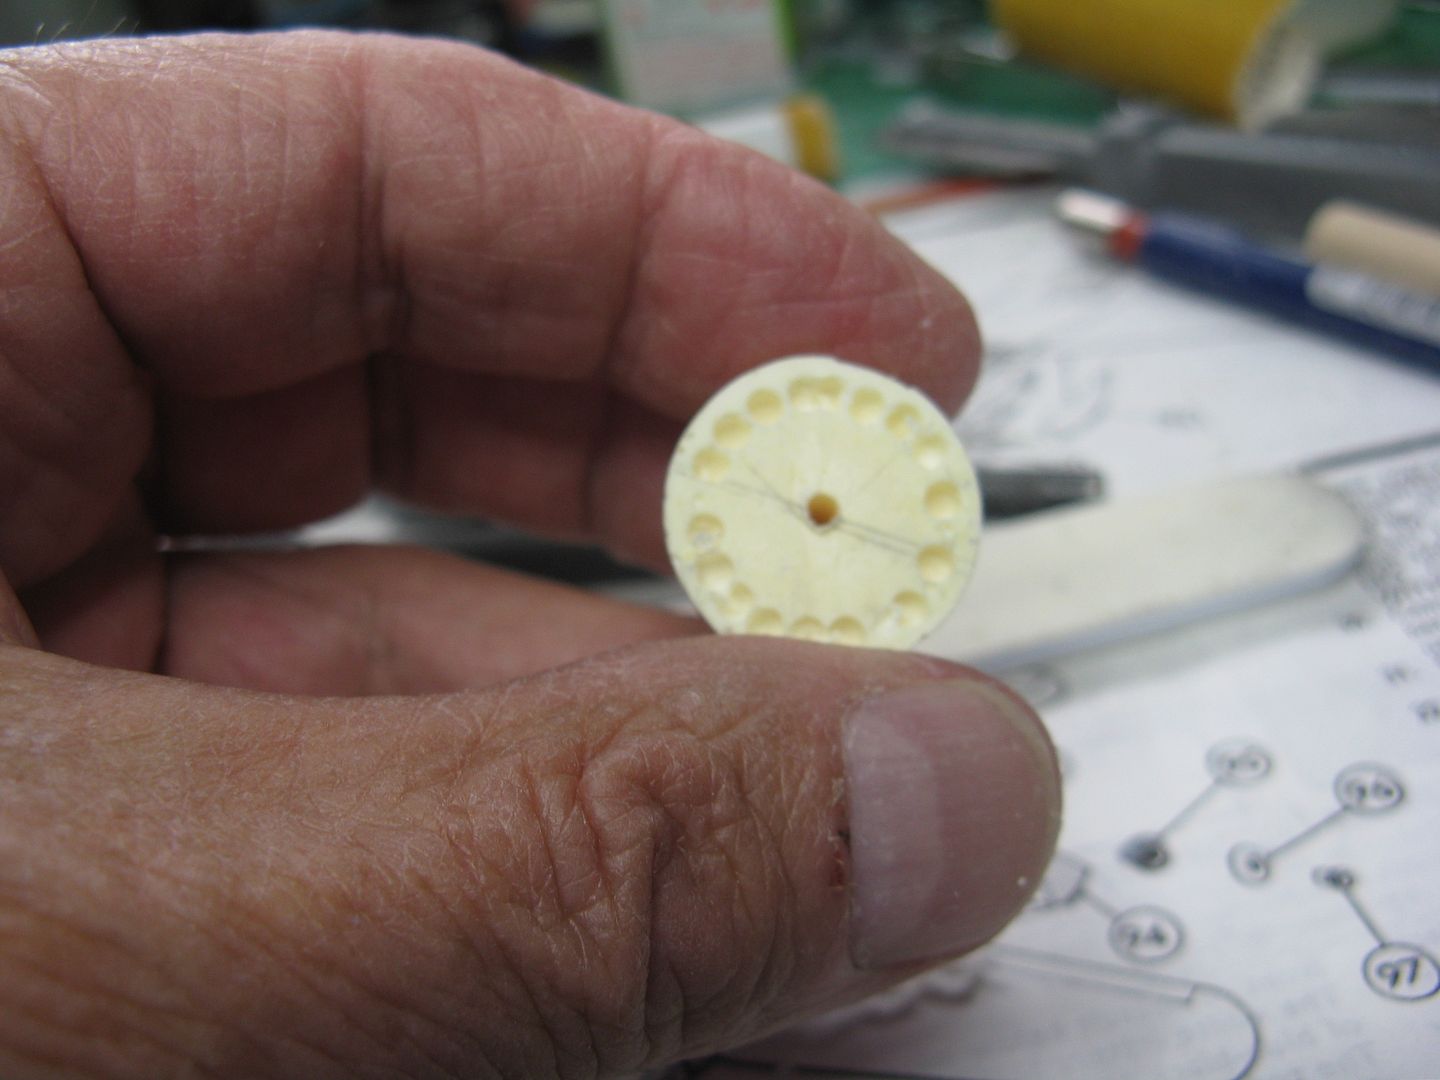
… Then used them to drill an equal bunch of 1/16" holes.
Once that was done, I used an 11mm box cutter blade to carve out as much material as I could. This will leave a shallow cone-shape of material around the center of the rear of the cowling that must needs be disposed of. Enter tool # 1. A short length of 3/8" dowel with a bit of 80 grit sandpaper glued to the end.
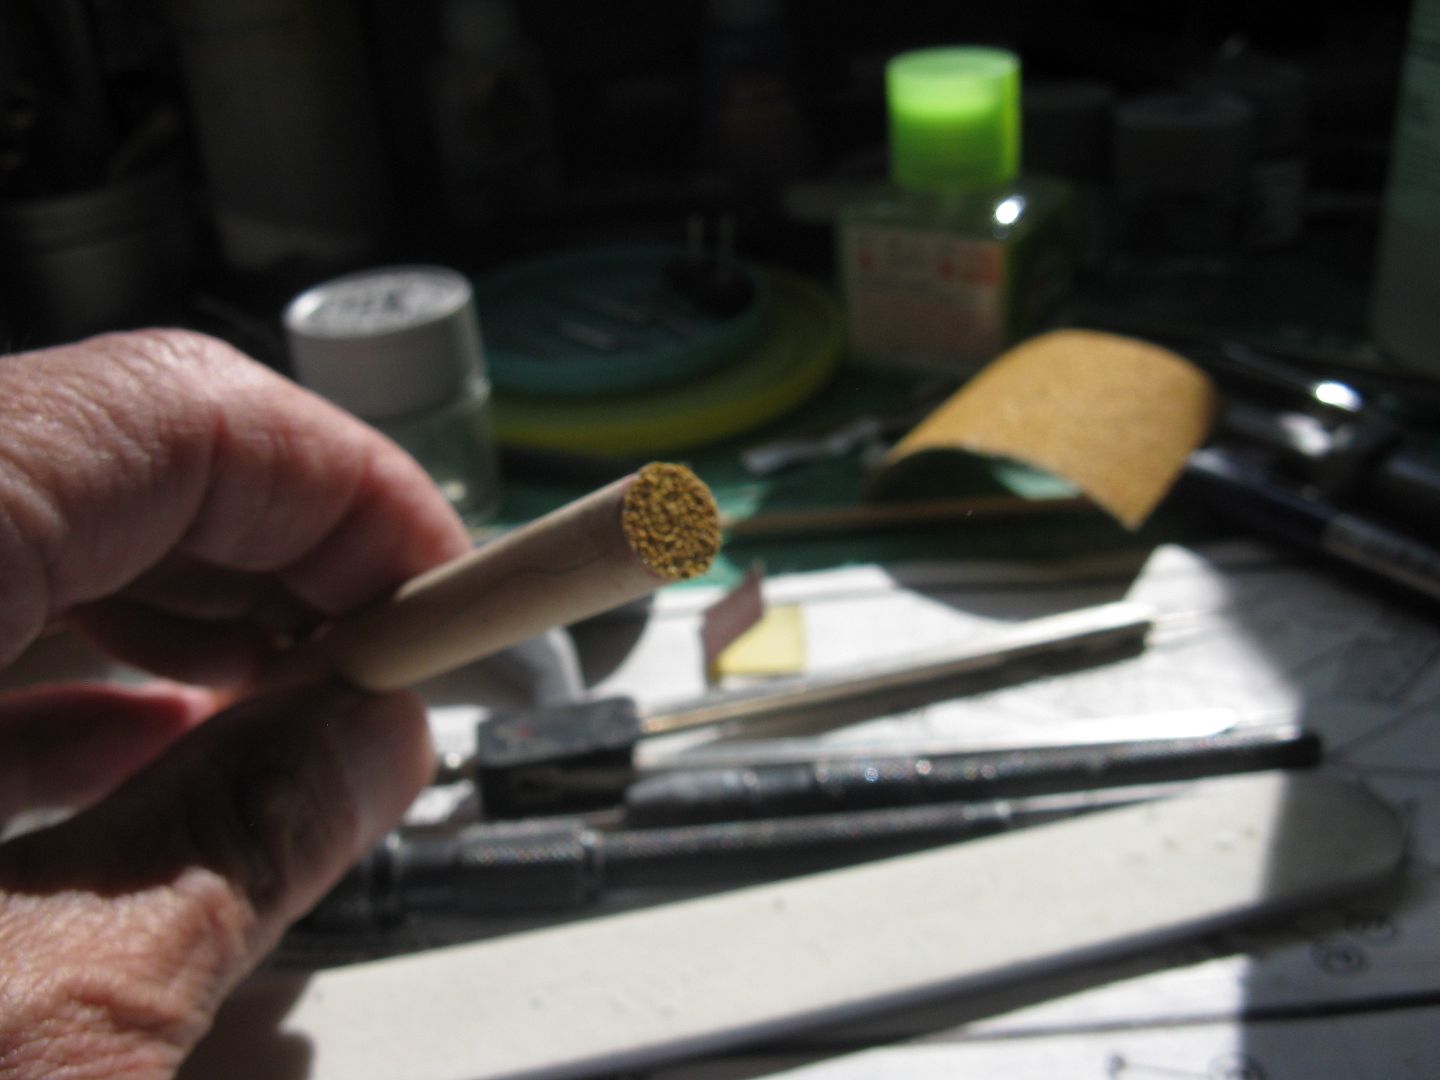
By working it around and around, backward and forward, I was able to reduce the cone of material to a flat surface that will fit against the end of the nacelle.
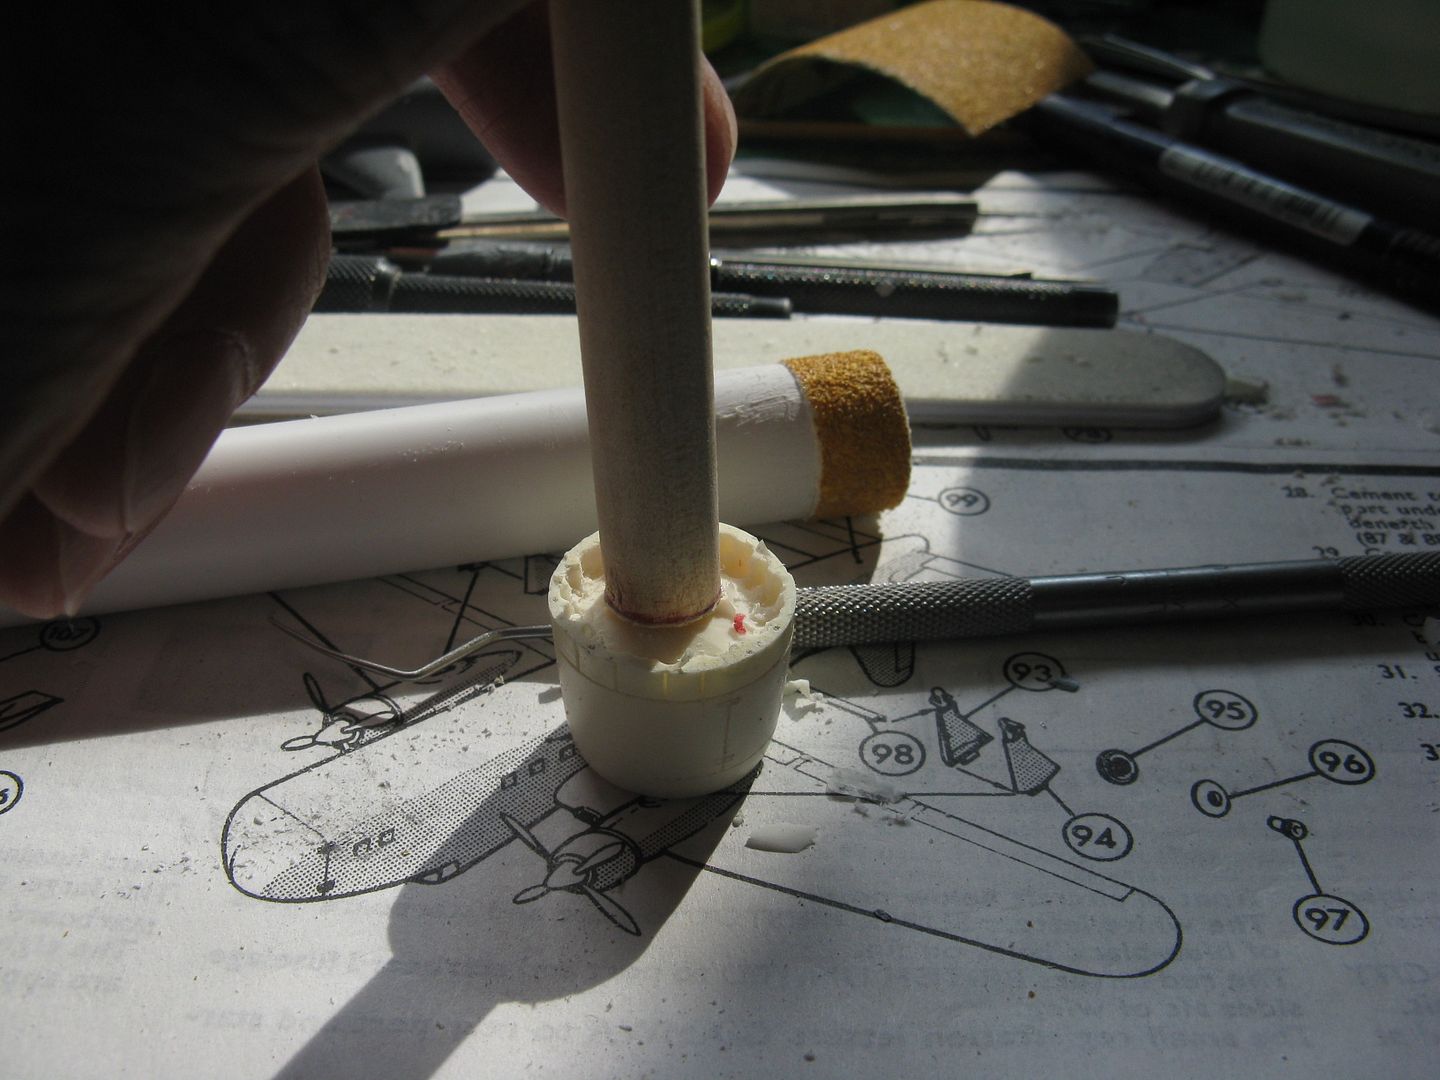
The cowl flaps must now be thinned down to a reasonable thickness. Enter tool # 2. I took a length of 1/2" plastic tube that was left over from a telephone cable installation and glued a strip of the selfsame 80 grit sandpaper around one end. Viola! a thinning tool.
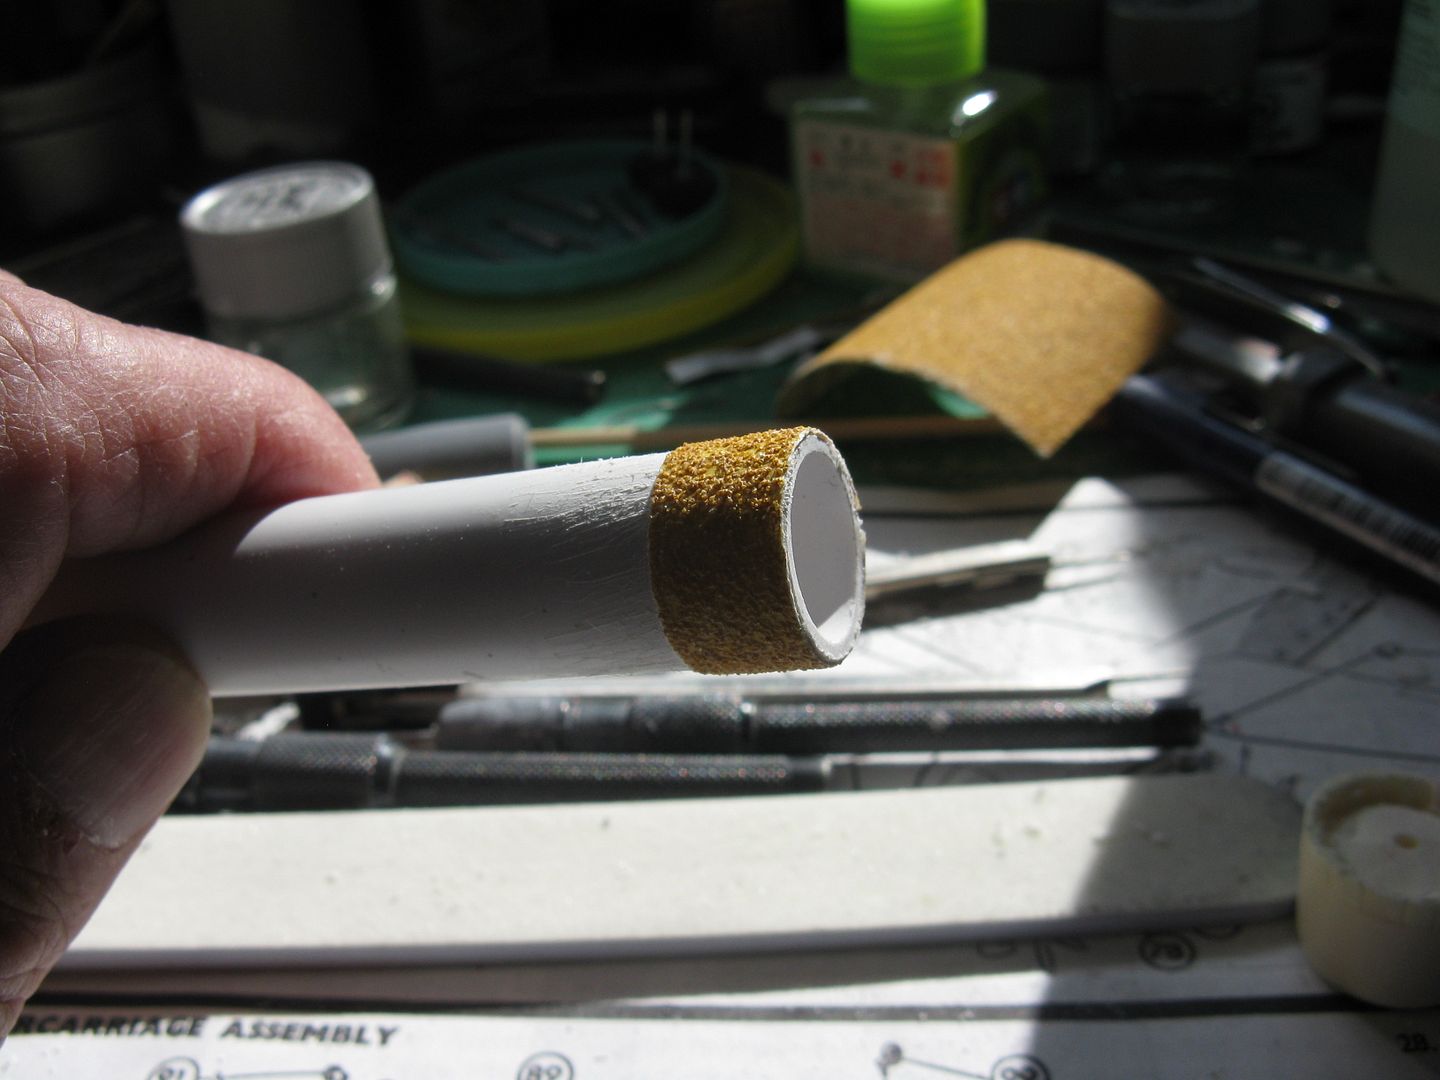
Hold the part in one hand, your tool in the other .. wait a minute, that didn't come out right.. Anyway, you get the idea. Rotate the tool against the material to be worked and sand away until the desired thickness is achieved.
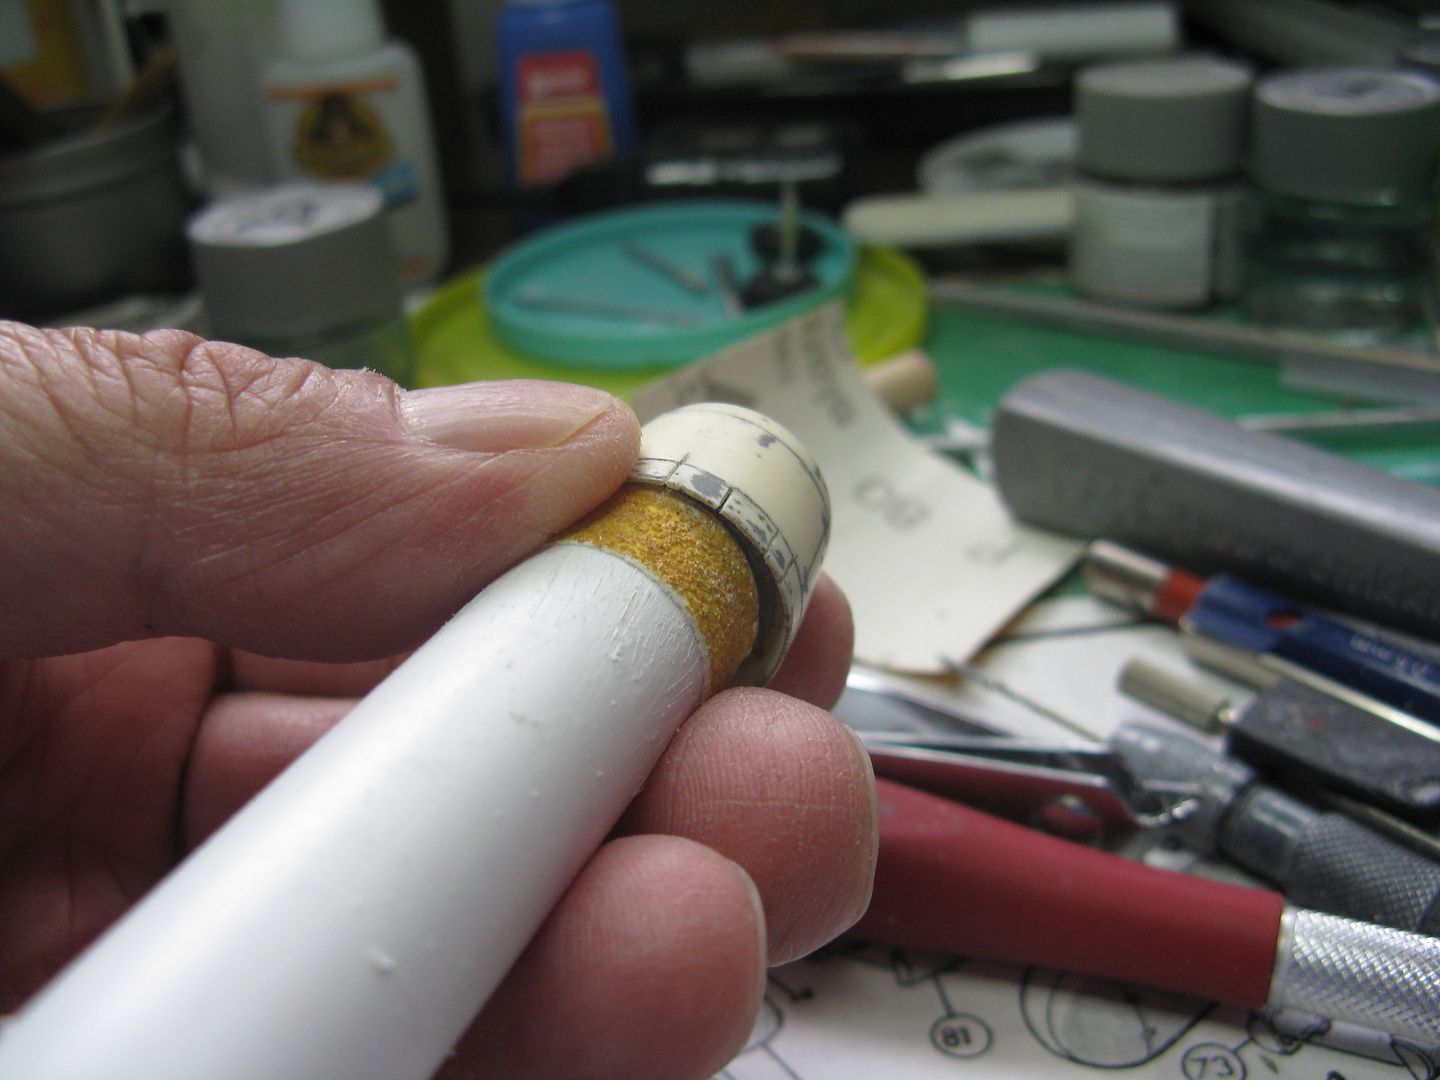
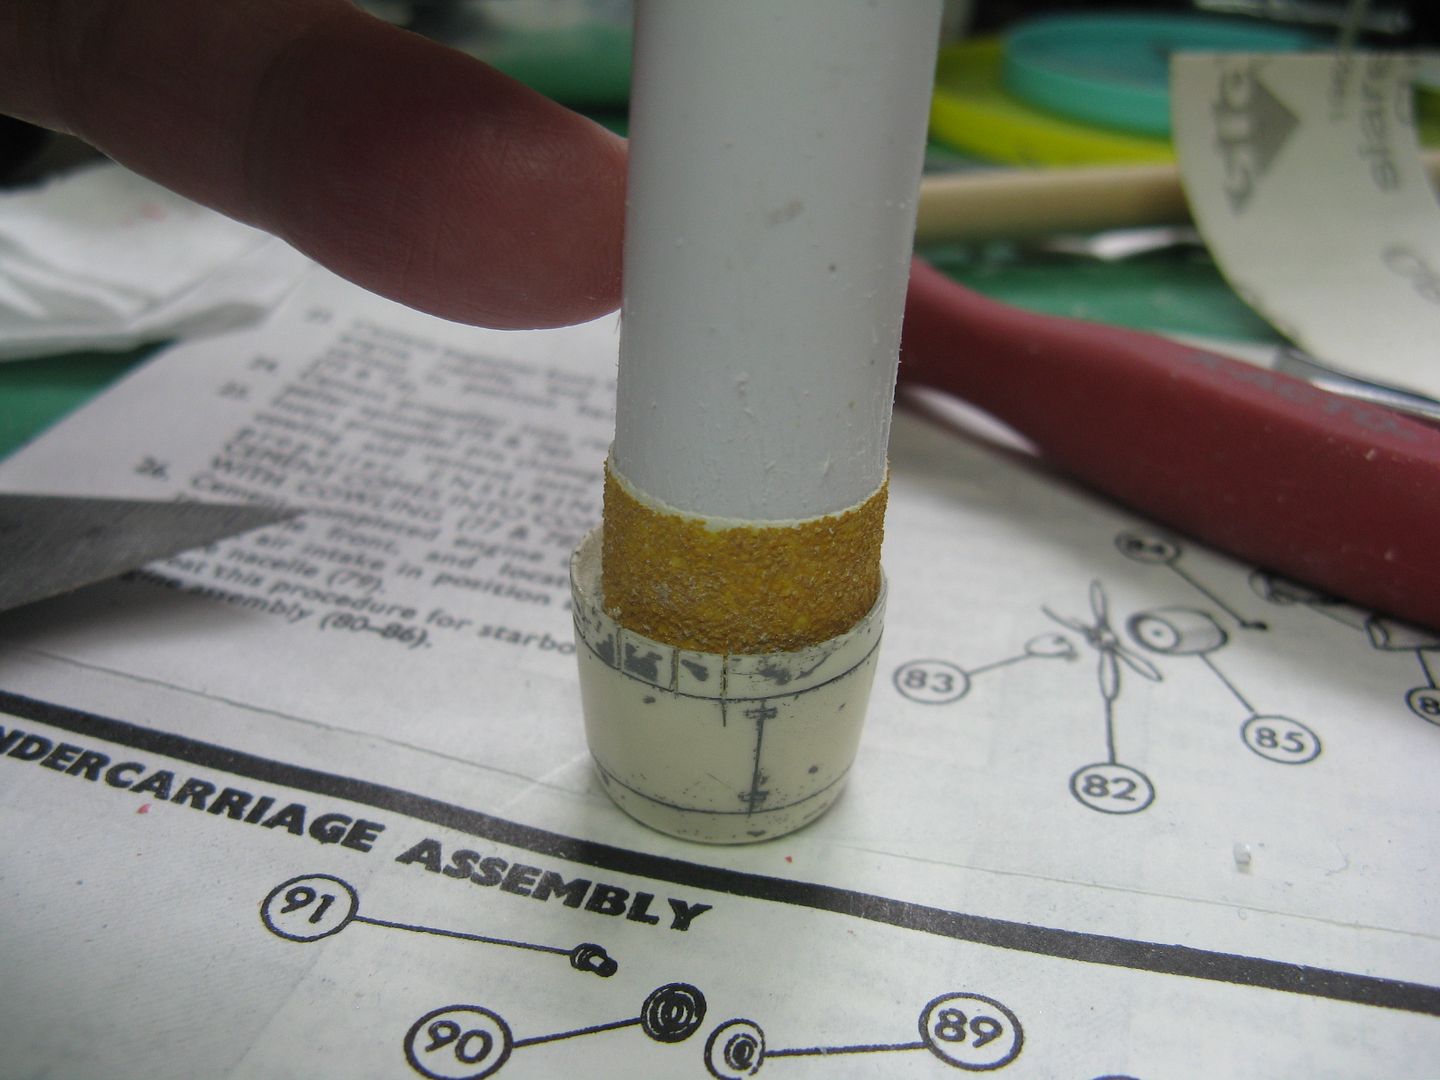
Finished product, with cowl flaps. I used a razor saw to cut between each individual panel of the cowl flaps.
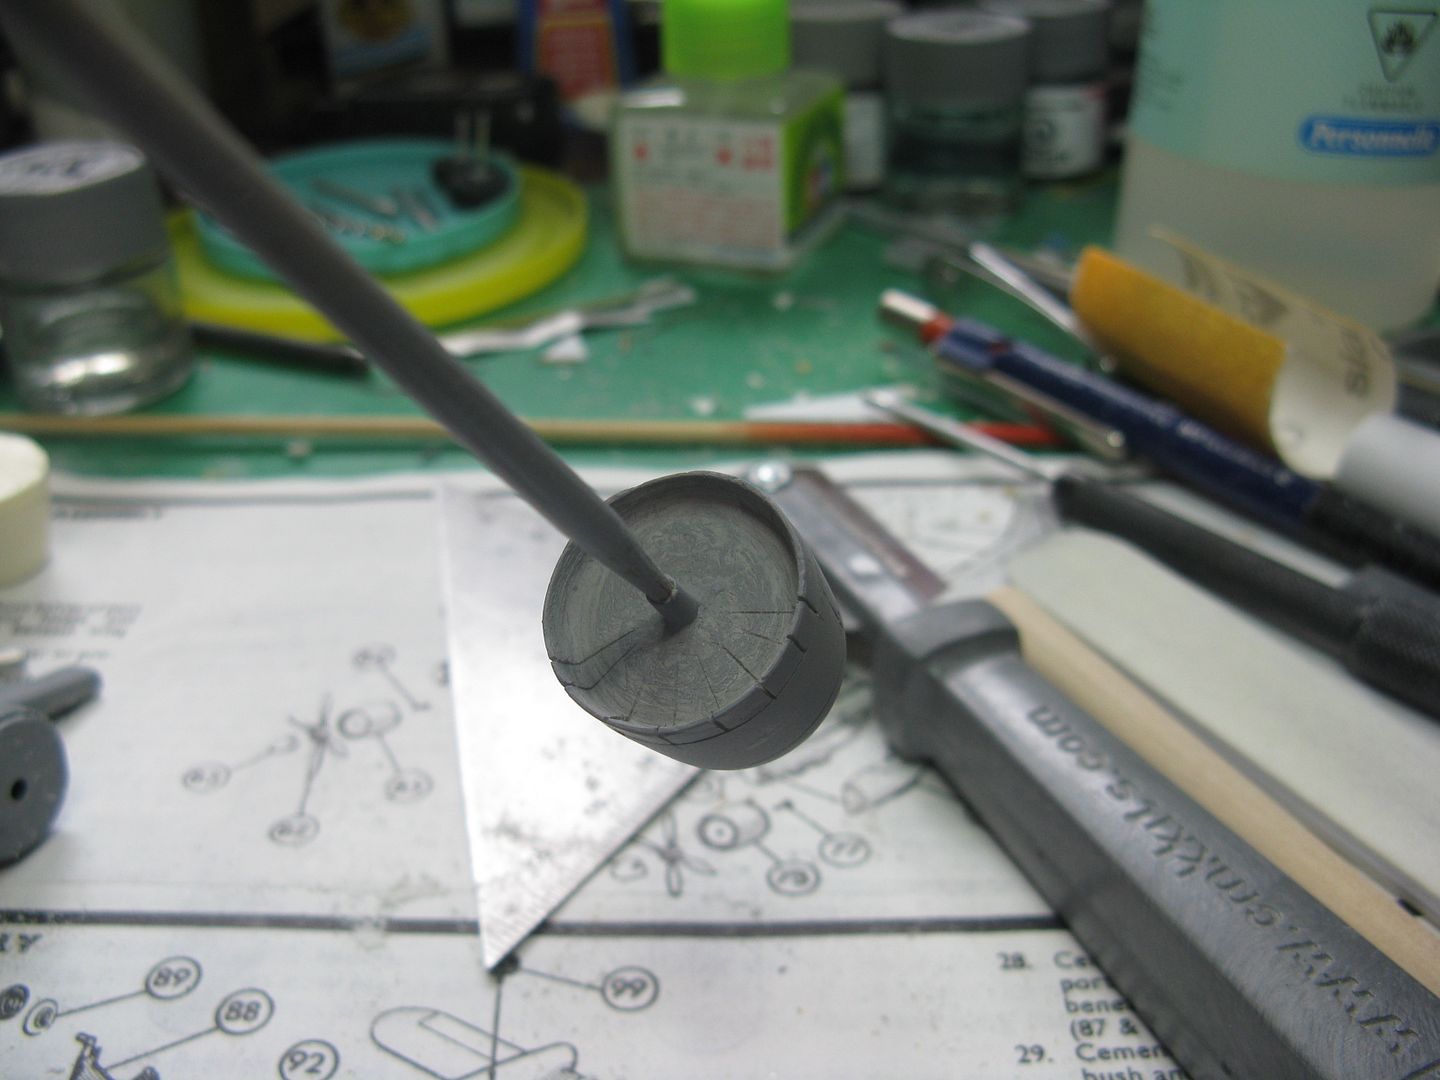
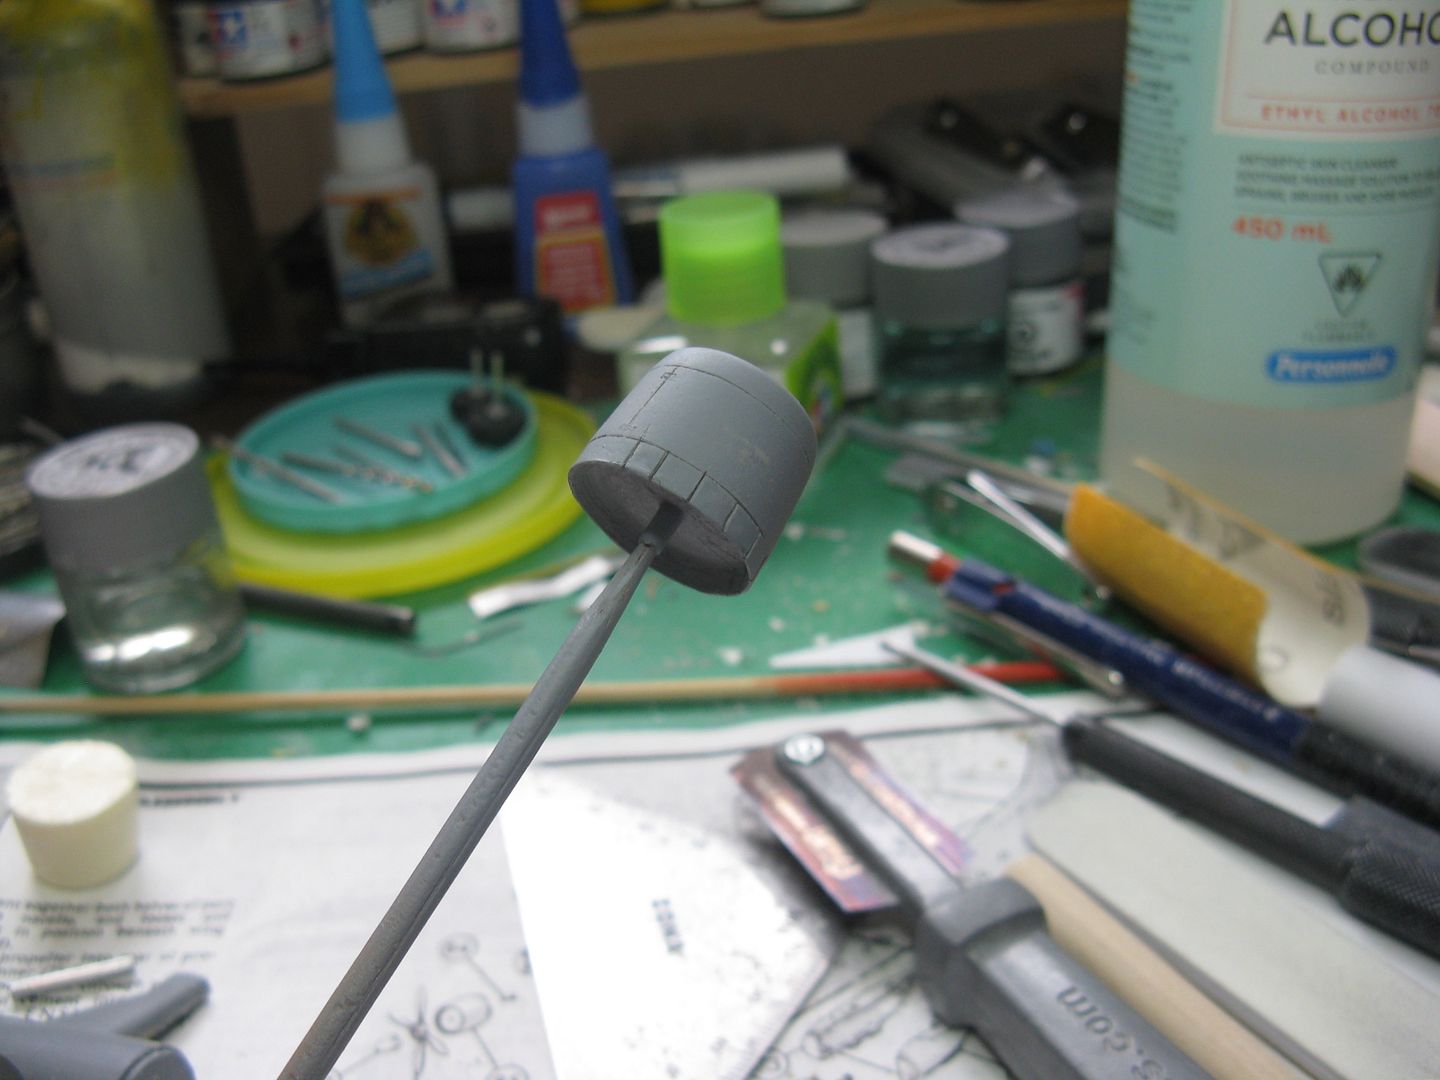
I drilled out the center of the engine to accept a length of 1/8" od aluminum tube slightly longer than the engine, to use as an engine bearing and also to give additional support between the engine and the nacelle. I dislike straight butt joints. Dry fitted in place.
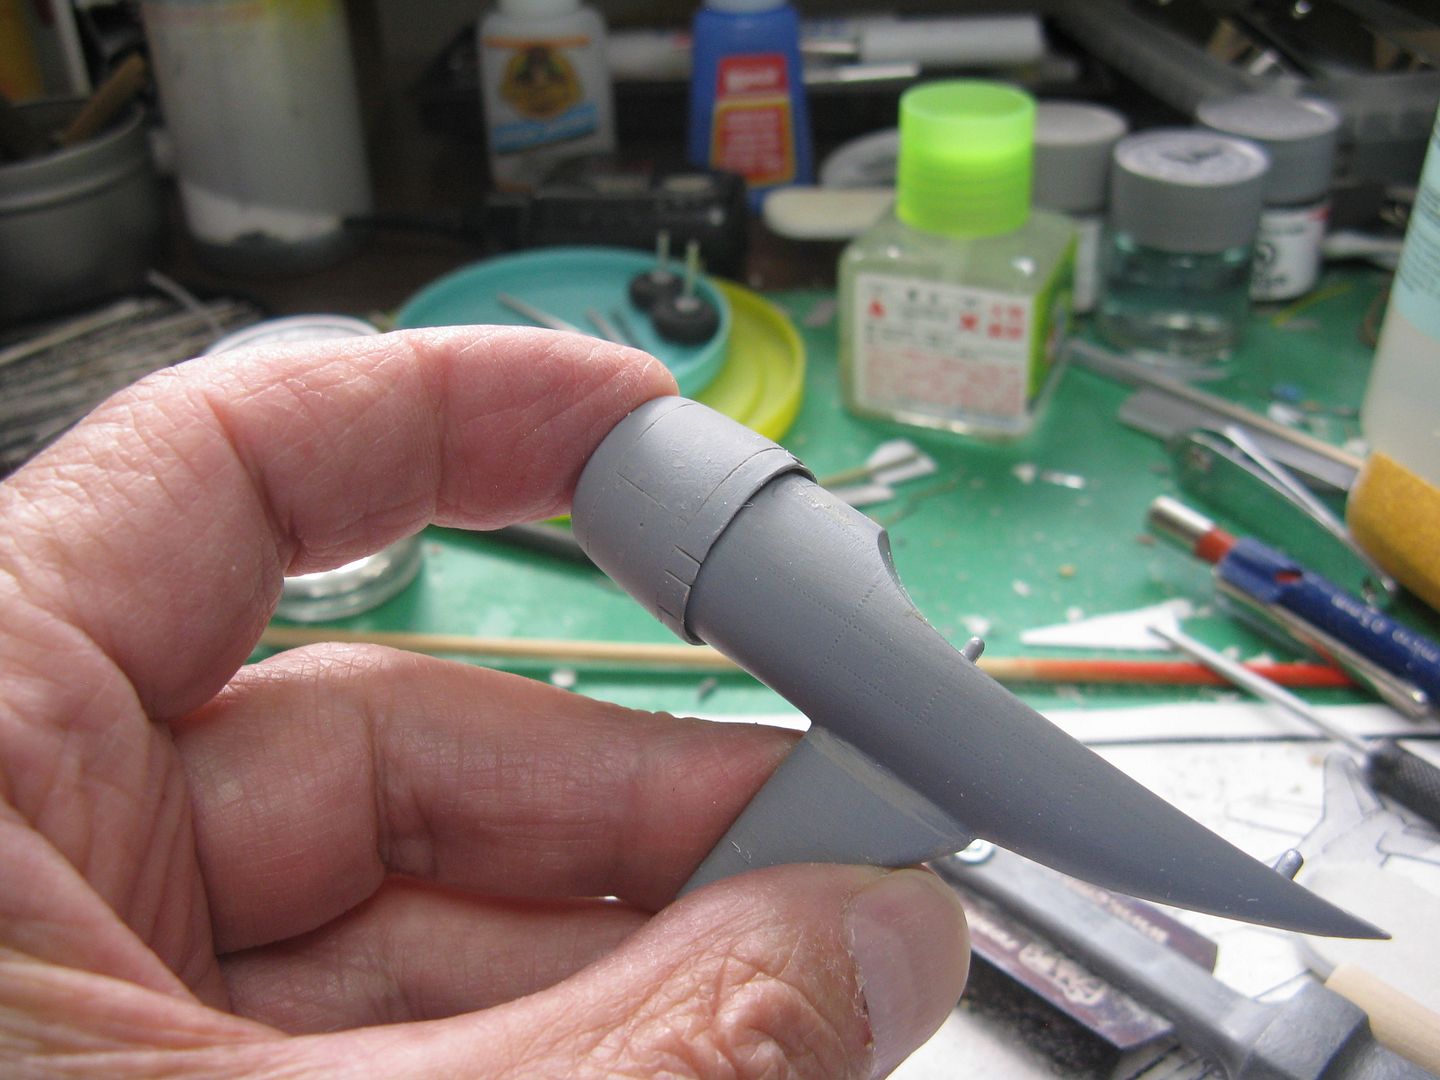
And there things stand at the moment. All the major components have been finished. I'll begin painting next week before I start the final assembly.
Here's what the resin engines look like, back...

…and front. There is no engine detail on either the resin or the kit engines. The front has a shrouded fan that presumably aids in engine cooling.

To get the material off the back end so's the engine will sit on the nacelle properly, I first drilled a bunch of pilot holes about 1/16" inside the circumference to a dept of 4mm, which equals the length of the cowl flaps...

… Then used them to drill an equal bunch of 1/16" holes.

Once that was done, I used an 11mm box cutter blade to carve out as much material as I could. This will leave a shallow cone-shape of material around the center of the rear of the cowling that must needs be disposed of. Enter tool # 1. A short length of 3/8" dowel with a bit of 80 grit sandpaper glued to the end.

By working it around and around, backward and forward, I was able to reduce the cone of material to a flat surface that will fit against the end of the nacelle.

The cowl flaps must now be thinned down to a reasonable thickness. Enter tool # 2. I took a length of 1/2" plastic tube that was left over from a telephone cable installation and glued a strip of the selfsame 80 grit sandpaper around one end. Viola! a thinning tool.

Hold the part in one hand, your tool in the other .. wait a minute, that didn't come out right.. Anyway, you get the idea. Rotate the tool against the material to be worked and sand away until the desired thickness is achieved.


Finished product, with cowl flaps. I used a razor saw to cut between each individual panel of the cowl flaps.


I drilled out the center of the engine to accept a length of 1/8" od aluminum tube slightly longer than the engine, to use as an engine bearing and also to give additional support between the engine and the nacelle. I dislike straight butt joints. Dry fitted in place.

And there things stand at the moment. All the major components have been finished. I'll begin painting next week before I start the final assembly.
Most excellent! Love the problem solving 
Heavens Eagle
Well-known member
Looks good and waiting to see how this one turns out. Definitely something different from the usual plane build.


chrispisme
Well-known member
You’re a master modeller my friend!
When your done this build come on over and help with the ATR?
When your done this build come on over and help with the ATR?
Similar threads
- Replies
- 25
- Views
- 4K


