• Modelers Alliance has updated the forum software on our website. We have migrated all post, content and user accounts but we could not migrate the passwords.
    This requires that you manually reset your password.
    Please click here, http://modelersalliance.org/forums/login to go to logon page and use the "Forgot your Password" option.

An M4A3 Sherman - Figures Done, all finished.

So the latest progress on my Sherman..........
20200503_122730.jpg

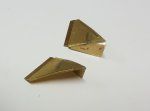
I had to get out my soldering Iron and had a great time getting my hand back in on these front brass guards.
20200509_020638.jpg20200509_020700.jpg
While cutting the clear viewing ports from the sprue i snapped every piece forcing me to create them from clear water based glue. My tip for cutting these successfully is to cut the mounting rod from the complete square mounting.
20200509_155933.jpg
20200509_155942.jpg20200509_155951.jpg

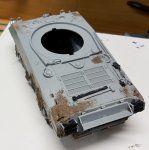
Next was the turret and it's texture. I had not looked into this previously, so I searched a number of photo's to understand what seam lines needed to be hidden and what additional sufacing needed to be done on the sides to cover-up. A little more work is still needed on the left side.
20200605_012314.jpg


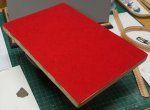
This is where it was at a week ago and I have now started work on getting the track lengths correct. I have also cut and filed a base adding the red felt underneath.
20200605_012506.jpg
20200605_012531.jpg 20200605_012622.jpg 20200605_012555.jpg
 
Last edited:
Cool. I finally found the Sherman I needed and have it ordered. I guess soon I will join you on the green side. Now just need to find a second kit.
Keep on keeping on, watching with interest :)
James
 
See that didn't hurt to much, Sherman aren't so hard. Looking forward to how you paint it up.
:victory:
 
Cool. I finally found the Sherman I needed and have it ordered. I guess soon I will join you on the green side. Now just need to find a second kit.
Keep on keeping on, watching with interest :)
James
Good luck James, see you on the other side!
 
Thanks everyone, so more progress...........
I have cut-out some of the extended end connectors on the magic track representing what I have seen in some of my reference pictures.
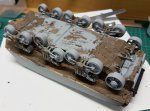
I also cut-out and added plastic card to the open section under the guards and once this was completed I could add the base mud texture to the lower chassis using the Tamiya texture paint. I used a brush and a pallet knife to apply the mix.
20200606_191805.jpg
20200606_191816.jpg
20200607_154805.jpg
20200607_154758.jpg
20200607_161901.jpg

20200607_161912.jpg20200607_161924.jpg
20200607_161935.jpg

20200607_161724.jpg 20200607_161756.jpg 20200607_161713.jpg
 
Last edited:
Moved this over to the Namesake campaign as long as there's no objections.

:soldier

Interesting how you mud it up even before painting.
 
Moved this over to the Namesake campaign as long as there's no objections.

:soldier

Interesting how you mud it up even before painting.
Thanks MP. :good:
I mud-up before the green so I can easily see where the mud is against the light grey background. This can get hard to see against another dark color underneath the chassis overhang. Plus as it is paint, I don't have to worry about the airbrush coat so much, especially in those 'hard to get to spots' and if I miss something the mud works as a good base color.
 
That Shermie is looking great !!!

I have cut-out some of the extended end connectors on the magic track representing what I have seen in some of my reference pictures.
...thats funny cause I was about to suggest that :good:

I also did a Sherman where I added the mud before painting and it works quite good doing it that way.
Keep up and great work!
:victory:
 
Back
Top