-
Modelers Alliance has updated the forum software on our website. We have migrated all post, content and user accounts but we could not migrate the passwords.
This requires that you manually reset your password.
Please click here, http://modelersalliance.org/forums/login to go to logon page and use the "Forgot your Password" option.
You are using an out of date browser. It may not display this or other websites correctly.
You should upgrade or use an alternative browser.
You should upgrade or use an alternative browser.
All Righty ... What's on the bench today?
- Thread starter panzerace007
- Start date
Wow Mark,
You, as usual;, have a lot of projects going on simultaneously!
Lookin' good!
Bob
You, as usual;, have a lot of projects going on simultaneously!
Lookin' good!
Bob
Terry, that is really nice looking! In fact, I would say your best work is in the Sci-fi arena.
They always seem to me to be your very best work.
Outstanding!


Bob
They always seem to me to be your very best work.
Outstanding!
Bob
Duke Maddog
Well-known member
Thanks Sharkman and Bob! Bob, I do tend to work on multiple models as I haven't the patience to wait for something to dry and not do anything while waiting. Now to actually finish something!
Terry, what stunning work! I always love watching your Sci-Fi builds!
Terry, what stunning work! I always love watching your Sci-Fi builds!
Swordsman
Active member
Some very nice things going on here ... I've been working on a building ... For the Texas Outlaws On30 travaling roads show ...
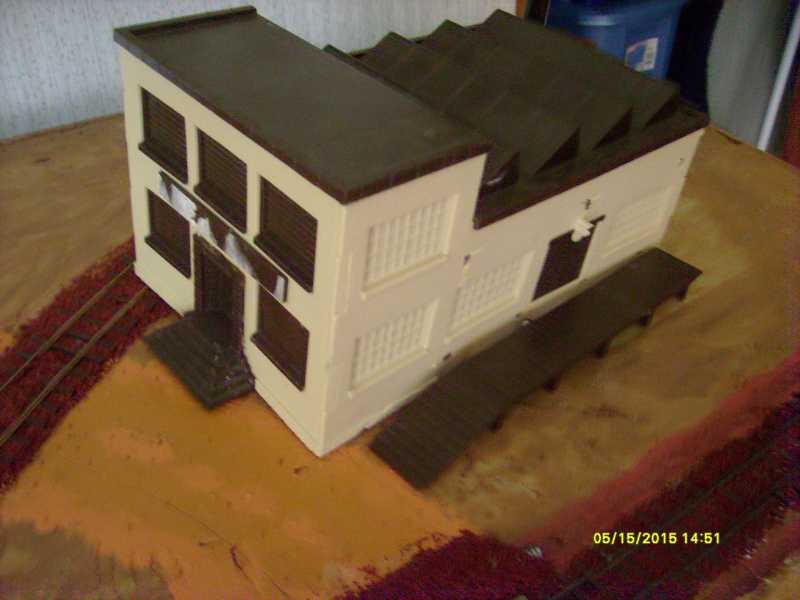
When I bought this old factory building it was very rough ... the windows had fake people molded on inside ... so when a lamp was inside they would project on outside ... But the cost was only $5 ... So I started working on it ...
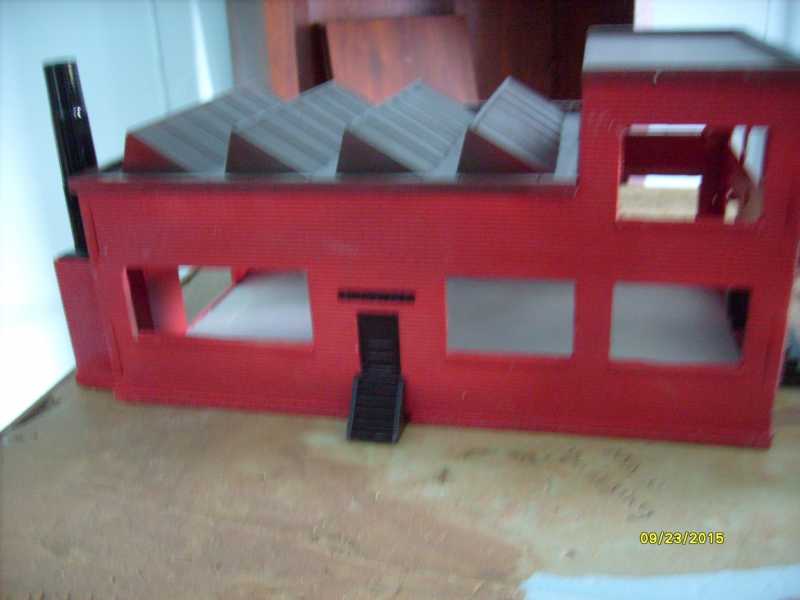
I cut the windows out with Dremel ... and painted it red brick color ...
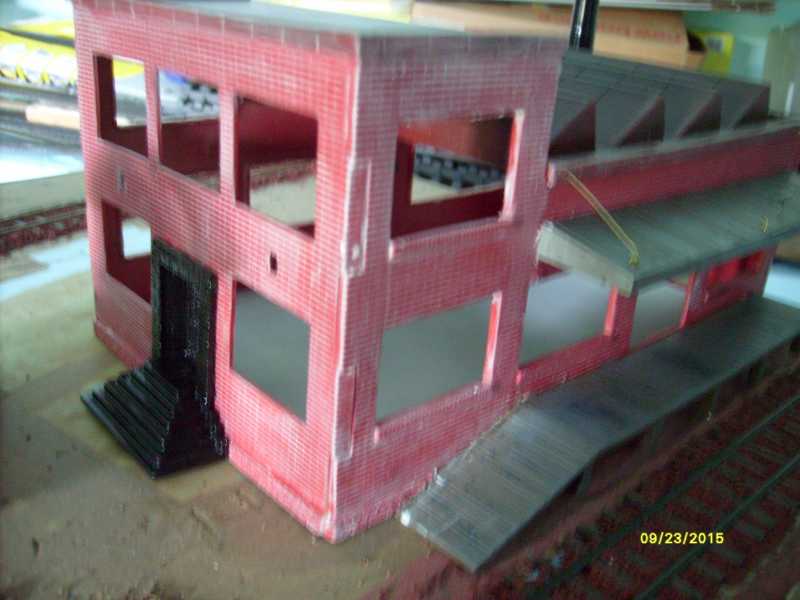
So since then I've been cutting windows for it ...

A friend gave me the Windows at bottom & I'm cutting them down to fit like top left ...
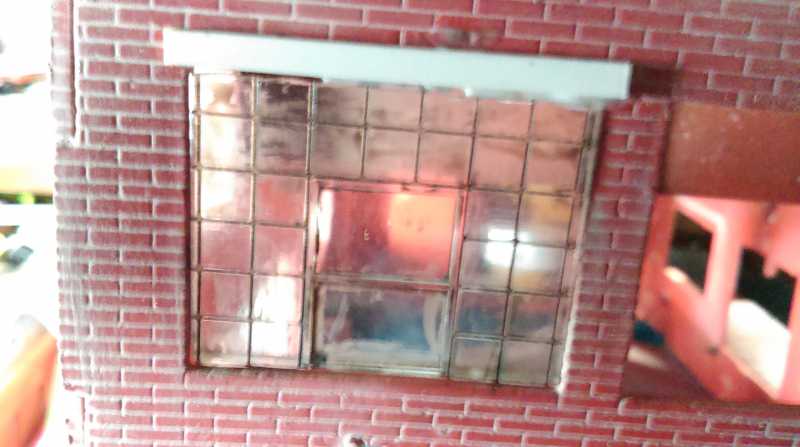
I'm experimenting with weathering and adding a brick header on top of Windows ...

When I bought this old factory building it was very rough ... the windows had fake people molded on inside ... so when a lamp was inside they would project on outside ... But the cost was only $5 ... So I started working on it ...

I cut the windows out with Dremel ... and painted it red brick color ...

So since then I've been cutting windows for it ...

A friend gave me the Windows at bottom & I'm cutting them down to fit like top left ...

I'm experimenting with weathering and adding a brick header on top of Windows ...
Need to check the time stamp on your camera Garry, and the focus. Would like to actually see it.
Terry, that is really nice looking! In fact, I would say your best work is in the Sci-fi arena.
They always seem to me to be your very best work.
Outstanding!


Bob
Thanks!
They certainly are fun.
Duke Maddog
Well-known member
Nice work on the building Gerry. That does make it look better.
Duke Maddog
Well-known member
A small update here. I'll start again with my aircraft.
I shot the bottom of the Dagger again since the camo grey got messed up. Now I can decal this bird:

I also did the decals on the USAF Jetstream. These were so old they kept curling, even with the application of decal solvent. I started with the demarcation lines. Here they looked okay before they started curling:

Then I did the wing walk lines. They did not go on straight, despite my best efforts. They kept sliding on the smooth wing surface when I tried to press them down. I didn't catch that mistake until too late:

I tried to loosen that one up to adjust it but it was too firmly attached. Oh well, it is an ancient 50+year-old kit....
Here's a couple shots of the decals after I got them all applied:


You can see the curling more effectively here. I'm gonna see what I can do about that later. If I can't do anything about it, oh well; it's an ancient 50+year-old kit.......
Another ancient kit that gave me some trouble with curling decals too was the Heller Saab J-32 Lannsen. These decals behaved a little better though once I brought down the boom:

Later I dullcoated this and then removed the masking. This just needs undercarriage and gear bay doors and she'll be done:

That's all for my aircraft, now for my latest on my armor.....
Since I was decaling, I decided to finally get the decals on my USAAF re-supply vehicles. All of the vehicles have most of the decals on them. Some simply disappeared from the bumpers after I applied them and hit them with solvent:


I also added the decals for the tiny Japanese Type 89 tank....

.....and later dullcoated it:

After the dullcoat dried, I dry-brushed this with a lighter grey:


This one is getting close. Just a little further to go.
Now it was time for some painting. I shot the black lines on the T-90, but forgot to take pics before I masked the black lines with more Silly Putty:

After that I shot more green to take care of the overspray. Now this is completely camouflaged:


I also started to modulate the color on the ACAV:

Until I got to the other side and saw that square of roughness. I decided that it was time to fix that. I sanded it down even more and then applied some Mr. Surfacer 500 to the spot:

Once that dries sufficiently, I'll sand it smooth and then re-paint that side.
Finally, I started the Hobby Boss Merkava IIID (LIC). The turret was the first thing to do. I assembled almost all of it here, leaving off a lot of the breakable detail bits:

Next was the upper hull. I added all of three pieces to this:

Here it is sitting all together on the lower hull to show how it looks:

Later on when I was painting, the next thing to happen was the basecoat of Green Drab on this Merkava:

Later when that was dry, I modulated the color with an over spray of Israeli Armor Sand Grey:


And that completes my small update so far. Thanks for looking in, comments are welcome.
I shot the bottom of the Dagger again since the camo grey got messed up. Now I can decal this bird:

I also did the decals on the USAF Jetstream. These were so old they kept curling, even with the application of decal solvent. I started with the demarcation lines. Here they looked okay before they started curling:

Then I did the wing walk lines. They did not go on straight, despite my best efforts. They kept sliding on the smooth wing surface when I tried to press them down. I didn't catch that mistake until too late:

I tried to loosen that one up to adjust it but it was too firmly attached. Oh well, it is an ancient 50+year-old kit....
Here's a couple shots of the decals after I got them all applied:


You can see the curling more effectively here. I'm gonna see what I can do about that later. If I can't do anything about it, oh well; it's an ancient 50+year-old kit.......
Another ancient kit that gave me some trouble with curling decals too was the Heller Saab J-32 Lannsen. These decals behaved a little better though once I brought down the boom:

Later I dullcoated this and then removed the masking. This just needs undercarriage and gear bay doors and she'll be done:

That's all for my aircraft, now for my latest on my armor.....
Since I was decaling, I decided to finally get the decals on my USAAF re-supply vehicles. All of the vehicles have most of the decals on them. Some simply disappeared from the bumpers after I applied them and hit them with solvent:


I also added the decals for the tiny Japanese Type 89 tank....

.....and later dullcoated it:

After the dullcoat dried, I dry-brushed this with a lighter grey:


This one is getting close. Just a little further to go.
Now it was time for some painting. I shot the black lines on the T-90, but forgot to take pics before I masked the black lines with more Silly Putty:

After that I shot more green to take care of the overspray. Now this is completely camouflaged:


I also started to modulate the color on the ACAV:

Until I got to the other side and saw that square of roughness. I decided that it was time to fix that. I sanded it down even more and then applied some Mr. Surfacer 500 to the spot:

Once that dries sufficiently, I'll sand it smooth and then re-paint that side.
Finally, I started the Hobby Boss Merkava IIID (LIC). The turret was the first thing to do. I assembled almost all of it here, leaving off a lot of the breakable detail bits:

Next was the upper hull. I added all of three pieces to this:

Here it is sitting all together on the lower hull to show how it looks:

Later on when I was painting, the next thing to happen was the basecoat of Green Drab on this Merkava:

Later when that was dry, I modulated the color with an over spray of Israeli Armor Sand Grey:


And that completes my small update so far. Thanks for looking in, comments are welcome.
Swordsman
Active member
Nice work on the building Gerry. That does make it look better.
Thanks Mark ... this one is destined to become the "A. Moses Luggage Co." I ... just have to be able to locate it on the module ... In reviewing your pervious thread post ... Excellent workmanship ... on the decals go down to the auto paint store and pickup one of those small pin-striping brushes ... A man with your talents should be able to lay that stripe down with paint ...

Terry, Your Sci-fi work is outstanding ... matter of fact can't think of anything you've done that isn't good ... Carry On the great Builds ...
 ...
...  ...
... 
Terry, Your Sci-fi work is outstanding ... matter of fact can't think of anything you've done that isn't good ... Carry On the great Builds ......
...

Thanks Gerry!
Wonderful news! 
Now that's what i call therapy!
Good for you guys Tony!
Bob
Good for you guys Tony!
Bob
Similar threads
- Replies
- 39
- Views
- 10K
- Replies
- 60
- Views
- 19K

