• Modelers Alliance has updated the forum software on our website. We have migrated all post, content and user accounts but we could not migrate the passwords.
    This requires that you manually reset your password.
    Please click here, http://modelersalliance.org/forums/login to go to logon page and use the "Forgot your Password" option.

1/48th scale Tamiya P-47D Bubble (Pin Up Campaign)

A couple of Tamiya P-47s (Pin Up Campaign)

Ok guys - I need some help. I am going to add the150 gallon flat drop tank on the center line. The Tamiya tank has very little detail, including the ports for the plumbing for the fuel back into the aircraft. It's especially weird because the paper tanks included in the kit have those details. Any way, I can't seem to find any pictures of the tank itself in any of my references or in a Google search. Does anyone have either photos or some info on the plumbing ports? I also need some reference pictures of where that plumbing enters the aircraft. It's weird, just can't seem to find anything.

Thanks in advance
Mike
 
A couple of Tamiya P-47s (Pin Up Campaign)

Mike I added two lines to the aft of the rear suspension point. Like you, I didn't find much info but I figured it would have to have two lines.


Click for more info
 
A couple of Tamiya P-47s (Pin Up Campaign)

Hi folks, been a long time since I last posted here. I really had hoped to be done by now. But unfortunately I've been on the road quite a bit and its really slowed things down. I am so glad though that this campaign has been extended!

Unfortunately I didn't have time today to make a true WIP post for my Jug, and work has me out of town again next week, but for now I'll post this picture showing where I am..


haa688a5.jpg


Almost done, just the propeller, the bombs and the fuel tank to go. All of which are in work. Hopefully I'll get a post up next weekend so you all can see how I got here. Hope to have her finished next weekend!

Thanks for looking in
Mike
 
A couple of Tamiya P-47s (Pin Up Campaign)

Thanks guys. I really appreciate the continued interest.

Mike
 
A couple of Tamiya P-47s (Pin Up Campaign)

As I promised last weekend, lets get caught up on this build.

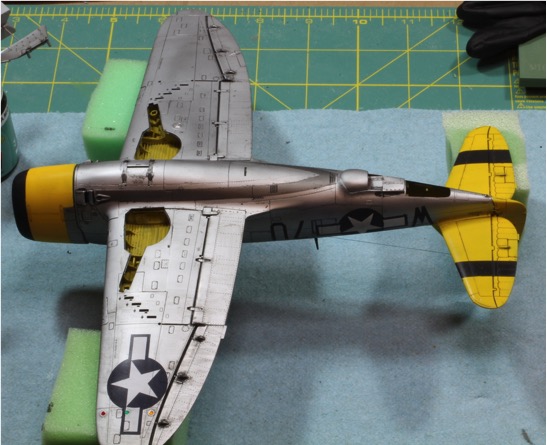
When we last left I had finished the decaling. After letting the decals sit for a few days, I sprayed a couple coats of Alclad Gloss over the entire model in preparation for a panel line wash. At this point I realized I had made a mistake. The area under the canopy on the top deck behind the seat, which I had left in Bronze Green was actually supposed to be OD green like the anti-glare panel. So, I added the antenna post, masked off the rear anti-glare panel using 3M sticky notes then sprayed the area behind the seat, and the antenna post in Tamiya OD green to match. Then I sprayed over that area with some Alclad Gloss.

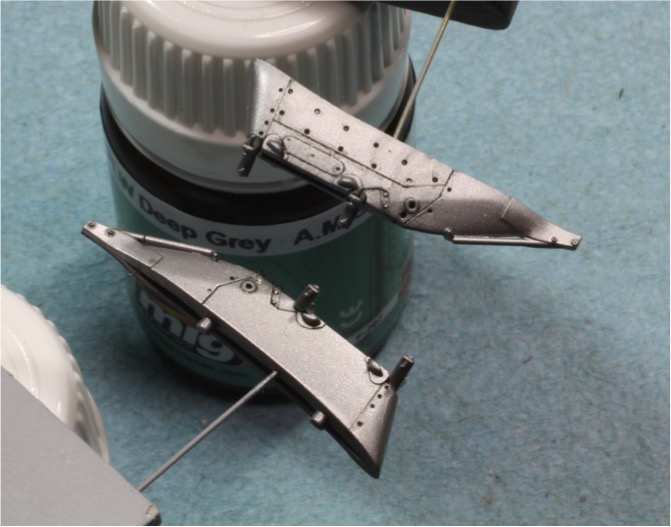
My plan was to use the Ammo from MIG PLW Blue-Black specifically for Aluminum skinned aircraft. I tried it out first on the bottom, left wing. This is when the frustration started. I really couldn’t get the MIG wash to work. It didn’t flow in the panel lines as expected and it would wipe right out of the panels as I tried to clean it up. Using the AK Oder-less thinners didn’t seem to help either. I think in the end I wound up stripping some of the gloss coat off that wing, and it really ended up being a big mess. Interestingly enough, I used the Ammo from MIG PLW, brown for yellow, on the yellow areas, which were also coated with Alclad Gloss and it worked completely fine. No idea what the problem is. I have since found that the PLW seems to work best over Tamiya X-22 Clear. In fact it is amazing in this combination, I used this for some metallic bits later on. I haven’t tried over future yet though. So long story short, I spent a little time away from this build as my frustration level was high, and I was seriously considering finding out the terminal velocity of a Tamiya P-47! After I calmed down a bit, I decided to use the Florey Black Wash instead. Again this took a little trial and error to get figured out, again with the bottom left wing as the test grounds. I kind of made a mess of that area in the end. The weathering there is way heavier then the rest of the aircraft, good thing its on the bottom.

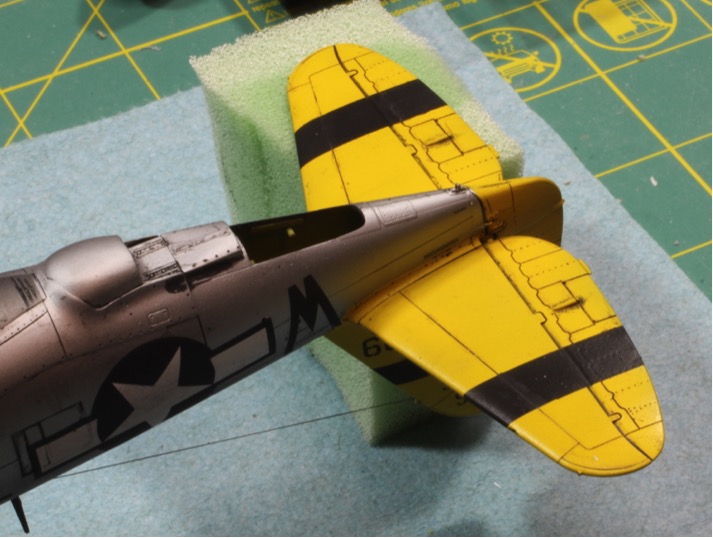
Once the wash had dried the whole thing received a couple coats of Alclad Flat. I really like the way I got a flat finish but its still metallic. After the flat coat I also added the antenna wire using EZ Line, which is just fantastic for these antenna wires. Responds well to CA glue and is flexible so it can actually be bumped, unlike fishing line on both counts.

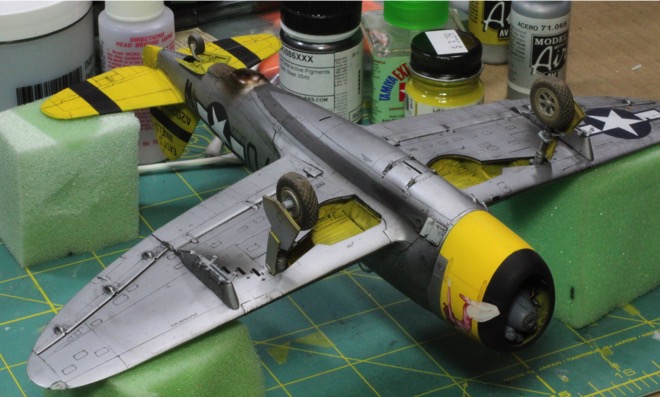
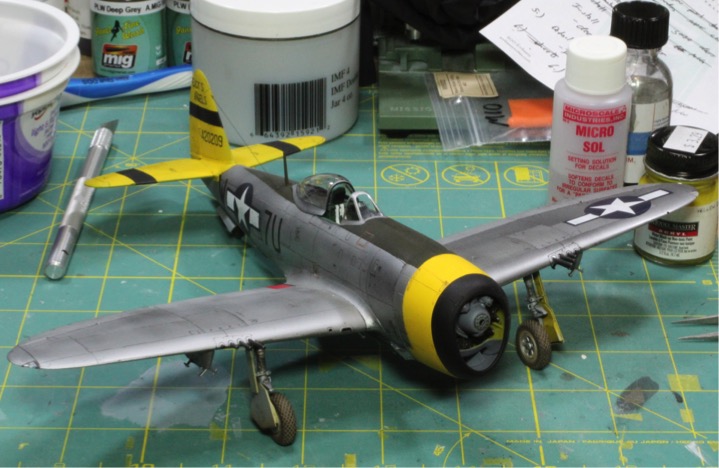
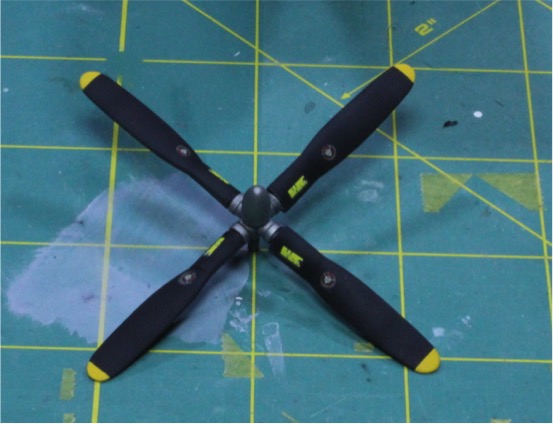
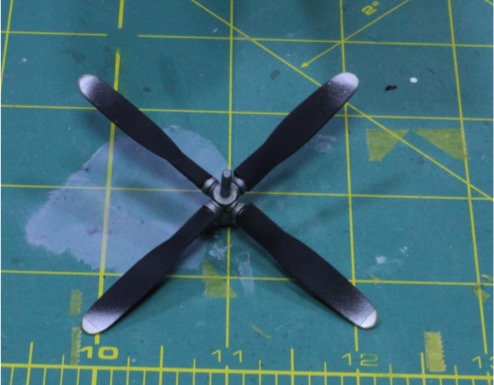
Ok, here are some pictures.

h02fc602.jpg


h534b9fb.jpg


hfe56260.jpg


hee07deb.jpg


h7594962.jpg


I really can’t say I’m happy with the wash. Its inconsistent and grainy up close. But it looks ok from a few feet back.

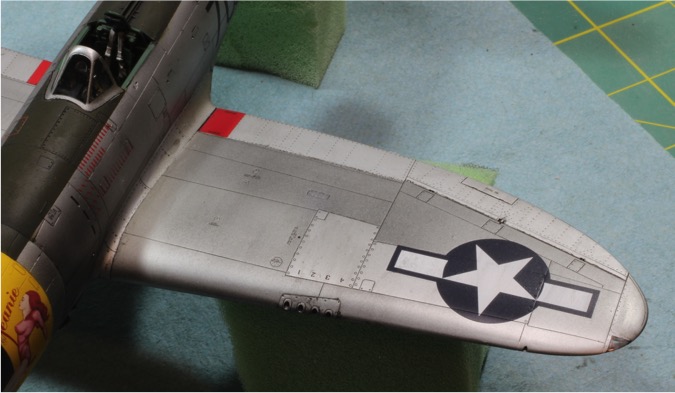
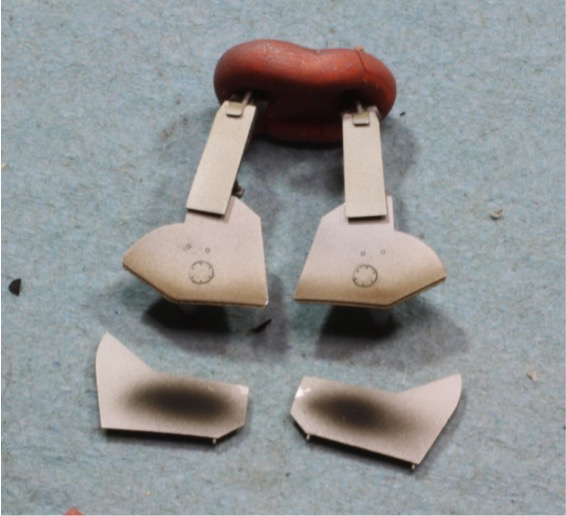
I used the new Ammo of MIG crystal colors to paint the IFF lights. These paints are specifically formulated for making lights unlike the Tamiya clear colors. I think they turned out really well. I used Crystal Orange, Crystal Green and Crystal Red. They were painted over a base of MM Chrome Silver. On my Razorback build I used the Quickboost clear resin IFF lights instead of painting the lights and in the end, I like the crystal paints better. I’ve included a picture of the unfinished Razorback wing (on the right) for you to see the difference.

hab8b116.jpg


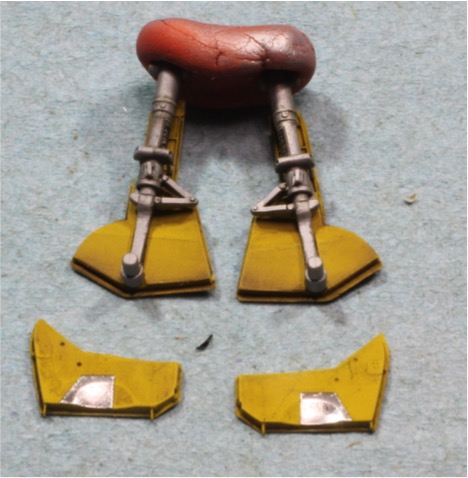
Once this was done, I pulled out the airbrush again and added some exhaust staining on the aircraft. I used Xtracolor Exhaust for the engine exhaust and the gun ejector ports and darkened the exhaust of the supercharger. Unfortunately I didn’t take any good pictures of this step. And the engine exhaust blended in with the steel band around the fuselage so it really isn’t visible anyway. Need to work on my color choice for my next build. I also decided to try my hand at heat staining the supercharger cover. This panel seems to darken as a result of the heat and is very evident on the NMF P-47s. After a pretty extensive search I finally got my hands on some Alclad Sepia heat staining. This is a brownish colored paint that is kind of like a transparent version of Alclad. It sprays wonderfully and you just build up the layers until you get the color density you want. I did find out, that if you think its dark enough, you probably went to far for the effect.

h093b6ff.jpg


hd1466dd.jpg


I made the mistake of making it too dark, and tried to dab a bit off with a cloth. Well that was a bad idea. Instead I left a rub mark where the paint came off. It actually looks horrible. In the end its on the bottom and basically invisible, so I am leaving it be.

At this point I really felt like I was sabotaging this build. Lesson learned. Don’t rush the end kids, don’t rush the end.

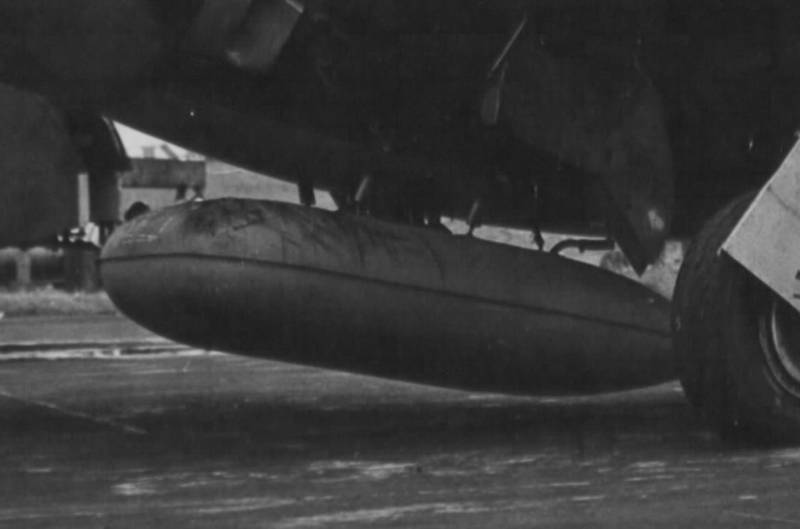
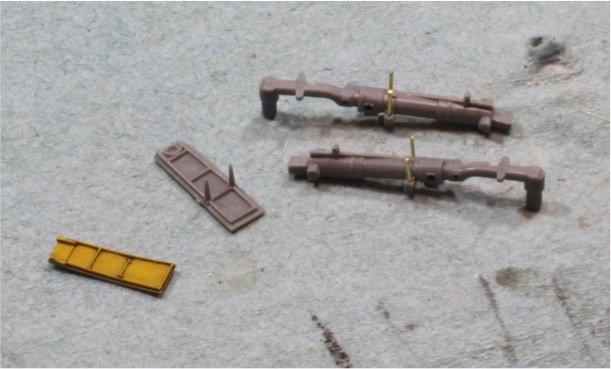
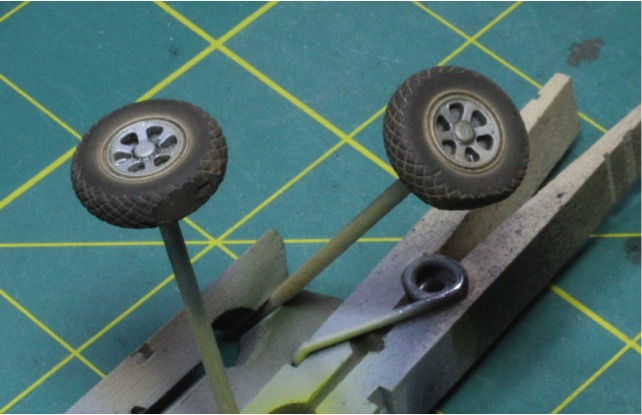
Next up were the wing pylons. These were assembled, cleaned up, primed and painted in Alclad Dark Aluminum for a little variety. This is where I learned how to use the Ammo PLW. I gloss coated with Tamiya X22 Clear then used the PLW Blue-Black for NMF. And it worked perfectly, flowed just like you would expect a wash to and I cleaned up all the little unwanted dabs with a brush and oder-less turpentine. Then flat coated with Alclad Flat.

h5545467.jpg


To be Continued...
 
A couple of Tamiya P-47s (Pin Up Campaign)

And continued...

While I was working on the pylons I was also working on the landing gear. I planned on using some aftermarket doors, really just because I didn’t want to deal with the punch marks located on the inside faces of all the kit doors. The only aftermarket doors I could find, not counting the ones that come in the Aires wheel bay kit, are for the Hasegawa kit. That shouldn’t be a problem, right? In the end I had to modify the landing gear legs to fit the lower door, and I had to add supports for the upper door that are molded onto the kit upper door. It really wasn’t tough work just took a little time. I used some brass rod for the upper door supports and cut off the wings that are shown here down near the axle.

h521b6d2.jpg

Everything was painted to match the aircraft. MM Acryl Zinc Chromate for the insides of the doors, Alclad Aluminum on the outside of the doors. A MIG dark wash was used for the insides of the doors and the Ammo PLW was used on the outsides. The landing gear legs were painted in Alclad Duralumin. And also received a MIG dark wash. Next up I tried to replicate some dust accumulation on the lower pars of the doors, which would have resulted from operating on grass fields in Europe. To do this I used Ammo from MIG’s Nature Effects Earth color. This is basically a thin enamel paint that comes in a variety of earth tones. Its thicker then a wash, but not by much. This was lightly missed over the bottom of the lower landing gear doors. I really like how this turned out. I think it looks exactly like I wanted it to look.

My reference photos also showed that the inner gear doors, located near the wing roots, have pretty heavy exhaust staining. I believe this is a result of running on the ground with the gear doors open, as these doors are right in front of the exhaust pipe. So I added this as well. Not as great as I wanted it to look, but not bad either. Here are some pictures of the finished MLG.

h3499e3b.jpg

hbcf6b9b.jpg

The wheels are from Sierra Hotel Models, and they are little gems. These depict the wheels without the covers and there are actually valve stems molded in. They are really awesome casts. I painted the hubs in aluminum and the tires in Ammo by MIG tires and rubber. I wanted to dirty these up as well to give the impression of working from grass fields in Europe so, I used MIG European Earth pigments, added them dry and rubbed off what I didn’t want. I repeated this process a couple of times until I had the look I wanted. And I have to admit, I love how these turned out. I think they look exactly like they should.

hf8300ee.jpg

After that, the gear and the pylons were installed. The tail gear was also done in the same manner as the mains, I just didn’t take any pictures of it along the way.

h6fb4732.jpg

I also added the guns, which are turned brass from Master. I painted them gunmetal and then I polished them with a steel pigment to get a metallic shine. I think they might be too dark, but they do look nice. The gun barrels were installed without any fuss.

hde94ea9.jpg

So all that work brings us to this point in time.

haa688a5_2016-02-05.jpg

And there you have it. Sorry about taking so long to update on the progress. I was really hustling to make it by the end of January despite some family issues that we have been dealing with around here. Like I said in my last post, just have the propeller, bombs and the fuel tank to go. Hope to be finished very soon.


Thank you all for your continued interest. See you next time.
Skinny Mike
 
A couple of Tamiya P-47s (Pin Up Campaign)

Mike I don't know why you asked me about my gunmetal, yours rocks! :notworthy

Looking great buddy! :popcorn
 
A couple of Tamiya P-47s (Pin Up Campaign)

Thanks Ed - I am working towards the end!

Mike I don't know why you asked me about my gunmetal, yours rocks! :notworthy

Looking great buddy! :popcorn

I asked before adding the pigments, I just wasn't sold on the gunmetal, but after I polished the guns, I have to admit they turned out pretty well.

Mike
 
A couple of Tamiya P-47s (Pin Up Campaign)

:drool I have really nothing to say but that your build is mouth watering

:pilot
 
Hi guys – quick update for today.

First off the bombs have been completed. They are the kit items assembled, decaled and painted. I painted the MM Olive Drab, used the kit decals then dirtied them up with a heavy wash using MIG dark wash. Then flat coated with Vallejo Flat Varnish.


h9029df6.jpg


I also finished the propeller. I used the Curtis late propeller which is appropriate for most P-47D bubble tops, event though I prefer the look of the big Hamilton propeller. After assembling I painted the tips in Insignia Yellow and the then the rest of the assembly in flat black, both MM enamels. Next I added some subtle streaking to the prop blades with thinned Tamiya NATO Black. Unfortunatly most of that effect got lost, next time I’ll try a lighter gray. The hub was sprayed in Alclad Duralumin. The kit decals were used and the hub received a wash in Ammo’s blue-black PLW. Next step was the flat coat using Alclad Flat.


h9a86ca6.jpg


I tried to add some wear on the backs of the propeller blades trying to spray a little Alclad Aluminum on the tips. In the end I don’t think it turned out to well. I’ll try something a little bit different next time.


hb2f075e.jpg


Well, the bombs are installed. The propeller will go on last and I am working on detailing the fuel tank. Almost there.

Thanks for looking
Mike
 
Back
Top