• Modelers Alliance has updated the forum software on our website. We have migrated all post, content and user accounts but we could not migrate the passwords.
    This requires that you manually reset your password.
    Please click here, http://modelersalliance.org/forums/login to go to logon page and use the "Forgot your Password" option.

1/35 scale Tamiya Panther

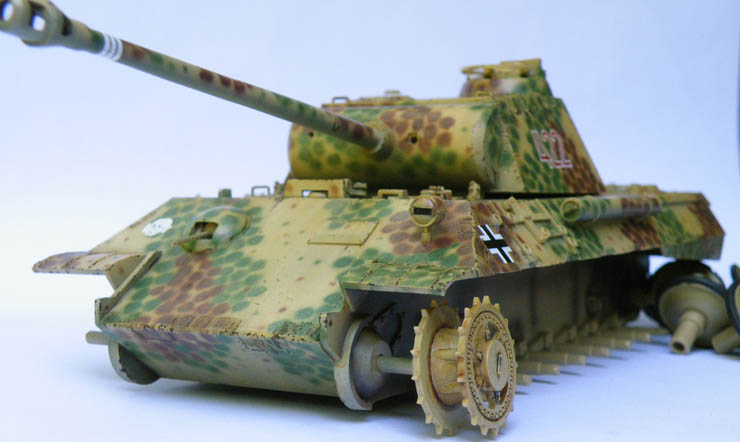
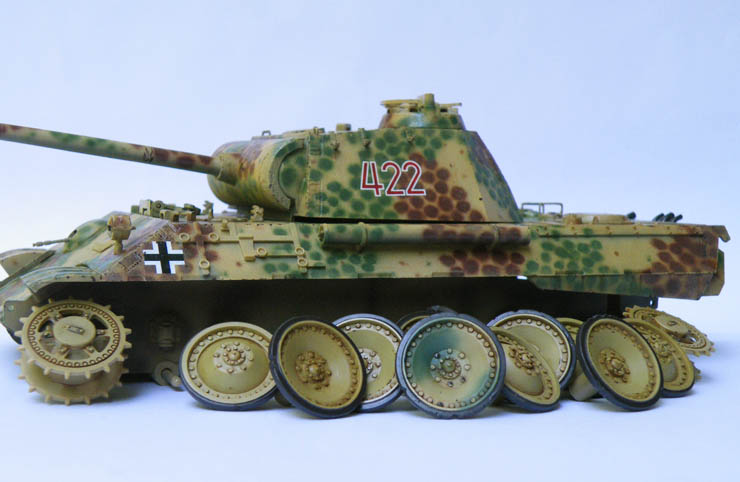
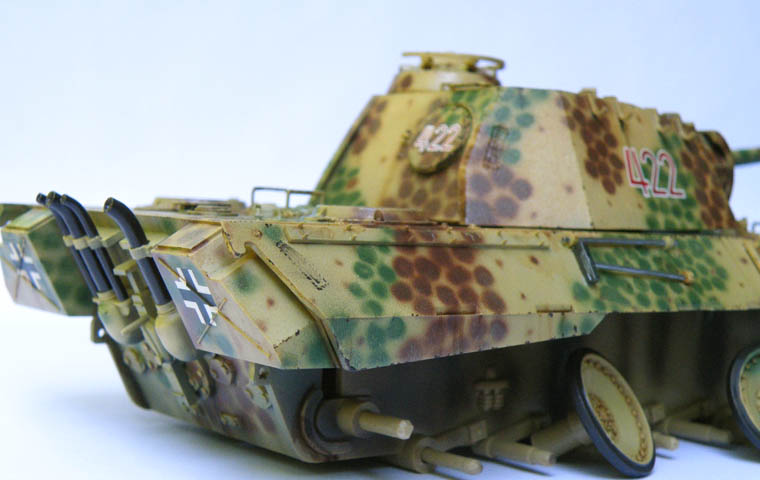
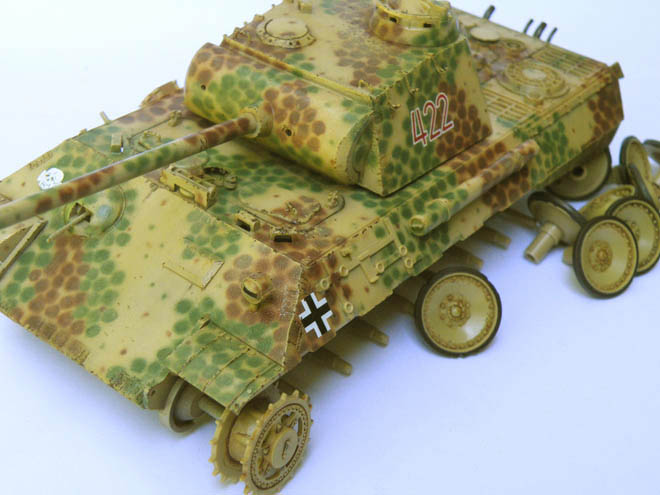
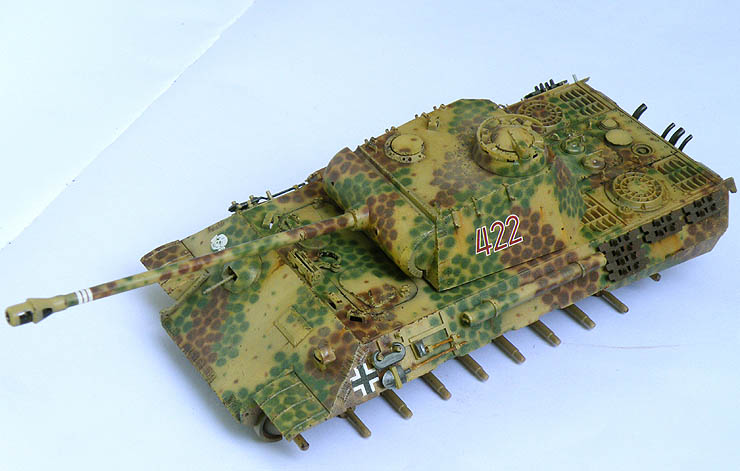
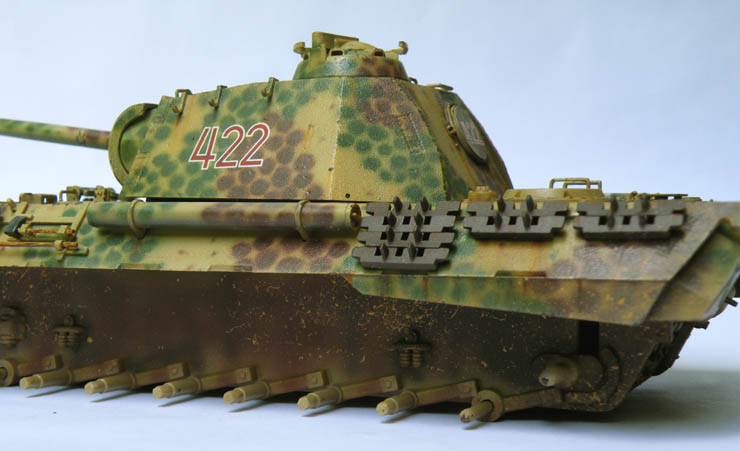
It's a nice kit for its age. remember that this kit came out about 1975 which is 35+ years ago. Also remember that most of the early Tamiya kits were designed to be used with 2 motors and remote control box. If you think these kit tracks are bad you should see whatthe original rubber band ones were like.

There are after market styrene tracks available at a pretty low price.

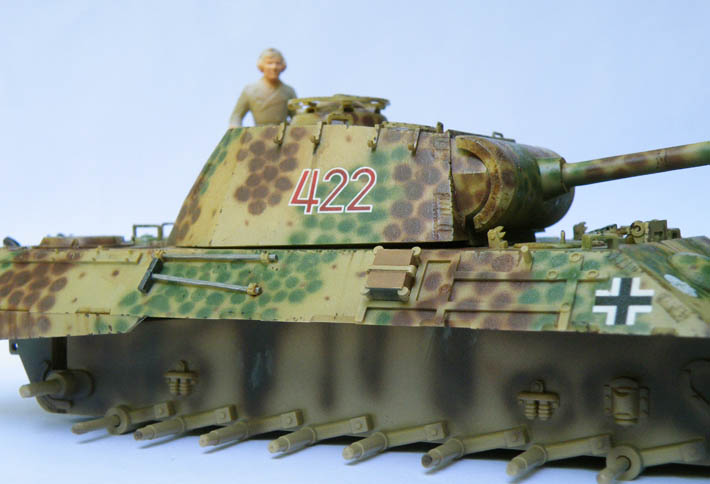
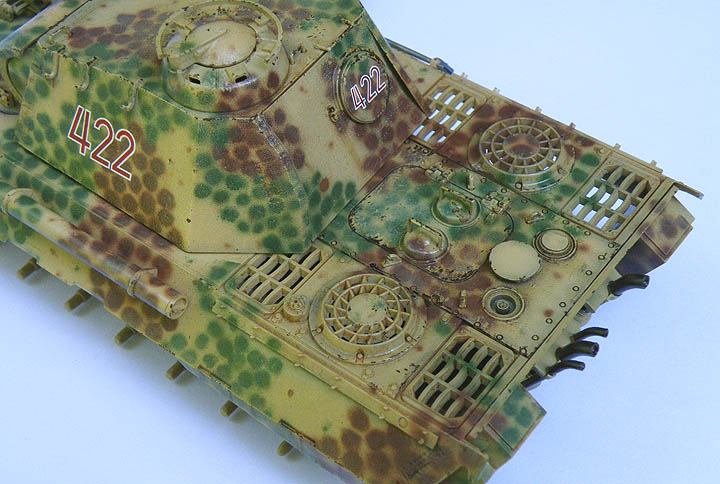
Considering the age of this kit I think it's a great build and paint scheme.

Cheers
 
Thanks for the input guys!

No matter what I build in the near future it will have to be O.O.B. since I have no modeling budget at all.

The Panther has been sprayed with a light coat of Future and after setting for a couple days I started adding some weathering with oil paints, since I don't build many armor models weathering this model is really just guessing on my part but I have seen the way mill and logging machinery weathers and rusts and tried to copy those examples.
I want this model to look well used but not totally worn out so there won't be much more weathering done to it than what you see here aside from some dirt and mud splatters near the undersurface of the fenders. The flat clear coat should tone down the oil paints and blend them in with the finish.

h47a7110.JPG


hbefc8e4.JPG


h8ce41af.JPG


h0d3b881.JPG


While I had the airbrush out the other day I thought I would paint the flesh tones on the tank crewman figure.
I started with flat white (a VERY thin coat) and that was followed by a pale version of the flesh colored paint.

h3186d02.JPG

Holding the figure upside down I then sprayed a darker verion of the flesh color making sure the spray pattern only touched the areas on the figure that would normally be in shadow giving the facial features a little more depth. It looks like crap in the pictures but it does look good in person.

hc598600.JPG


Matrixone
 
Thank Luiz, Bob, and Mike!

Mike,
My last serious attempt at armor in this scale was an Italeri Panzer IV in the early 1980's.
I wanted this Panther to be historically accurate model but the more I researched the Panther the more I realized I am not capable of making this ancient kit into an acceptable model to today's standards so I whiffed it and am getting the most enjoyment out of it as possible.

Some work was done earlier today on the Panther but not really picture worthy.

Two pictures from yesterday.

hb132cc1.JPG


h9374986.JPG


Matrixone
 
One easy way is to flatten out solder and bend to shape. A long tome ago(1986) We were watching the Mets in the World Series and the SF earthquake happened. Anyway, I was just starting my first tank model since being a kid. Monograms 1/48th Panther. It had an Aust. A hull, G mantle, D cupola, G model deck fans. I didn't know a lot about armor back then except for the Squadron in Action Panther book. So I figured it was rebuilt from spare parts. When I showed the finished model to a patient of mine who was in the 8th Panzer Division he said" They looked just like that!". The best compliment I could ever have gotten. Great job on your model. Gary
 
Thanks Gary and Tankbuilder!

Gary,
I think trying to flatten the figure to get it to fit inside would exceed the benefits of such a procedure, for now I will leave figure intact and use it as painting practice.

After spending time weathering the Bf 109K-4 with oil paints I sat that model aside so the oils could dry completely and have returned to the Panther.
I attempted to follow the kits instructions and use hot water to shape the tow cables as needed to fit on the model and found the plastic to be brittle and I ended up breaking both tow cables even though the water was so hot I could not touch it directly. I suspect the age of the plastic might have something to do with the problems I faced, I have successfully bent plastic using hot water before without any trouble.

Many of the small breakable bits have been glued on and some dirt and mud stains were added, I wanted this Panther to look like it has been out in the field for a while.

h6784ff6.JPG


h95daa59.JPG


h31f59c7.JPG


h5c547e6.JPG


hedf7f09.JPG


hae55169.JPG


The tanks treads have been washed and are drying, they will be painted next.


Matrixone
 
Oh MAN!!! Love the mud splatter on the back! Looks great Les, fine job so far.

Yeah the Panther I did had the same instructions and the hot water trick didn't work for me either.

:popcorn
 
Bob,
Thanks for letting know I am not the only one that fell for the 'hot water plastic bending technique' in the instructions, what kind of water was Tamiya expecting us to use? :bat
Water from a melt down at a nuclear plant might have worked but anything less than that was bound to crack the plastic. :bang head


Matrixone

I think that today the plastic is nowhere near as soft as it used to be circa 1975. Back then many complained about the "soft details" because the plastic wasn't of a type that could give fine details. Now a lot of plastic is brittle and one even needs to be very careful cuting tow cables from the sprue lest the cables break. That's why so many moved to wire tow cables.

Cheers
 
Thanks!

Tankbuilder,
The plastic seemed almost brittle to me, I have experience with using hot water or heat to bend plastic and I was actually looking forward to bending the tow cables in this kit but right from the start I suspected there was going to be trouble when the first tow cable I tried to bend barely moved at all, I kept using water that was hotter than the time before with each attempt with no luck other than bad.

One resource that I have on hand and forgot about is an old wood burning tool, I have used this before to bend plastic by holding the plastic part close to the tip to heat it and slowly start to bend the plastic, its a very controllable way to bend plastic and would have been a better way to go than using hot water to shape those tow cables.

I gathered the most usable pieces of each of the tow cables and glued them together to make one tow cable, when the glue is 100% dry I will try and place it on the model but I am certain it will not conform to the surface of the model all that well. If it breaks again I will scrap it and move on.


Matrixone
 
One way of using solder to make straps is to flatten out solder(it comes in different sizes) with needle nose pliers and then bend into shape. I used it for my M-4 headlight guards.Gary
 
You can cut off the ends and then drill/hollow them out a bit and then glue apprpriate diasmeter thread/string to them. Just be sure that when you do that and then put them on the model that the thread follows a realistic curve. I use whit glue to stiffen mine and to remove any fibe hairs that might be sticking up.

Cheers
 
Back
Top