Think I would plug it up with some putty. Looks like it's a nice raised surface that would sand well, maybe use a narrow metal file to shape it then some Mr. Surfacer or something to smooth it out once done.

-
Modelers Alliance has updated the forum software on our website. We have migrated all post, content and user accounts but we could not migrate the passwords.
This requires that you manually reset your password.
Please click here, http://modelersalliance.org/forums/login to go to logon page and use the "Forgot your Password" option.
You are using an out of date browser. It may not display this or other websites correctly.
You should upgrade or use an alternative browser.
You should upgrade or use an alternative browser.
1/35 scale 160th SOAR MH-60M
- Thread starter Hawkwrench
- Start date
Hawkwrench
Active member
Mr. Surfacer, what's that?
Tim
Tim
http://www.swannysmodels.com/Surfacer.html
He tells ya all about it.
Great filler/primer. Can be tricky to work with if not thinned correctly.
He tells ya all about it.
Great filler/primer. Can be tricky to work with if not thinned correctly.
Never used Milliput so I like the sound of it. ")
Hawkwrench
Active member
Milliput huh?
I may have to look into that.
I just bought some Perfect Putty last week because they say that's the cat's (sorry MP) meow for filling in seams and it's water soluable.
Tim
I may have to look into that.
I just bought some Perfect Putty last week because they say that's the cat's (sorry MP) meow for filling in seams and it's water soluable.
Tim
Skinny_Mike
Well-known member
Love all the detail. Nice work Tim!
Hawkwrench
Active member
Skinny, thanks for the compliment. Hopefully I get to work on it Wed night after I get off work.
Tim
Tim
Hawkwrench
Active member
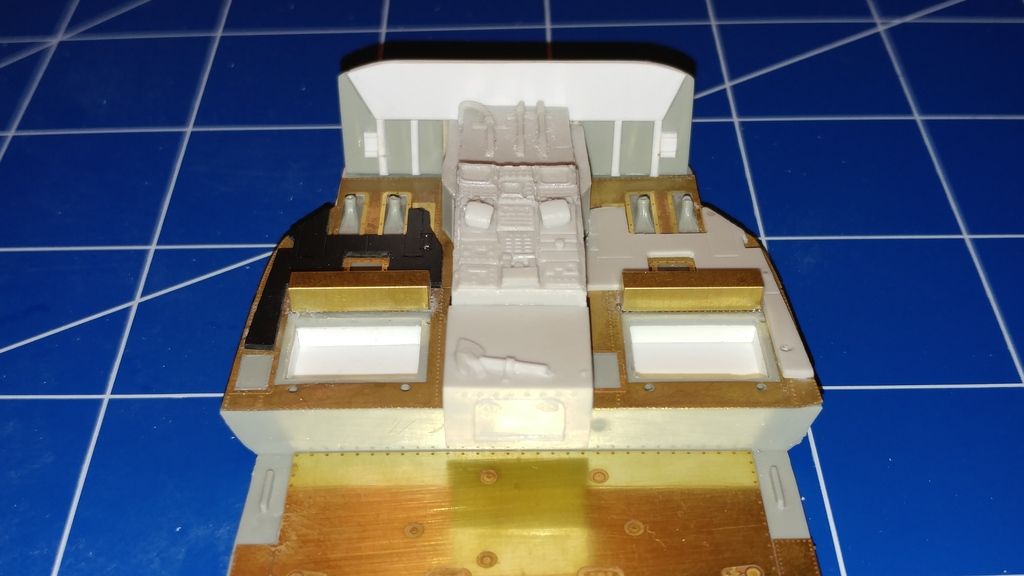
So tonight, I folded and glued the boxes in front of the cockpit seats. (I've forgotten what those boxes are--too many years have gone by, but I'm sure Ramon or Erick can tell us. I also managed to put in the center console and the center console extension after alot of dry fitting and sanding. Its not glued in just yet because I still need to glue on the cabin floor cover which holds the minigun junction boxes. Alot of dry fitting is needed in order for everything to fit together.

I wish I could build as quick as you guys do, but this will be a slow build!
Comments and critiques welcome.
Tim

I wish I could build as quick as you guys do, but this will be a slow build!
Comments and critiques welcome.
Tim
Sherman 18
Master at Arms
Nothing wrong with taking your time
Why rush when it looks this good 
Hawkwrench
Active member
Thanks guys for the compliments. I so wish I could model more, but my family life is hectic, work schedule is crazy and the wifey keeps me busy.
Tim
Tim
Hawkwrench
Active member
The front cockpit wall is plain with no detail. Working from my collection of MH-60 and UH-60 pics, I began to detail the wall to give it some pop instead of a plain piece of plastic. It may not be 100% accurate, but in the end it will look pretty dog gone close. Here's what I've got so far:
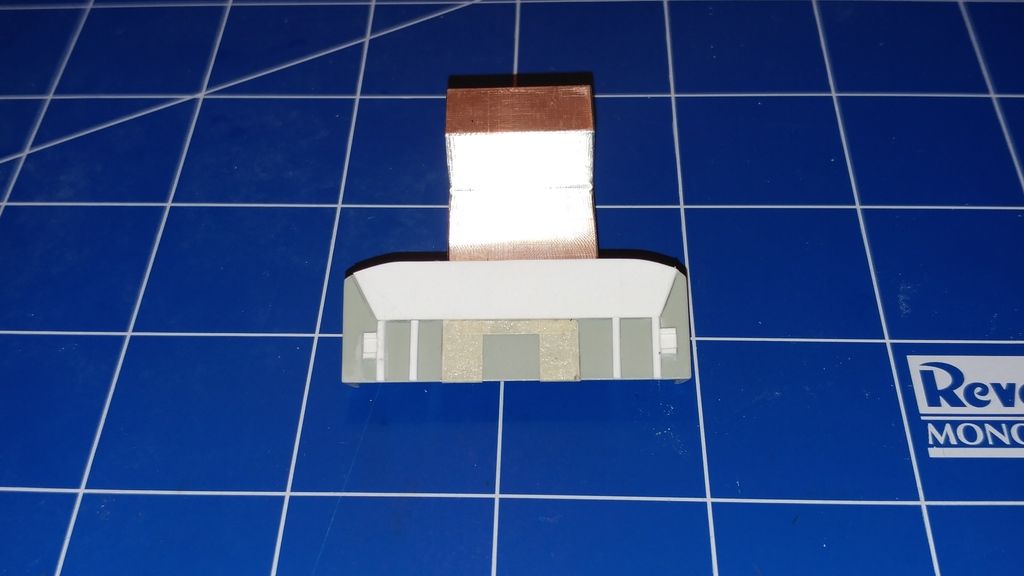
I managed tonight to glue on the PE cabin floor, cut down the cargo hook walls 1/16 of an inch and worked on the front wall
No more updates for about a week cause I have to work OT.
That's all for now, comments and critiques welcome!
Tim

I managed tonight to glue on the PE cabin floor, cut down the cargo hook walls 1/16 of an inch and worked on the front wall

No more updates for about a week cause I have to work OT.
That's all for now, comments and critiques welcome!
Tim
You get that hole buttoned up Tim? It's looking good.
Hawkwrench
Active member
No, I keep forgetting to. :facepalm
Tim
Tim
 ...
... Hawkwrench
Active member
Just so you guys don't think my measurements were off with the spacing of the electrical component vertical mounting rails on the front cockpit wall, Their not.
For some reason they are meant to be that way from Sikorsky.
Just a FYI!
Tim
For some reason they are meant to be that way from Sikorsky.
Just a FYI!
Tim
Hawkwrench
Active member
So, a little update tonight. Ive been continuing to work on my scratchbuilt cockpit front wall. I added some mounting stringers for the electrical boxes and then glued on the 4 boxes them selves.

I was about to start putting on the resin rivet decals when I realized I hadn't put on a clear coat yet.
I'm going out tomorrow and buying some Future or whatever it's called now so I can have it on hand. I ordered some 1/35 scale electrical connectors from Reedoak, but they haven't came yet. Once I apply the rivets, I'll glue on the connectors and then the electrical wiring and get it primed and it will be done.
That's all for now!
C&C welcome
Tim
Similar threads
- Replies
- 2
- Views
- 604