
-
Modelers Alliance has updated the forum software on our website. We have migrated all post, content and user accounts but we could not migrate the passwords.
This requires that you manually reset your password.
Please click here, http://modelersalliance.org/forums/login to go to logon page and use the "Forgot your Password" option.
You are using an out of date browser. It may not display this or other websites correctly.
You should upgrade or use an alternative browser.
You should upgrade or use an alternative browser.
1/32 Trumpeter P-40B..Going Dark
- Thread starter fightnjoe
- Start date

Skinny_Mike
Well-known member
1/32 Trumpeter P-40B..One Step Forward, Then .....

1/32 Trumpeter P-40B..Tail Wheel Assembly and Extr
Many thanks.
Wow. It really is amazing what can happen when we move past a stumbling block.
Just a bit of an update:
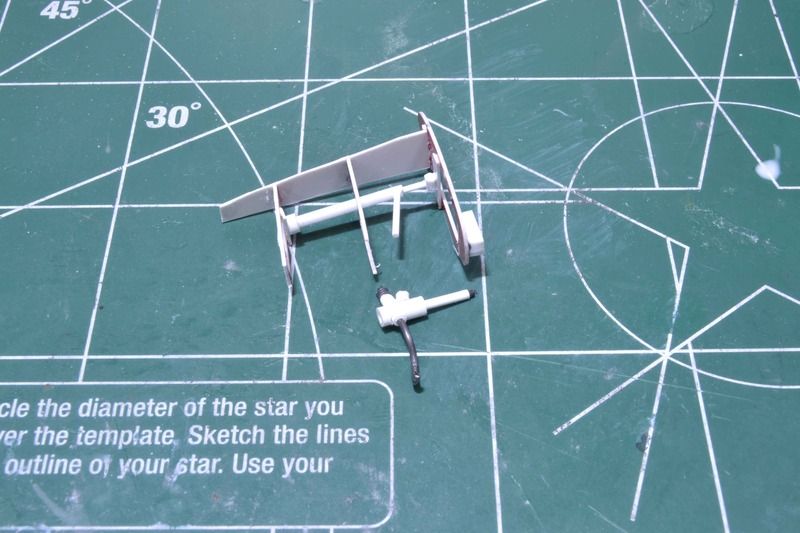
Work has commenced on the interior begining with the tail wheel assembly. This does not represent 100% accuracy as I needed to make sure there was stability and strength as well.
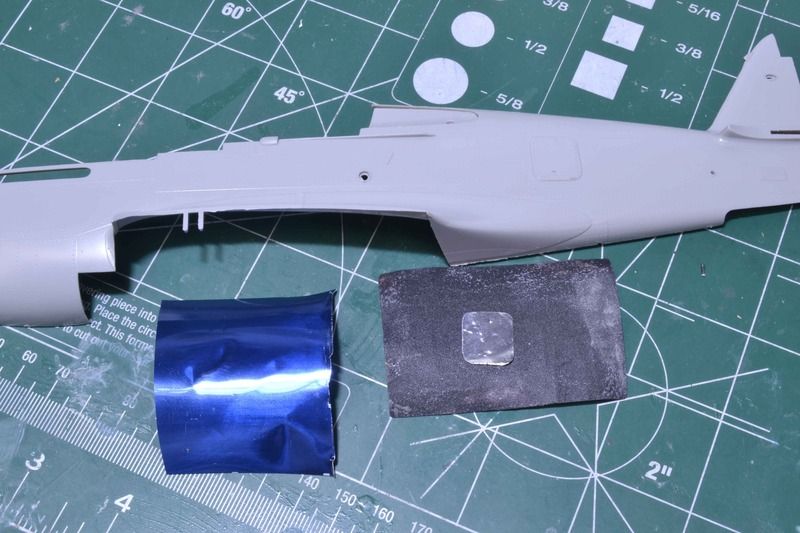
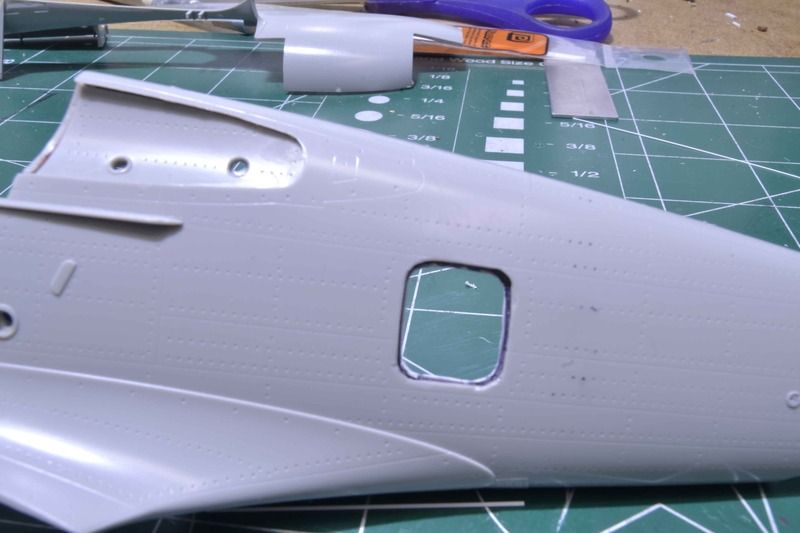
Before I go too far I really need to open up the access door on the fuselage. For that first a template is made out of aluminium foil which is taped to an aluminium can, cut out, and cleaned up a bit.
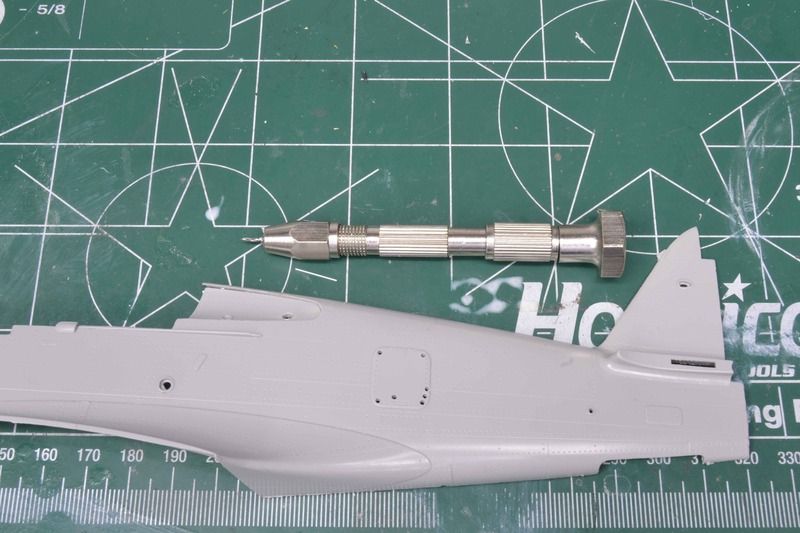
Next is to drill out the door. Let the drilling begin.
And drilled out.
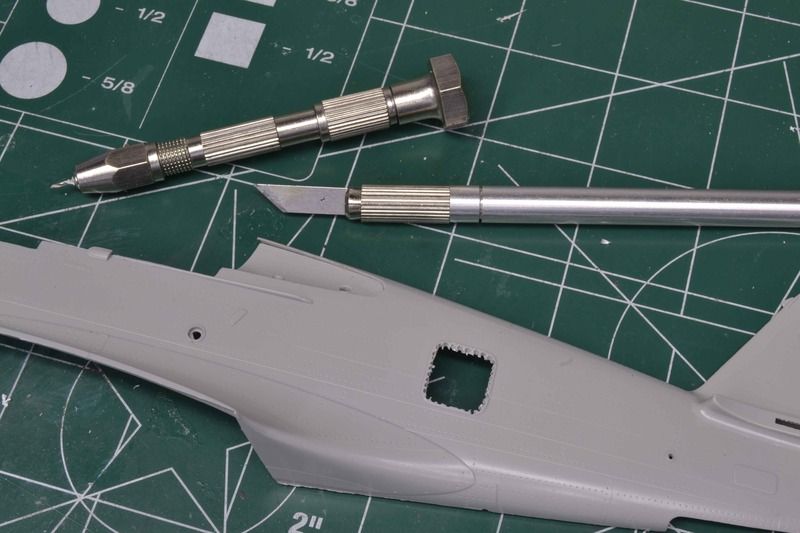
Next will be to clean up the cut and then I can put in stringers and back plates.
All comments, critiques, and criticism are encouraged.
Joe
Many thanks.
Wow. It really is amazing what can happen when we move past a stumbling block.
Just a bit of an update:
Work has commenced on the interior begining with the tail wheel assembly. This does not represent 100% accuracy as I needed to make sure there was stability and strength as well.
Before I go too far I really need to open up the access door on the fuselage. For that first a template is made out of aluminium foil which is taped to an aluminium can, cut out, and cleaned up a bit.
Next is to drill out the door. Let the drilling begin.
And drilled out.
Next will be to clean up the cut and then I can put in stringers and back plates.
All comments, critiques, and criticism are encouraged.
Joe
Swordsman
Active member
1/32 Trumpeter P-40B..Tail Wheel Assembly and Extr
Nice recovery Joe ... Rivet counters always bugged me ... it's not that there right it's the destructive criticism when they twist the knife in the wound ... hmy: Looks like your over it and on the march forward again ... excellent job on the fuel tank and new ammo chute ... for the door ... a pin vice for a drill ??? you have a Dremmel and small bits, that's what I use, although it can walk on you just seems faster ... a little cleanup and that door will look great ... I don't care what the rest of the modelers say ... your work Rocks
 :woohoo:
Nice recovery Joe ... Rivet counters always bugged me ... it's not that there right it's the destructive criticism when they twist the knife in the wound ...
hmy: Looks like your over it and on the march forward again ... excellent job on the fuel tank and new ammo chute ... for the door ... a pin vice for a drill ??? you have a Dremmel and small bits, that's what I use, although it can walk on you just seems faster ... a little cleanup and that door will look great ... I don't care what the rest of the modelers say ... your work Rocks :woohoo:1/32 Trumpeter P-40B..Tail Wheel Assembly and Extr
Git'er done Joe.
Git'er done Joe.
1/32 Trumpeter P-40B..Start The Interior
Moving right along with the interior work.
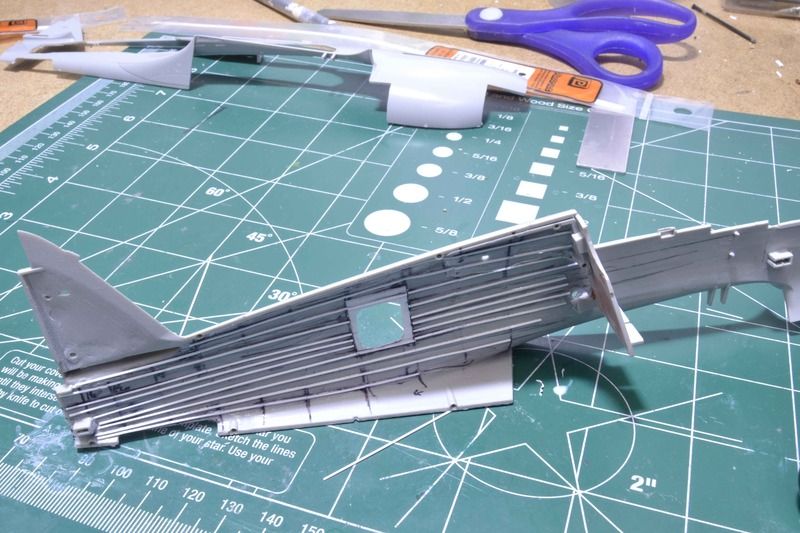
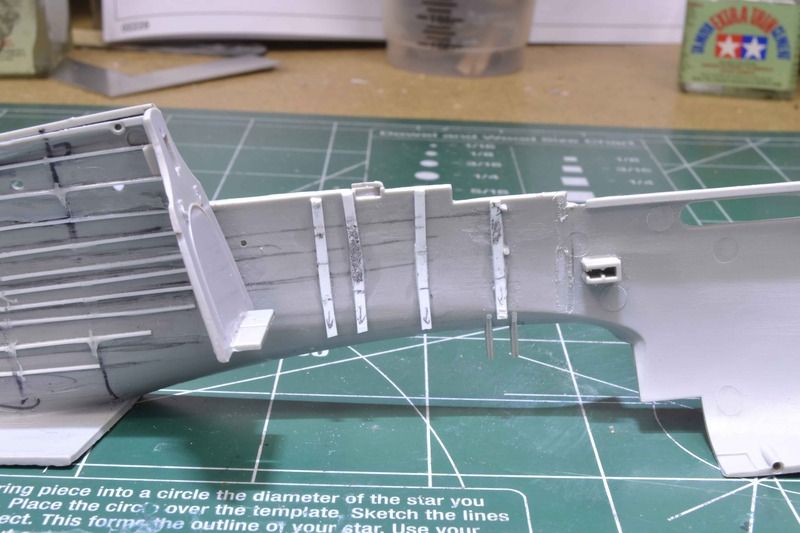
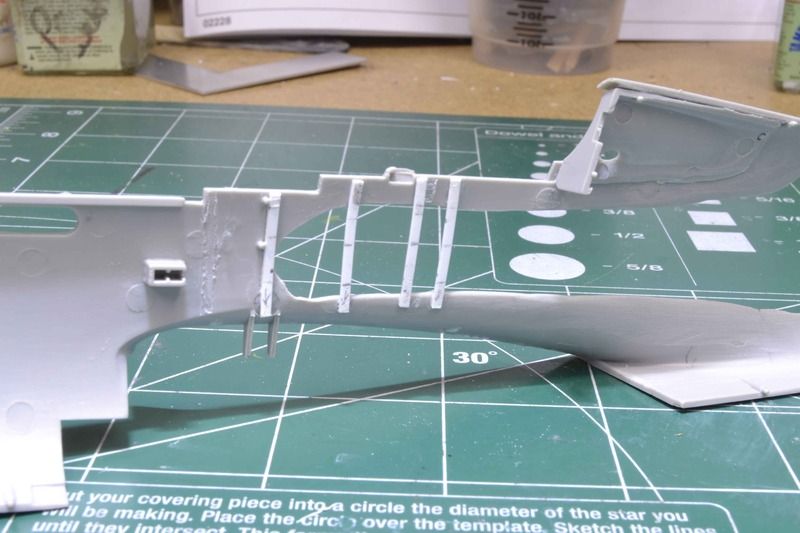
First up was to clean up the access door and then attach a backing plate.
Once that was completed I moved on to putting the stringers in place. These are .020 hex rod.
With that done the part of the builds that I truly enjoy could begin. The interior work.
First up was to prep bulkheads 8 and 9 for radio equipment. I took some time and set up the racks to mimic what I have seen in pictures.
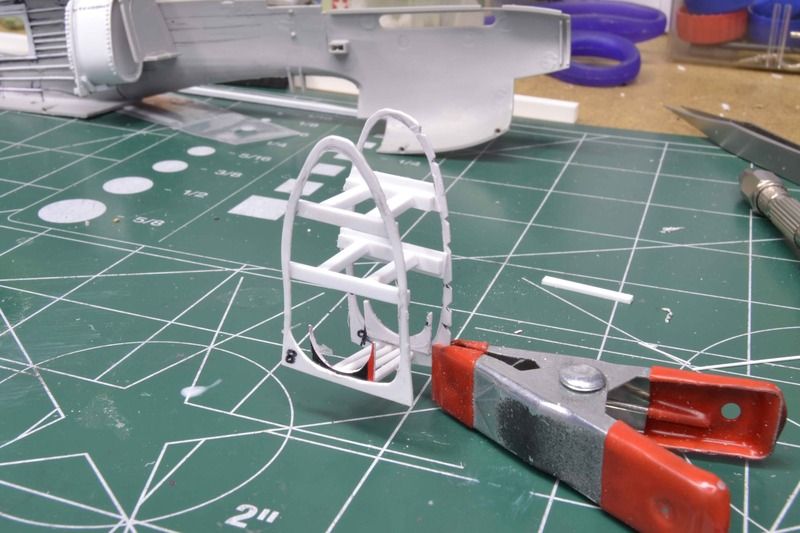
The next step of course was to actually build up the radio equipment. Now indulge me on this.
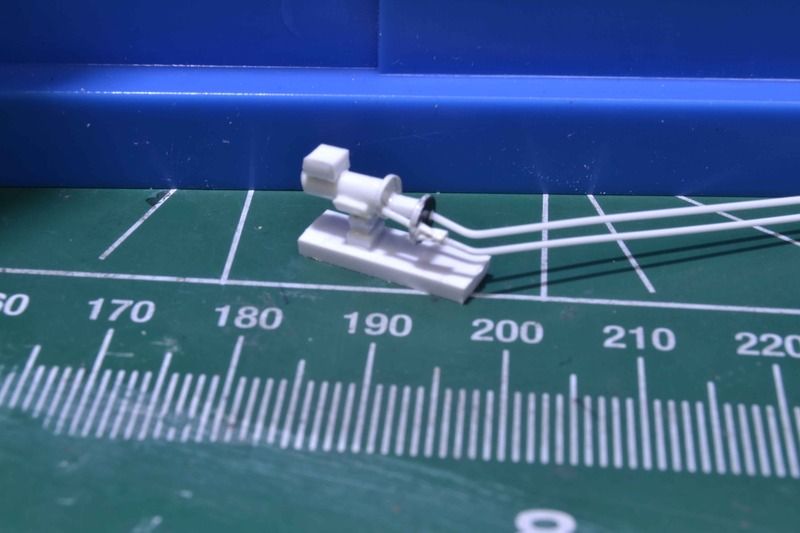
From left to right. Radio boxes both recieving and transmitting, dynamotor and antenna switch box, junction box, and the reciever and transmitter.
Now with that ready, before I can add the wiring, I am going to need to do some painting I think. I may just move on and continue the construction of interior assemblies. Thinking on this.
All comments, critiques, and criticism are encouraged.
Joe
Moving right along with the interior work.
First up was to clean up the access door and then attach a backing plate.
Once that was completed I moved on to putting the stringers in place. These are .020 hex rod.
With that done the part of the builds that I truly enjoy could begin. The interior work.
First up was to prep bulkheads 8 and 9 for radio equipment. I took some time and set up the racks to mimic what I have seen in pictures.
The next step of course was to actually build up the radio equipment. Now indulge me on this.
From left to right. Radio boxes both recieving and transmitting, dynamotor and antenna switch box, junction box, and the reciever and transmitter.
Now with that ready, before I can add the wiring, I am going to need to do some painting I think. I may just move on and continue the construction of interior assemblies. Thinking on this.
All comments, critiques, and criticism are encouraged.
Joe
1/32 Trumpeter P-40B..Start The Interior
Nice stuff.
Nice stuff.

Sherman 18
Master at Arms
1/32 Trumpeter P-40B..Start The Interior
Watching with great interest
Watching with great interest
1/32 Trumpeter P-40B..Start The Interior
Many many thanks.
Got to say although I really enjoy the research aspect of builds it can get more than a little frustrating. For example on this one there is a landing gear control unit to the left of the seat. I can find two pictures of it installed but they do not show the best angle. I cannot find much more. Some reference to it on a few pages but no drawings or photos.
Ahh the good and the bad.
Many thanks for such kind words.
Joe
1/32 Trumpeter P-40B..Small Details
Just a quick update.
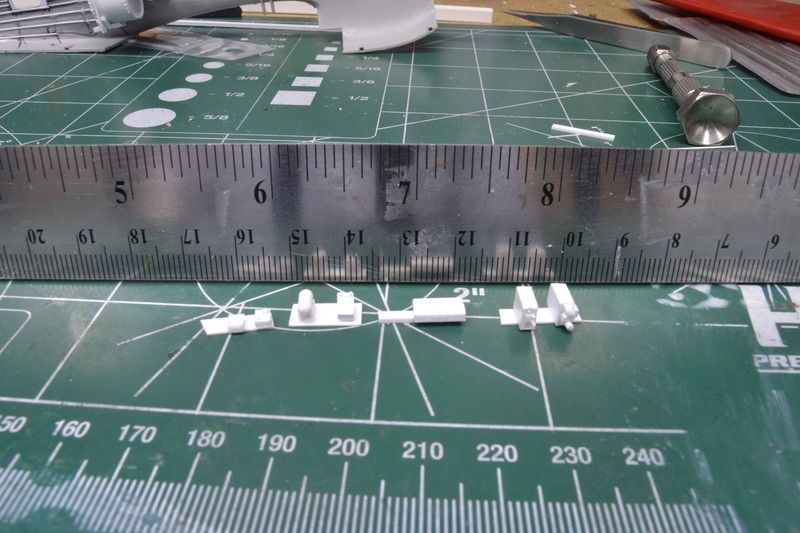
Spent some time getting some of the internal details constructed. Again they are not 100% but they will work for what I need.
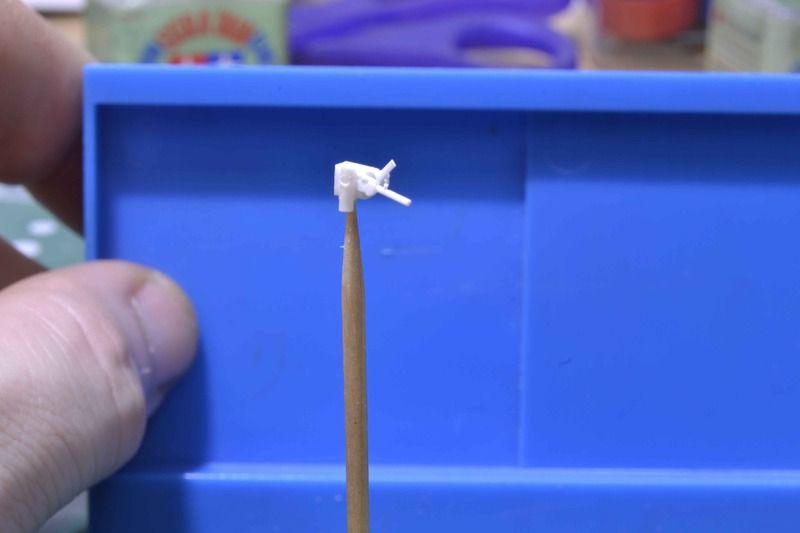
The hydraulic pump.
And the landing gear/flap unit
I have also begun to frame in the cockpit.
I will be doing some crossmembers for the stringers. These will only be there to make sure the detail has a place to anchor.
All comments, critiques, and criticism are encouraged.
Joe
Just a quick update.
Spent some time getting some of the internal details constructed. Again they are not 100% but they will work for what I need.
The hydraulic pump.
And the landing gear/flap unit
I have also begun to frame in the cockpit.
I will be doing some crossmembers for the stringers. These will only be there to make sure the detail has a place to anchor.
All comments, critiques, and criticism are encouraged.
Joe