JamesOLeary
Master at Arms
Wow! Incredible work!

Modelers Alliance has updated the forum software on our website. We have migrated all post, content and user accounts but we could not migrate the passwords.
This requires that you manually reset your password.
Please click here, http://modelersalliance.org/forums/login to go to logon page and use the "Forgot your Password" option.
Great to read a comment from you buddy. Its been a good while, since I read anything from you. Hope all is well with u and the family. Appreciate your kind comment, as usual. God bless.
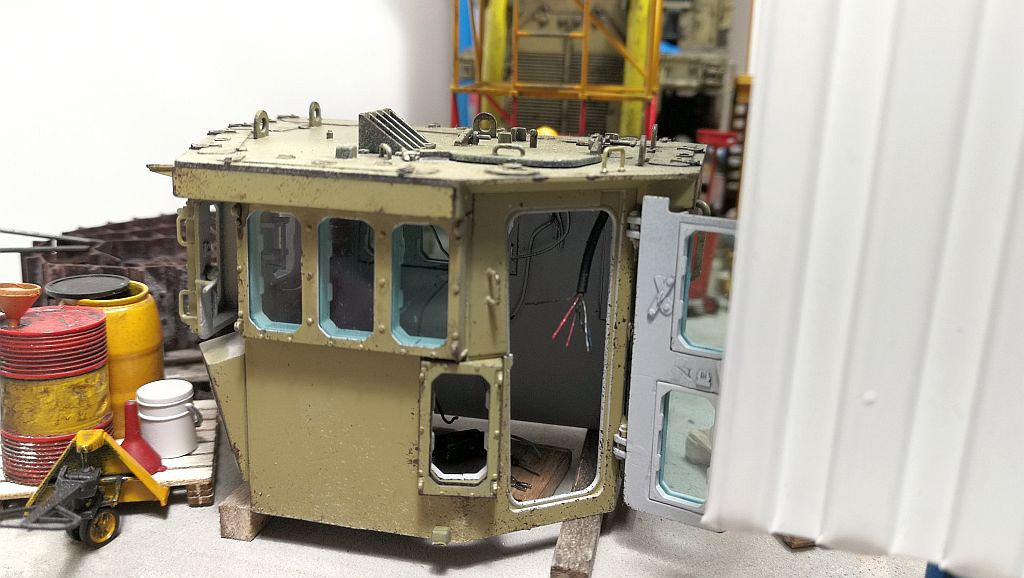
Well, just hang in there buddy. And appreciate your warm sentiments. Have a great day.Thanks Charles! We are experiencing a couple major bumps but still surviving. I'm still building, but not as prolifically as before. I find it amazing that with all the extra time from these stay-at-home directives; I actually have less time to model than before! Still, I'm getting a few things done, as you can see in my manufacturing thread.
God bless you too and keep these outstanding dioramas coming!
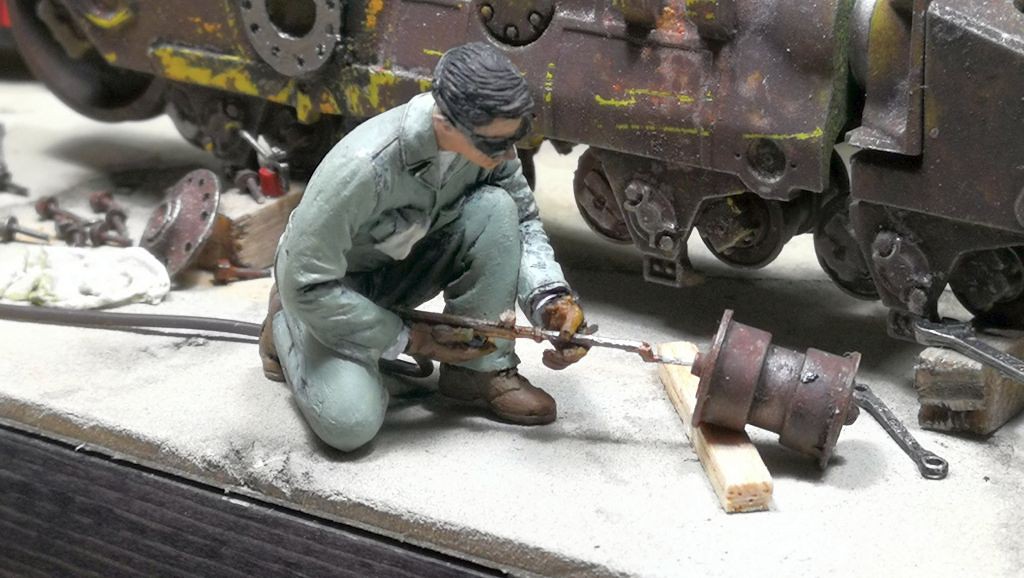
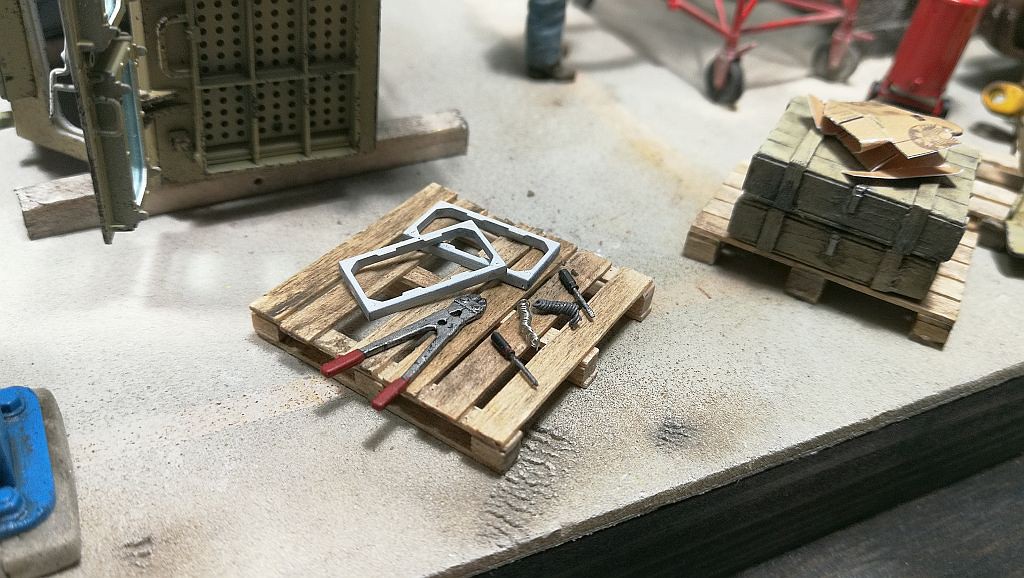
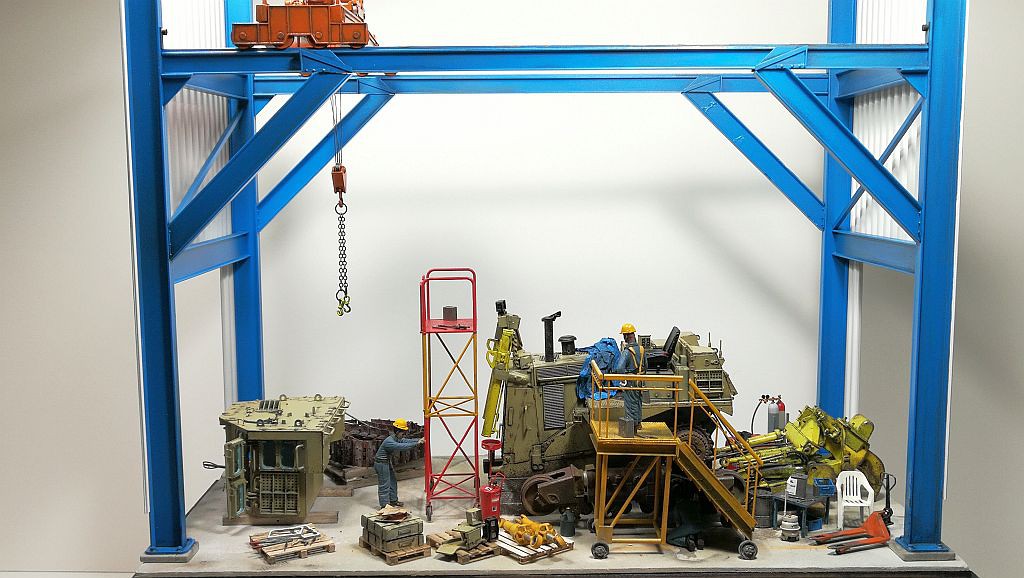
") I am still contemplating, if he should be welding where he is at the moment. I'm looking for other alternatives. so, he is not glued in placed until I've decided.
I am still contemplating, if he should be welding where he is at the moment. I'm looking for other alternatives. so, he is not glued in placed until I've decided.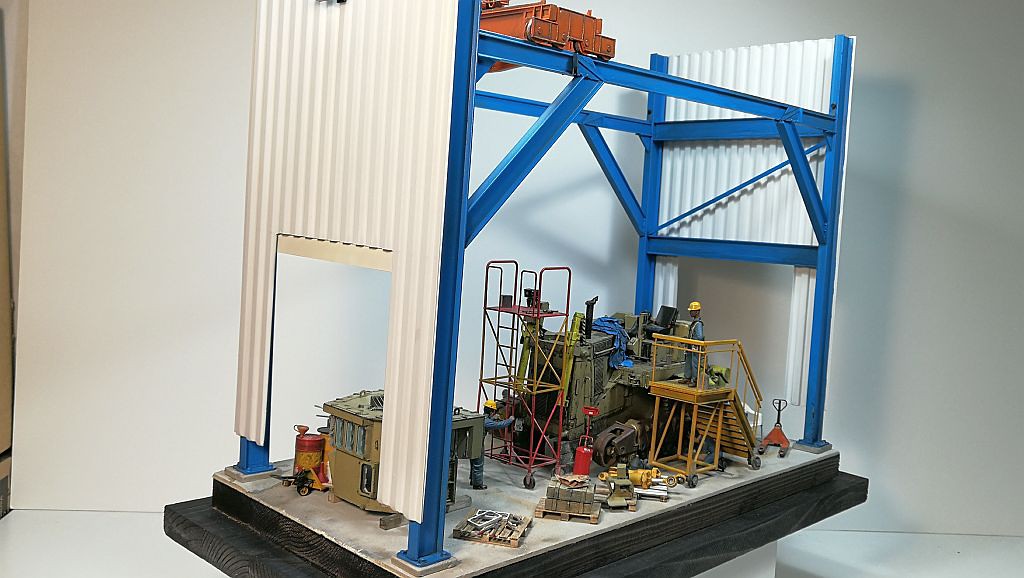
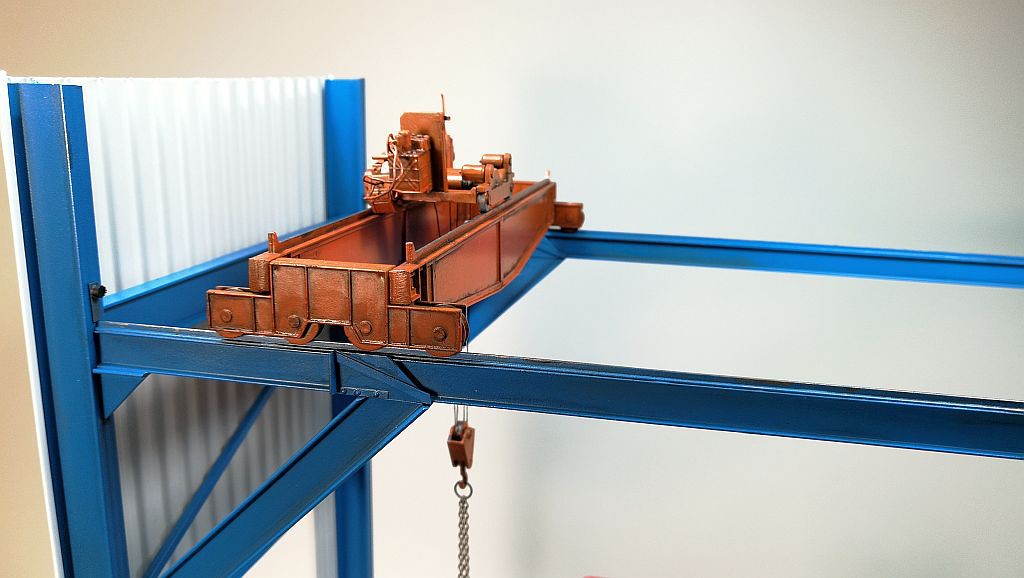
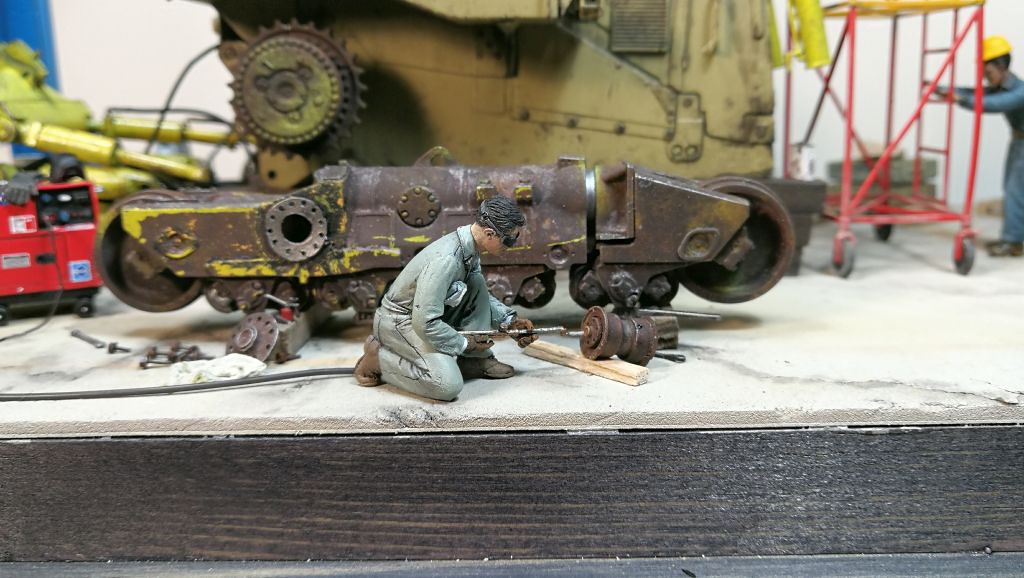
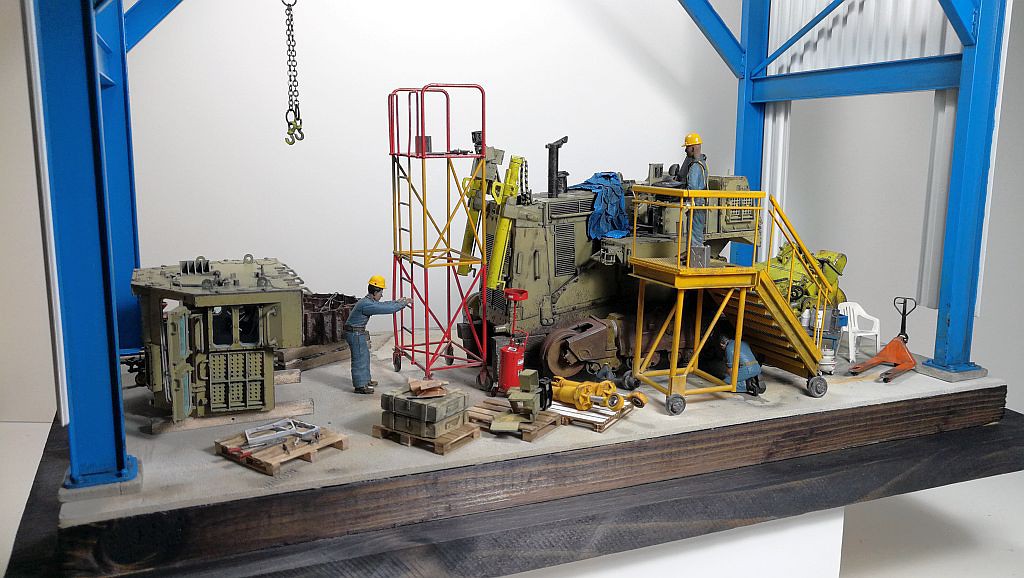
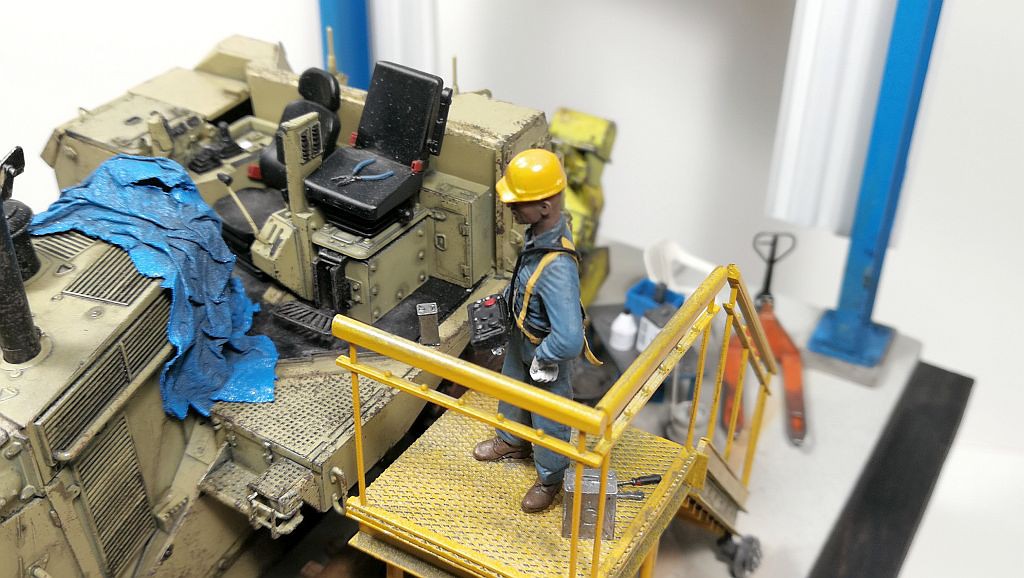
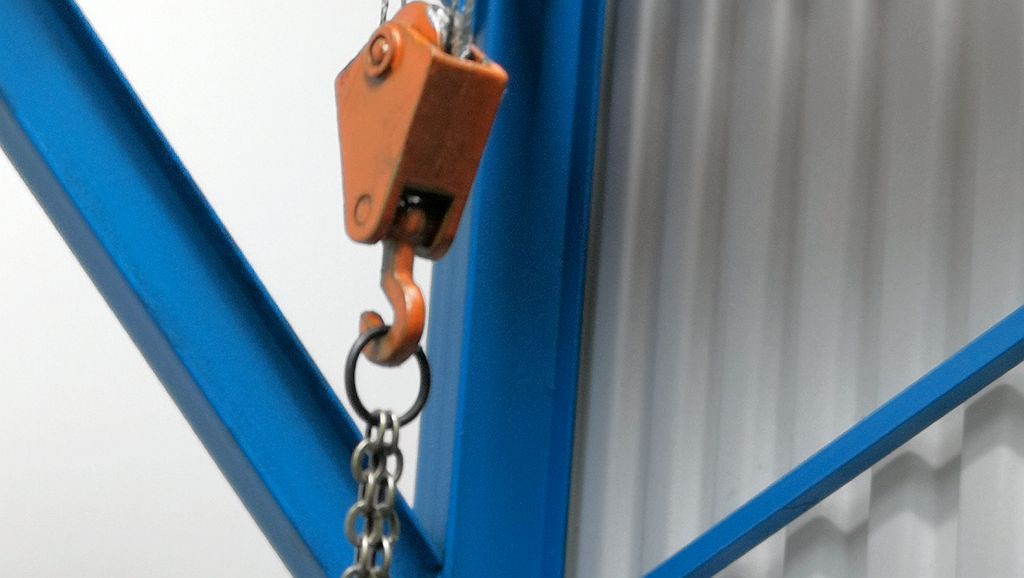
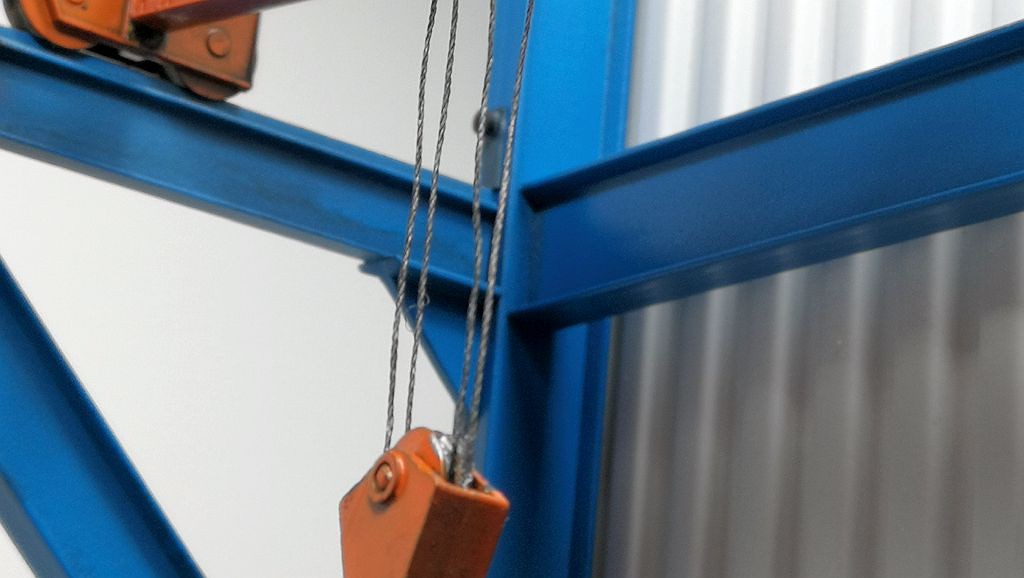
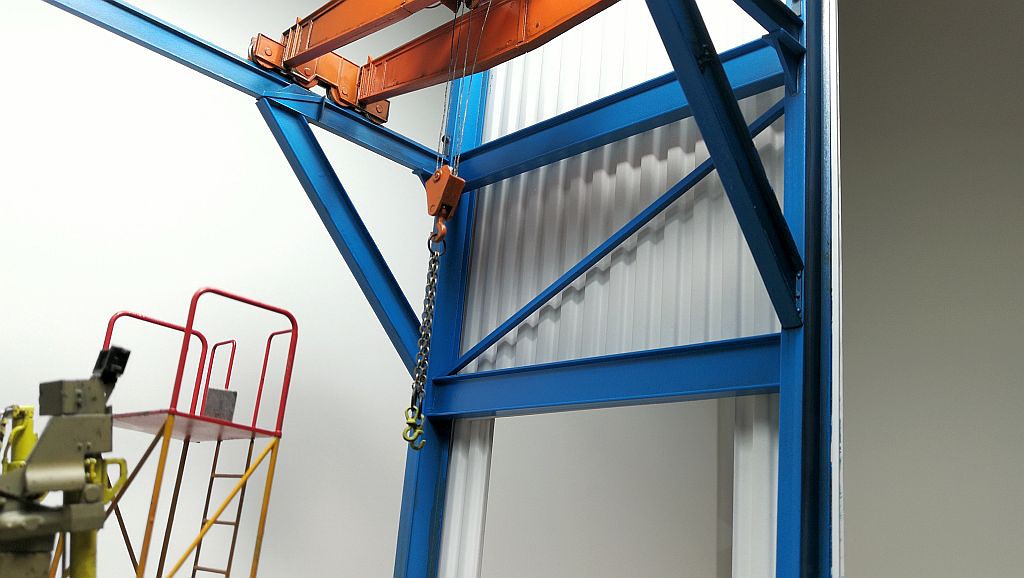
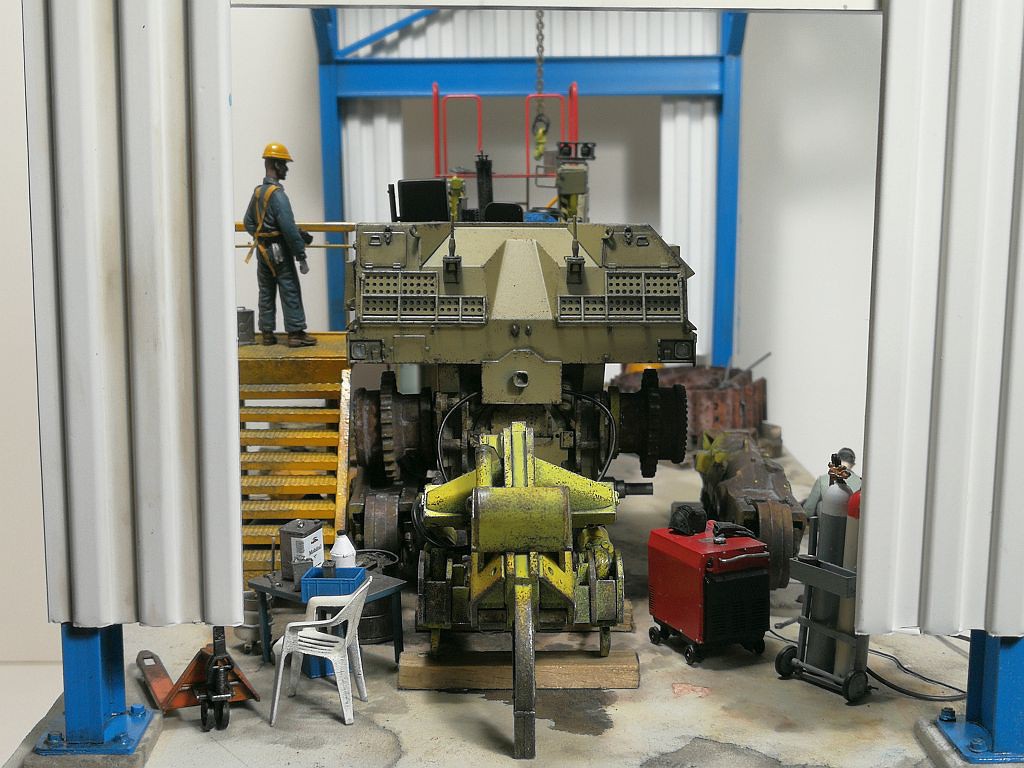
How about putting something on the hook and give it actual tension? Maybe have the cab still attached?It is to get the tension of the crane cables straighten out. It's a little better than before, but you can still see a little kink . Any suggestion let me know.
How about putting something on the hook and give it actual tension? Maybe have the cab still attached?
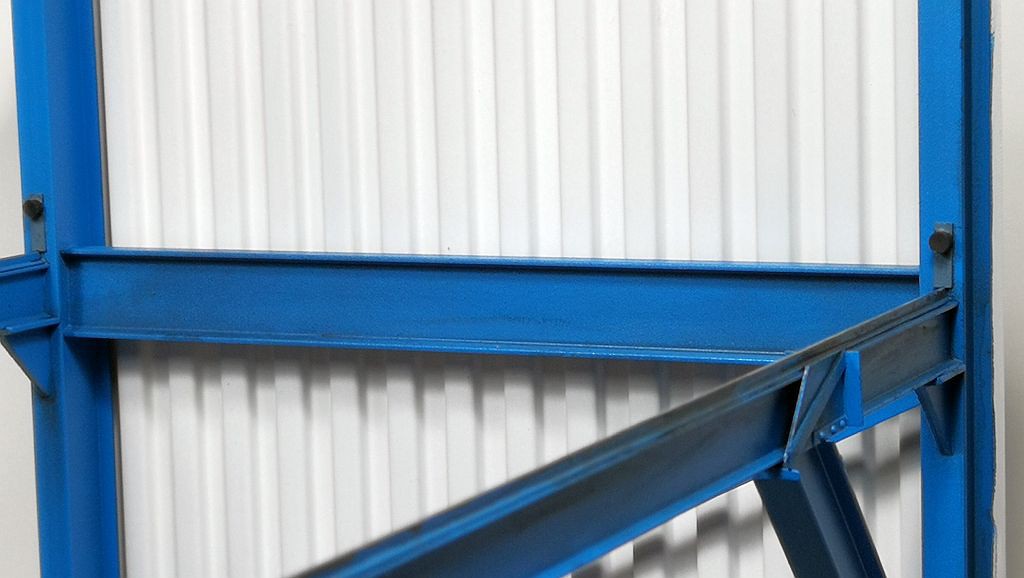
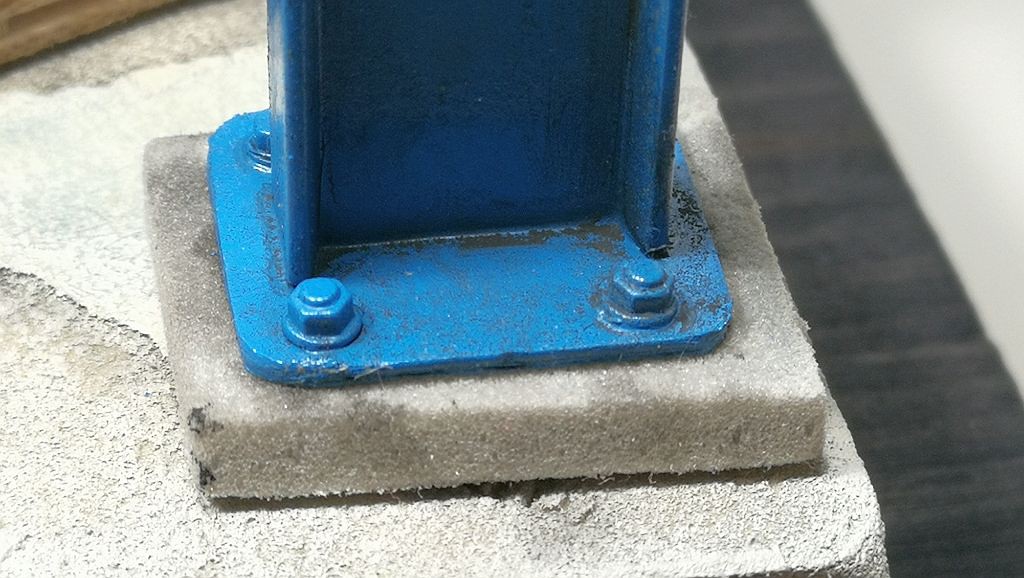
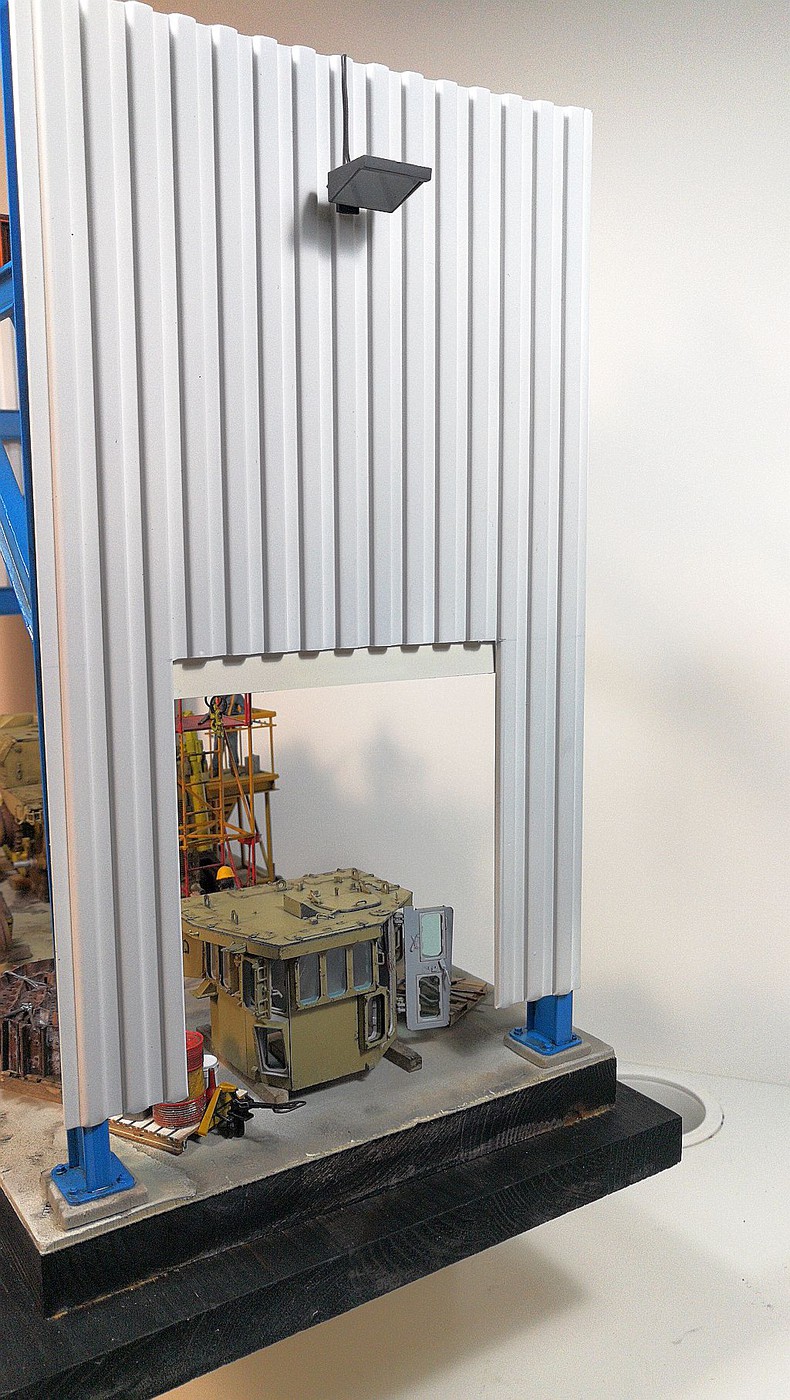
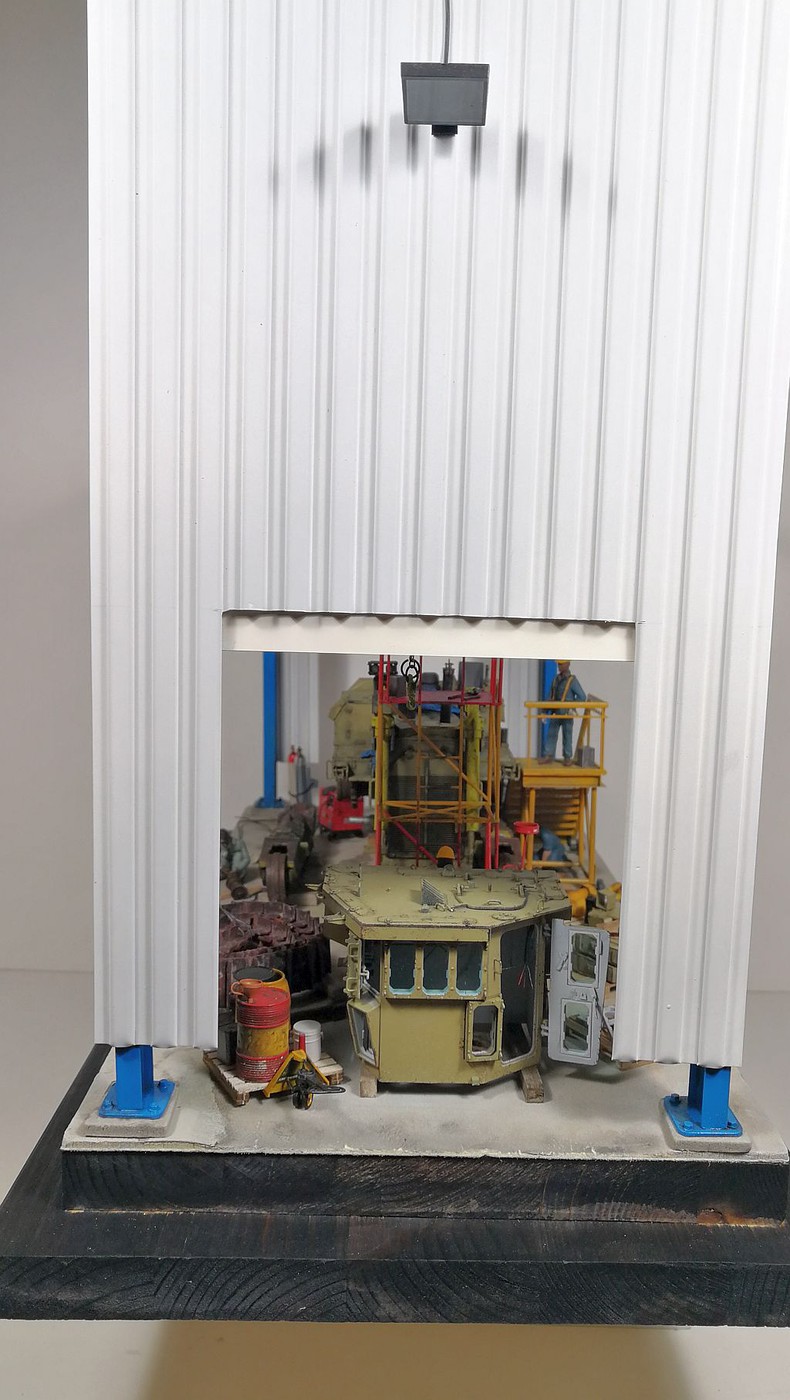
Amazing work Charles. Maybe some more grime around the bases of the beams, those things catches years of stuff built up.
Then maybe some other component, the bucket or one of the lift arms?
The weathering technics look amazing!
Luiz.
Some suggestions on the welding. I can't think of a good reason to use a cutting torch on an assembled roller. Rollers on newer Cats are pretty much sealed units with bearings inside, when you see one leaking it has to be disassembled and overhauled. Old cats weren't sealed and you hit the rollers with a track grease gun every day or so. However, in either case they would be disassembled with the shaft and bearings removed and the work would be done with an arc welder. The most frequent thing that might be done is building up the areas that contact the track rails.
I would pose the welder near the ripper and instead of a cutting head a welding tip or rosebud would be attached to the stock of the acetylene torch and he could be hardfacing the ripper shanks or teeth.

 evandesigns.com
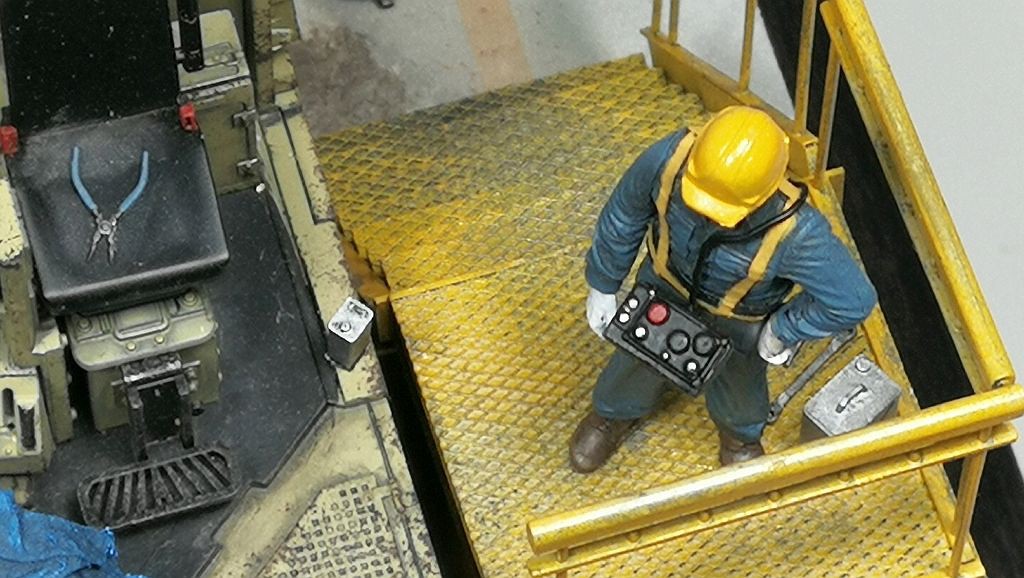
This is pretty outstanding work Charles- I love all the details you put into your pieces. Your figures outshine my attempts so kudos there my friend. The only thing I could add is if you're doing lighting for this one, this company does a pretty good welding LED set, and their stuff is great.
Welding LED Kit
Simulate real welding sparks and bring life to your model project with the welding simulator LED light kit from Evan Designs! Comes in a variety of sizes. Shop today