• Modelers Alliance has updated the forum software on our website. We have migrated all post, content and user accounts but we could not migrate the passwords.
    This requires that you manually reset your password.
    Please click here, http://modelersalliance.org/forums/login to go to logon page and use the "Forgot your Password" option.

D9R - Major Overhaul diorama -Stage 2

Great to read a comment from you buddy. Its been a good while, since I read anything from you. Hope all is well with u and the family. Appreciate your kind comment, as usual. God bless.

Thanks Charles! We are experiencing a couple major bumps but still surviving. I'm still building, but not as prolifically as before. I find it amazing that with all the extra time from these stay-at-home directives; I actually have less time to model than before! Still, I'm getting a few things done, as you can see in my manufacturing thread.

God bless you too and keep these outstanding dioramas coming!
Well, just hang in there buddy. And appreciate your warm sentiments. Have a great day.
 
Stage 3 update!!!!!


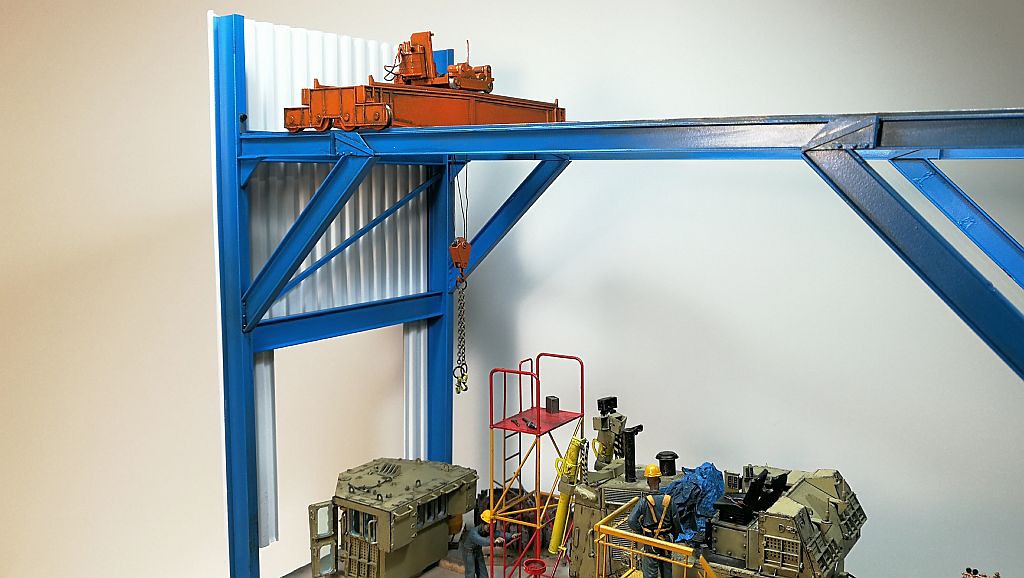
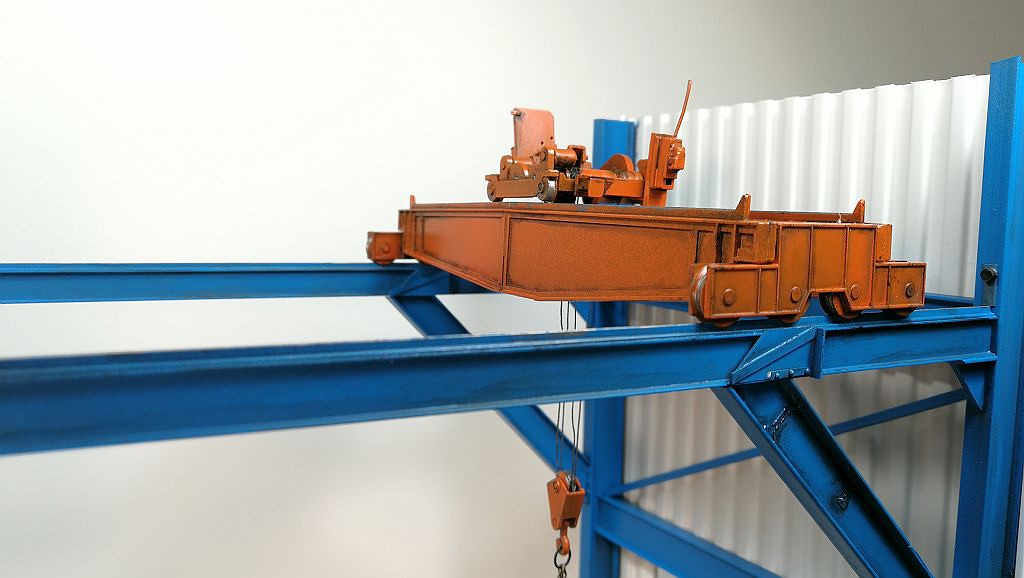
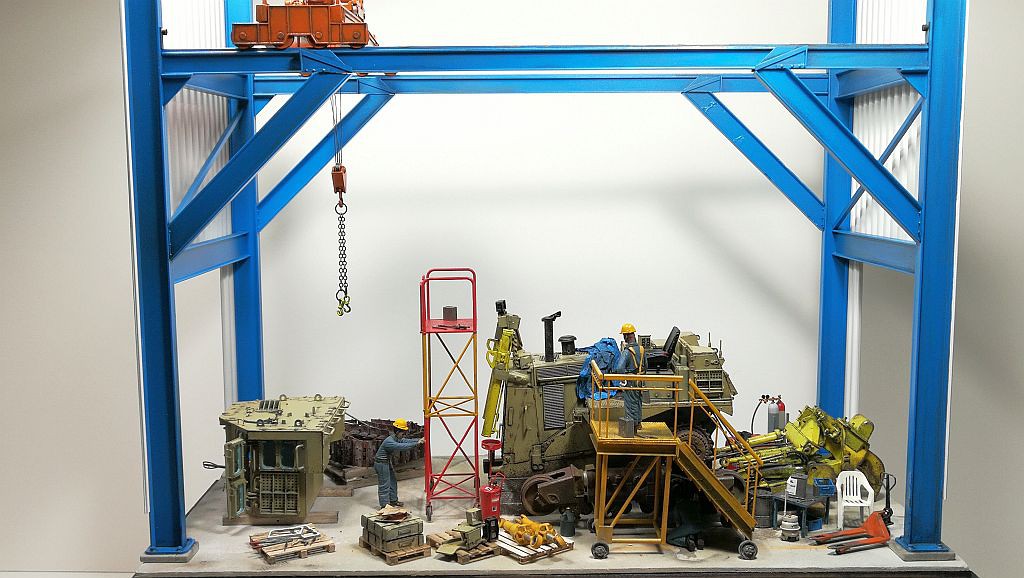
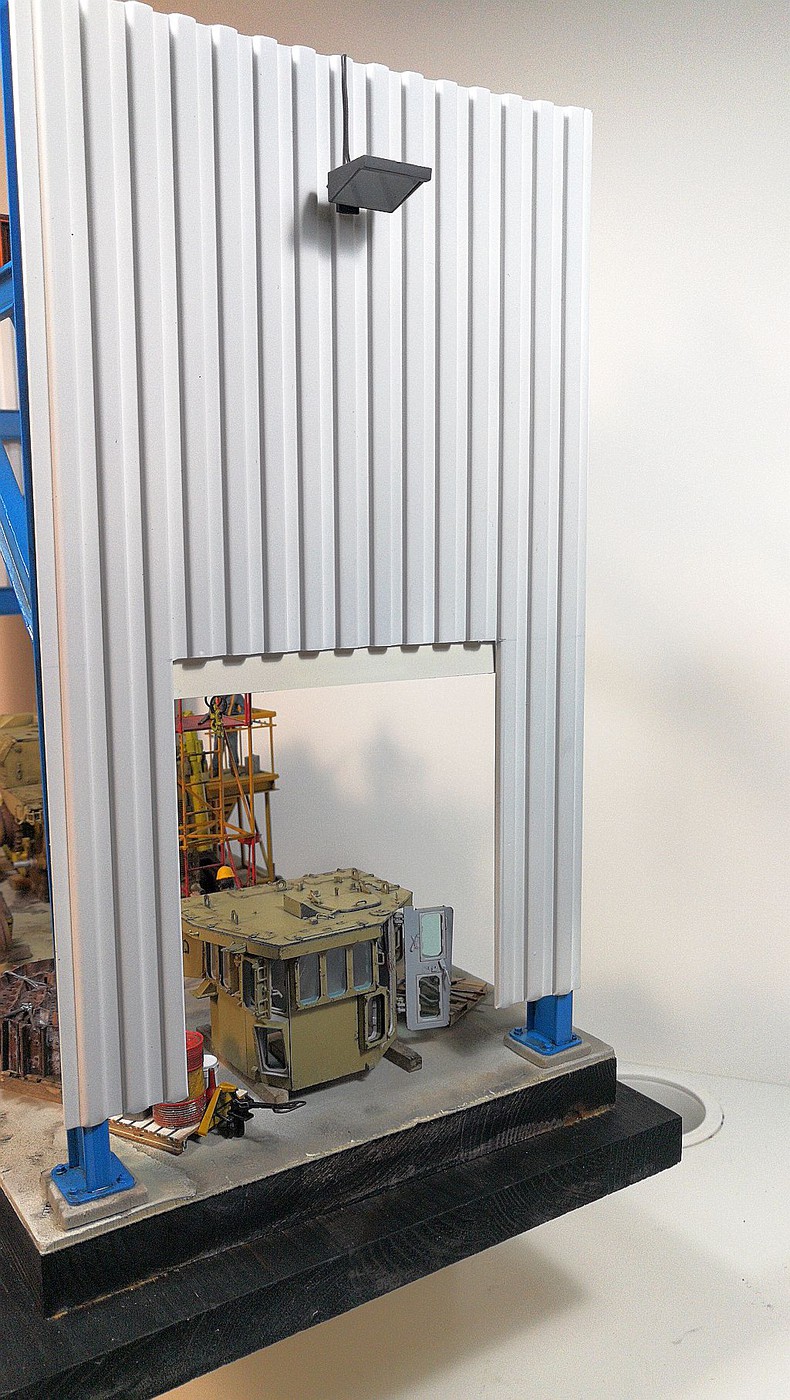
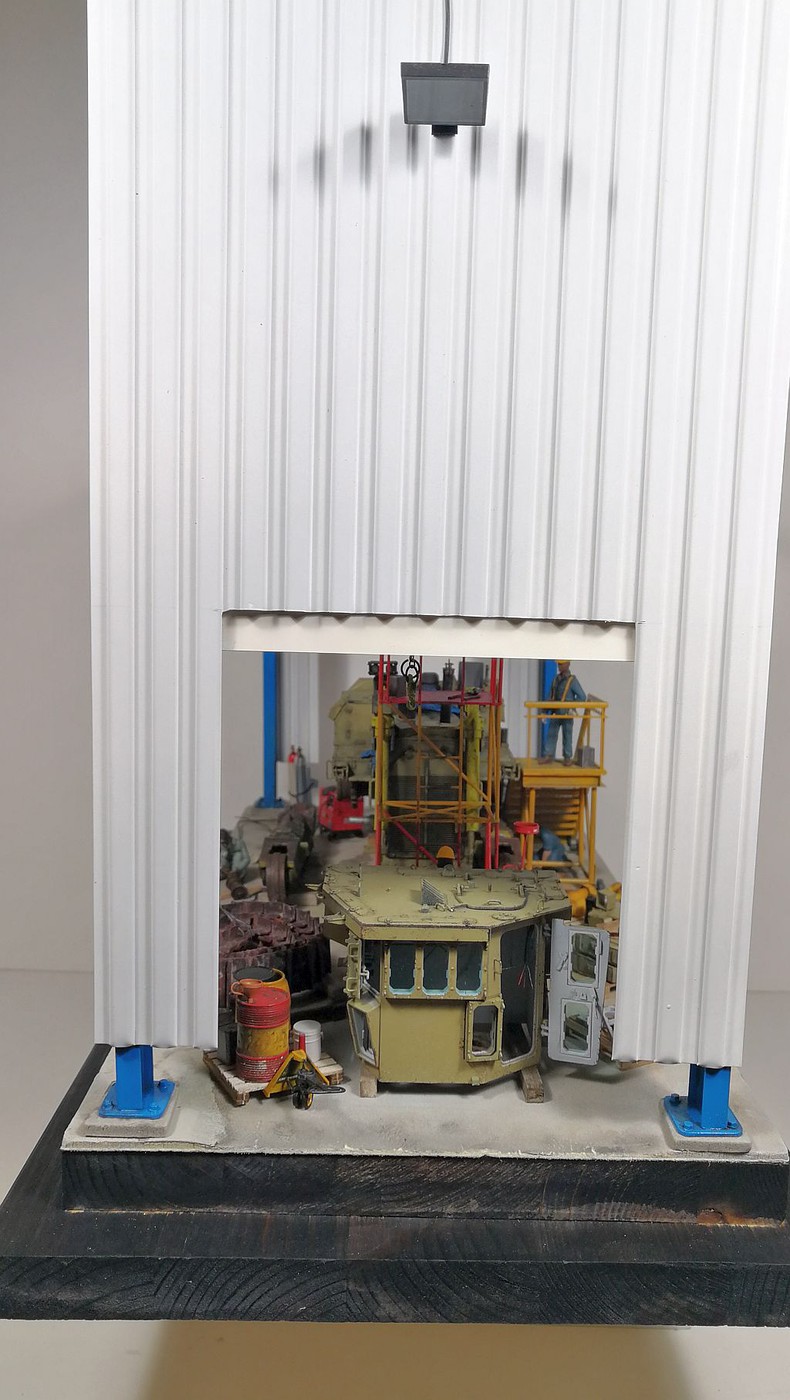
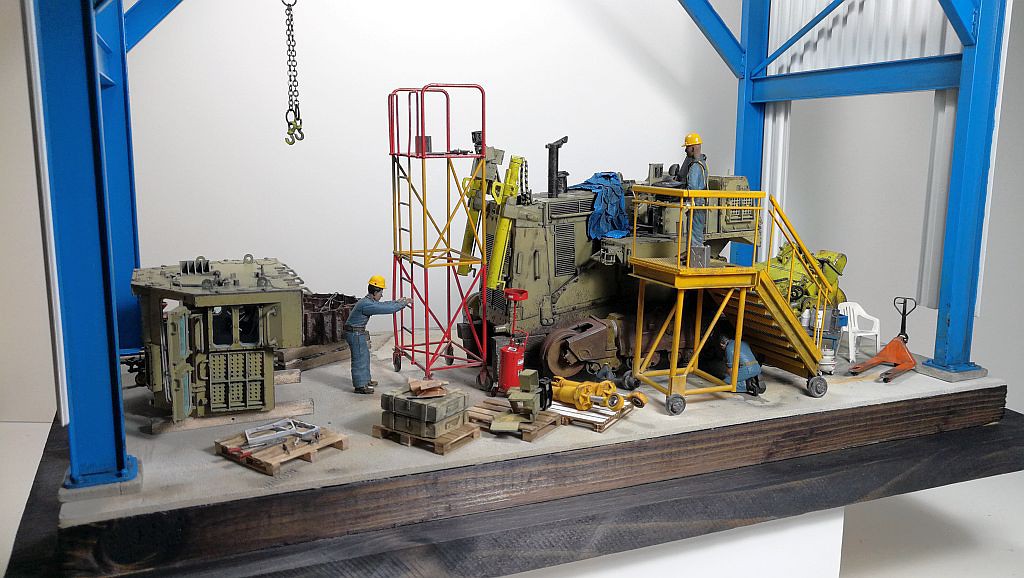
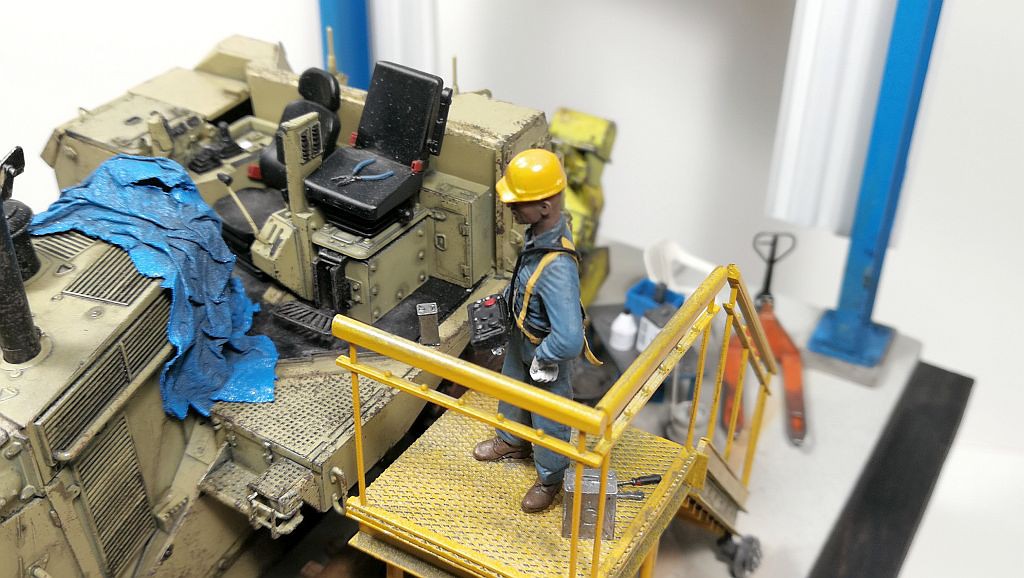
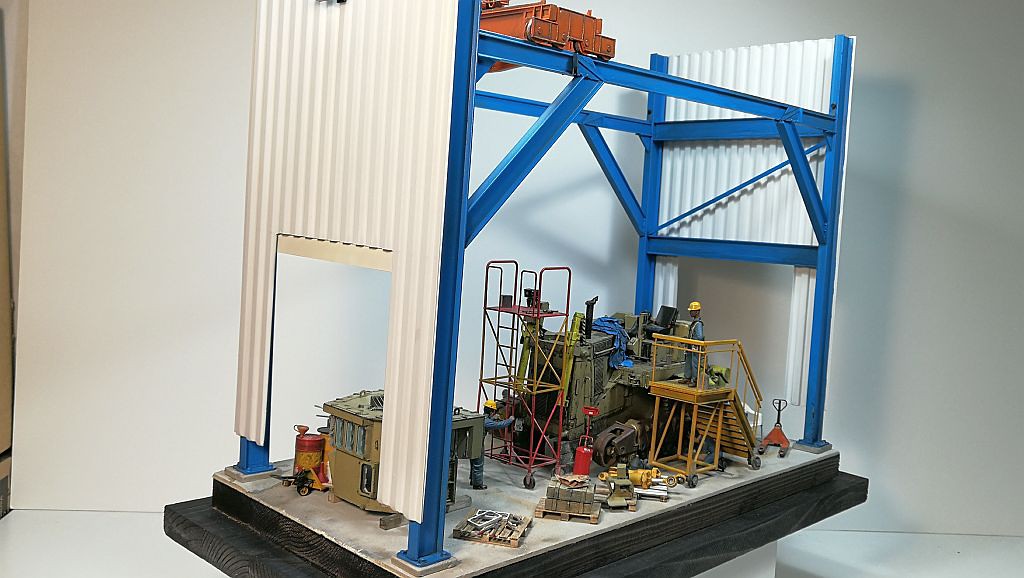
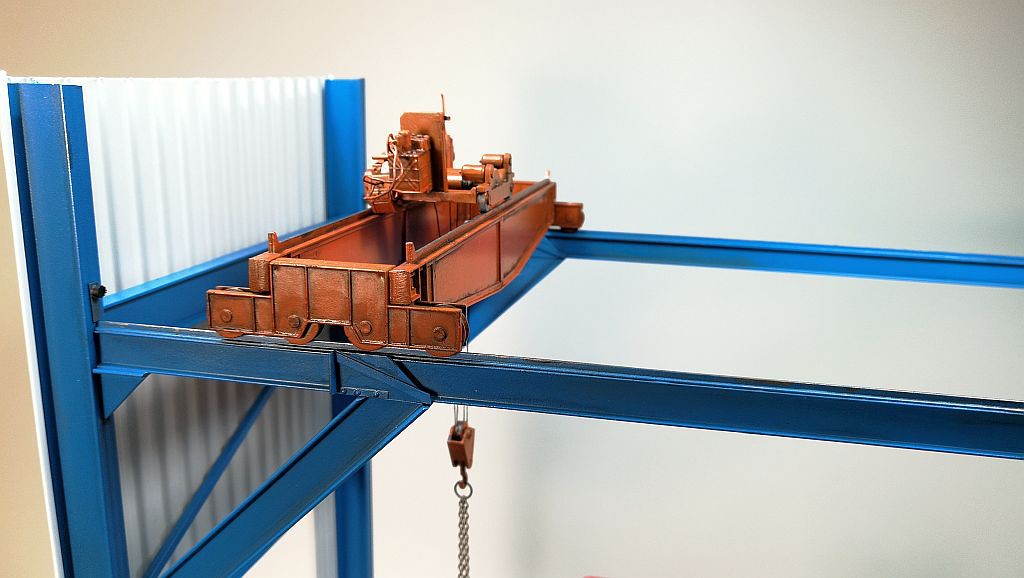
Ok guys. Here is stage 3. As you can see, since stage 2 was posted sometime ago, I've added a scratch built steel truss with an overhead crane. The overhead crane is a kit from Walthers. Yes, it is a HO scale railroad kit. But within the parameters of this scale, its usage was perfect. I had to cut and splice the kit to fit the space I needed. I also incorporated some scratch built parts to give it some UMP! :)

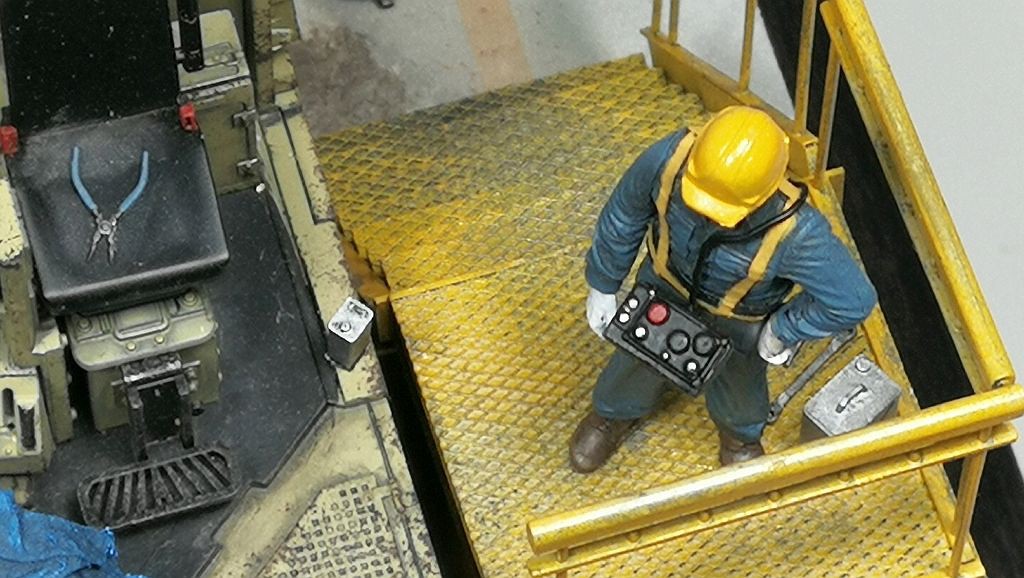
If you noticed, one of the mechanics has a remote control that operates the overhead crane. The crane itself was modified to simulate the new changes as it was manually operated by a operator who sat in a cab in the air. So, I justified this by the removal of that cabin and replacing the controls as a remote control device, in the hands of the operator. I have one issue, that I am still working out. It is to get the tension of the crane cables straighten out. It's a little better than before, but you can still see a little kink . Any suggestion let me know.

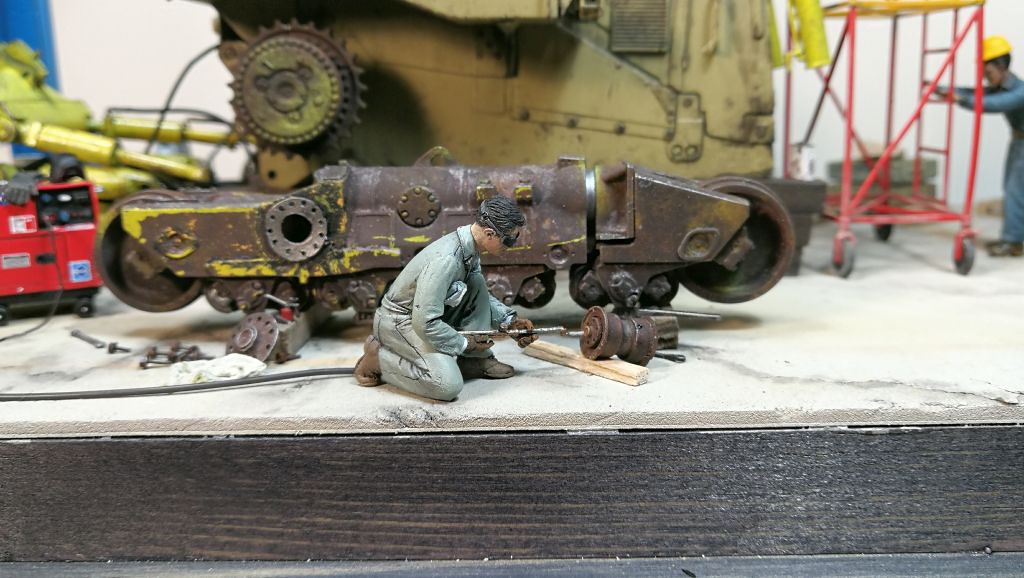
I also added a scratch built corrugated siding at both ends of the workshop entries. Added a scratch built flood light at both ends as well. I added a fourth figure, a welder. I am still working at improving my figure painting, so don't hit me over the head, too hard. I know I still need more work. But I can tell, I am improving. :) I am still contemplating, if he should be welding where he is at the moment. I'm looking for other alternatives. so, he is not glued in placed until I've decided.
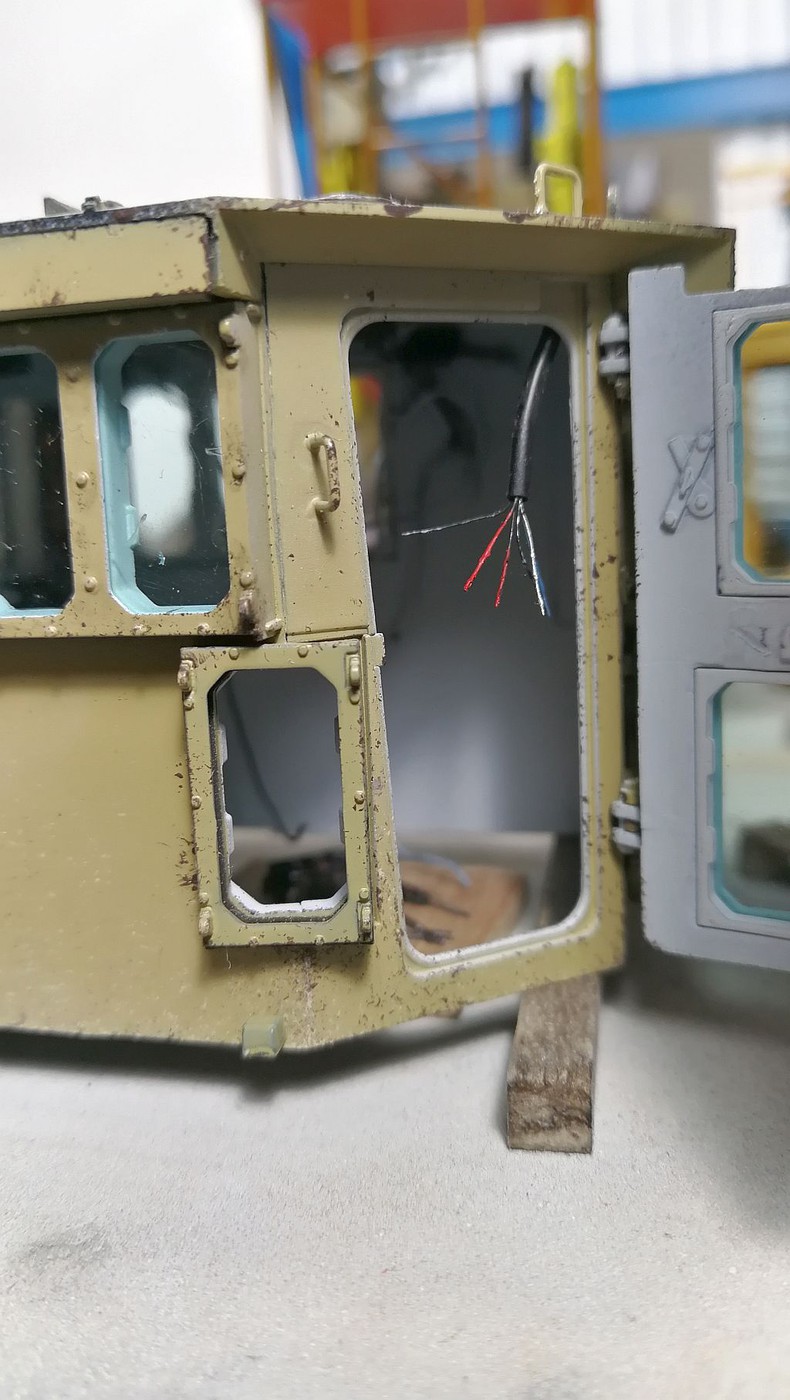
I've also added more detail in the armor cabin. You can see a wire hanging downwards, that looked it has been strip from whatever it was connected to, after being removed from the body. I thought it would add some interest to the effect of the diorama.

So far that's about it. Will try and take some better photos and post the final look, when I get everything finalized. Thanks for looking.


It is to get the tension of the crane cables straighten out. It's a little better than before, but you can still see a little kink . Any suggestion let me know.
How about putting something on the hook and give it actual tension? Maybe have the cab still attached?

Amazing work Charles. Maybe some more grime around the bases of the beams, those things catches years of stuff built up.
 
How about putting something on the hook and give it actual tension? Maybe have the cab still attached?

Amazing work Charles. Maybe some more grime around the bases of the beams, those things catches years of stuff built up.

Appreciate your suggestion. I had thought about having the cab as you suggested but I really wanted to have the door open, to be able to see the detail inside. I have not completed the weathering. But thank you for your suggestion. :)
 
George Takai 'Oh Myyy'.jpg
 
Some suggestions on the welding. I can't think of a good reason to use a cutting torch on an assembled roller. Rollers on newer Cats are pretty much sealed units with bearings inside, when you see one leaking it has to be disassembled and overhauled. Old cats weren't sealed and you hit the rollers with a track grease gun every day or so. However, in either case they would be disassembled with the shaft and bearings removed and the work would be done with an arc welder. The most frequent thing that might be done is building up the areas that contact the track rails.

I would pose the welder near the ripper and instead of a cutting head a welding tip or rosebud would be attached to the stock of the acetylene torch and he could be hardfacing the ripper shanks or teeth.
 
The weathering technics look amazing!

Luiz.

Thank you Luiz.

Some suggestions on the welding. I can't think of a good reason to use a cutting torch on an assembled roller. Rollers on newer Cats are pretty much sealed units with bearings inside, when you see one leaking it has to be disassembled and overhauled. Old cats weren't sealed and you hit the rollers with a track grease gun every day or so. However, in either case they would be disassembled with the shaft and bearings removed and the work would be done with an arc welder. The most frequent thing that might be done is building up the areas that contact the track rails.

I would pose the welder near the ripper and instead of a cutting head a welding tip or rosebud would be attached to the stock of the acetylene torch and he could be hardfacing the ripper shanks or teeth.

Very good and solid advice Jeaton01. Although, I did not understand every technical word you used, but I think with a photo of the part you are referring to that I should let the welder weld, would be helpful. I do know the ripper device, but exactly what part of the ripper are you referring to? I apologies for my ignorance in this matter.
 
This is pretty outstanding work Charles- I love all the details you put into your pieces. Your figures outshine my attempts so kudos there my friend. The only thing I could add is if you're doing lighting for this one, this company does a pretty good welding LED set, and their stuff is great.

 
This is pretty outstanding work Charles- I love all the details you put into your pieces. Your figures outshine my attempts so kudos there my friend. The only thing I could add is if you're doing lighting for this one, this company does a pretty good welding LED set, and their stuff is great.


Appreciate your help in suggesting a lightening kit. I hd contemplating something like that. Great kit. I may just give it a try.
 
That is one of the most wonderful things about MA, when folks make comments about errors, they are always in ways to help improve. Information and experience are always shared freely and the aim of people here is to help each other.
 
Thought I had commented on this already Charles but must have been too dumbstruck in awe to actually post something!!

Amazing work!

:tens:
 
Back
Top