
-
Modelers Alliance has updated the forum software on our website. We have migrated all post, content and user accounts but we could not migrate the passwords.
This requires that you manually reset your password.
Please click here, http://modelersalliance.org/forums/login to go to logon page and use the "Forgot your Password" option.
You are using an out of date browser. It may not display this or other websites correctly.
You should upgrade or use an alternative browser.
You should upgrade or use an alternative browser.
More JUNKING around .
- Thread starter phantom II
- Start date
phantom II
Master at Arms
What if you laid tape on each side and then put a bead of 5 minute epoxy. Wipe with a bud and clamp then remove the tape? Or maybe clamp and hang then pour in some resin or would that be too hot?
James
I honestly don't know James as I have never tried either of those . The 5 minute sounds interesting though. Thanks for the ideas

One of the aggravating factors is that the thicknesses of the two parts did not match up in a great way .
Actually cleaned it up before you posted and used several coats of Tamiya before reassembly . Hoping that will make for a better bond . Hope to find out tomorrow :coolio
Cheers, C B)
jknaus
Administrator
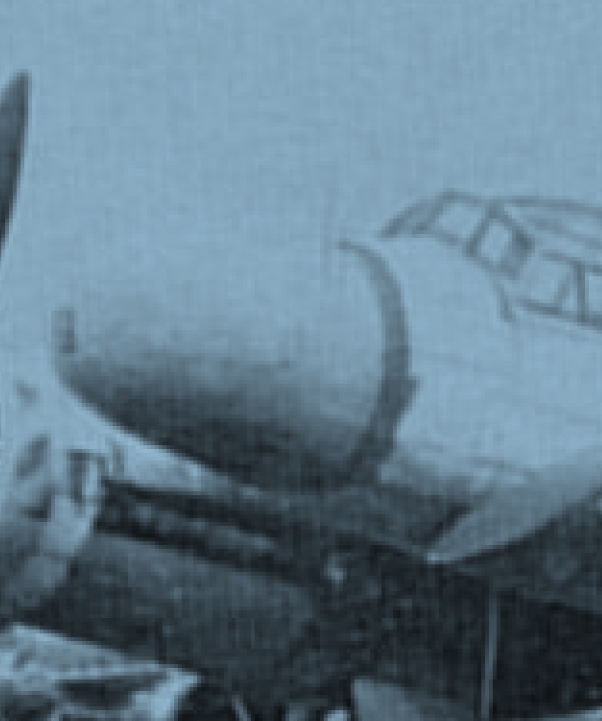
Chris as per my message here is the blown up nose. I really think that is gun tape. The width makes me think of the tape used on the gun ports. I saw no example of this on the operational birds I could find.
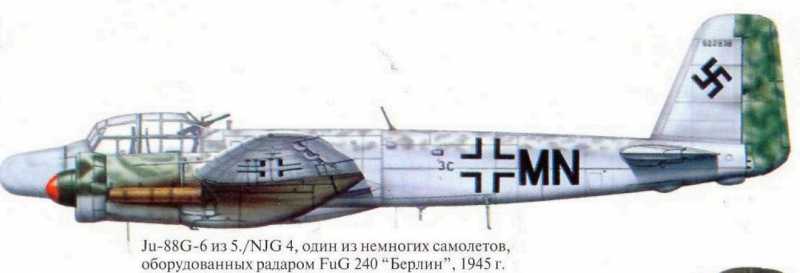
Next is the scheme that I thought looked interesting. I know you like unique schemes and this may qualify.
James
Next is the scheme that I thought looked interesting. I know you like unique schemes and this may qualify.
James
Heavens Eagle
Well-known member
I use mostly WeldOn3 which is for gluing clear acrylic together without crazing the acrylic. It has similar components to what Tenax7R and Ambroid ProWeld have. It might dry marginally slower, but not that you would really notice. It works on Styrene, Acrylic, and ABS which is a real plus. The other thing is I buy a 1 pint can at a local acrylic plastics dealer for $12. My last can cost $10 and lasted about 10 years. Made a small hole in the metal seal top and used a long needle glass syringe to pull it out and put it in an old Ambroid bottle. Then kept it "tightly" capped.
What I would try would be to take a fine file and make a smooth flat mating surface on those two parts. Then use a larger brush and flow a nice amount of solvent between the parts. Wait 8 to 10 seconds and squeeze the joint. A small bead of plastic should squeeze out. Make sure it is aligned and let it dry. The joint is supposed to be as strong or stronger than the surrounding plastic. I have almost never had any trouble with my glue joins cracking or breaking open using WeldOn and flowing it into the joint. I have managed to break joints loose, but it is not easy and usually only part of the joint breaks. Usually there are parts around it that will break loose first.
Also a slightly loose joint when flowing the solvent works better rather than a tight joint. It allows the solvent to completely flow in and start to work. Doesn't take much, just a thin line, but you want it to be fully filled before squeezing.
Hope that helps.
phantom II
Master at Arms
Chris as per my message here is the blown up nose. I really think that is gun tape. The width makes me think of the tape used on the gun ports. I saw no example of this on the operational birds I could find.
Next is the scheme that I thought looked interesting. I know you like unique schemes and this may qualify.
James
Thanks James
") Does that mean you have more than the three pictures that I have found ?
Does that mean you have more than the three pictures that I have found ?I believe you've nailed this one.
Cheers, C. B)
jknaus
Administrator
I found a few in books but this seems to be a rare bird. I think I read 15 were made? Dont know if these will help.
https://www.sas1946.com/main/index.php?topic=25302.0
https://ww2aircraft.net/forum/threads/junkers-ju-88-g-6-berlin-radar.48115/
http://histomil.com/viewtopic.php?t=222
http://hugojunkers.bplaced.net/junkers-ju88-serials.html
James
https://www.sas1946.com/main/index.php?topic=25302.0
https://ww2aircraft.net/forum/threads/junkers-ju-88-g-6-berlin-radar.48115/
http://histomil.com/viewtopic.php?t=222
http://hugojunkers.bplaced.net/junkers-ju88-serials.html
James
phantom II
Master at Arms
Thanks for the suggestions Paul but I do not seem to have ready access to the things you mentioned :idonno
I remember looking for Plexiglas cement a couple years ago and it was not to be had locally and not worth ordering for the small amount needed at the time .
In the end, I solved the problem with what was at hand .
Cheers, Christian B)
I remember looking for Plexiglas cement a couple years ago and it was not to be had locally and not worth ordering for the small amount needed at the time .
In the end, I solved the problem with what was at hand .
Cheers, Christian B)
phantom II
Master at Arms
What if you laid tape on each side and then put a bead of 5 minute epoxy. Wipe with a bud and clamp then remove the tape? Or maybe clamp and hang then pour in some resin or would that be too hot?
James
Thanks James . Cleaned them up good , gave everything three coats of extra thin before assembling and giving them a last coat . Melted a generous amount of plastic .
They will remain fragile though as there just not a whole lot of plastic in those joints . :S
Cheers, C. B)
phantom II
Master at Arms
I found a few in books but this seems to be a rare bird. I think I read 15 were made? Dont know if these will help.
https://www.sas1946.com/main/index.php?topic=25302.0
https://ww2aircraft.net/forum/threads/junkers-ju-88-g-6-berlin-radar.48115/
http://histomil.com/viewtopic.php?t=222
http://hugojunkers.bplaced.net/junkers-ju88-serials.html
James
That seems to sum it up James. They were coming of the assembly line but only a few made to squadrons .
Like the ME 262's they probably did not have any personnel trained to operate or maintain them .
Cheers, C. B)
phantom II
Master at Arms
After a good bit of extra thin and several coats of Mr.Surfacer , the wings past muster .

While waiting , I installed the Pheil antenna and it's cover . Sanded smooth than polished ...

I should be looking at the wing fit and working on the cockpit soon .
Cheers, Christian B)
While waiting , I installed the Pheil antenna and it's cover . Sanded smooth than polished ...
I should be looking at the wing fit and working on the cockpit soon .
Cheers, Christian B)
You'd never know there was a problem!
Good fix Christian!
Bob
Good fix Christian!
Bob

Brokeneagle
Master at Arms
perfect fix!
Nice job Chris! 
135engineer
Active member
:coolio
Heavens Eagle
Well-known member
Excellent work there Christian.

phantom II
Master at Arms
You'd never know there was a problem!
Good fix Christian!
Bob
Oh, I'll know it
. Thanks Mr. Bob. Cheers, C. B)
phantom II
Master at Arms
Thanks Paul and Chris
Cheers, C. B)
Cheers, C. B)