
-
Modelers Alliance has updated the forum software on our website. We have migrated all post, content and user accounts but we could not migrate the passwords.
This requires that you manually reset your password.
Please click here, http://modelersalliance.org/forums/login to go to logon page and use the "Forgot your Password" option.
You are using an out of date browser. It may not display this or other websites correctly.
You should upgrade or use an alternative browser.
You should upgrade or use an alternative browser.
More JUNKING around .
- Thread starter phantom II
- Start date

Duke Maddog
Well-known member
Most impressive work on a unique aircraft. Way to go!
JamesOLeary
Master at Arms

Watching this one take shape...
Cheers,
James
phantom II
Master at Arms
Sweet! Glad you got some bench time in.
Hi Bob. I've made it up this week with Zero bench time . Just too much explaining for here but with Rhino in town and IronMike wanting t go to the races.....I'm gonna stay busy for a while longer :frantic .
Cheers, C. B)
phantom II
Master at Arms
Looking good Chris. The nose is certainly distinctive")
James
Sure is James . Wish there was more photographic evidence . Gonna have to wing it

Cheers, C B)
phantom II
Master at Arms

phantom II
Master at Arms
Some excellent surgery there Dr. Lacroix!
Thanks Jeeves for your confidence but I'm no Alex . It's life still hangs in the balance.
Cheers, C B)
phantom II
Master at Arms
Please stand buy , still figuring on that nose :fencing
Cheers, C. B)
phantom II
Master at Arms
Thanks Dave , James , Duke , Mr. Bob and Luiz . for looking in on me .
Still considering how to go .
One of the problem with these kits that are designed so that the manufacturer can issue multiple applications is that there is so many parts to tape together and try to get an impression of your own modifications
Cheers, C. B)
Still considering how to go .
One of the problem with these kits that are designed so that the manufacturer can issue multiple applications is that there is so many parts to tape together and try to get an impression of your own modifications
Cheers, C. B)
phantom II
Master at Arms
There are two noses available from Quickboost .
The one I chose appeared to be somewhat too big in diameter . Really hard to judge as the are not symmetrical and there are so many fiddly parts to try and line up.
I finally came up with an idea to better judge fit of the nose .
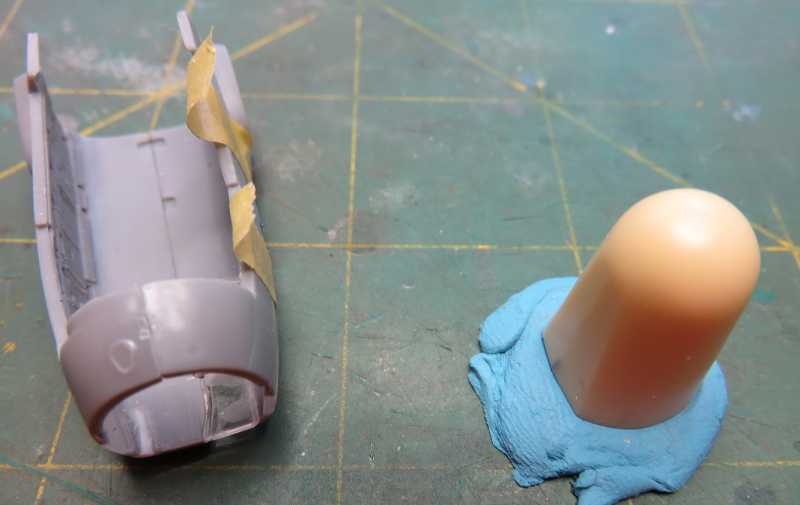
First, I made an imprint of the fuselage and then placed the nose in the imprint and it appears good . Don't want to have a dust problem with the cockpit once I get to the assembly stage .
The second check reveals that the nose cone droops when mounted as is .
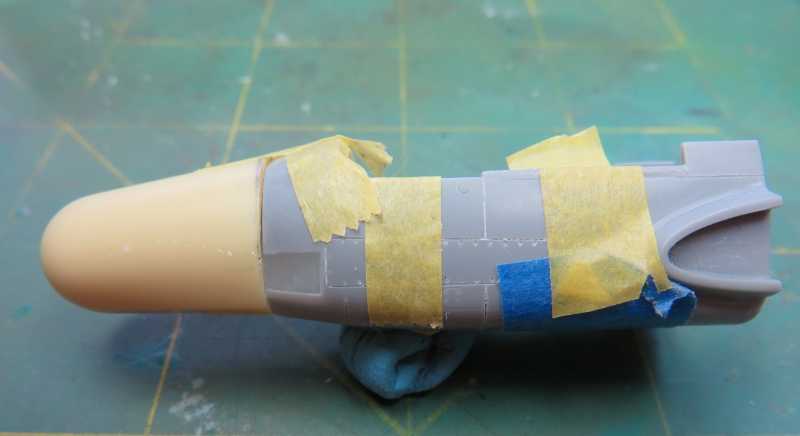
Somehow, that seems improbable in real life , so I'll just wing it from here.
Inserting a .020 shim on the bottom made it appear more believable . Now to decide whether to add to the bottom or remove it from the top edge... .
I'm going to do the interior before going any further .
Cheers, Christian B)
The one I chose appeared to be somewhat too big in diameter . Really hard to judge as the are not symmetrical and there are so many fiddly parts to try and line up.
I finally came up with an idea to better judge fit of the nose .
First, I made an imprint of the fuselage and then placed the nose in the imprint and it appears good . Don't want to have a dust problem with the cockpit once I get to the assembly stage .
The second check reveals that the nose cone droops when mounted as is .
Somehow, that seems improbable in real life , so I'll just wing it from here.
Inserting a .020 shim on the bottom made it appear more believable . Now to decide whether to add to the bottom or remove it from the top edge...
.I'm going to do the interior before going any further .
Cheers, Christian B)
Wow!
That .020 shim made a big difference!
Amazing how such a little change can make such a difference!
Bob
That .020 shim made a big difference!
Amazing how such a little change can make such a difference!
Bob
phantom II
Master at Arms
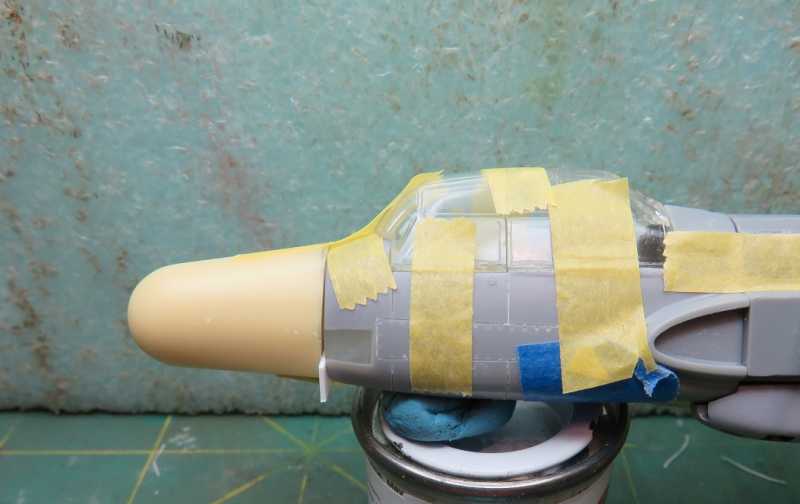
I agree Mike .
The canopy is likely to be installed to keep the various parts line up and be in danger of damage .
Cheers, Christian B)
The canopy is likely to be installed to keep the various parts line up and be in danger of damage .
Cheers, Christian B)
Brokeneagle
Master at Arms
B) nice work!
Ian.
Ian.
phantom II
Master at Arms
Thanks Luiz and Ian . Your interest is appreciated 
Modeling still seems to be hit and miss . Posting pictures even more so .
I have made progress even though I have not done what I said I would.

I primed the cockpit area was primed with Mr surfacer
and that's where I went off the rails Airbrush in hand , I primed the tail wheel well, followed by RLM 02
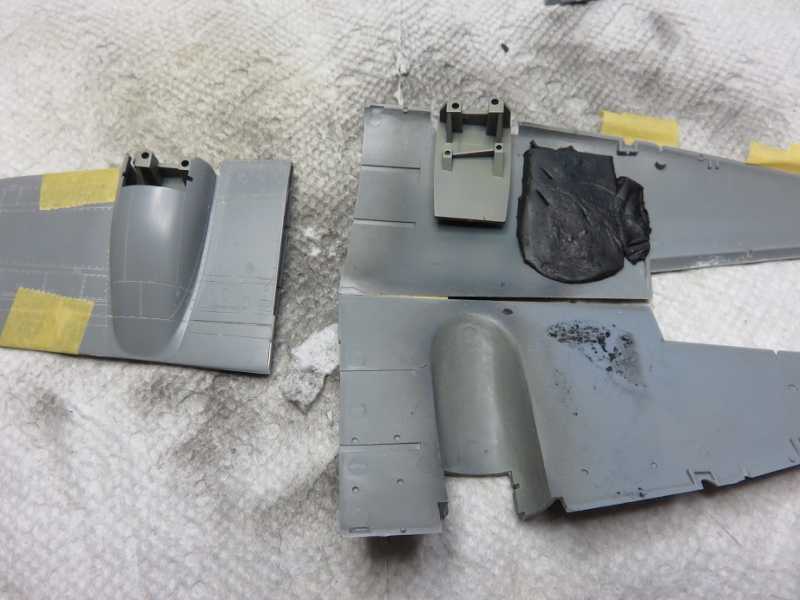
Same with the main wells. While there I inserted some Apoxie to keep the hollow places from flexing while I build. That always results in broken seems on the leading edges.
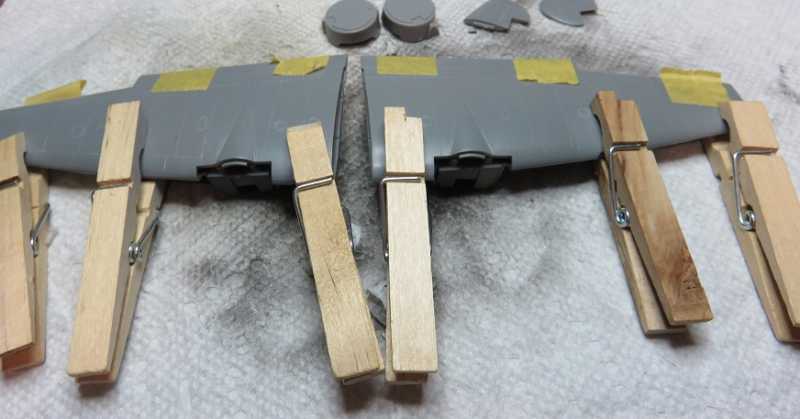
Super glued the leading edge and used Tamiya on the trailing edge.

Same story on fuselage , except it's super glue all around .
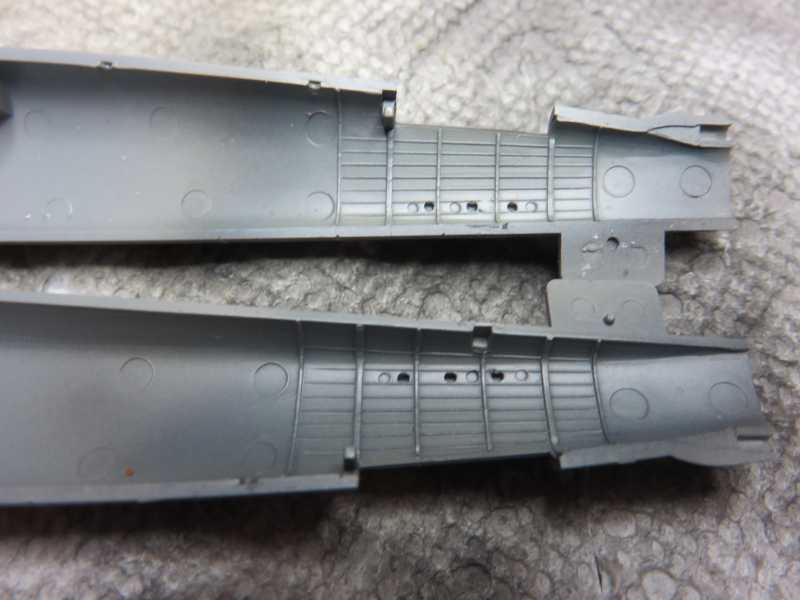
Next, everything was sanded and scribed
Next, the engine housings were scribed and assembled

I was not crazy about the kit carburetor intake or the exhaust , so it's now Quickboost ( on the right )
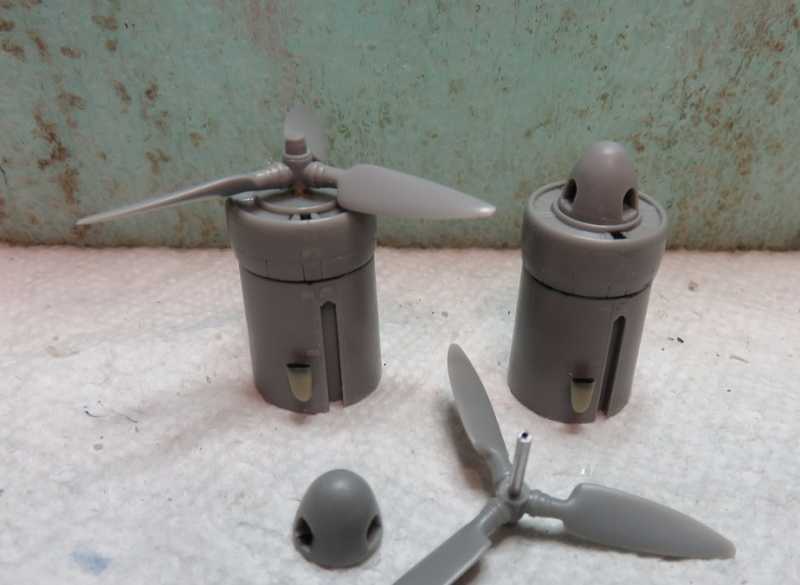
The props were cleaned up and metal tubing replaced the kit attachment pins

The exhaust was painted AK silver and then misted with clear Tamiya yellow
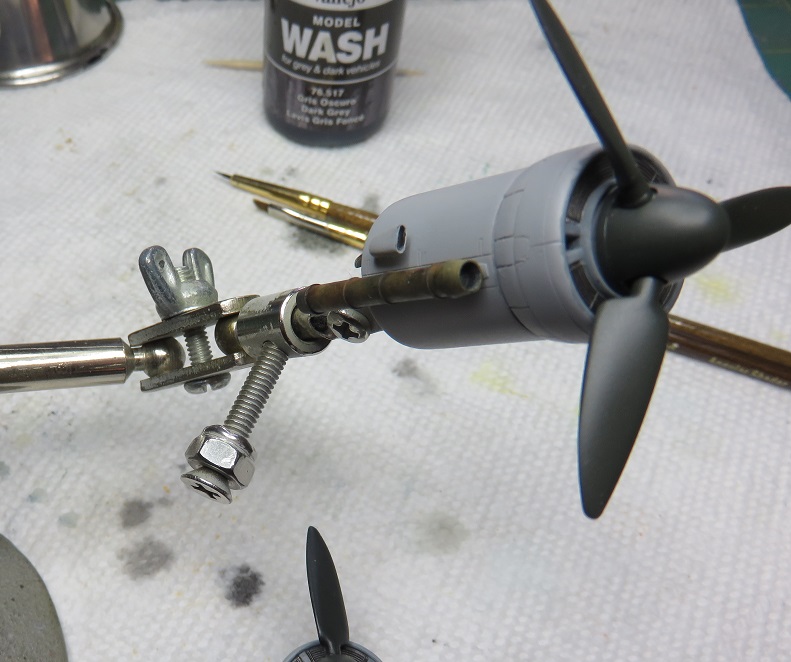
The props were painted, the radiators detailed and the exhaust stained .
That's all for now . Cheers, Christian B)
Modeling still seems to be hit and miss . Posting pictures even more so .
I have made progress even though I have not done what I said I would.
I primed the cockpit area was primed with Mr surfacer
and that's where I went off the rails Airbrush in hand , I primed the tail wheel well, followed by RLM 02
Same with the main wells. While there I inserted some Apoxie to keep the hollow places from flexing while I build. That always results in broken seems on the leading edges.
Super glued the leading edge and used Tamiya on the trailing edge.
Same story on fuselage , except it's super glue all around .
Next, everything was sanded and scribed
Next, the engine housings were scribed and assembled
I was not crazy about the kit carburetor intake or the exhaust , so it's now Quickboost ( on the right )
The props were cleaned up and metal tubing replaced the kit attachment pins
The exhaust was painted AK silver and then misted with clear Tamiya yellow
The props were painted, the radiators detailed and the exhaust stained .
That's all for now . Cheers, Christian B)
Heavens Eagle
Well-known member
Looks good Christian!
