• Modelers Alliance has updated the forum software on our website. We have migrated all post, content and user accounts but we could not migrate the passwords.
    This requires that you manually reset your password.
    Please click here, http://modelersalliance.org/forums/login to go to logon page and use the "Forgot your Password" option.

1/32 F/A 18 A

Thanks for looking!
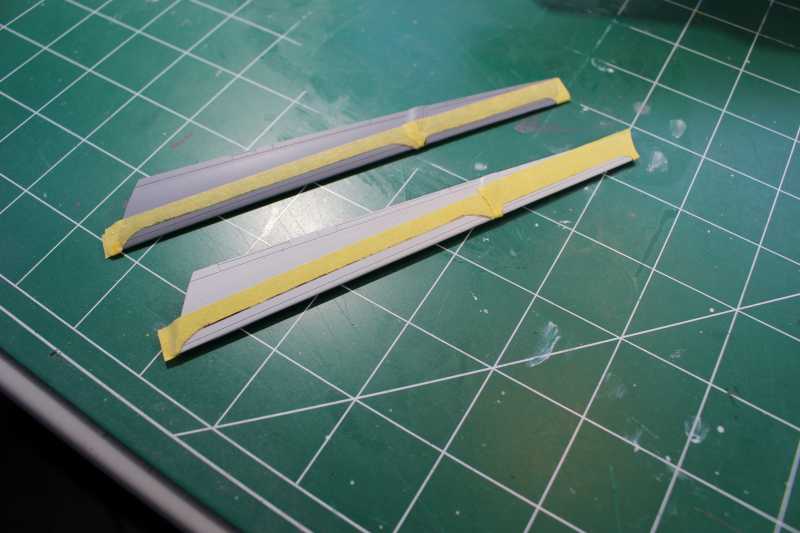
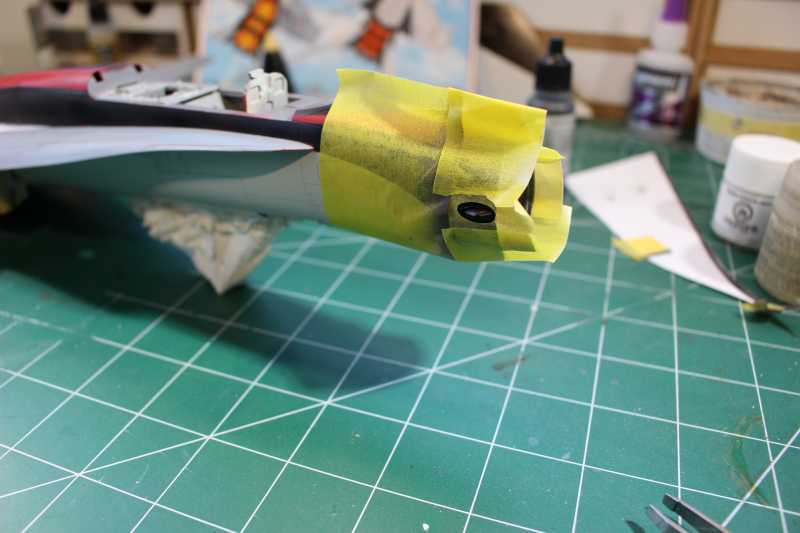
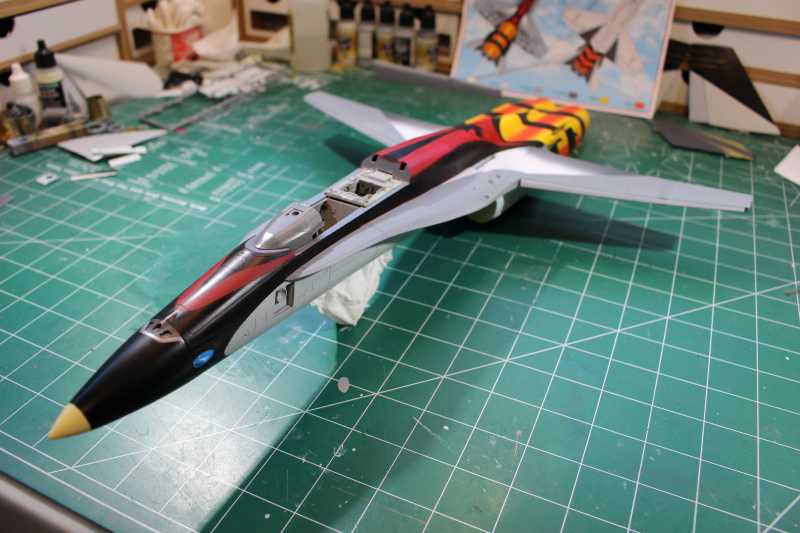
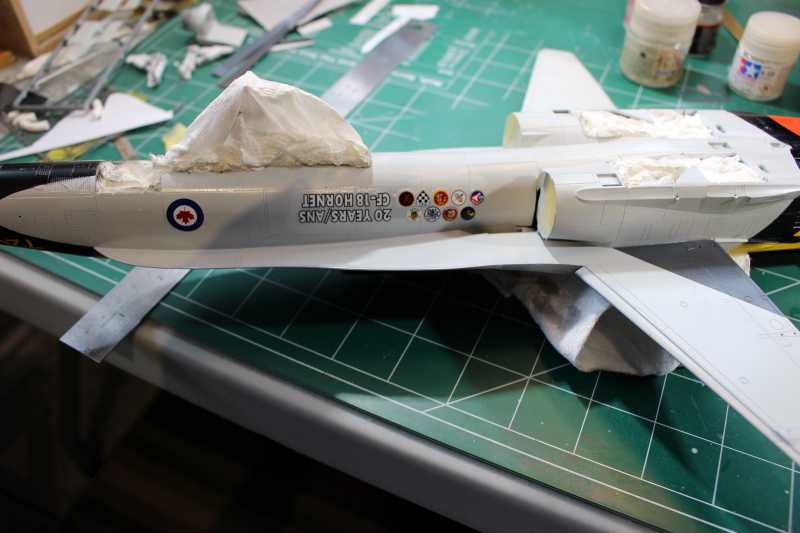
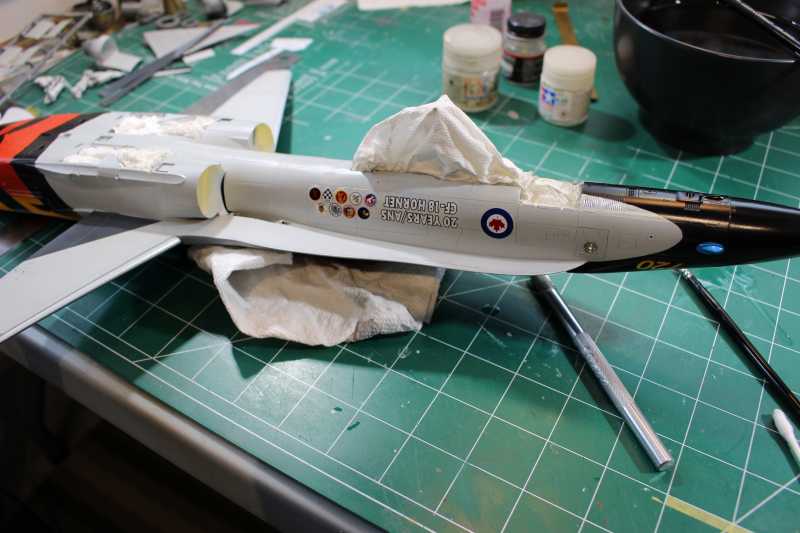
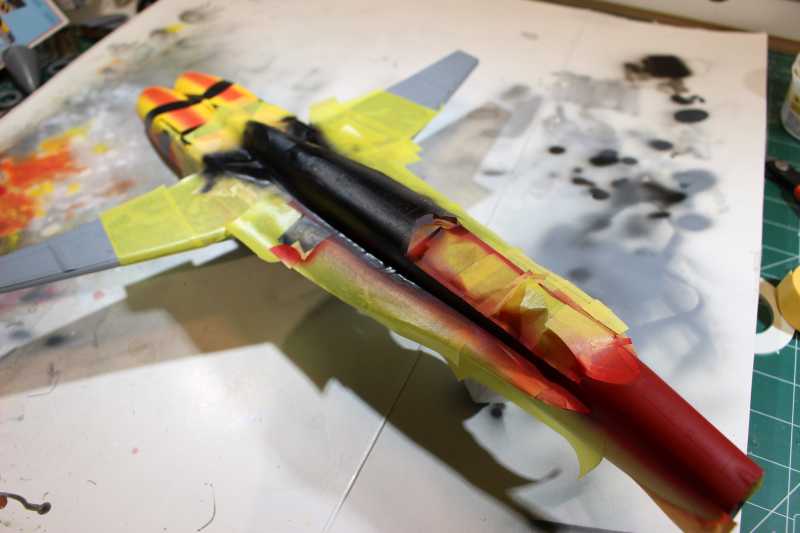
I've used scans of the decals on plain white paper as masks all along for the painting, this time I used cutouts of the scans laid directly on the model, dampened so they'd lay flat and stick to the model and shot paint right over the wet paper.

paper mask laid on and wet down...

haf9563a.JPG

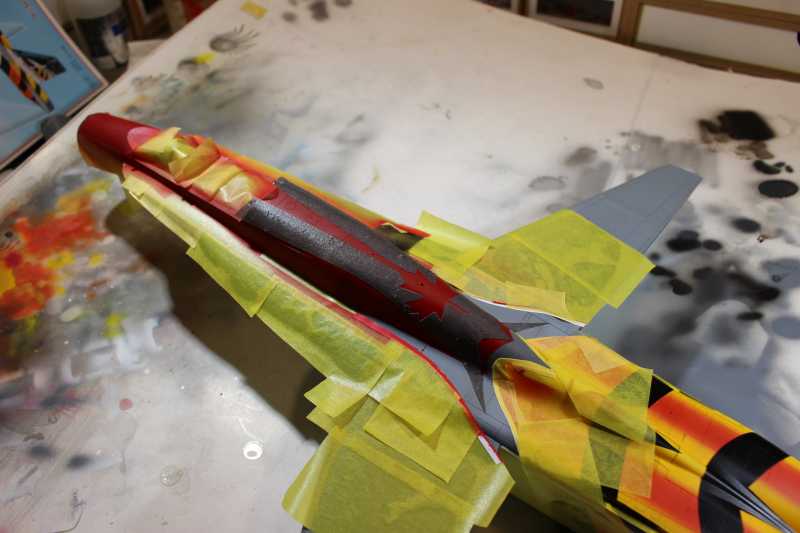
painting over the wet paper mask

h9ab0d64.JPG


hb37c965.JPG

masks removed;

h22ffed1.JPG


h64aa3bd.JPG


h64aa3bd.JPG

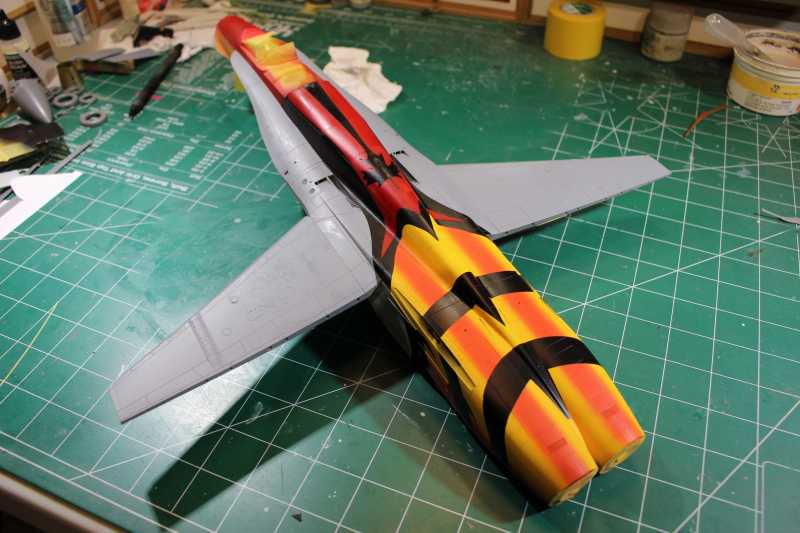
Some touch up of paint work will be needed but, in my opinion, easier than working with an ill fitting or damaged decal.


Looking good (y)

Fantastic tip!
 
Thanks for looking and encouragement, I really appreciate it! Great people here!
My latest update/installment has, I think, most of the painting done...maybe. In any case, I've begun gluing things together on the kit again.
painting on the leading edge tapes
h9f779d0.JPG

painting on the blue "eyes"
he9053c6.JPG

where I stopped for the night
h3e1de84.JPG


h55fb723.JPG
 
Thanks guys, the red’s not perfect and it’s kind of bugging me...I don’t know if it’s bad enough to go over again, I’ll leave it awhile and see if it keeps nagging at me. Otherwise I am quite happy with it, I’ve begun adding details (fine wire to represent pipes, hoses and such) to the main gear legs now
 
Thanks a lot! it's a great kit and I'm really trying to do it justice!
Some break lines have been fitted, not true to the prototype but representative of the real thing. As well some bits added to the spot light

h6e1c2f8.JPG


h5c7daa8.JPG


h74e0e4e.JPG

thanks for looking!
 
Really nice work so far. It looks like an angry Hornet ( no pun intended )

Red is a really tricky color . What about it bothers you ?

Cheers, Christian B)
 
I started putting on placard decals, those fairly prominent data placards on the main gear shocks and legs. Those decals wouldn't conform to the cylindrical shape of the gear legs so I applied micro set, then sol, then Mr. mark softer but the decals laughed at any decal solution I tried, I escalated the conflict with stronger and more drastic methods as the battle raged, now I wouldn't recommend this method to anyone else but I was beyond caring when I got out the Alclad Lacquer thinner/ airbrush cleaner and brushed that onto the decals...those decal aren't laughing at me anymore! They behaved themselves right smartly after that!
The decals snuggled down like they were painted on. An experiment that worked out in this case and it shortened the war by years, but, not a method to take lightly and now that the Genie is out of the bottle and I'm wondering if I should go back and try this method on some finished kits with silvered decals...

h30b7903.JPG


hd1a836a.JPG
 
Wow, I need to remember that. I have read of using Tamiya thin but that sound scary to me :S


Cheers, Christian B)
 
Thank you very much!
I've begun adding decals but put one in the wrong place (too far back) an example of leaving another duty too long and being in a rush (I'm such an idiot) I also had a bit of an issue here and there with decals cracking but nothing that couldn't be dealt with. I knew I'd have problems with such huge colored areas which is why I painted as much as I could, if I was better at it I'd try painting the Hornets and wing graphics as well...maybe next time.

This marking is my goof, too far back, it'll be partially obscured by the engine intake splitter plate
h9fac931.JPG


This one is correctly placed further ahead

h0c3f68b.JPG

top markings and graphics
he35f5a4.JPG
 
Back
Top