
-
Modelers Alliance has updated the forum software on our website. We have migrated all post, content and user accounts but we could not migrate the passwords.
This requires that you manually reset your password.
Please click here, http://modelersalliance.org/forums/login to go to logon page and use the "Forgot your Password" option.
You are using an out of date browser. It may not display this or other websites correctly.
You should upgrade or use an alternative browser.
You should upgrade or use an alternative browser.
Trumpeter 1/48 Cessna A-37B Dragonfly
- Thread starter Steve Ski
- Start date

Steve Ski
Well-known member
Thanks, Saul. The paper is on the way. I'll see how the results pan out hopefully by next week at the latest. and thanks again for jumping in there and helping out, it's greatly appreciated.@Steve Ski, any update on the markings? Let me know if you'd like me to send what I photographed.
Steve Ski
Well-known member
Gents, my laser decals from the ups store seem to be working. Saul, you're a treasure, Brother, ya saved my bacon. Steaks and cold one for the house, yehaaaaaa! I did a test run on one and it's working great. Ya, the definition is not completely there, but way better than my ink jet printer and with the dark camo it won't be an issue. Onward to the bench!
Thanks, Saul!!!
Thanks, Saul!!!
Steve Ski
Well-known member
Sad news, I just found out my old friend Brad, in one of the ref pics with the red tower to his left, he's behind the wind screen, passed in January. We were on a load crew together. Not sure why, but he was younger than me. Most of us who were at HAFB from 85-87 make contact here and there with each other by some means, pretty cool how we do that. I just heard this two days ago, bummer, Brad was a good man, and one funny guy!
So, not only for my former shop chief, but in memorial for Brother Brad. The build continues.
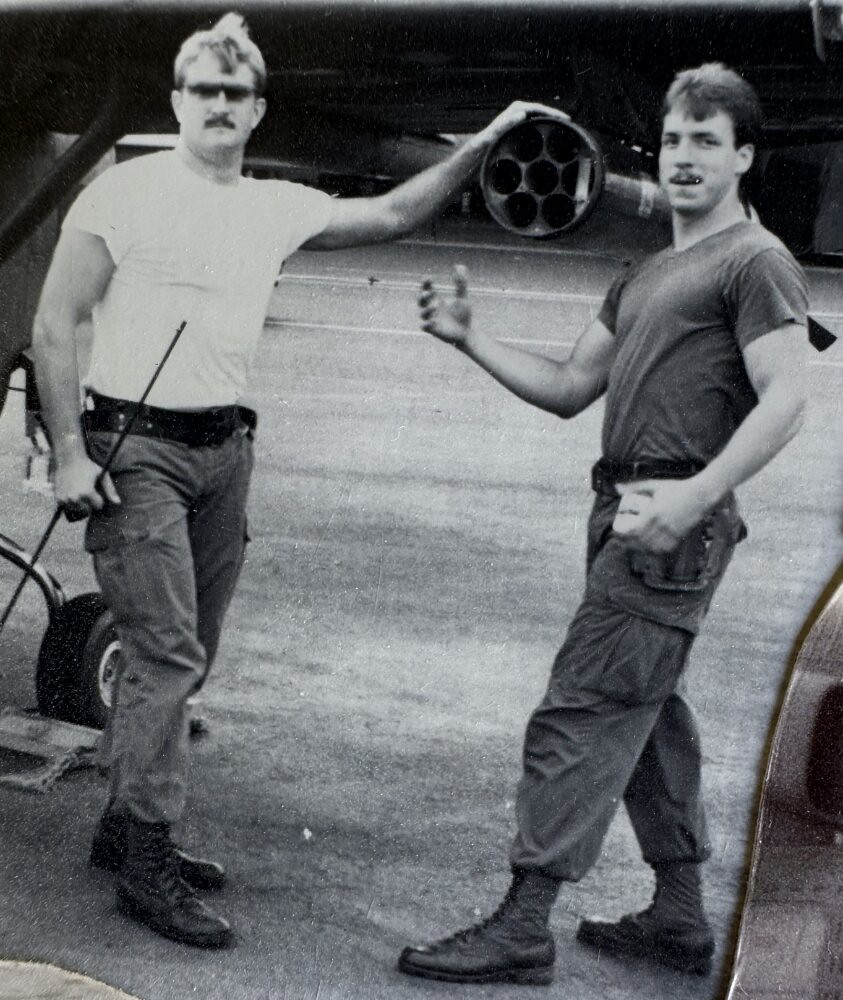
Yes, that is my ugly mug on the left, can't be helped.
So, not only for my former shop chief, but in memorial for Brother Brad. The build continues.
Yes, that is my ugly mug on the left, can't be helped.


Steve Ski
Well-known member
Wings to Fuselage
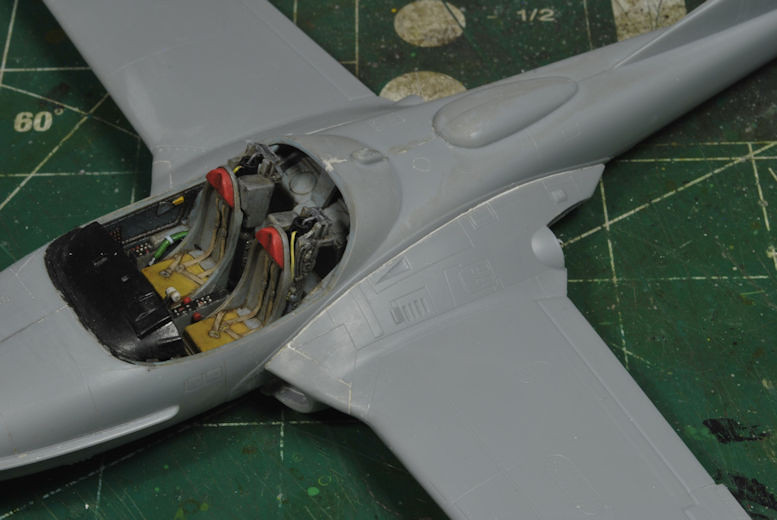
As often happens, I thought I had taken photos of the difficult areas when fitting the wings to this fuselage, but nope, sorry. I believe it was a case of the memory card not registering and I was snapping away, unawares, oops. I know there are a few who have this kit, so I wanted to show what difficulties I ran into, but I’ll mention them now.
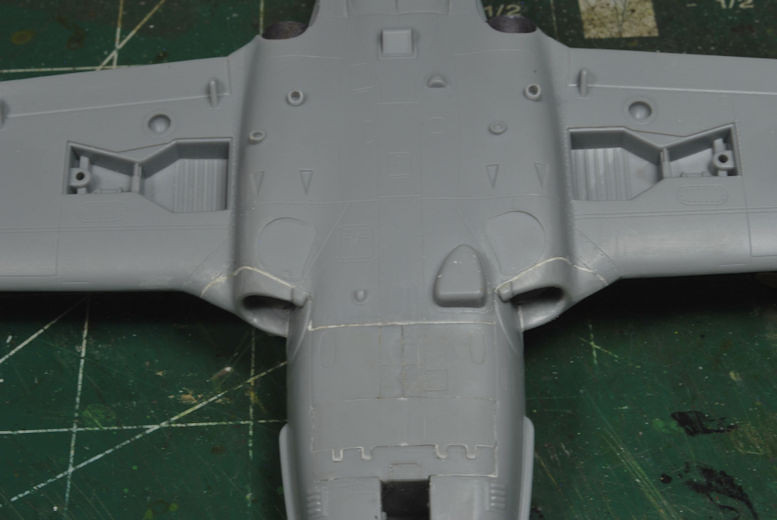
The engine intakes, according to the instructions, are secured in place as well as the exhaust nozzle, just before the fuselage goes on, but be prepared to sand the sides of the intakes. I spent quite a bit of time sanding down the inner portions of each intake, plus I sanded the bottom of the cockpit tub, and trimmed the fuselage sides not visible once the wings are attached. When attaching the wings you will notice a gap up front, or in back, whichever end gets placed first. Using a bright light, you will see inside how the intakes and sides of the fuselage interfere with the assembly, then get to work sanding. I stopped numerous times to check the fit, but back to sanding I went. Plan on a lot, it was several sessions worth, btw.
Once I felt I was close enough and ran 500 test fits, seems like it, I ran a bead of super Glue and put it together. Naturally, when you’ve got wet glue it wigs out on you and the fit jacks all ta heck, then you fight it before it’s permanent. There will be a gap up top along the wing root, but none to speak of below. After dropping some glue into the gap and compressing the pieces together for a minute or so, I ran a small bead of Testors tube putty and pressed it in and cleaned up the mess. There is some touch up to do, but not much.
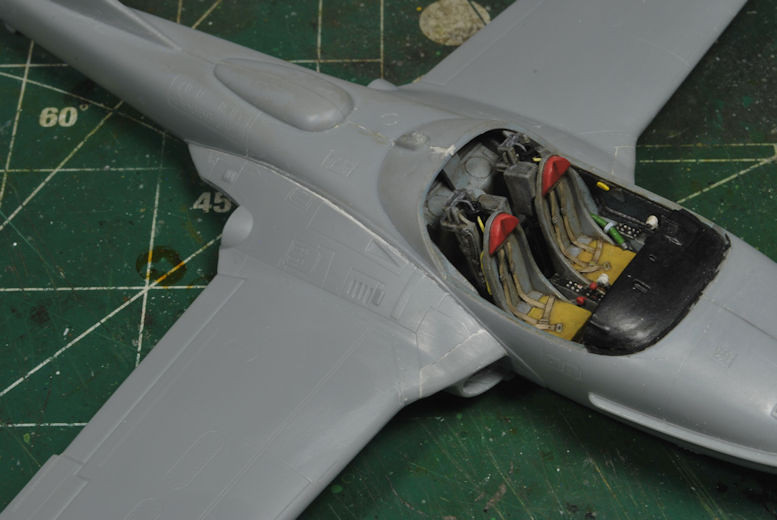
The intake trim was not exactly sized correctly, so plan on clean-up there as well. Once you’ve got them where you can work them over it’s just a matter of careful sanding to avoid wiping out the panel details.
There is one more final issue I was consistently running into, and completely avoidable, and that was the cockpit dashboard kept getting popped off because of where I was gripping the fuselage when working on the underside. It’s in an odd spot for holding the fuselage when you’re working on it, so be aware of that.
More to follow soon and thanks for watchin. Cheers, Ski.
As often happens, I thought I had taken photos of the difficult areas when fitting the wings to this fuselage, but nope, sorry. I believe it was a case of the memory card not registering and I was snapping away, unawares, oops. I know there are a few who have this kit, so I wanted to show what difficulties I ran into, but I’ll mention them now.
The engine intakes, according to the instructions, are secured in place as well as the exhaust nozzle, just before the fuselage goes on, but be prepared to sand the sides of the intakes. I spent quite a bit of time sanding down the inner portions of each intake, plus I sanded the bottom of the cockpit tub, and trimmed the fuselage sides not visible once the wings are attached. When attaching the wings you will notice a gap up front, or in back, whichever end gets placed first. Using a bright light, you will see inside how the intakes and sides of the fuselage interfere with the assembly, then get to work sanding. I stopped numerous times to check the fit, but back to sanding I went. Plan on a lot, it was several sessions worth, btw.
Once I felt I was close enough and ran 500 test fits, seems like it, I ran a bead of super Glue and put it together. Naturally, when you’ve got wet glue it wigs out on you and the fit jacks all ta heck, then you fight it before it’s permanent. There will be a gap up top along the wing root, but none to speak of below. After dropping some glue into the gap and compressing the pieces together for a minute or so, I ran a small bead of Testors tube putty and pressed it in and cleaned up the mess. There is some touch up to do, but not much.
The intake trim was not exactly sized correctly, so plan on clean-up there as well. Once you’ve got them where you can work them over it’s just a matter of careful sanding to avoid wiping out the panel details.
There is one more final issue I was consistently running into, and completely avoidable, and that was the cockpit dashboard kept getting popped off because of where I was gripping the fuselage when working on the underside. It’s in an odd spot for holding the fuselage when you’re working on it, so be aware of that.
More to follow soon and thanks for watchin. Cheers, Ski.
Rhino
Super Moderator
I find your narrative about the Tweet very interesting. This is a largely unsung combat aircraft. I look at the picture of Bradley and yourself and wonder aloud "Were any of us ever that young?" Hell, I can still remember when I had hair! I was PURTY! I only miss flying when I look at the sky.

Looks like it was worth the effort.
Steve Ski
Well-known member
Ya, I look back at some of those pics and wonder where the heck my hair went too. But I still have a little, couldn't think of shaving my head, too many knots! Ya, I was wondering what the heck these were when they sent me to tech school for em, the I was, great, hemorrhoids!I find your narrative about the Tweet very interesting. This is a largely unsung combat aircraft. I look at the picture of Bradley and yourself and wonder aloud "Were any of us ever that young?" Hell, I can still remember when I had hair! I was PURTY! I only miss flying when I look at the sky.
Yes, MP, it's gotta be done, right?
Looks like it was worth the effort.
Steve Ski
Well-known member
Got a question for you regular bird builders, what should I use to keep the canopy in place when priming the bird and applying the camo pattern? It will be open canopy when finished, however, I am finding the ejection seats are too high for the canopy to land properly, meaning I'm sanding some of the ejection seat portions to let it lay proper. I don't want to go too far, but I was thinking of using silly putty or similar to hold the canopy in place when airbrushing the primer and camo pattern. I don't see that there would be any distortion in pattern since the gap is not too drastic.
What do yall think? I'm all ears. Thanks in advance, Gents.
What do yall think? I'm all ears. Thanks in advance, Gents.
Canopy doesn't fit and you're going for open cockpit then I would not try to paint it attached. I would stuff some sponge down in the cockpit. Make sure you got a good seal coat in the cockpit because I would wet the sponge and force it down in the cockpit. When it dries it should be to fit. Or tape off the cockpit and trim up the excesses.
I've done this a couple of times also. Do an inside mask of the canopy as well as the external. Since it's not a green house canopy it shouldn't be must work. Paint black first then the interior color and exterior. That'll give the illusion of a seal around the glass and frame. Works best in 1:32. I got a photo of the ol' VooDoo
you can see a couple of the photos in the slide show.

Keep in mind this is nearly 20 year old, date on the image is 2007
I've done this a couple of times also. Do an inside mask of the canopy as well as the external. Since it's not a green house canopy it shouldn't be must work. Paint black first then the interior color and exterior. That'll give the illusion of a seal around the glass and frame. Works best in 1:32. I got a photo of the ol' VooDoo
you can see a couple of the photos in the slide show.
Keep in mind this is nearly 20 year old, date on the image is 2007
Steve Ski
Well-known member
Awesome, MP, that sounds like a good technique. I did tape the inside already knowing it would need it. The black base tone makes sense, after the primer, good idea. But I'm still a little concerned with the camo pattern appearing correct. I will definitely stuff foam in the cockpit to keep that from any incidents of ill effect.
Muchos gracious, MP!
Muchos gracious, MP!
Guess you have to eyeball the pattern.
Negative ghost rider! Then the primer color would show, maybe use a black primer?after the primer
Steve Ski
Well-known member
Late to the party as usual. whats going on here then ? Steve and a flying machine...i need to close the program shut down and re boot...
Yup, still no change, must be real then.expecting to see a fag hanging out that sharp mouth
Lol, yes, a flying machine, if ya can believe it. Heck Paddy, I've even got me a pilot's license, don'tchya know?This is a special request build, but I've got a whole shelf of wingy dingy thingys that will need attention eventually.
Steve Ski
Well-known member
Who knows, paddy, I just might have to keep building birds so I don't forget how, then go back and paint figures so I don't forget how. sheesh, this is getting rough to keep up.Well they say a change is as good as a rest
Similar threads
- Replies
- 22
- Views
- 5K