• Modelers Alliance has updated the forum software on our website. We have migrated all post, content and user accounts but we could not migrate the passwords.
    This requires that you manually reset your password.
    Please click here, http://modelersalliance.org/forums/login to go to logon page and use the "Forgot your Password" option.

Tamiya P-38F build

Tamiya P-38F build review

Looking really good.

Sorry you had a bad time with paint. I'm sticking with stinky enamel/lacquer paints, the acrylics and I do not see eye to eye.

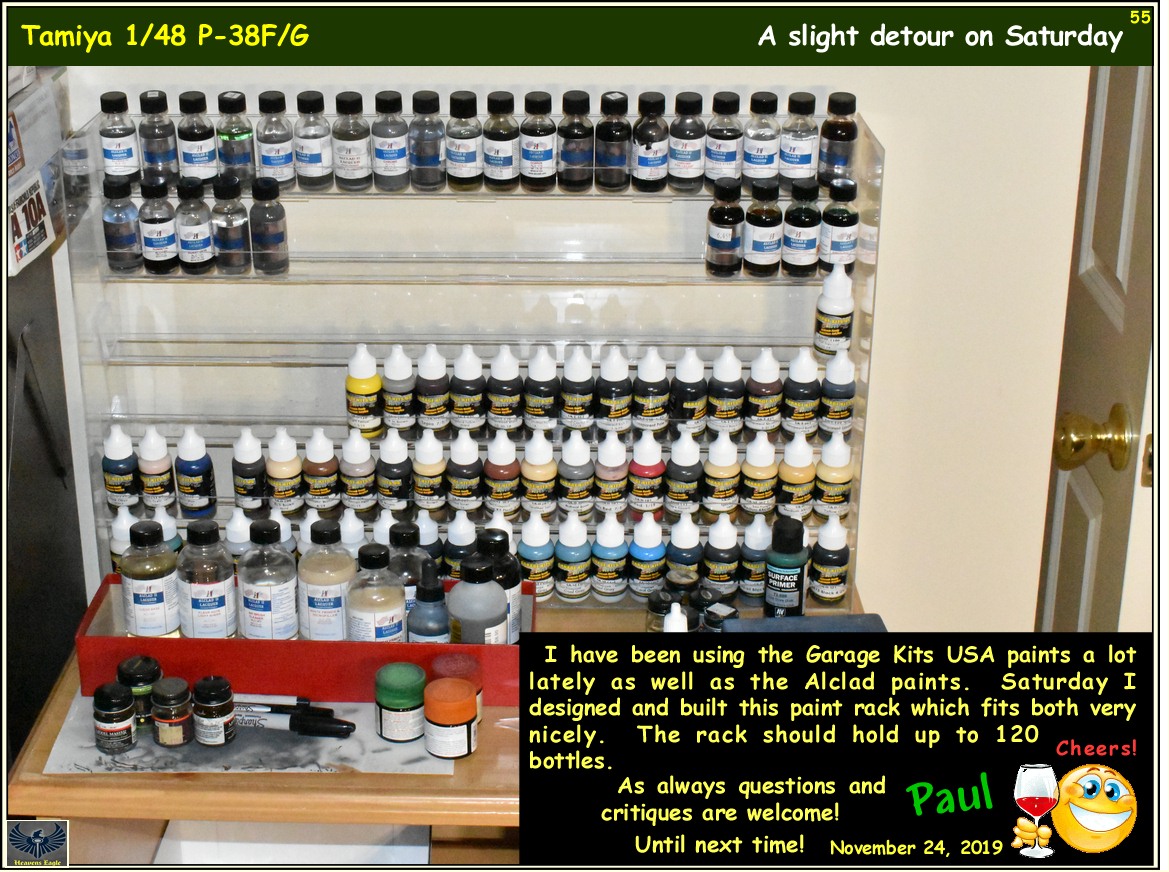
Hey Barney! Yeah that paint just isn't conducive for the purpose. When it quickly set up in my airbrush that last time I used it, that was it. I really like the Garage Kits USA Colors paints. They work almost like the enamels. While the guy that makes them has been catering to large scale figure painters, he is going to be branching out into paint for military vehicles in the near future. Most of the figures at Wwonderfest are painted with them. They go through the airbrush as smooth as thinned enamels and clean up easily as well. The P-38 is going to get a lot of weathering work using them. He is also looking into doing a replacement for the Testors Dullcoat.

Am also sorry to see you will be passing on San Marcos.
 
Tamiya P-38F build review

All these 'hard yards' will pay-off later, Paul... 'doing a great job on this, matey (y)


Ian.

Thanks Ian!

This isn't any more challenging than stuff I have done before. Thursday morning I will be in surgery and should be home in the afternoon. Hopefully all will go smooth and well. I am planning on having 3 days at the bench then so we will see how it all goes. If I can I will touch base thursday evening.

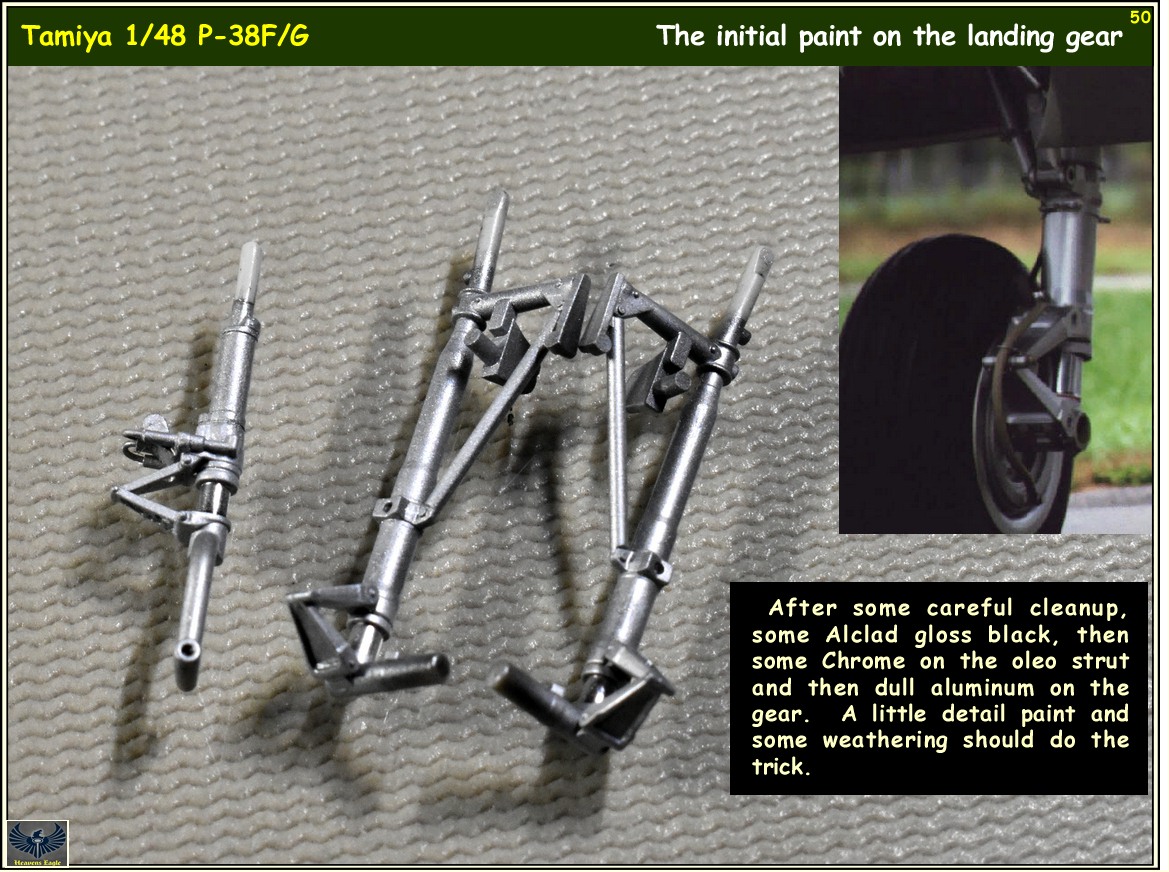
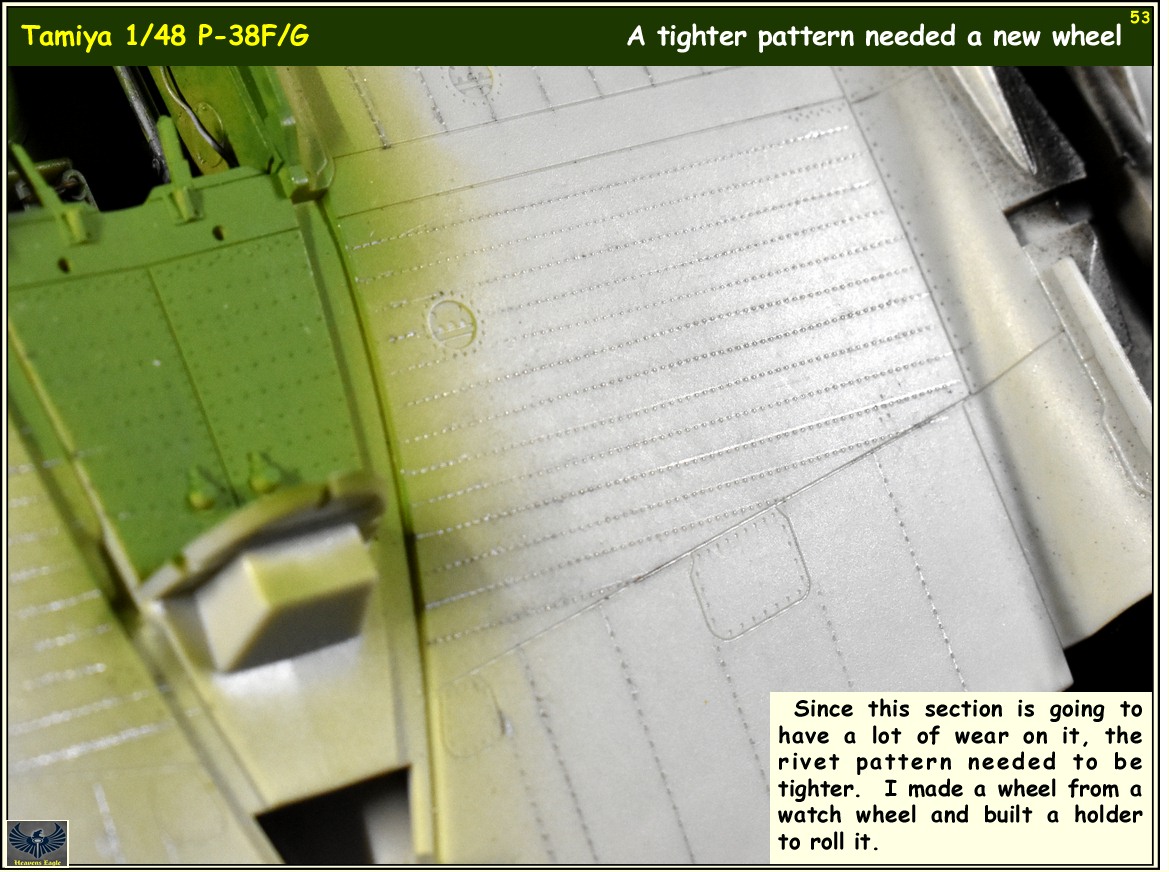
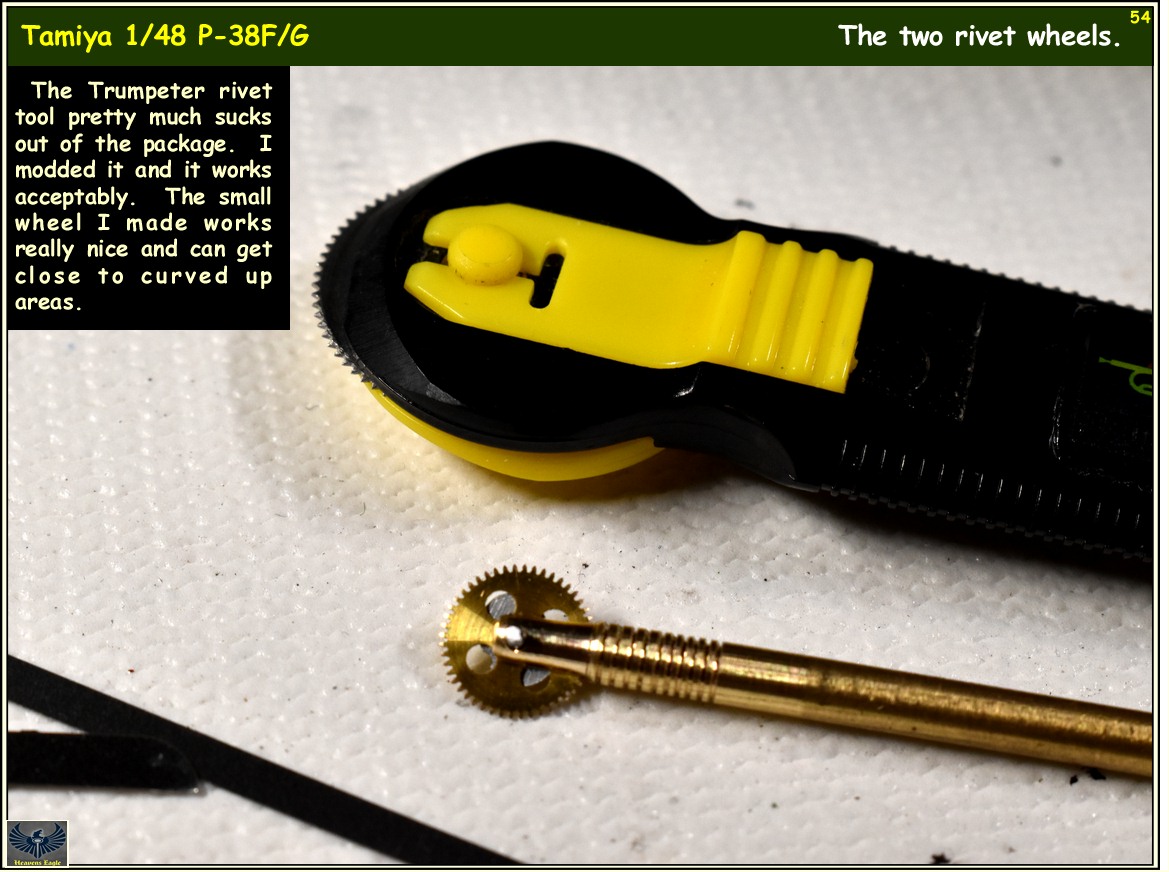
Need to finish cleaning up the gear doors, do some more minor detail work on the landing gear struts and get continuing on. Am thinking I will pull out some defunct watch wheels to do the rivet work as they are smaller than the other wheels I have and could get into the areas around the cockpit on the wing. Have a ton of parts just need to go looking.
 
Thanks Luiz. It is an outpatient surgery so I "should" be home sometime Thursday afternoon. I am sure that I will then spend most of the rest of the day sleeping.

I will tune in though and let you all know how it went.
 
I am off to surgery this morning everyone. Wish me well on it. Hopefully I will be up to tuning in this afternoon and maybe hitting the bench tomorrow.
 
Good news it seems all around, I was out of the surgery center by 10:30 or so thi morning. Walking just fine and it seems like I have a smaller incision than last time. (part of the old one is way above the Ace wrapping on my thigh now)

So good news is if I really want to get an old VW bus I could drive it no problem. :yipee ('cause I really would like to get one again eventually)

Also have had no side effects from the antesthetic really either. Only downs are tired and feel like dozing off this afternoon, and I have a small spot that is a bit on the achy side. Got meds for the pain and it is better than I expected to be honest.

Tomorrow (or maybe after a good nap) I will get back on this as it is coming along quite nicely. (y)
 
Thanks Bob! It's good to be on the other side of this finally. I will get to meet with the doctor as a followup on Dec 3. Heard that he was quite happy with how it all went and seems like he did a better job than the other jerk that did this job before.
 
Thanks Barney!

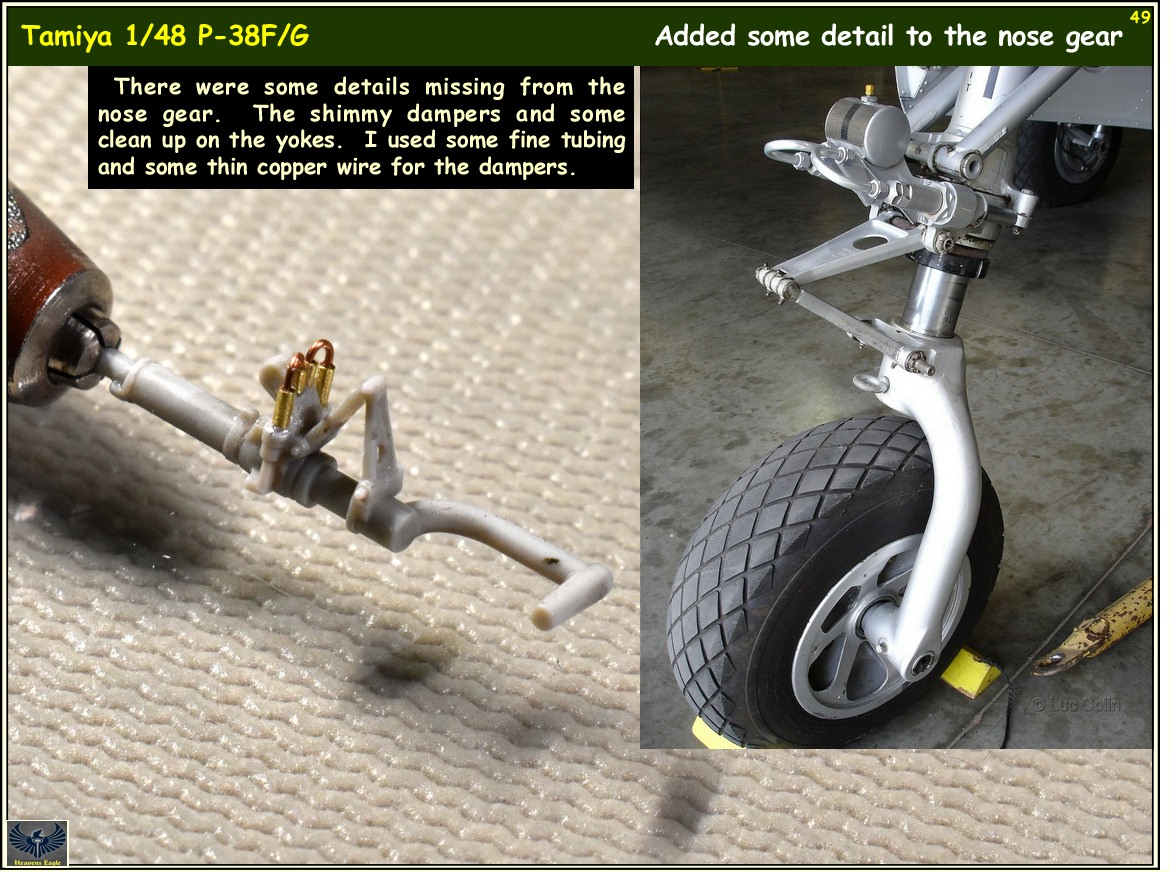
Ended up past the sleepy bit, so I went in and did a little work on this tonight. Mainly on the nose gear. It was short on some prominent detail for the anti shimmy device. Some small holes, turned down small tubing, and copper wire got the job done. Then I found the upper pin had cracked almost off so it had to be drilled and pinned.

I am needing some new thin quick set CA as all that I had got thick and went bad. Might make a trip to the Hobby Shop tomorrow. They should be in the new location by now.

Moving around has done more to work out the discomfort in my leg. Also had to re-wrap the ACE bandage as it was a bit on the loose side and not really staying put. I don't really like the new bandages with the Velcro. The old ones with the metal clips I think worked better.
 
Adhesive tape.

i worked as a trainer through HS, College and in the USAF... It will still come loose, but the tape will hold it longer.
 
The build is looking fantastic. Thanks for the build review. Seems like this kit is one for the stash.
:good:

Thanks for looking in Mike!

Yes it is a well thought out kit. Most everything fits quite well. I have only used a "slight" amount of filler on the leading edge of the wing and where the top/bottom sides of the cockpit nacelle meet. Then a very slight amount on the top of the booms just behind the superchargers. There is a line on the top/bottom of the booms behind the radiators at the seam that is supposed to be there. It matches with other panel lines, so no filler there. The worst area seems to be the air intakes for the oil coolers. That is a complex area that fits well, but has seams that should not be there.

I would recommend the full Eduard PE set with interior and exterior. The cockpit is a little light on some details, and things like the radiators and oil coolers are a touch off. The PE gets it right. I modded the landing gear yoke links on the kit to match photos rather than use the PE parts as the PE parts are not thick enough.
 
After the surgery last Thursday I took it easy for the rest of the day. Friday I just couldn't set still though. My leg actually felt better if I was up and moving around. Not doing jumping jacks or running, just slow walking around the house. While the incision is smaller than last time, I have a large area around it that has no feeling. :angry: Good thing is I can still walk around, kick butt and take names. (y) Hopefully this will be the last one.

Since I had some free time and needed to just take it easy it was get busy in the hobby room.

Tam-P-38F-049.jpg


Tam-P-38F-050.jpg


Tam-P-38F-051.jpg


Tam-P-38F-052.jpg


Tam-P-38F-053.jpg


Tam-P-38F-054.jpg


Tam-P-38F-055.jpg


The paint rack should help with the paint organization. This brand works quite well and he is getting ready to branch out into military colors. The Alclad bottle fitting was a bonus.

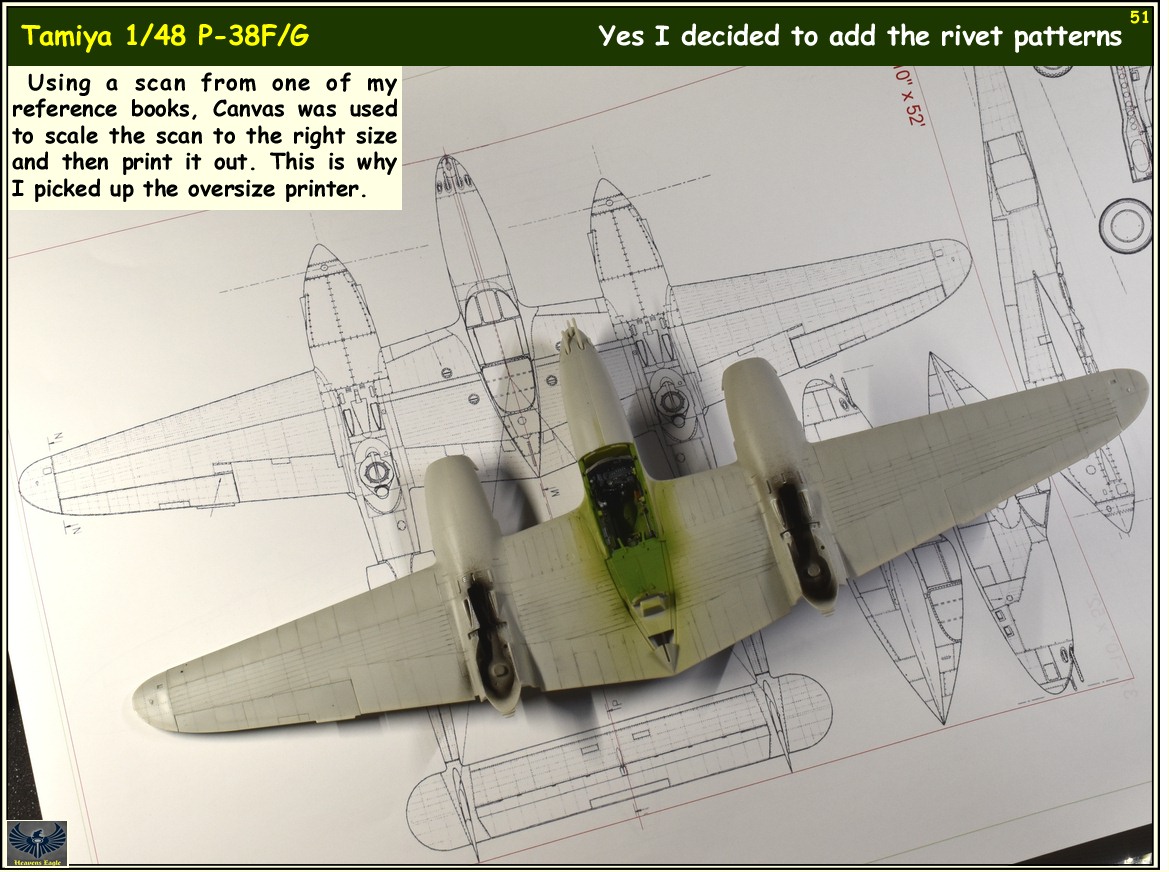
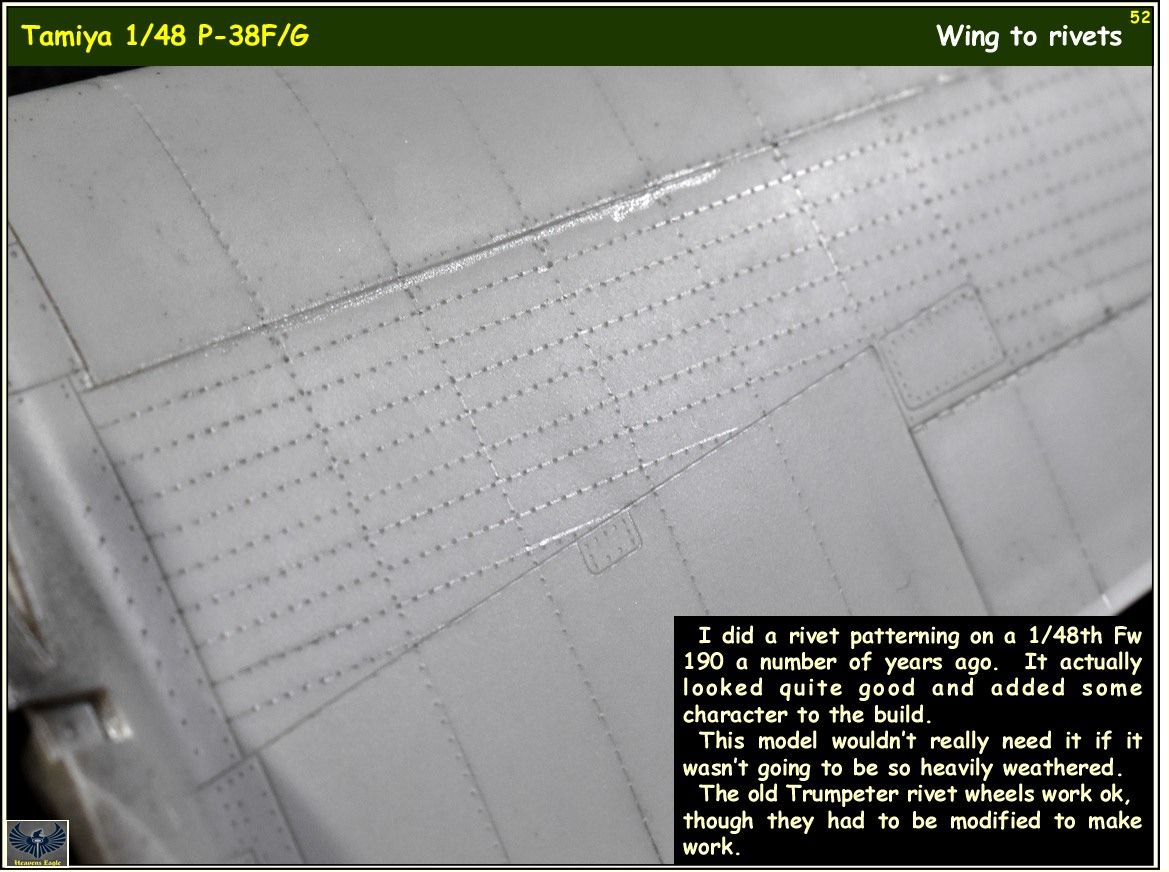
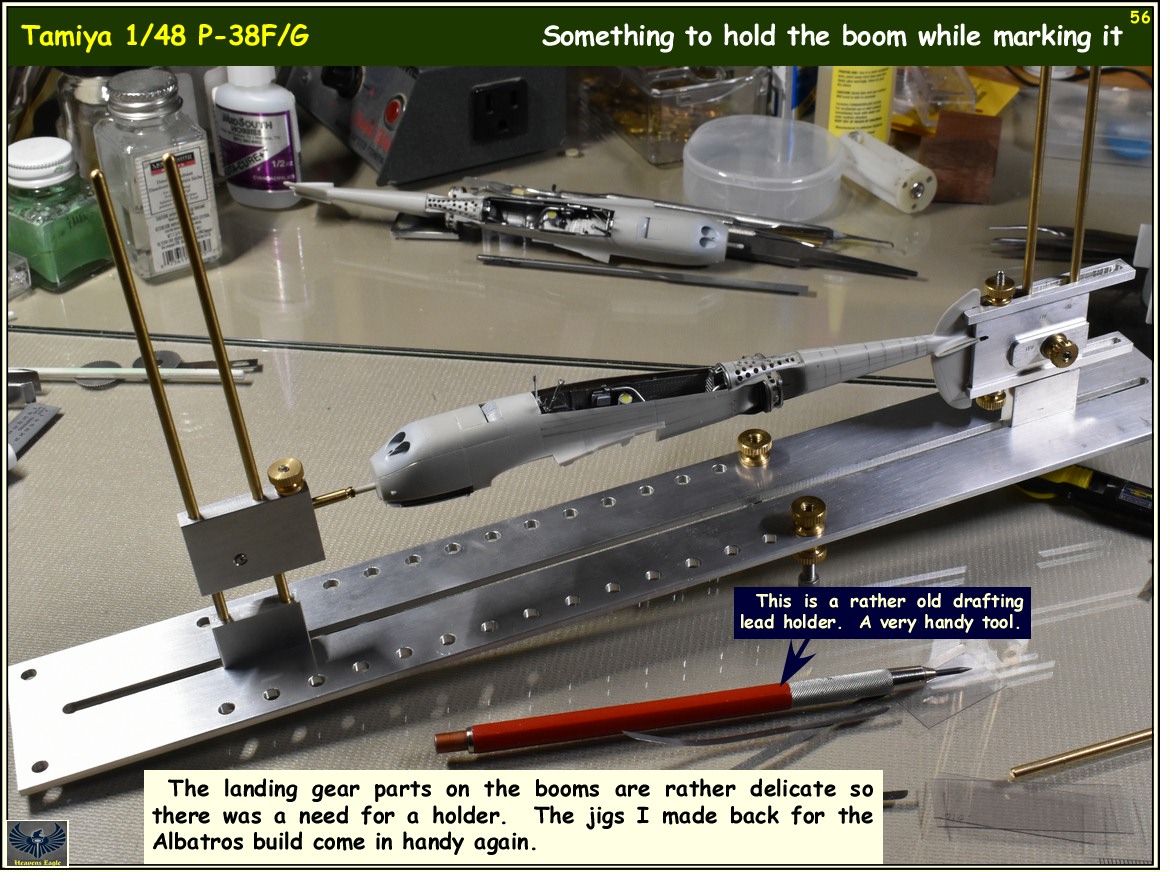
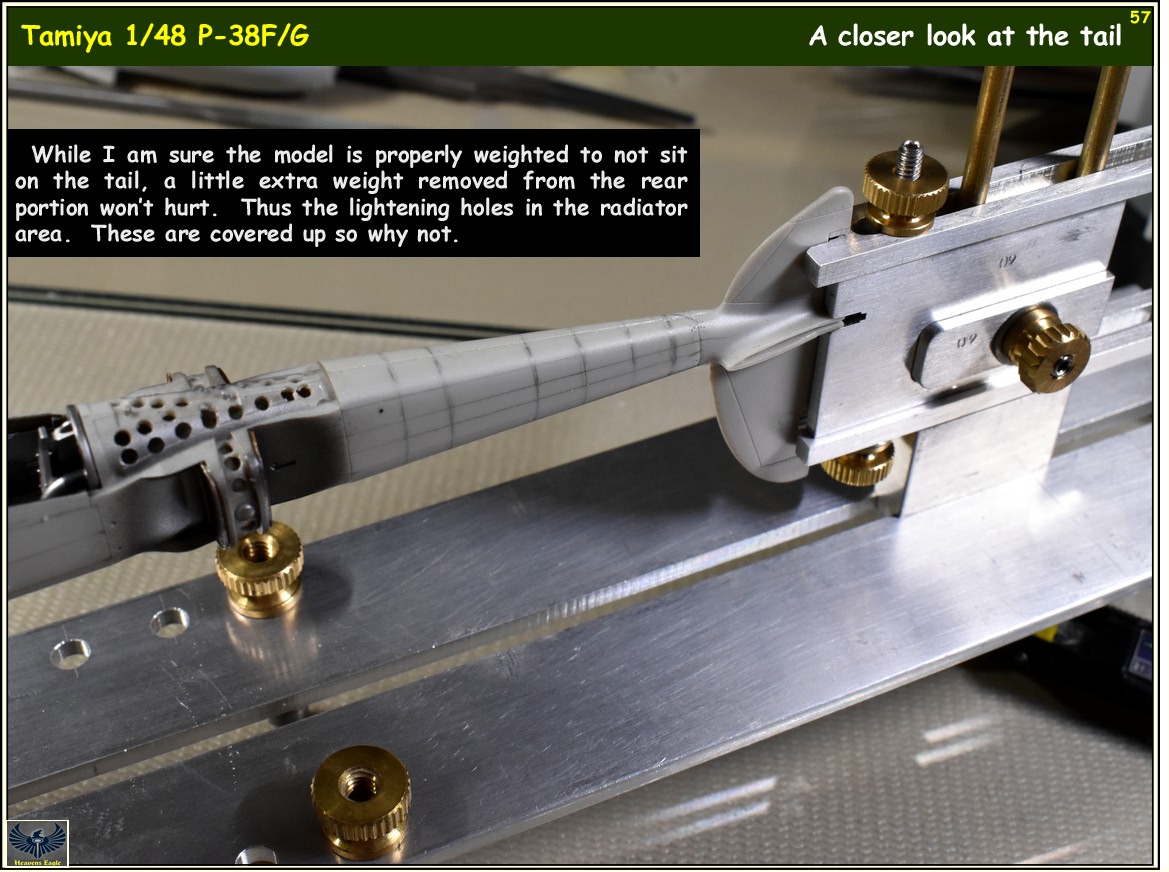
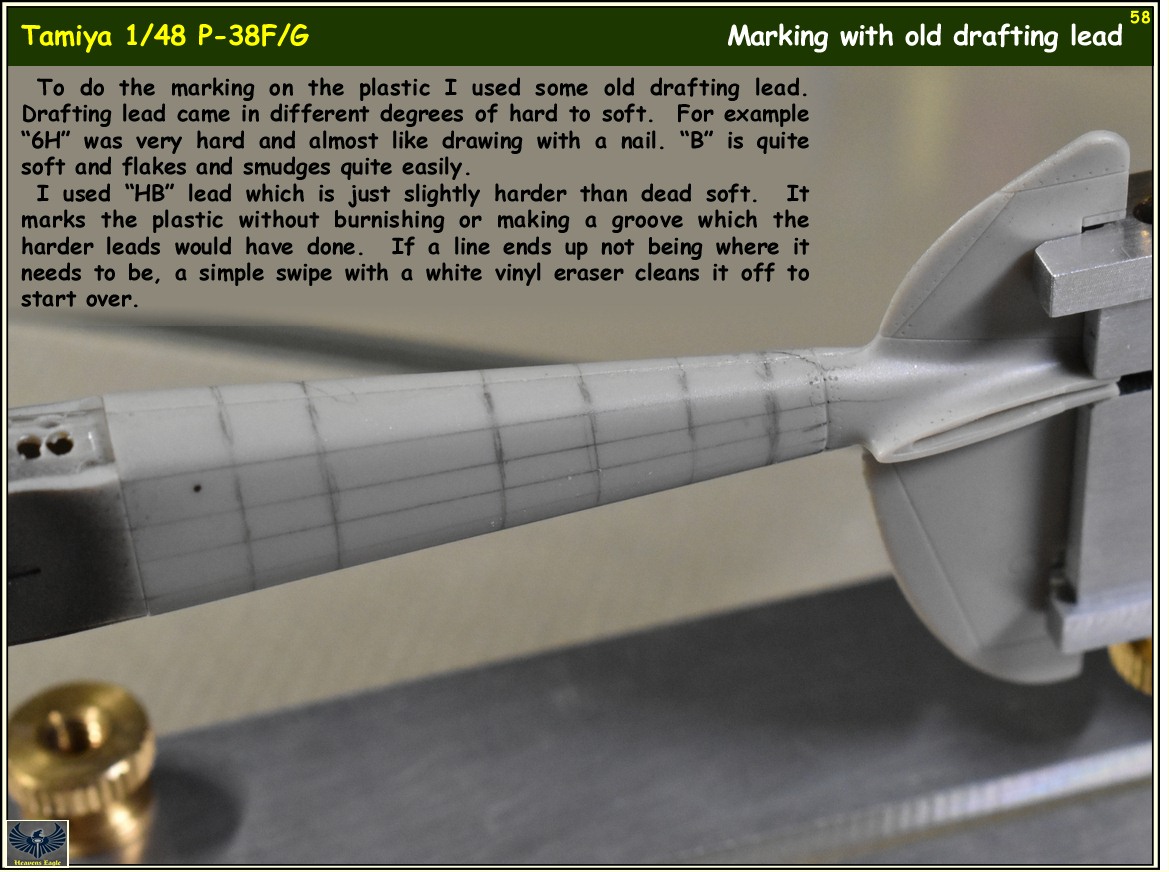
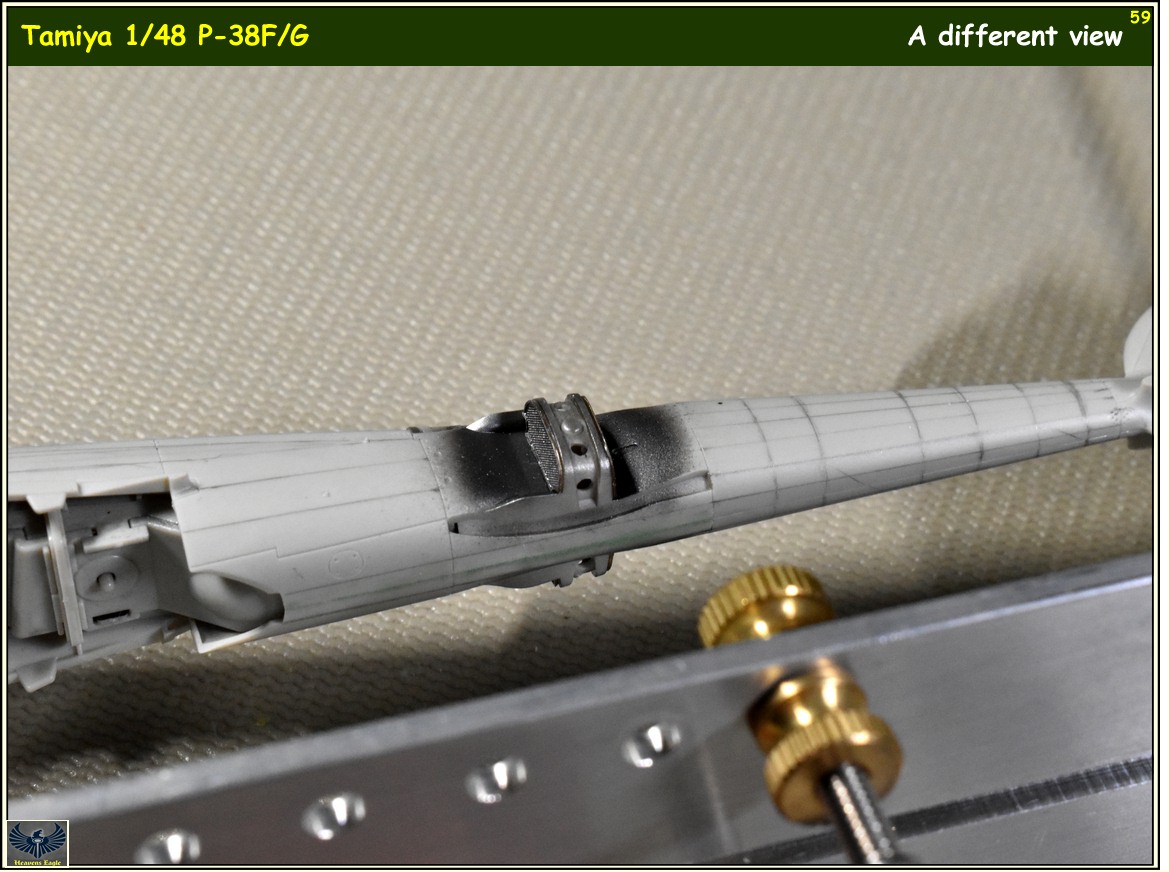
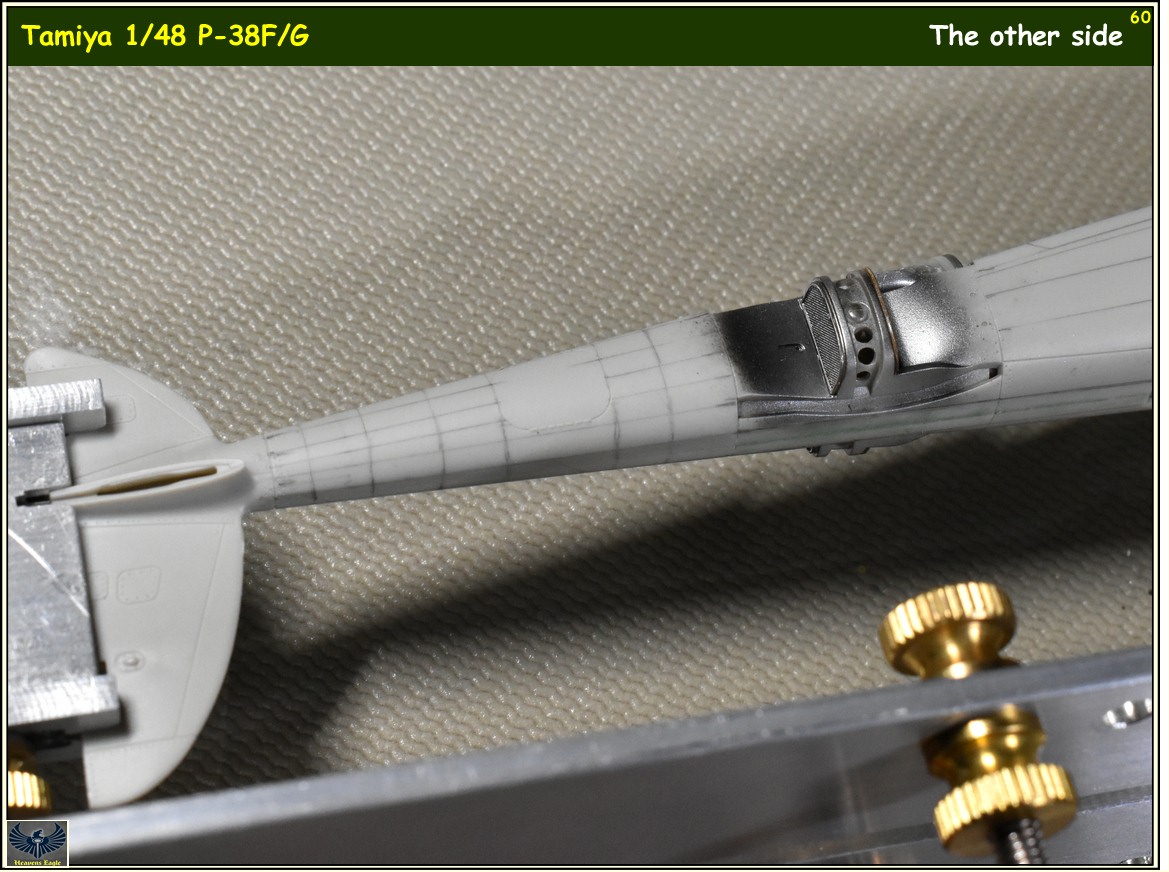
As for rivet tools I might toss the Trumpter one if I can find some better quality tools. To do the guide lines I dug out an OLD drafting pencil and put a piece of HB lead in it. (Very soft lead makes nice lines on the plastic) Then using various means I measured and drew out the lines to guide the rivet tool.
 
Looking great, I picked up some of Eduard's latest releases for this kit. Need to get it on the to do list.
 
Hey! Here is another update! Did some work on one of the booms last night. The hard part is measuring and marking where the lines will go. Following the lines with the rivet tool is fairly easy.

Tam-P-38F-056.jpg


Tam-P-38F-057.jpg


Tam-P-38F-058.jpg


Tam-P-38F-059.jpg


Tam-P-38F-060.jpg
 
Back
Top