
-
Modelers Alliance has updated the forum software on our website. We have migrated all post, content and user accounts but we could not migrate the passwords.
This requires that you manually reset your password.
Please click here, http://modelersalliance.org/forums/login to go to logon page and use the "Forgot your Password" option.
You are using an out of date browser. It may not display this or other websites correctly.
You should upgrade or use an alternative browser.
You should upgrade or use an alternative browser.
TAMIYA MERKAVA MK.I - Lebanon 1982
- Thread starter iambrb
- Start date


Heavens Eagle
Well-known member
TAMIYA MERKAVA MK.I/II
You know they are doing "Full Tilt Boogie" to get airborn in a MBT!
Will the term "flying brick" work?
You know they are doing "Full Tilt Boogie" to get airborn in a MBT!
Will the term "flying brick" work?
iambrb
Well-known member
TAMIYA MERKAVA MK.I/II
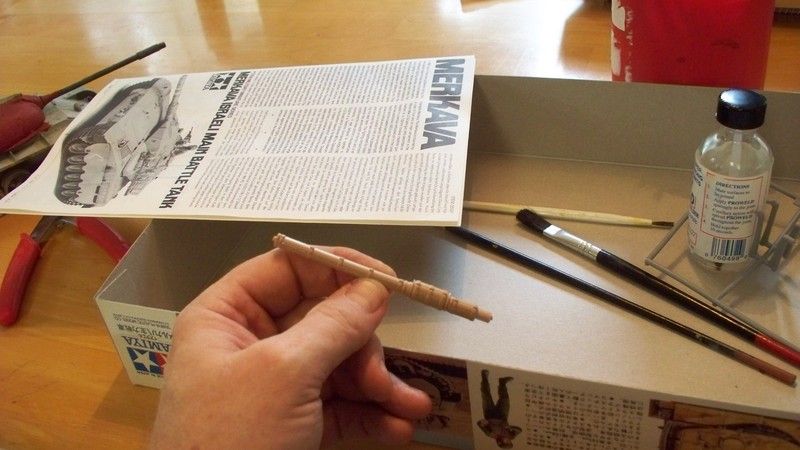
OK, here is my time stamp. Got it yesterday, going to do a tiny bit with it here in a bit:
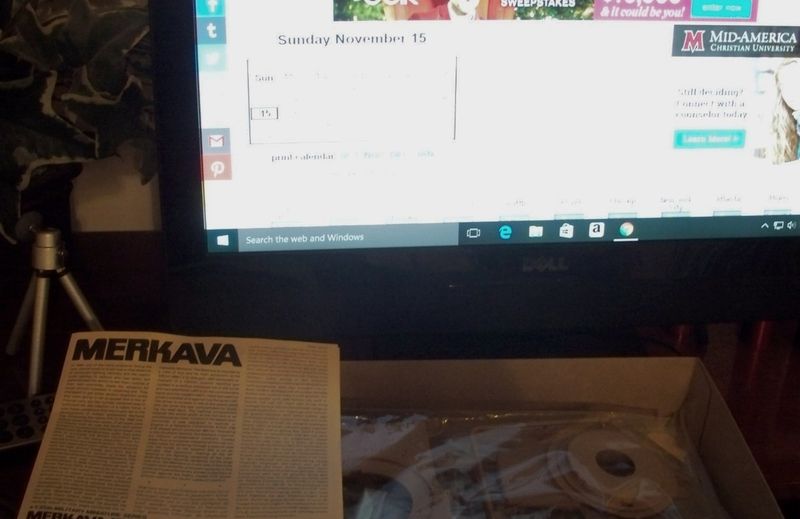
really the first thing I am goiing to go with is seeing how bad the barrel is going to be. Not long after this site started and I got rolling, I have always "treated myself" to aftermarket aluminum barrels, but with this sleeved 105mm barrel, that ain't gonna happen. I can get a resin-cast one from Accurate Armor, but that this Scotland (My fam's ancestral home, BTW), and the cost of the item + ship is within a few 'Scottish Notes' of the entire cost of the kit so far! So if I goof it up or are not happy I have a back up plan, but that $20USD/"Yankee Greenbacks" I was hoping to put towards Spade Ace metal tracks !
On aside note, this may take a bit to get rolling, as I have other trons in the proverbial fire, so this will be a slow go of it. this kit, while happy that it is a tamiya, is one of thoer older models, and as such, it is going to suffer from the issues of many of thier kits of this era, that of the motorization holes, open sponsons, and other such that will allow you to in some instances see directly into the take. I maintain that I do not have AMS!!! but I am intending to correct these, and will document them as I roll. So anyhow that is it...a time stamp, & my "Merkava Manifesto!!!"
iambrb
Well-known member
TAMIYA MERKAVA MK.I
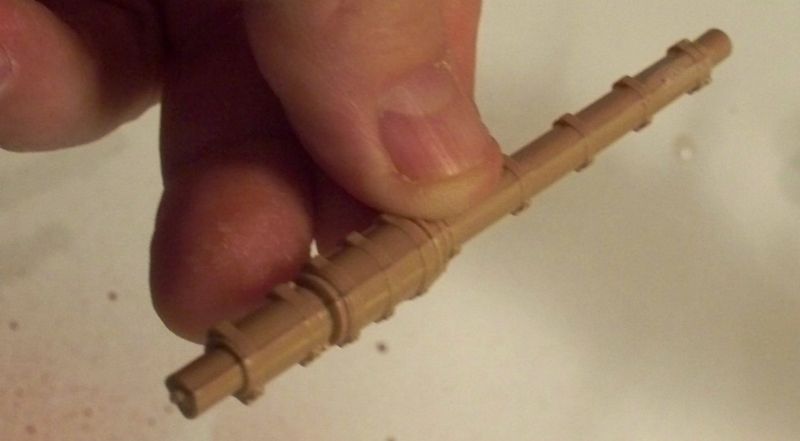
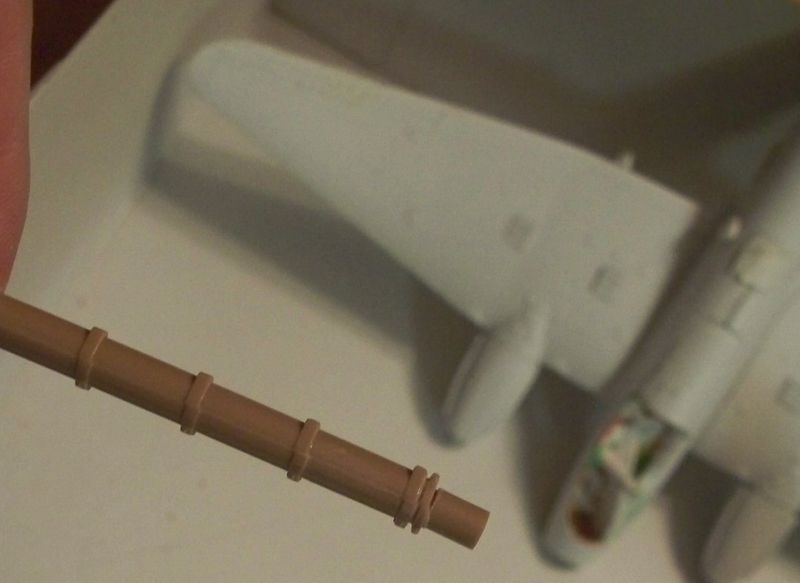
Ok so here is the barrel. As I had posted earlier, I wanted to try this first. That second closeup I contrasted some of the color so you can see the onvious seam that will have to be sanded.
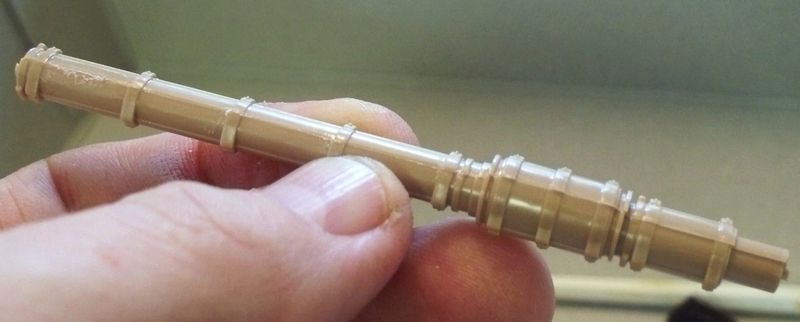
Although there is some work there, when I was at Hobby Lobby the other day in the modleing aisle I noted they had some sanding sticks that were actually narrower than the Squadron sticks, so I am going to get them when I pick up some styrene sheet for other parts of this model, and we will see!
Ok so here is the barrel. As I had posted earlier, I wanted to try this first. That second closeup I contrasted some of the color so you can see the onvious seam that will have to be sanded.


Although there is some work there, when I was at Hobby Lobby the other day in the modleing aisle I noted they had some sanding sticks that were actually narrower than the Squadron sticks, so I am going to get them when I pick up some styrene sheet for other parts of this model, and we will see!
iambrb
Well-known member
TAMIYA MERKAVA MK.I
OK, so getting a bit of work done tonight, and here is what I do and do not like regarding this model:
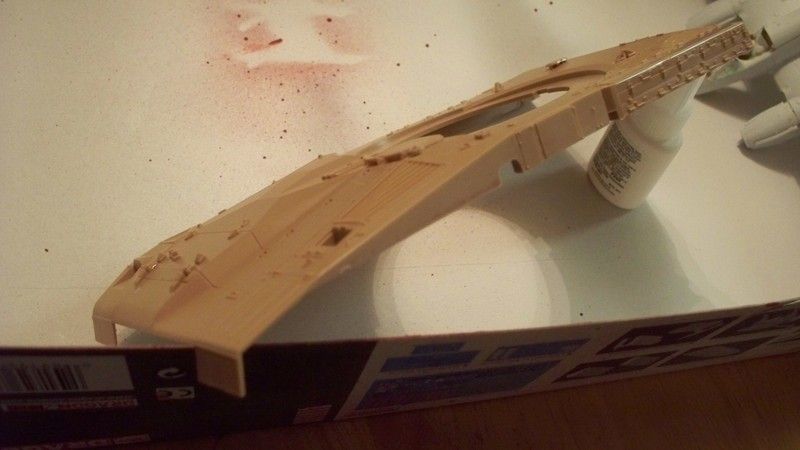
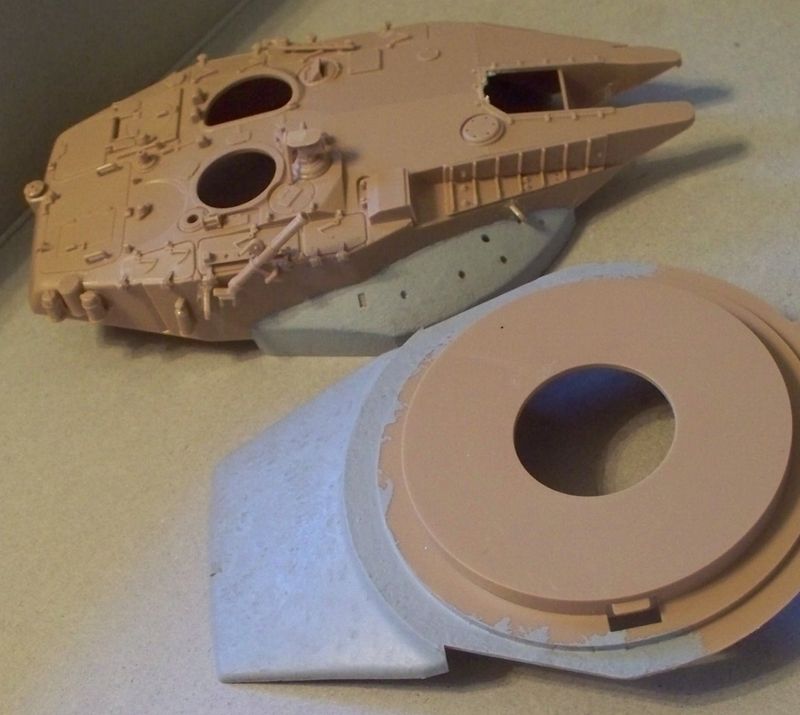
Tamiya models are just flat-out NEAT. I mean, whoever on here first said they just fall together could not be more right. I mean this thing does fall together! I have been reviewing various pics and I found an older build blog on this particular model. In it, the modeler states that he did not intend to use the side skirts, and I saw some models when googling this that had partial skirts and that sort, but when looking at actual photos from 1982 Lebanon, the time frame I am going for, I was not able to find any like that - virtually every tank used in action had these skirts, so I chose to build the lower hull pretty much OOB, and here it my work thus far:
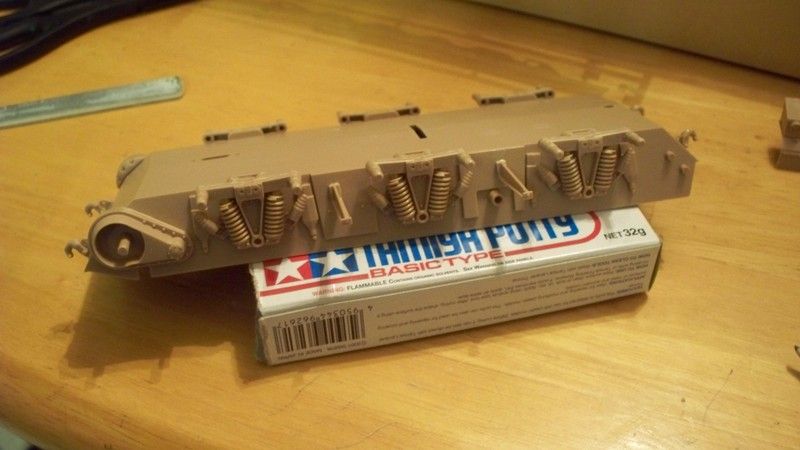
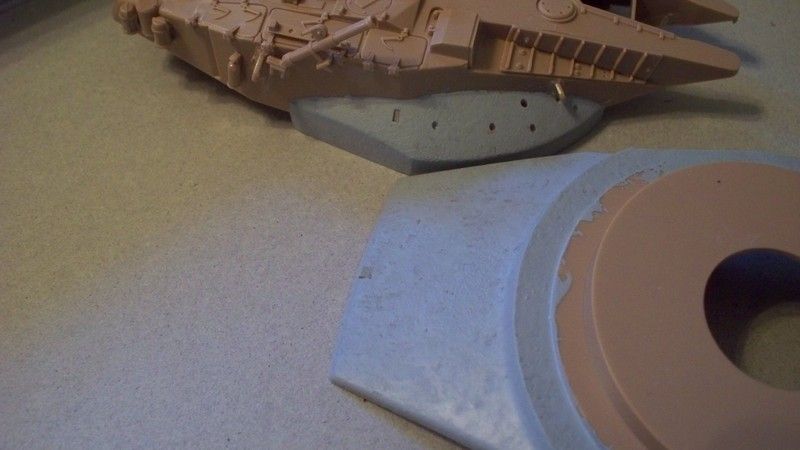
One thing I do not care for is the thickness of the fenders. here you can see it in the front
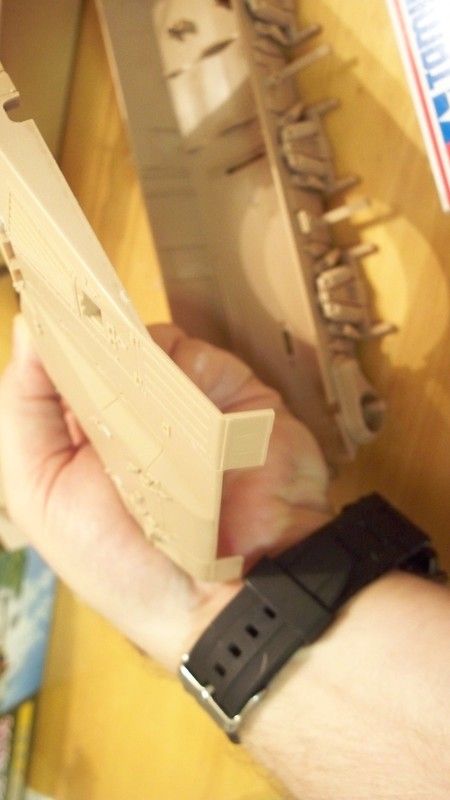
In the rear it is the same, but I think what I am going to do here is to get some sheet styrene and cut off the fenders front & rear and replace them, and maybe those bolts at the top of the fender as well, or perhaps thin out the back and 'recycle' them
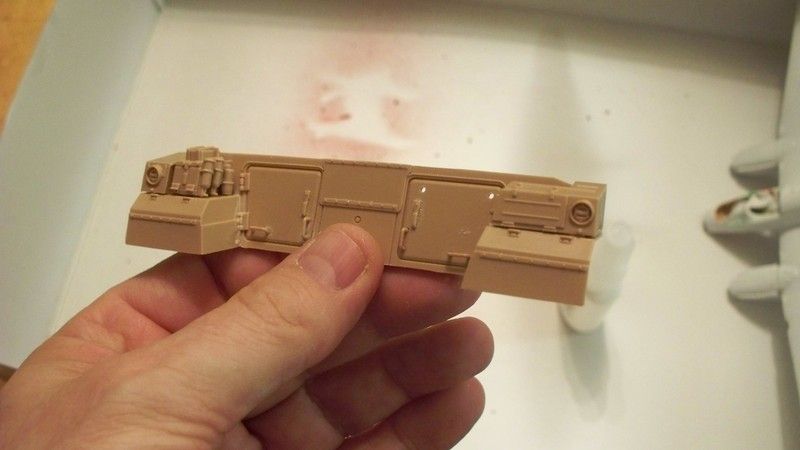
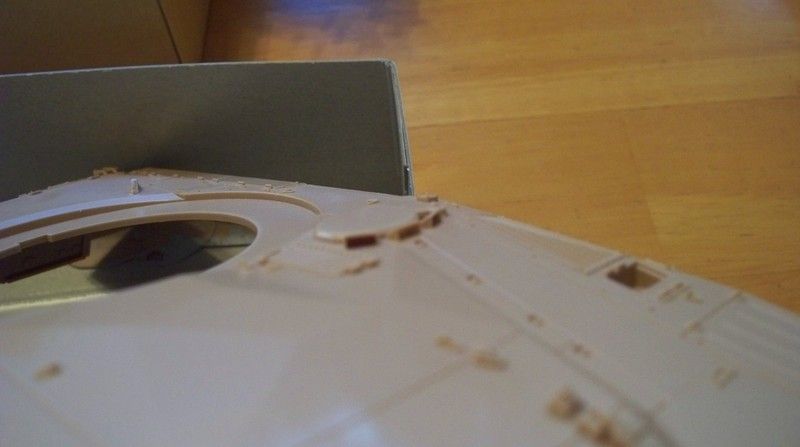
Hard to see in these pics, but one negative point from Tamiya at the time these molds were made is that they both sponson sides were left completely open. in fact, both that top lower hull pic and some of these others show some places that Tamiya left as 'holes' that allow you to see right into the tank, skirts or no, so I have to also plate over that with styrene too. really not going to be too tough, just a bit of a PITA (OK, so maybe I do have a touch of AMS...). I know that with the side skirts the possibility of this being seen is pretty low, but I am looking for a really keen finished product here.
So one of the things that I really seriously do NOT like is the barrel. the more I look at it, especialy with the muzzle attached, the less I like it. In this pic, you cane see those huge-mondo-lines that I am going to have to scrub the crapola out of.
In this pic you can see the worst offender. In order to get the evacuator to line up correctly I had to allow the muzzle portion to be a bit off, and man does it ever show here! This is the bottom but still looks really sucky, don't think I can go with this without some real work.
This part really looks like that muzzle is crooked, but I swear I used my square from my press-brake days and she mikes out at 90 degrees on the barrel head. Still looks crooked though

So I think next pay period, I am going to spring for that 105mm barrel from Scotland. it will be the same cost as the kit! Oh well. despite the tiny isues it is off to a good start. Enjoying this much more so than the DML Sdkfz.251. I guess that is 'cause I have been out of it awhile and am just getting back in, and tamiya engineering makes the difference. At any rate, hope to get a bit more done soon, let me know about your experiences with Tamiya kits!
OK, so getting a bit of work done tonight, and here is what I do and do not like regarding this model:
Tamiya models are just flat-out NEAT. I mean, whoever on here first said they just fall together could not be more right. I mean this thing does fall together! I have been reviewing various pics and I found an older build blog on this particular model. In it, the modeler states that he did not intend to use the side skirts, and I saw some models when googling this that had partial skirts and that sort, but when looking at actual photos from 1982 Lebanon, the time frame I am going for, I was not able to find any like that - virtually every tank used in action had these skirts, so I chose to build the lower hull pretty much OOB, and here it my work thus far:

One thing I do not care for is the thickness of the fenders. here you can see it in the front


In the rear it is the same, but I think what I am going to do here is to get some sheet styrene and cut off the fenders front & rear and replace them, and maybe those bolts at the top of the fender as well, or perhaps thin out the back and 'recycle' them

Hard to see in these pics, but one negative point from Tamiya at the time these molds were made is that they both sponson sides were left completely open. in fact, both that top lower hull pic and some of these others show some places that Tamiya left as 'holes' that allow you to see right into the tank, skirts or no, so I have to also plate over that with styrene too. really not going to be too tough, just a bit of a PITA (OK, so maybe I do have a touch of AMS...). I know that with the side skirts the possibility of this being seen is pretty low, but I am looking for a really keen finished product here.
So one of the things that I really seriously do NOT like is the barrel. the more I look at it, especialy with the muzzle attached, the less I like it. In this pic, you cane see those huge-mondo-lines that I am going to have to scrub the crapola out of.

In this pic you can see the worst offender. In order to get the evacuator to line up correctly I had to allow the muzzle portion to be a bit off, and man does it ever show here! This is the bottom but still looks really sucky, don't think I can go with this without some real work.

This part really looks like that muzzle is crooked, but I swear I used my square from my press-brake days and she mikes out at 90 degrees on the barrel head. Still looks crooked though

So I think next pay period, I am going to spring for that 105mm barrel from Scotland. it will be the same cost as the kit! Oh well. despite the tiny isues it is off to a good start. Enjoying this much more so than the DML Sdkfz.251. I guess that is 'cause I have been out of it awhile and am just getting back in, and tamiya engineering makes the difference. At any rate, hope to get a bit more done soon, let me know about your experiences with Tamiya kits!

TAMIYA MERKAVA MK.I
Or you could just thin the fenders by sanding the insides.
Or you could just thin the fenders by sanding the insides.
iambrb
Well-known member
TAMIYA MERKAVA MK.I
More I thunk it over, the more I am likley to to just 'dat.
Or you could just thin the fenders by sanding the insides.
More I thunk it over, the more I am likley to to just 'dat.
135engineer
Active member
That's gona look good . Nice start
iambrb
Well-known member
Ok, so I know I have not been on in a bit, besides some 'lurking' and the odd comment, but today, I took a day off from work, both to burn rather than lose a vacation day, and in the late day-evening I am going to be very near MP's house, volunteering to direct traffic for a local children's home Christmas light program. As a result, I am getting a good bit of work done today, so here is some of the latest:
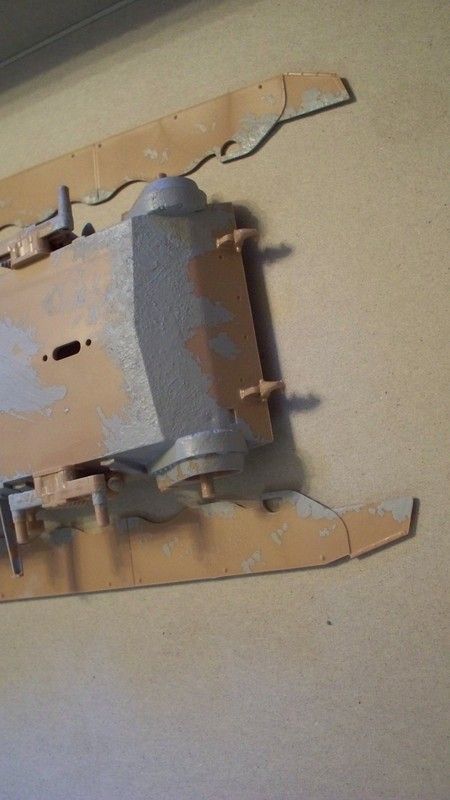
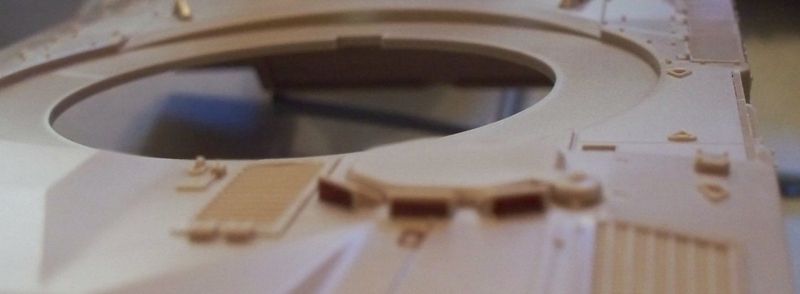
So I just do not think that the cast portions of the turret sides & underside are good enough on the tamiya kit,based on alot of photo reasearch, so I took some MR. Surfacer 500 and added to it. neat stuff, just brush it on and as it becomes tacky, just keep dabbing it until you get the desired consistency
Note that I basically have the turret comeplete until I decide what to do figure-wise, I even drilled out the mortar to give it a better look. I had origiannally intended to go with the Meng tank crew, but they are a bit too modern, as I am looking for 1982-type figures. I graduated hi-school in 1982, & I remember that back then there were no plastic bottles! I am seriously thinking about the Verlinden guys, as I have a specific idea in mind, depending on how some experiments go.
I also am wanting to show dried/light mud and as such, I have applied so.e Mr. Surfacer to the bottom of the hull, around the running gear, and to the bottom portions of the side skirts. With a little drybrush and paint, it should (hopefully) come out looking nice
Now Tamiya wanted me to use clear bits for the periscopes which I did not like, as I would be able to see into the hull. Instead, I got the idea to use some old blank camera film nefatives. here in the first pic you can see it in the periscope on the left only and then in the 2nd with it in all. Not the easiest thing to do, trimming to fit and all that, but it came out looking very nice I think
Lastly, note that the wheels that come with the kit are a bit simplistic on the drive sprocket and rear wheel, they both lack holes in critical areas, so I have ordered resiv versions of both and am waiting for the Blitzkrieg (I think it is) wheels to show up. it was only $2 more for all the wheels than just the drive and rears, so I went with that, 2 bucks more is a good trade for not having to remove the seam lines on all those road wheels. When they get here I will add in the Mr. Surfacer, that is why you see it only sparingly on the side here

So right now, I am pretty much at a stop point. I am waiting for my Evergreen sheet from Sprue bros. (should be here today!) so I can fill in some of the stuff Tamiya leaves glaringly in the open. Also, I am waiting on resin cast wheels from Australia, a barrel from Scotland, a Verlinden stowage kit & Legend M2 to be bore mounted over the main gun (Note that some but not all had this in 1982, based upon the research I have been doing, so I am going with it.).
All in all not looking too bad. When I get the plastic card I have a bit of work ahad of me, but that's the fun part, right?
Going to make the most of the day and get some other subject modeling in, take care and let me know both what you think and any improvments you can suggest!
So I just do not think that the cast portions of the turret sides & underside are good enough on the tamiya kit,based on alot of photo reasearch, so I took some MR. Surfacer 500 and added to it. neat stuff, just brush it on and as it becomes tacky, just keep dabbing it until you get the desired consistency


Note that I basically have the turret comeplete until I decide what to do figure-wise, I even drilled out the mortar to give it a better look. I had origiannally intended to go with the Meng tank crew, but they are a bit too modern, as I am looking for 1982-type figures. I graduated hi-school in 1982, & I remember that back then there were no plastic bottles! I am seriously thinking about the Verlinden guys, as I have a specific idea in mind, depending on how some experiments go.
I also am wanting to show dried/light mud and as such, I have applied so.e Mr. Surfacer to the bottom of the hull, around the running gear, and to the bottom portions of the side skirts. With a little drybrush and paint, it should (hopefully) come out looking nice

Now Tamiya wanted me to use clear bits for the periscopes which I did not like, as I would be able to see into the hull. Instead, I got the idea to use some old blank camera film nefatives. here in the first pic you can see it in the periscope on the left only and then in the 2nd with it in all. Not the easiest thing to do, trimming to fit and all that, but it came out looking very nice I think


Lastly, note that the wheels that come with the kit are a bit simplistic on the drive sprocket and rear wheel, they both lack holes in critical areas, so I have ordered resiv versions of both and am waiting for the Blitzkrieg (I think it is) wheels to show up. it was only $2 more for all the wheels than just the drive and rears, so I went with that, 2 bucks more is a good trade for not having to remove the seam lines on all those road wheels. When they get here I will add in the Mr. Surfacer, that is why you see it only sparingly on the side here

So right now, I am pretty much at a stop point. I am waiting for my Evergreen sheet from Sprue bros. (should be here today!) so I can fill in some of the stuff Tamiya leaves glaringly in the open. Also, I am waiting on resin cast wheels from Australia, a barrel from Scotland, a Verlinden stowage kit & Legend M2 to be bore mounted over the main gun (Note that some but not all had this in 1982, based upon the research I have been doing, so I am going with it.).
All in all not looking too bad. When I get the plastic card I have a bit of work ahad of me, but that's the fun part, right?
Going to make the most of the day and get some other subject modeling in, take care and let me know both what you think and any improvments you can suggest!
135engineer
Active member
Looking good. when you do the periscope lenses try the allclad armored glass it has a great look.

Is that why traffic was backed up all the way to town? 
Good for you Bruce.
Our local children's home, Connie Maxwell Children's Home has been doing Christmas lights for many years now, they have full program of shows, hay rides, carriage rides and all sorts of activities. Last several years folks from all over have been coming to see. Folks are able to drive through and see what the families have done.
Bruce and I both have a lot of friends who grew up out there.
Looking good Bruce, remember that mud would get EVERYWHERE when it was churning up stuff.
iambrb
Well-known member
Is that why traffic was backed up all the way to town?
Looking good Bruce, remember that mud would get EVERYWHERE when it was churning up stuff.
very good! Actually, I was just directing buses into parking. had 18 in three hours! Also had a few pwoplw ask about other lights....so I gave them your address, and told them they would get a free dinner too! Any of 'em make it?
:tomato
really it was a good time, I had no idea that they did all of that - there were over 100 people still waiting for horse & buggy rides at 8:30 pm when they quit leting buses in. it was also net to see the many signs that said "Jesus is the reason for the season," & similar, and displays that were not afraid to show it in today's world climate.
I understand what you are saying about da' mud. I did not want it too thickly applied, and the upperportion there will be hidden by the armored skirts, so just waiting for all the stuff to show up before i roll on.
iambrb
Well-known member
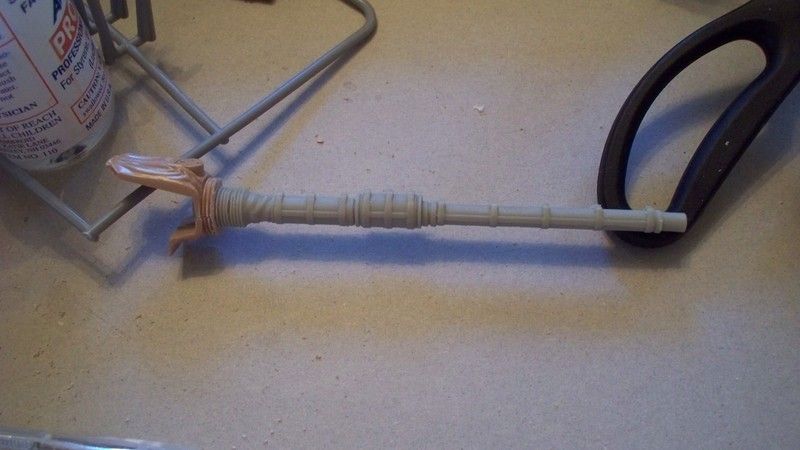
Ok so the barrel came in! I got right to work on it. in taking it outta the package, I noticed straight outta the gate it wa not a simple replacement item, note that it is longer thant the Tamiya part:
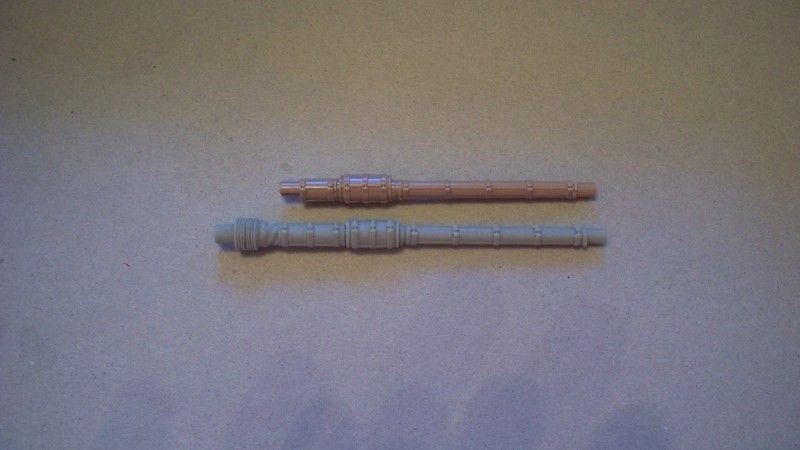
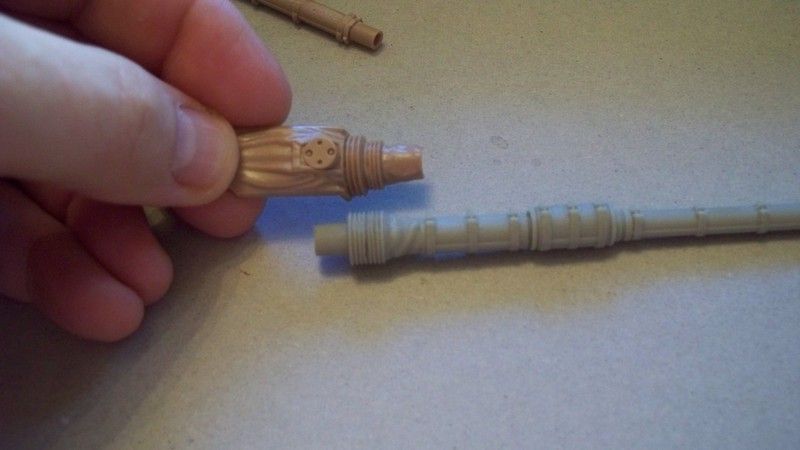
really not a big deal, the tamiya product has the mantlet seperate, and the Accurate Armor does not. these two pics show the patient prior to surgery, and the patient after with the item cut and super-glued in place.
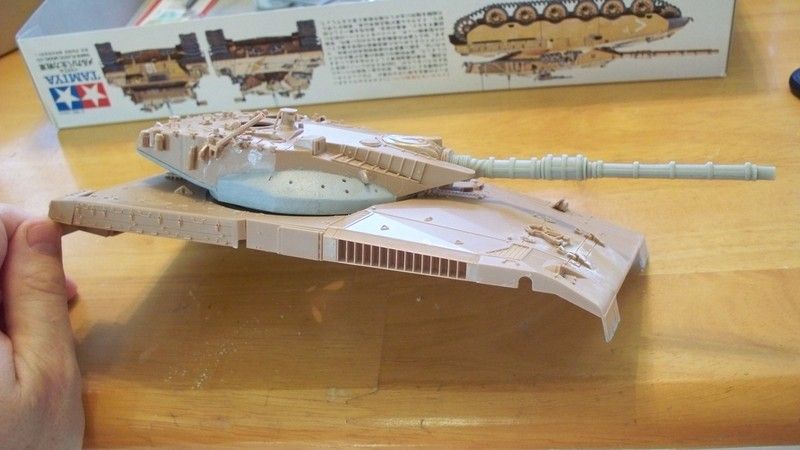
Lasty was simply taking a quick peek at some photo references, then getting her mounted up. this is the gun installed, and the turret just 'set' together (not glued), to check the gun angle when on the turet. The angle worked out just right, with a wee bit of fitting
And onward I roll! I anxiously await the rest of my parts, something I do not do well!

really not a big deal, the tamiya product has the mantlet seperate, and the Accurate Armor does not. these two pics show the patient prior to surgery, and the patient after with the item cut and super-glued in place.


Lasty was simply taking a quick peek at some photo references, then getting her mounted up. this is the gun installed, and the turret just 'set' together (not glued), to check the gun angle when on the turet. The angle worked out just right, with a wee bit of fitting

And onward I roll! I anxiously await the rest of my parts, something I do not do well!
Similar threads
- Replies
- 4
- Views
- 2K