• Modelers Alliance has updated the forum software on our website. We have migrated all post, content and user accounts but we could not migrate the passwords.
    This requires that you manually reset your password.
    Please click here, http://modelersalliance.org/forums/login to go to logon page and use the "Forgot your Password" option.

Sherman IDF M50

iambrb

Well-known member
Ok so here is my entry, but it might be a week or so before I really get her rolling:

19E93F54-47CD-4DFC-A617-2757DC965F0C.jpeg

BEDBF2BE-4543-4A07-BE4B-CA9E5E8B277D.jpeg

46C728E2-8023-42FA-8D06-F71D321BC465.jpeg

so I had bought a Masterpiece Models version of this, only to find it incomplete,as in the guy had completely wrong suspension and the like in it, but that’s how it sometimes goes when u buy an old kit at a show!
So I have the Dragon kit, along with Star Decals recent reissue of their decal set

have several irons in the fire at the moment, but will get it rolling soon!

so I am TOTALLY digging the Lebanese M50 Eric posted bee-low, so much so I am thinking oh doing it just as shown!
 
Last edited:
Yummy!! :good:
I say step just outside the box and go for a Southern Lebanese Army M50 :coolio2:
1590328886229.png

Yes that is a Blue-Gray with dark blue/black stripes...:bigrin:
 
How Verrrry interesting!!!

Last time I listened to you I wound up (still) building up a vignette with almost 100 sunflowers!

So let me chew this one over, I am getting tired of Sand Grey
 
Hoo-Whee is this thing ever a Dragon kit! I had read an article regarding This kit and it’s ‘difficulties’ and am REALLY living it!

so each HVSS suspension assy is 12-14 parts!
B4C6D50B-ADE6-41CD-B50D-DA5BE3E075F6.jpeg
Not only that, but the mounting point for these will not fit without modification. Here it is showing the level of gap before modification

65F1A9AC-BB57-4FDC-8150-483DCE528BA2.jpeg
I really don’t have pics, but the mounting points were so small, I had to hand drill holes & install pins, along with a mini-level & a handmade jig. It don’t look like much, but it’s all solid, and even the wheels touch
3F79B080-6D12-4694-BE53-D7CCC70DD6EE.jpeg
2D6F4313-CF6A-48D9-95A4-A43AB97D49D6.jpeg
 

Attachments

  • 6DE72A7D-B50C-4ECD-95DE-7133B4F4E188.jpeg
    6DE72A7D-B50C-4ECD-95DE-7133B4F4E188.jpeg
    829.3 KB · Views: 13
A bit more as of late. I am going with rhe a Lebanese version, even found all the correct paint! To that end, if you look at those pics of the Lebanese tanks, you’ll see that the were supplied with no tools or any of that lot as you would normally find on ‘Shermie’s’ . Issue is, this Dragon kit ha holes all over the Hull for tools, so I had to stretch spruce, sink it in and cut/sand
CF545CBB-71DE-4569-BEC6-DB36D2190895.jpeg
3385067C-A59C-402B-94E1-96C15E0A77D7.jpeg
D61514AD-DE9A-4463-B9CD-3ABA4BA7F495.jpeg
 
Next up was the Turret. A highly esteemed member here (cough-Eric...cough...) donated a DEF model turret, whose ring had already been modified for a Tamiya kit. I was too high, so I took my hand ol' wood rasp to it and thinned it down, to like paper thing then fitted it, and here is where said turret sits. Note that I have to take off the very top bit
5CAD553C-FEBF-4DE3-8D53-CEBC2BB8168C.jpeg
627AC4DF-06ED-4BF6-B3F6-C5CF8D970B08.jpeg
1EEA2A30-B4D5-442B-9FB8-435A61556653.jpeg
 
Last edited:
So as you can see the rasp worked really well. There were two versions of this French-designed improved gun, both with & w/out the canvas mantlet cover, but the one in the pic had it (as did most). So I got out the razor saw and removed a small bit of the mantlet and installed it. I have a tiny bit to patch in one side, but I feel good with this. Won’t put much else on the turret till the end as the remaining bits are quite fragile, but again, not bad. I will add that this turret or the Verlinden product is VERY necessary as the kit turret is seriously not shaped right around the turret bustle
3F6C006B-7310-46B5-B2BA-2CE7044F186C.jpeg
2E0542E3-880A-4A76-99EA-0216E456E5F5.jpeg
045F796E-C0F7-4156-87DC-D84DB5498BF9.jpeg
4E51B319-7F60-40AA-88B7-BE804E137C81.jpeg
 
Looking Great there Bruce! That turret really improves the over all appearance of the kit. Keep up the good work!
:victory:
 
So feeling a bit of the blahs as of late:
0735A81F-499C-464E-878A-3744B642302E.jpeg

And today was a bit of a frustrating one for this model.
Sinkmarks anyone?

A0BC7E69-9B41-4F1A-B655-9F17639ADC5C.jpeg

also the tracks proved to be doubly frustrating. The guide horns have big seams and there are pin marks in the main track
AB42C275-507D-40E3-B769-81D25F1B7B48.jpeg

So it looks like aftermarkets are in order! So that’s it for today, sorry there’s no better to report
 
Last edited:
Ok feeling pretty good about today's efforts! So with the exception of needing to fill in some holes in the fender and at the rear where the telephone box should be, it is really looking nice. Here it is just 'setting' together, the upper, lower, & turret are not glued in place. So besides a few empty brackets I am basically I am at a stop-point until the tracks come in and i can get them assembled, but overall looking quite nice I do say!

m501.jpg
m502.jpg
m503.jpg
m504.jpg
 
OK so I now have both a seat of Tamiya M51 rubber band tracks plus a set of AFV Resin tracks, so time to get the running gear on this, right? Not so fast. Only Dragon would design this to have no securing pins or any of that on the trailing wheel! So I drill holes & make my own pins, no prob., right?
z15.jpg

z14.jpg

Not so fast. Note the 'hub' where I installed the pins. Turns out this makes the return wheel stand out waaaaaay to far! So I had pull the pins back out, and do surgery. Note how much of the hub is gone (Hint: try ALL of it)
z12.jpg


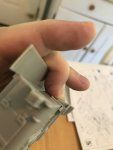
But hey, at least it all lines up now! So then I had to re-drill the holes. Also, the two wheels themselves basically fell apart when I tried to drill out one part just a tad, so I took them apart, drilled more, and made a long pin that goes thru both wheels and into the 'hub,' or whats left of it. Came out nice but man is thing ever some work.

z13.jpg
z11.jpg
 
Last edited:
Back
Top