• Modelers Alliance has updated the forum software on our website. We have migrated all post, content and user accounts but we could not migrate the passwords.
    This requires that you manually reset your password.
    Please click here, http://modelersalliance.org/forums/login to go to logon page and use the "Forgot your Password" option.

Sharkman's AMTech P-40

Great start Warren, maybe that should have been the approach I took with the IL2 exhaust and I wouldn't have lost them inside.

Try coating that wire with some Mr. Surfacer to smooth it out. :popcorn
 
Thanks all!

Work is proceeding slowly!

Got the pit painted up and gave it a wash followed by some dry brushing.


For the exhaust inserts, I thought I would add some more bracing, just in case, so they don't pop out later (You got me worried Bob with your IL-2)! I just used some spare sprue.


Fuselage is together!


I've already assembled one of these AMTech kits (the fictional p-40 I was working on, have to finish that at some point too!) and that kit fit together much better than this kit. Part of the body or the wing must be warped because this particular kit has some pretty bad wing root gaps that will need to be filled. I wouldn't be discouraged though, for all of you who bought similar kits, My other ones look ok, I think it was just this one but be on the look out!


Cockpit in place and wings glued on! Next up, fill, sand, repeat! :frantic

 
Did you check the dihedral? On a few of my kits, the wings are flattened and the dihedral needs to be reset.

Regards,
 
Excellent idea on the exhaust inserts. I was thinking the other day how to pop just the cowl off to get it back in place. This is why we share these builds, learn from each other, I screw it up and y'all find a fix. :rotf
 
I'd certainly echo what the lads have said, check that dihedral it's very pronounced on the P-40.

Ian
 
Thanks for the advice guys! I didn't check the dihedral and it is fairly flat. After looking at the wings and fuse more carefully, there is definitely a warp in this particular kit.

Attempting a fix, pics soon. Stay tuned!

:fencing
 
I didn't check the dihedral and it is fairly flat. After looking at the wings and fuse more carefully, there is definitely a warp in this particular kit.

Let's say I recognized the gap! If you (or your loved one) has a blow dryer, tape the wingtips up to close the gap and heat the center of the lower wing slowly. This will soften the plastic enough to let the tape hold the wing to give it the dihedral.Only heat the center (actually, either side of the hump on the center line)!

Regards,
 
Been a busy week!

That is a great tip Saul, but I wasn't able to use it as we have no hair dryer! I believe I have this fixed. I'll post some pics later tonight.

:drinks
 
we have no hair dryer!

Then, how do you get your hair so fluffy?

Moving-picture-puppy-dog-skaking-off-water-animated-gif.gif


Regards,
 
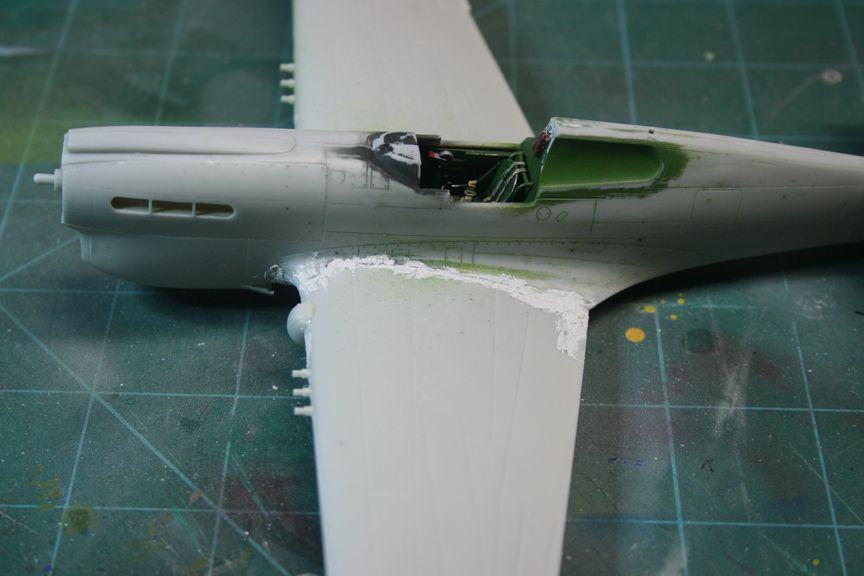
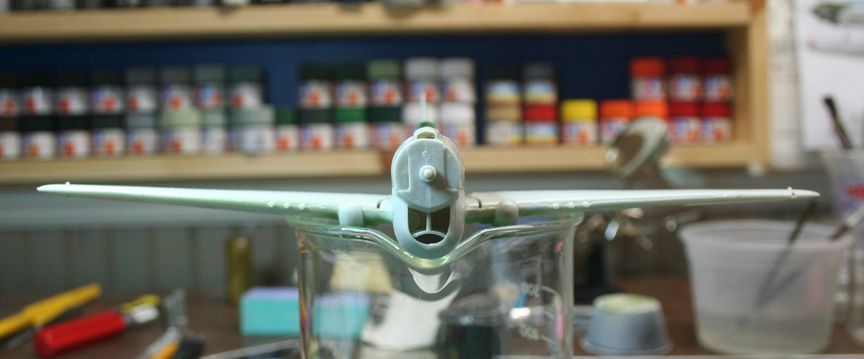
Here's where I was at. i hadn't checked the dihedral (thanks for pointing that out guys!) and it was pretty flat,as you can see here


Without the availability of a hairdryer, I thought that if I carve out some of the top wing where the wings were joined to the fuselage, thus releasing some of the tension, I might be able to bend the wings into the correct position.


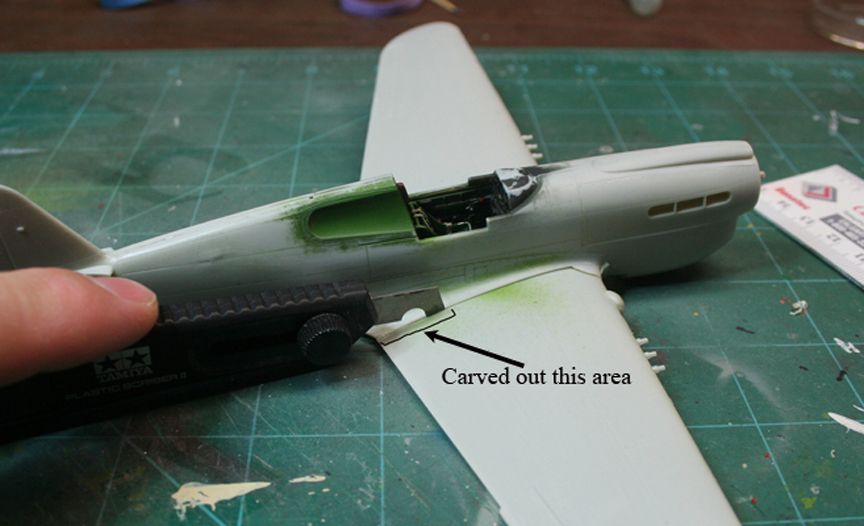
Followed by liberal amounts of gap filling Ca glue and tape and allowed to sit for a couple days.


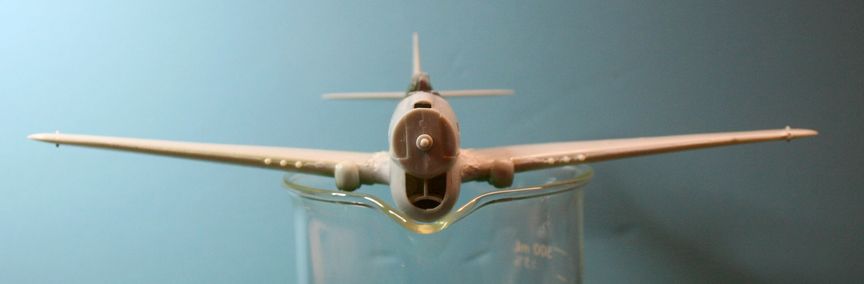
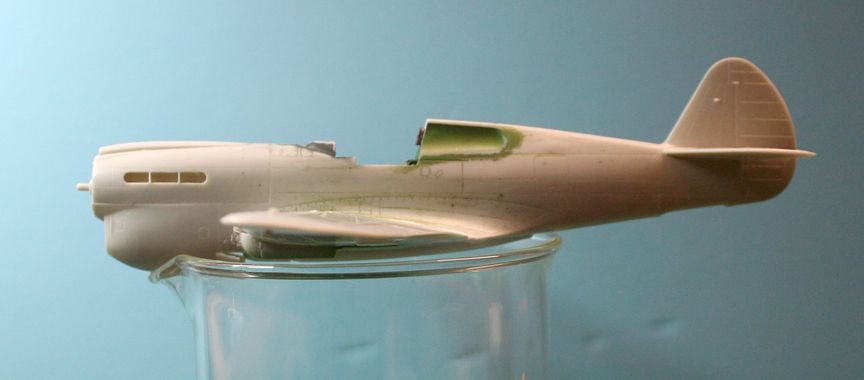
Now, this is what she looks like. Could possible go more, but this is better than before. There wea still a bit of a gap near the front of the wing root but the gap filling CA and some sanding with a rat tail file helped out.


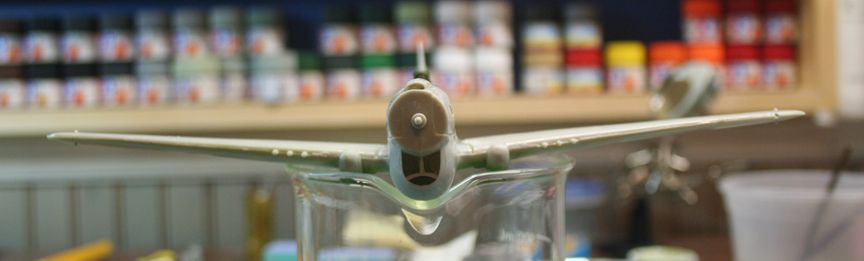
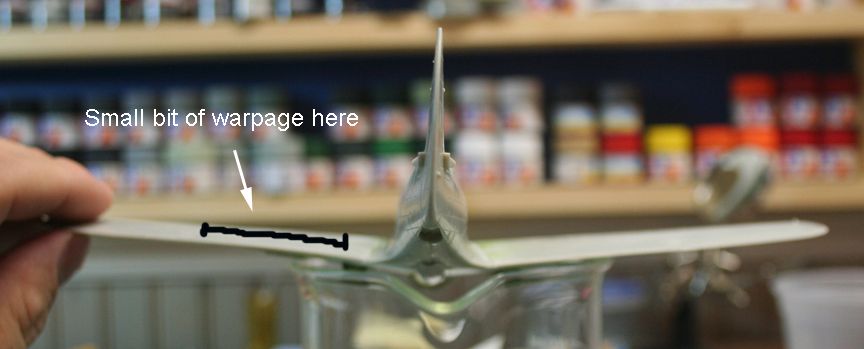
Looking more closely, this kit definitely has some slight flaws I didn't see before. There is still a slight warp in the port side wing


and a bit of a warp in the body going to starboard. I've tried to show it in these pictures but not sure if it is noticeable. The gaps are much smaller in the wing root though and more manageable.


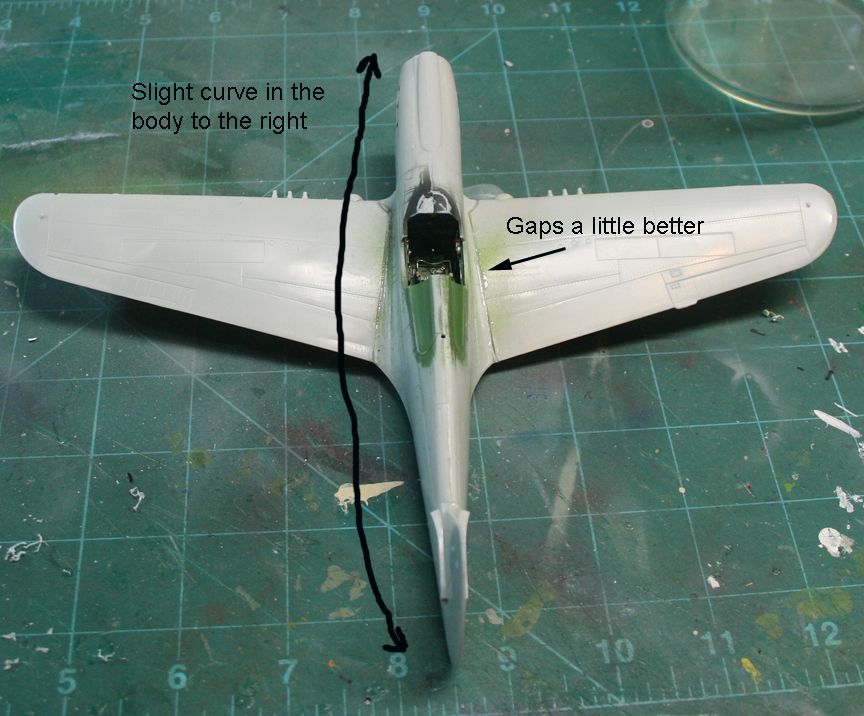
I've just added some fill and need to sand the front part of the wing roots but I think I can live with this fix.

 
Still plugging along slowly with this one.

Started to look at the gear for this kit. From my reference pics, it looks like the kit pieces are wrong so I'll try to address something for that!


Otherwise, I cleaned up the mold lines on the gear and drilled out the tie down loops


I added some little actuators in the cowling, should have really added more in there before I closed the fuselage up.


This is rough for now but I will try and add a bit of plumbing to the wheel wells too (again, should have addressed this before buttoning up the wings).

 
Back
Top