
-
Modelers Alliance has updated the forum software on our website. We have migrated all post, content and user accounts but we could not migrate the passwords.
This requires that you manually reset your password.
Please click here, http://modelersalliance.org/forums/login to go to logon page and use the "Forgot your Password" option.
You are using an out of date browser. It may not display this or other websites correctly.
You should upgrade or use an alternative browser.
You should upgrade or use an alternative browser.
Revell '65 Mustang Fastback
- Thread starter Greg Kimsey
- Start date


Greg Kimsey
Well-known member
I thought the same thing!Having the 1/1 scale version in the garage is a definite advantage!
Greg Kimsey
Well-known member
Well, after looking at my 1:1 I realized I had done the bed of the trunk wrong. I removed what I had done, and using a piece of corrugated plastic I glued in the top of the gas tank. It isn't exact, but looks cool. I then used 2mm x .5mm strip to add the edges. Then glued on .03hex rod cut into tiny bolt heads in the correct spots, which are NOT eveny spaced and seem quite random. The filler tube is 2.5mm aluminum tube.
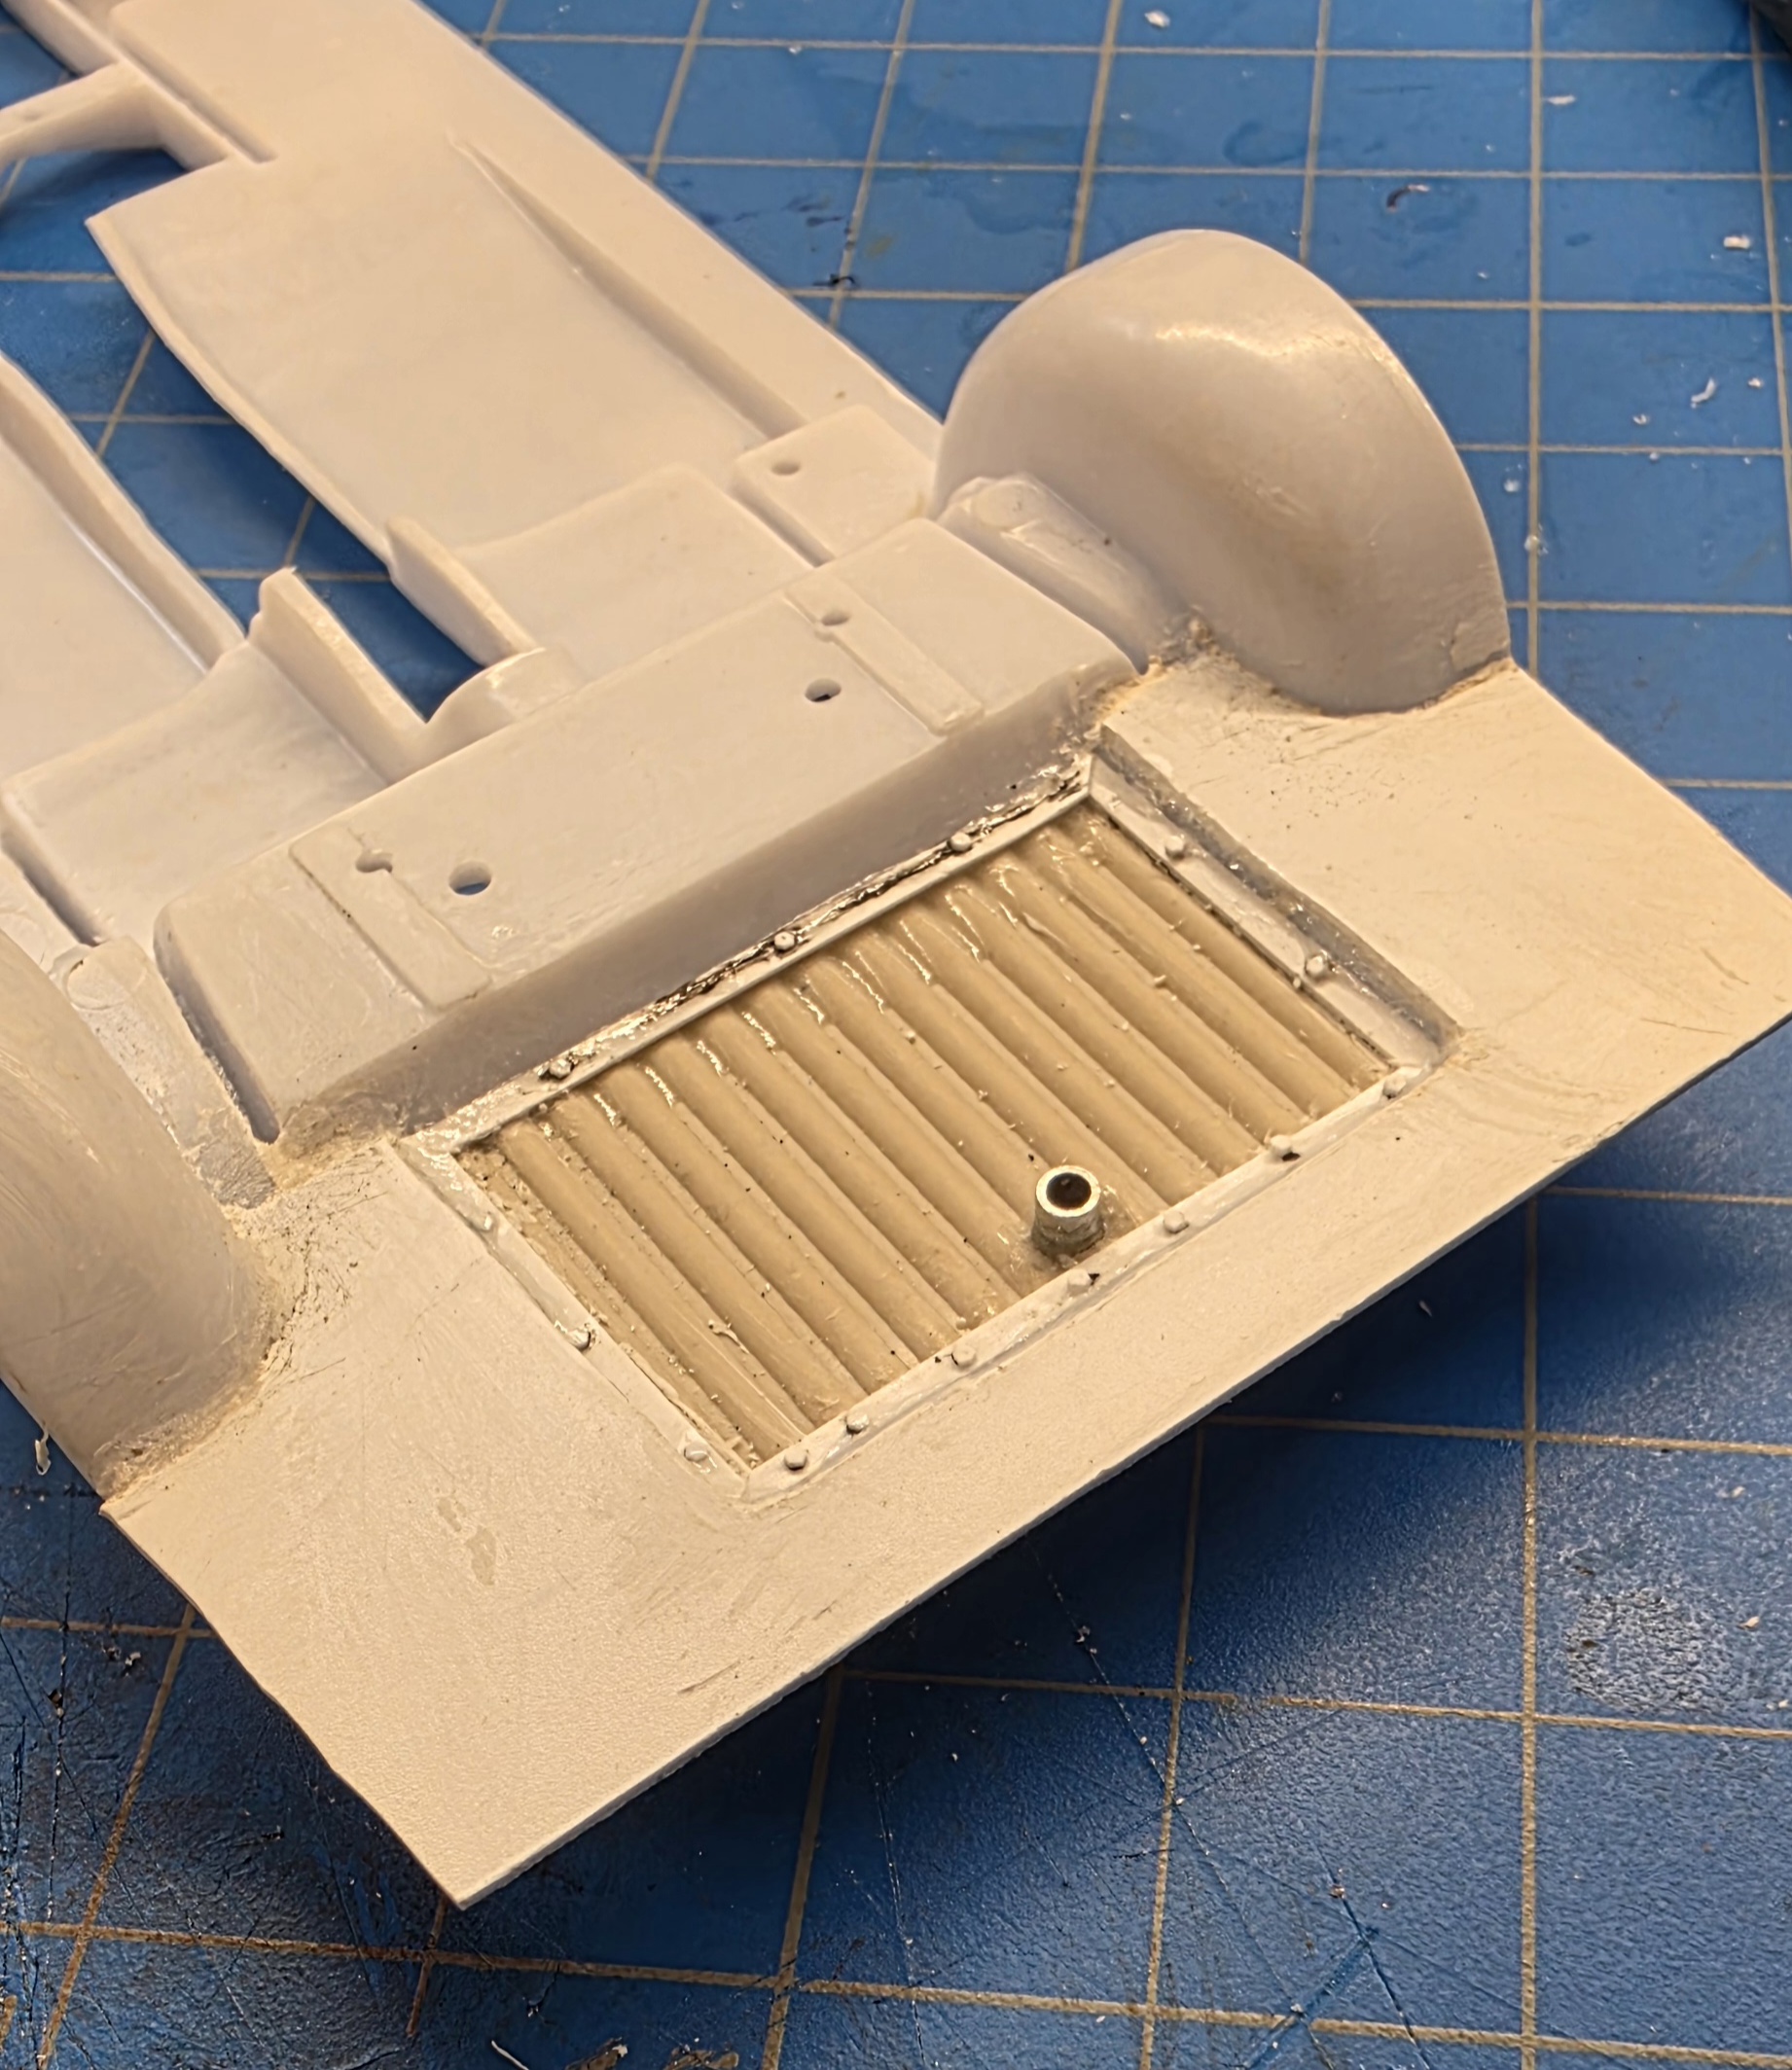
I am fixing issues as I see them with no rhyme or reason. I noticed the undercarriage had molded brake and fuel lines...
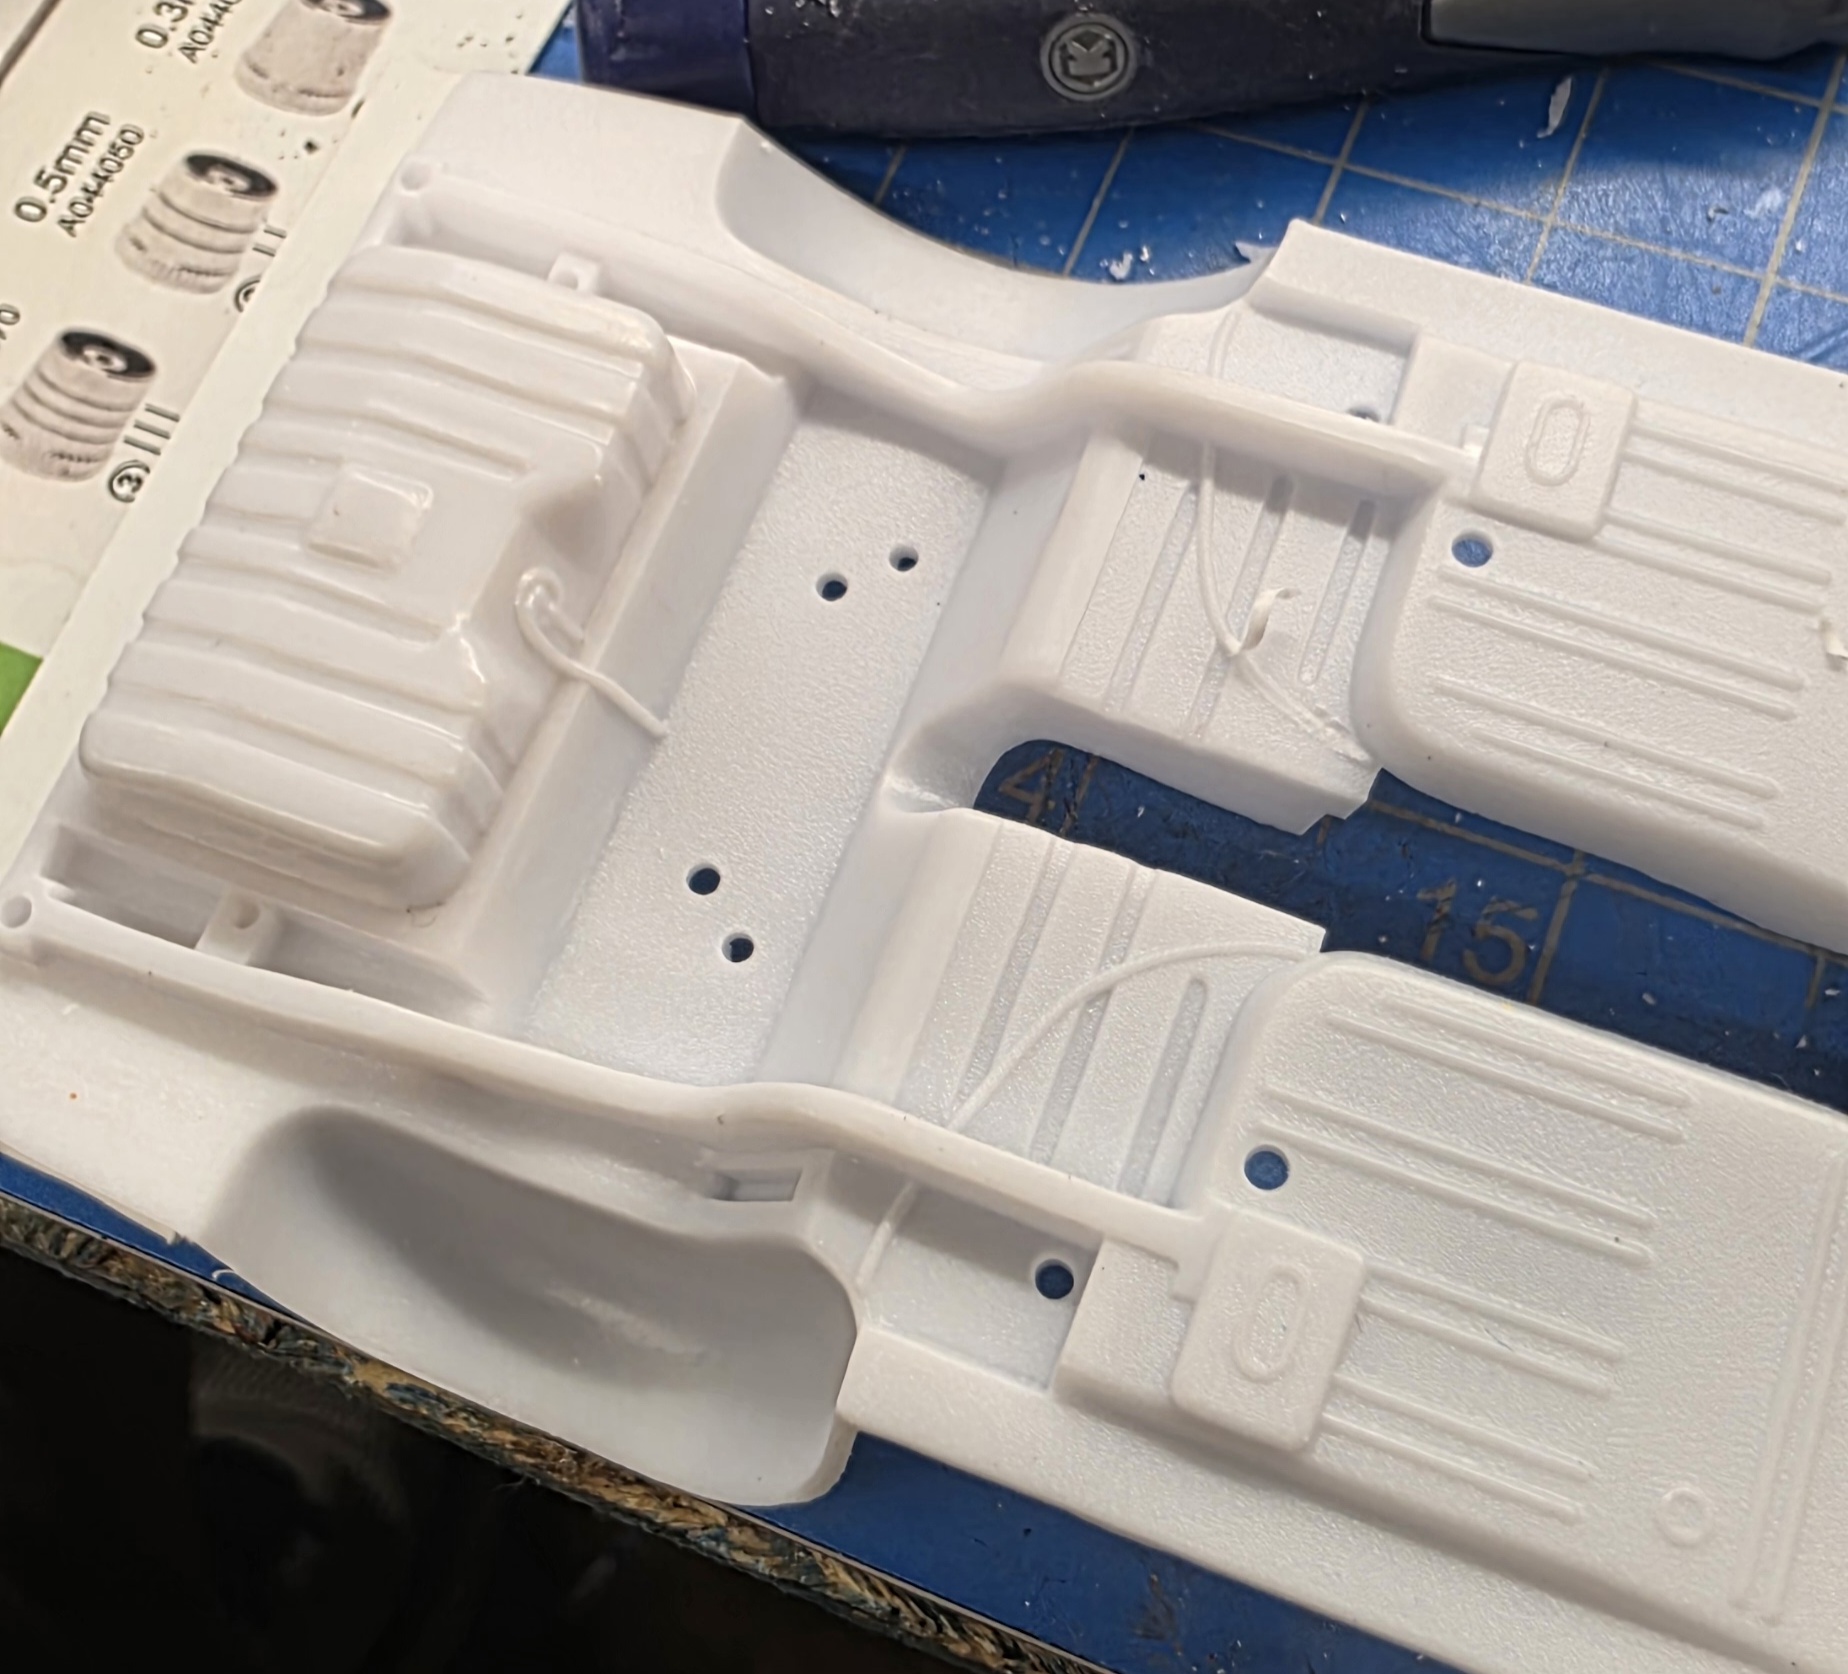
The are quite atrocious and had to go.
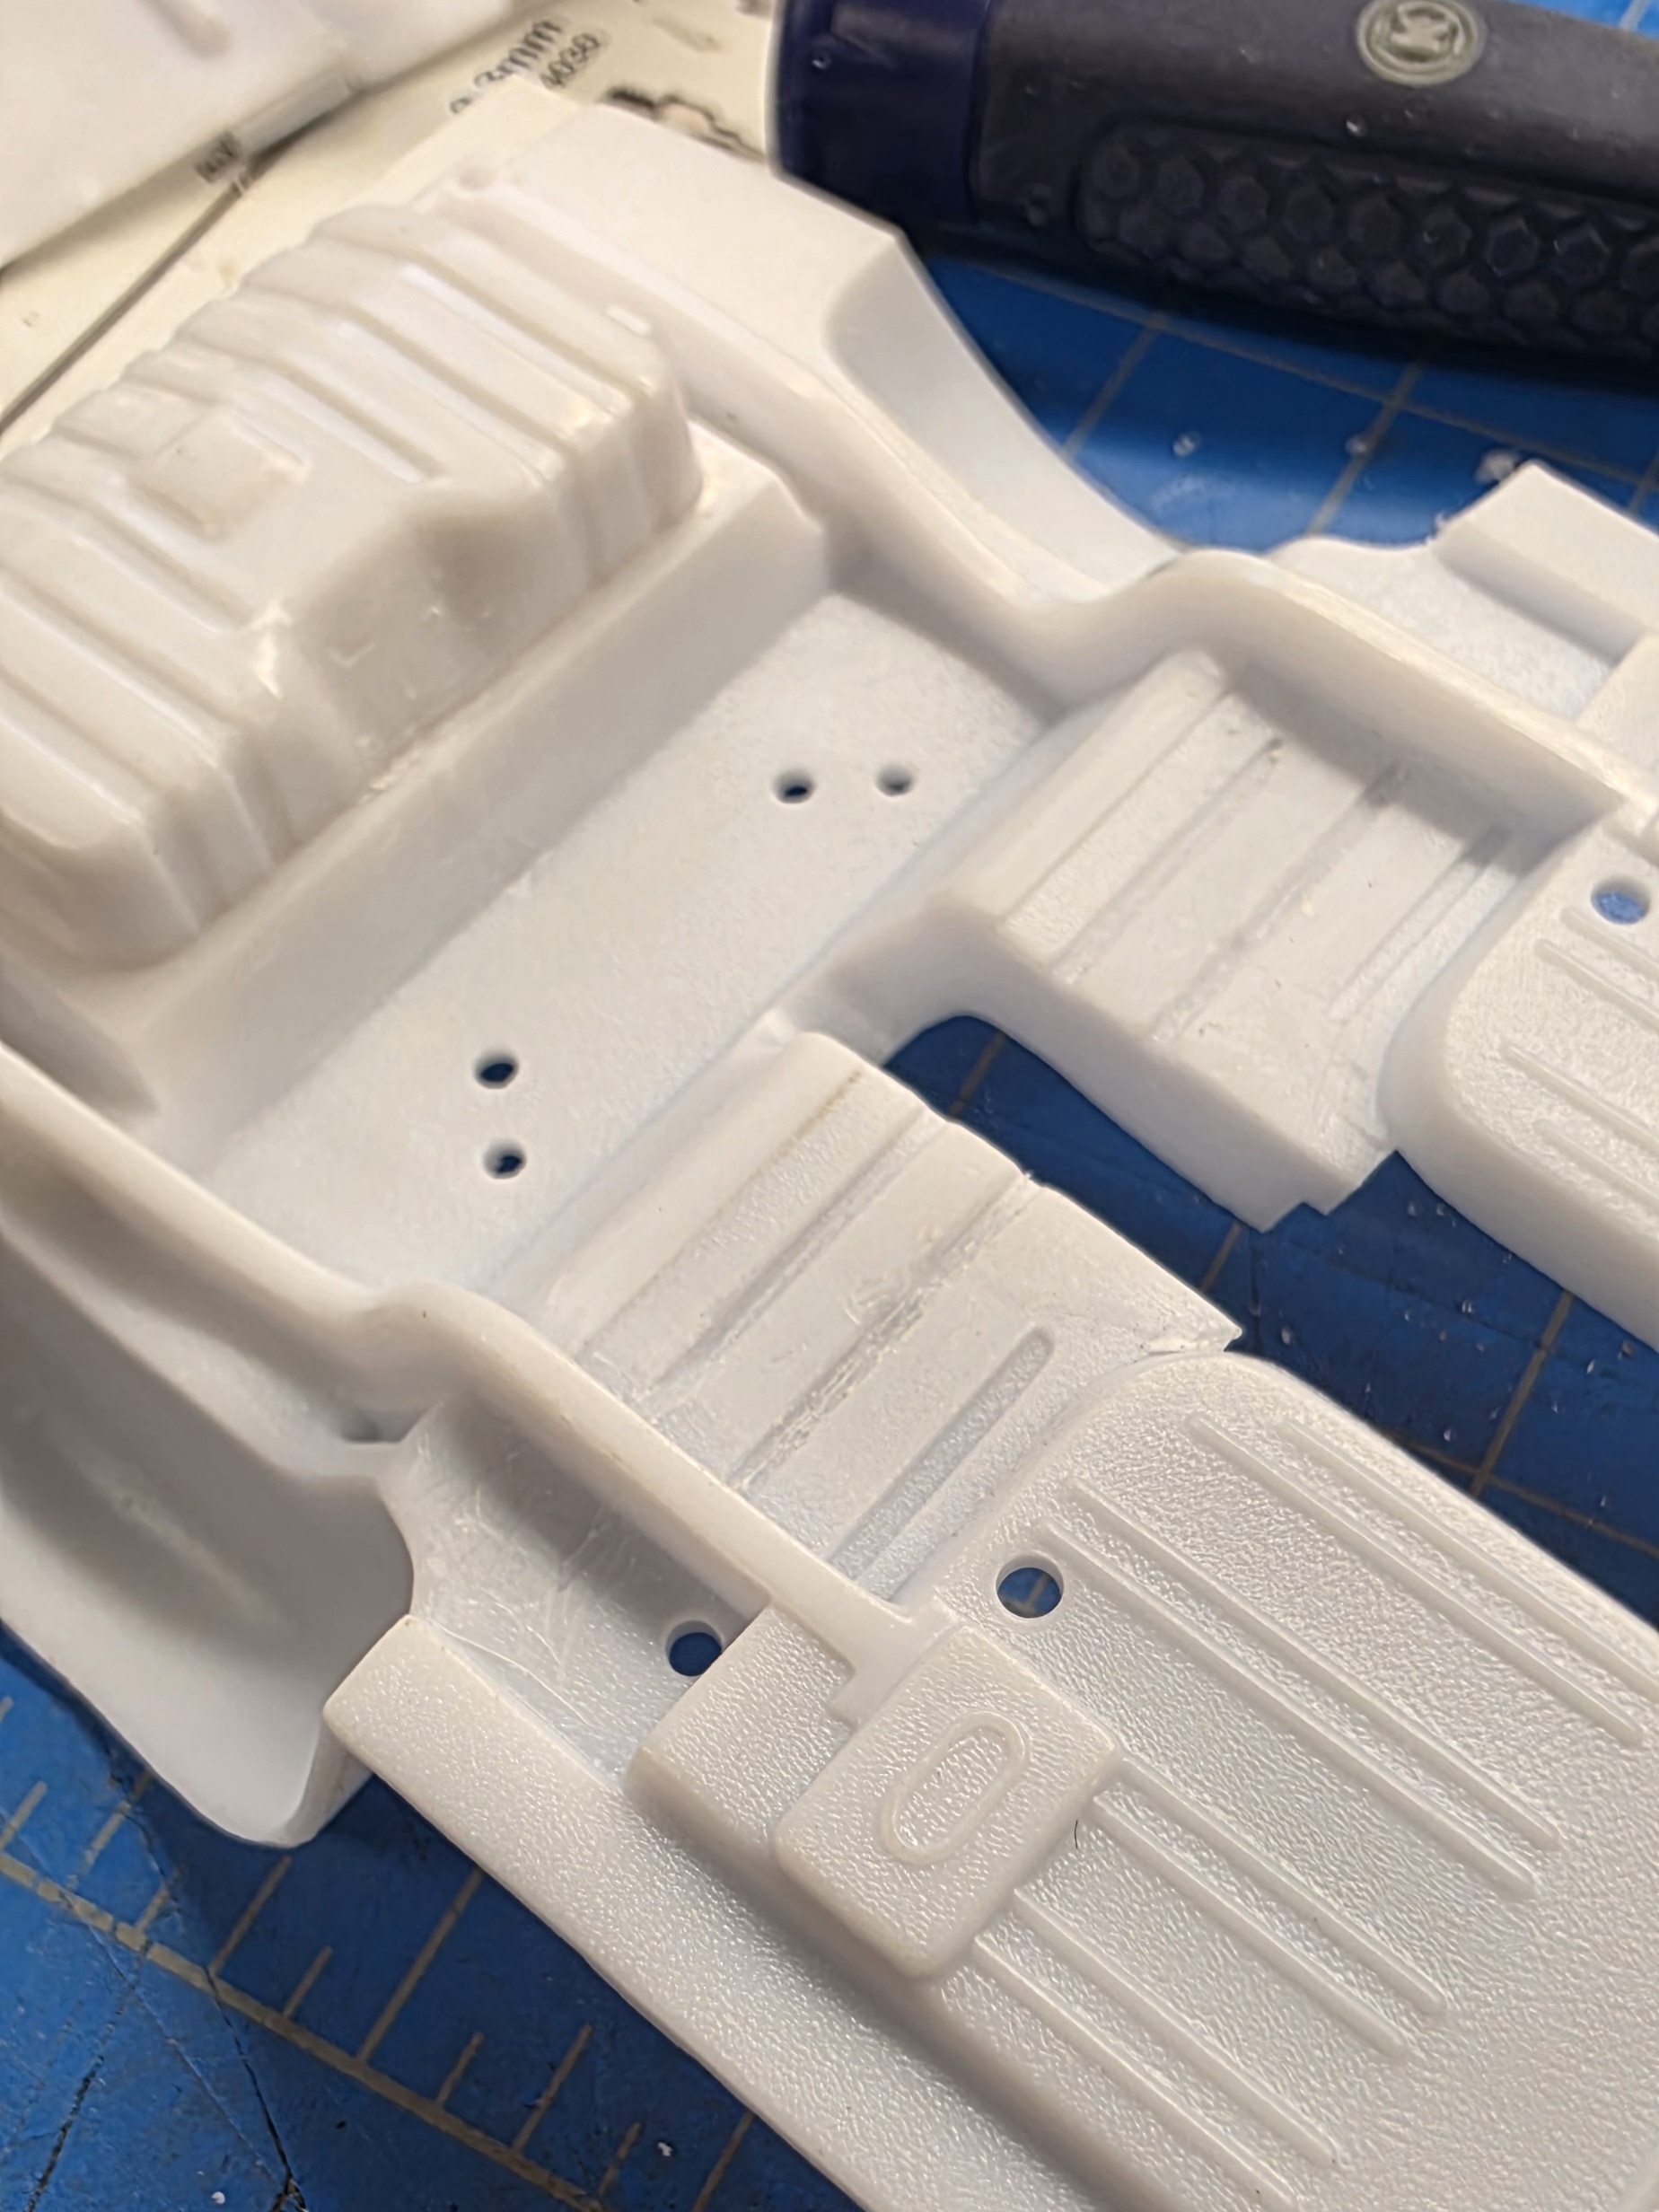
The fuel sending unit was also removed and replaced with a 3mm styrene disc.
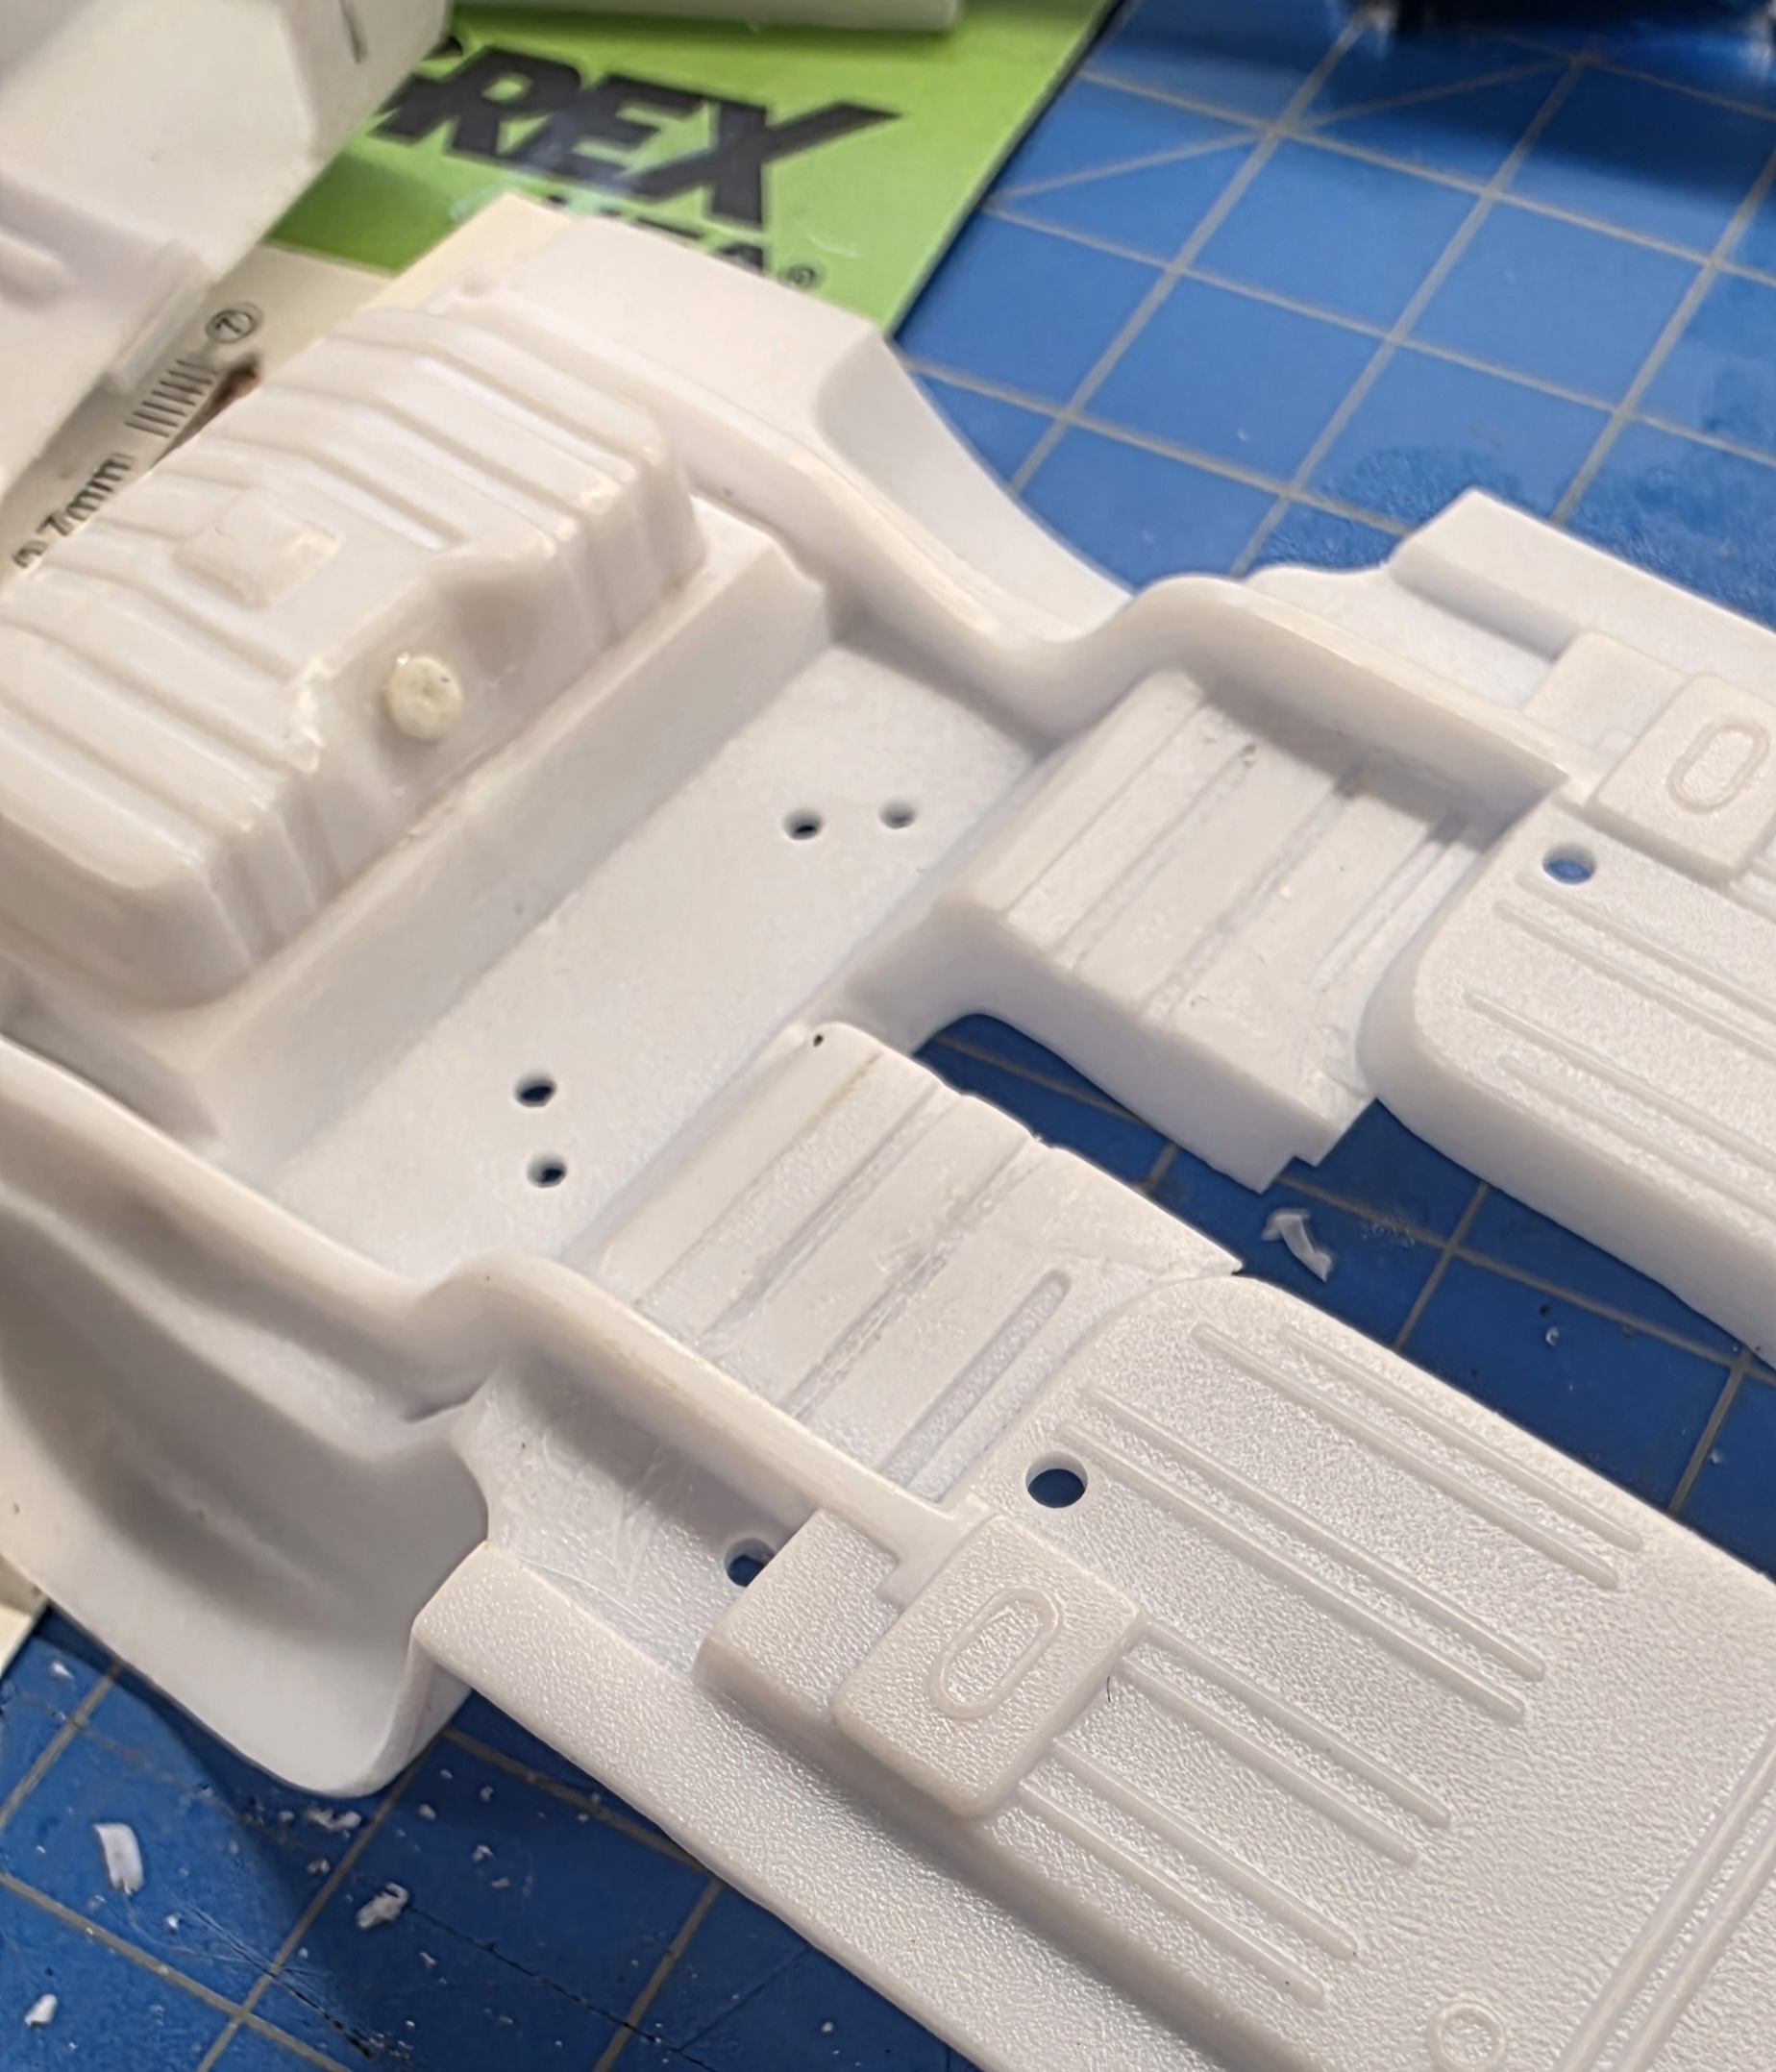
In the back seat I noticed the front edge of the quarter panel was wrong. Using a 4.5mm square rod of styrene I reshaped it with a small plane then sanded smooth to this shape...
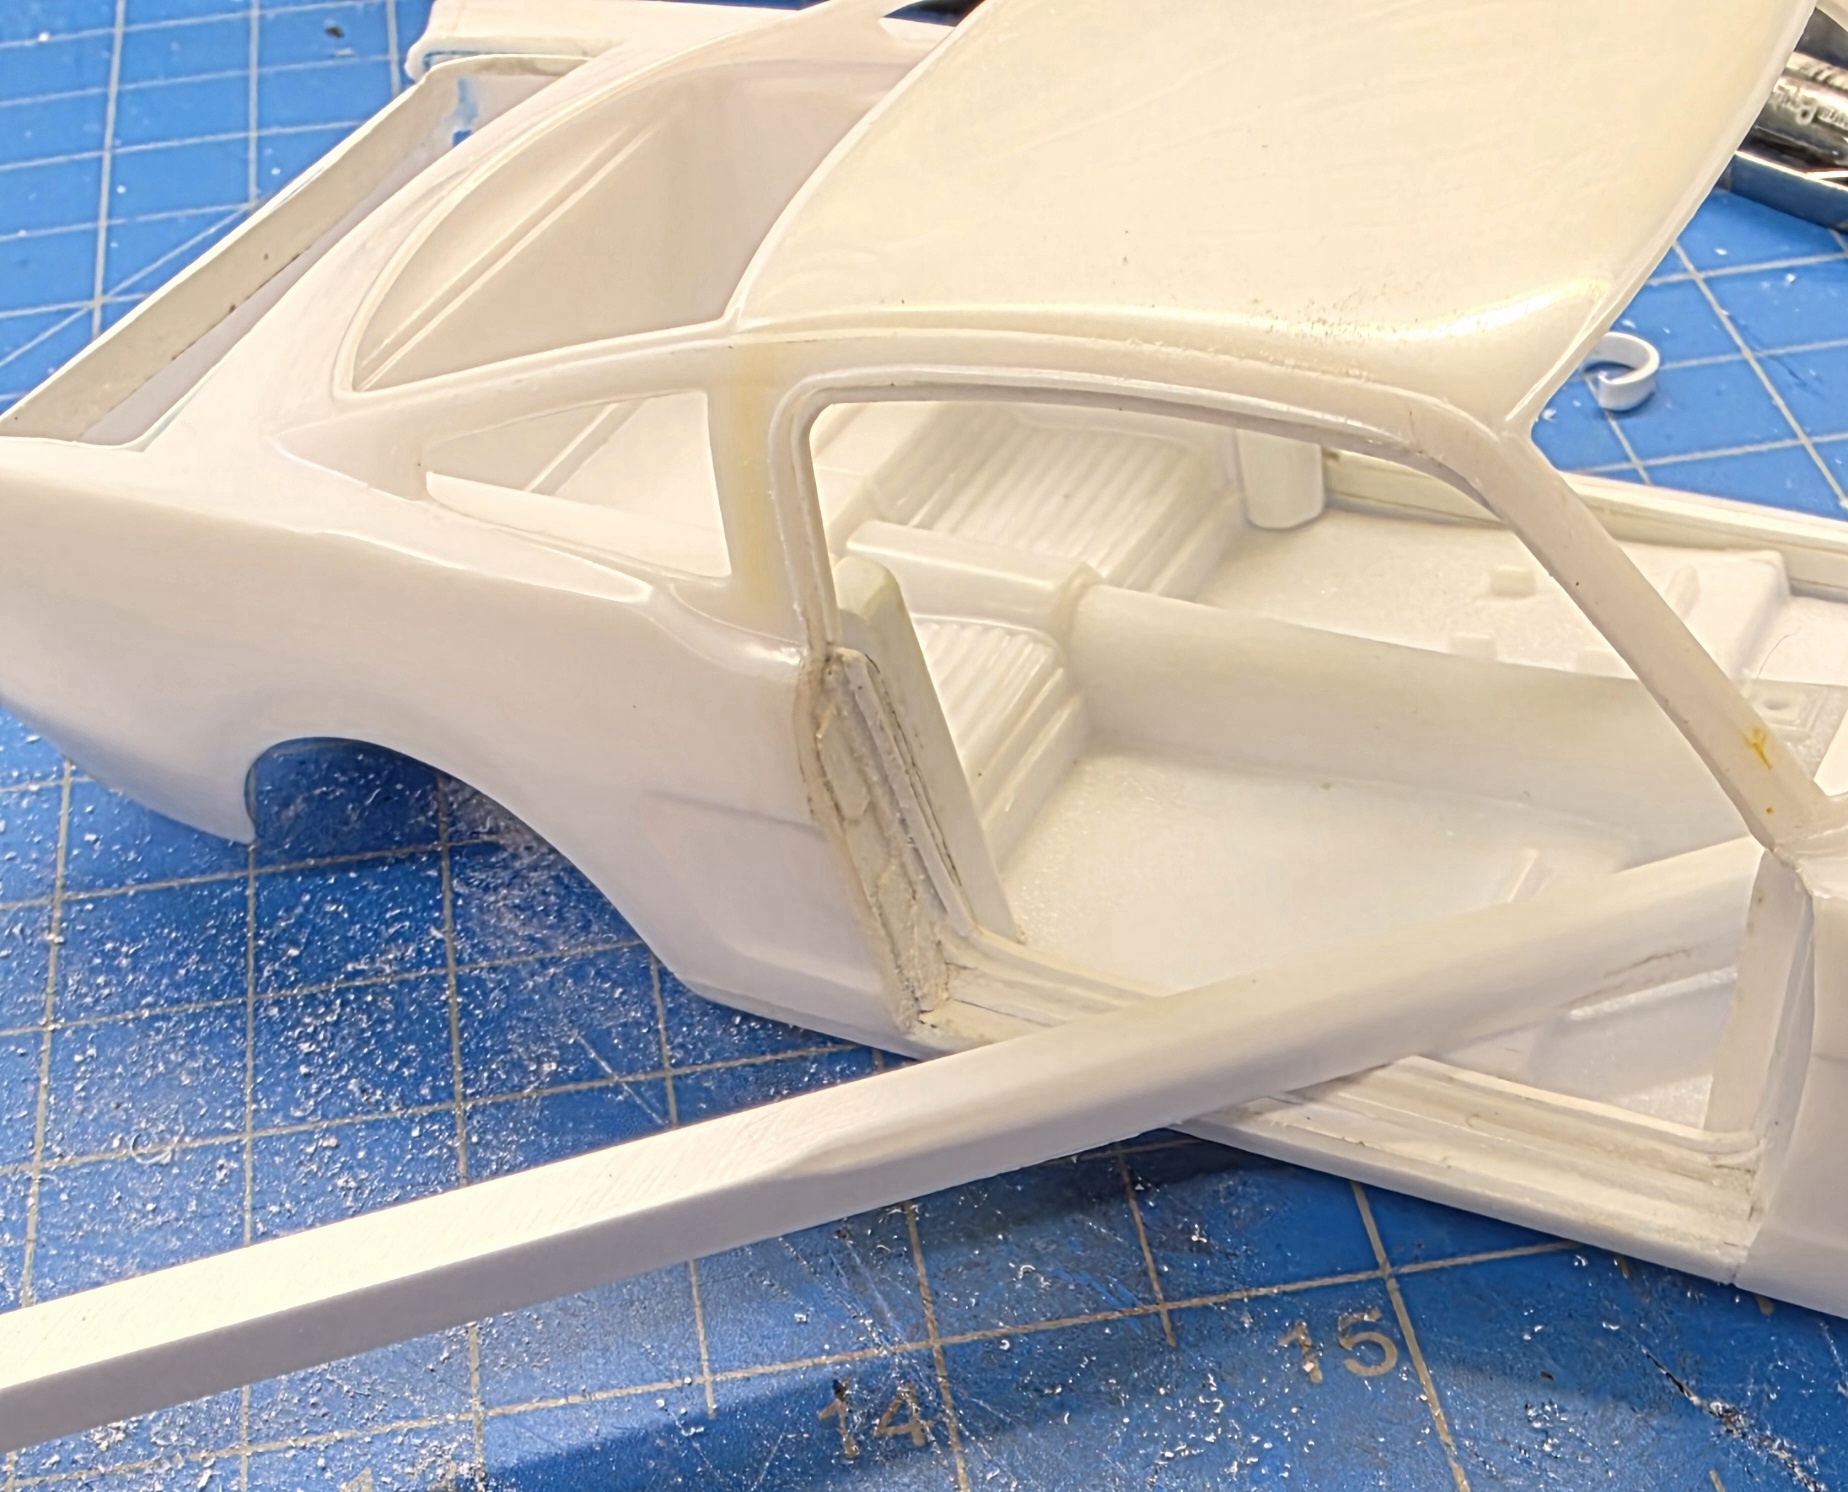
I cut to length then shaped with a file and sandpaper to fit then glued with Testors cement
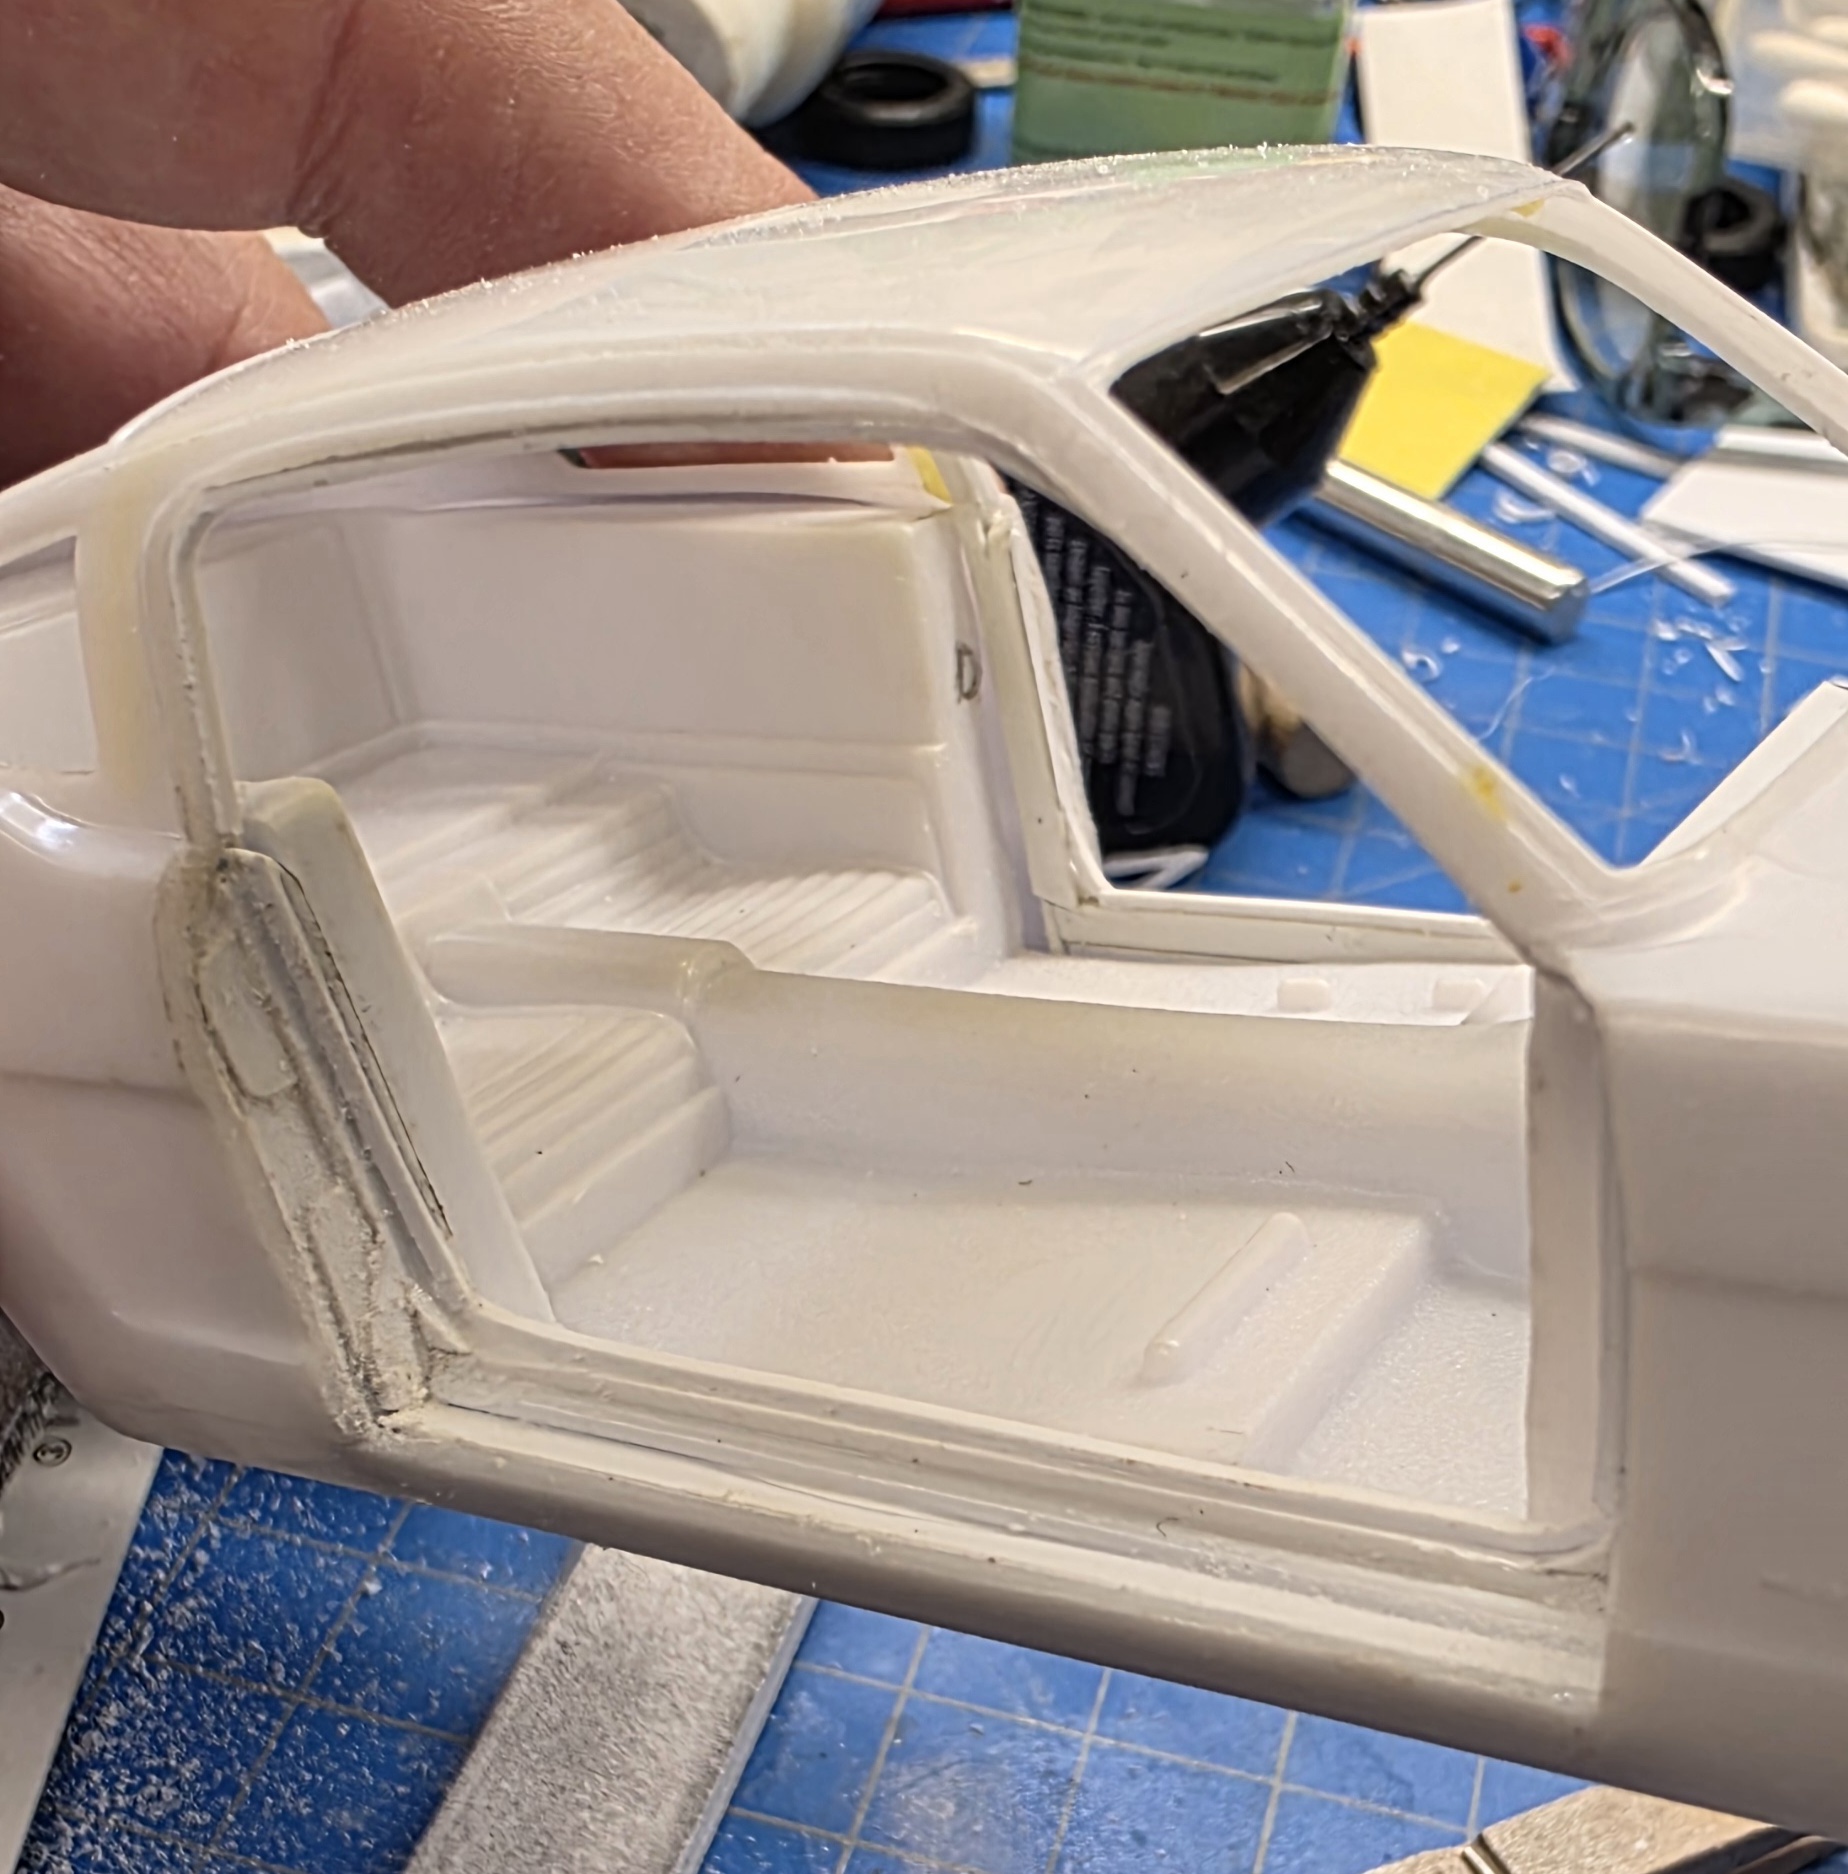
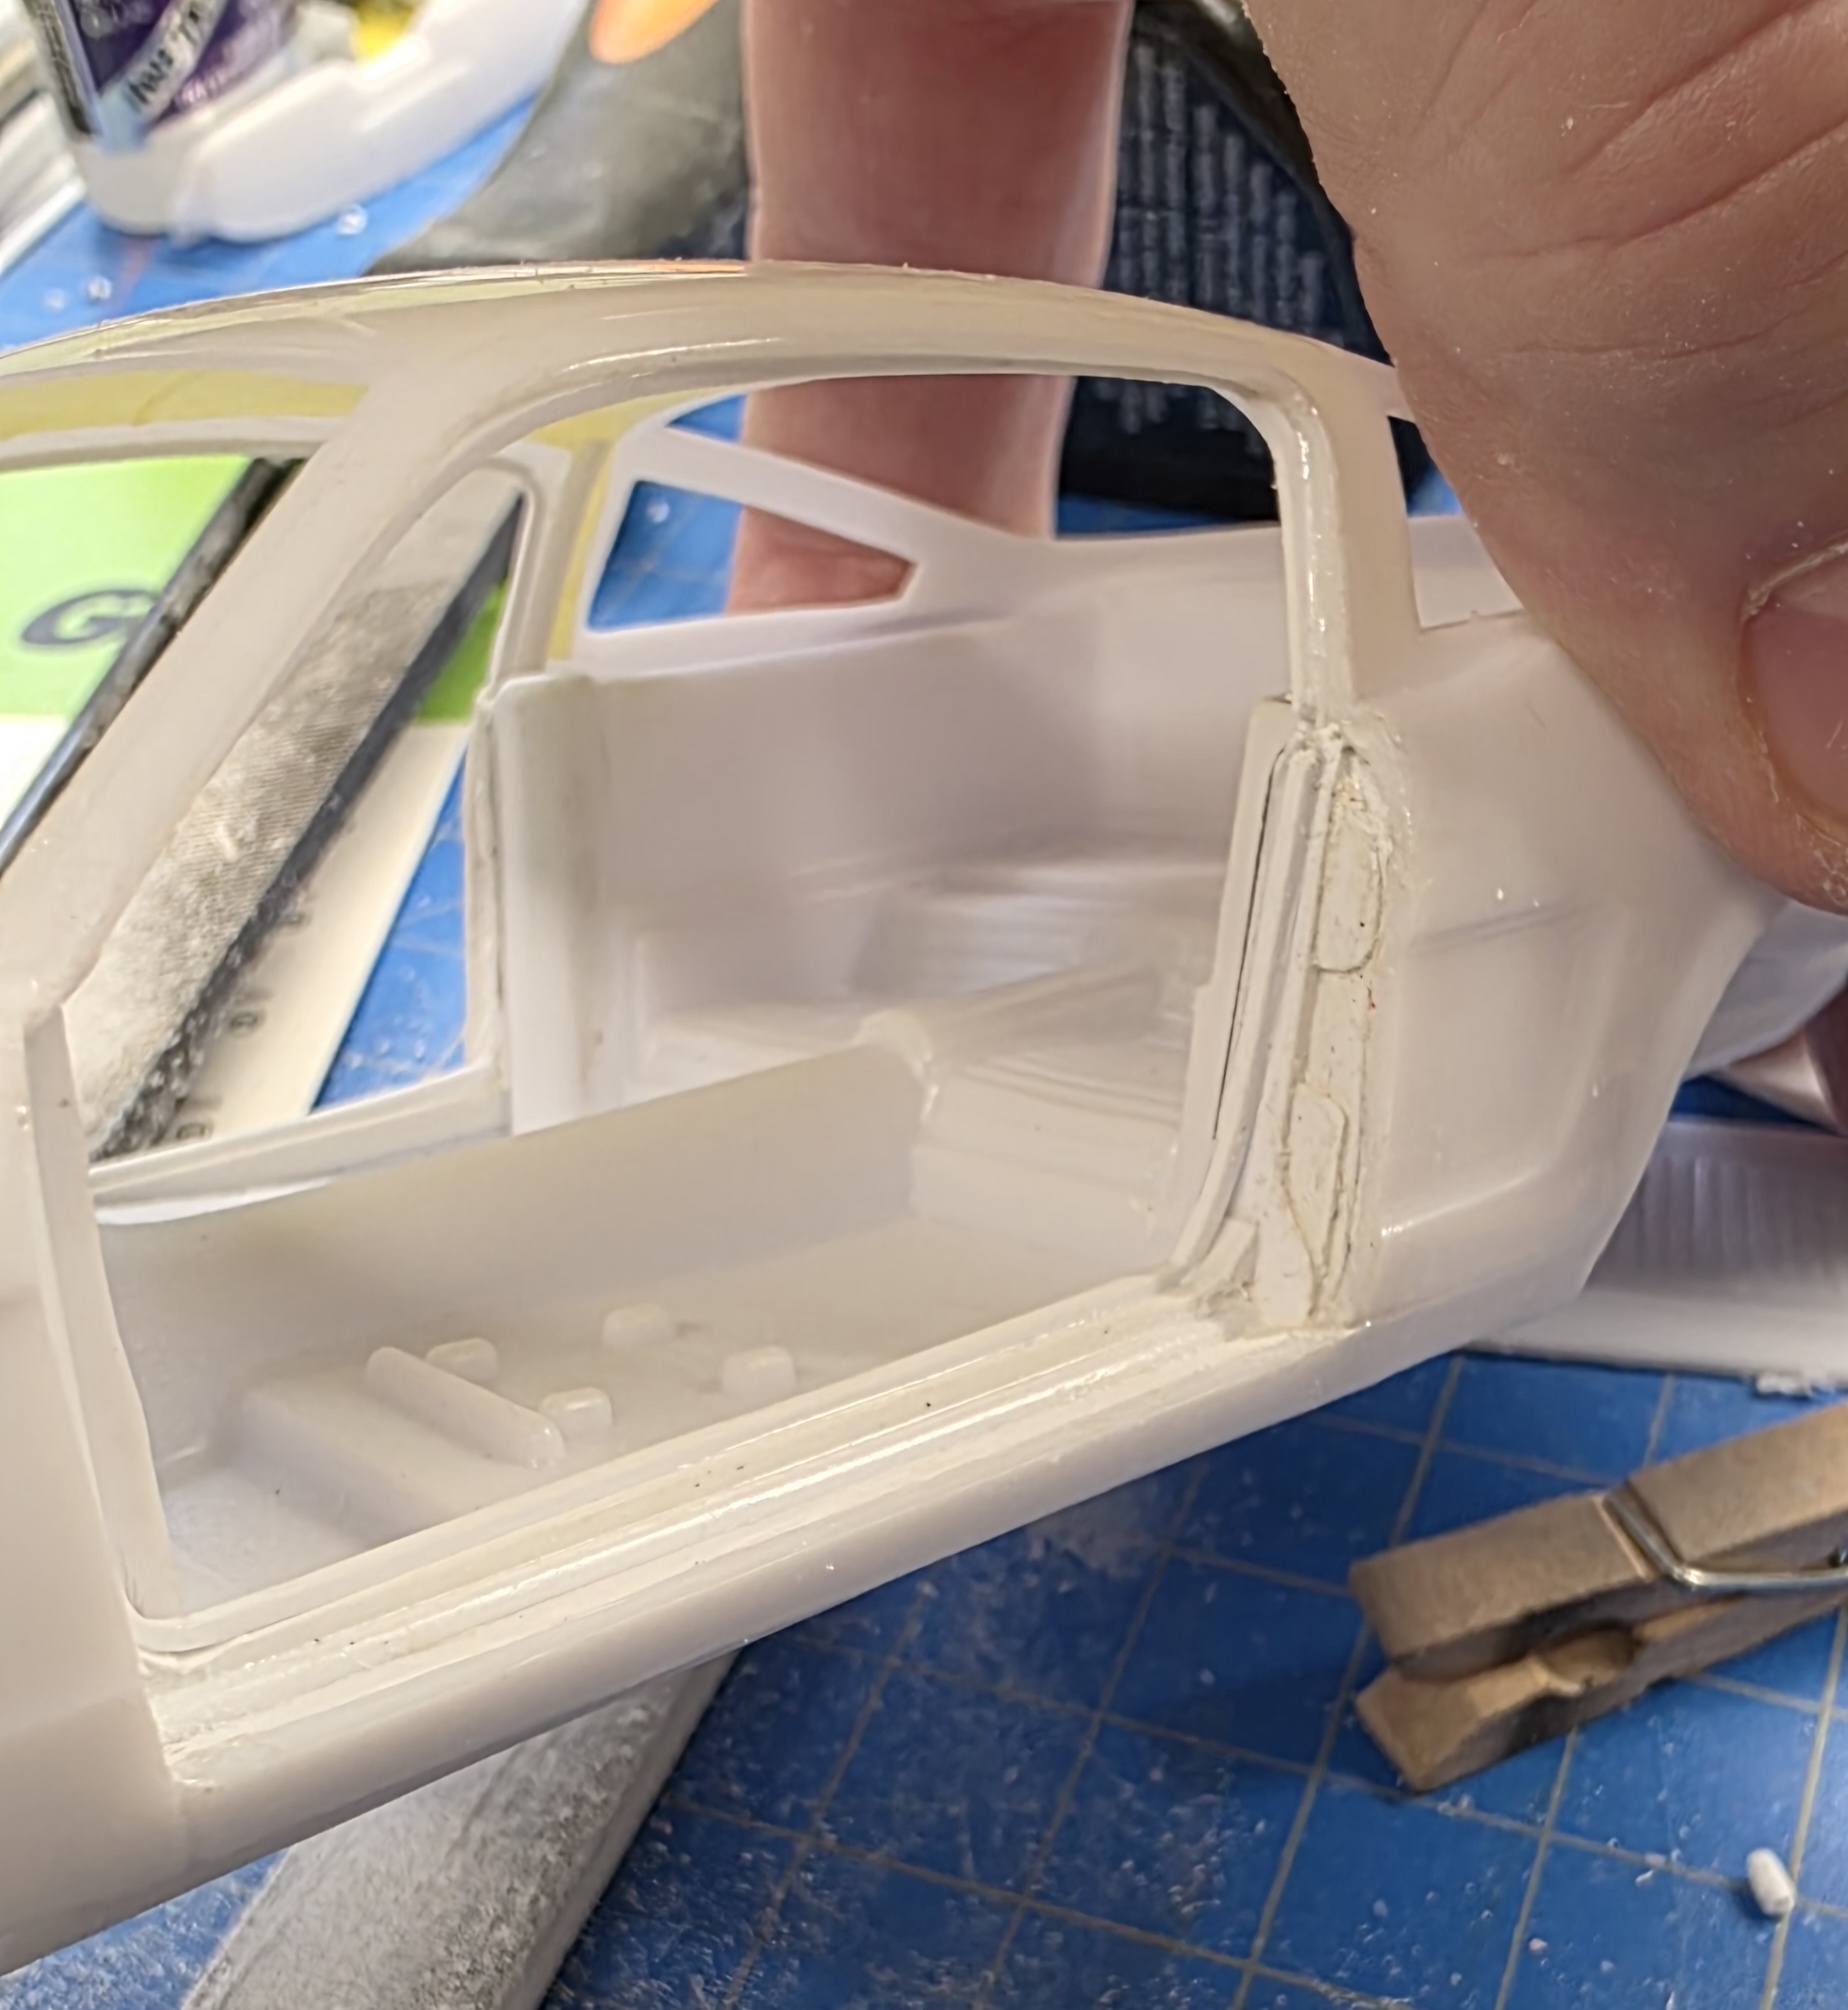
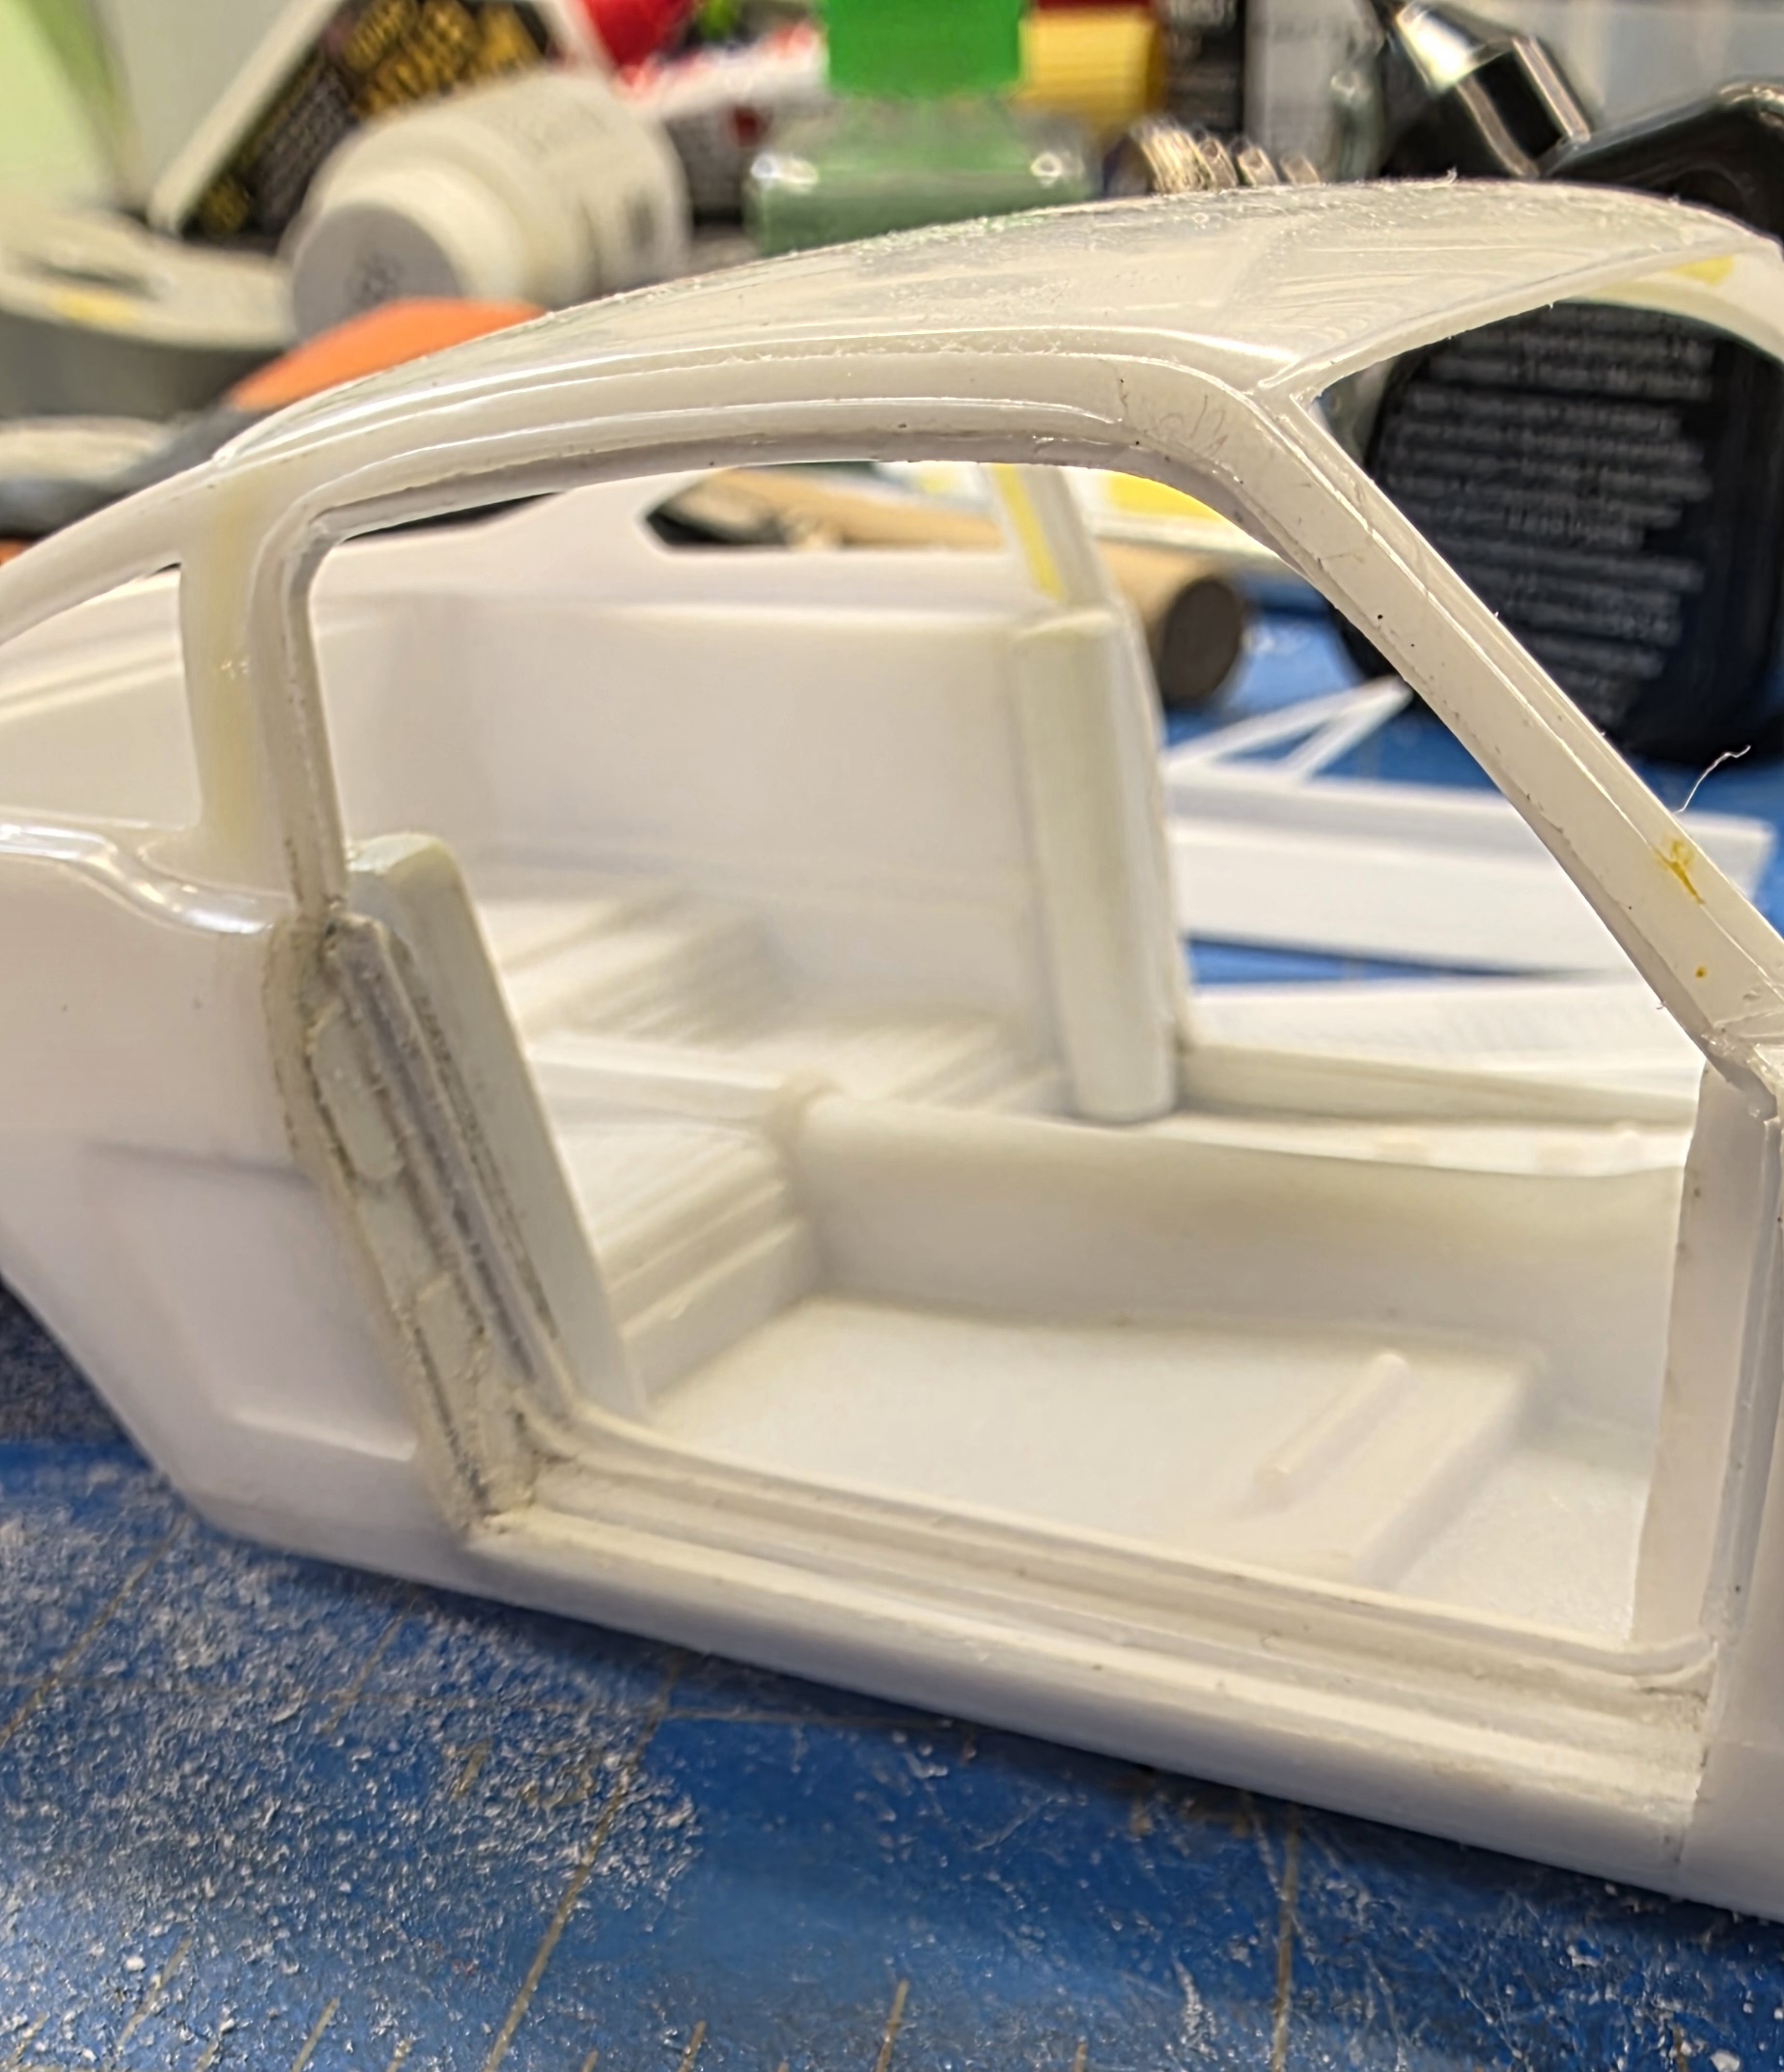
To further the random sequence of events, I realized I needed something to which I could glue the door hinges. I measured how much room I had from the wheel well wall to the door support bar (in blue) then cut 2mm card (in red) to size and glued her in.
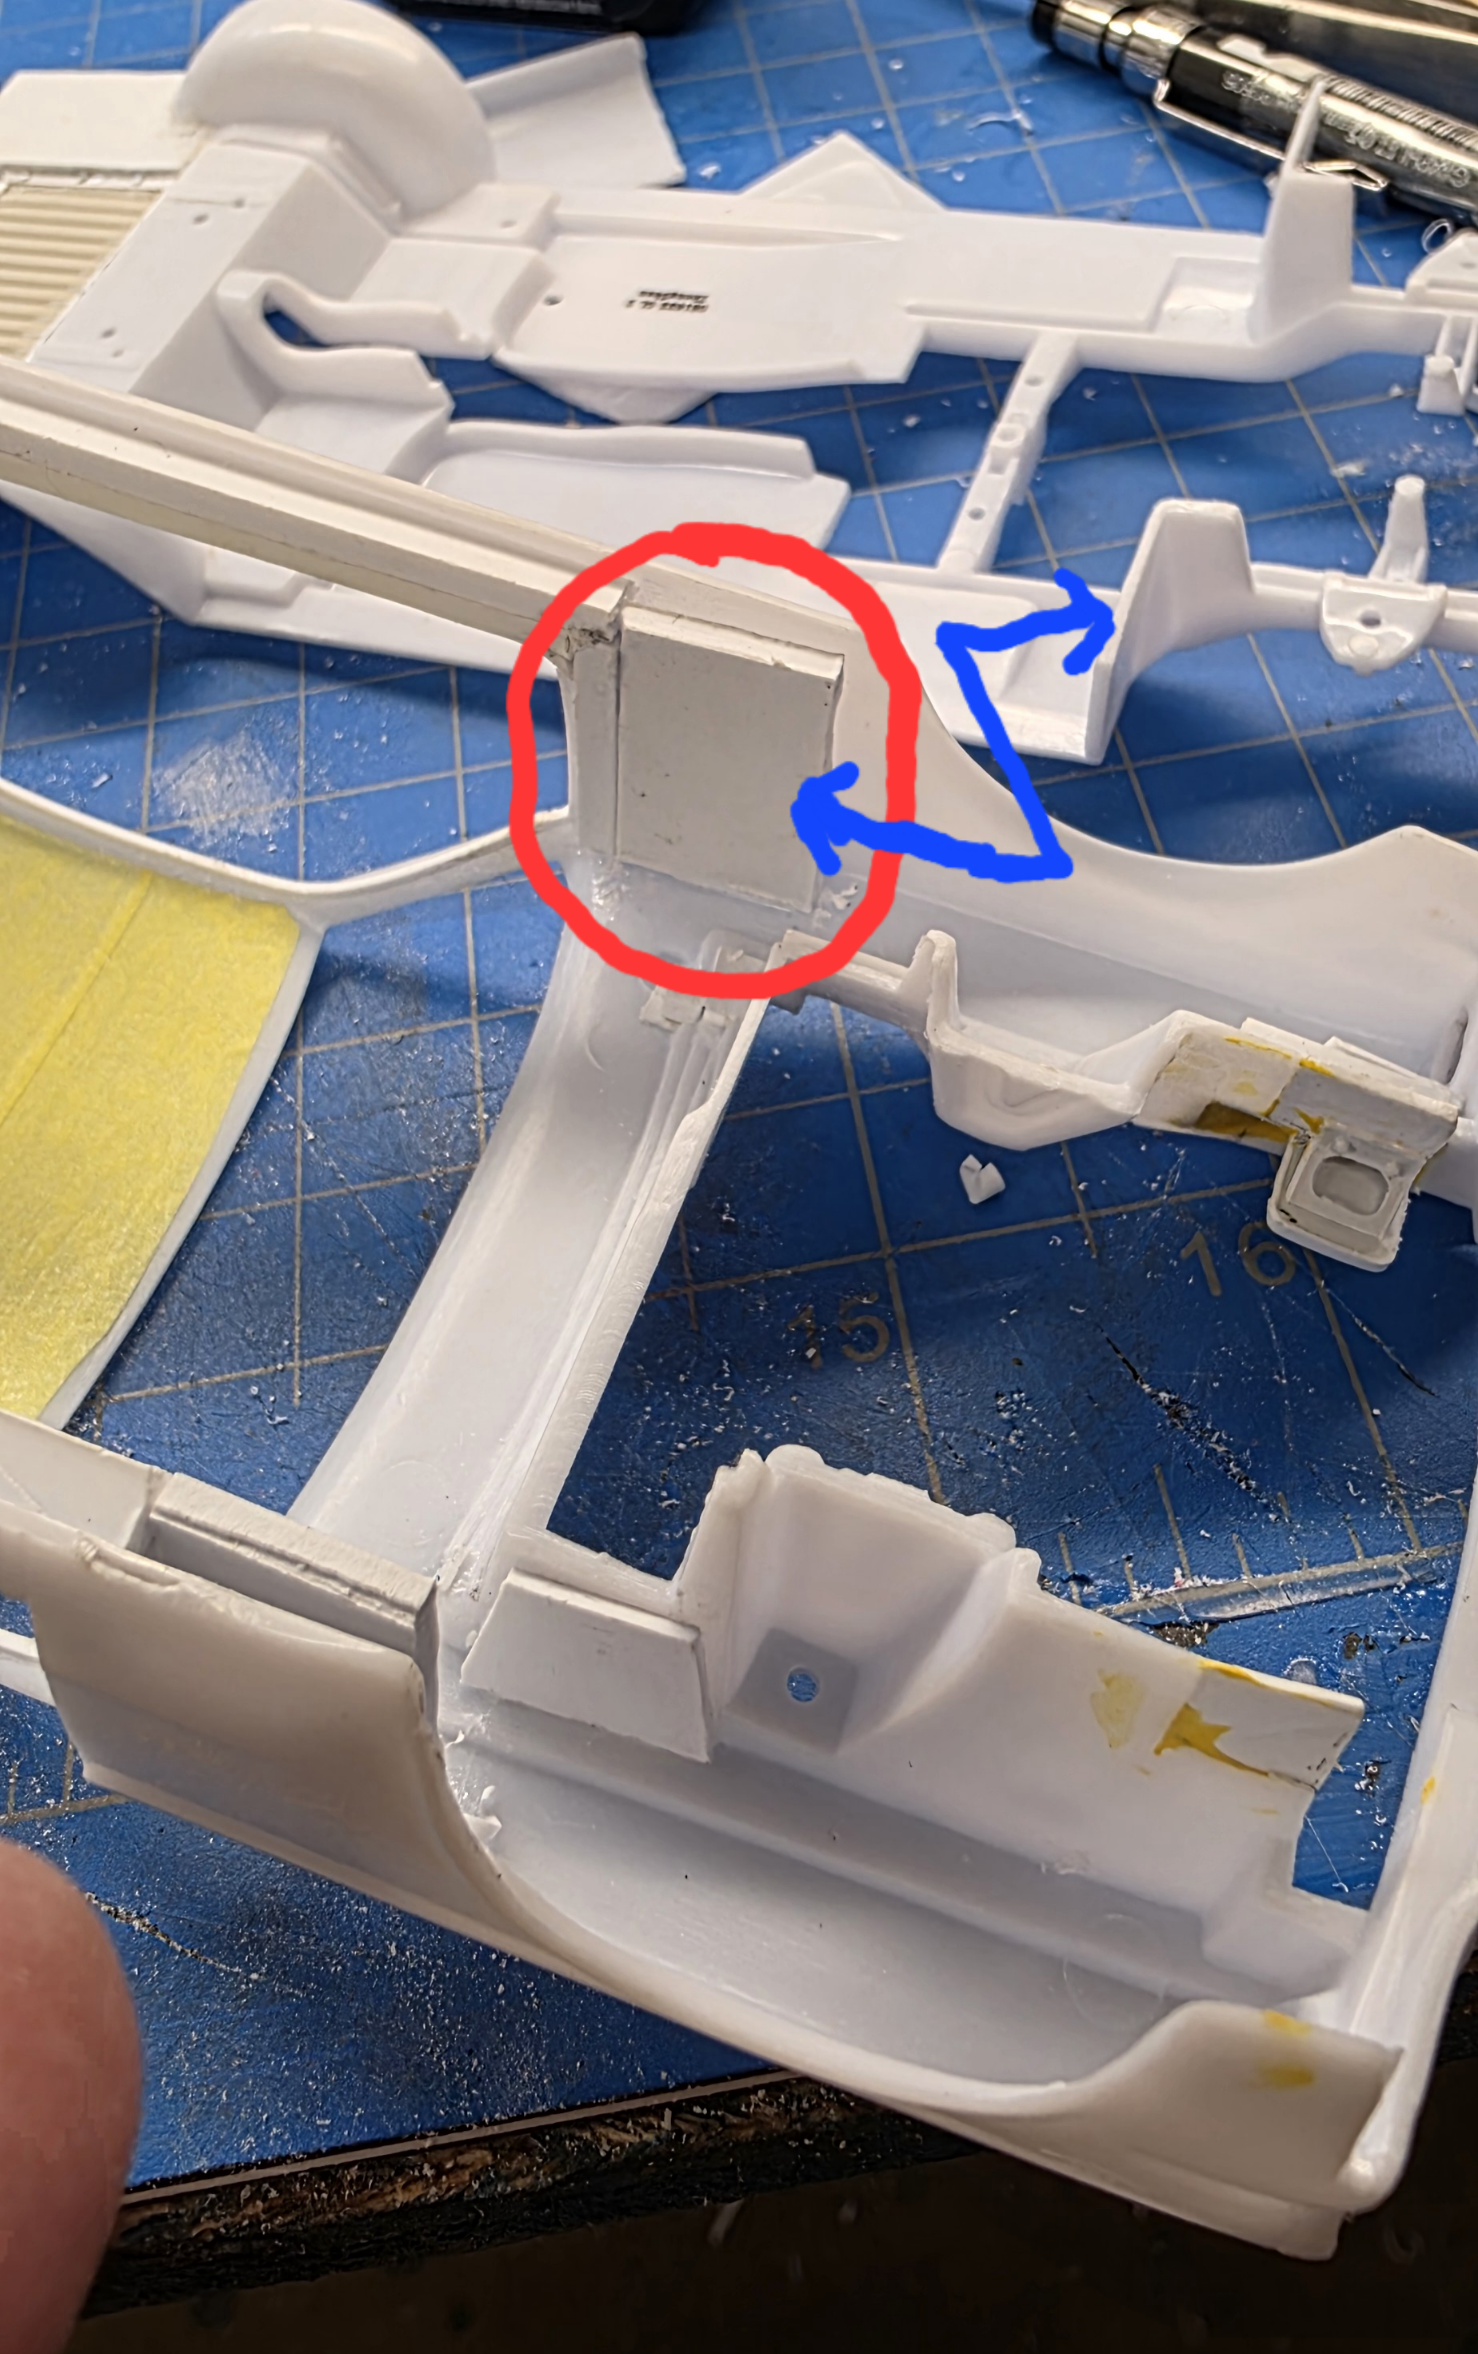
That is enough randomness for one post. I have in mind to start on the door panels now...
I am fixing issues as I see them with no rhyme or reason. I noticed the undercarriage had molded brake and fuel lines...
The are quite atrocious and had to go.
The fuel sending unit was also removed and replaced with a 3mm styrene disc.
In the back seat I noticed the front edge of the quarter panel was wrong. Using a 4.5mm square rod of styrene I reshaped it with a small plane then sanded smooth to this shape...
I cut to length then shaped with a file and sandpaper to fit then glued with Testors cement
To further the random sequence of events, I realized I needed something to which I could glue the door hinges. I measured how much room I had from the wheel well wall to the door support bar (in blue) then cut 2mm card (in red) to size and glued her in.
That is enough randomness for one post. I have in mind to start on the door panels now...

centaur567
Well-known member
Your attention to detail is remarkable and why I don't do car models much or ship models for that matter. Gary S.

I road in the back seat of one of those things up in the mountains around Highlands. I don't think I can fit in one now.
Looks great Greg!
Looks great Greg!

Greg Kimsey
Well-known member
Ok, so, I got distracted by the quarter panel vents. The ones included in the kit are not up to par LOL. So I attempted to make them!
I will line the opening with 2mm x ... uh, .3mm I think. I have had some practice lining openings with the door frame but is still extremely challenging for me. Patience (not a virtue), tiny bits of cement, hold and wait, move along. I am getting better at measuring where to bend. I use a little needle tool to create the curves.
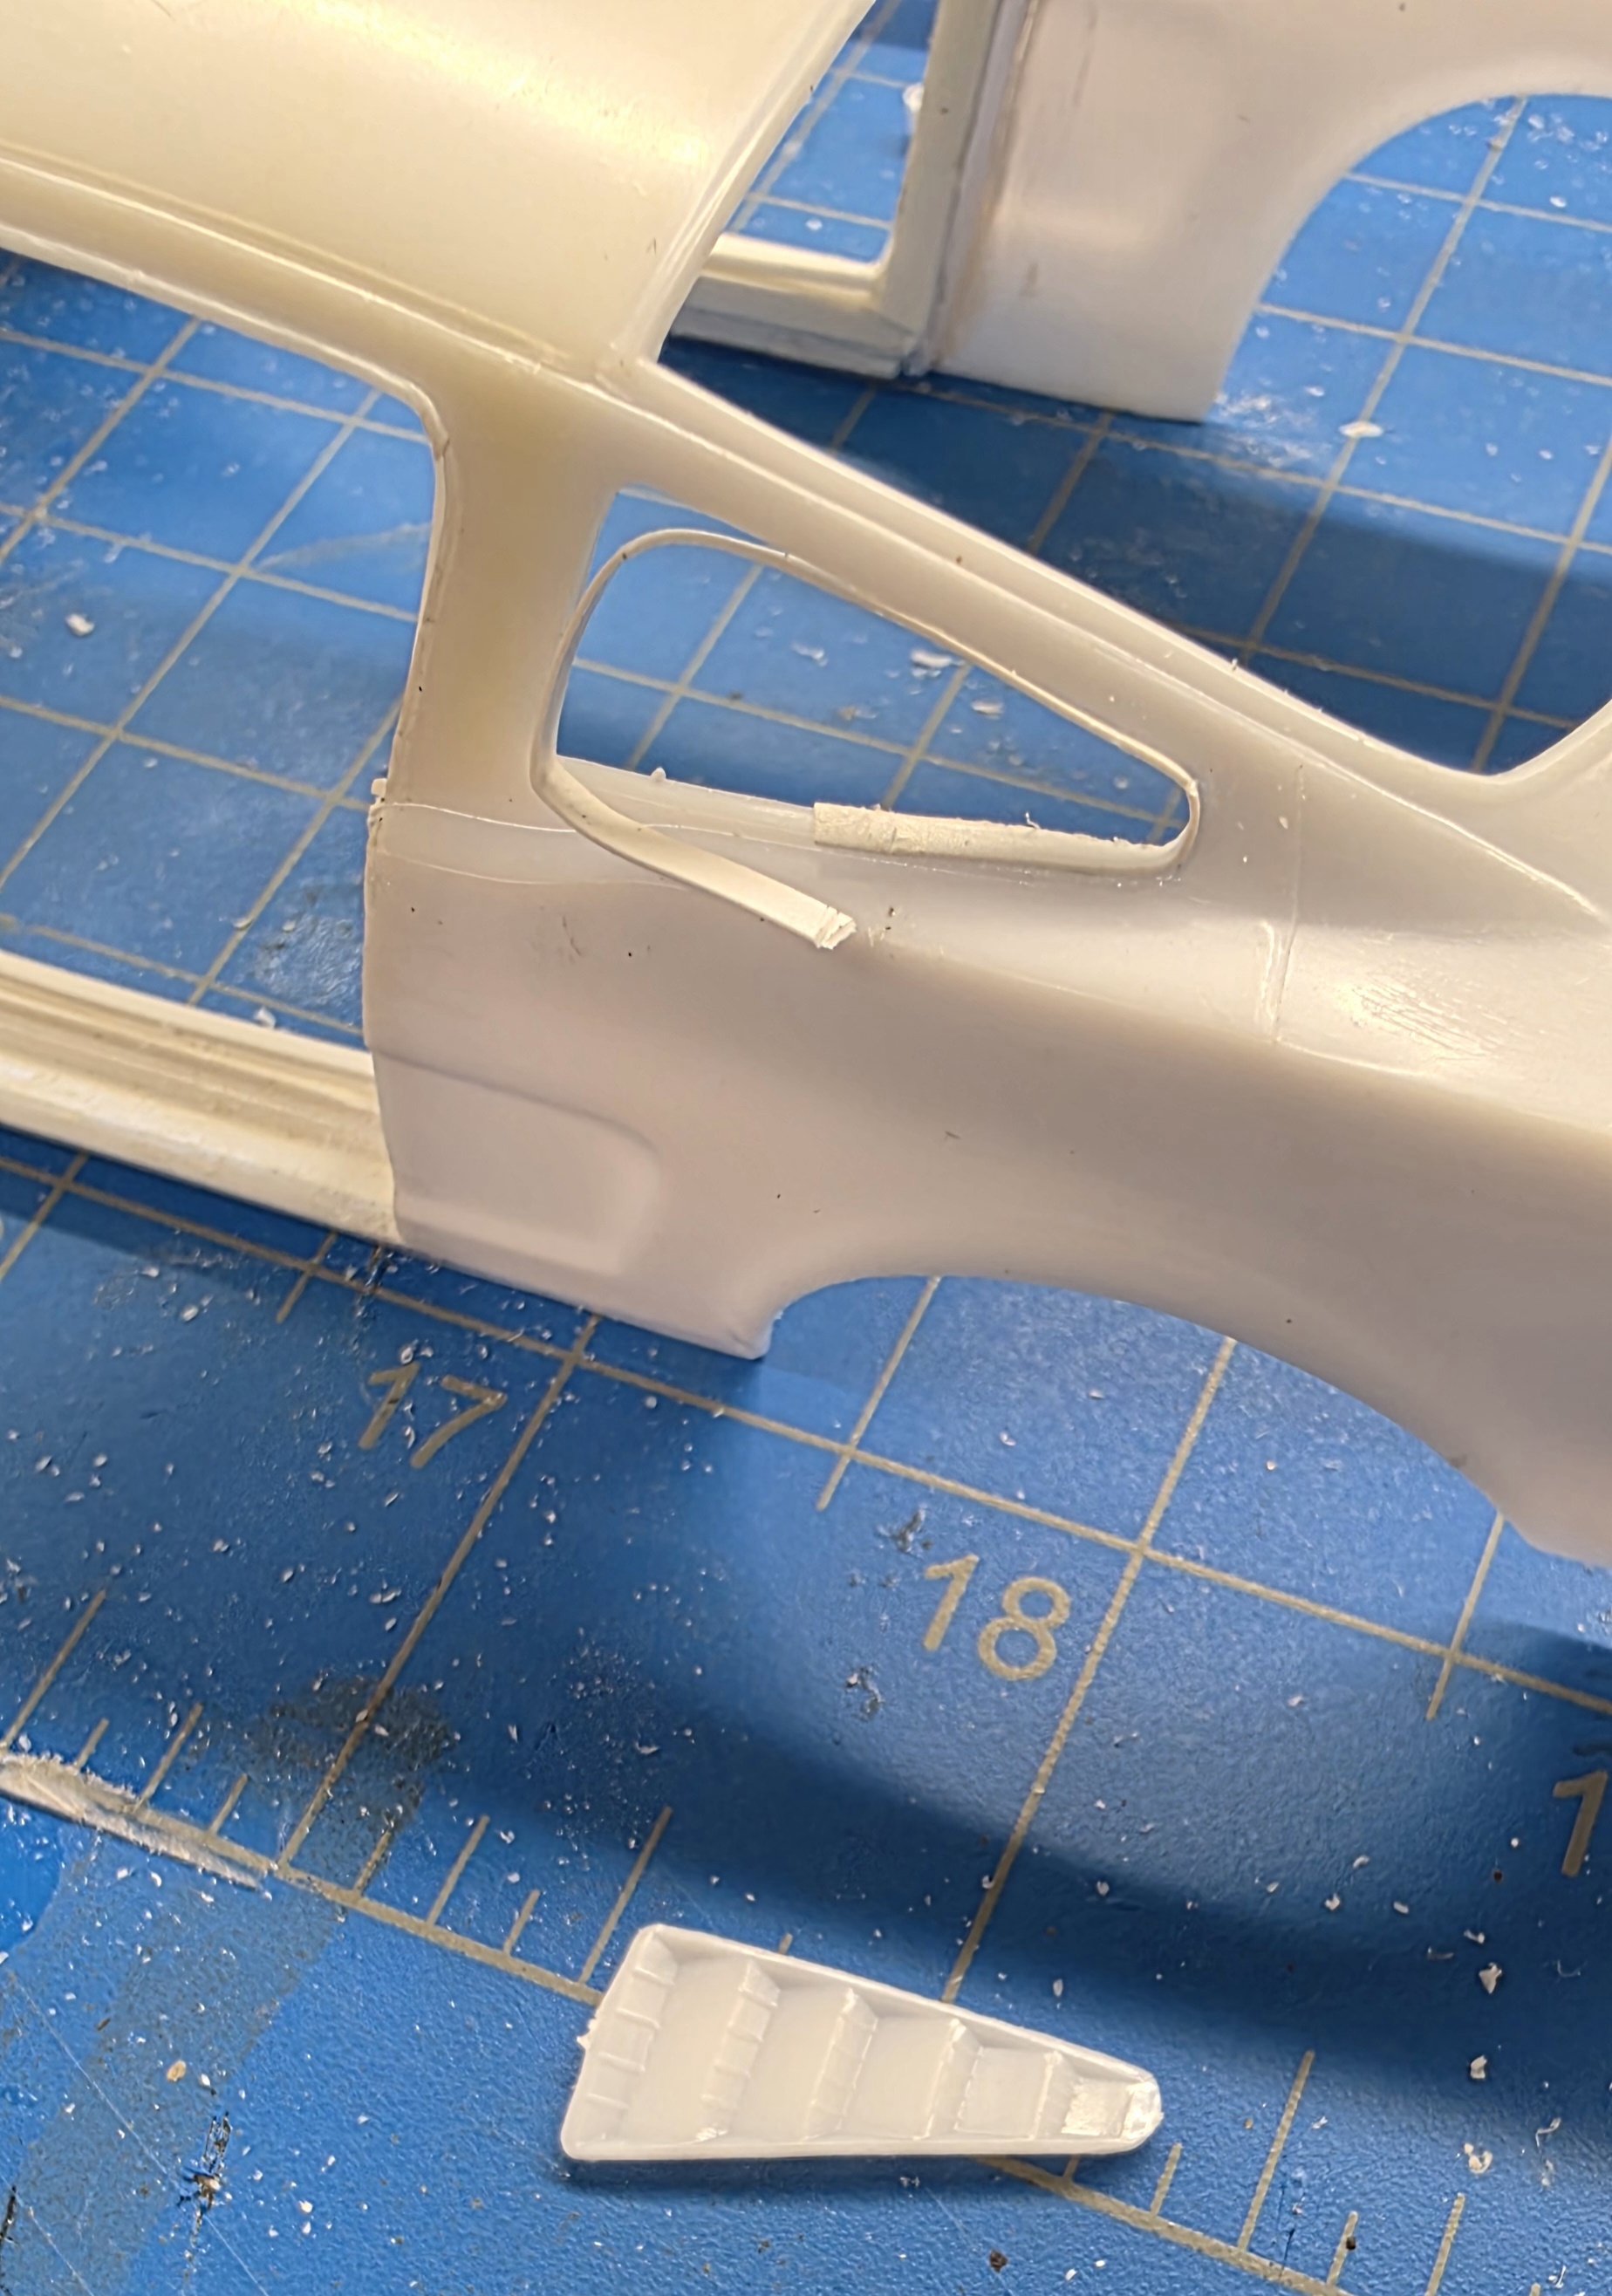
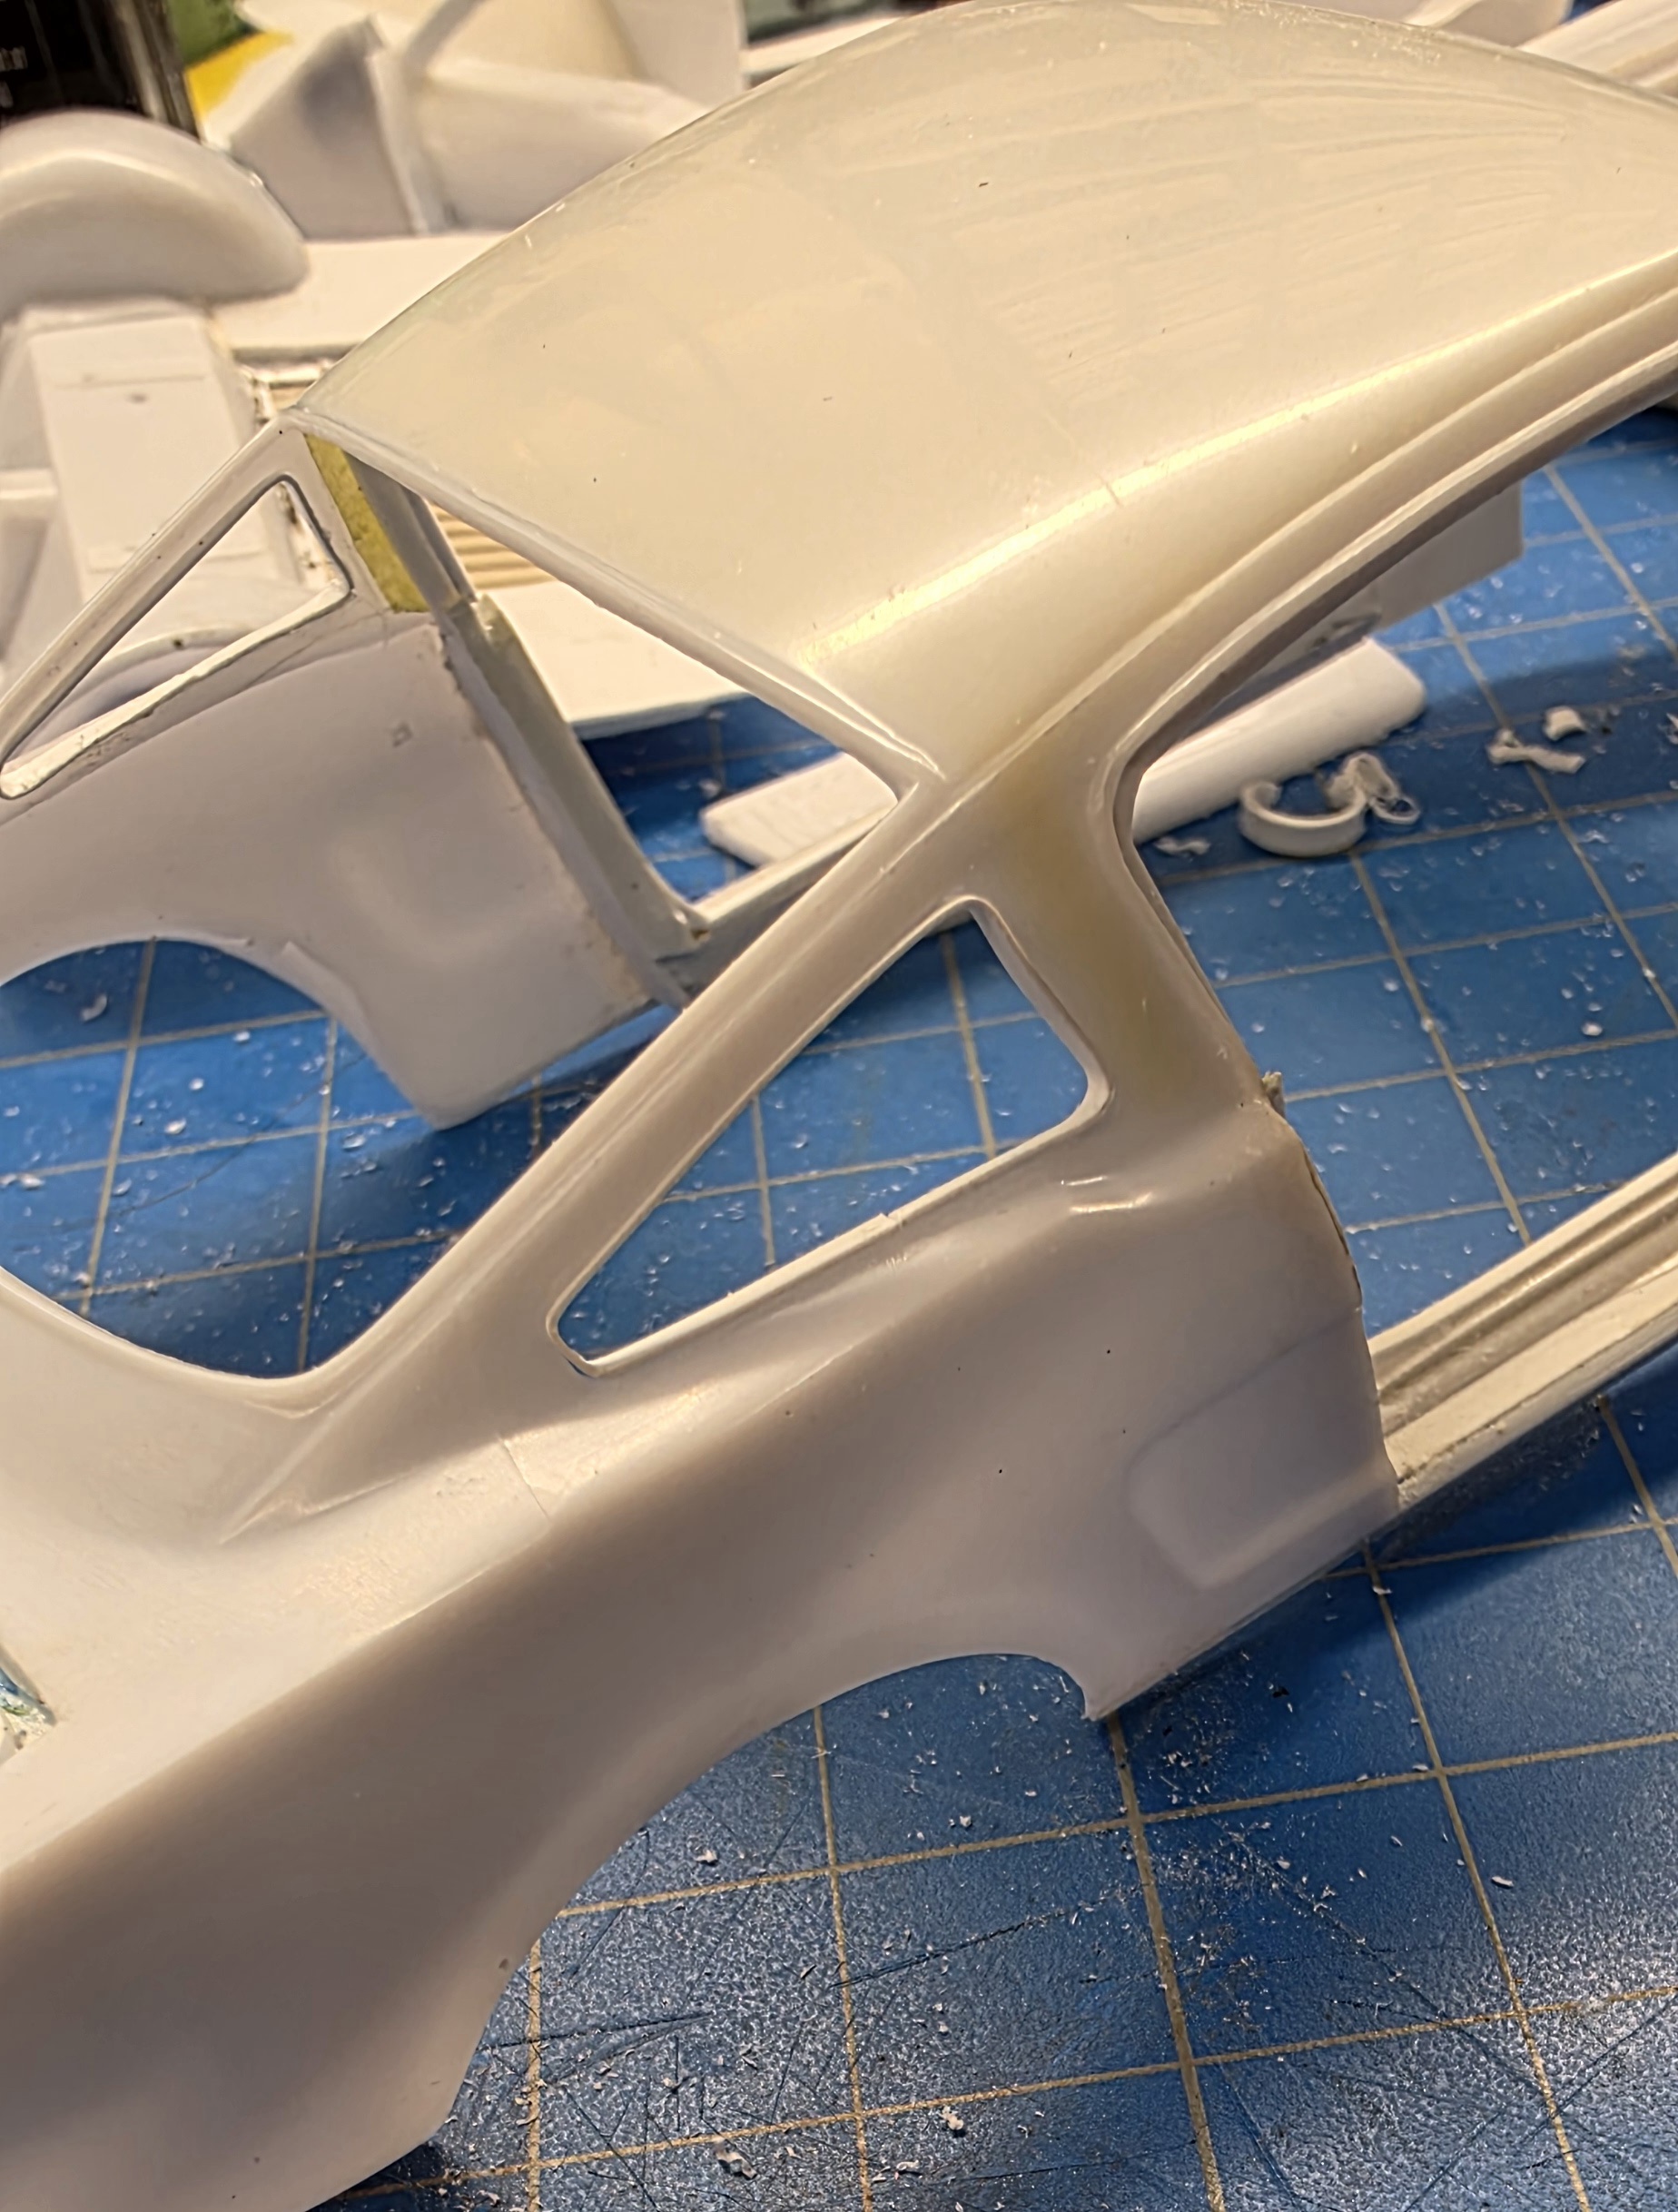
Now that I have the edges lined I need to make the louvers. I used 4mm x .5mm strip cut to height and cemented at an angle so it is flush (or nearly so) on the front and back side. The distance between is eyeballed. There was probablly a mathematical measurement method but I don't know it.
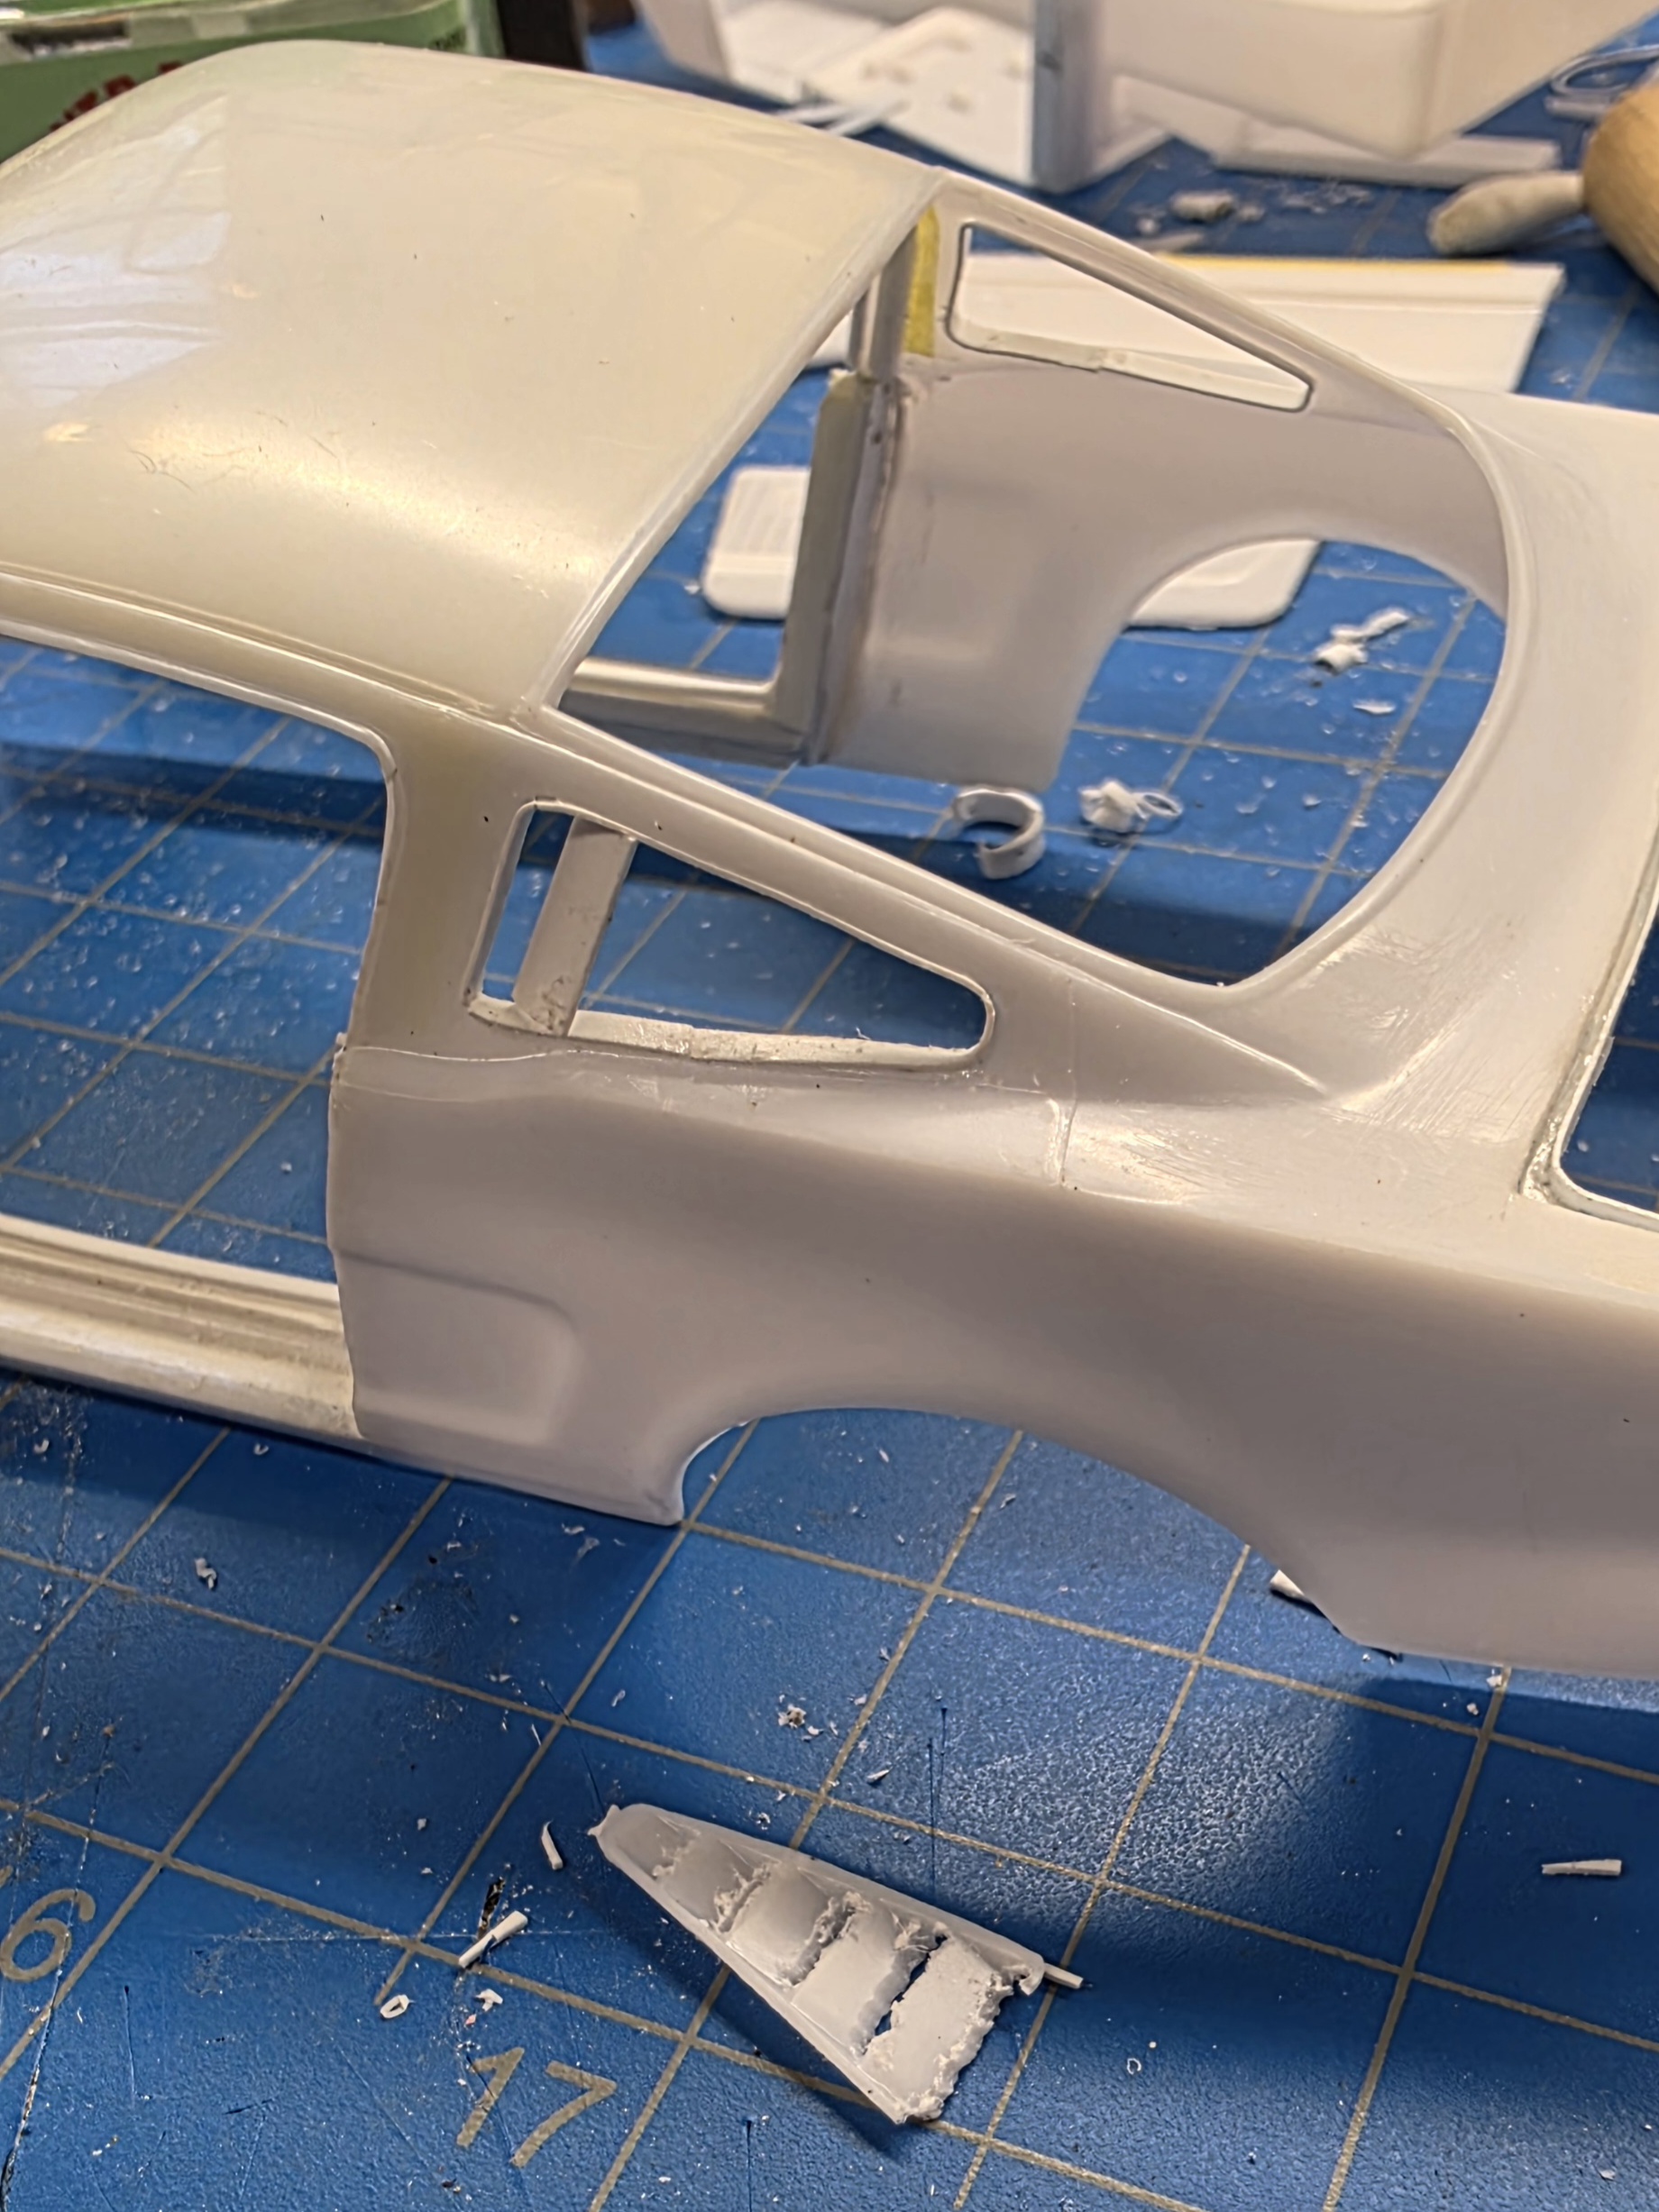
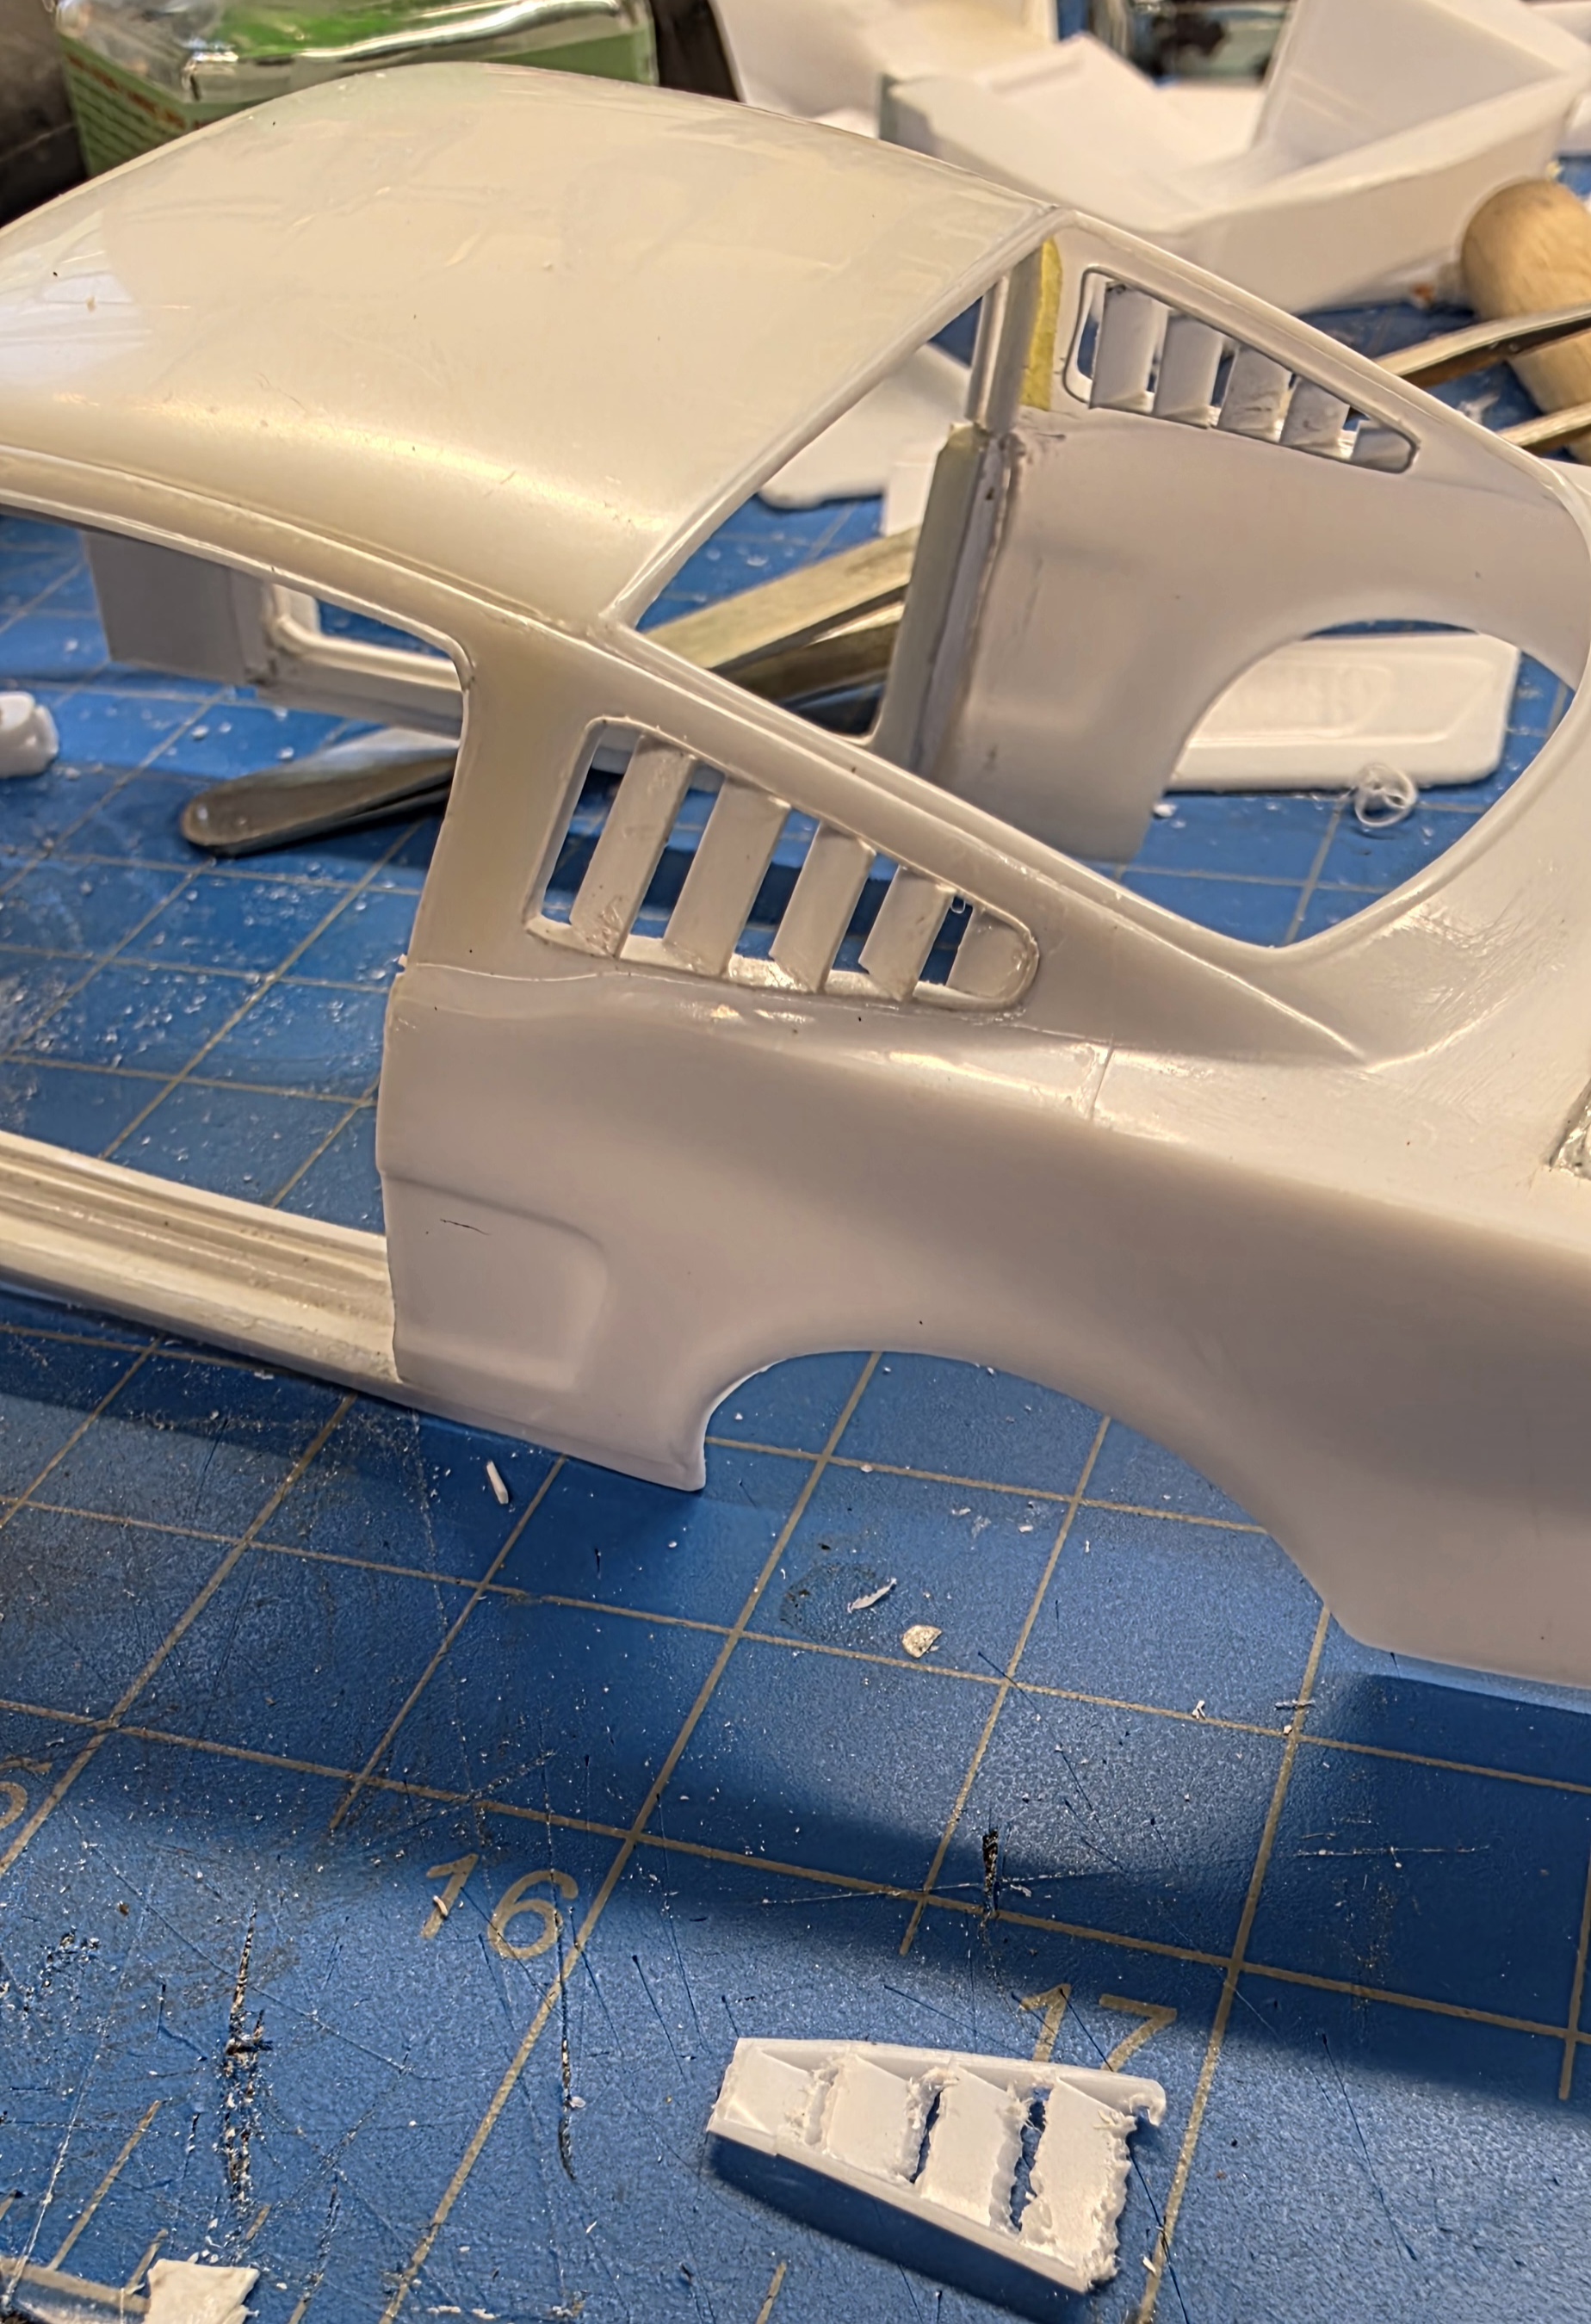
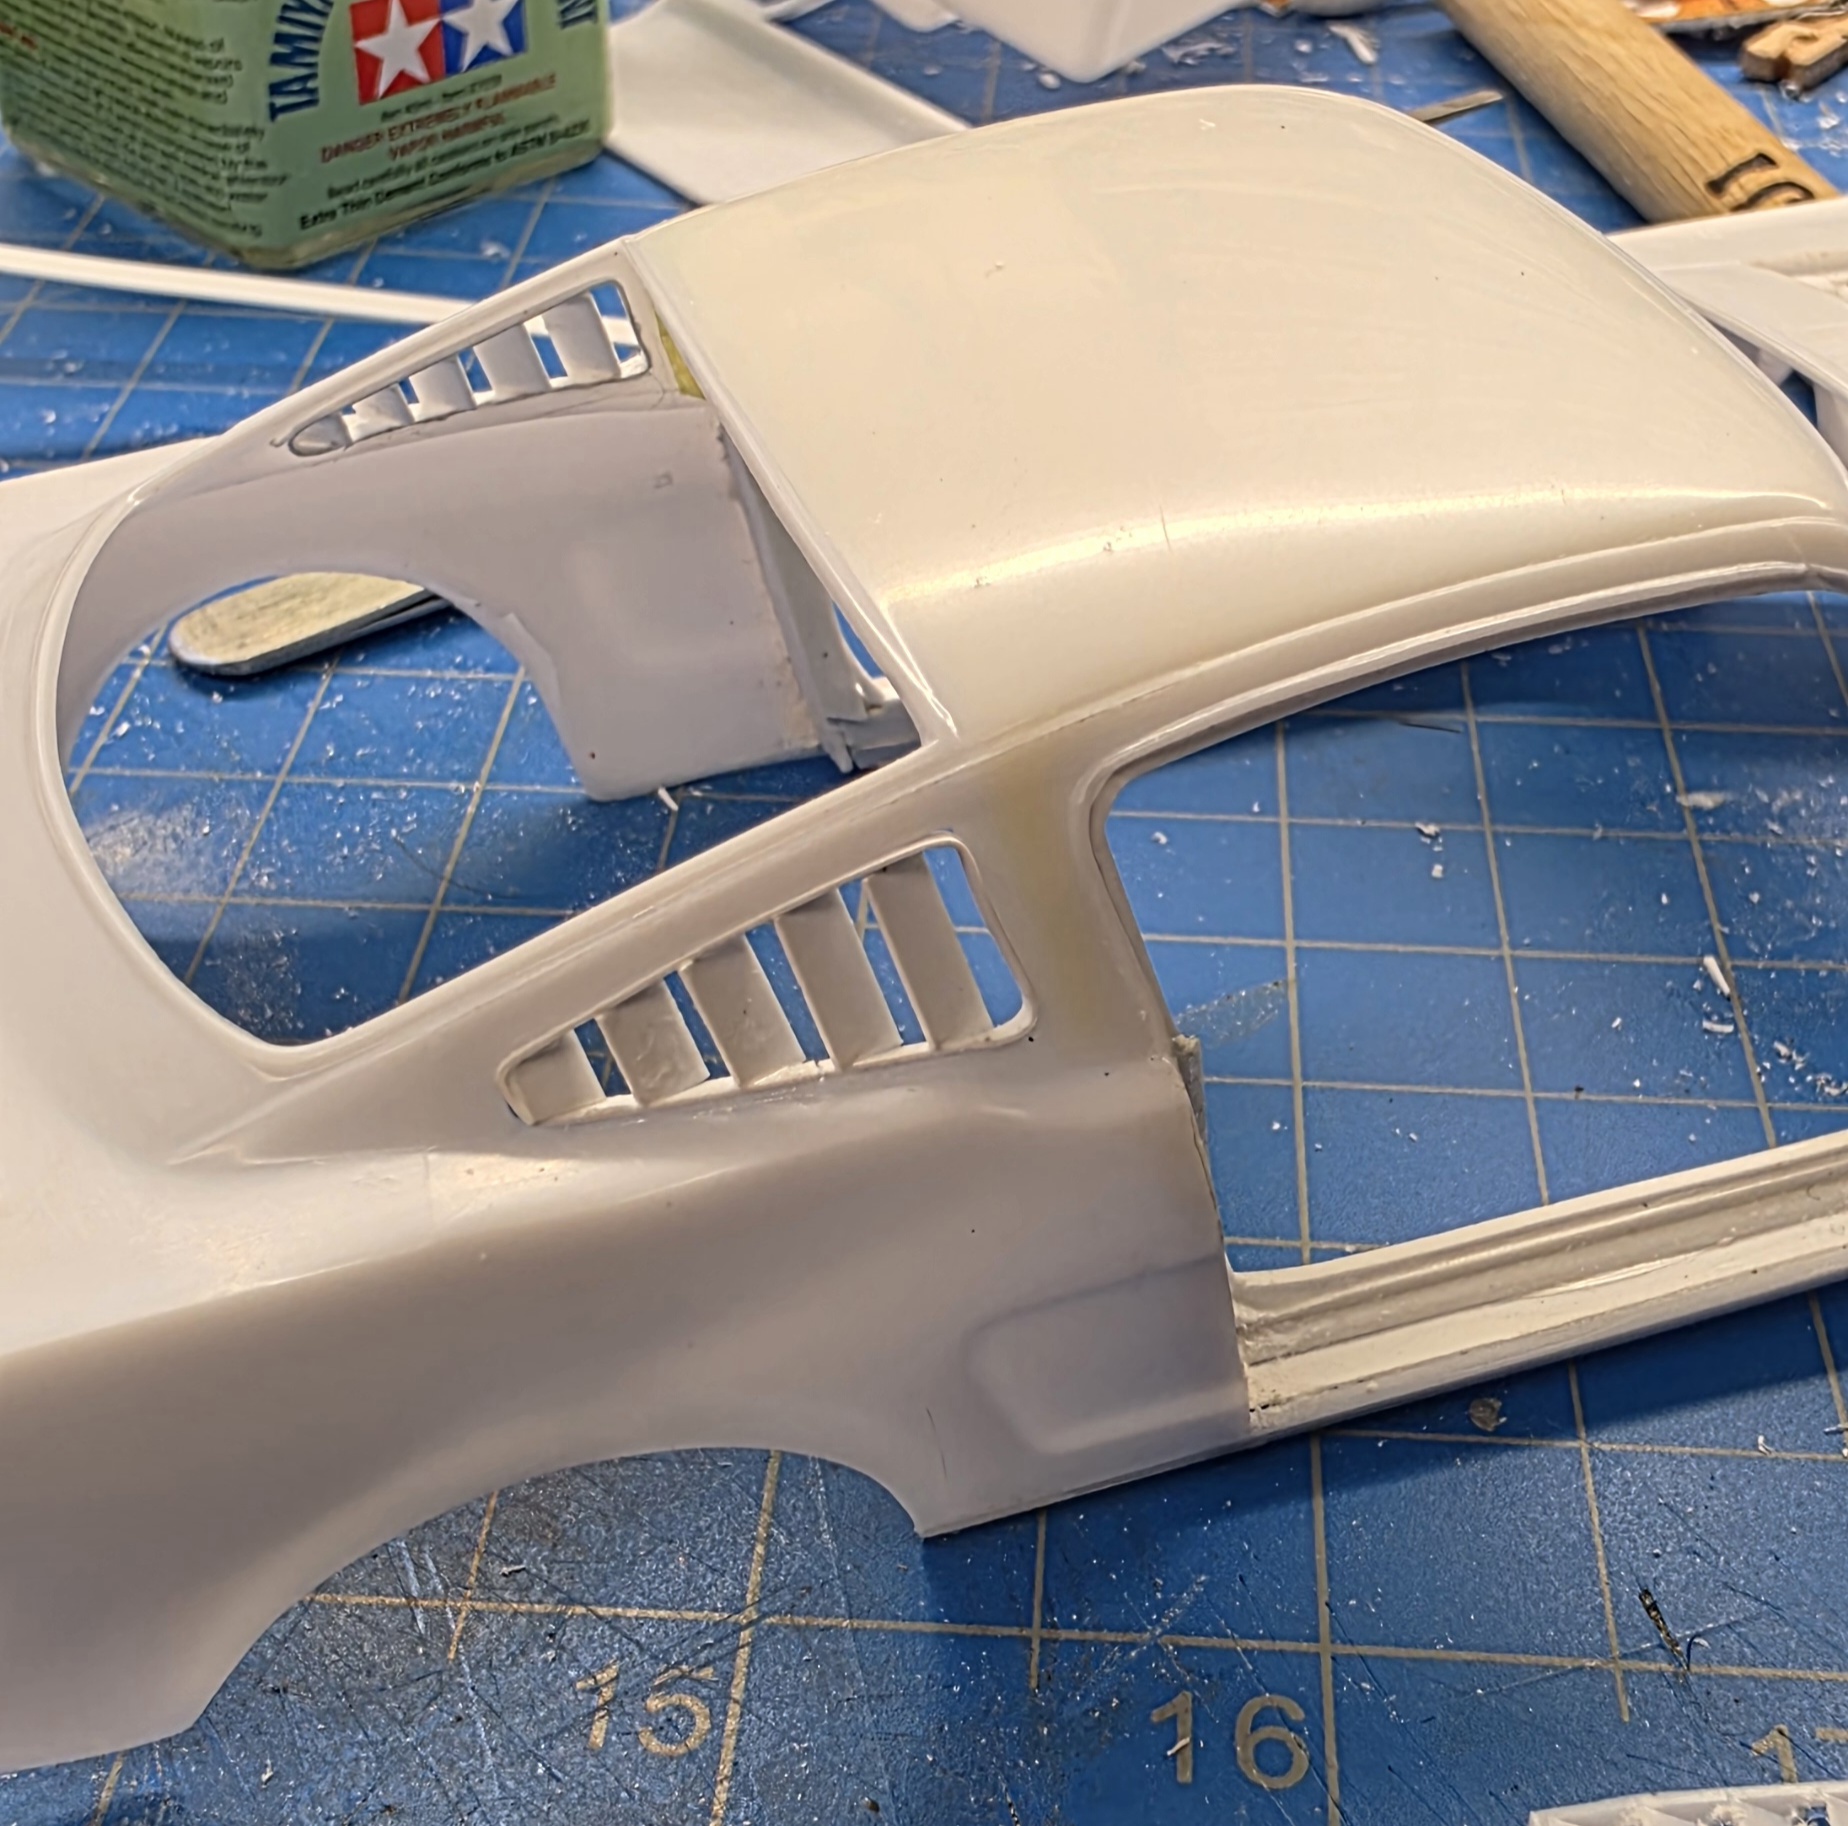
Now, what to do about the vent openings. They look like this...
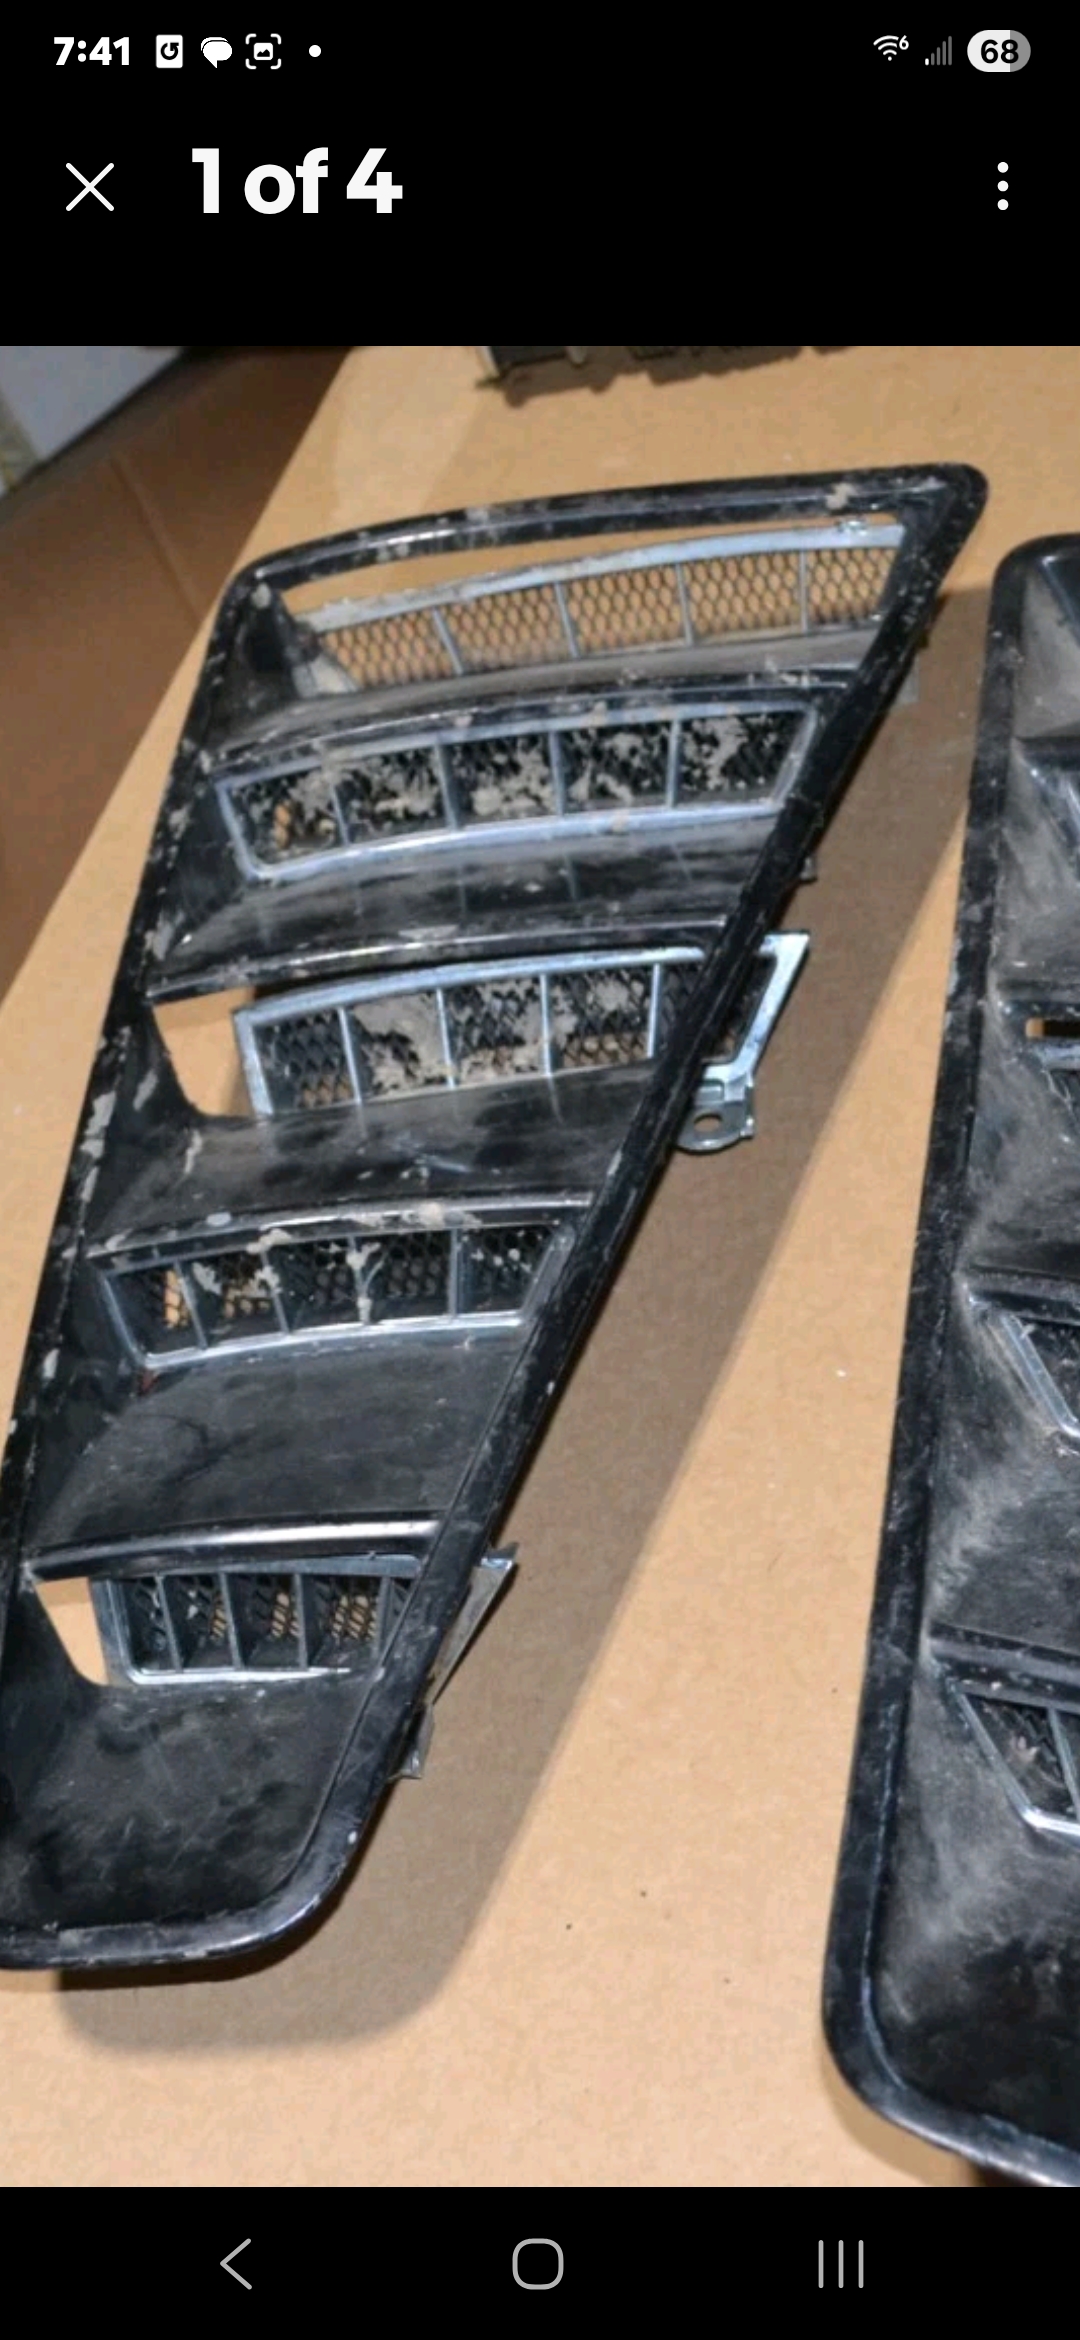
The A4 Garage guy used 2mm nickel strips from KS Models and solder. I have looked for those, or ANY 2mm nickel strips for a long time and failed. Besides, I don't think I could pull it off. I knew plastic strips wouldn't work for something so small. I got the smallest styrene rod I have; .2mm, and cut them into 3mm lengths. It was difficult to cement them in place because they kept sticking to the tweezers!
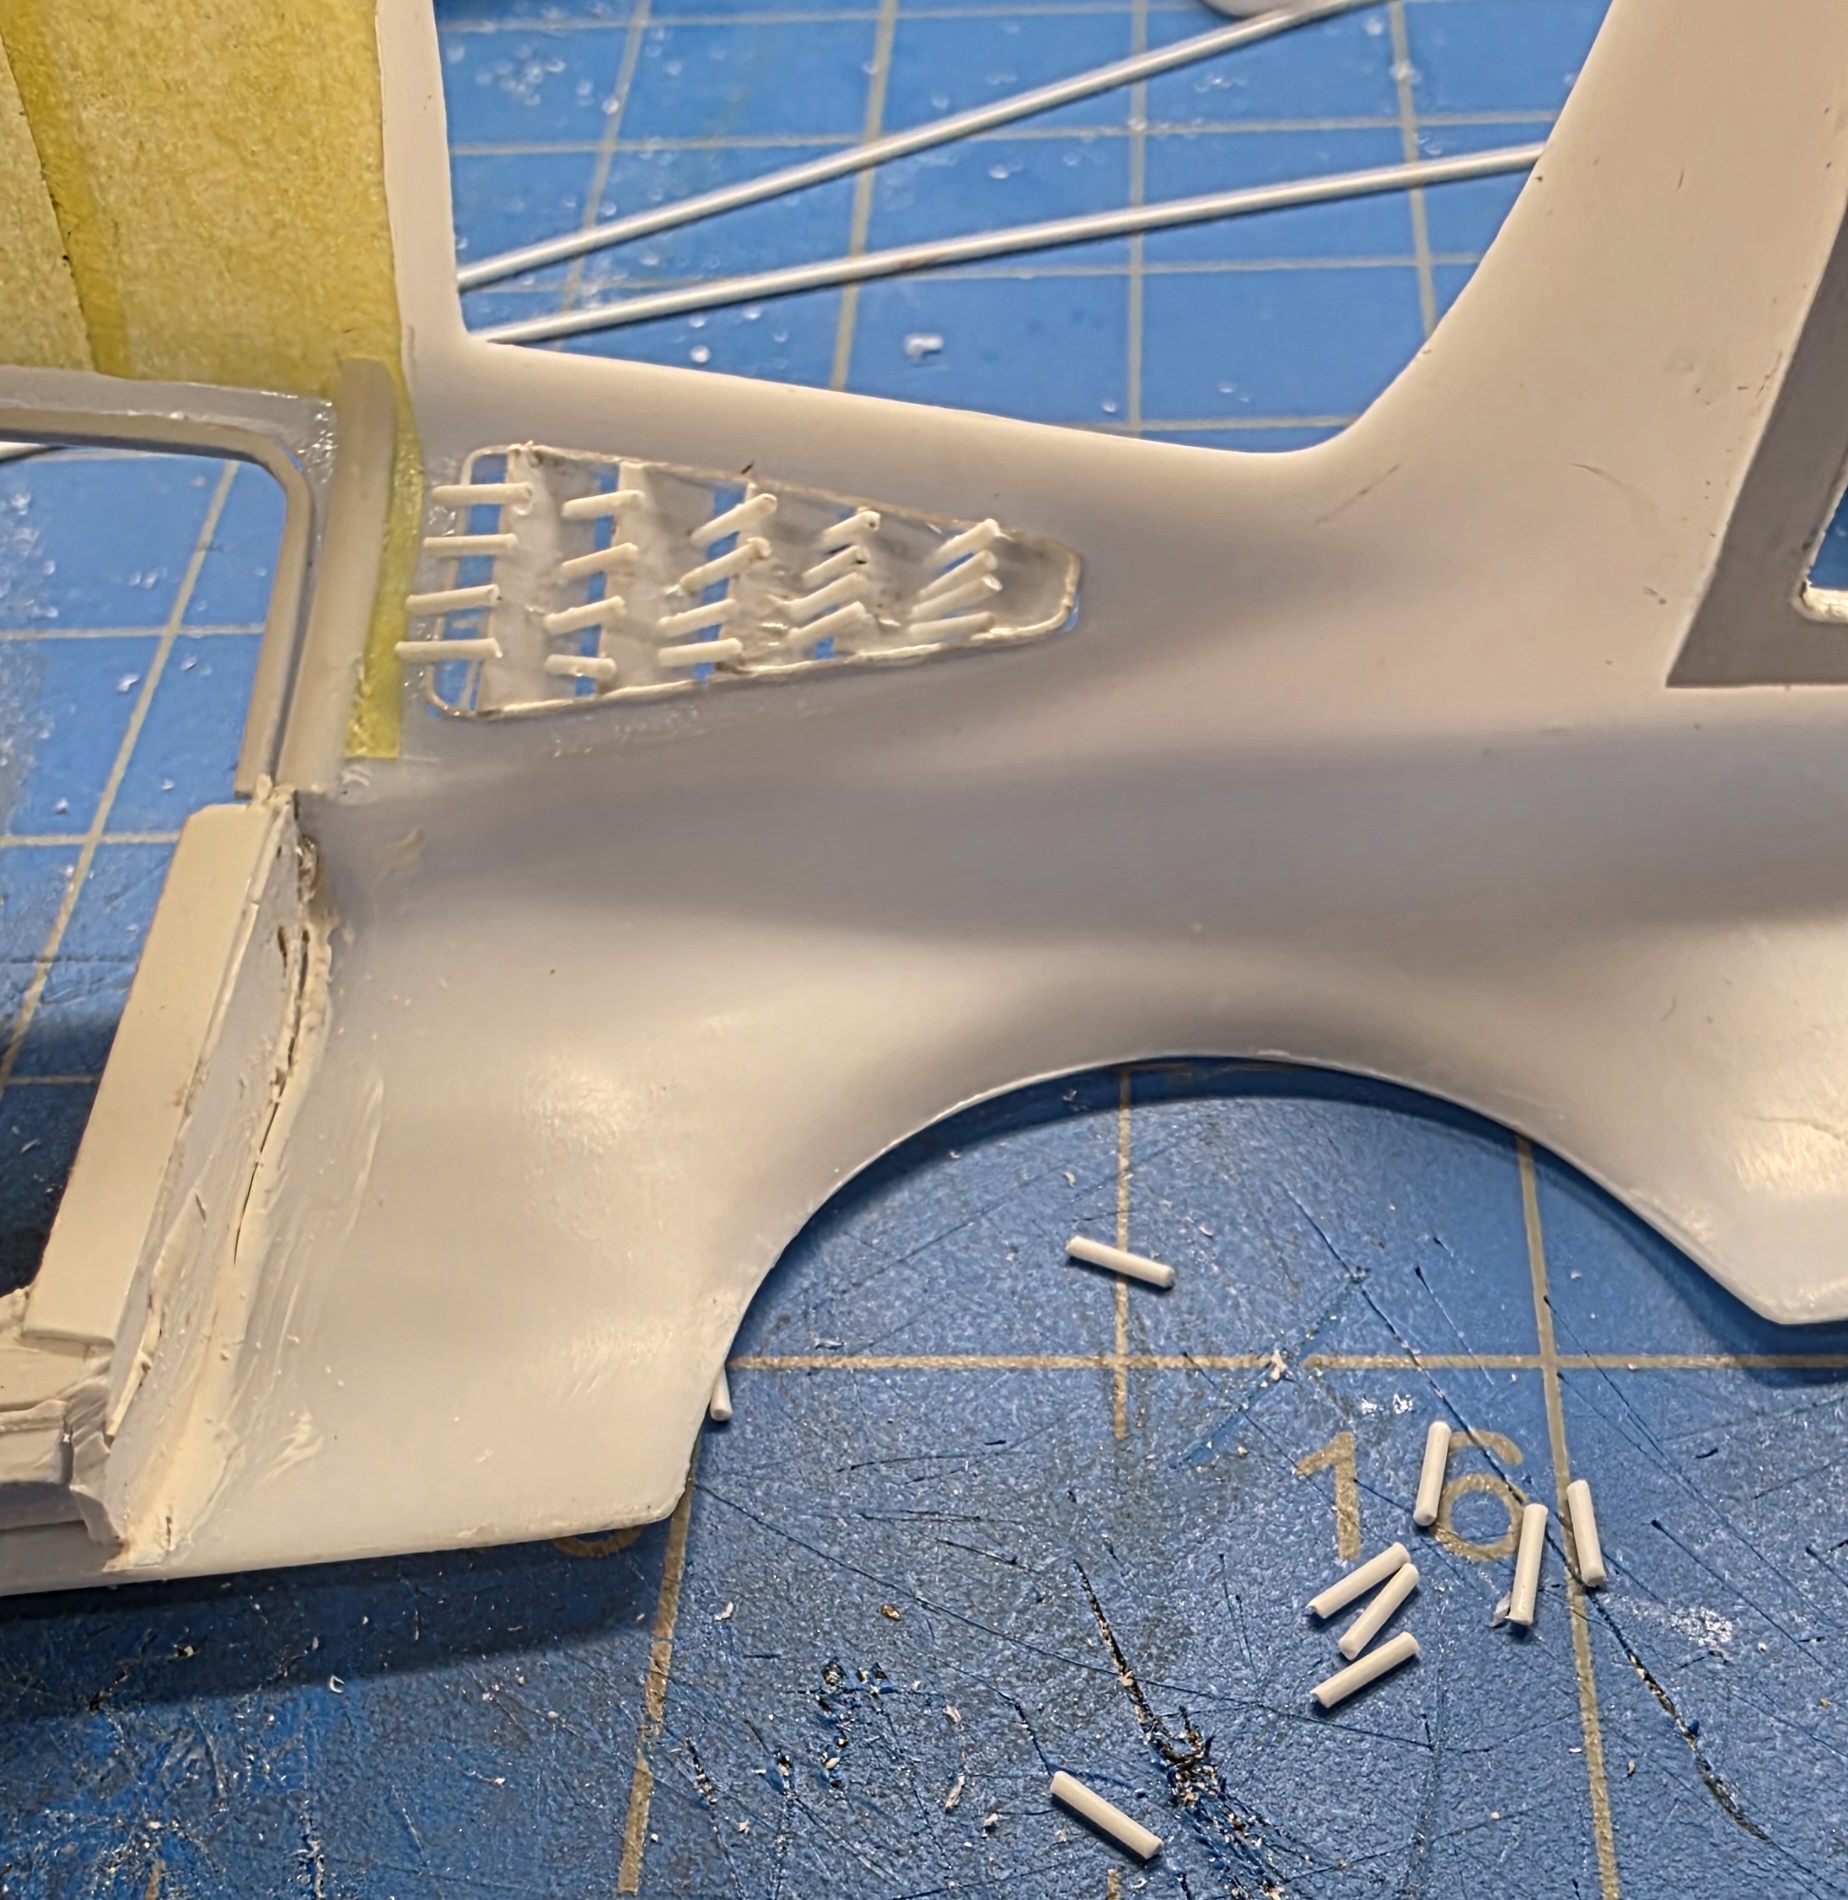
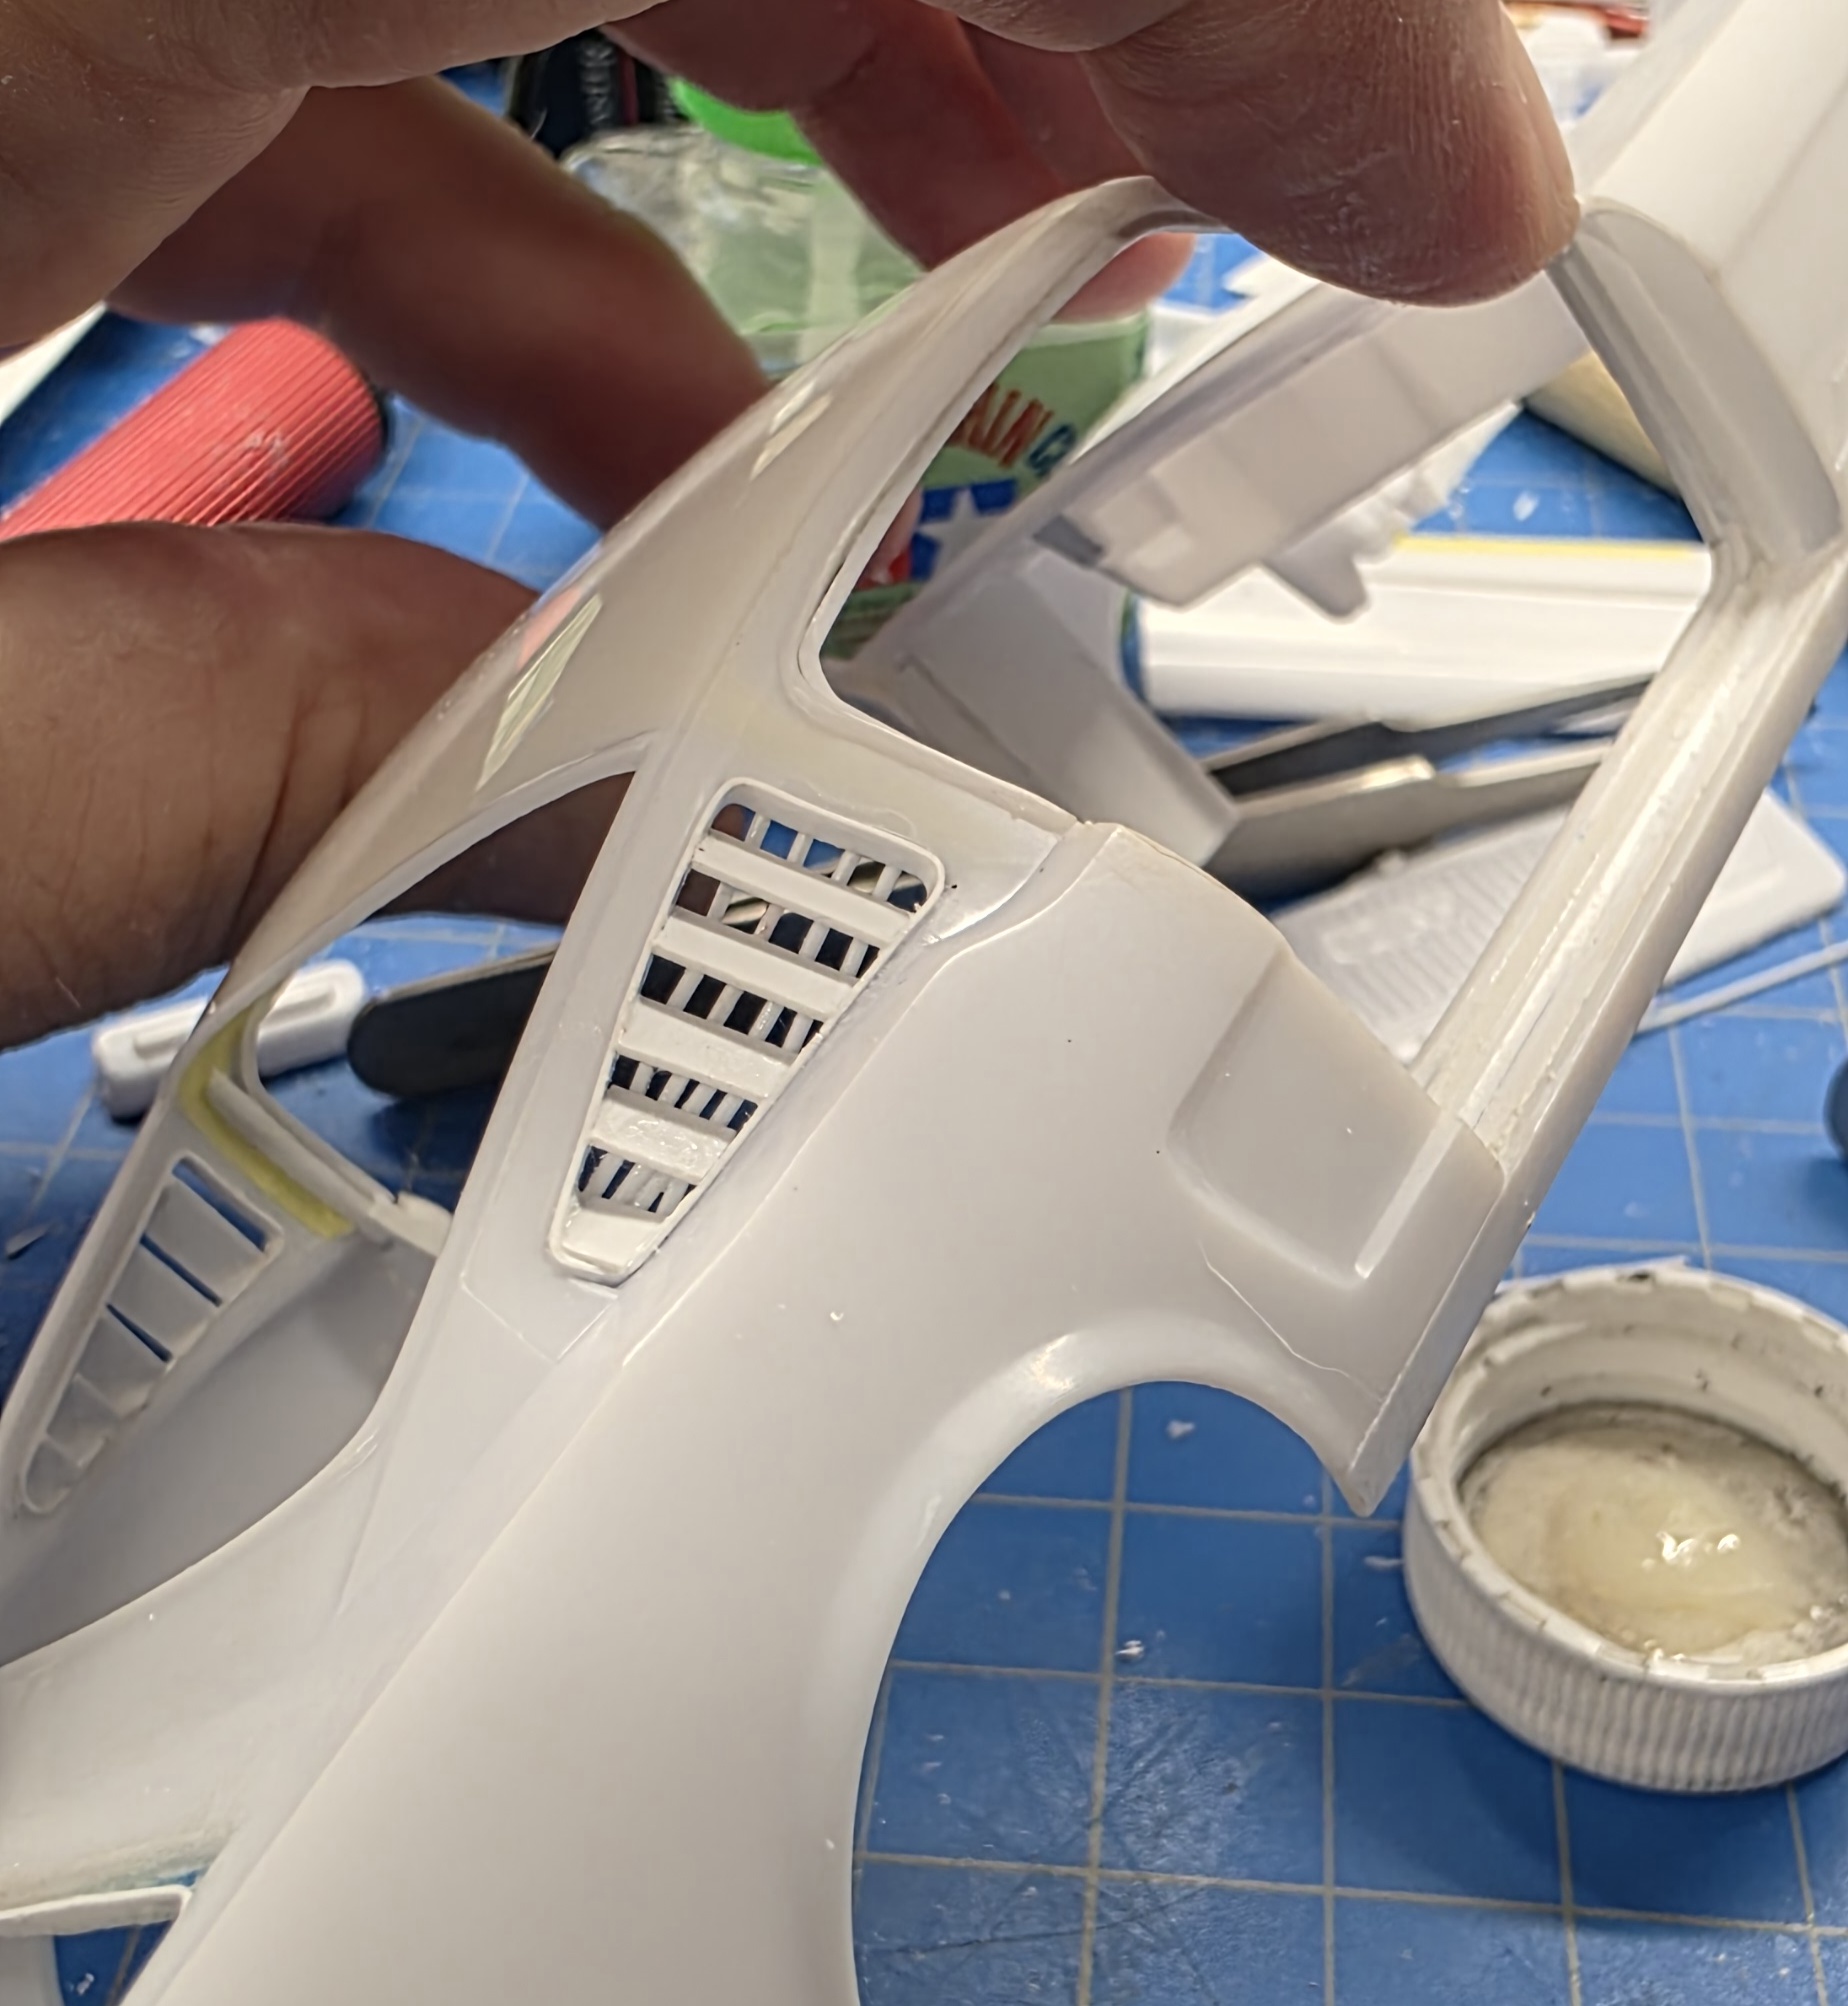
Once again they are eyeballed but looks OK from the outside and will be covered inside.
I have K&S Models diamond pattern screen so I cut it into 2mm strips then cut to length and Gator Glued it to the ribs
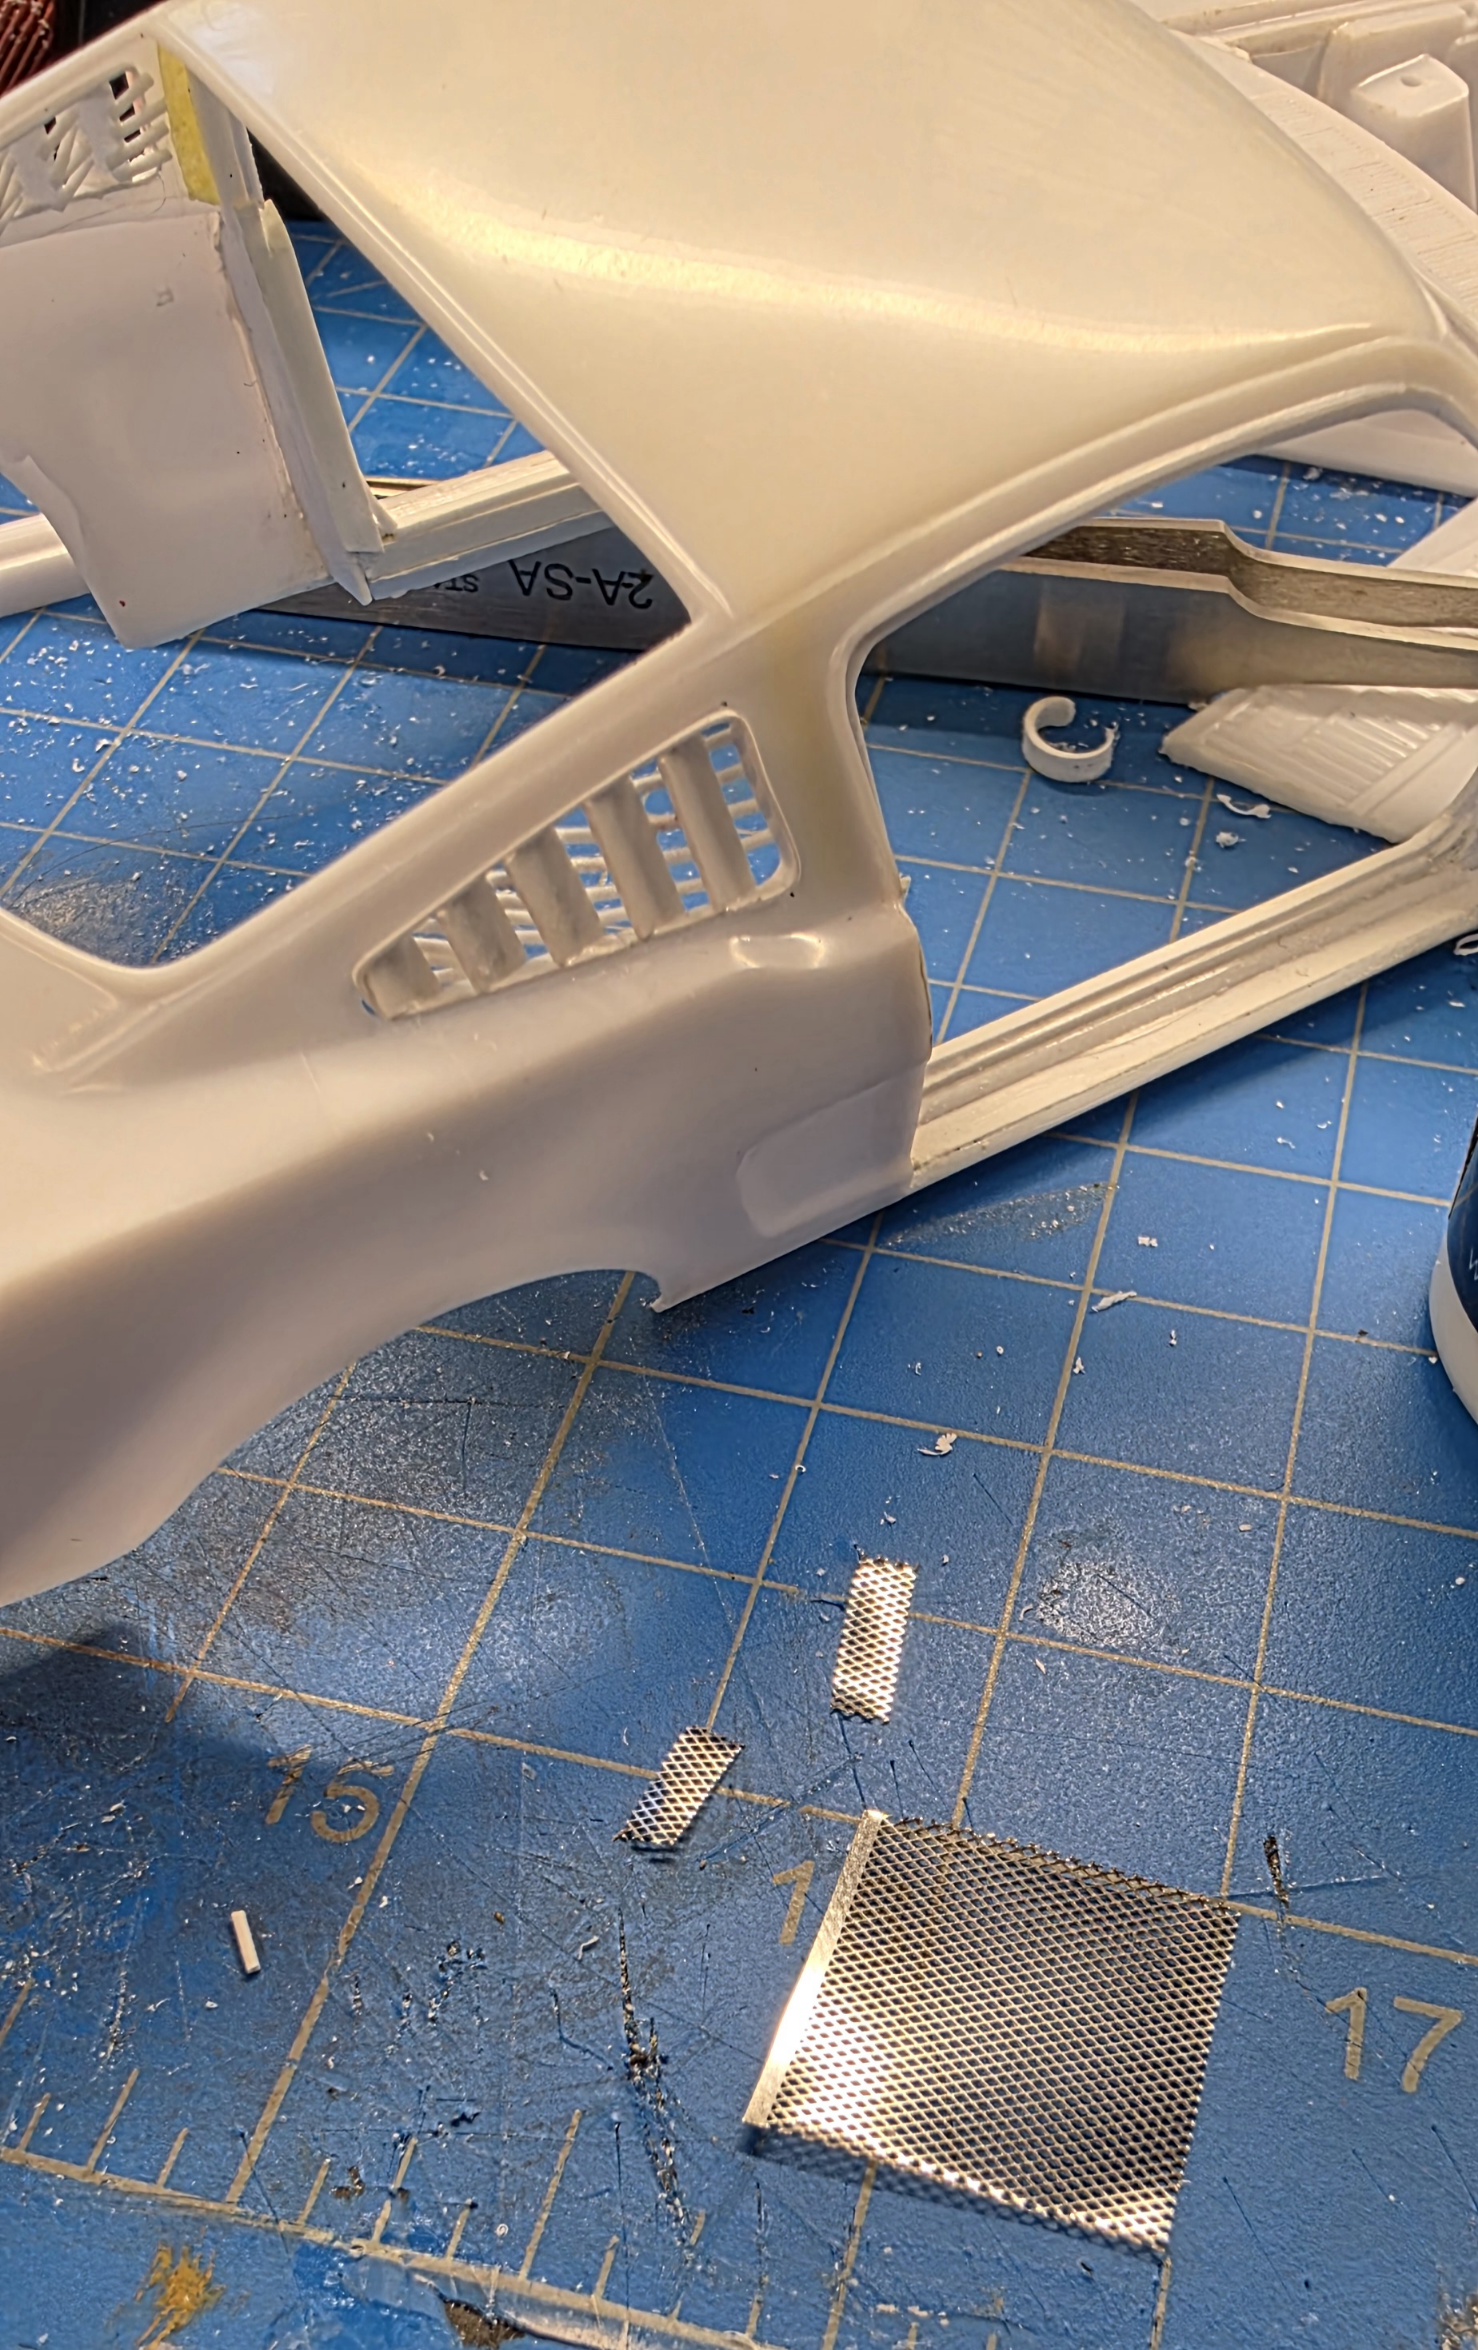
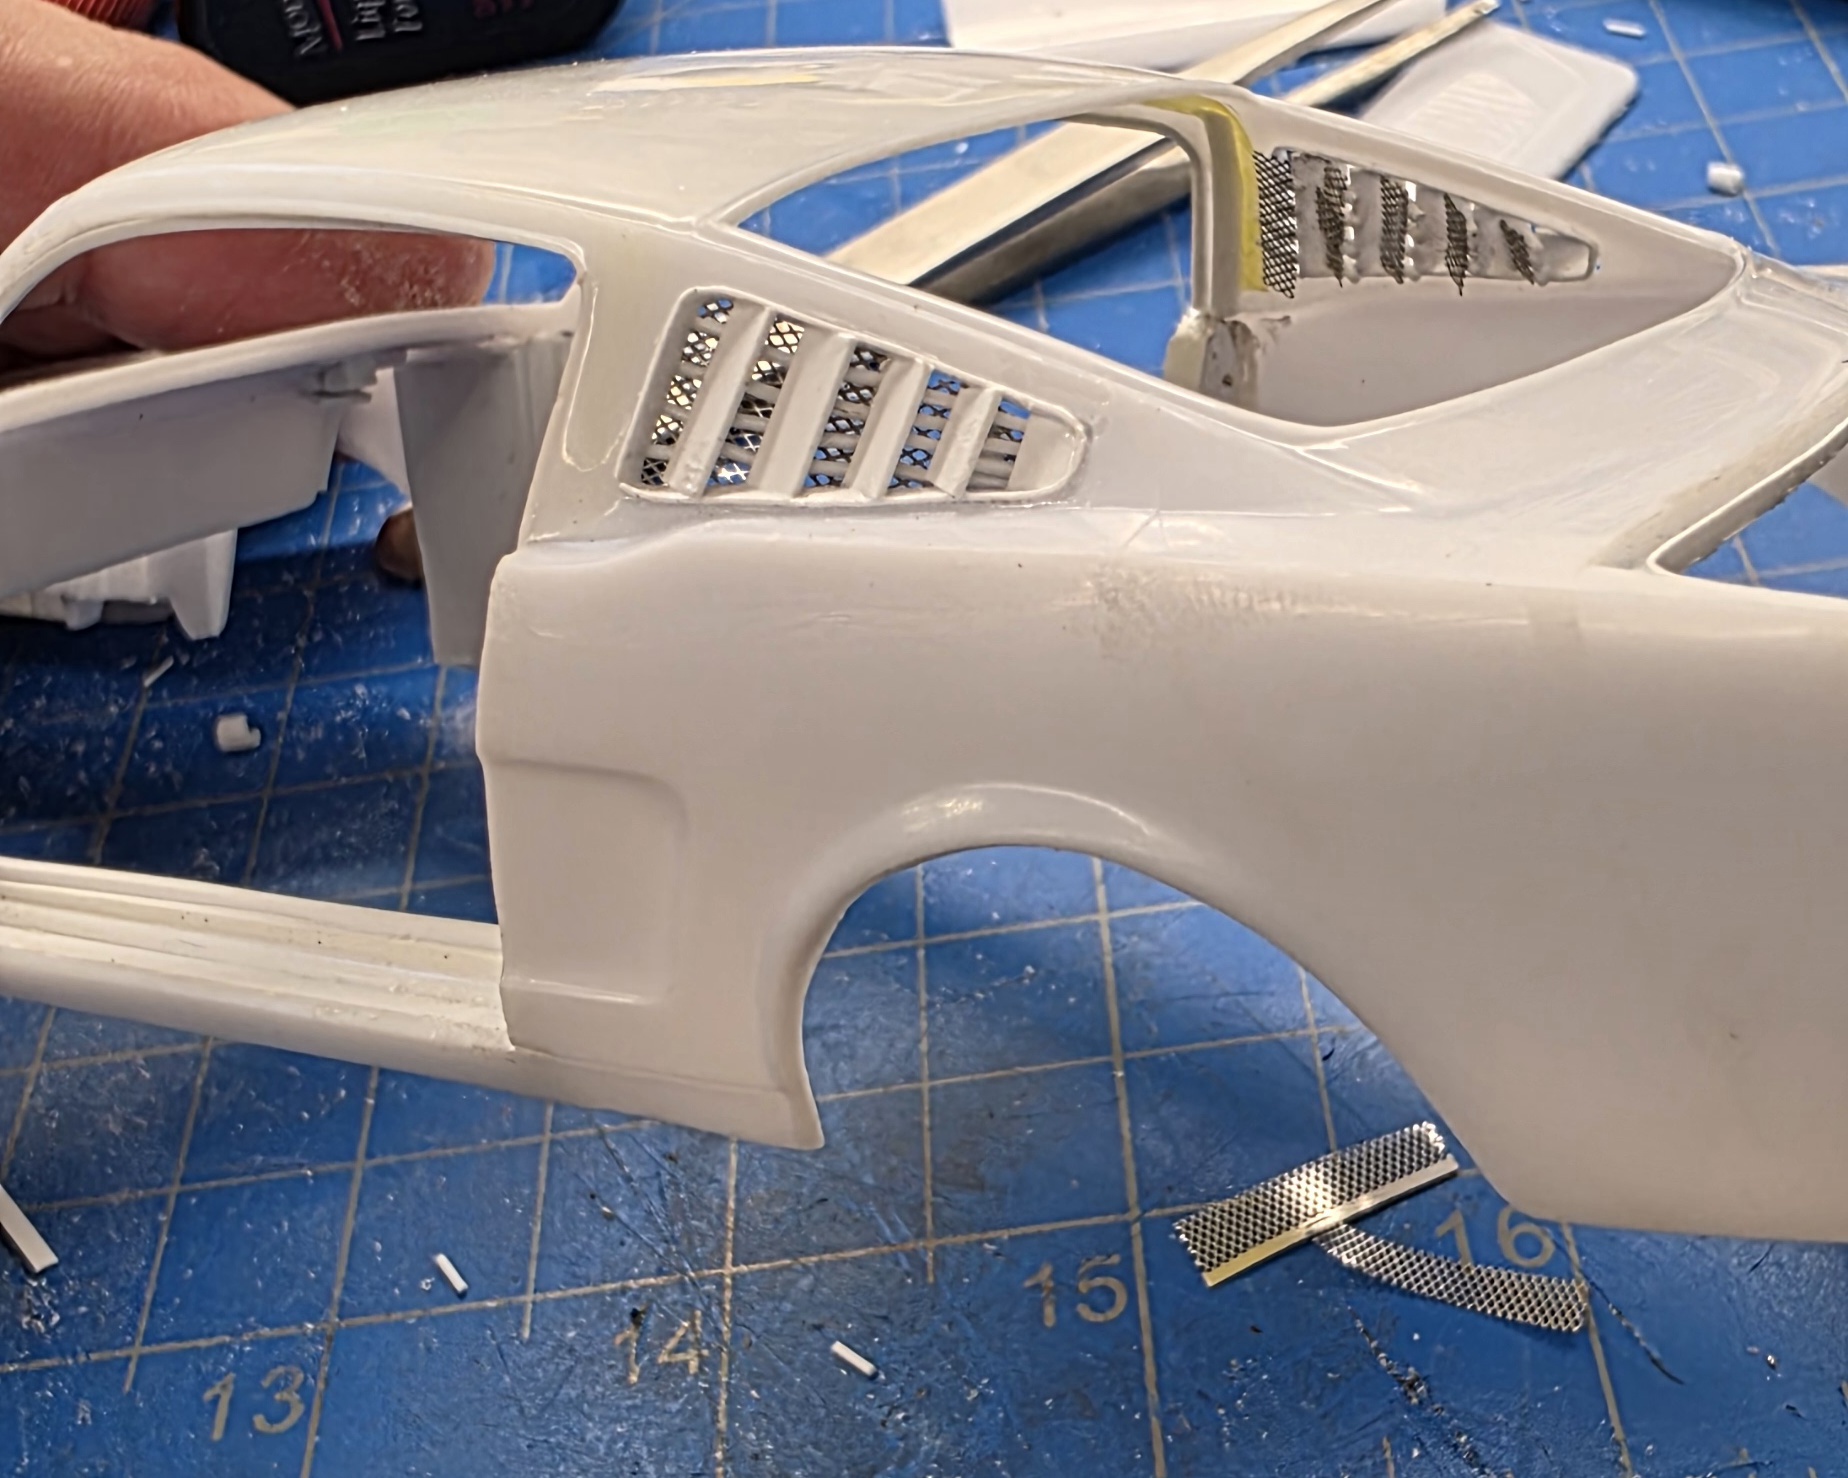
To make the covers for the inside I used the same thin card. I formed the ends using round needle nose pliers.
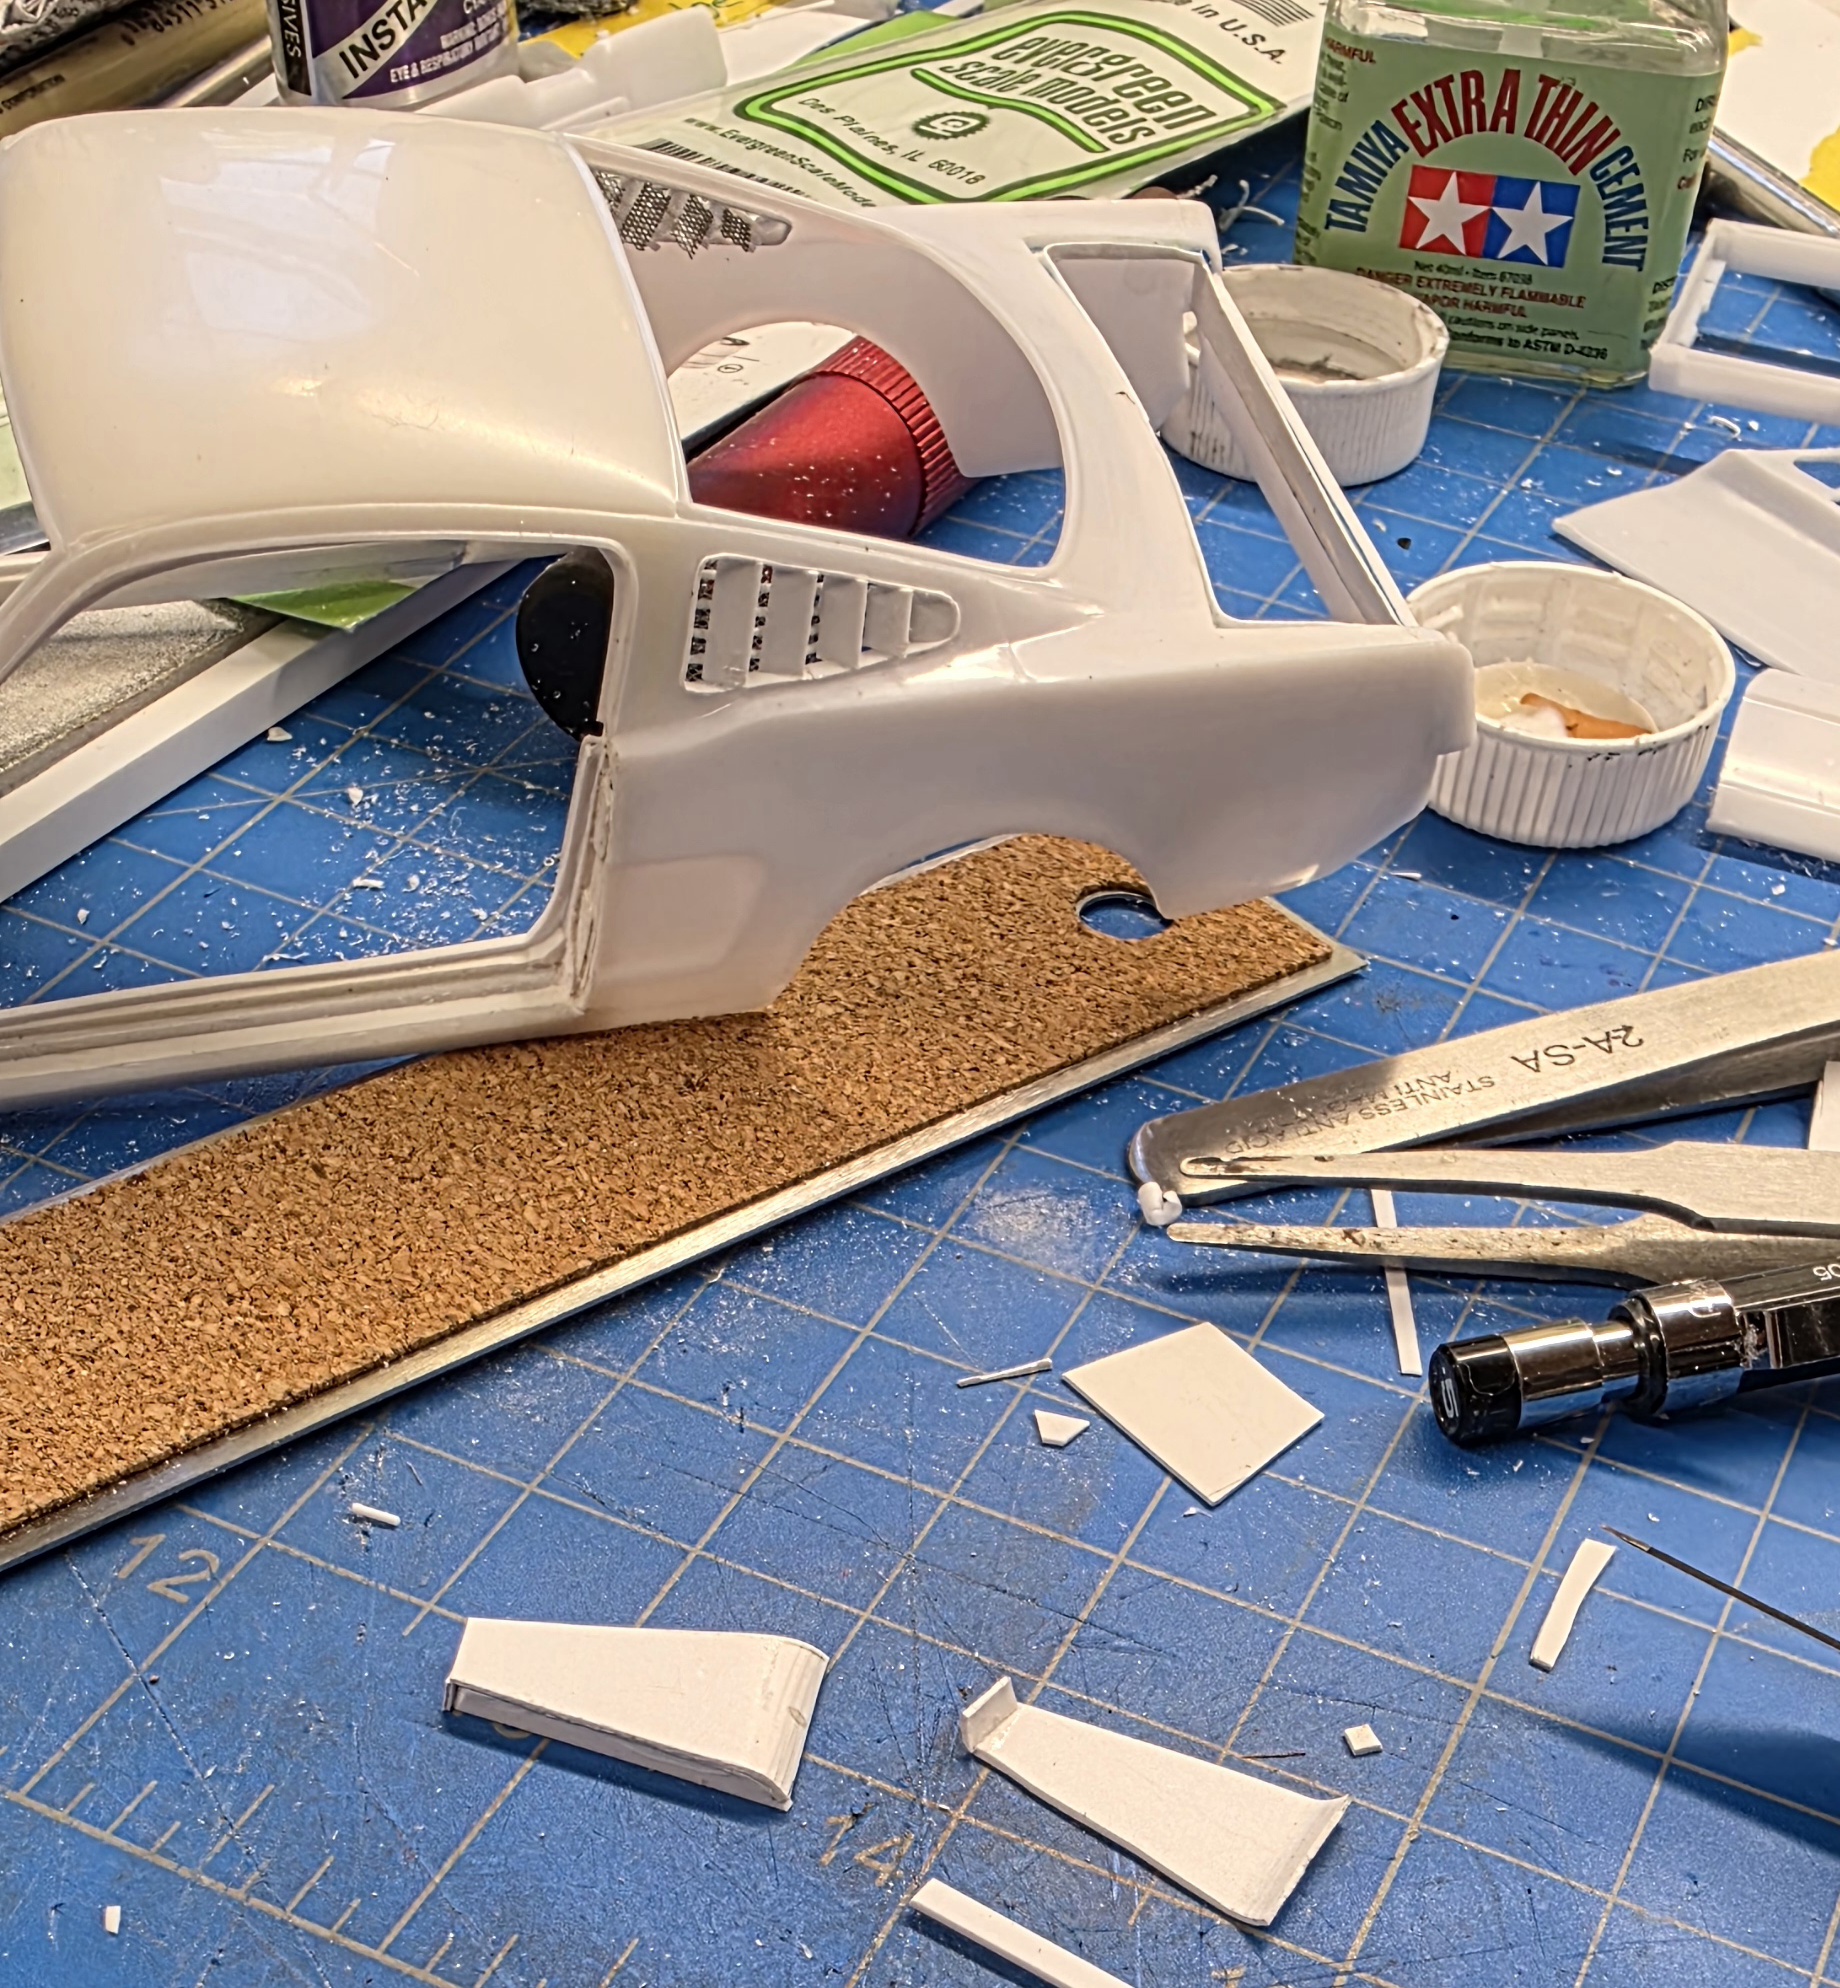
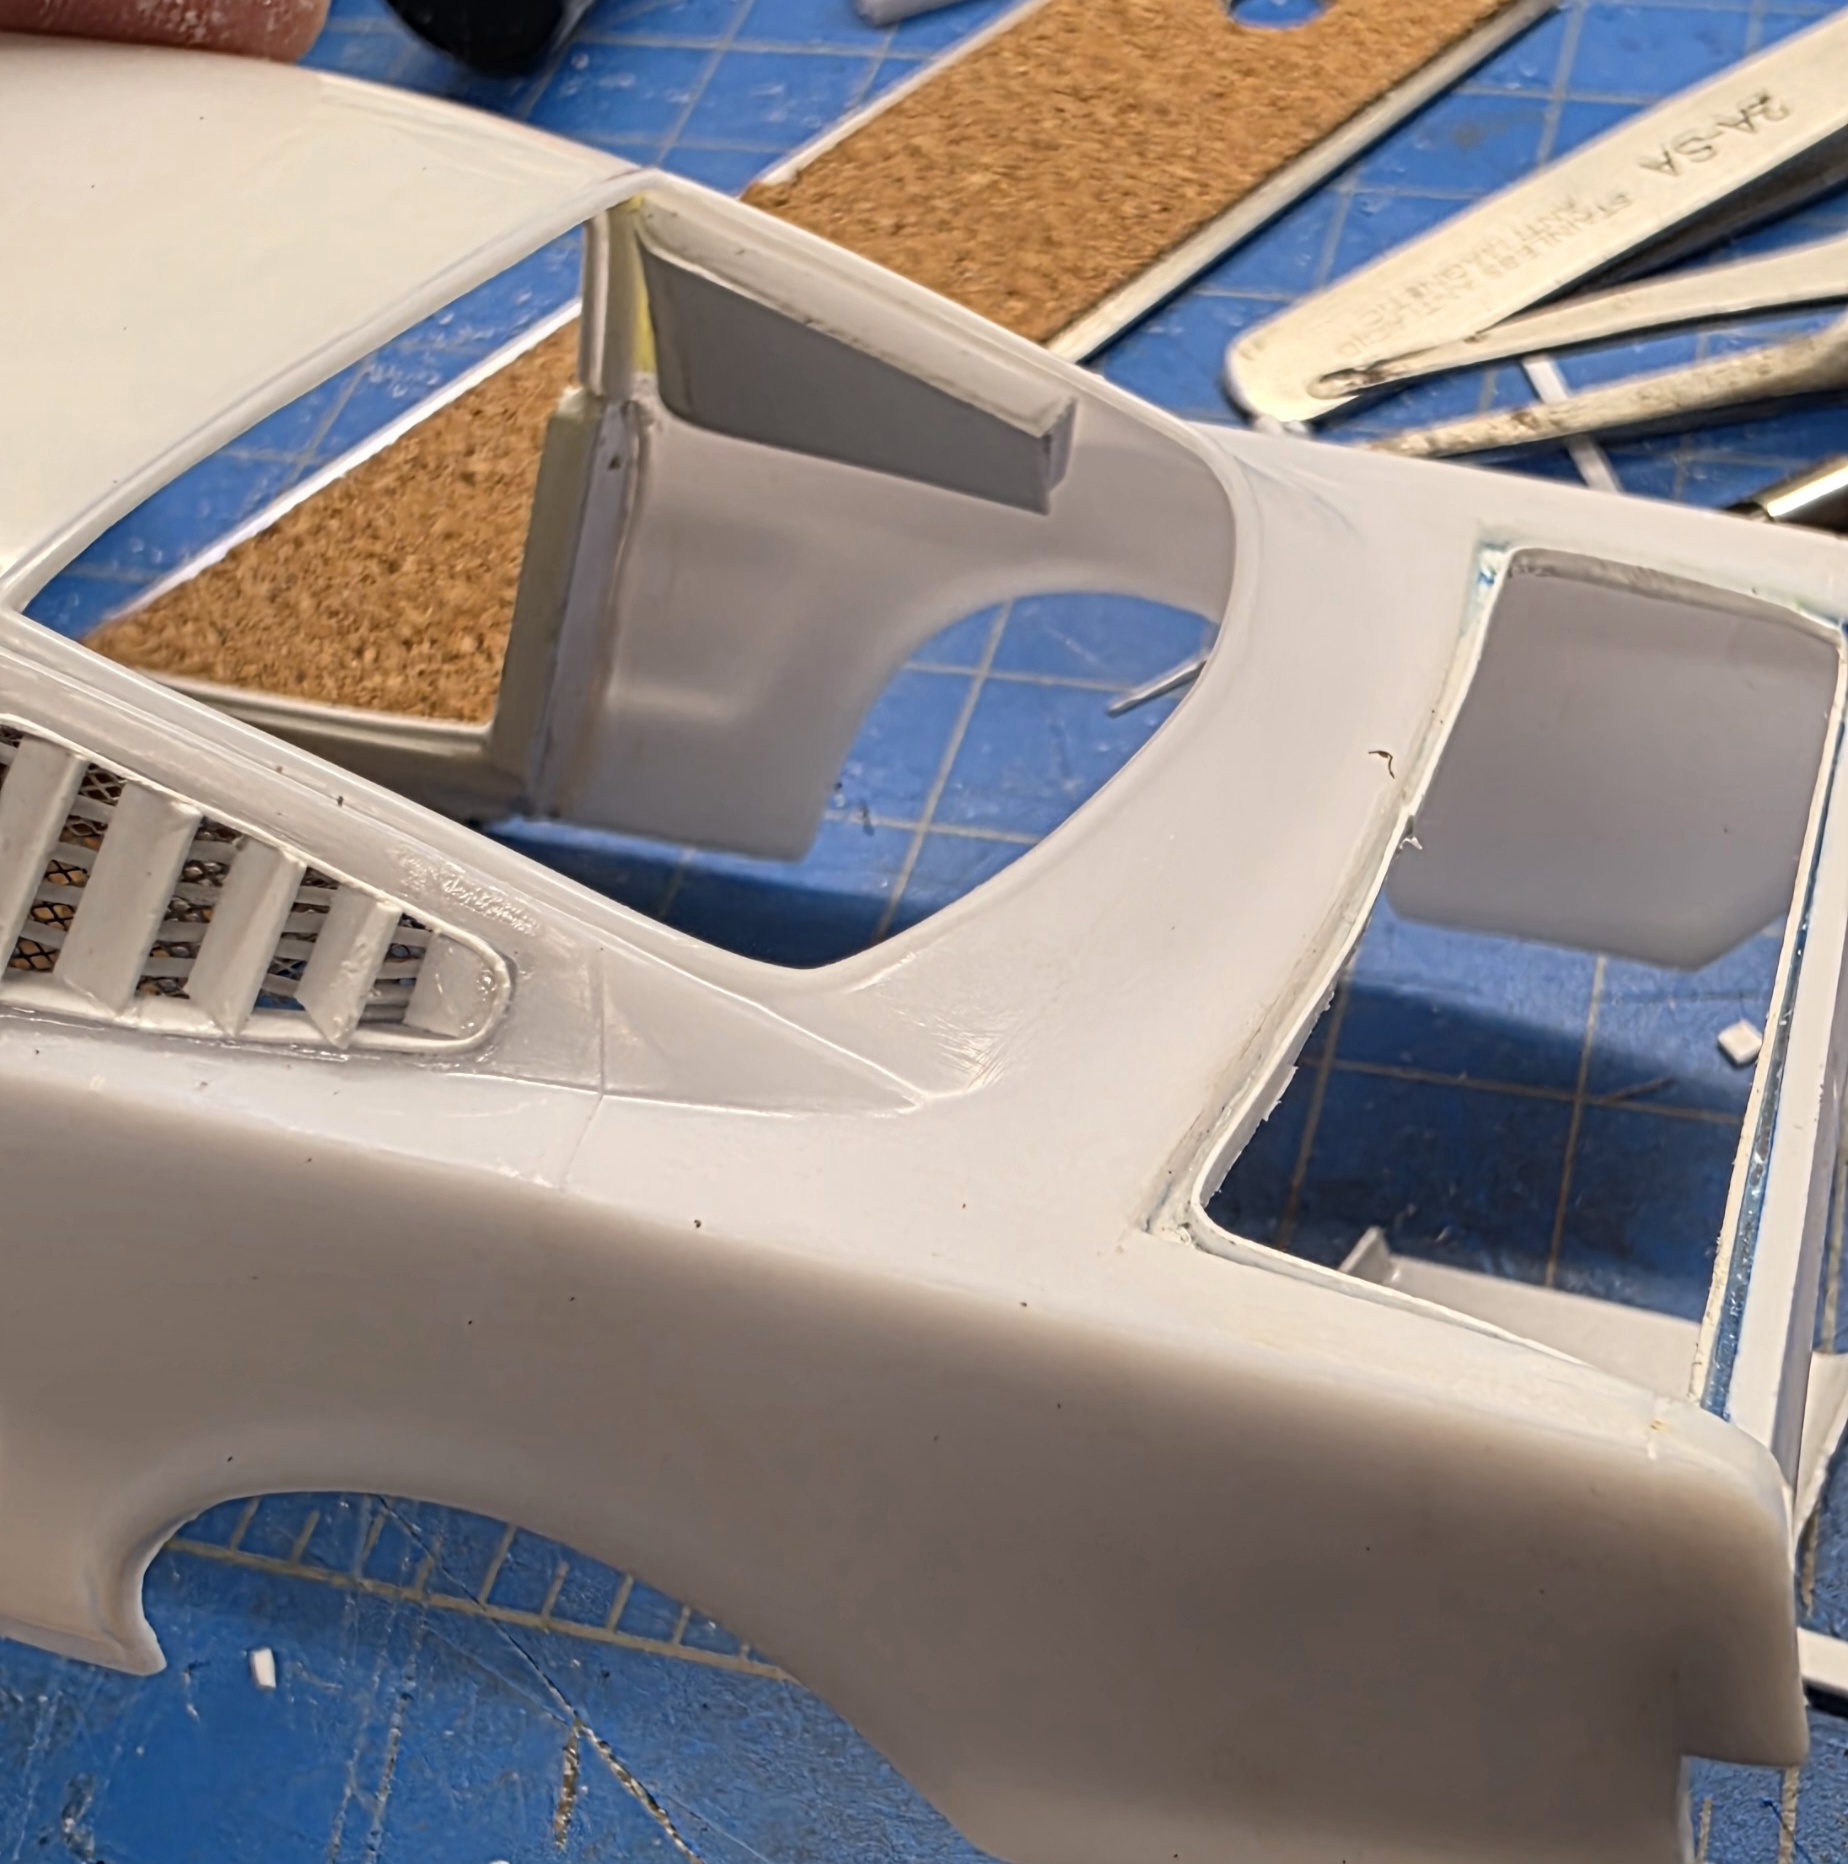
And that is where I am! Still some clean up and vent doors to add inside
I will line the opening with 2mm x ... uh, .3mm I think. I have had some practice lining openings with the door frame but is still extremely challenging for me. Patience (not a virtue), tiny bits of cement, hold and wait, move along. I am getting better at measuring where to bend. I use a little needle tool to create the curves.
Now that I have the edges lined I need to make the louvers. I used 4mm x .5mm strip cut to height and cemented at an angle so it is flush (or nearly so) on the front and back side. The distance between is eyeballed. There was probablly a mathematical measurement method but I don't know it.
Now, what to do about the vent openings. They look like this...
The A4 Garage guy used 2mm nickel strips from KS Models and solder. I have looked for those, or ANY 2mm nickel strips for a long time and failed. Besides, I don't think I could pull it off. I knew plastic strips wouldn't work for something so small. I got the smallest styrene rod I have; .2mm, and cut them into 3mm lengths. It was difficult to cement them in place because they kept sticking to the tweezers!
Once again they are eyeballed but looks OK from the outside and will be covered inside.
I have K&S Models diamond pattern screen so I cut it into 2mm strips then cut to length and Gator Glued it to the ribs
To make the covers for the inside I used the same thin card. I formed the ends using round needle nose pliers.
And that is where I am! Still some clean up and vent doors to add inside
Can you get a taper on the trailing edge of the louvers? That'll make them look a lot more thin. 
Greg Kimsey
Well-known member
Oooh, yes. You mean the outer visible edge, right? Yes. I'm on it.Can you get a taper on the trailing edge of the louvers? That'll make them look a lot more thin.
Ooooh, wait...metal? and a then kerf in the edging for lateral support? Same with the vent ribbing. This is why I love this place.
That'll work.
Greg Kimsey
Well-known member
Well, IDK. The fins are better, but the vent ribs are not. I tried four different ways to make them and none of them are good. I shouldn't have been afraid to try the soldering iron I guess. It is still better than the kit parts though...I think
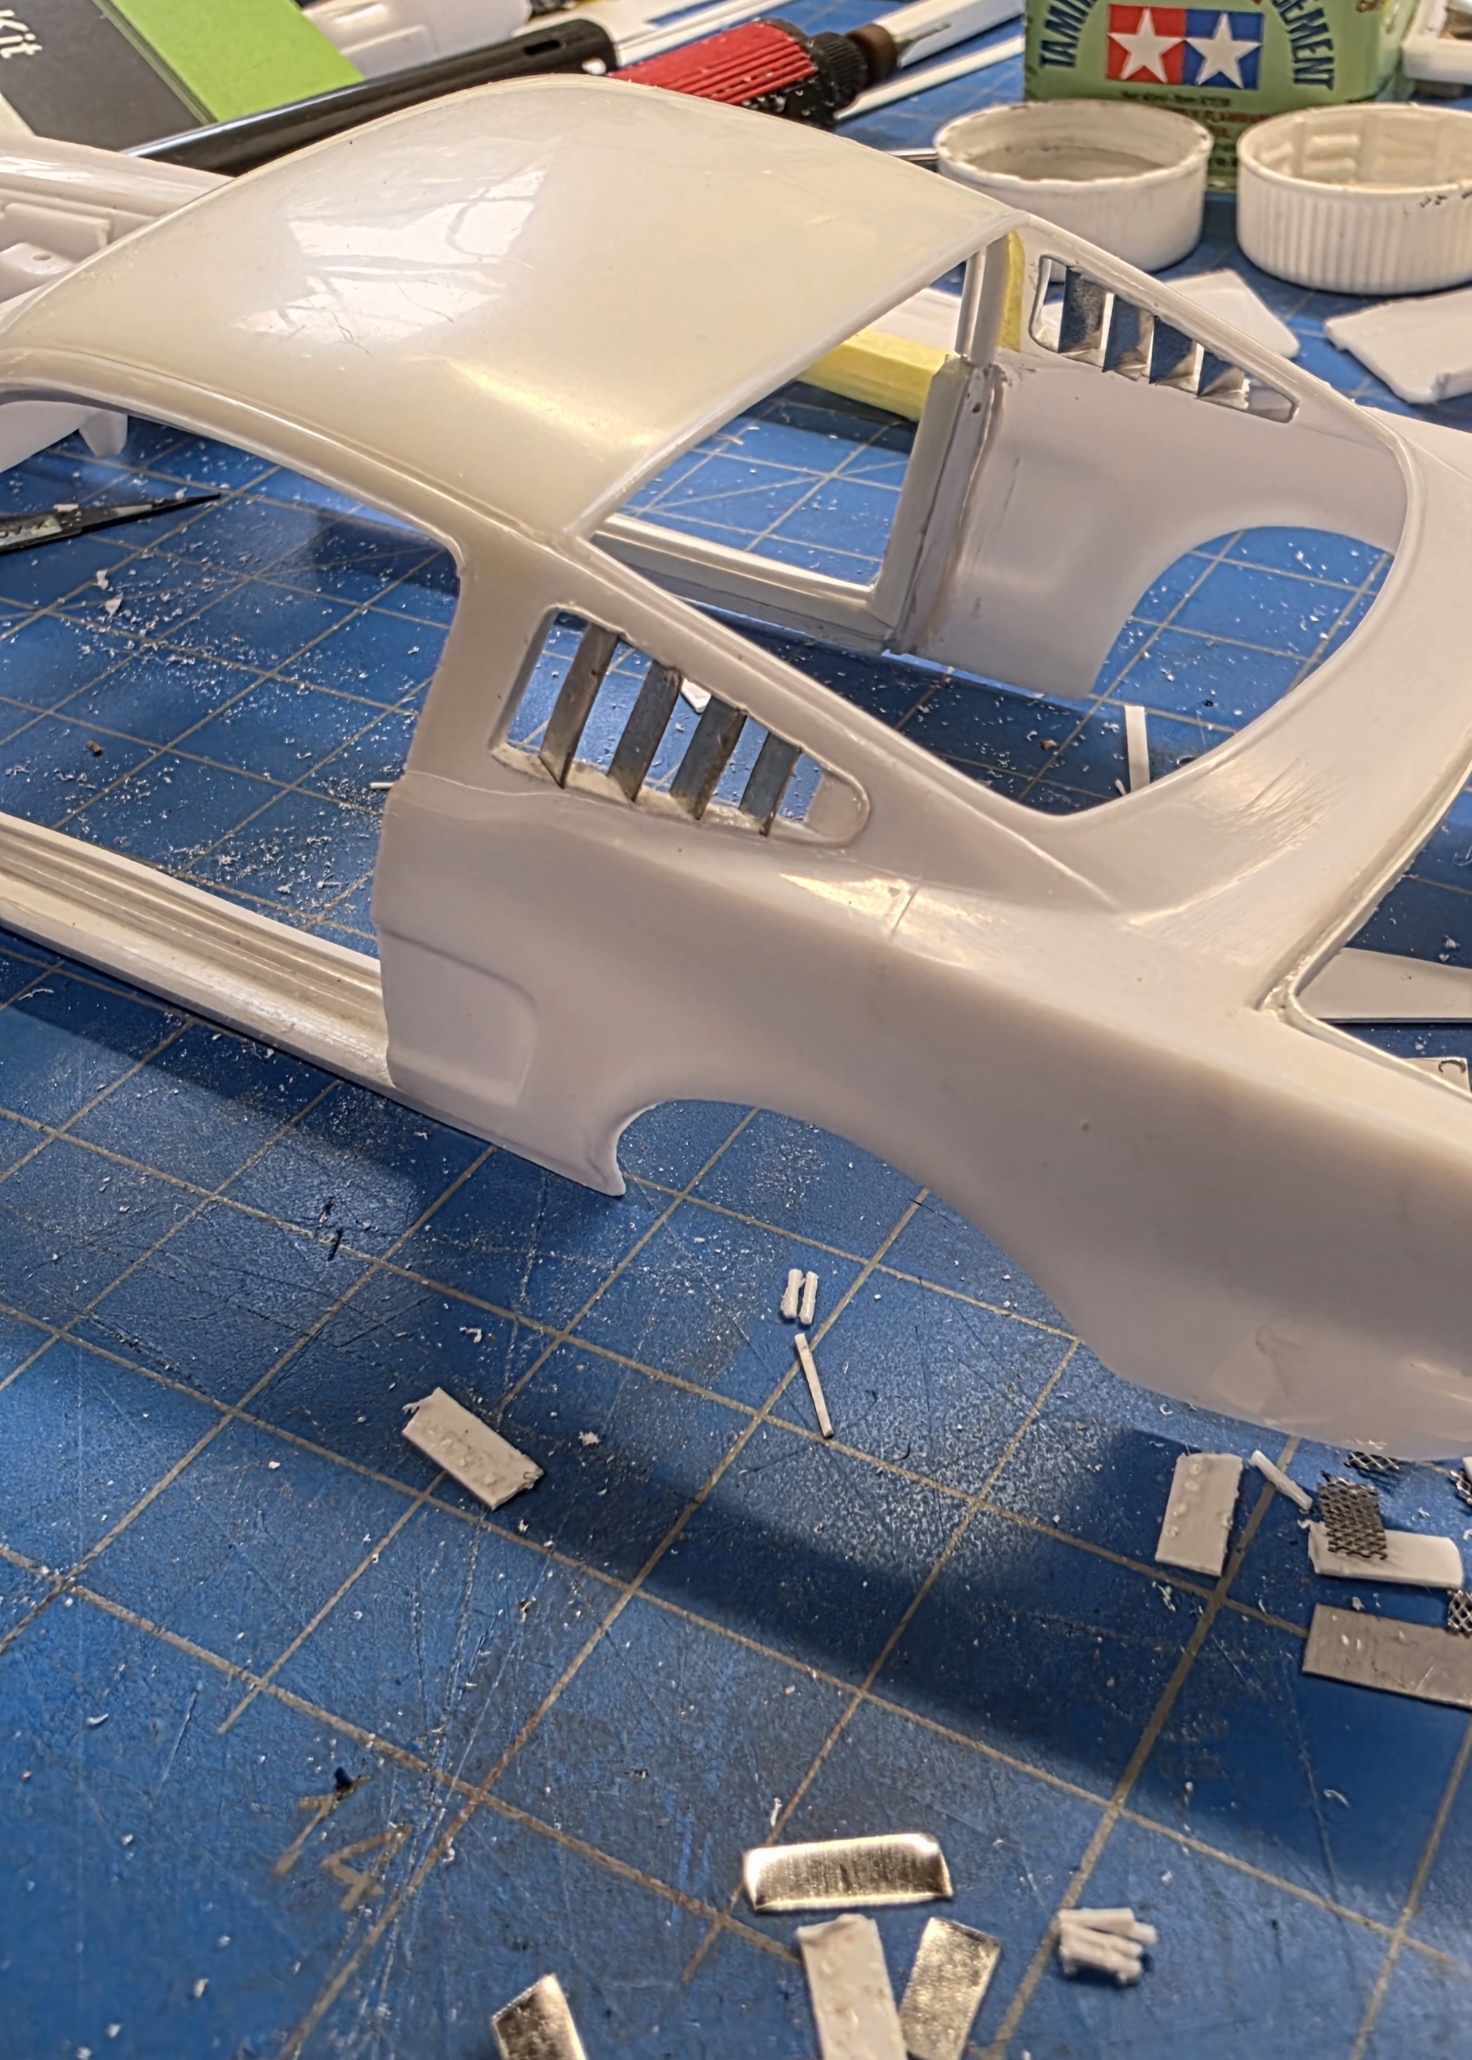
I decided to zig zag the strips, first in metal then plastic. I liked the plastic better
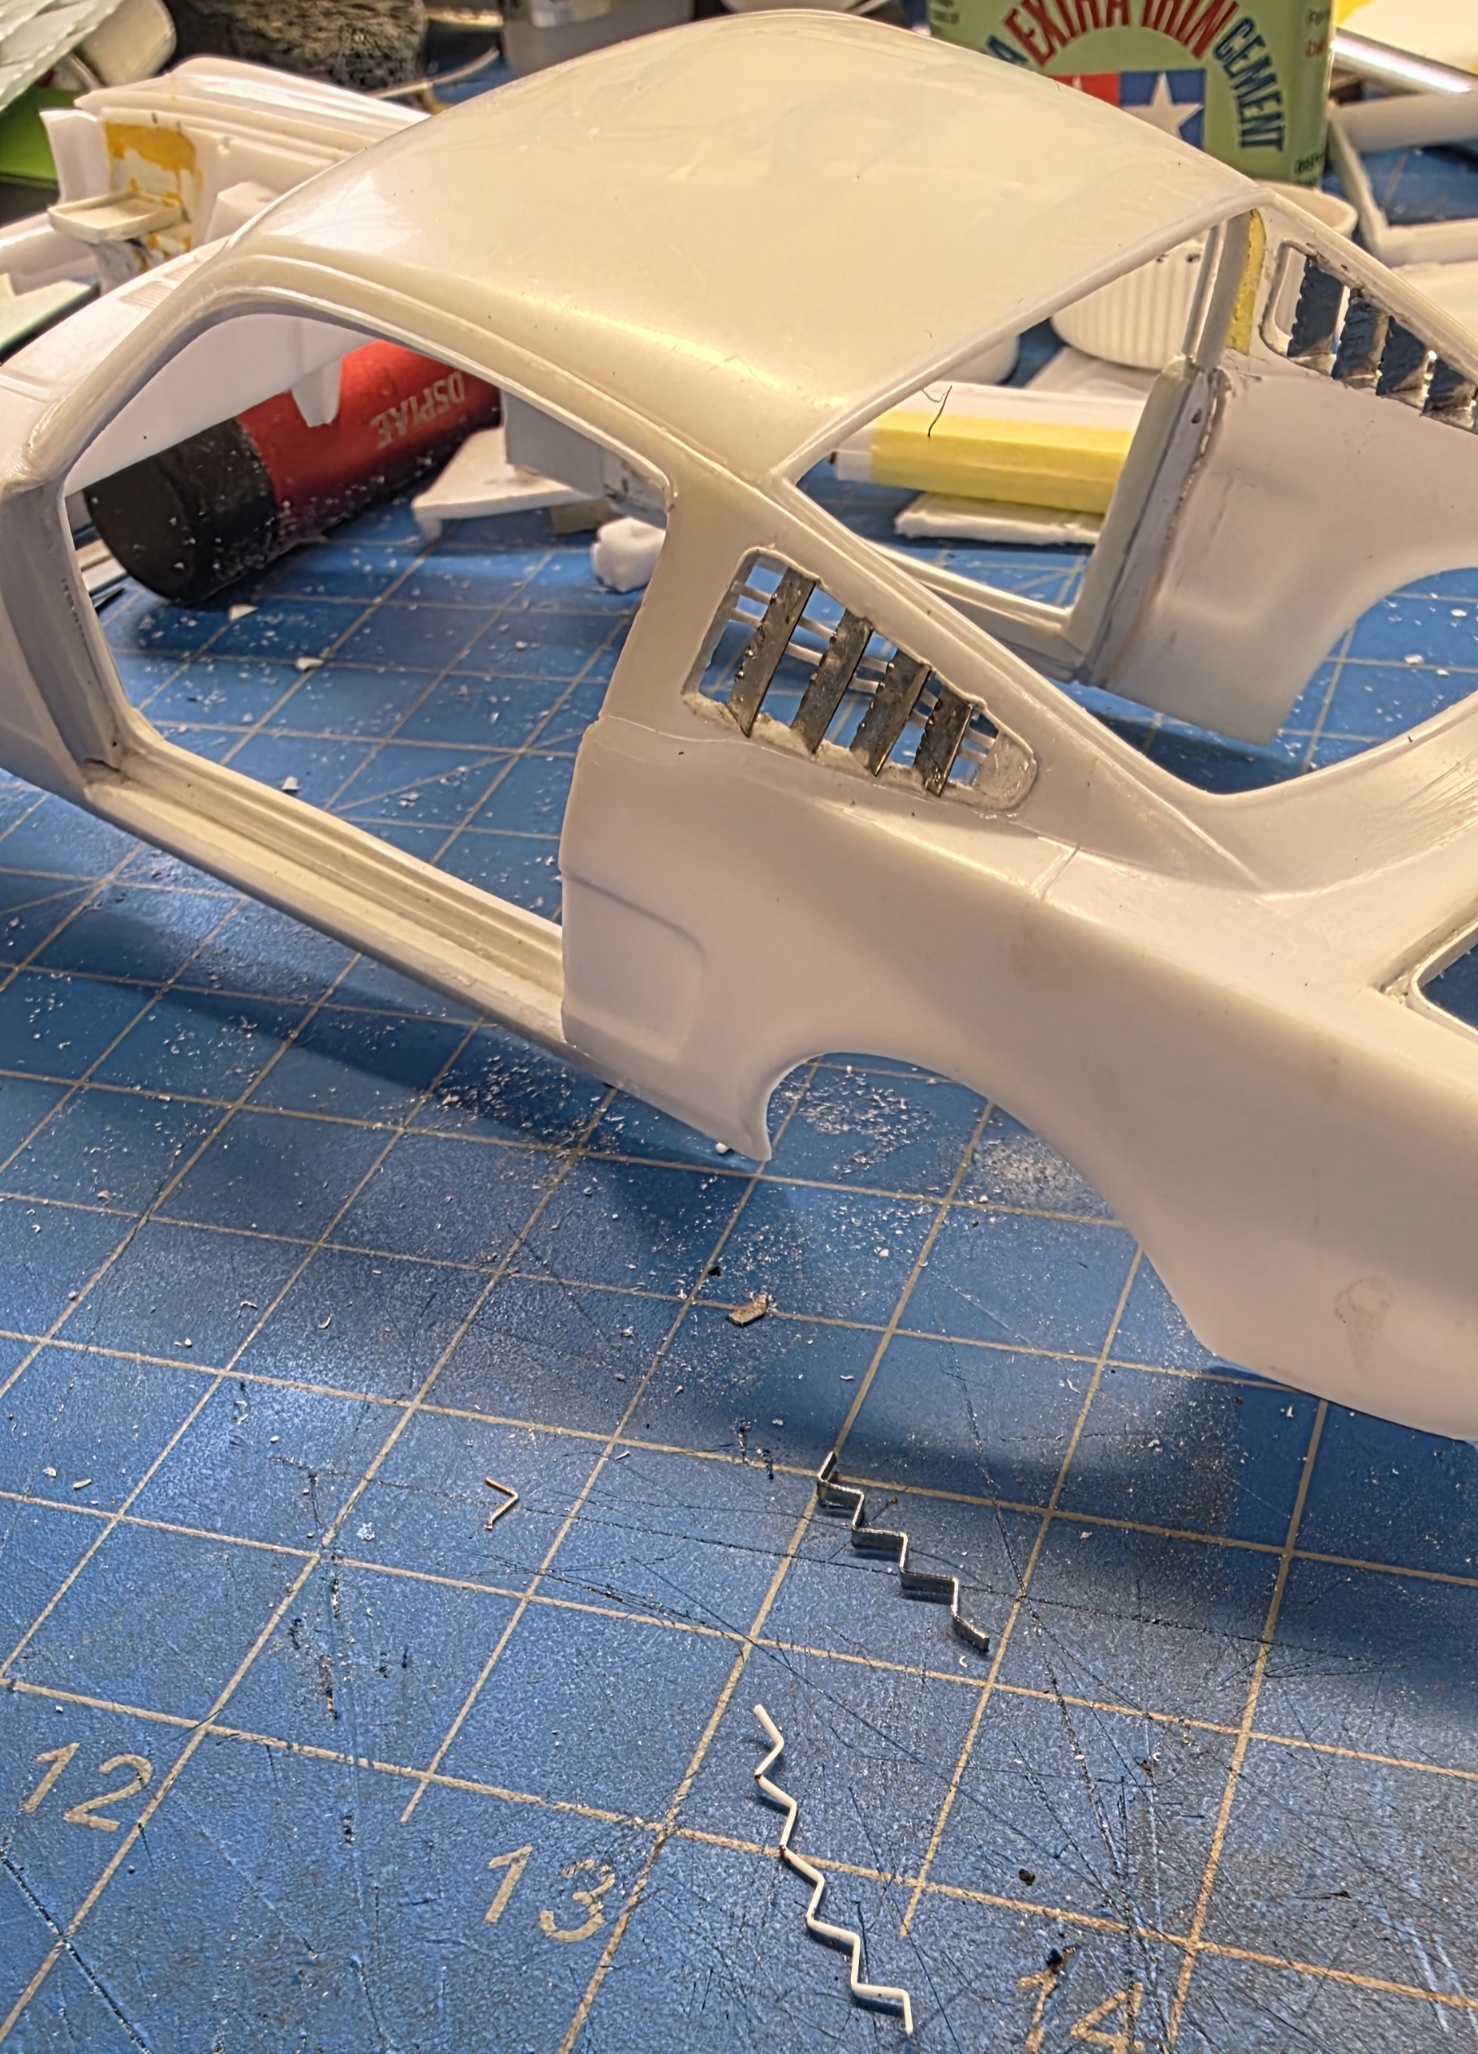
I also zig zagged the screen. The interior vent covers did their job of covering the mess...
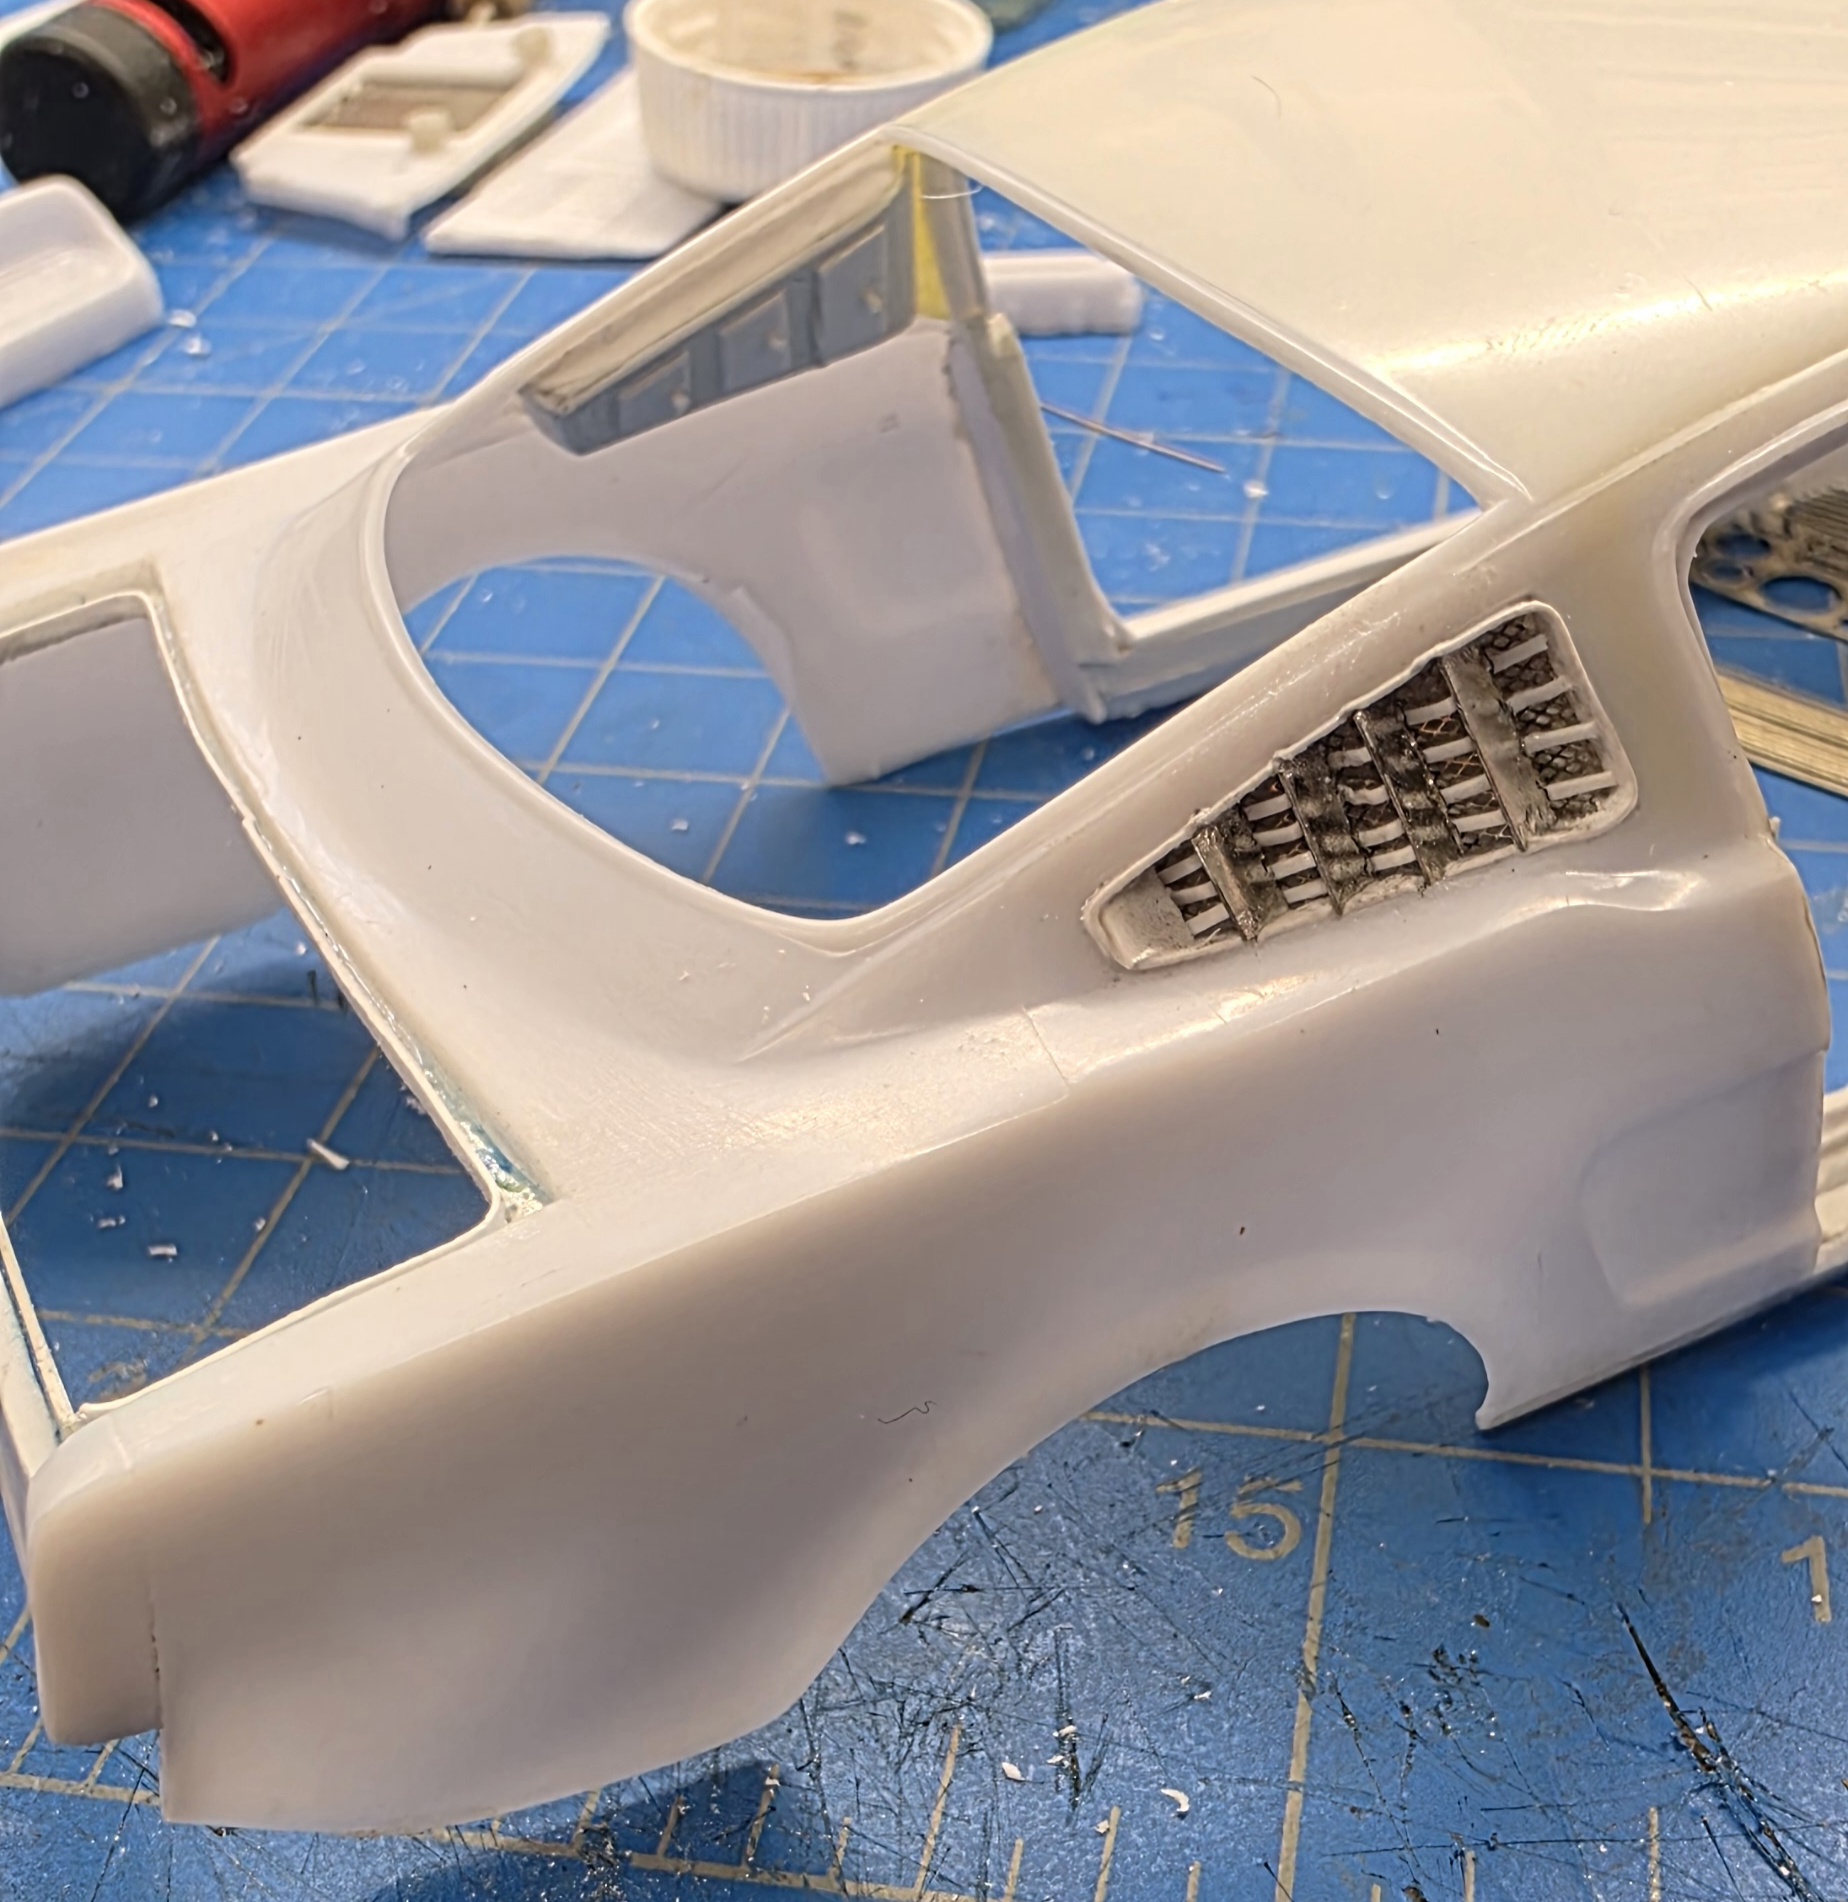
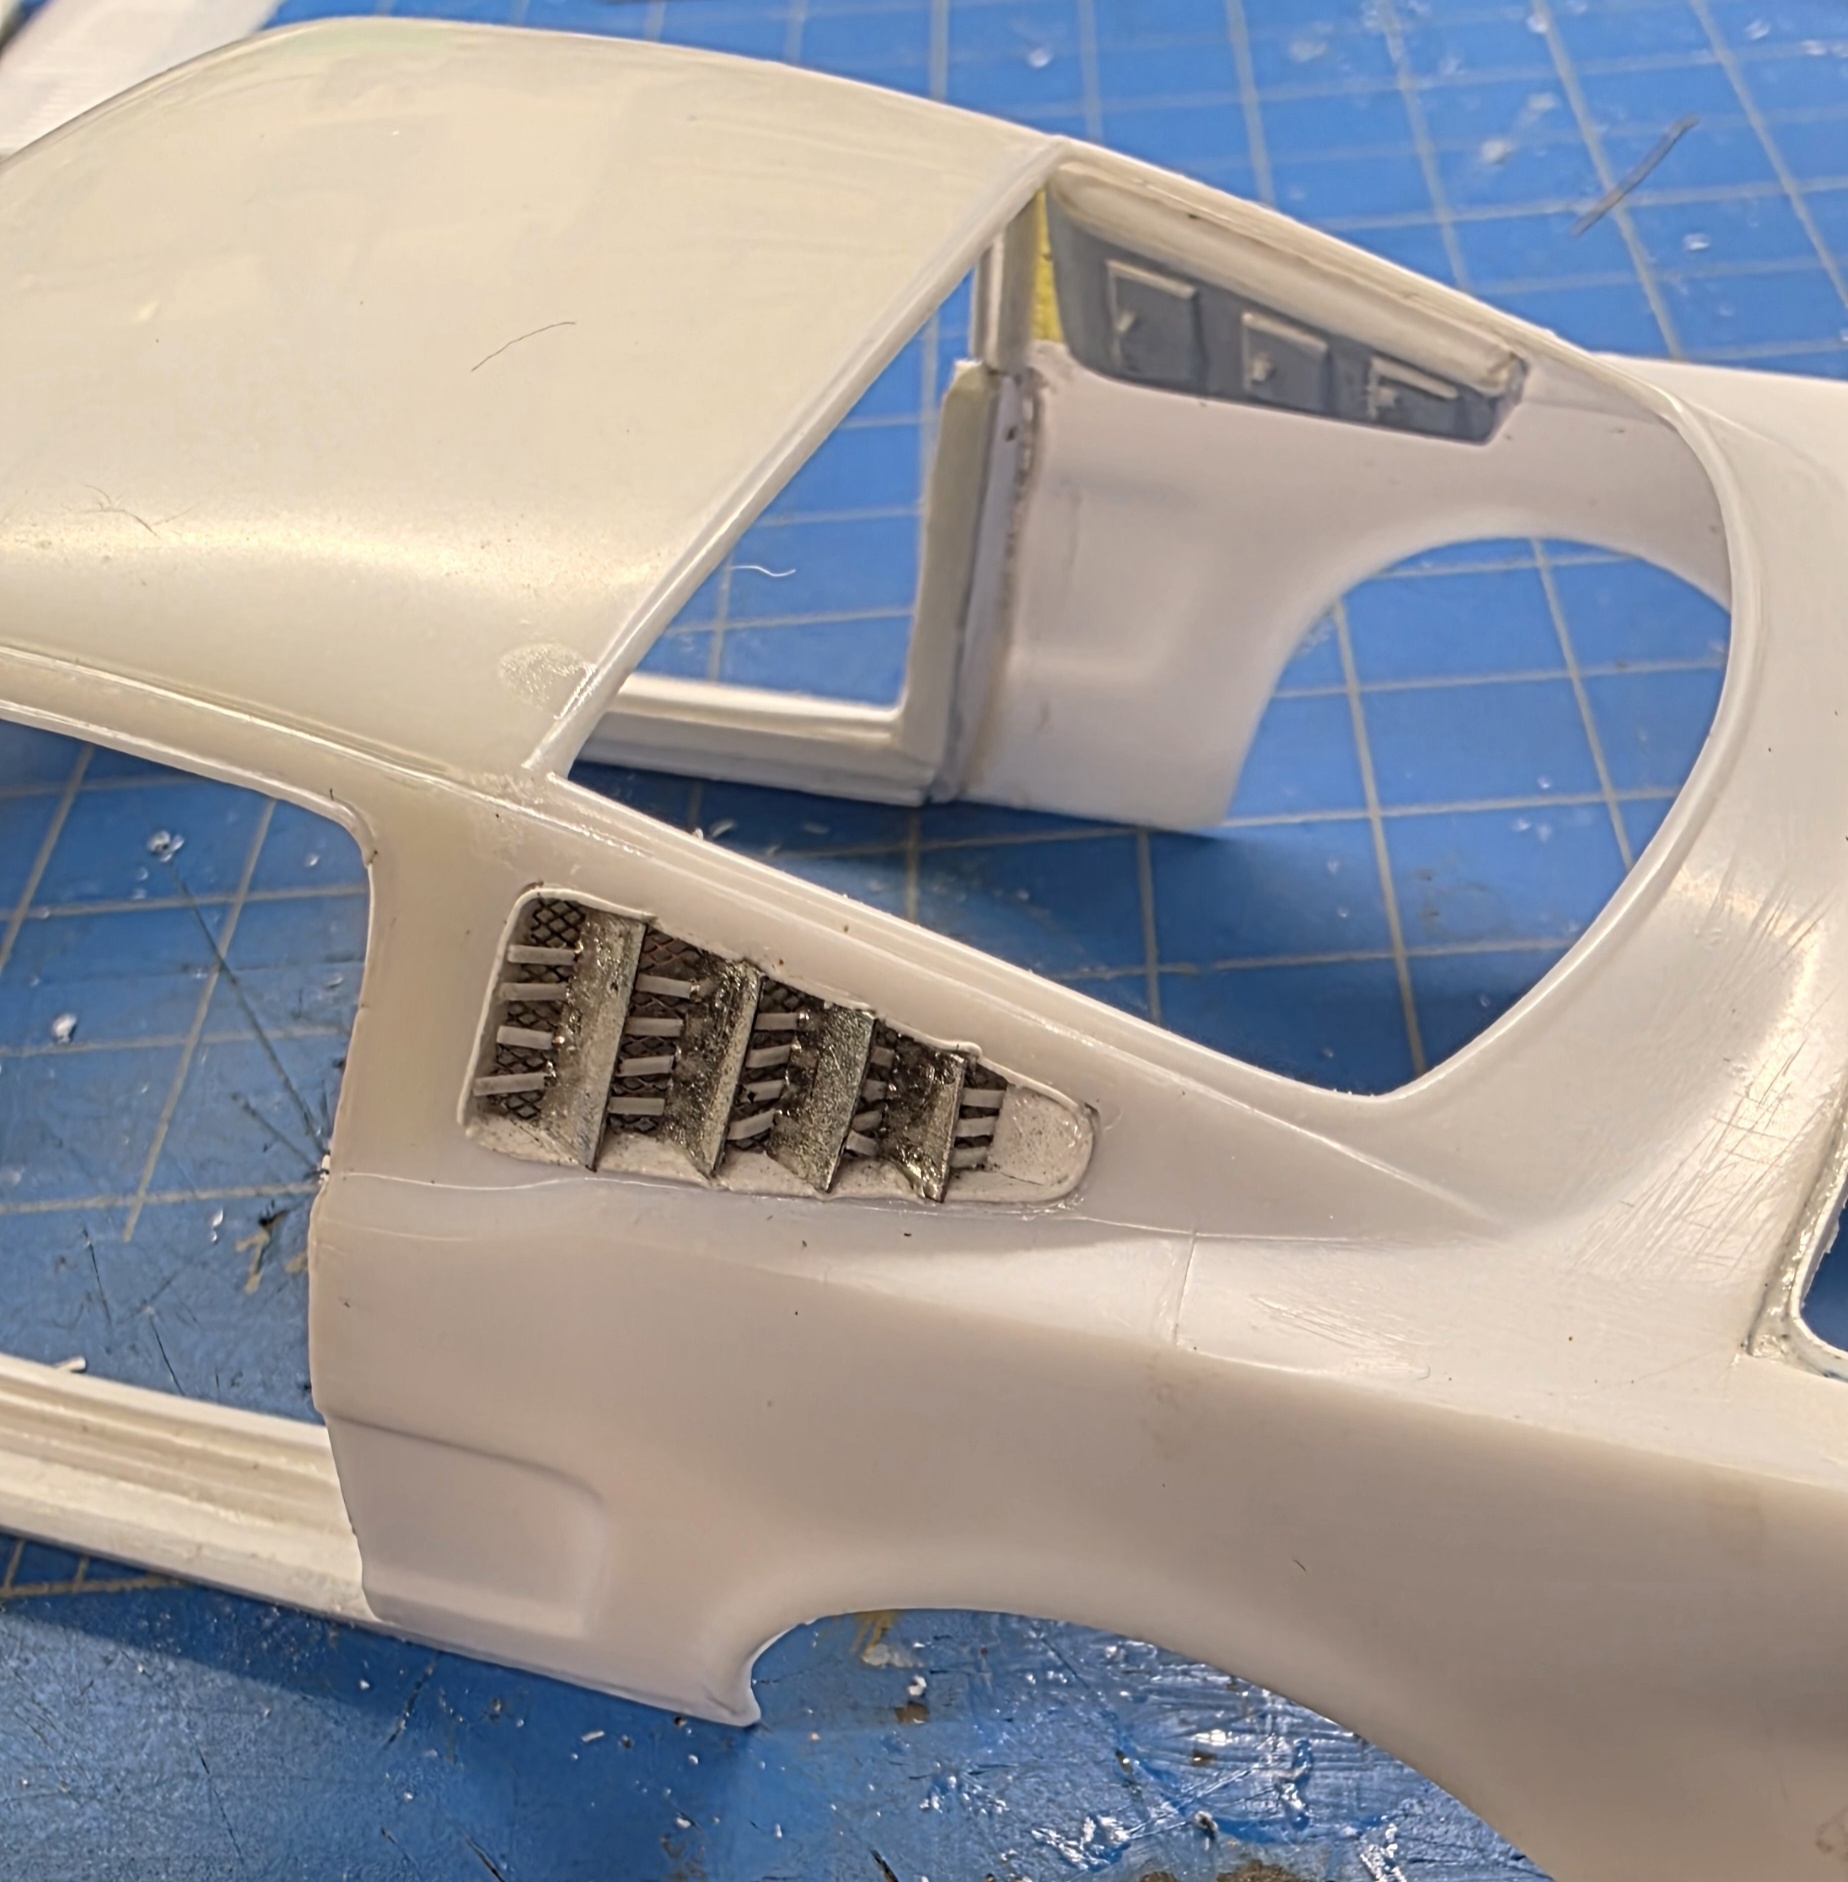
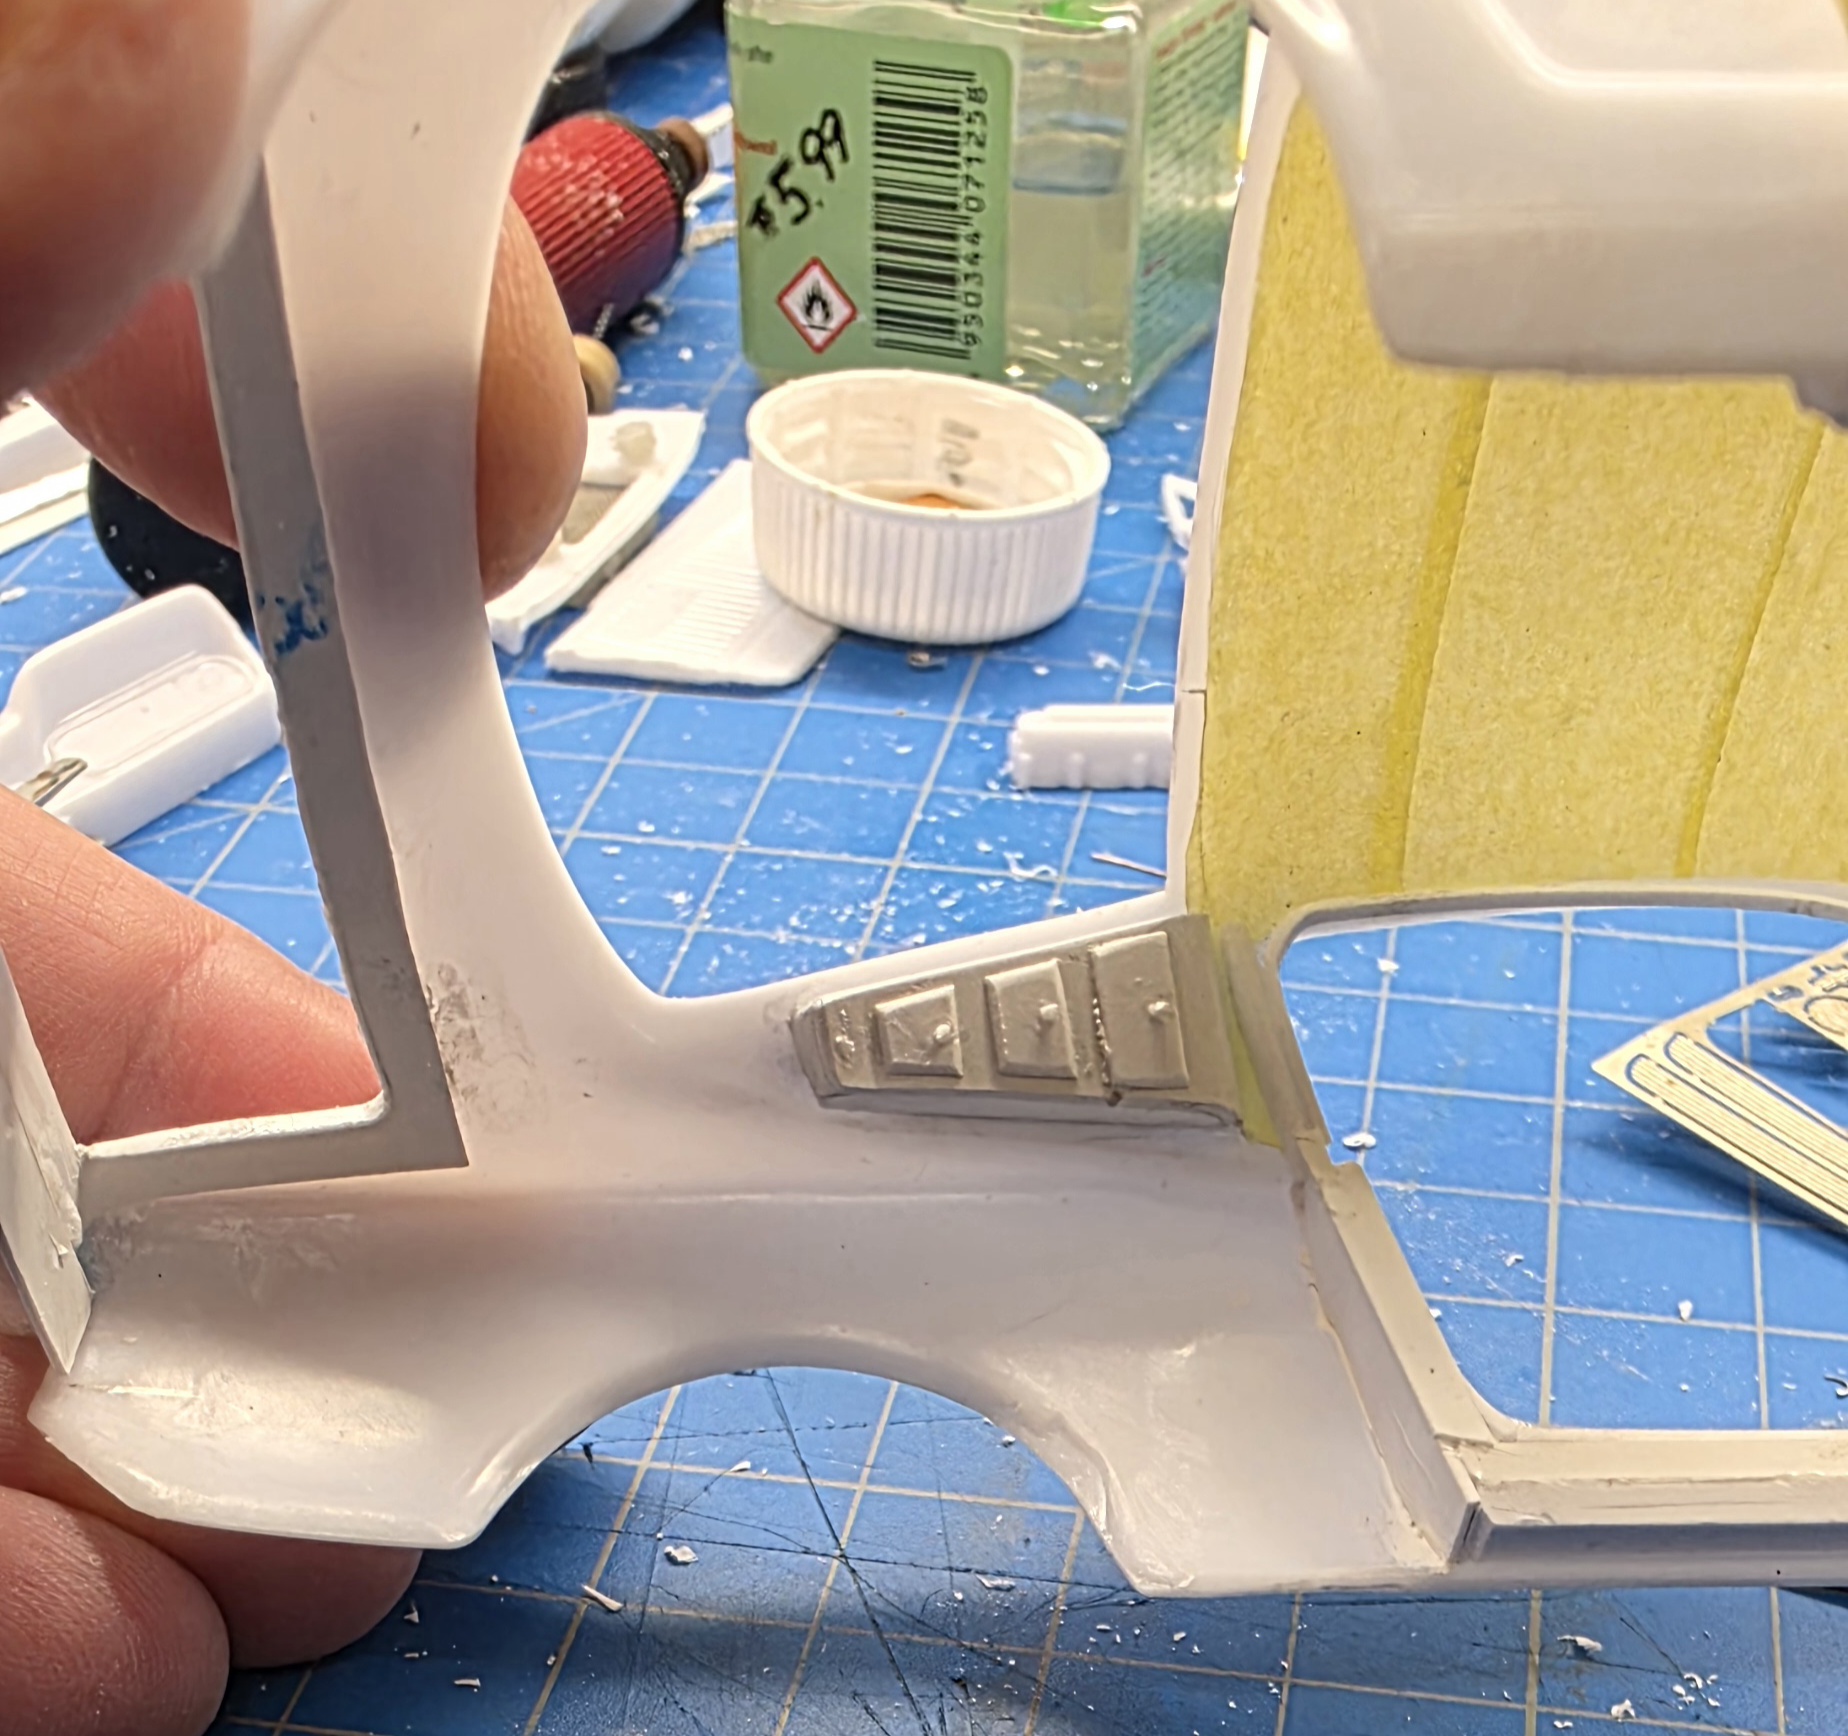
I decided to zig zag the strips, first in metal then plastic. I liked the plastic better
I also zig zagged the screen. The interior vent covers did their job of covering the mess...
Those look great!
Greg Kimsey
Well-known member
You know I am going to get out the soldering iron...right? SiiiigghhhhhThose look great!

Brokeneagle
Master at Arms
Nice work 
Greg Kimsey
Well-known member
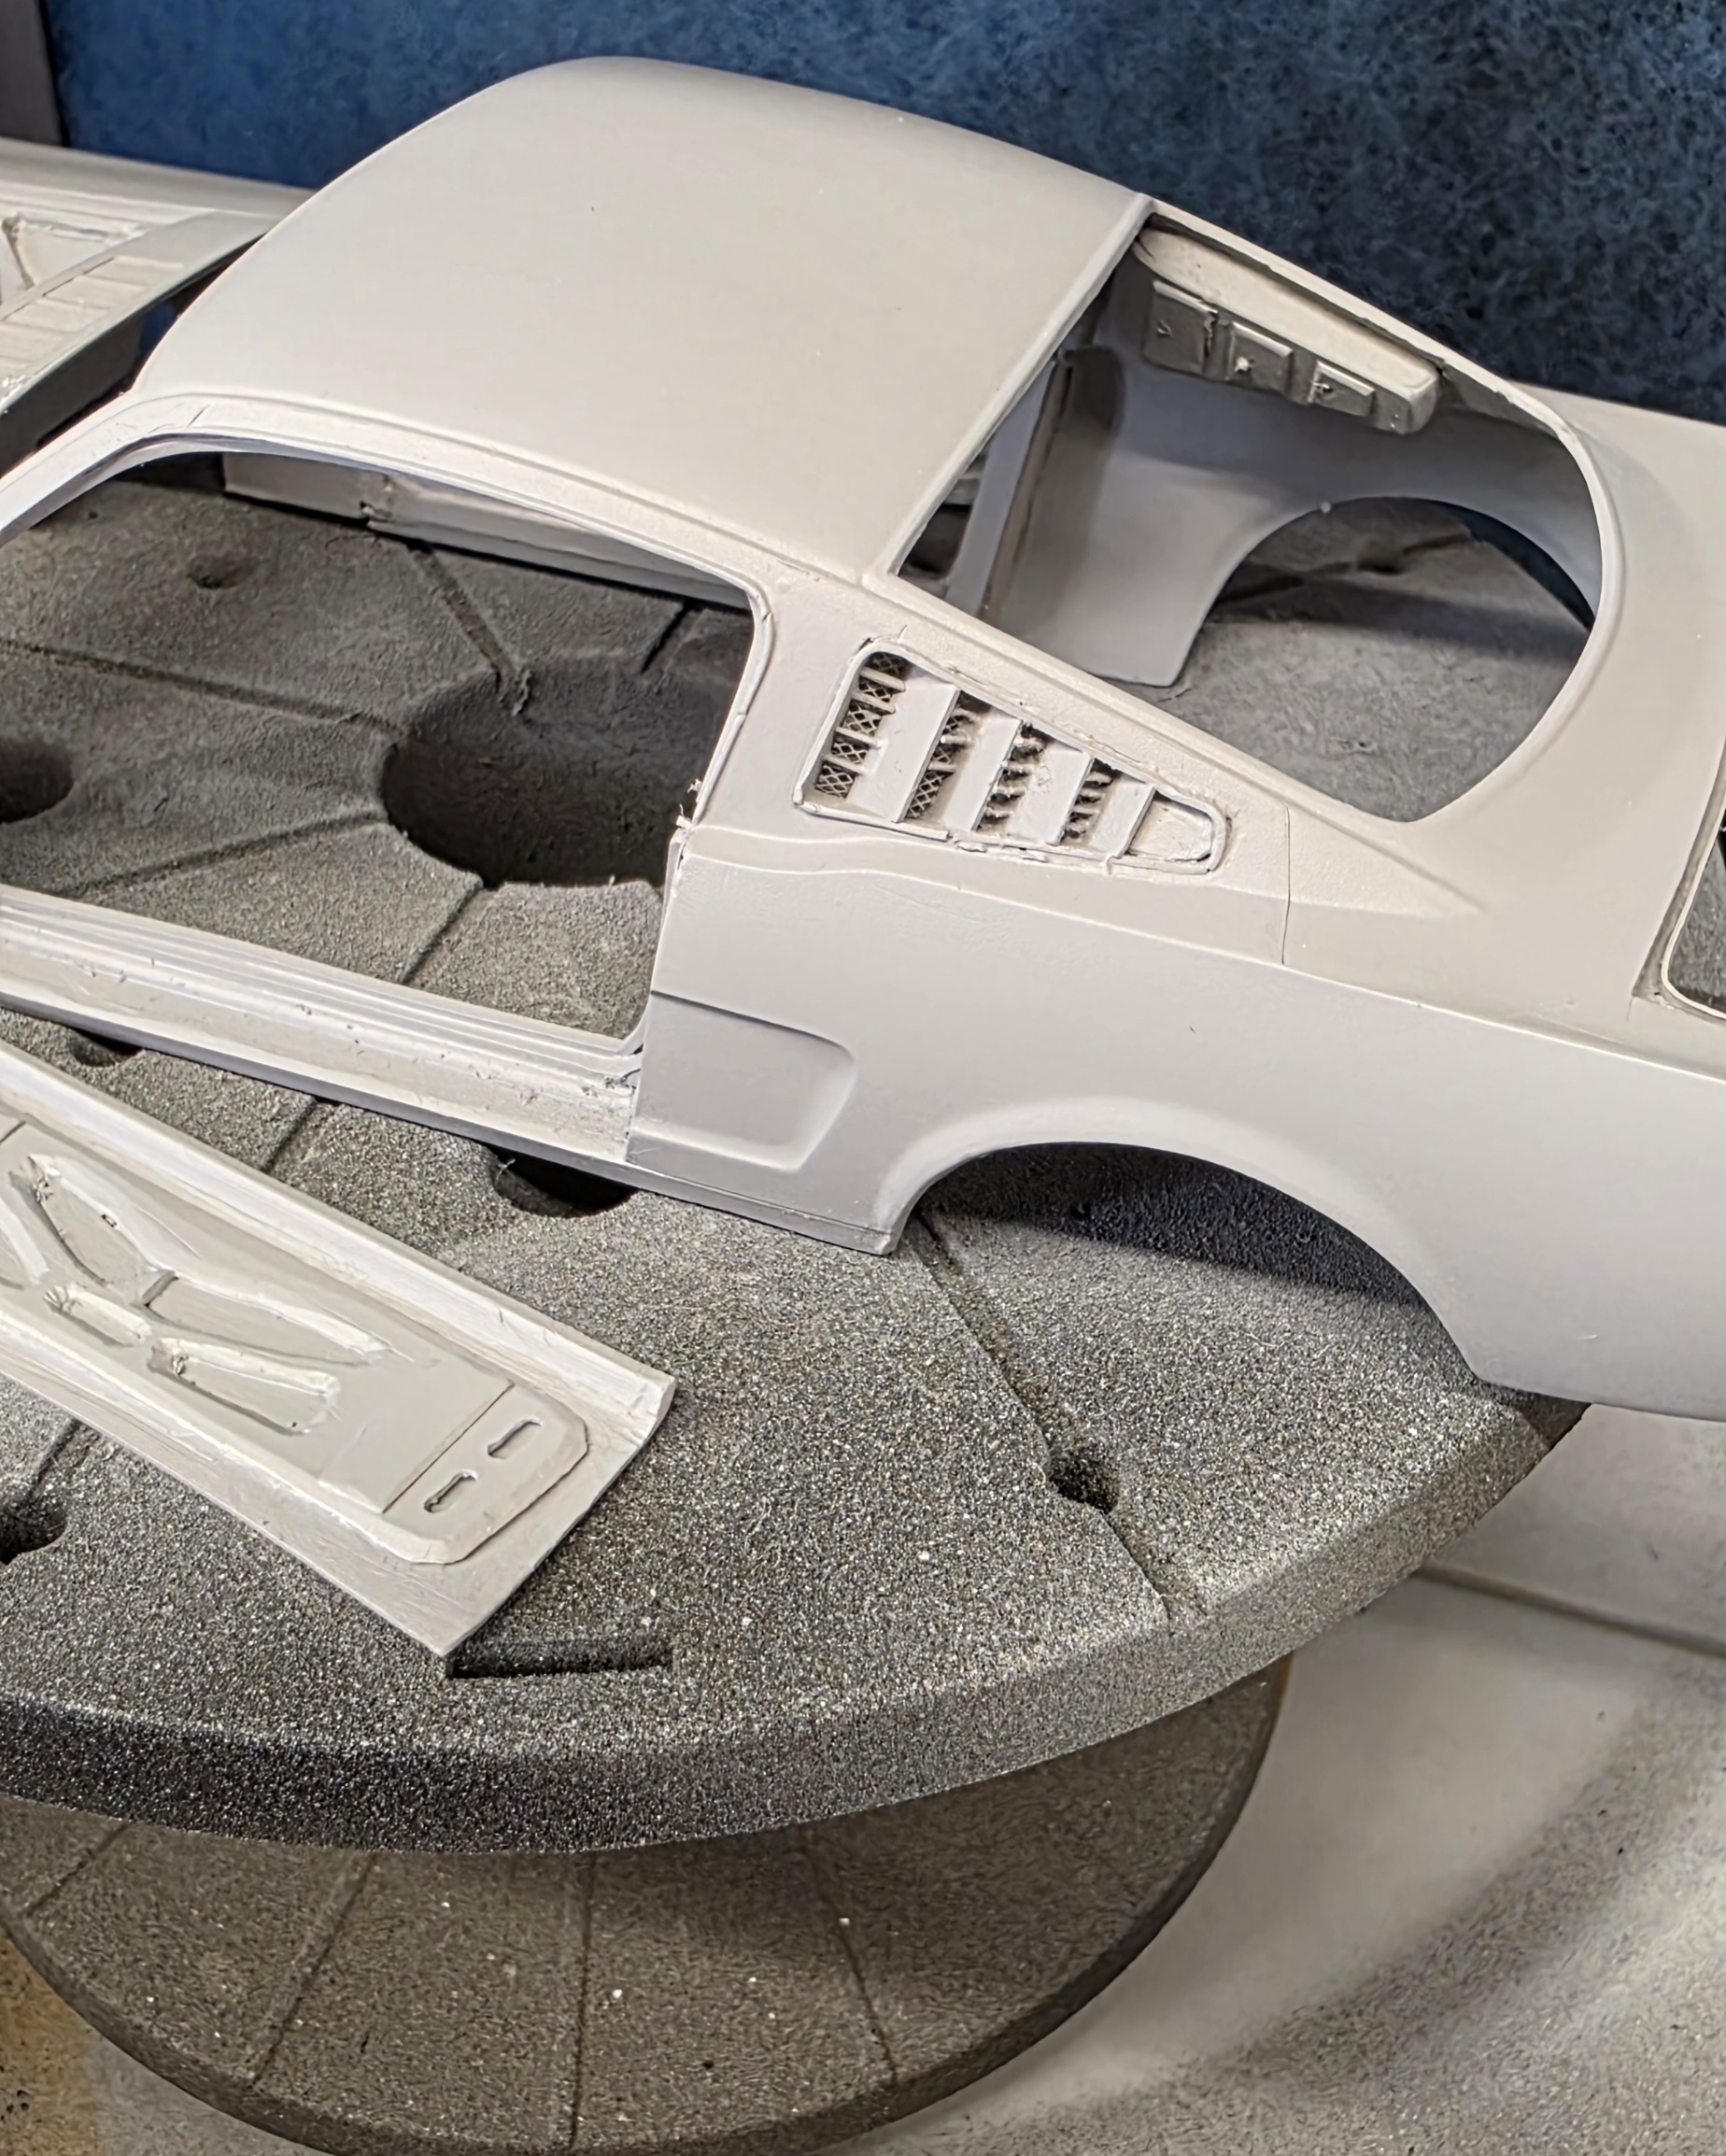
Got some clean-up on the vents, but overall I am happy with them.
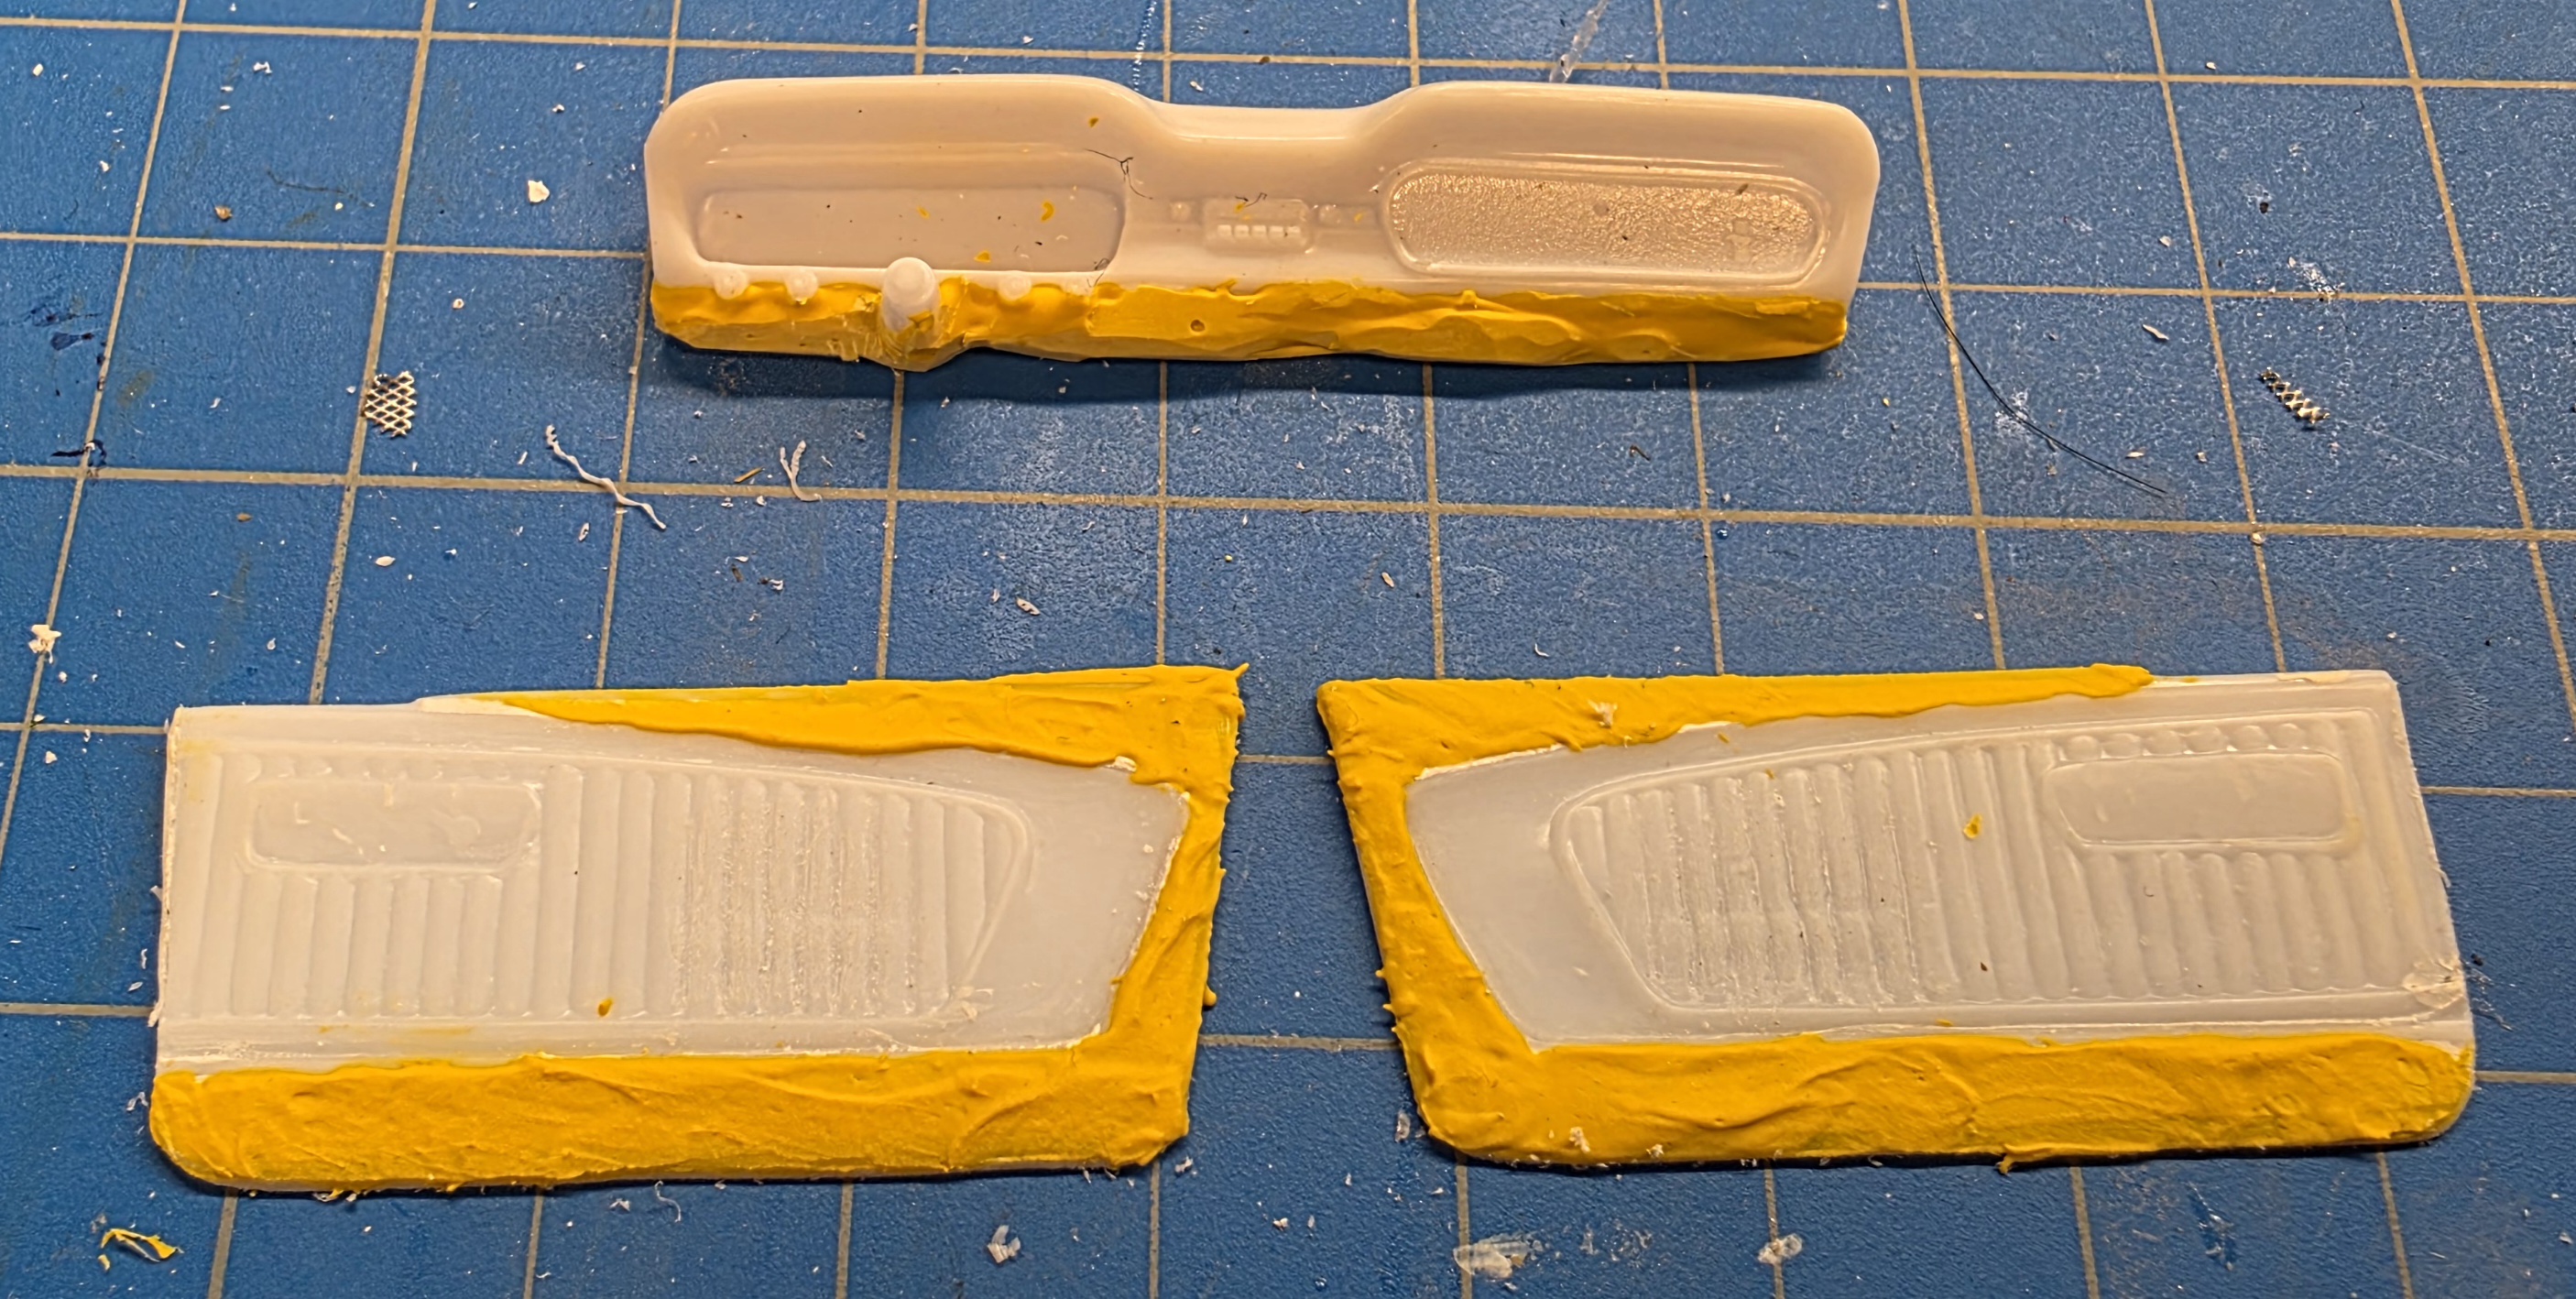
I have a little design flaw to fix. This is Tamiya polyester putty. (When this tube is gone I will replace it with Bondo.)
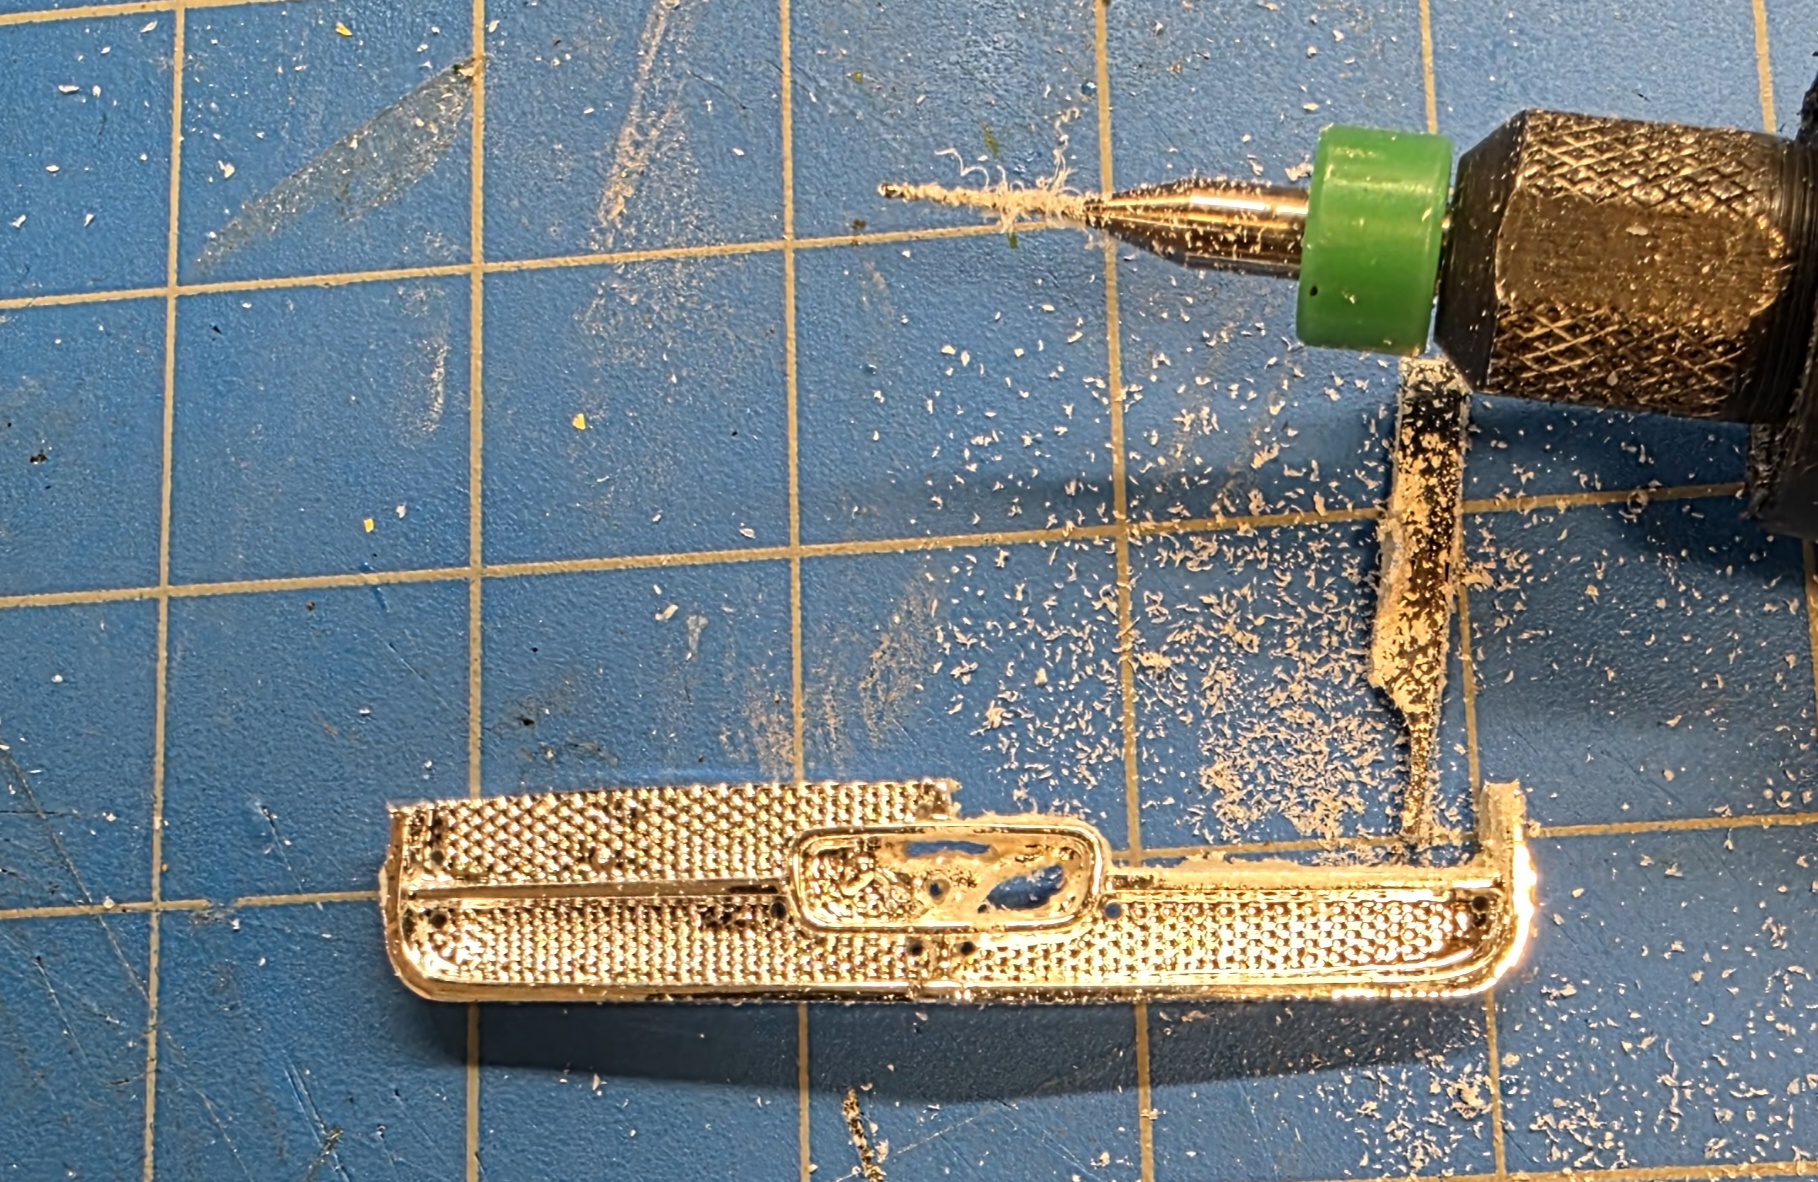
And finally in my random order of building I am performing a little surgery and will replace with mesh screen.
I have a little design flaw to fix. This is Tamiya polyester putty. (When this tube is gone I will replace it with Bondo.)
And finally in my random order of building I am performing a little surgery and will replace with mesh screen.
