The image below is a classic and immediately recognisable as the capture of U-505 on the 4th June 1944, near Cape Verde - 10 volcanic Islands off the West coast of Northern Africa.


BACKGROUND
The action above came about when the 'Hunter-Killer' group, Task Group 22.3, led by the USS Guadalcanal (an Escort aircraft carrier) and 5 additional escort destroyers, made their way out from Norfolk in mid May 1944 to the area in question, looking for U-Boats [based on decrypted German messages] that were operating in the area. On the 4th June they made an extremely close sonar contact with U-505, near to one of the destroyers. Planes were launched from the carrier to intercept and act as spotters, while the target was engaged by the destroyer Chatelain. The sub sustained multiple damage and the captain ordered the sub to surface and crew to abandon ship.

The crew set charges and abandoned the sub but it did not sink immediately, as it was not scuttled with only a few valves opened and the engines left running. The sub continued along the surface in a slow circle with a damaged rudder and was quickly intercepted by US Navy crew from another destroyer in the group. They closed the valves, disarmed the charges and stopped the sub from completely sinking.
U-505
U-505 was an early war Type 9C(long range sub), built in 1941 during the early part of the war, when the 'slotted deck' configuration and early small tower were standard features. The U-boat was upgraded in 1943 to a Turm 2 conning tower while in port for repair and further upgrades. It was then upgraded again to a Turm 4 configuration(without leaving) in May - July, before going out on their next patrol. The deck gun was removed at this time and 2 x twin 20 mm guns added to the upper rear platform and 1x quad 20 mm to the lower. This configuration was upgraded again in late 1943 -early '44, when the quad 20 mm was replaced with a single 37 mm. A snorkel was still not installed and probably would have been after patrol 12, if the boat had returned.
(see excerpt from UBOAT .NET page below)

U-505 was on it's 12th patrol and had been an unlucky boat, with many technical failures returning them to port, mainly due to sabotage but some as major damage, as in a Hudson sub hunter aircraft in November 1942, while on its 4th patrol.
While on their tenth patrol the Captain committed suicide. All in all a bit of a cursed boat it seems.
THE DIORAMA/ MODEL

The main photo is just what a diorama maker is looking for in submarine modelling, with the drama and detail all there.
The real challenge for this one will be creating an ocean surface with semi transparent areas close to the hull and blending these with the deeper ocean with no depth, further out.
Of course the late, great diorama modeler, Lewis Pruneau' modeled this exact scene in 1/35 scale back in the day and it has always been a favourite classic dio for me. It was his diorama that inspired me to create my own Type 7C/41 dio in 1/72 scale (the Last Patrol), some 10 years ago now. So in a way, I suppose this will be a kind of tribute to him, from me, for the great models he created and inspired in others.
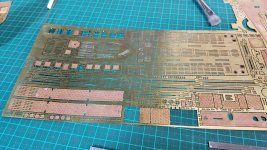
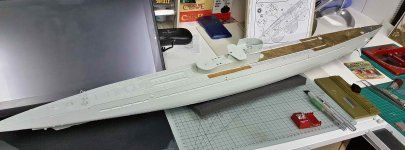
Please follow and enjoy the build from here' as I will be incorporating lessons learned in my earlier diorama' while incorporating some new ideas that I have formulated since then. There is also a 'ton' of PE and figures that are available now that did not exist 10 years ago.......as well as the kit itself.
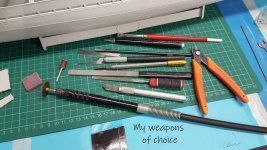
I will be using the following :


BACKGROUND
The action above came about when the 'Hunter-Killer' group, Task Group 22.3, led by the USS Guadalcanal (an Escort aircraft carrier) and 5 additional escort destroyers, made their way out from Norfolk in mid May 1944 to the area in question, looking for U-Boats [based on decrypted German messages] that were operating in the area. On the 4th June they made an extremely close sonar contact with U-505, near to one of the destroyers. Planes were launched from the carrier to intercept and act as spotters, while the target was engaged by the destroyer Chatelain. The sub sustained multiple damage and the captain ordered the sub to surface and crew to abandon ship.
The crew set charges and abandoned the sub but it did not sink immediately, as it was not scuttled with only a few valves opened and the engines left running. The sub continued along the surface in a slow circle with a damaged rudder and was quickly intercepted by US Navy crew from another destroyer in the group. They closed the valves, disarmed the charges and stopped the sub from completely sinking.
U-505
U-505 was an early war Type 9C(long range sub), built in 1941 during the early part of the war, when the 'slotted deck' configuration and early small tower were standard features. The U-boat was upgraded in 1943 to a Turm 2 conning tower while in port for repair and further upgrades. It was then upgraded again to a Turm 4 configuration(without leaving) in May - July, before going out on their next patrol. The deck gun was removed at this time and 2 x twin 20 mm guns added to the upper rear platform and 1x quad 20 mm to the lower. This configuration was upgraded again in late 1943 -early '44, when the quad 20 mm was replaced with a single 37 mm. A snorkel was still not installed and probably would have been after patrol 12, if the boat had returned.
(see excerpt from UBOAT .NET page below)
U-505 was on it's 12th patrol and had been an unlucky boat, with many technical failures returning them to port, mainly due to sabotage but some as major damage, as in a Hudson sub hunter aircraft in November 1942, while on its 4th patrol.
While on their tenth patrol the Captain committed suicide. All in all a bit of a cursed boat it seems.
THE DIORAMA/ MODEL
The main photo is just what a diorama maker is looking for in submarine modelling, with the drama and detail all there.
The real challenge for this one will be creating an ocean surface with semi transparent areas close to the hull and blending these with the deeper ocean with no depth, further out.
Of course the late, great diorama modeler, Lewis Pruneau' modeled this exact scene in 1/35 scale back in the day and it has always been a favourite classic dio for me. It was his diorama that inspired me to create my own Type 7C/41 dio in 1/72 scale (the Last Patrol), some 10 years ago now. So in a way, I suppose this will be a kind of tribute to him, from me, for the great models he created and inspired in others.
Please follow and enjoy the build from here' as I will be incorporating lessons learned in my earlier diorama' while incorporating some new ideas that I have formulated since then. There is also a 'ton' of PE and figures that are available now that did not exist 10 years ago.......as well as the kit itself.
I will be using the following :
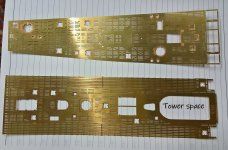
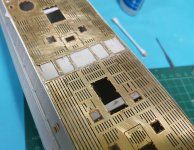
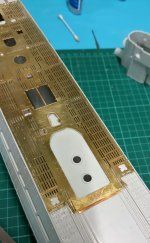
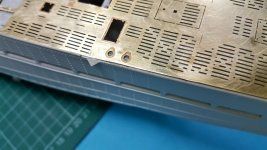
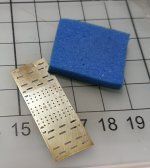
- Pontos 9C upgrade set
- CMK US Navy figure sets
- Shapeways 3D printed USN surf boat
- Blue foam sheets (30cm x 60cm x 3cm, 30cm x 60cm x 5cm)
- Various new water products from AK.
- Correct tower and water line decal sets from AMP.
Last edited:

