This is not a kit I bought myself instead it was very kindly given to me by jknaus, it might be quite a while before I will be able to again buy any new model kits so when James sent this me this brand new kit I could not resist and started on it even though my work table is plenty full with other projects. ")
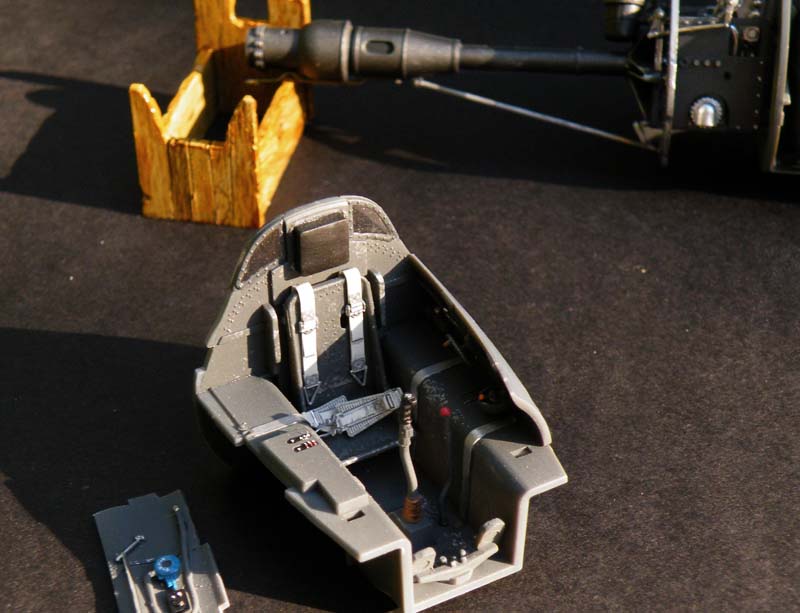
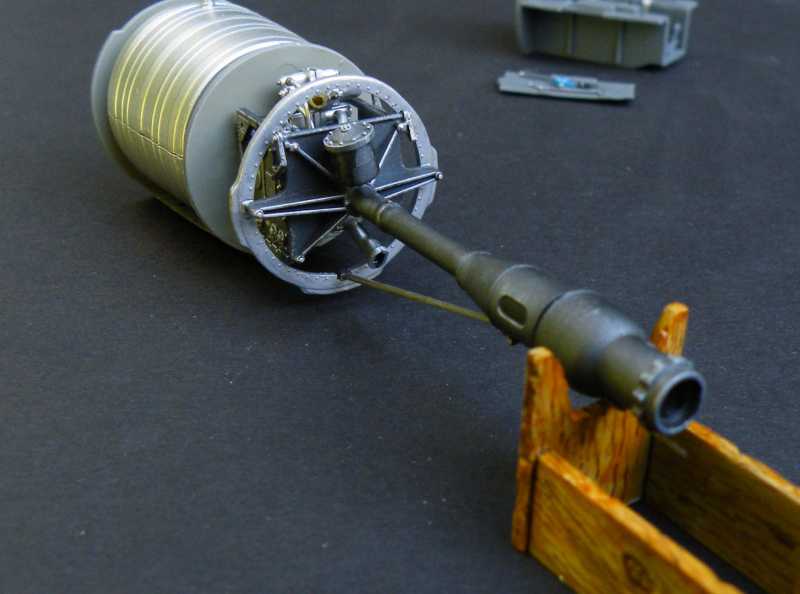
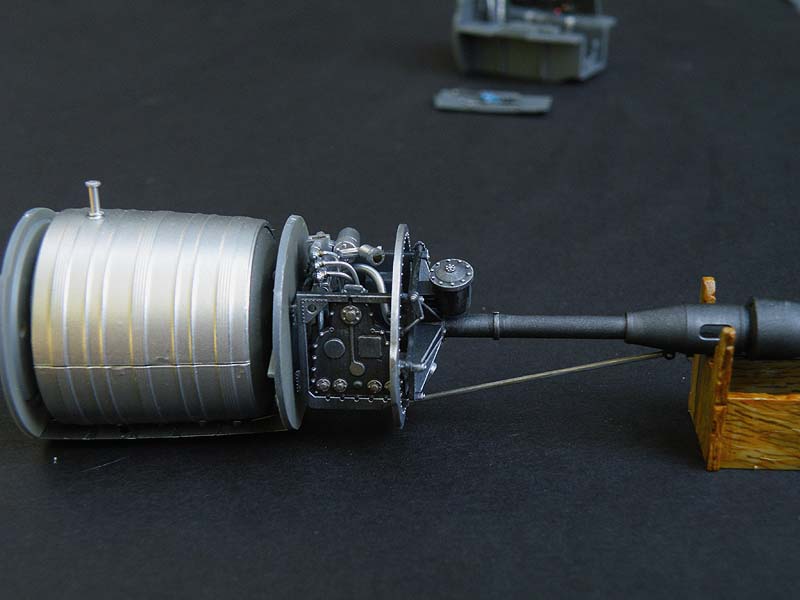
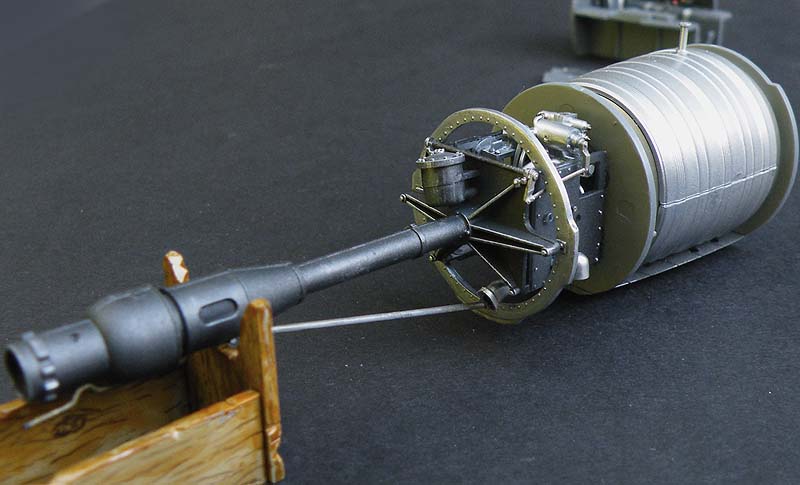
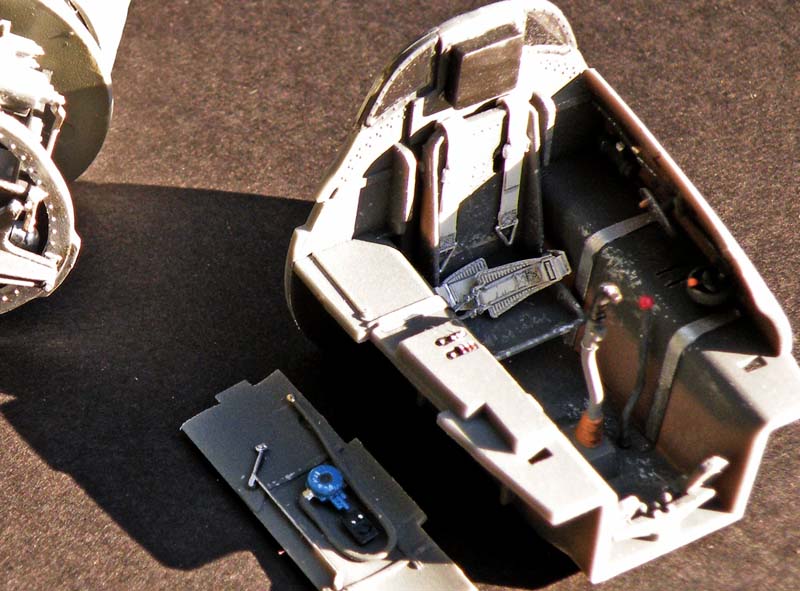
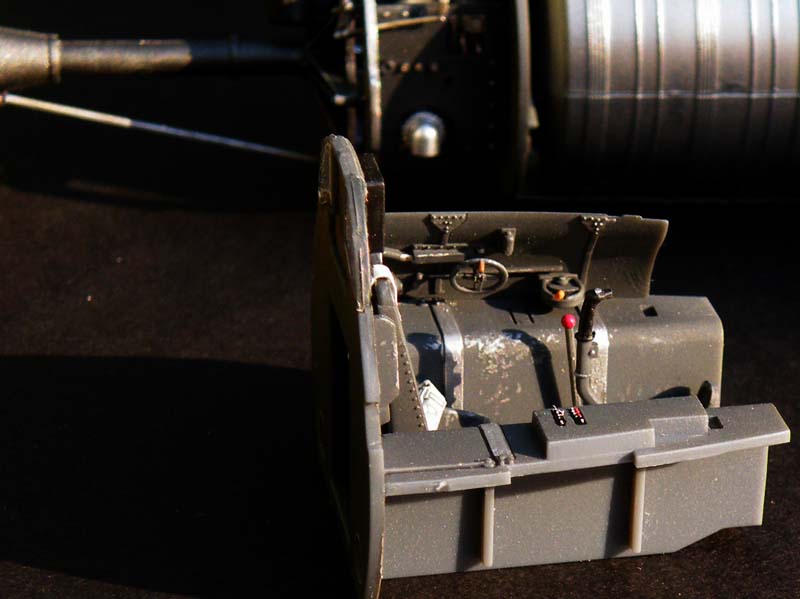
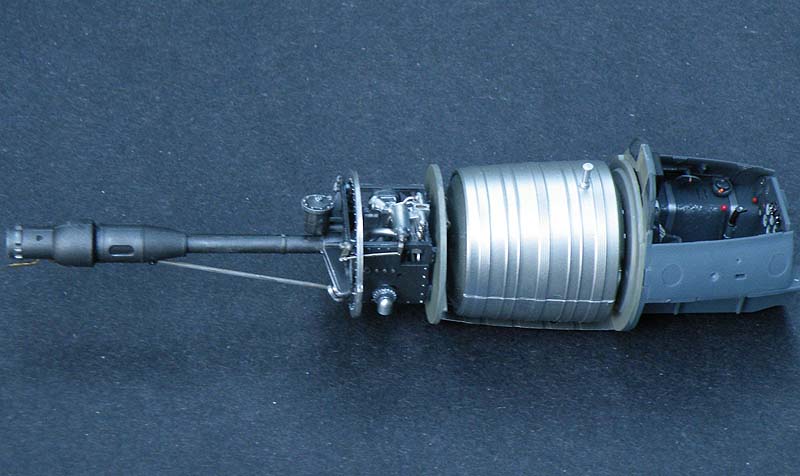
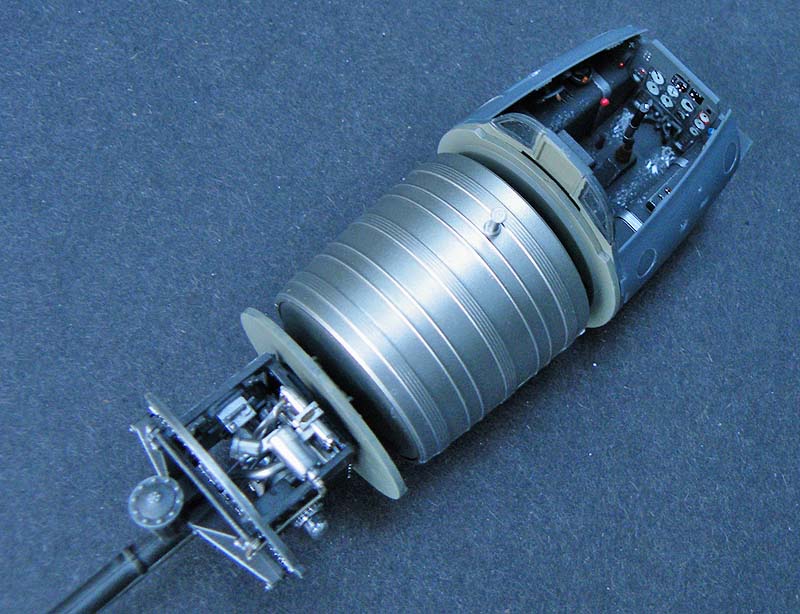
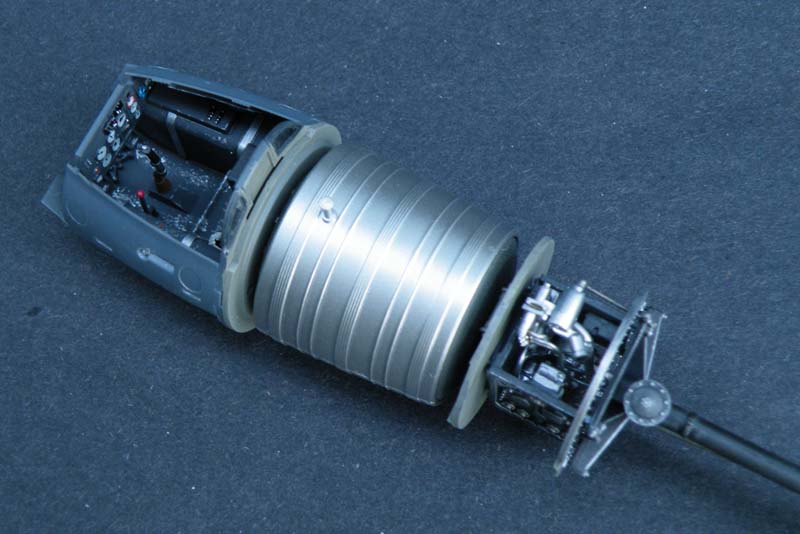
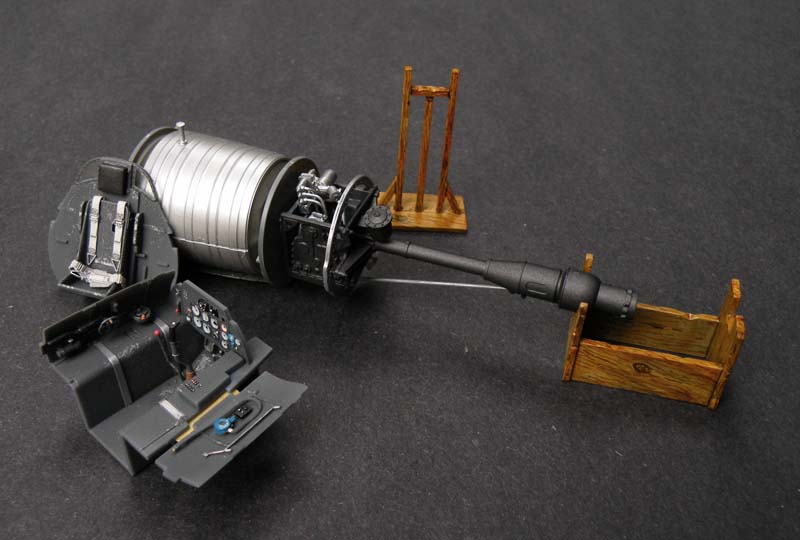
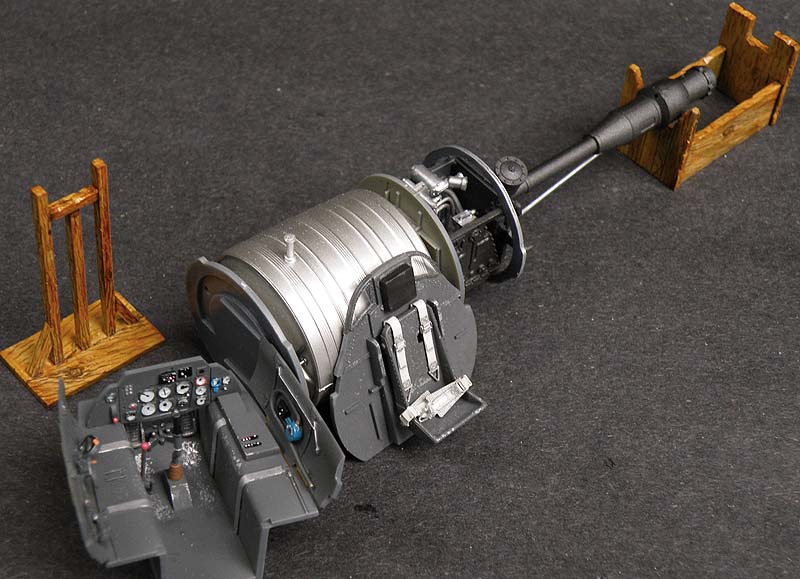
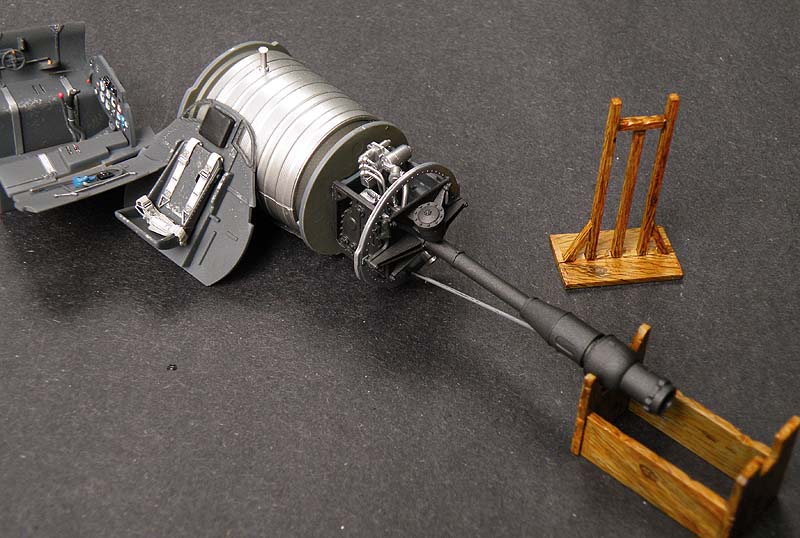
In the pics below you can see the cockpit is painted up but not yet glued together, the rocket motor has been built up but is not 100% finished, one or two small parts still need to be added and detail painting is not done either.
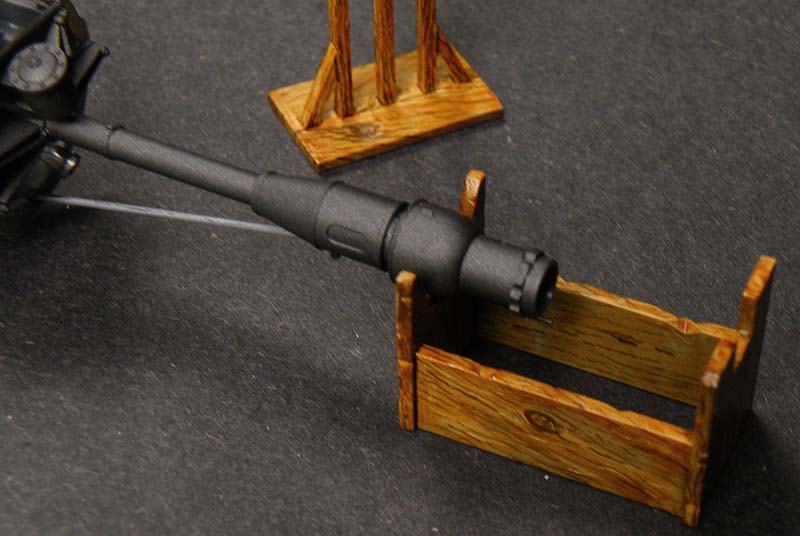
I went ahead and built and painted the display stands now instead of waiting until the end of the build because I thought they could be useful for some of the in-progress pictures. The instruction sheet would have you paint these parts a wood color but these stands could have been made of metal too...I chose to make them look like the wooden version.
In this picture below you can see the leather headrest and this is the best leather effect I have ever done on a model, a custom mix of the leather color was sprayed on the headrest in a thick layer of paint and while the paint was still wet I added texture with some clean course sandpaper by pressing it against the still wet paint, after the paint had dried it really looked like leather.
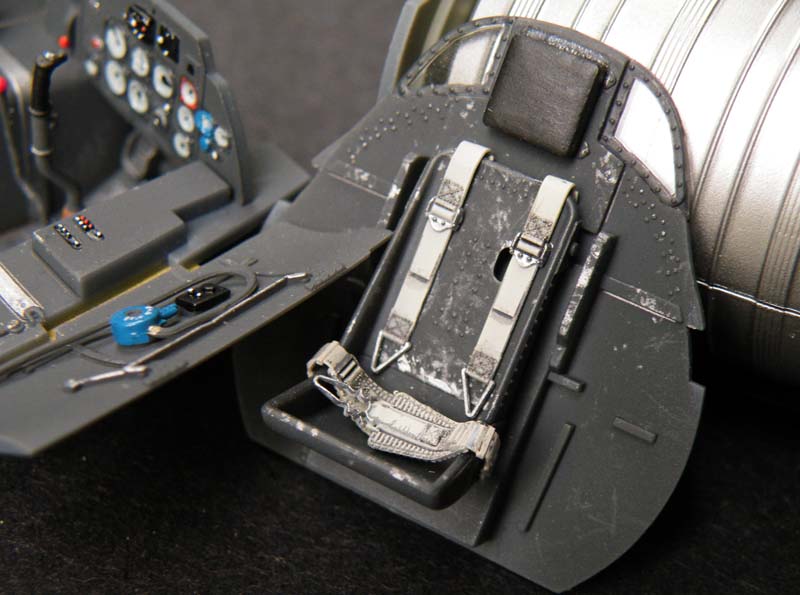
As you can see in the pictures showing the instrument panel I used the kits instrument decals and they look a bit strange...the instrument faces SHOULD be black with white numbers for reasons unknown Meng decided to reverse this. If anybody else will be building this kit get aftermarket instrument decals if you can find some!
Thanks James for giving me the chance to build this amazingly well detailed kit!!! :woohoo:
Matrixone
In the pics below you can see the cockpit is painted up but not yet glued together, the rocket motor has been built up but is not 100% finished, one or two small parts still need to be added and detail painting is not done either.
I went ahead and built and painted the display stands now instead of waiting until the end of the build because I thought they could be useful for some of the in-progress pictures. The instruction sheet would have you paint these parts a wood color but these stands could have been made of metal too...I chose to make them look like the wooden version.
In this picture below you can see the leather headrest and this is the best leather effect I have ever done on a model, a custom mix of the leather color was sprayed on the headrest in a thick layer of paint and while the paint was still wet I added texture with some clean course sandpaper by pressing it against the still wet paint, after the paint had dried it really looked like leather.
As you can see in the pictures showing the instrument panel I used the kits instrument decals and they look a bit strange...the instrument faces SHOULD be black with white numbers for reasons unknown Meng decided to reverse this. If anybody else will be building this kit get aftermarket instrument decals if you can find some!
Thanks James for giving me the chance to build this amazingly well detailed kit!!! :woohoo:
Matrixone