• Modelers Alliance has updated the forum software on our website. We have migrated all post, content and user accounts but we could not migrate the passwords.
    This requires that you manually reset your password.
    Please click here, http://modelersalliance.org/forums/login to go to logon page and use the "Forgot your Password" option.

Me-109 Night Fighter

ErnieS

Member
I would like to build a Me-109 nightfighter, hopefully the new year will bring more success as far as finishing kits goes, so will hopefully finish this one relatively quickly (y) Tamyia kit, Owl decals, some etch for the cockpit and the bubble for the radar from the Hasegawa boxing of this aircraft.


Ernie
 
Hey there's Cousin Ernie (y)

Ernie if you have another shot with more of the unbuilt kit that would be a better start photo. Looking forward to seeing you back at the bench. :popcorn
 
Close enough, looks like the same picture just not cropped.

Same set-up, two differenet pics. I had to take a close up of my awesome 1990's tech phone so the date would be visible, as you could not see it in the above shot :facepalm
Ernie
 
So at last an update! Spent the last 5 days without heat so taking care of that took priority, so I am a little bit further behind than I would like, but it's all good. So anyway I have finished the cockpit adding details from the Eduard Zoom set that came with the kit when I got it in a trade. Also finished the wing assembly as the interiors of the radiators were RLM-02, so while I had the paint out I figured I take care of as much as I could.


All the wires were added from Milliput epoxy putty. worked pretty well, you can roll out a piece as thin as you like and shape it with a wet paint brush. Because the Milliput reacts with water before it cures, once in place just brush some water on it and it will harden in place attached to the model. I also played around the chipping in the cockpit as well just for fun to see how it would look.


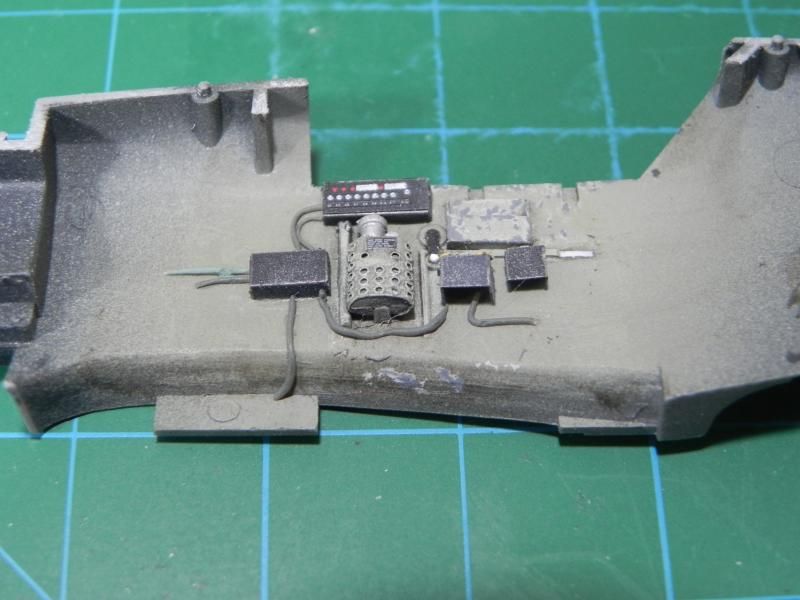
The opposite side, same processes used.


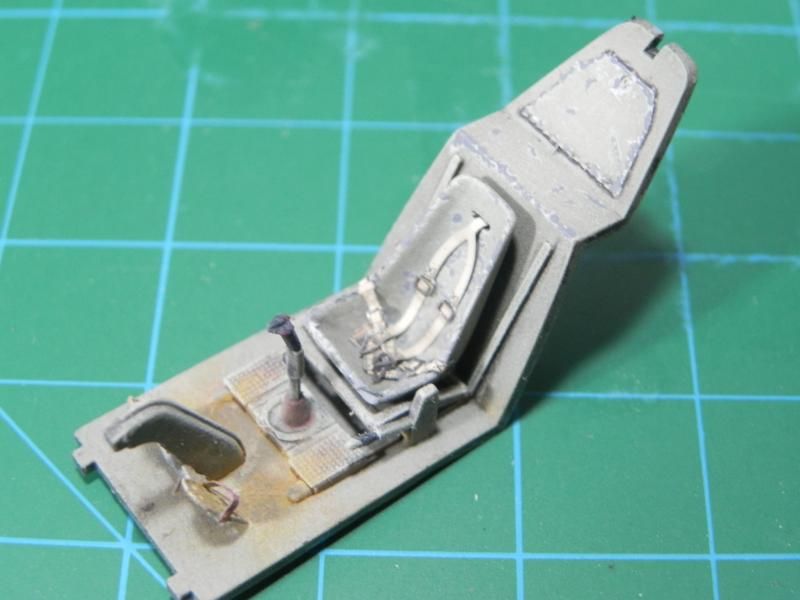
The floor and seat, I had to drill and shape the slot in the seat back to accept the Eduard harness. Added a couple different colors of pigment to the floor and rudder pedals to simulate dirt and dust carried in on the pilots feet. Also, I replaced the foot straps with pieces of Tamyia tape as the etched ones were very small and fragile, and I lost one when I was looping it around on the pedal.


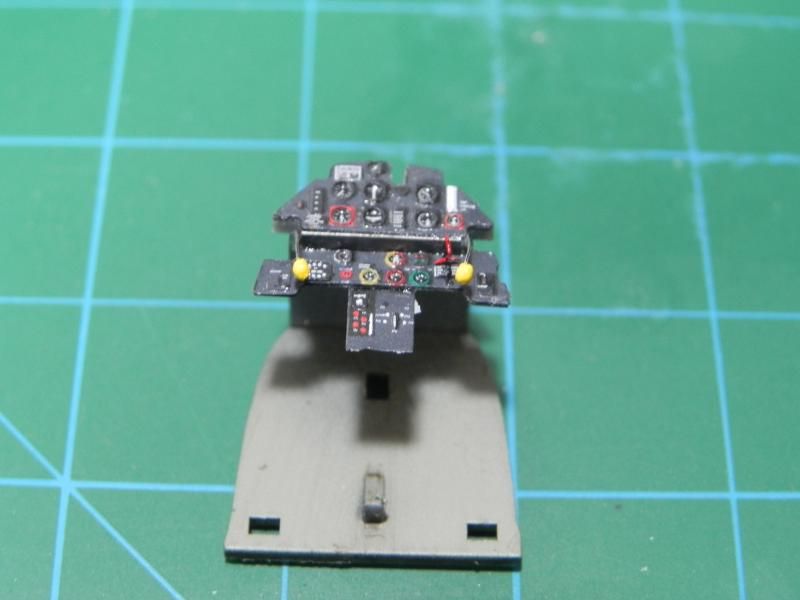
The instrument panel. I used Future to attach the top panels to the backs as the Future gives you time to adjust the parts, and also, most importantly, does not affect the printing on the panels. When It dried, I added another drop of Future to each lens to simulate the glass. The levers in the Eduard set have you fold over the knobs on the ends to make them a bit thicker, but I added a drop of Krystal Kleer to each knob to make it more 3 dimensional, the touched up the knobs with Tamyia paint.

From here the pace should pick up as most of the finicky fussy stuff is done. A little test fitting of the cockpit and then everything goes together (y)
Ernie
 
That is a fantastic looking cockpit! :good:

I really like how the chipping turned out. Can you elaborate on you techniques?

Mike
 
That is a fantastic looking cockpit! :good:

I really like how the chipping turned out. Can you elaborate on you techniques?
Mike

Thank you! Much appreciated :drinks

Basically I was just playing around, but for the chipping I first mixed a color lighter than the RLM 02 base color using Vallejo paints I had on hand (I don't have all their colors) I used London Grey, German Field Green and AK's German tank interior color, which is a warm off white. For the chips on the map holder, around the edge of the cockpit opening and door on the rear cockpit bulkhead I used a very fine brush to apply the lighter color. For the open areas on the cockpit sidewalls I used a piece of Natural Sea Sponge held with tweezers to randomly make the chips. After this color dried, I used London Grey for the interior of the chips, applied with a fine brush to the center of all the lighter chips, and if possible kind of following the shape of the lighter chip. The most important thing is to keep the paint fresh and fairly thin so it goes on nice and thin and not clumpy. I add a little flow improver or thinner when the paint starts drying on the brush. Hope this is helpful,
Ernie
 
Got a bit more done!


Drilled out the cowl guns.


And together! :dance Seam work next, as well as a couple of mods to the rudder and then I will add the horizontal stabs. Going good now, hope it continues!
Ernie
 
Rudder mods completed. These consisted of adding two more tail lights from .020 Evergreen rod. A slot for each was cut into the rudder, then the new light glued in and blended with some Tamyia surface primer. When that all dried they were lightly sanded and the ends of the new lights rounded over. The tab was added from .020 Evergreen sheet using a template on the decal instructions, glued on and again blended in with Tamyia surface primer. When dry it was sanded to blend into the rudder and the edge thinned down. This tab was to help offset the bubble housing on the lower fuselage that housed the direction finder.


This will be all on this for a bit; I hope to start painting it next weekend, but between then and now I will be touching up any panel lines that need to be rescribed, masking and generally making sure that everything is as it should be before painting starts. Not really exciting or photo worthy.
Ernie
 
Cousin Ernie you've taken your work bench by storm, it's going to pay off in the end I know :popcorn
 
Cousin Ernie you've taken your work bench by storm, it's going to pay off in the end I know :popcorn

Thank you sir! I sure hope so! After the past couple of years with more starts than completions, and averaging about one decent build each year I need to turn things around. Just wait until the shelf queen campaign starts, I think I can fill that up all by myself :yipee
Ernie
 
Back
Top