• Modelers Alliance has updated the forum software on our website. We have migrated all post, content and user accounts but we could not migrate the passwords.
    This requires that you manually reset your password.
    Please click here, http://modelersalliance.org/forums/login to go to logon page and use the "Forgot your Password" option.

ICM Tu-2

nsmekanik

Member
I started this one awhile ago, well, a long while ago

IMG_0575.jpg


IMG_0579.jpg


Due to a number of issues, like colour confusion and stepping on one of the canopies,

IMG_0123.jpg


it went back into the box. Just recently I decided to dig it out and see how far I could get with it, of course the first thing in order is to finnish glueing on the nacelle.

IMG_0121.jpg


IMG_0122.jpg


I also managed to finish every bodies favourite chore :yipee

IMG_0127.jpg


One thing I think is important to noteis the total amount of filler used on this kit so far :D

IMG_0130.jpg


IMG_0131.jpg


IMG_0135.jpg
 
(y) (y) (y) One airplane that has interested me for quite a while but was always scarred to start. Looking forward to more info from your build.
No filler needed ! Awesome , that took some of the edge off. :popcorn

Cheers, Christian B)
 
Thanks guy's.

Jeeves, it's 1/72, kinda puts alot of the latest large scale Trumpeter kits to shame for surface detail, now doesn't it :evil: .

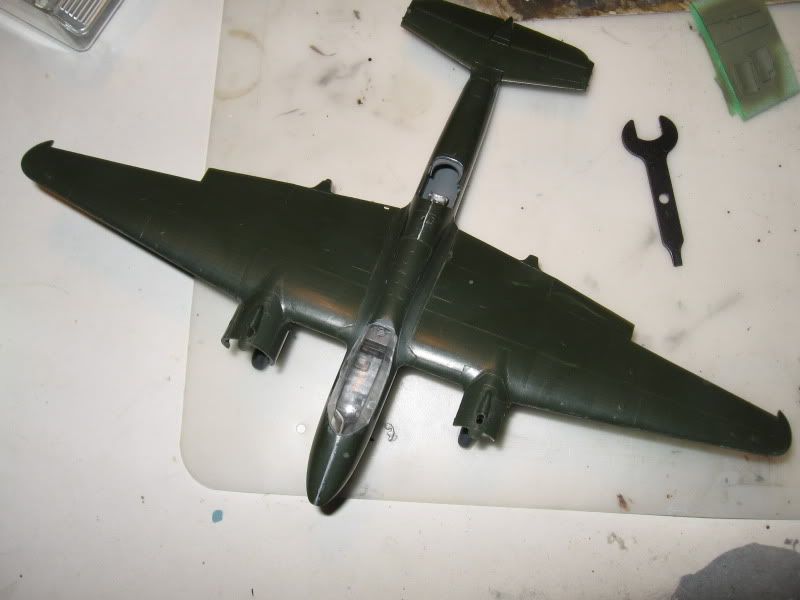
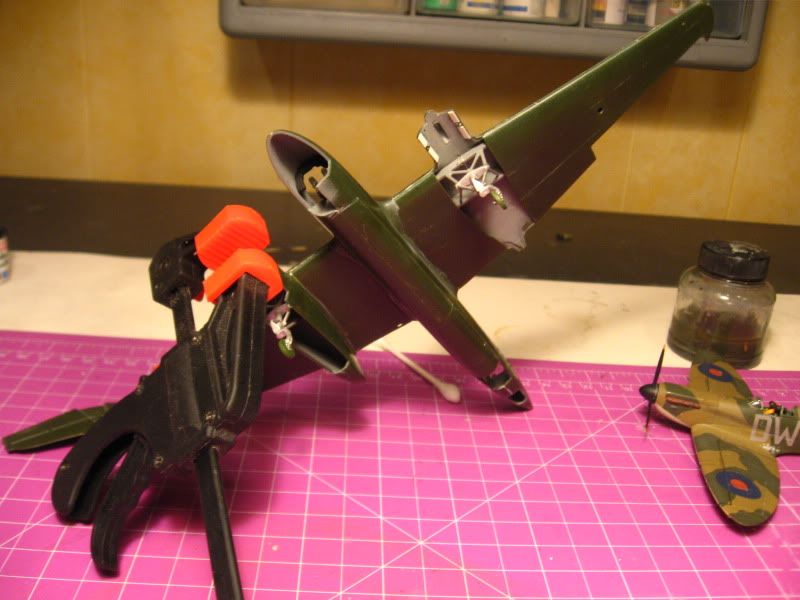
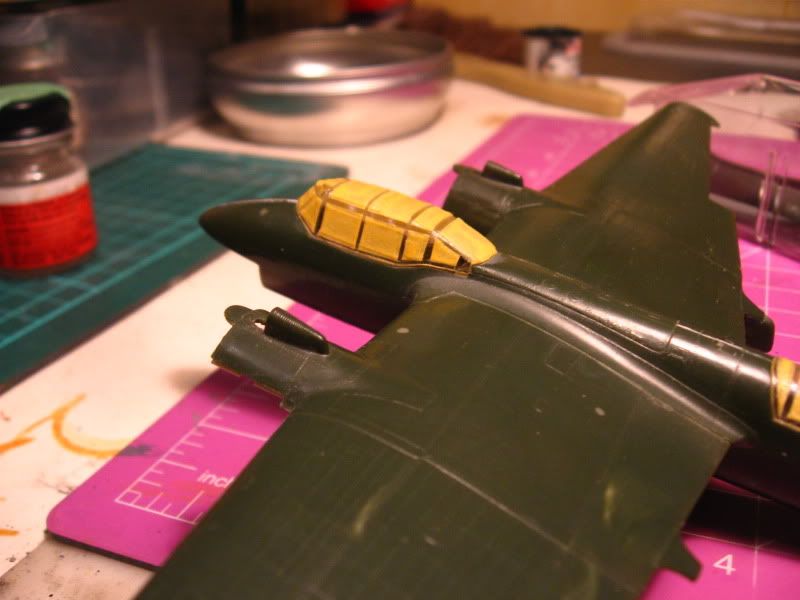
Christian, it's not that bad, it just takes a bit of careful clean up and gluing, for the fuselage I started at the tail section and worked forward, carefully lining up each section doing one at a time. The reason there is any filler at all on the fuselage is that if you clean up the mating surfaces so they are flat and blemish free it will be to narrow for the canopies, you don't have a lot of leeway in cleaning up mating surfaces. And where there is filler I used tape on either side so as not to totally wipe out the detail.

Make sure all the mating surfaces are touching before you glue them, with the wings this is not difficult as there is a main spar, glue the tops on first and then the inner lower pieces, take your time in sanding and fitting them, and then the outer ones. Mostly I removed the locating pins from the parts.

IMG_0133.jpg


IMG_0132.jpg


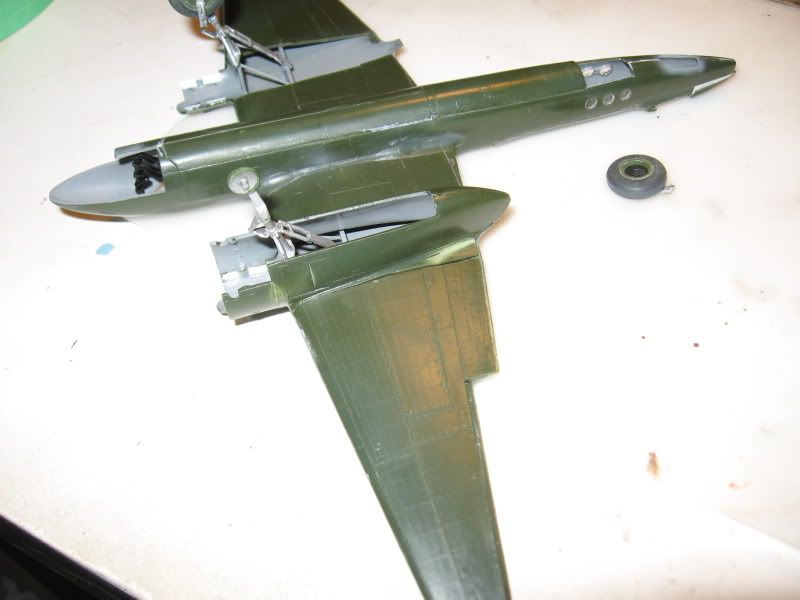
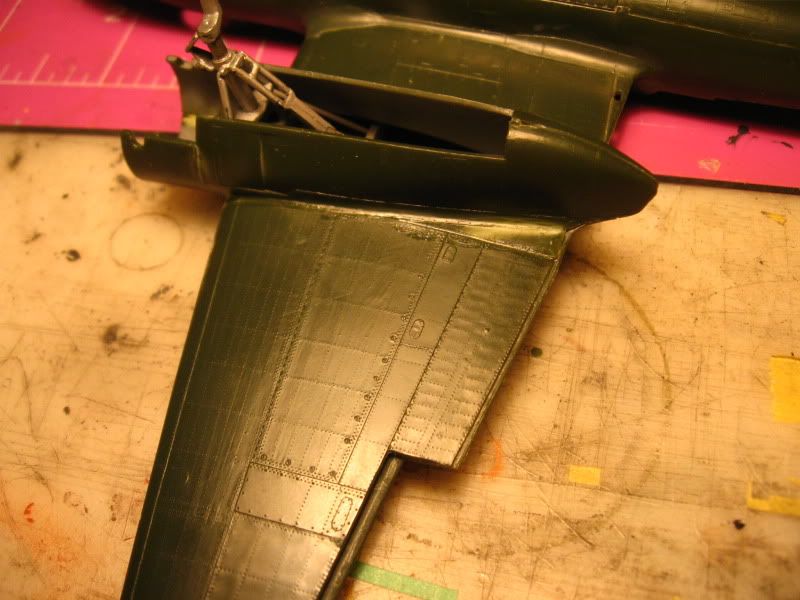
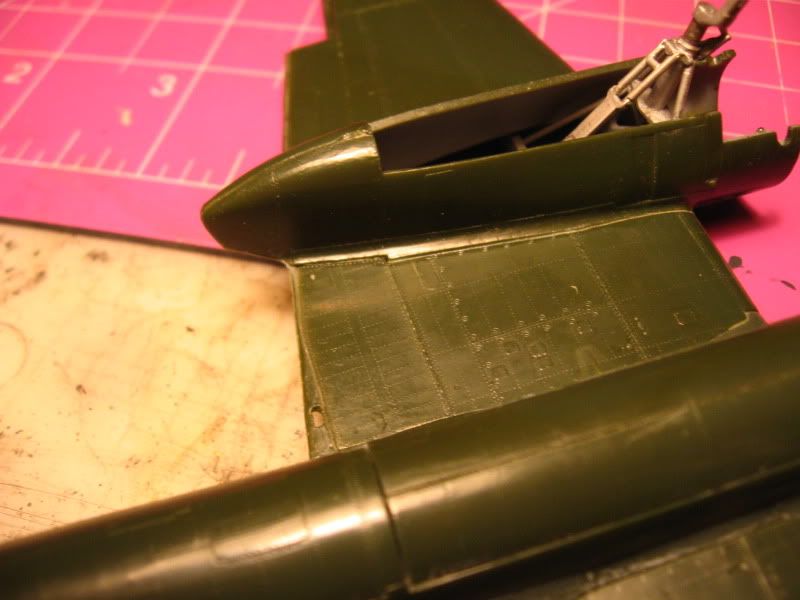
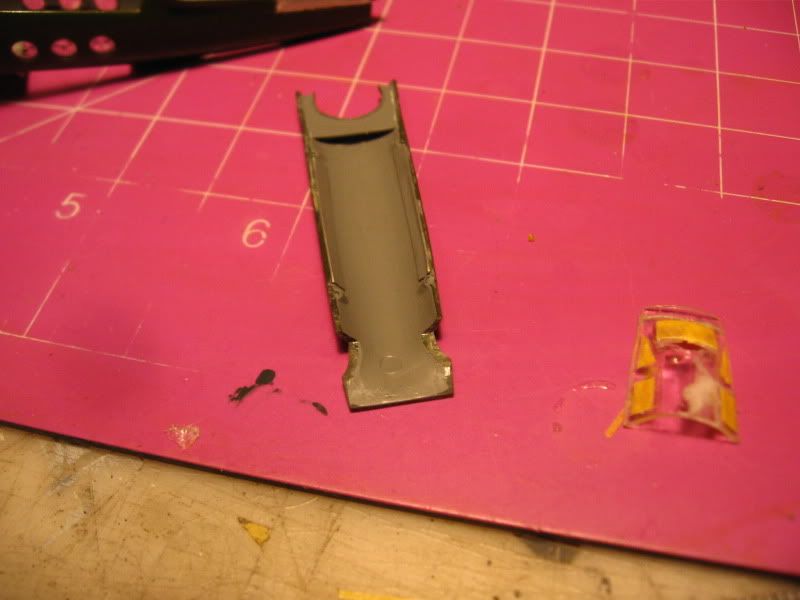
Build the cowlings before you add the nacelles, as you will find a number of the parts will have to be bent into shape. The landing gear looks to be delicate(I pinned mine) but really once the nacelles are on it's quit sturdy. you could probably get away with adding them later, but I suspect it would be difficult and not worth the bother.

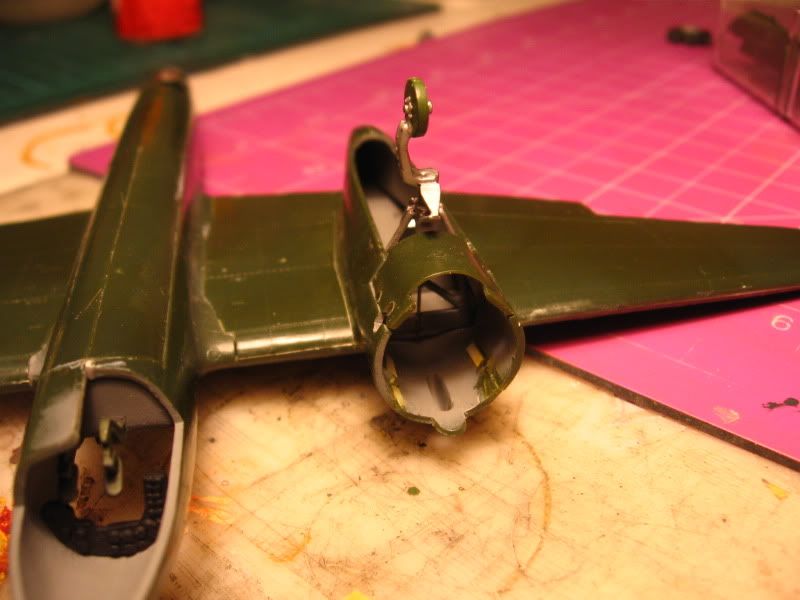
If you look closely at the bottom pic you will see the lower cover looks to be to narrow, but actually if you heat it up and flatten it, it fits good and the whole nacelle will be round as the cowlings. To add the nacelles, glue only the very back, not even all the way to the gear bay, just enough to hold them together. If you have checked them against the inner and outer lower wing panels and sanded everything down properly, you will get a seamless and step less joint when you go to glue the nacelles on. You will have to bend the nacelle half's a bit to get them to line up properly, do one side at a time working from the back to the front and leave the cowling surfaces to last, as the wing part has to be forced down a bit, and do not use the exhaust ring as a guide. The parts are not warped, but they do need to be prodded into proper shape.

IMG_0130.jpg


IMG_0131.jpg


I mucked up a bit on this side and there is a bit of a step, but the other side is perfect :D .

At the moment I can't afford any references to this plane, I know they are out there, so if anyone has some info they wouldn't mind sharing please let me know, one thing I am looking for is under wing bomb mounts.
 
Thanks for the heads up on the build. I really like the lines of this airplane but all those rivets are somewhat daunting. Too reminiscent of the old Airfix models .

How nice it would be to have a new tooled version.

Is there adequate interior detail ?

If you need reference material, I managed to stumble up on a walk around at a soviet museum . On the other hand that might make it overwhelming to build. Just so let you know it's out there.

Cheers, Christian B)
 
I'm always interested in what's out there thanks. If you haven't looked at the kit yet, the rivetts are recessed and easily restored, who ever designed this kit deserves an award I think. Unfortunately there is not much by the way of interior detail, but if you are feeling up to the challenge you can always add some. the canopies are a bit ruff, but very thin and ok under a coat of future, one interesting detail is a bulged window on the side of the main canopy,how they did that is like asking how they got the caramilk in a caramilk bar :hmmm , also it is a post war canopy, it would be nice if they released a war time version, or somebody would make on. I've got quite a few pics saved too if you need anything, but some details I have yet to find.
 
Well, I was wrong.Mine is a VEB model and has no rivet detail. It would not surprise me to find an ICM version living in the closet either but I did not spot it.
I thought the ICM was just a repop of my older kit.

Don't know if you have these but they could be helpful to you.

http://scalemodels.ru/modules/photo/viewcat_cid_180.html

http://www.polish-aircraftprofile.strefa.pl/tupolev_tu-2/index.html

Anyhow, just at a quick glance , the rivet detail does not seem obvious. Could be good for me.

Cheers, Christian
 
Hey Christian, I've seen the first one, The second one is awsome (y) hadn't seen that one before, Thanks :drinks . Any chance of some pics of the VEB model? Never seen or heard of that one before. You can also find the ICM in an Encore boxing in case anyone was wondering.

Nice lookin job on that dewertus, I take it you used the kit decals, if so, how did they work?
 
http://www.arcair.com/Gal1/901-1000/Gal928_Tu-2_Torre/00.shtm

Try pasting that in your browser and it should pull up the build at ARC. Don't the title plastikart fool you. Mine says that as well. Let me know if you need anything else.

Cheers, Christian B)
 
Cheers Christian, appreciate that. Ya thats a pretty ruff kit, I think you'd be happier with the ICM one personally, honest it's not as scary as it looks. Sorry updates are slow, to much time on the computer :gogo and not enough time on the bench although I did manage to paint the canopy frames :D
 
Luckily I have a choice of which one to build as well as some possible spare parts. Any idea what the vintage is of the ICM markings. Would that pass for cold war . There's a campaign coming up.
It might be a good excuse to build it.

Thanks for the good info, Christian B)
 
Internet modeller

Here is a link that might help you with that, one scheme that is not mentioned(missed?) is a Tu-2 Polish airforce 1952, so maybe this one will work for you. Another scheme, TU-2 of the Soviet Air Force, built by funds raised by Moscow workers, 1945, seems to be in error as I've found a picture of it that is captioned summer of 1944 and the early style canopy is clearly visible.

Mig3 soviet warplanes

scroll half way down to the white 32

I have no idea how the decals will work as I have yet to try them or know of anyone who has.
 
Hey, that's Massimo's link on the TU-2. Pm'd him today, that's all his info on that airplane.
I hope you have a good in progress photo's so I have something to go from when I get around to mine :popcorn

Cheer's Christian B)
 
I've actually got 2 threads going over there on this plane, no luck so far in getting any information over what he's already supplied unfortunately.

Mig 3 colour forum

and a build thread as well

Mig 3 forum build

He's done an excellent job over there, I wish he was able to finish his work on the colour charts as it is I'm going to have to do some guess work on what to use for camo paints
 
Well, my best council to you is get some Akhan paint's that's what I have used for my last two builds and I am really happy with those.

Other than that, it seems that VVS painters had a lot of lee way on the actual shapes used (unlike the RAF) that used rubber stencils. Besides, they were not always complying with the directives.

In other words I see a lot of room for artistic freedom. :pilot

Cheers, Christian B)
 
Back
Top