Skinny_Mike
Well-known member
Hey everyone! Its been a busy year end break for me. I am getting in a lot of building. At the December meeting for my local model club, we decided on 3 in house contests that we were going to conduct. The first was “M for March”. Basically the rules are; build a kit that has an M in the name for the March meeting. This was the perfect excuse for me to build the Eduard MIG-21 SMT in my stash.
Since I am a pretty slow builder, I figured I better get started. Little did I know just how quick this thing was going to go together! I started the kit just before Christmas, and have been taking some pictures but I haven’t stopped to post anything, until now. So here’s the update…
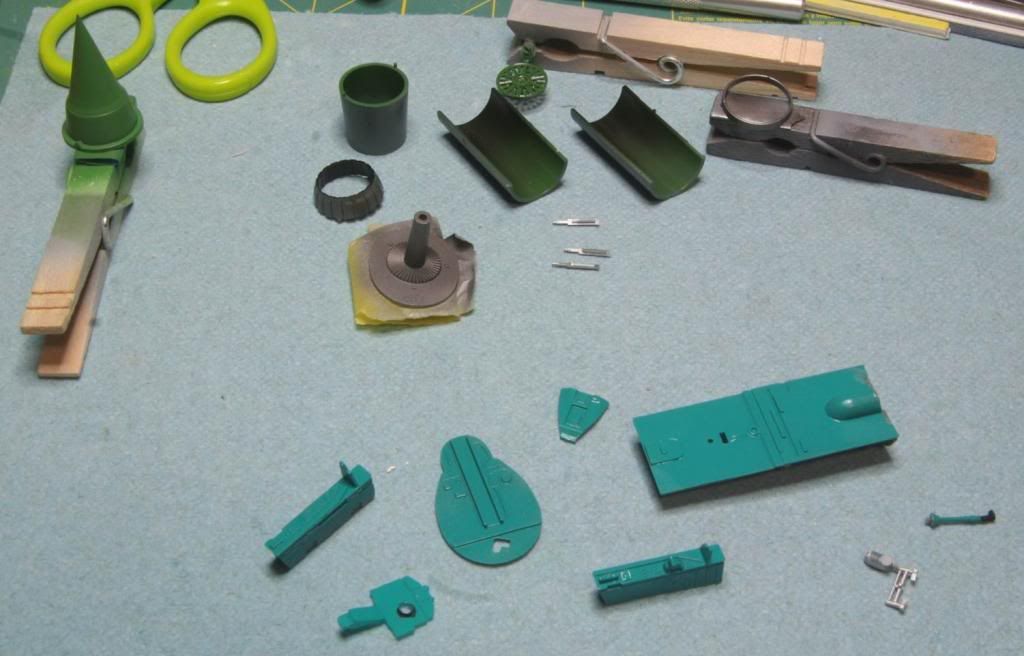
All the internals are painted and ready for assembly. The engine bits are at the top of the folder and the cockpit parts are at the bottom. The shock cone was painted in radome green from Akan paints. I haven’t used Akan paints before but they sprayed really nicely. For those that don’t know Akan seems to specialize in Russian paints and are color matched.
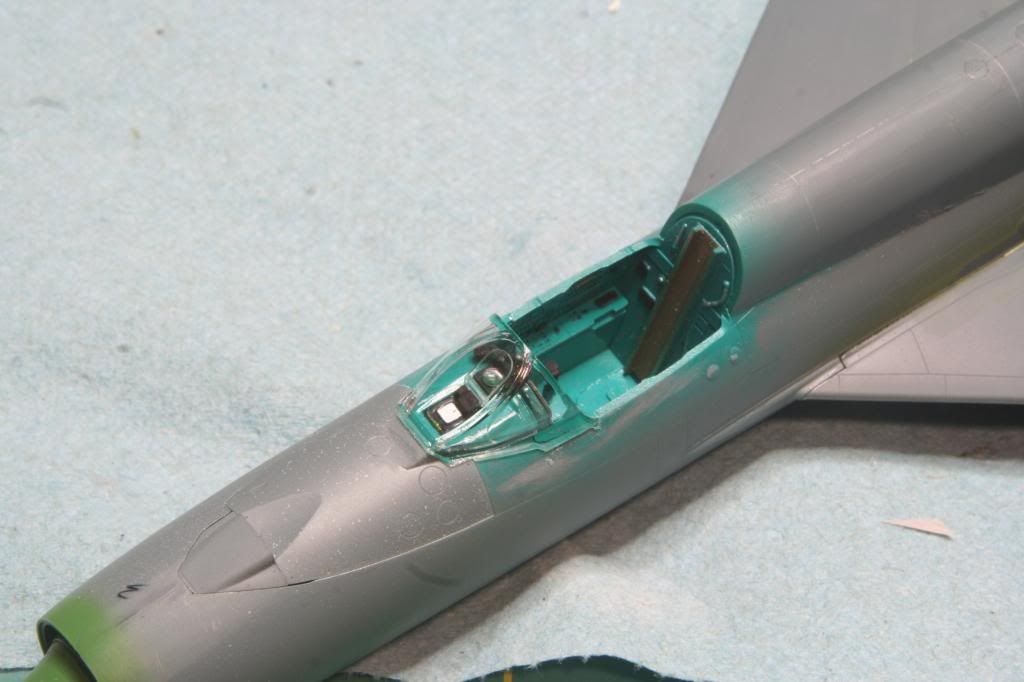
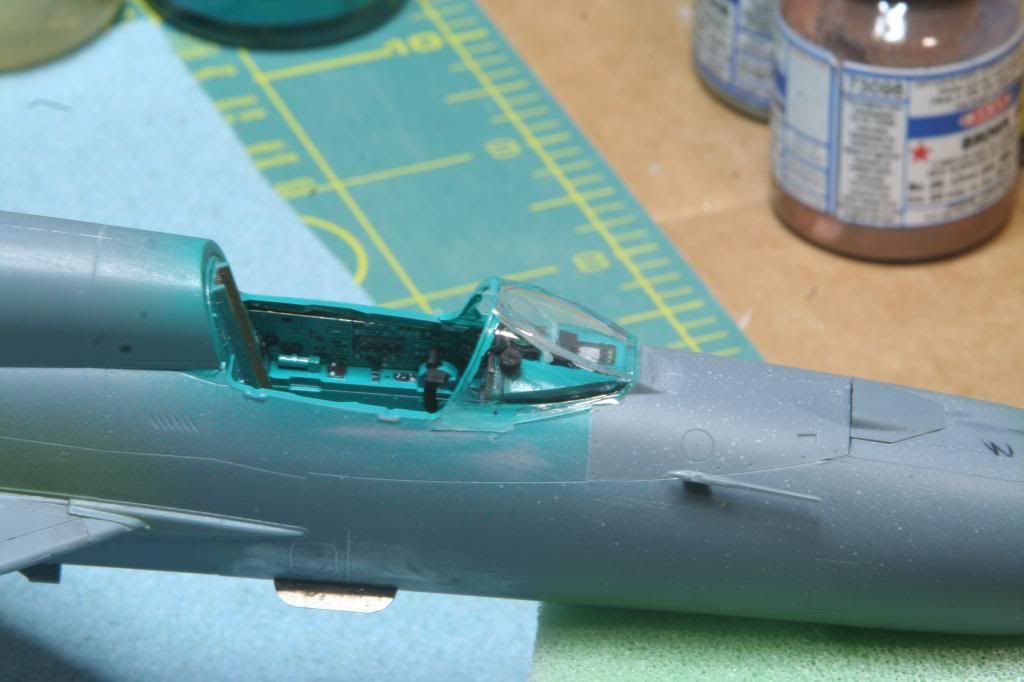
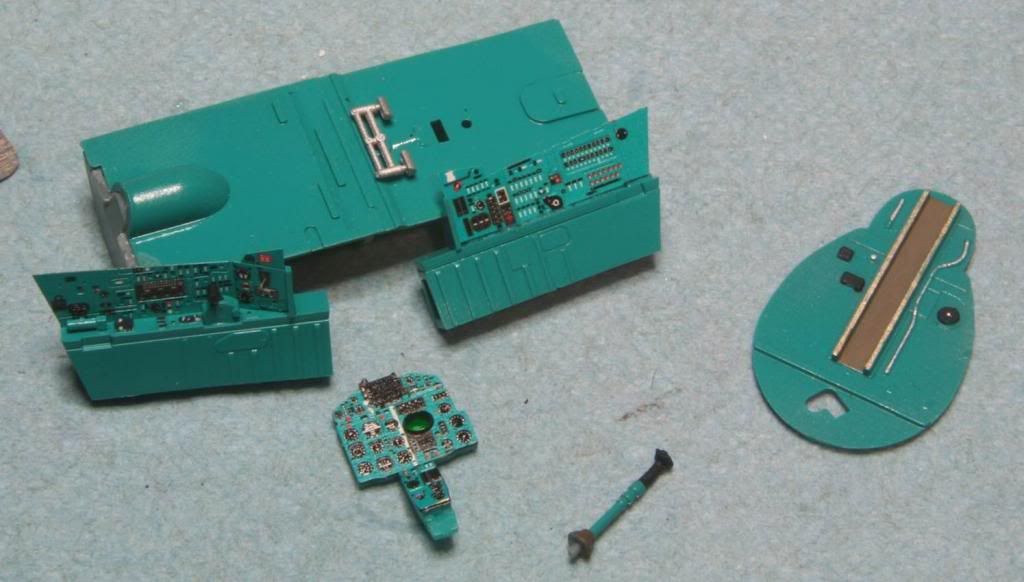
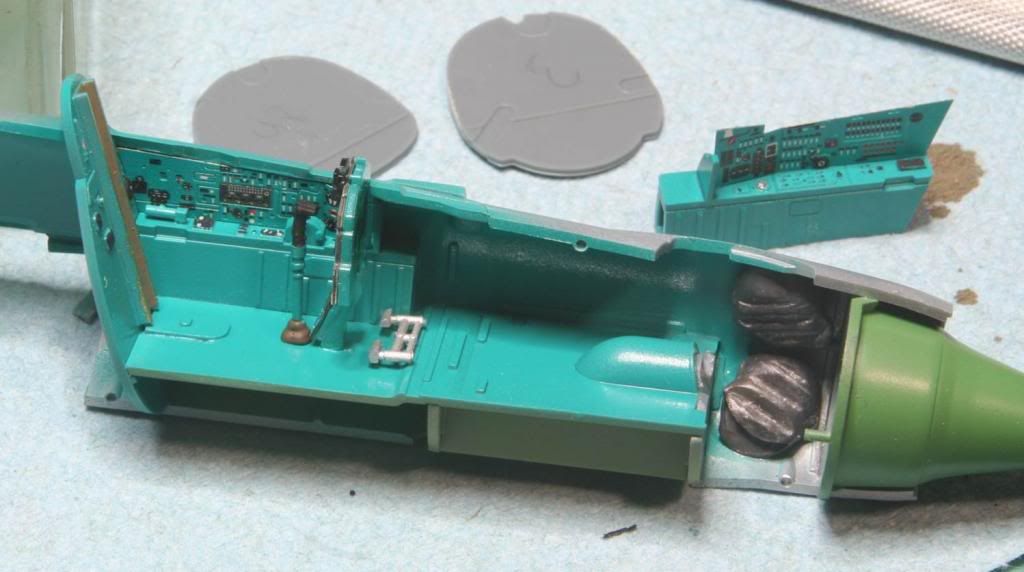
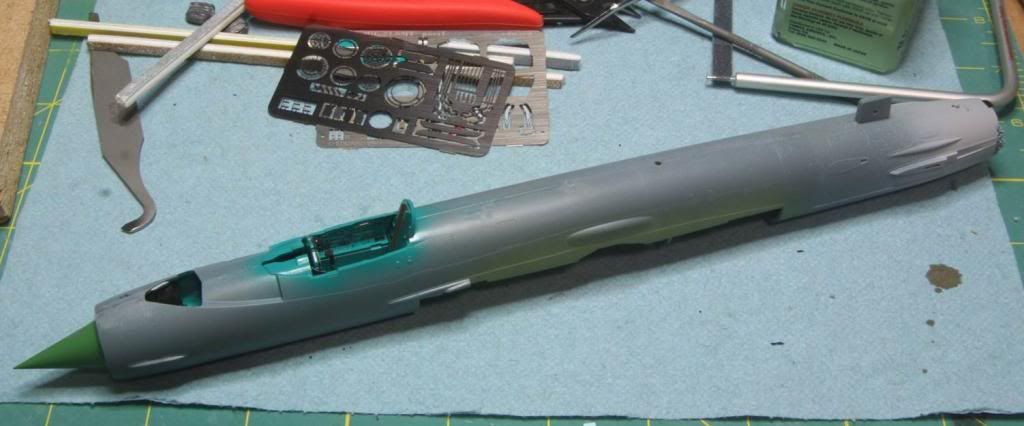
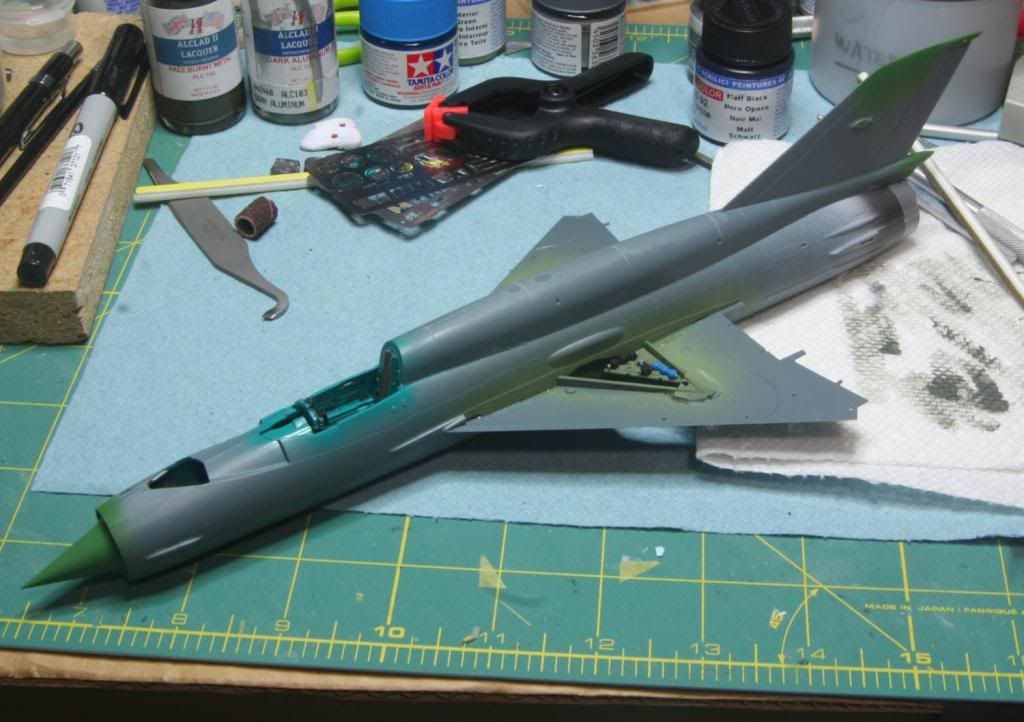
The cockpit was detailed painted, I didn’t use the photoetch for the side consoles, assembled and then installed, along with the shock cone. I added some weight to the nose by squishing some fishing weights and gluing them to the side of the fuselage. I also filled the shock cone with little fishing weights and then filled it with super thin CA glue to secure the weights in place. The aircraft is pretty nose heavy now.
Once all the innards were installed I assembled the fuselage halves. Sorry I didn't take any pictures of the assemble engine. But honestly it’s a tube. A tube buried in the back end – of another tube! Honestly not much to see there!
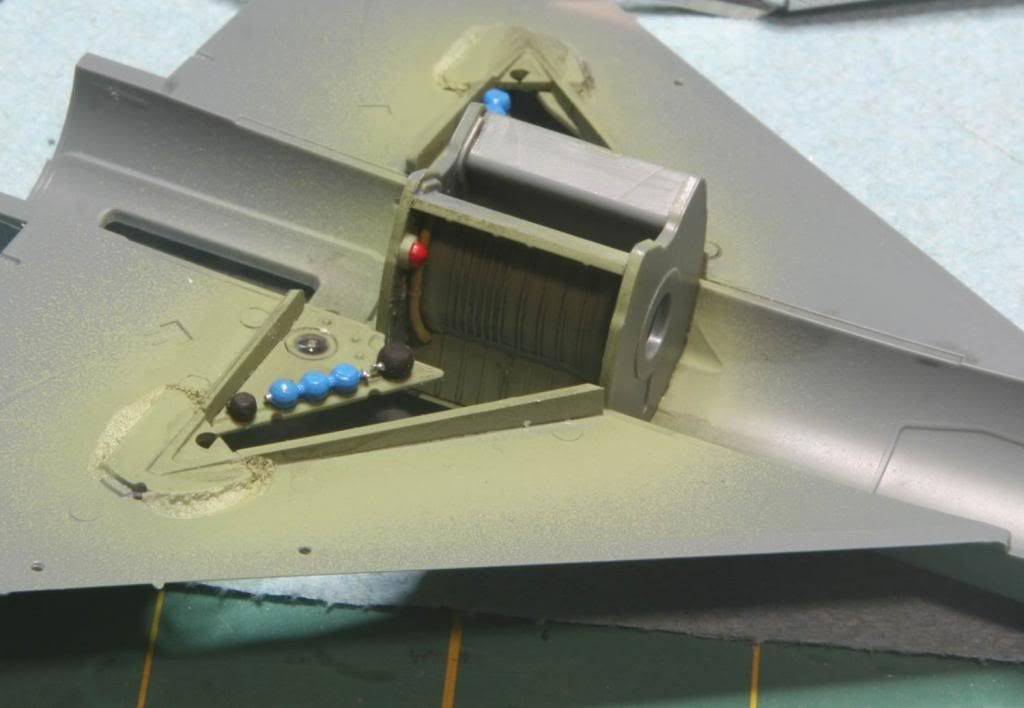
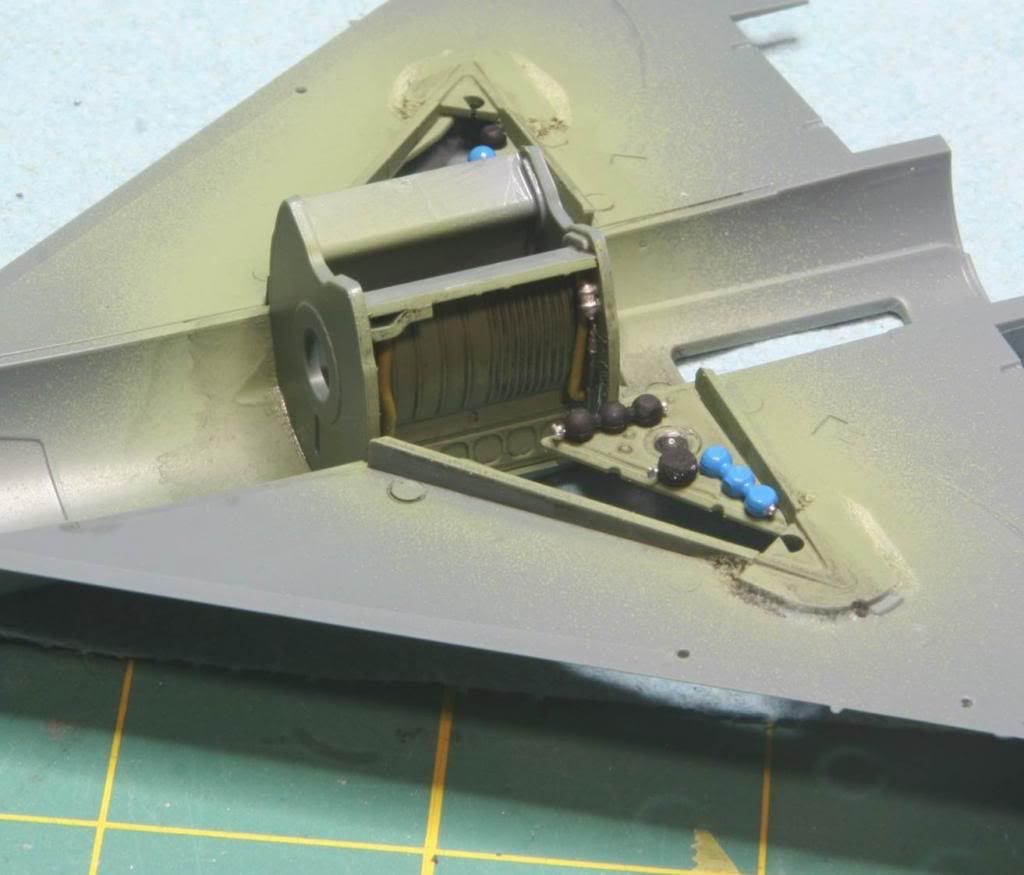
Next step was to add the MLG bay to the lower wing section. I painted the gear bays in Life Color Interior Green. Then the bays received a mash with MIG Dark Wash and then the details were painted up and the little bits added.
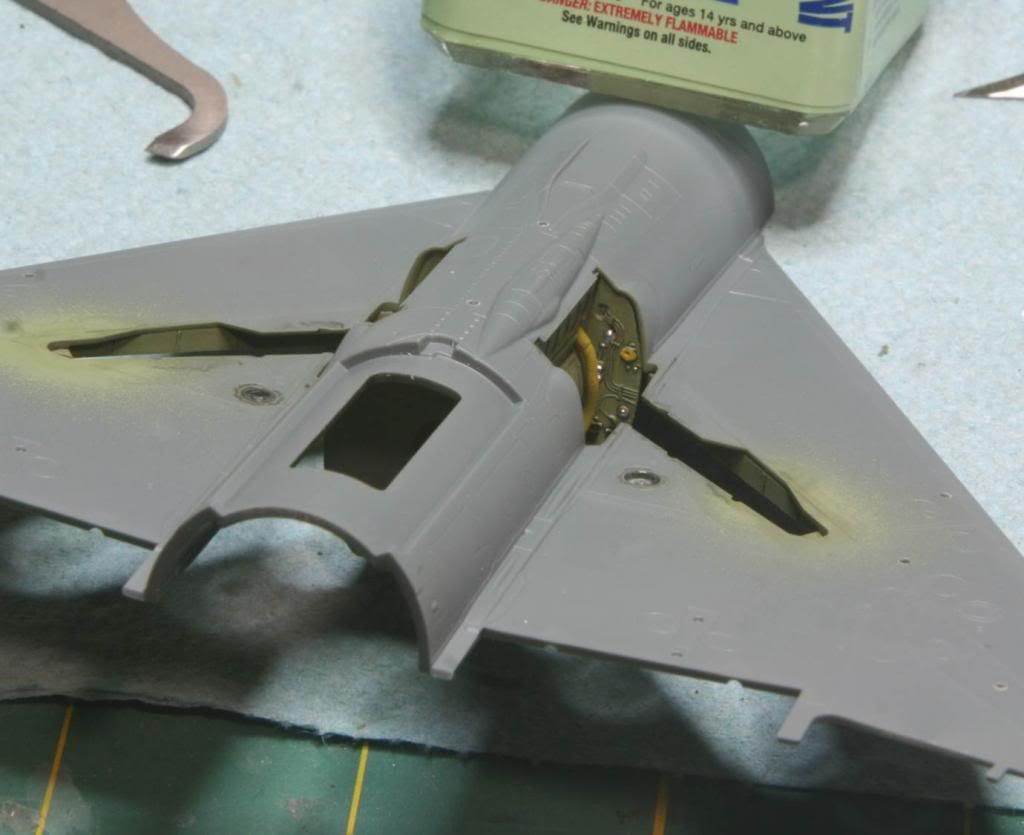
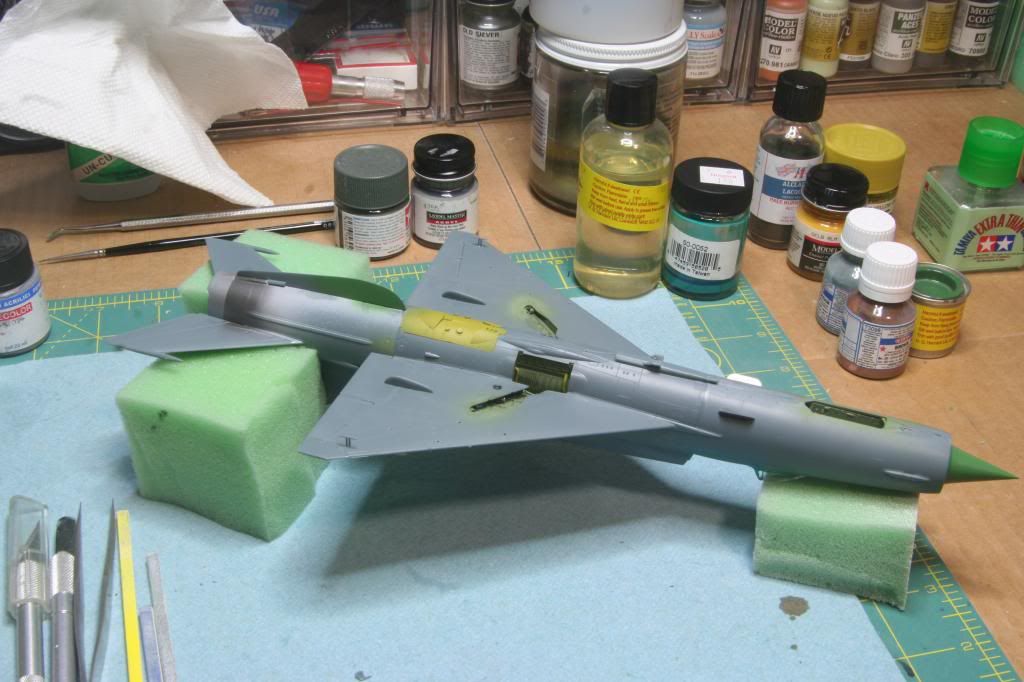
After that, its all gone pretty quickly. The spine was assembled and installed, and then the lower wing half. The metallic parts at the engine exhaust were painted in Alclad Dark Aluminum and Steel and the various antennas were also painted in the radome green.
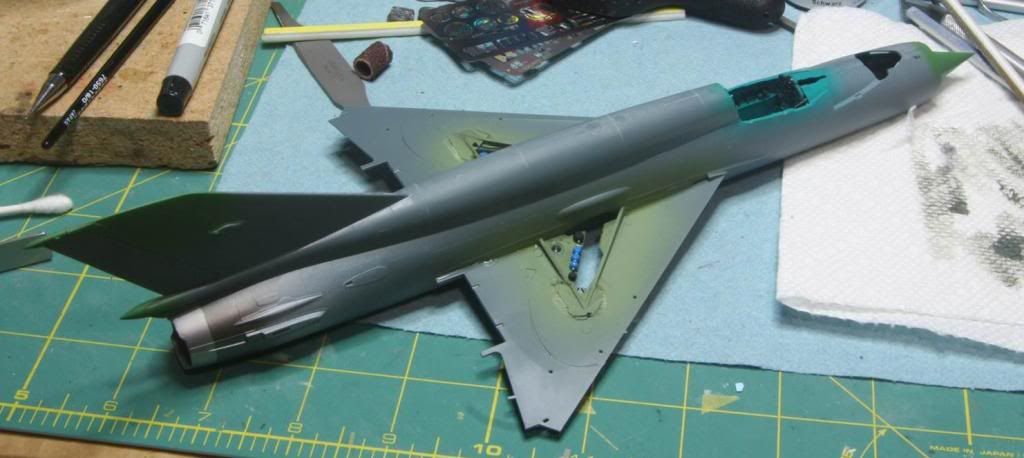
Then the tops of the wings and the control surfaces as well as the horizontal tail pieces were added. I also added the HUD panel to the front of the cockpit.
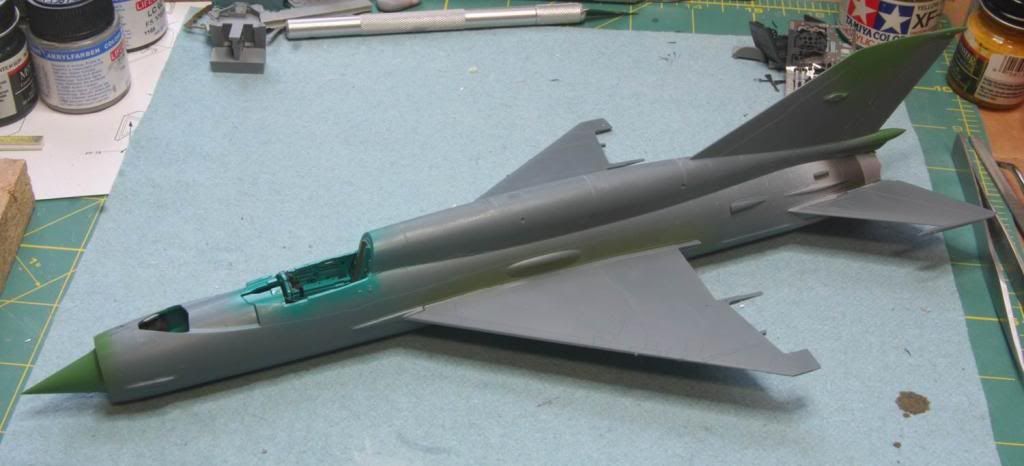
I had a bit of a problem here. I didn’t have the instrument panel installed in the right angle when it was assembled, so the HUD panel and the IP did not meet like they were supposed to. I ended up breaking out the IP (not on purpose ) and re-installing it, which helped clean up the fit. In the future I will keep the IP out until I have the HUD panel in and then install the IP. There is plenty of room to do it that way. I also needed a little bit of putty at the top of the wing roots. I’m not sure if that’s normal for this kit or not, but there was a bit of a gap on mine. Otherwise the fit has been amazing.
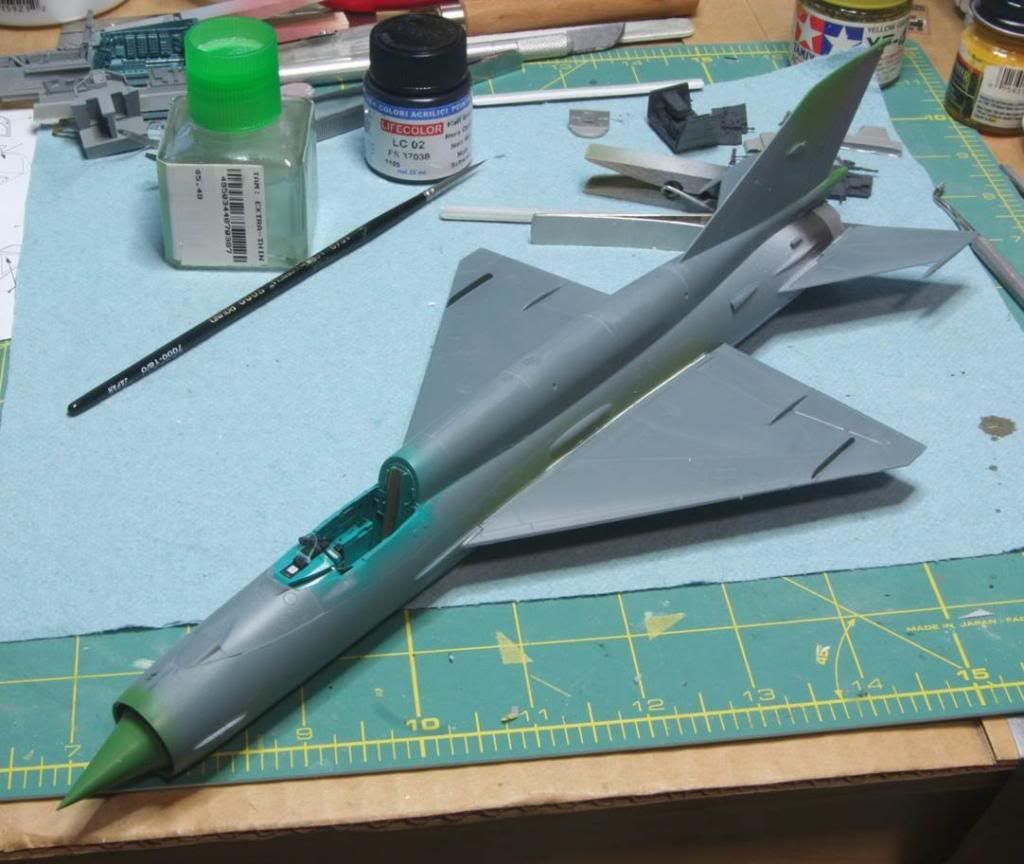
As of right now, there is no aftermarket on this beast. I am planning to use a Quickboost seat and a Master Models pitot tube, but they are both out of stock at my normal source, so I may come to a grinding halt at that point. The seat isn’t that necessary, the kit one is very nice, I just hate working with the photo-etched seatbelts, but I think the pitot tube is a necessity considering how exposed it is and my track record with those things! And I still really haven’t decided on what paint scheme to go with.
Stay tuned – more to follow!
Mike
Since I am a pretty slow builder, I figured I better get started. Little did I know just how quick this thing was going to go together! I started the kit just before Christmas, and have been taking some pictures but I haven’t stopped to post anything, until now. So here’s the update…
All the internals are painted and ready for assembly. The engine bits are at the top of the folder and the cockpit parts are at the bottom. The shock cone was painted in radome green from Akan paints. I haven’t used Akan paints before but they sprayed really nicely. For those that don’t know Akan seems to specialize in Russian paints and are color matched.
The cockpit was detailed painted, I didn’t use the photoetch for the side consoles, assembled and then installed, along with the shock cone. I added some weight to the nose by squishing some fishing weights and gluing them to the side of the fuselage. I also filled the shock cone with little fishing weights and then filled it with super thin CA glue to secure the weights in place. The aircraft is pretty nose heavy now.
Once all the innards were installed I assembled the fuselage halves. Sorry I didn't take any pictures of the assemble engine. But honestly it’s a tube. A tube buried in the back end – of another tube! Honestly not much to see there!
Next step was to add the MLG bay to the lower wing section. I painted the gear bays in Life Color Interior Green. Then the bays received a mash with MIG Dark Wash and then the details were painted up and the little bits added.
After that, its all gone pretty quickly. The spine was assembled and installed, and then the lower wing half. The metallic parts at the engine exhaust were painted in Alclad Dark Aluminum and Steel and the various antennas were also painted in the radome green.
Then the tops of the wings and the control surfaces as well as the horizontal tail pieces were added. I also added the HUD panel to the front of the cockpit.
I had a bit of a problem here. I didn’t have the instrument panel installed in the right angle when it was assembled, so the HUD panel and the IP did not meet like they were supposed to. I ended up breaking out the IP (not on purpose
) and re-installing it, which helped clean up the fit. In the future I will keep the IP out until I have the HUD panel in and then install the IP. There is plenty of room to do it that way. I also needed a little bit of putty at the top of the wing roots. I’m not sure if that’s normal for this kit or not, but there was a bit of a gap on mine. Otherwise the fit has been amazing.As of right now, there is no aftermarket on this beast. I am planning to use a Quickboost seat and a Master Models pitot tube, but they are both out of stock at my normal source, so I may come to a grinding halt at that point. The seat isn’t that necessary, the kit one is very nice, I just hate working with the photo-etched seatbelts, but I think the pitot tube is a necessity considering how exposed it is and my track record with those things! And I still really haven’t decided on what paint scheme to go with.
Stay tuned – more to follow!
Mike
")