Yago Alonso
Member
Hi kids.
I post here all photos from TNT.
Again I get to work. After they to have been some months of works at home, to the end I could mount the desk and I placed the two sections of the diorama. During these months of "inactivity", I was compiling information and material for when had time. And now that begins the good weather, I have returned to the zone of work with force and desires.
After to have taught the module of the Second Section of the diorama, and after to have explained what wanted to do, I have begun to mount the new sections.
(NOTE: See the web site on http://www.modelismo-hld.com/dioramasyvinetas/alemania19421sec/index.php & http://www.modelismo-hld.com/dioramasyvinetas/alemania19422sec/index.php)
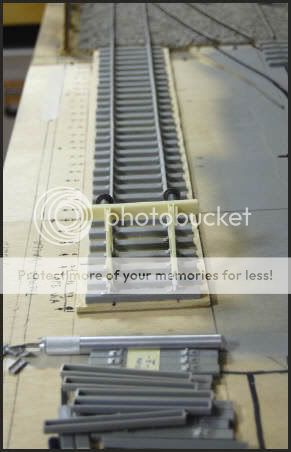
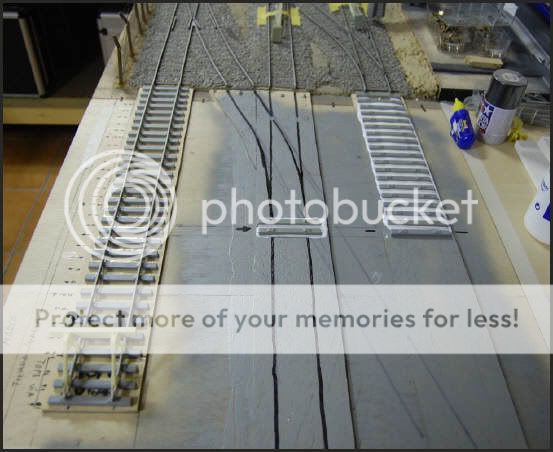
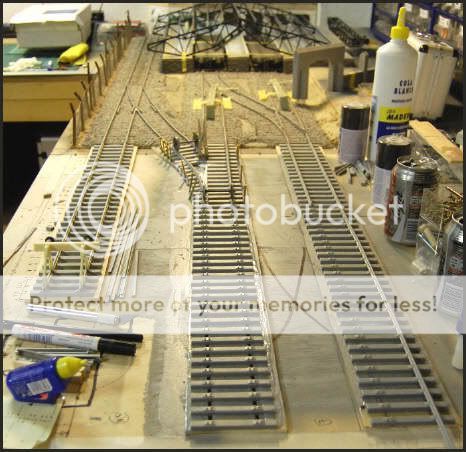
:arrow: First I have carried out the section of dead end, that was the simplest one to carry out. Using as staff the plan of assembly of the sections of DRAGON RAILWAY TRACKS, was placing adhesive and subsequently I was putting the railways...
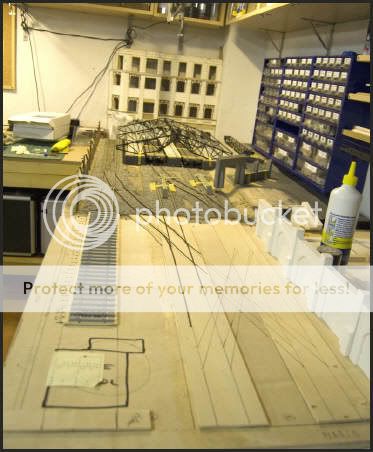
:arrow: Next I put the rails and I left them set. Of this section only will lack to place the stop of corresponding stop block-iron...
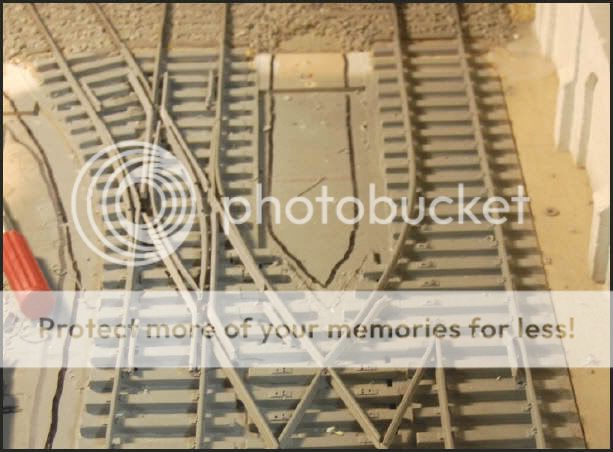
:arrow: After mounting that section I superimposed the railways of the other two tracks. Of that way I will know where I have to do the starts of bypasses and where will go located the crossing of ways in that section in scissors...

I expect that you like it.
A strong hug.
Yago.
___________
Hi kids!
I put new photos here.
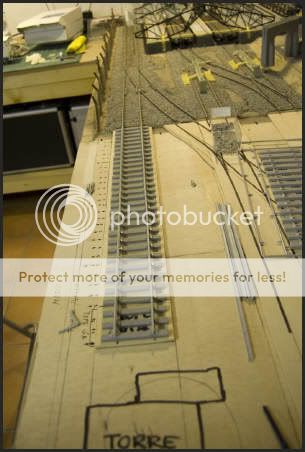
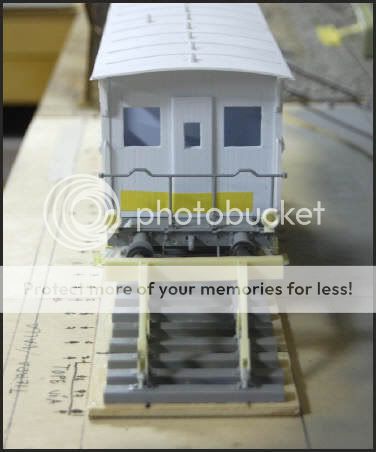
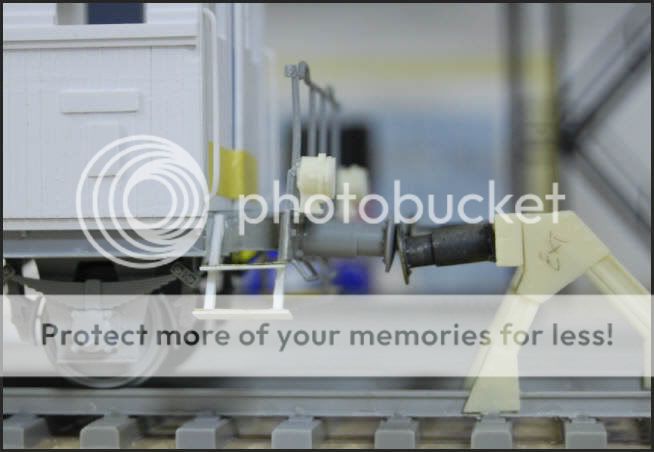
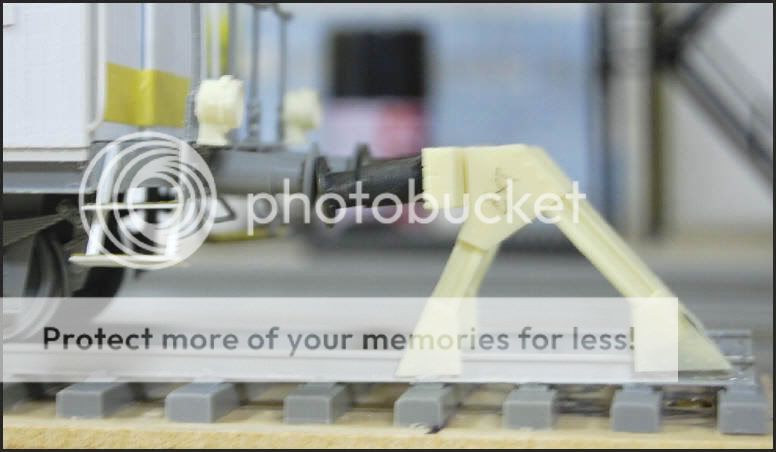
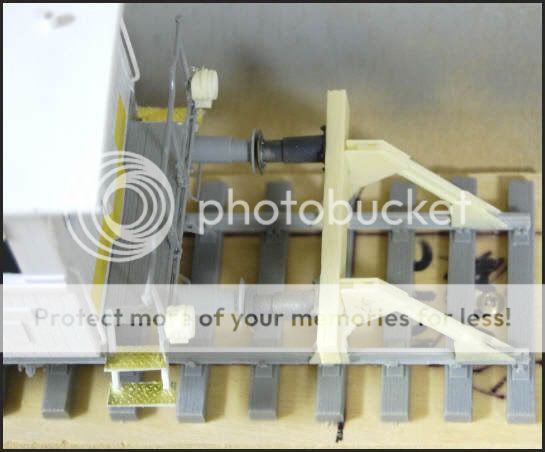
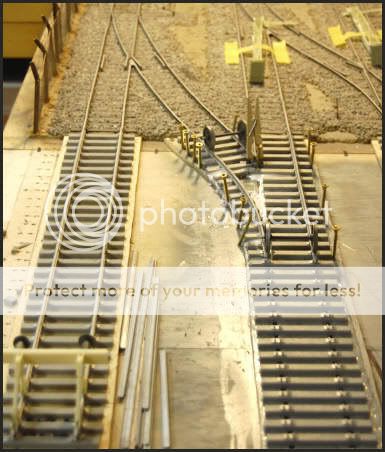
First, I made the STOP BLOCK-IRON for died railway, and them I put it on his position...
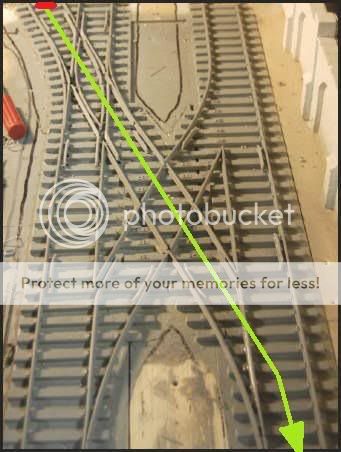
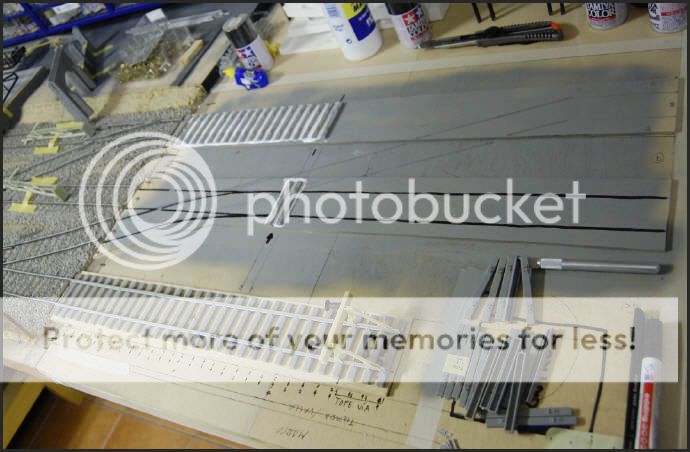
Next, I have begun to take measures and I have placed several railways that will serve me as reference to delimit so much the space of the simple bypass like of the start of the crossing in scissors that goes subsequently...


In the end, I will not be able to reproduce all the crossing of scissors in the second section of the diorama. After it to have taken measures, I will be able to represent more or except the half of that type of crossing...
But I believe that will be sufficient and will create certain tension in the representation of the diorama.
Thanks for all.
Yago.
_________
Hi kids.
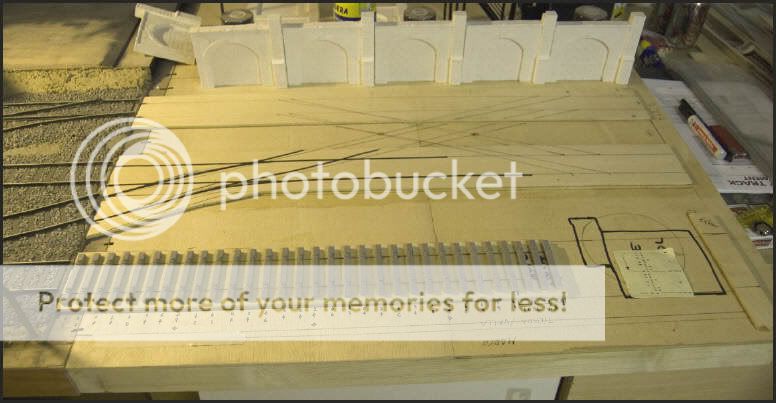
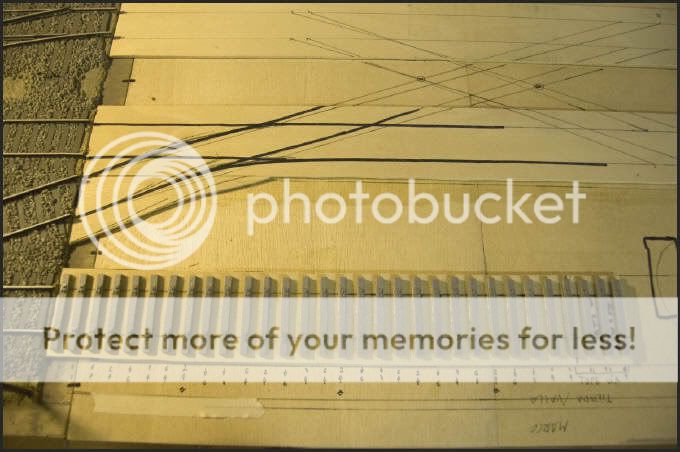
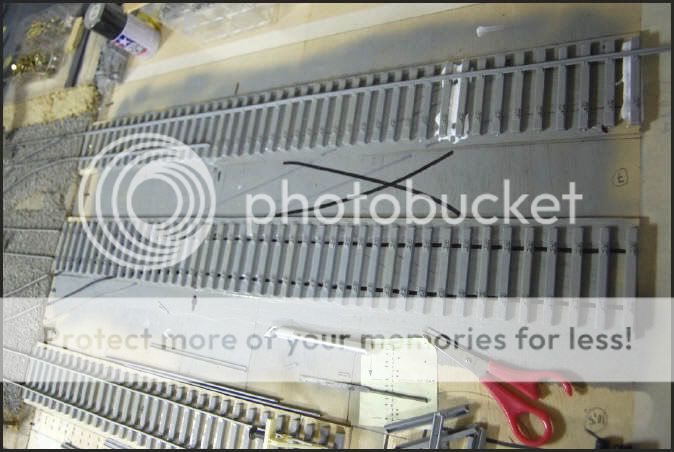
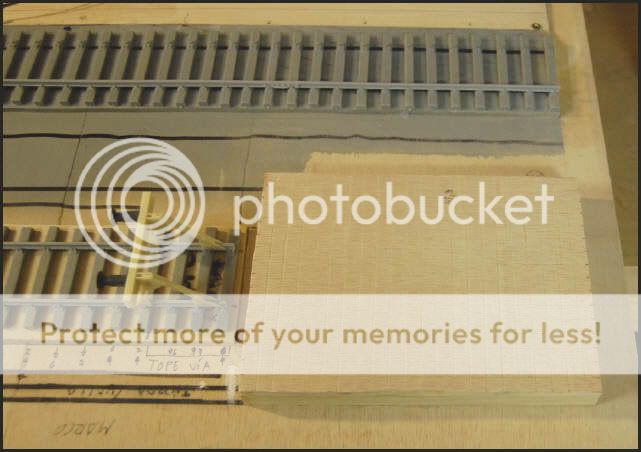
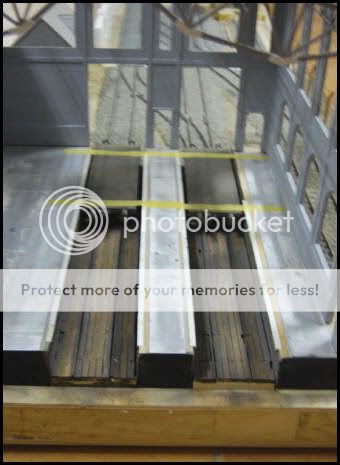
The next week I will try to give him a little more than form to the new sections of ways. I have placed the railways of the two sections and I have set the rails that will not suffer modifications.
------------------
Este fin de semana intentaré darle un poco más de forma a los nuevos tramos de vías. De momento he colocado las traviesas de los dos tramos y he fijado los raíles que no sufrirán modificaciones.
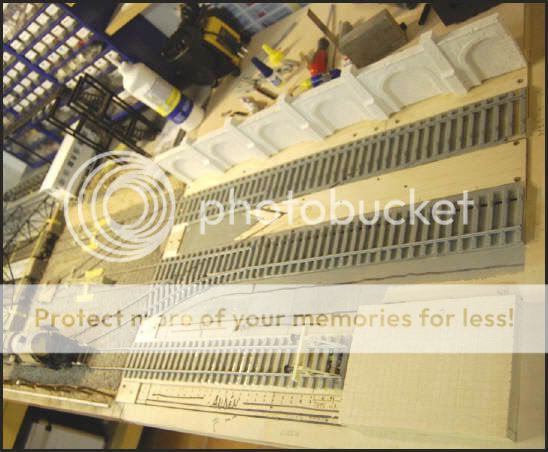
:arrow: Location of the railways of the two sections of railway tracks... (Ubicación de las traviesas de los dos tramos de vías...) :!:
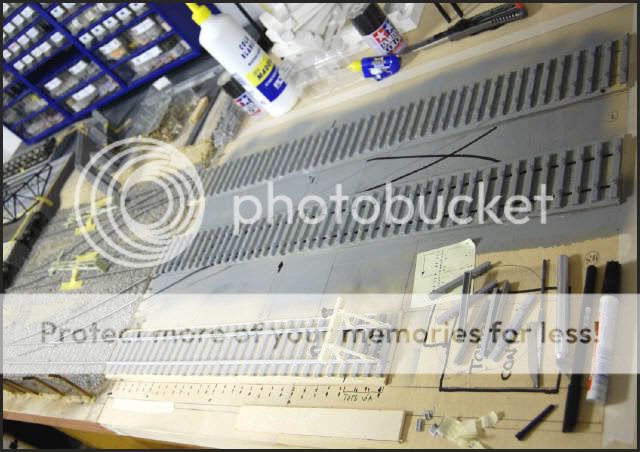
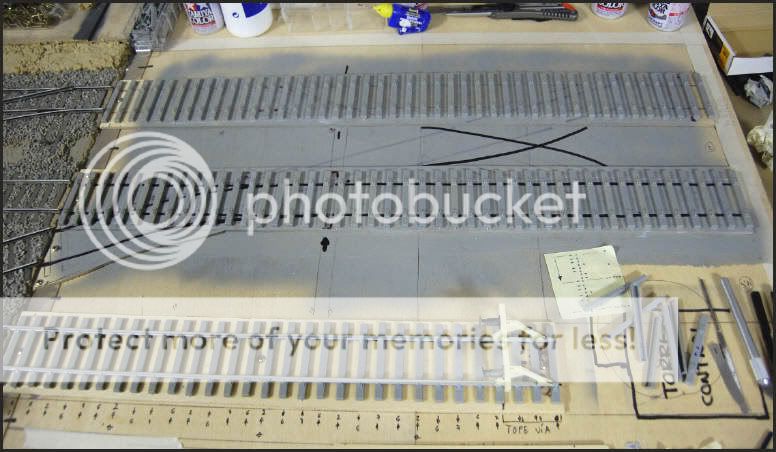
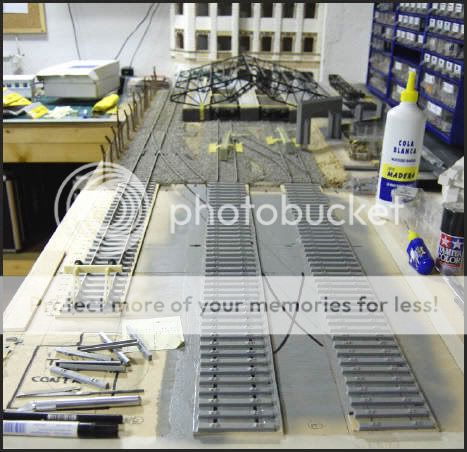
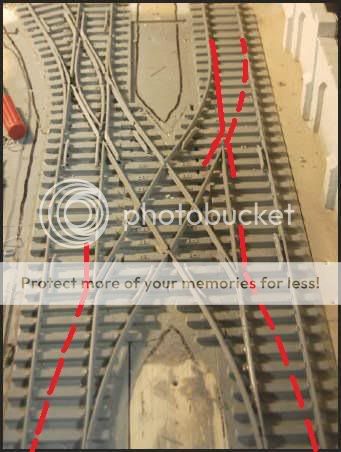
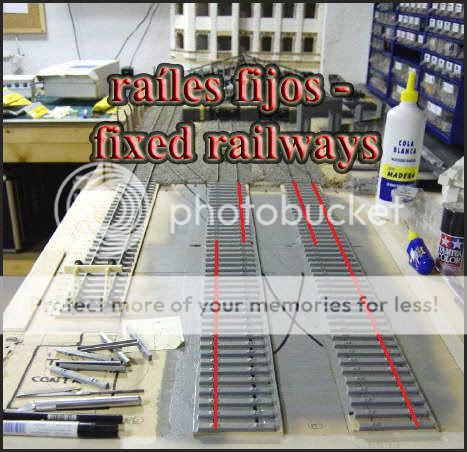
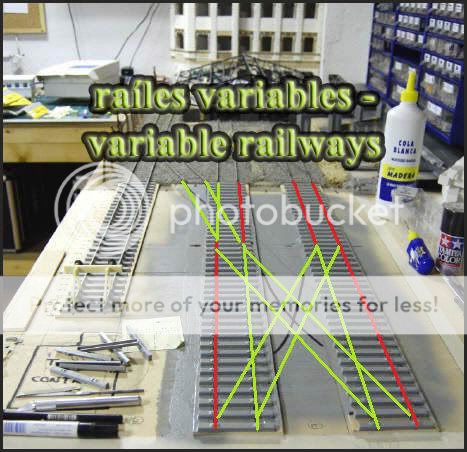
:arrow: Location of the fixed rails and graphics of the ones that will be modified... (Ubicación de los raíles fijos y gráficos de los que serán modificados...) :!:
Thanks for your time.
Espero que os guste. Un fuerte abrazo.
Yago.
_________
Here I post what I have been able to do today.
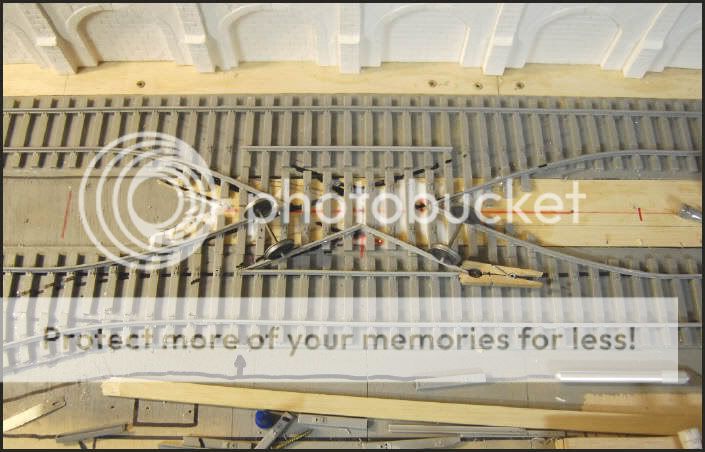
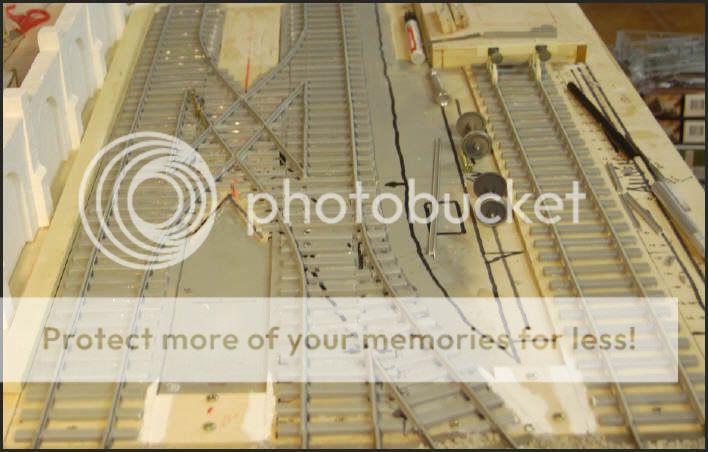
I have initiated the construction of the bypass that precedes the crossing of scissors and that does of link of union with it previously carried out of the 1st Section.
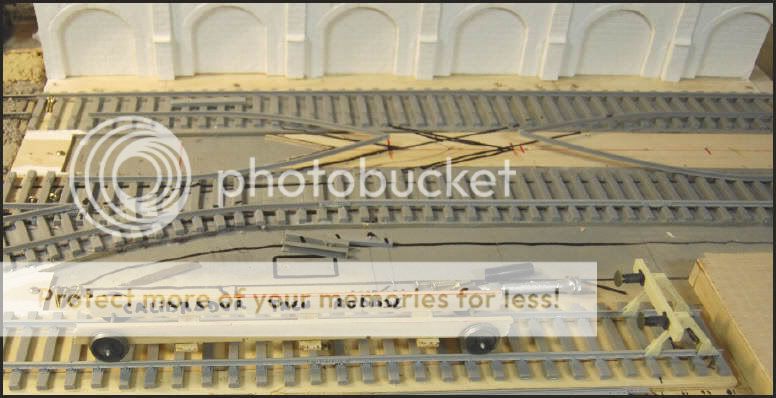
:arrow: General view of the union by means of rails of the Sections 1st and 2nd...
:arrow: Fat detail of the assembly of the bypass. ..
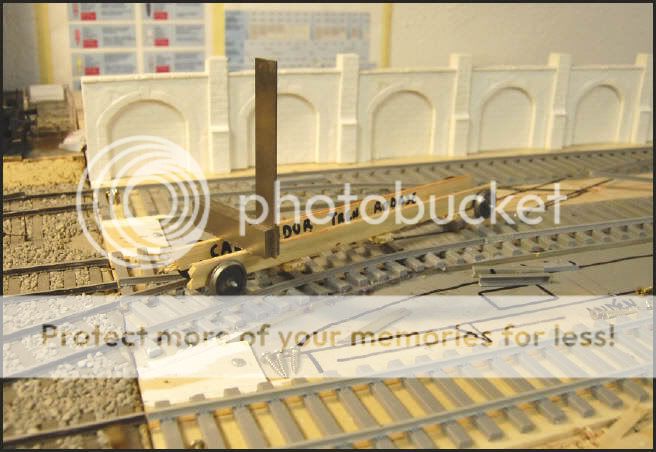
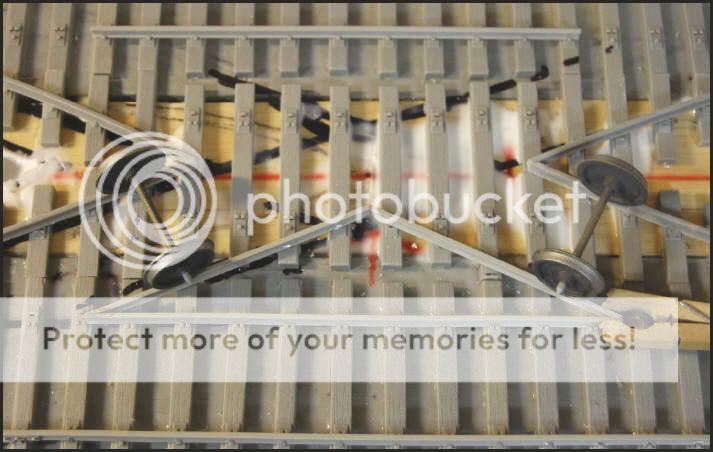
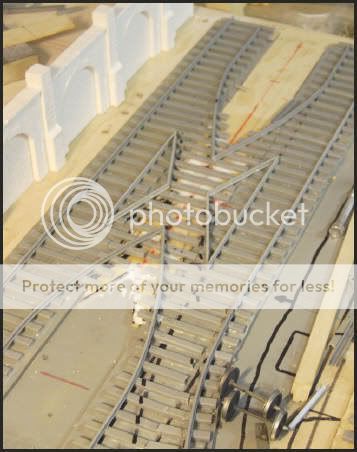
:arrow: The use of an axis of freight car with wheels aid to the assembly of the wide one of rails. In this manner themselves not surprises of disproportions will be produced further on...
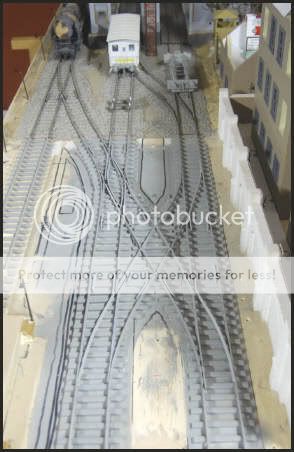
:arrow: General views of it carried out up to now...
I expect that you like it
A strong hug.
Yago.
________
Hi kids:
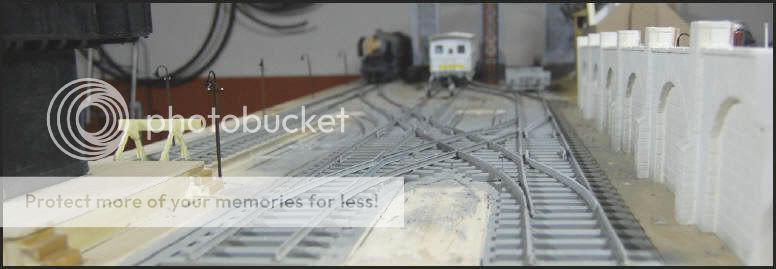
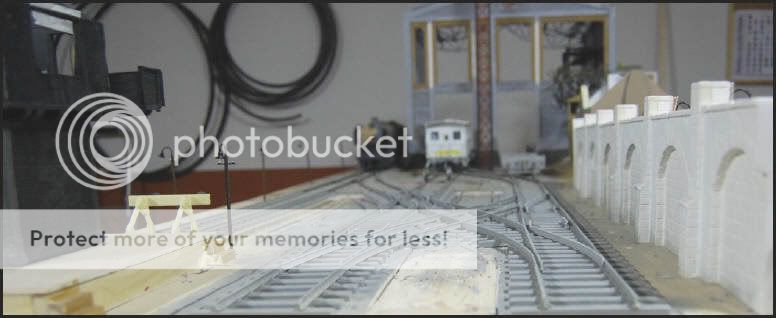
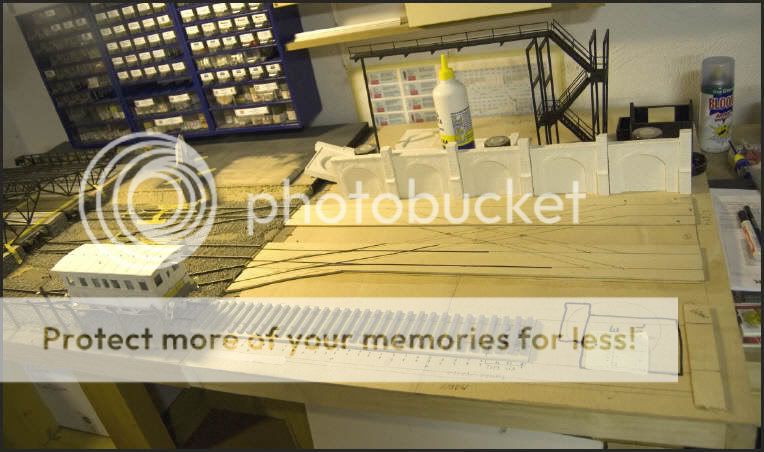
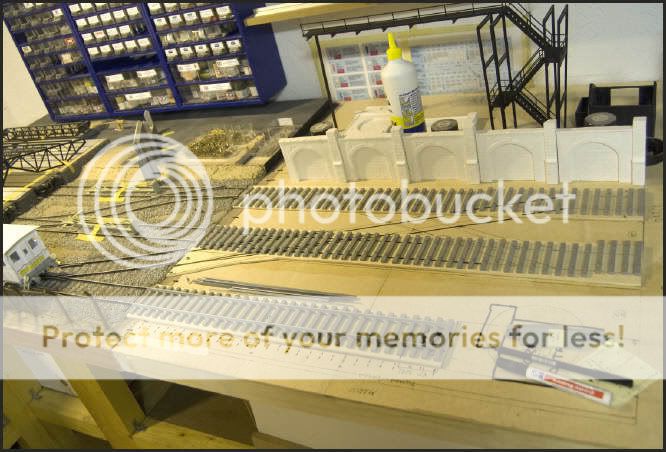
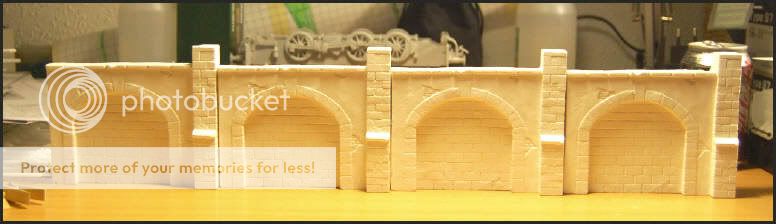
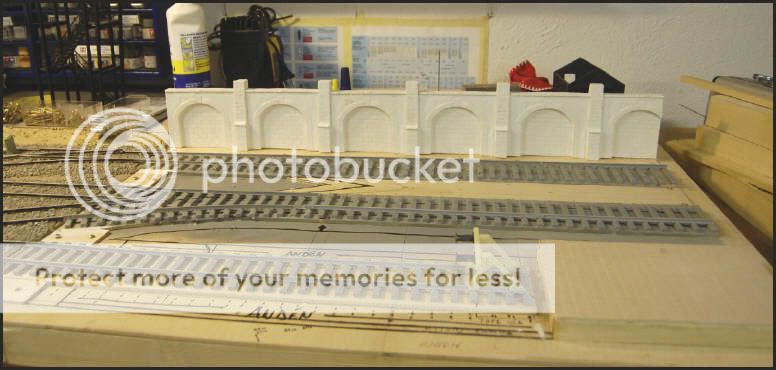
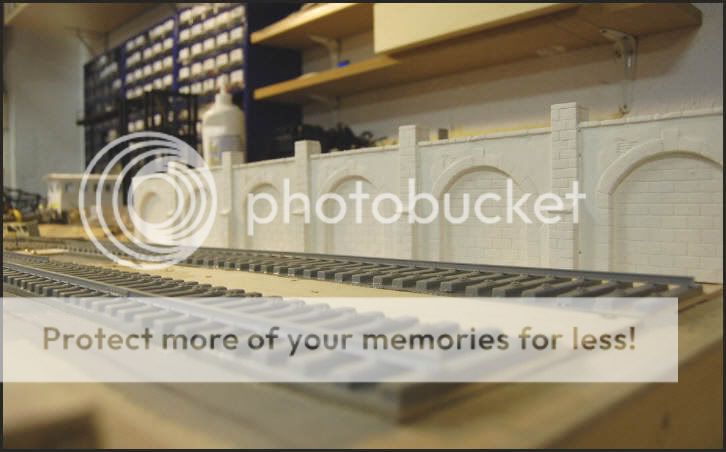
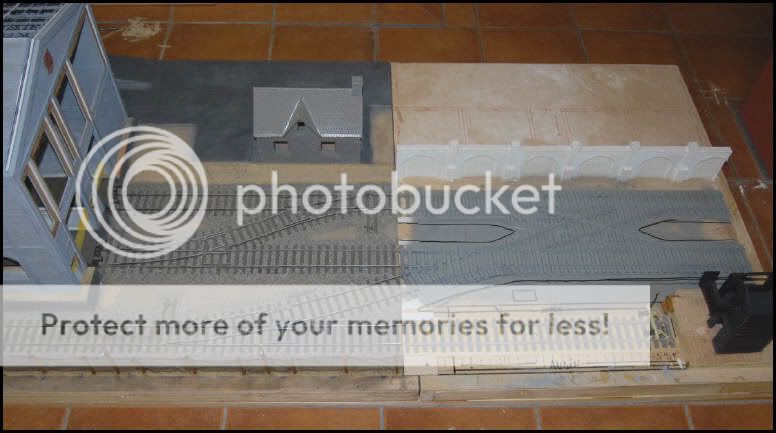
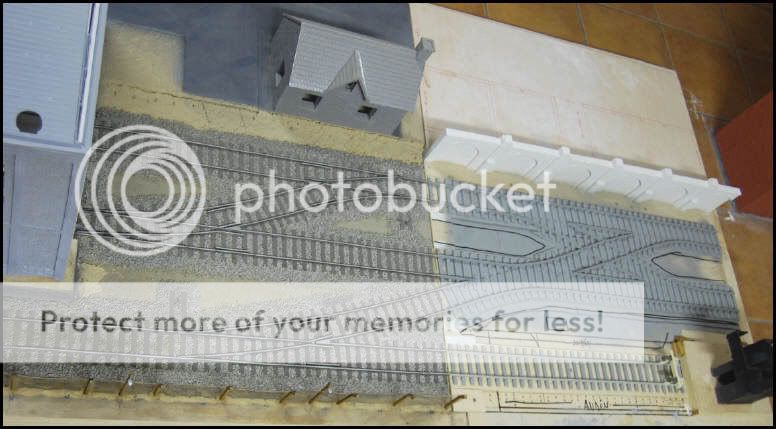
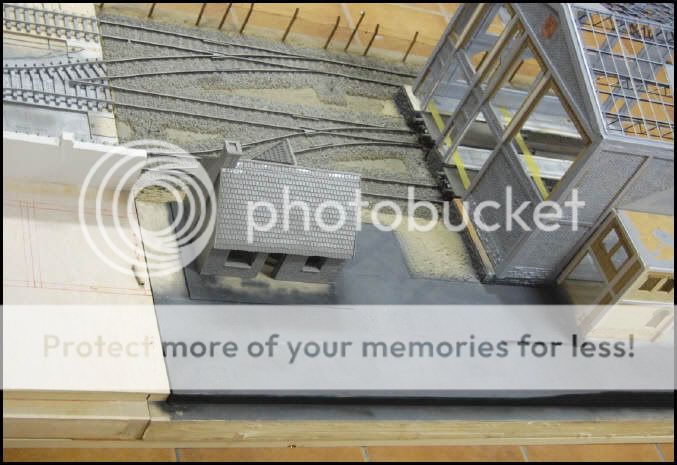
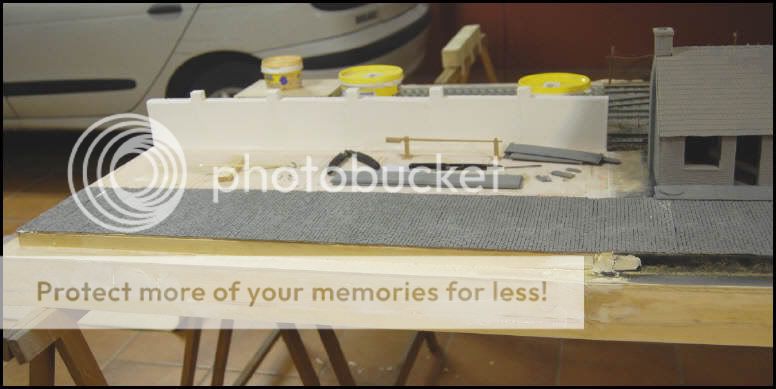
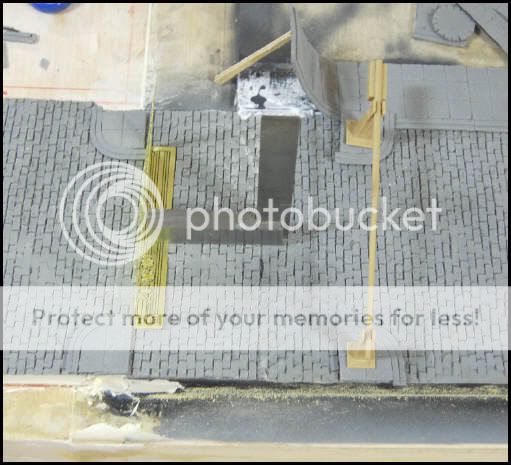
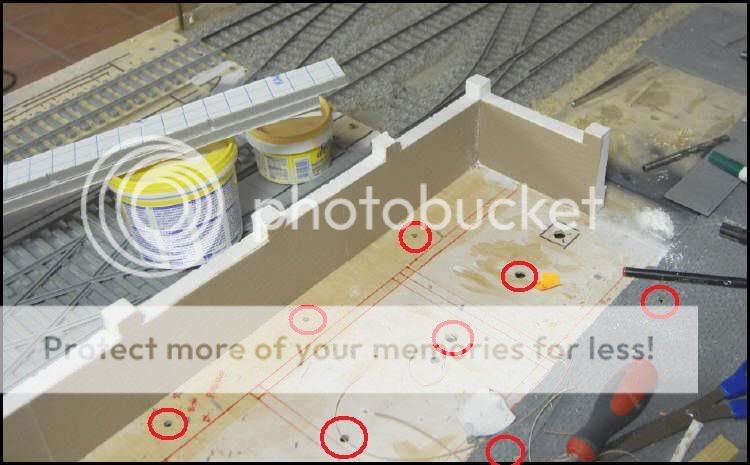
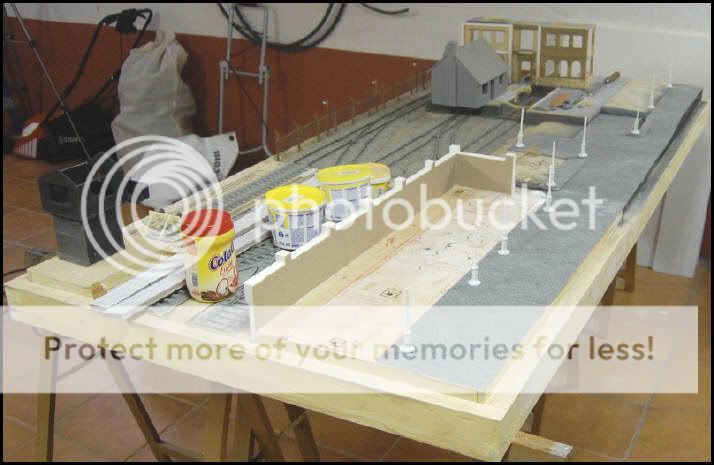
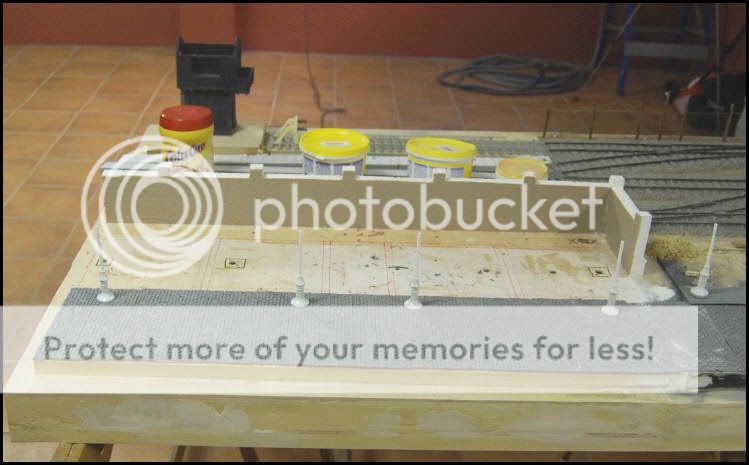
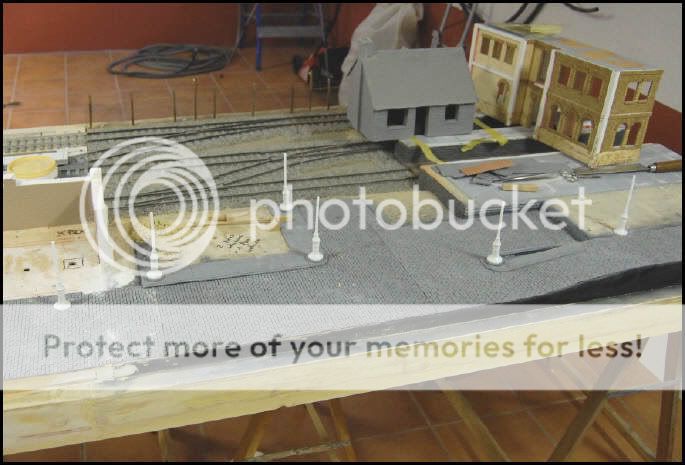
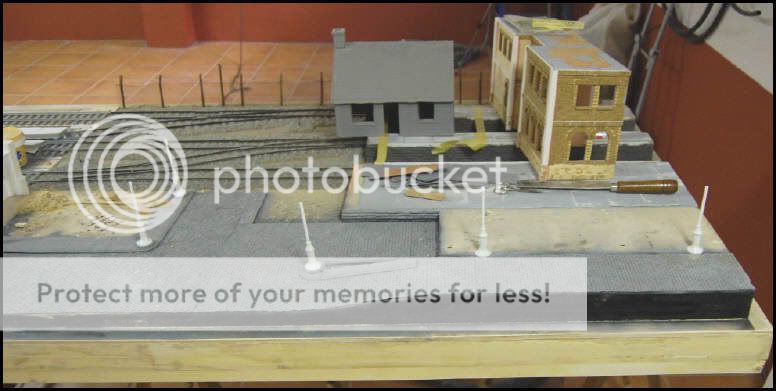
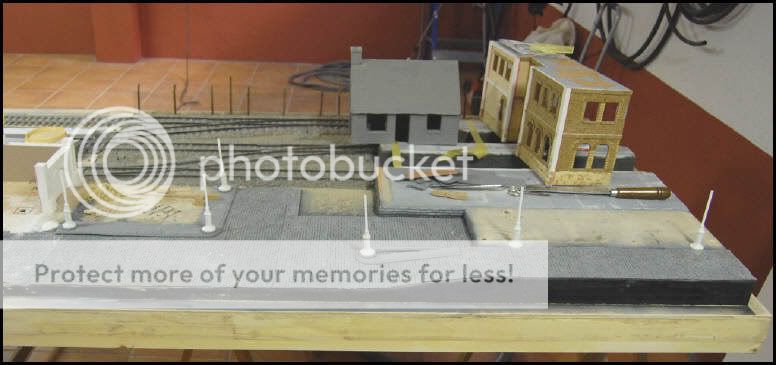
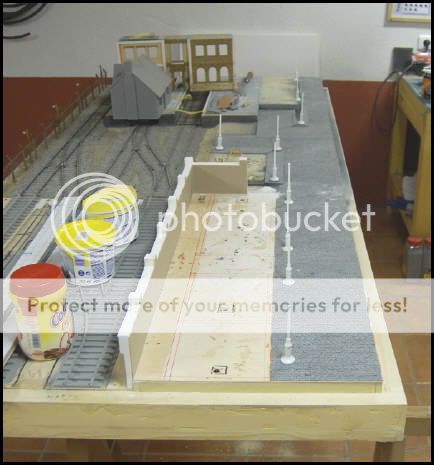
While I continue squeezing me the head, with the theme of the ways to obtain an acceptable result, I have placed the wall of separation of the railway precinct and the urban zone. I have united the pieces and I have lowered the surpluses of plaster. In the unions there I am employee white putty for be not inharmonious with the color base. One of the blocks was trimmed (the located to the right) so that could fit in the diorama, although this helps me to add something of tension and irregularity in the composition.
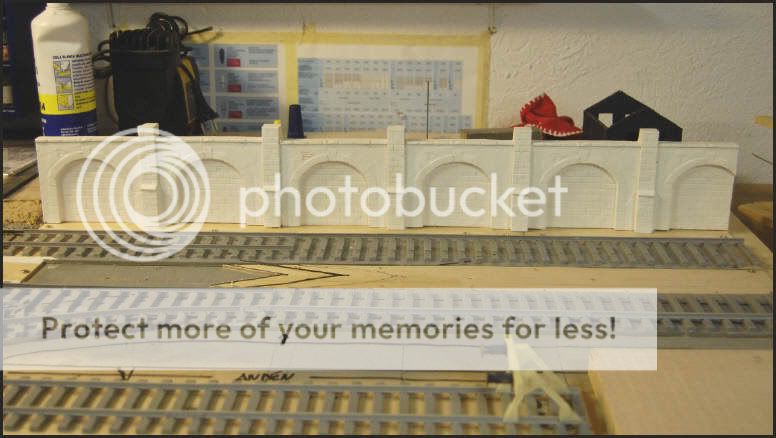

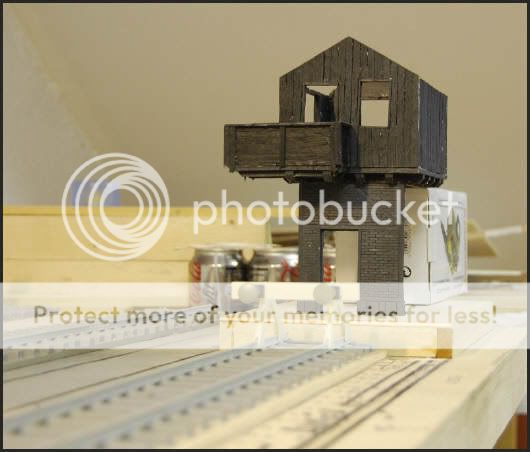
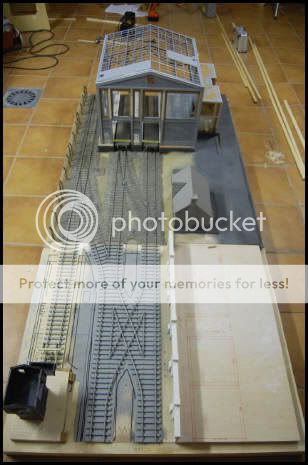
And on the other hand, I have carried out the base of the railway control tower. By means of ribbons of wood I have done the retaining walls, and with plywood I have done the base. Besides, the base has been quartered by means of quadrants to simulate the floor...


I expect that you like.
A strong hug.
Yago.
________
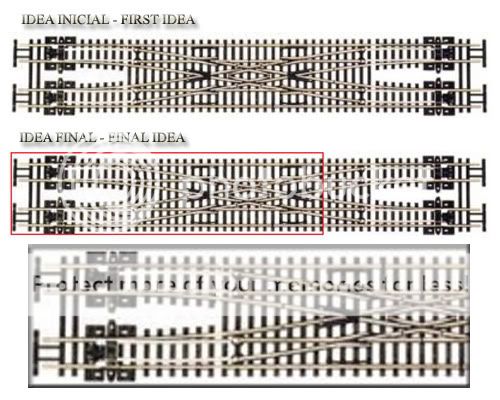
With the arrival of the sections of DRAGON Railways (that finally I obtained in eBay), I have begun with the scissor crossing. Here I post some pictures...

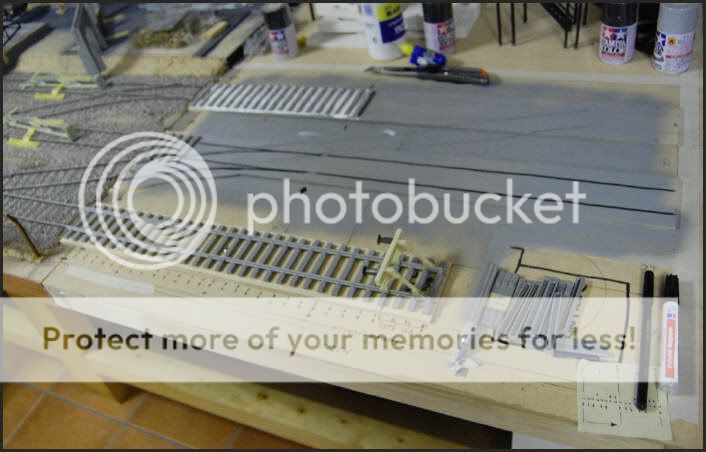
And here I show a caliper of wide of railway that I have done me to go placing and adjusting the rails.
I have performed him four positions to have various margins among axes.
I expect that you like.
Yago.
_________
Hi kids!
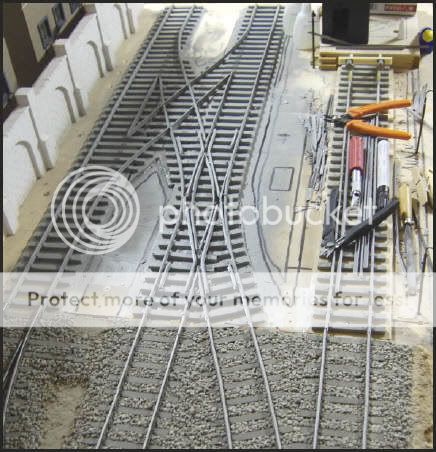
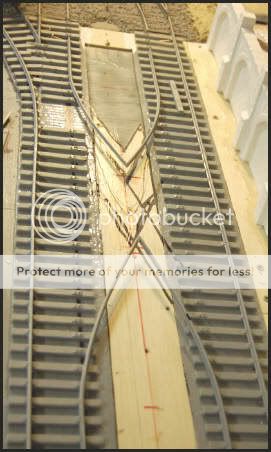
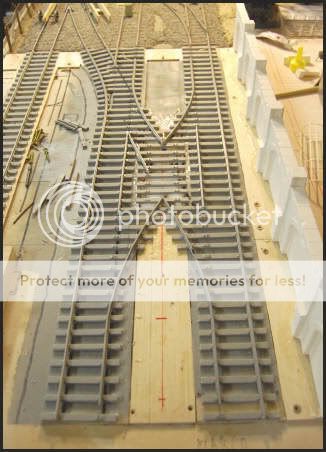
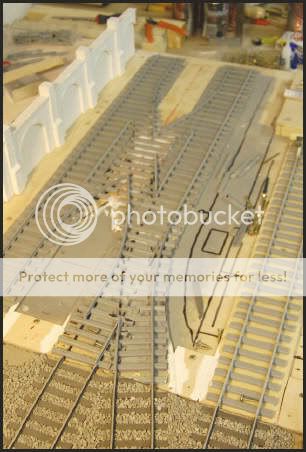
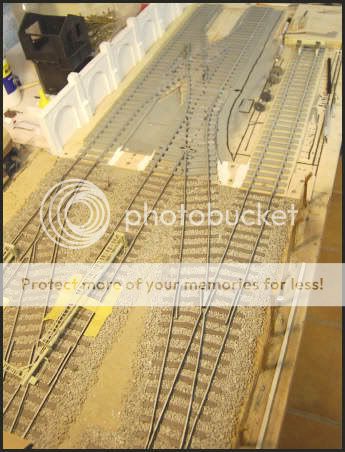
As I have commented ultimately, the summer causes to me that I'm working more and hard, is somewhat strange. But you have the test with the following pictures. I have begun to put the rails of the central part of the scissor crossing. Previously I have placed the railways in that zone...
I expect that you like.
A strong hug.
Yago.
________
Hi kids!
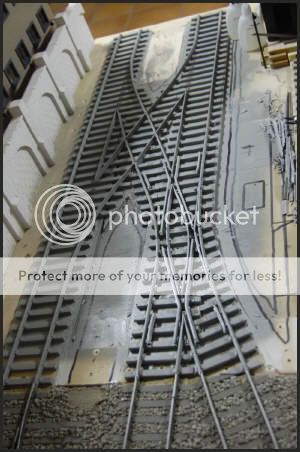
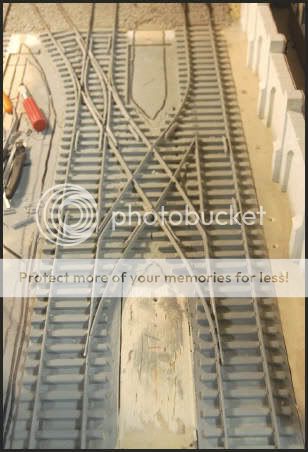
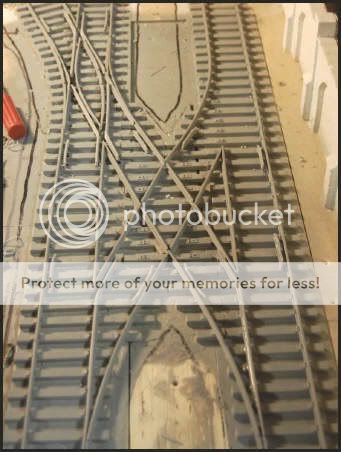
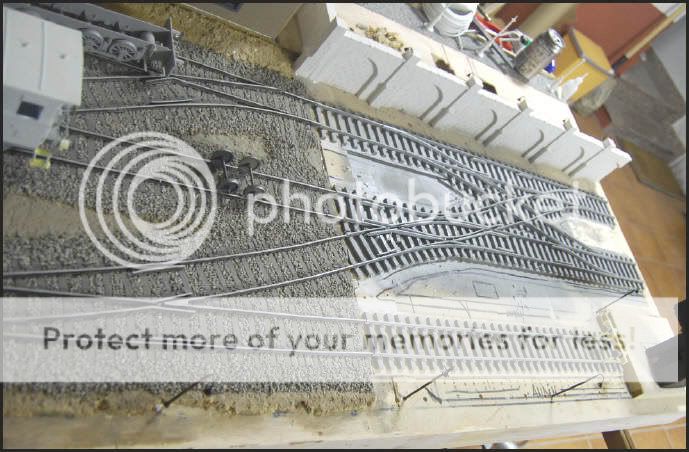
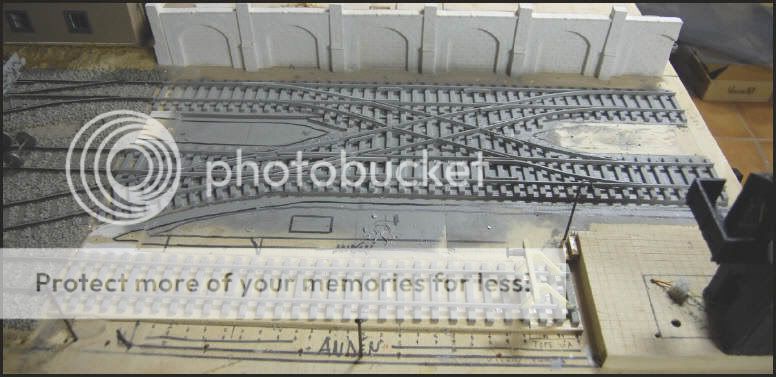
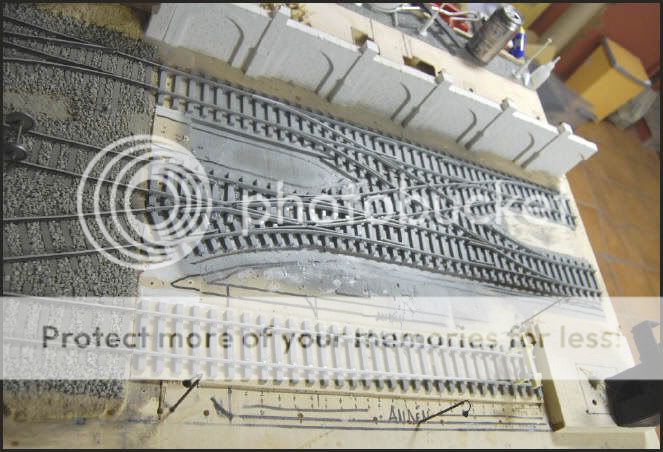
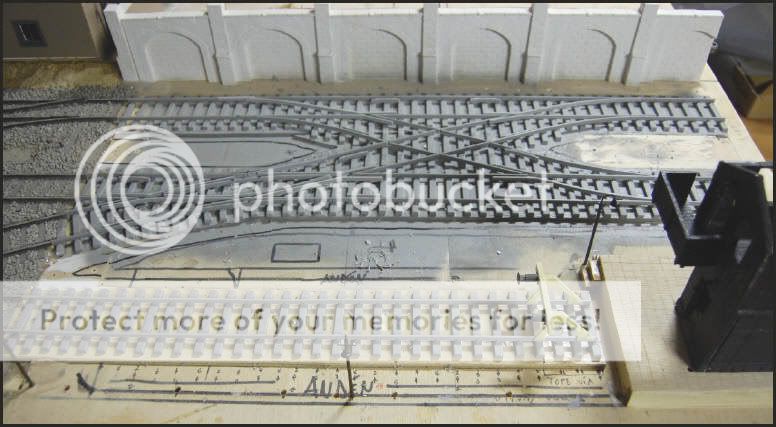
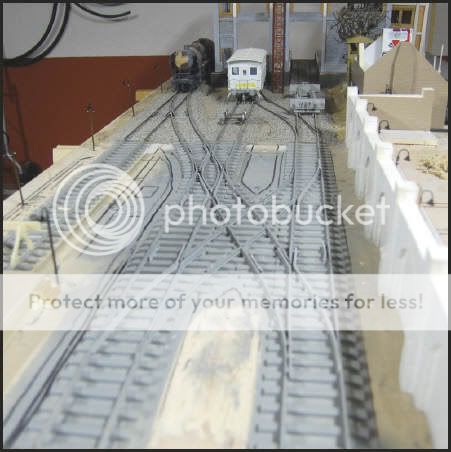
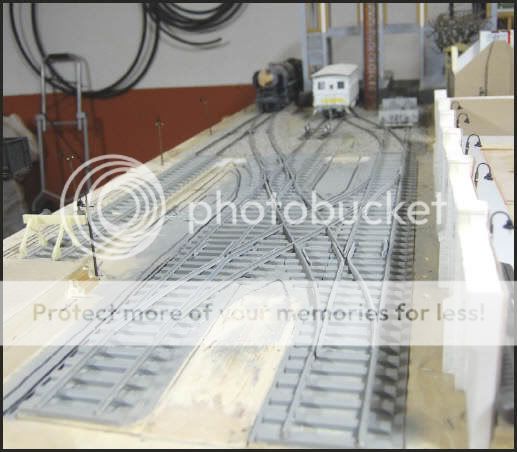
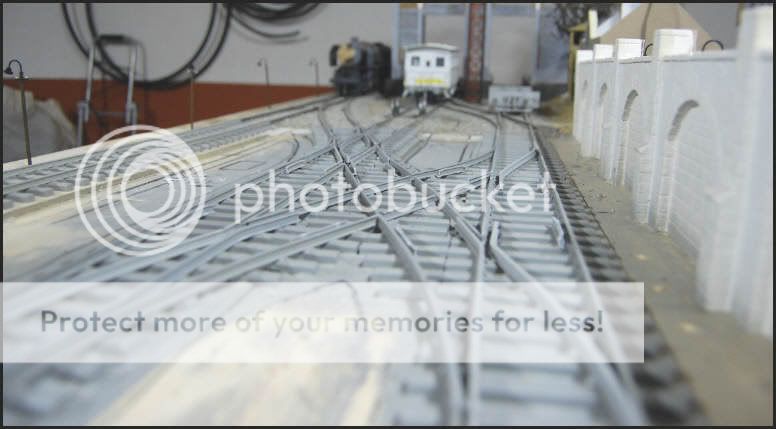
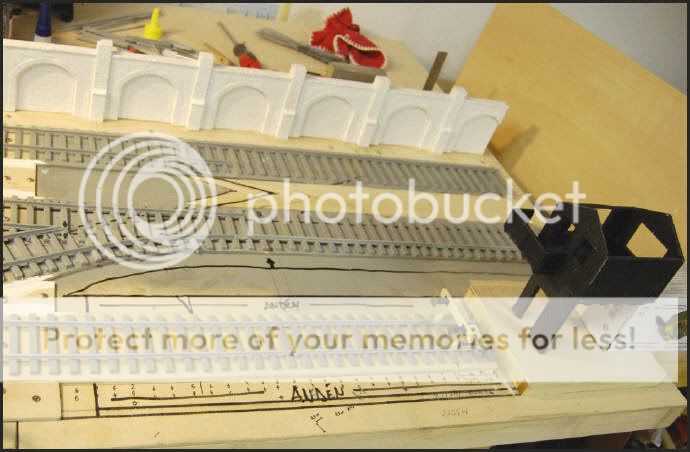
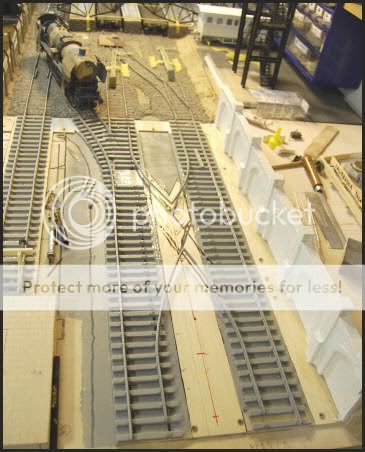
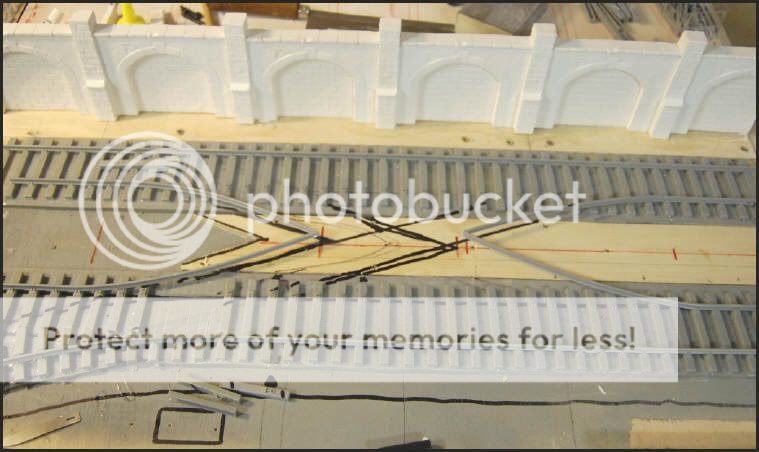
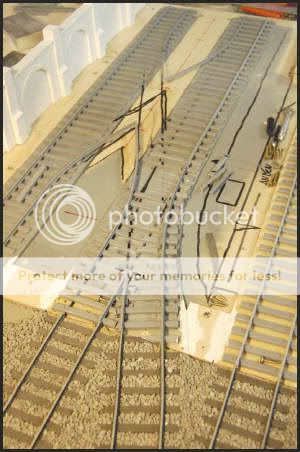
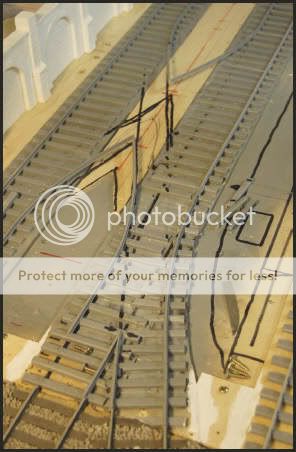
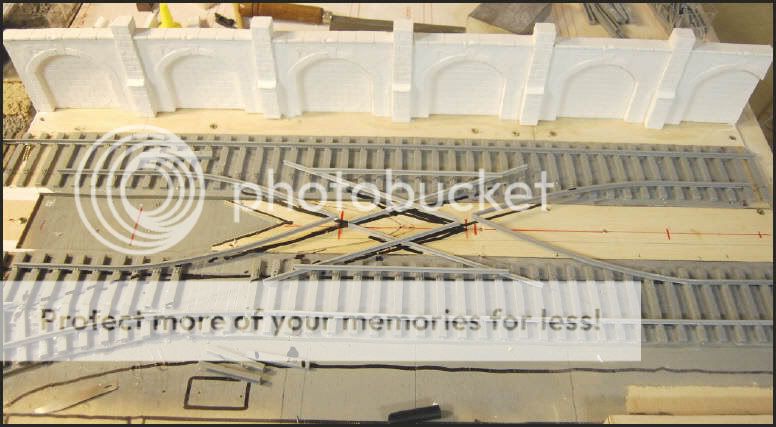
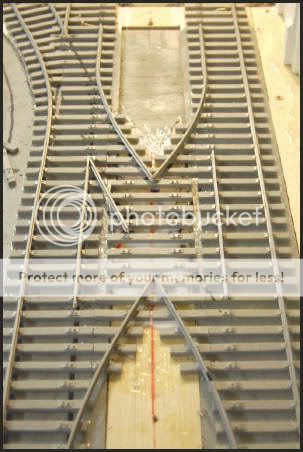
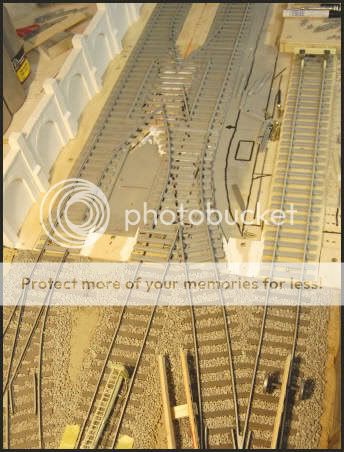
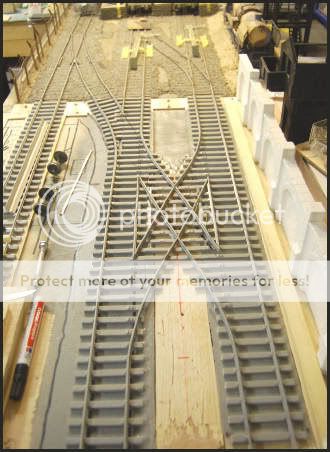
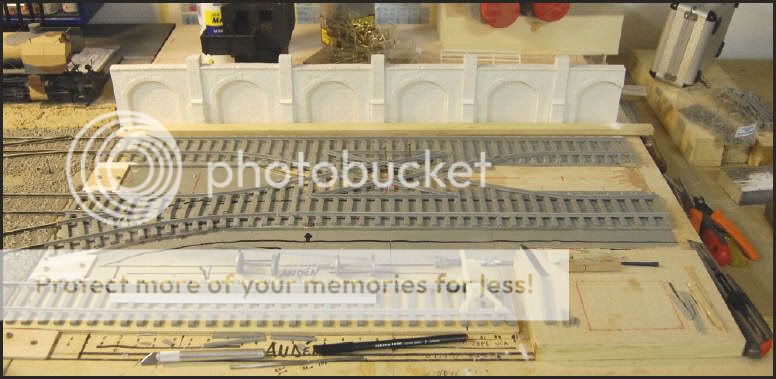
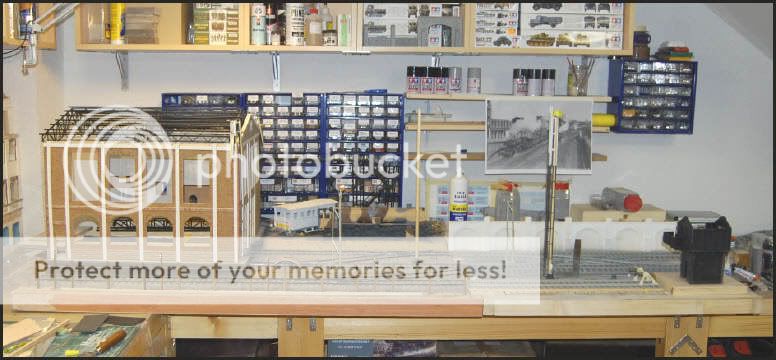
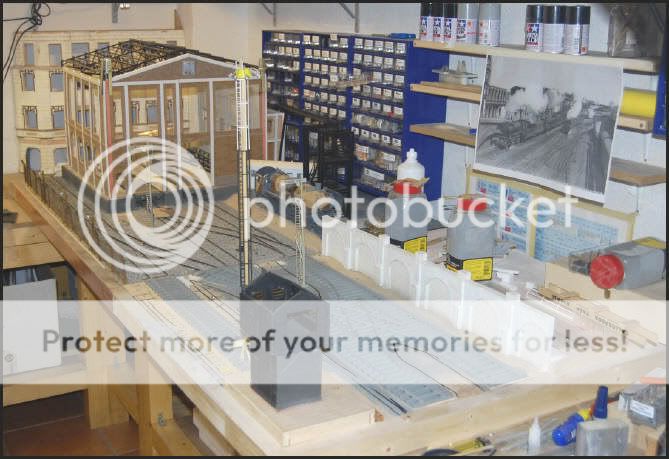
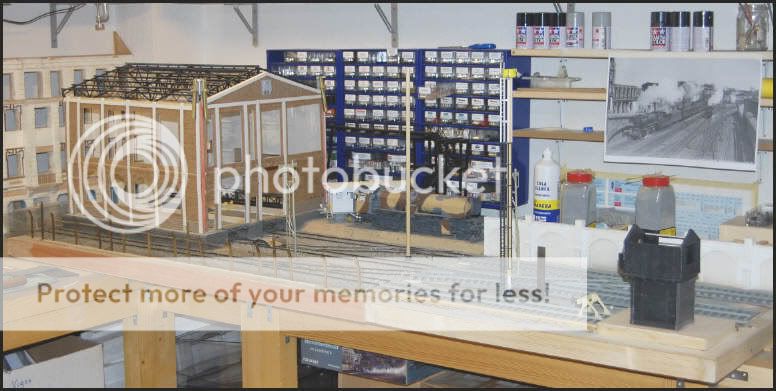
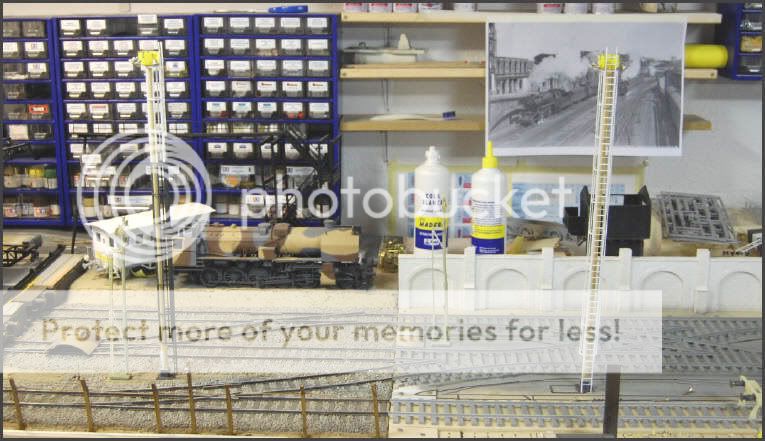
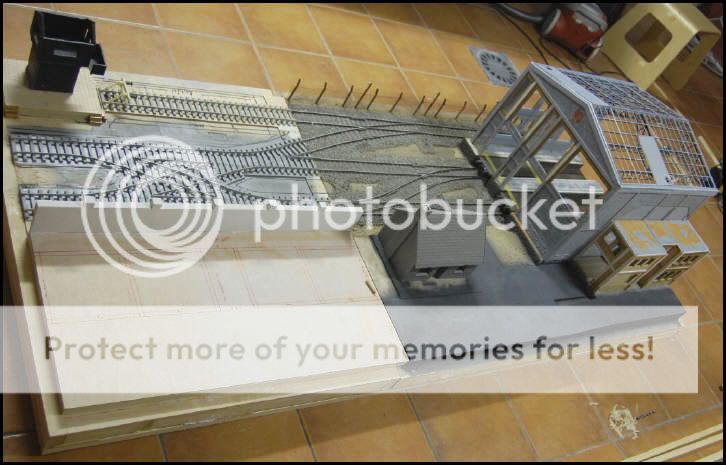
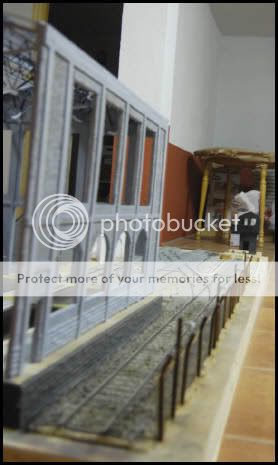
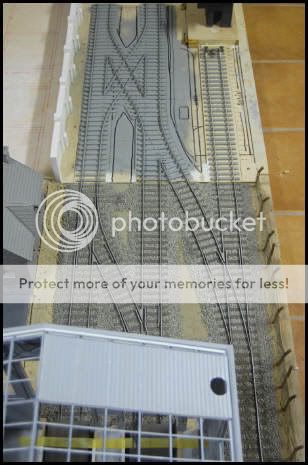
Received part of the orders of railways of DRAGON, I have managed to finish the structure of the knot or scissor crossing. Only it will remain to do the mechanisms of bypass and the reinforcements of the crossings and bypasses. Here I post some photos to see the process of assembly...

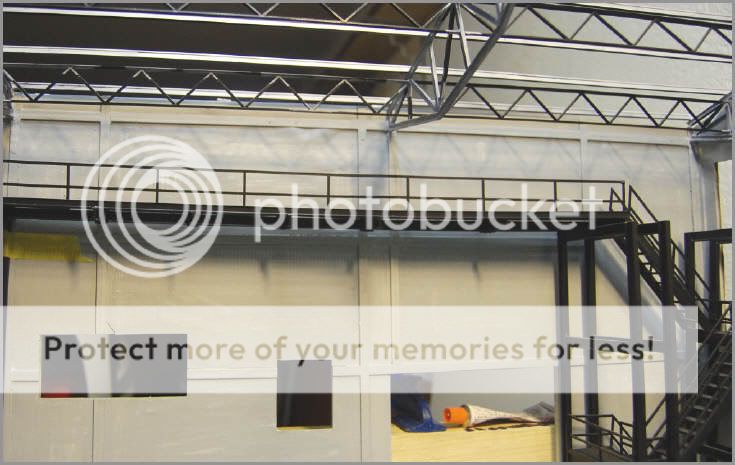
SEE THE DETAIL OF THE BLACK & WHITE PHOTO THAT THERE IS IN THE UPPER PART OF THIS IMAGE
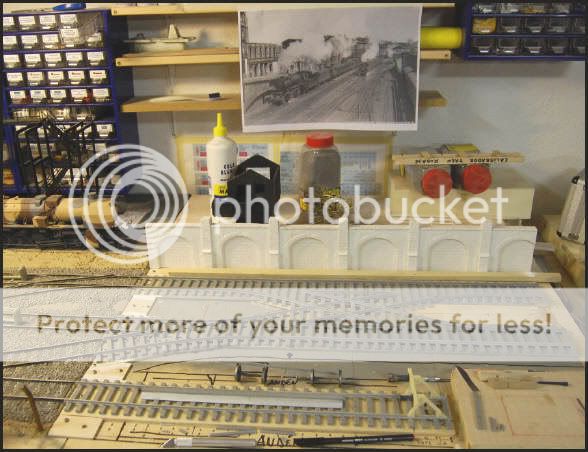
The photo and the diorama have a great similarity, before scissor crossing appears one bypass.
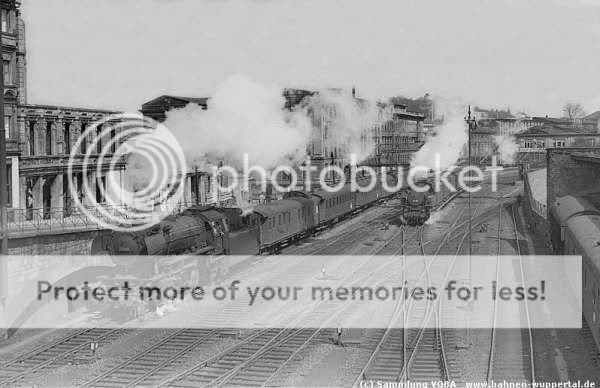
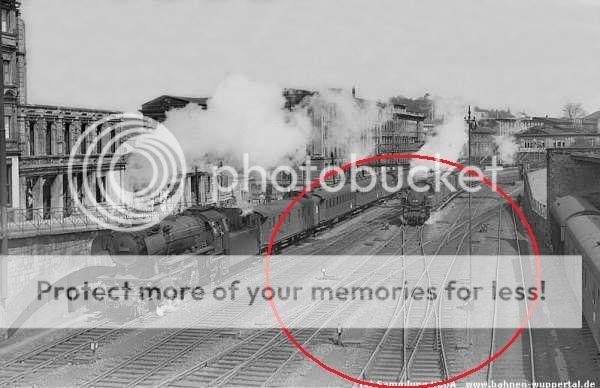
It has served me as template, to a certain extent, to see the plan that should continue.

I expect that you like.
A strong hug.
Yago.
________
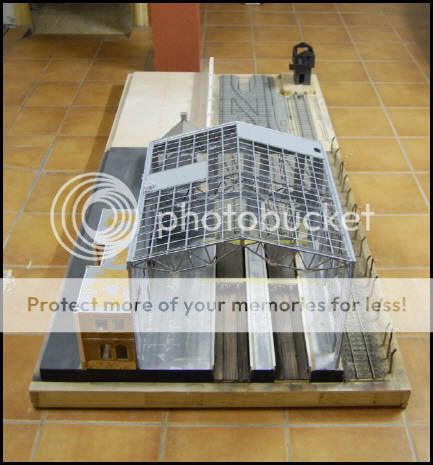
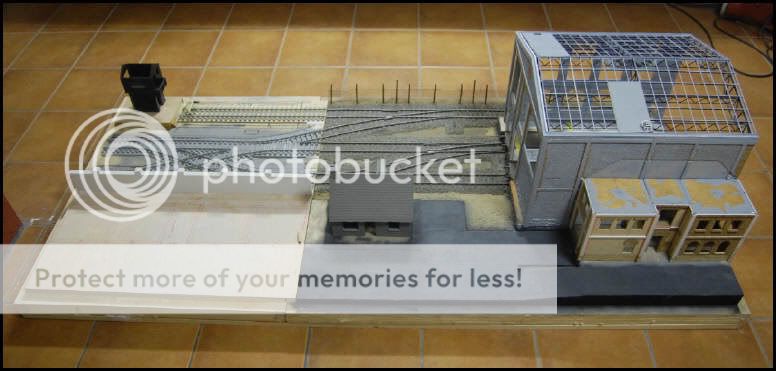
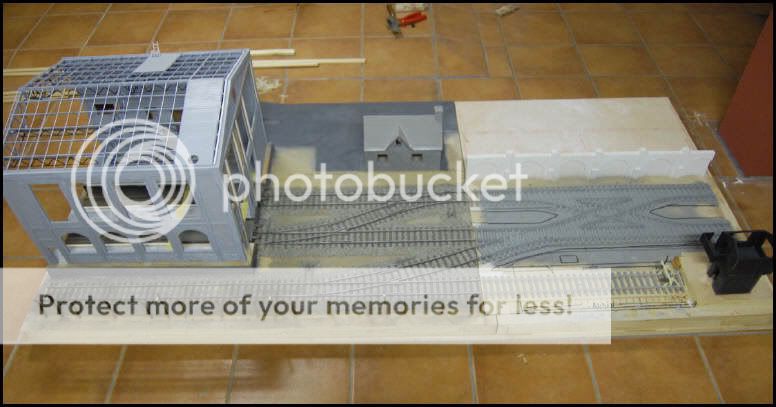
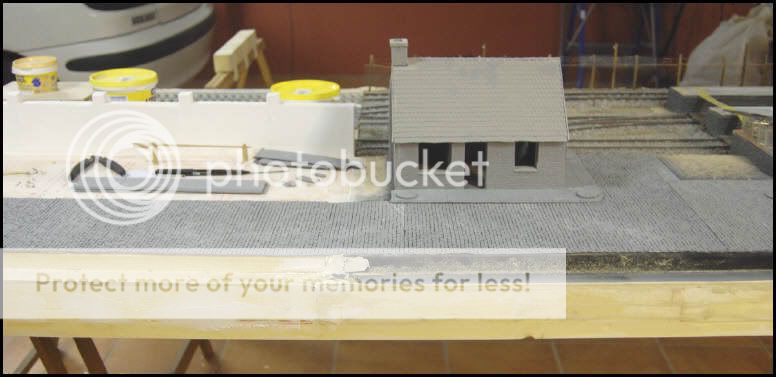
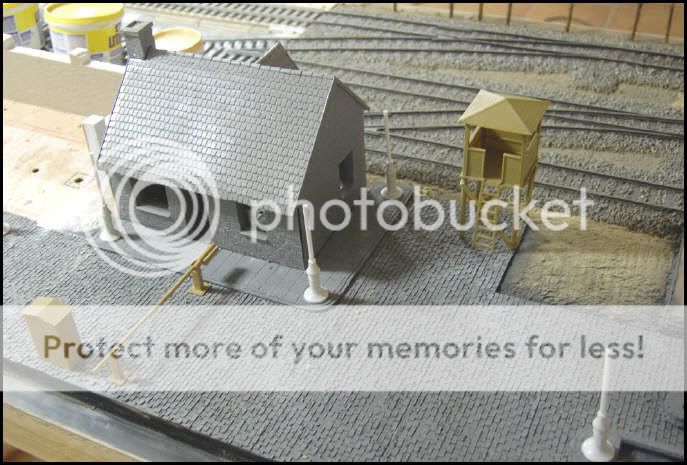
Time ago that I did ¡n't mount the diorama with the principal building and did some photos to be able to appreciate the assembly.
I expect that you like.
A strong hug.
See you soon kids.
Yago.
______
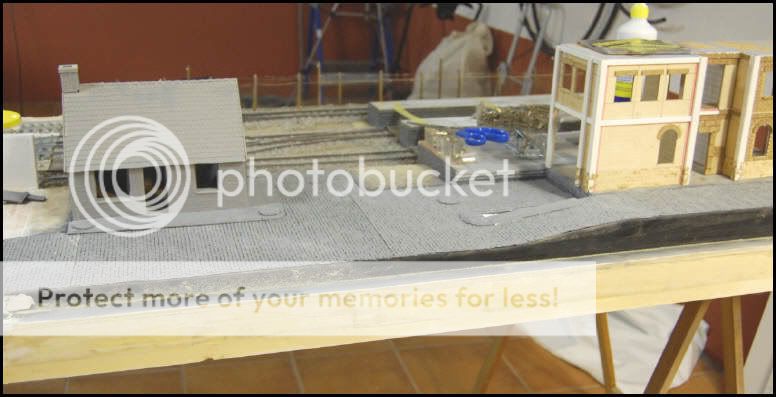
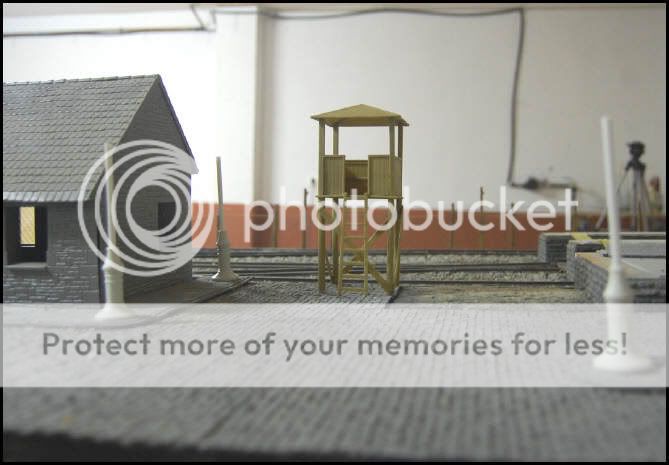
More photos:
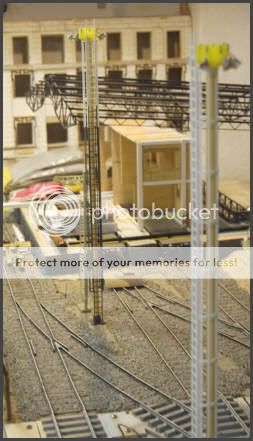
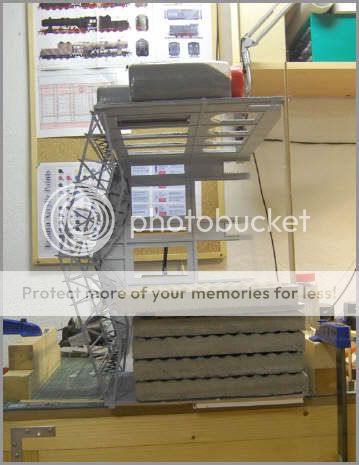
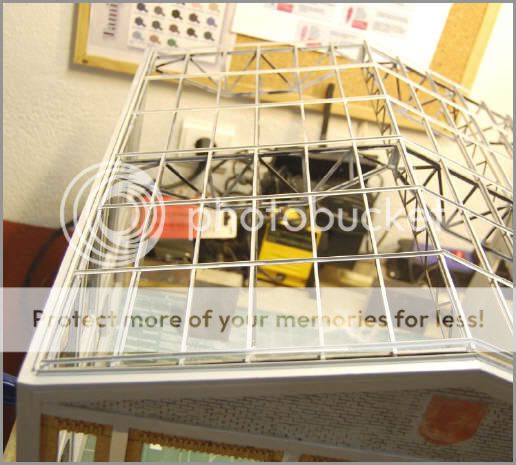
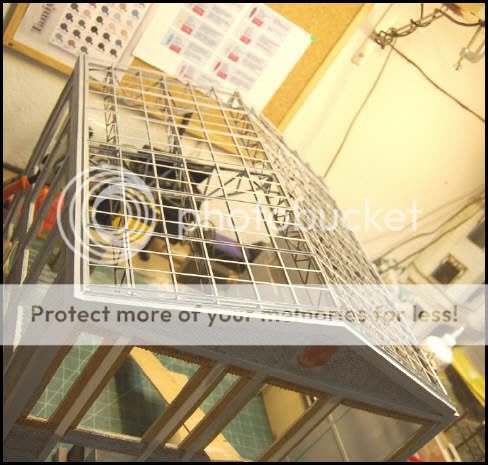
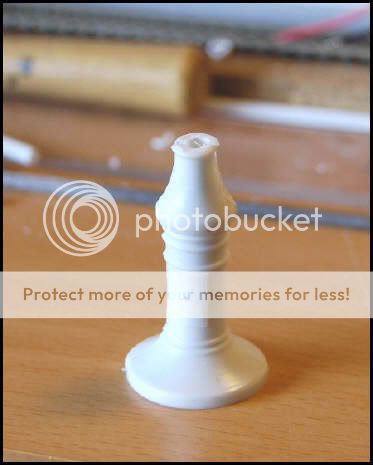
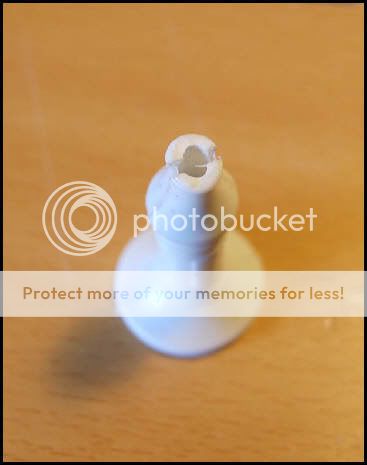
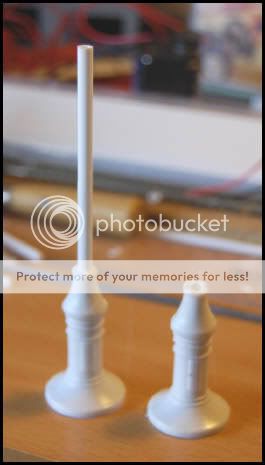
For second lighting tower...

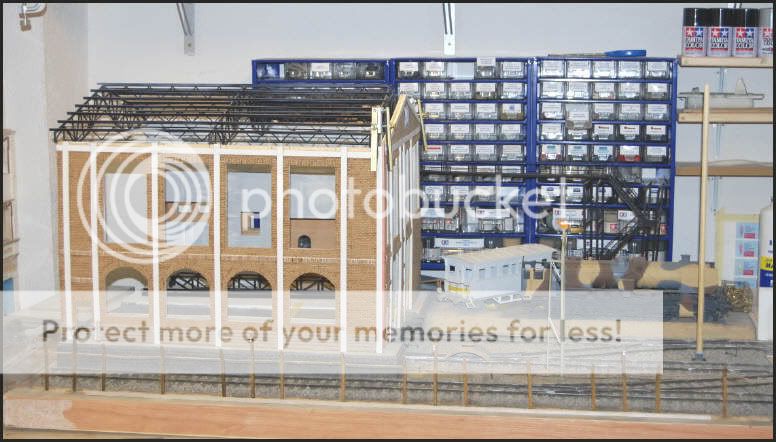
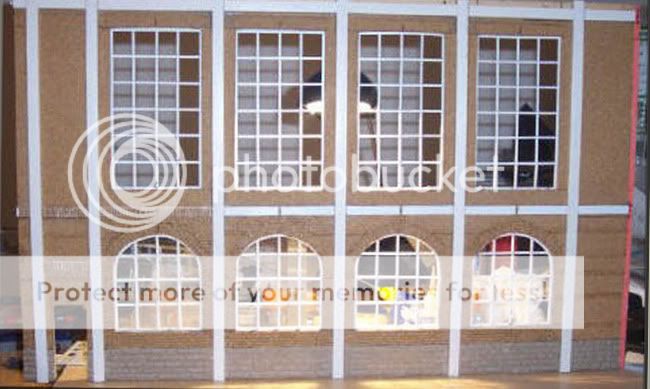
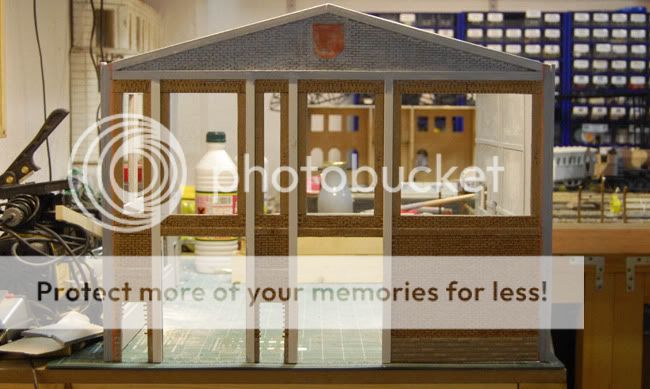
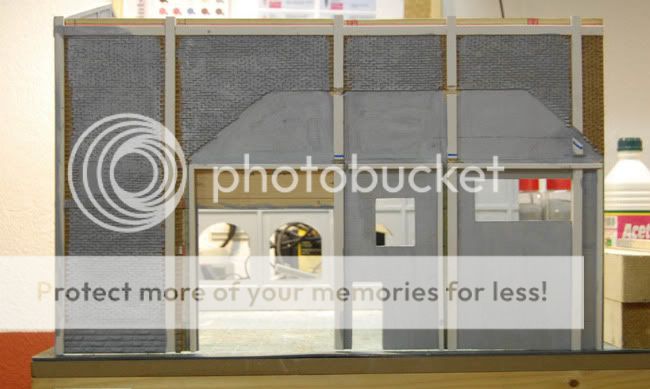
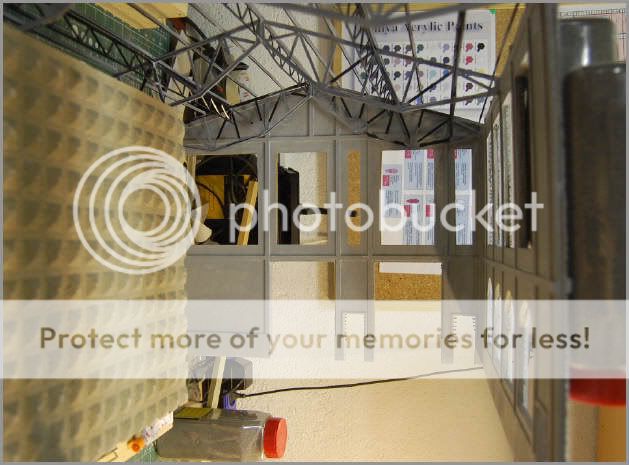
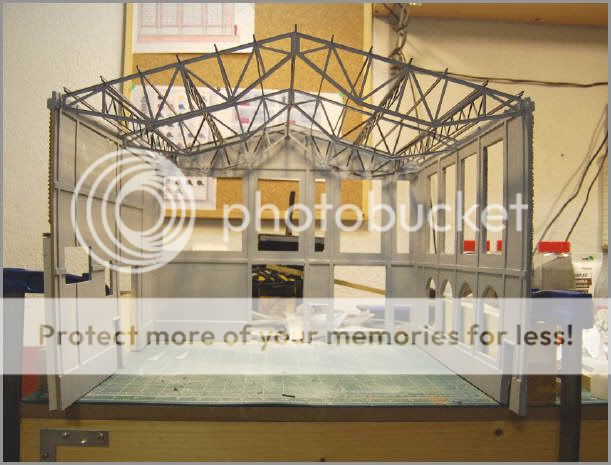
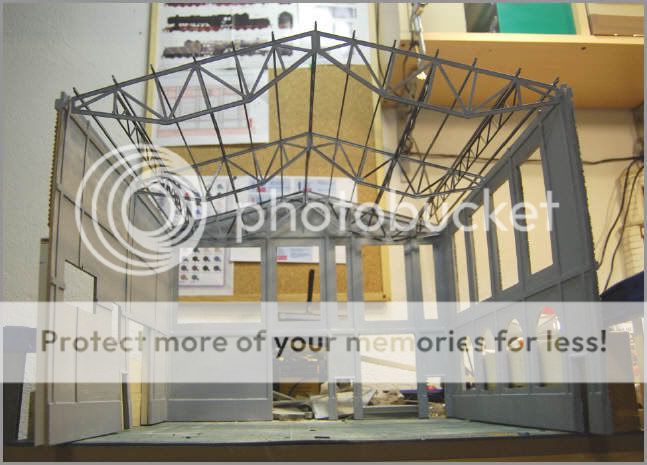
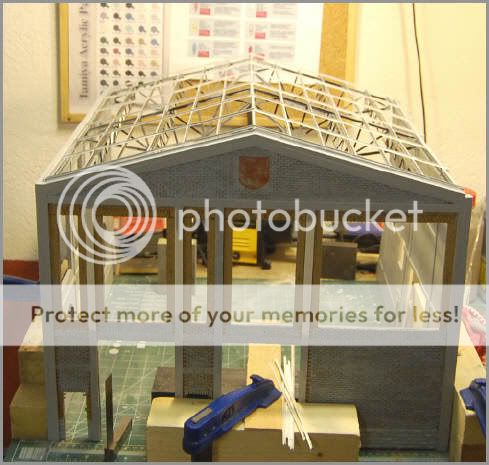
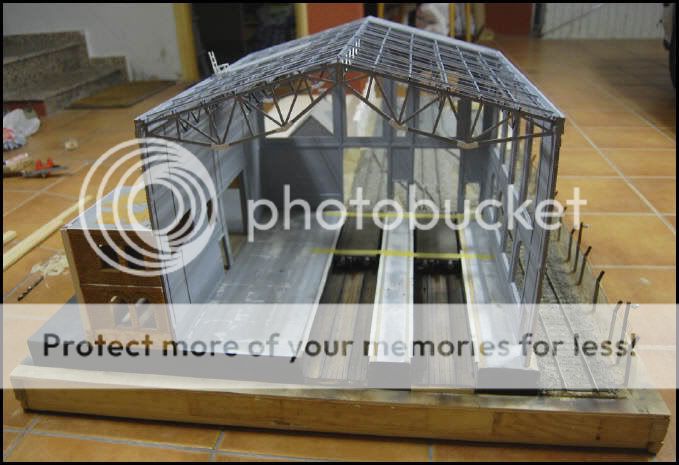
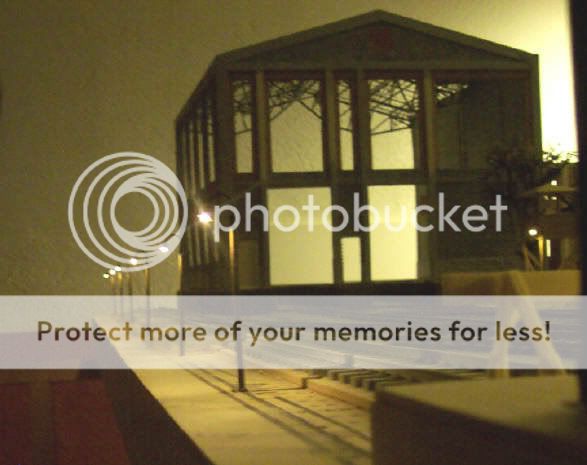
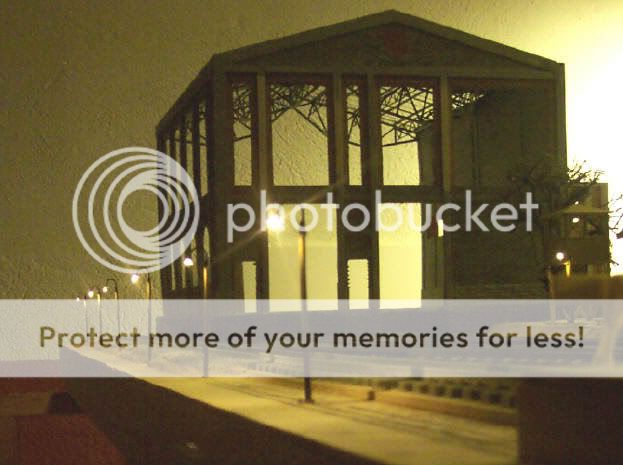
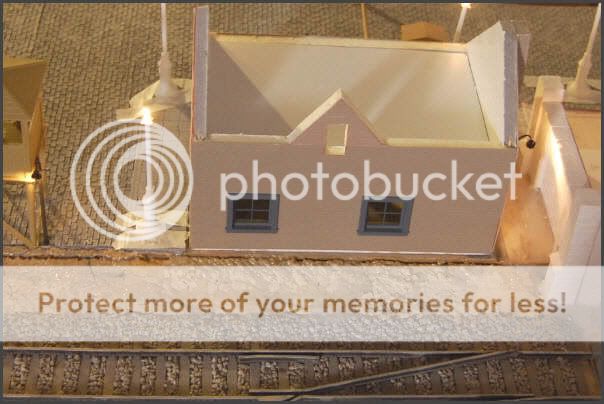
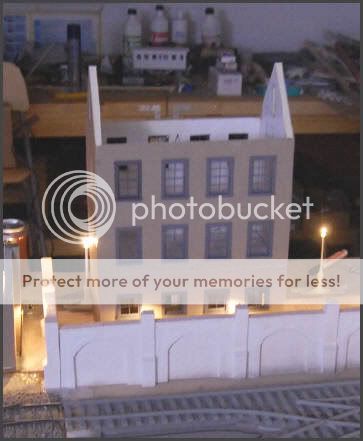
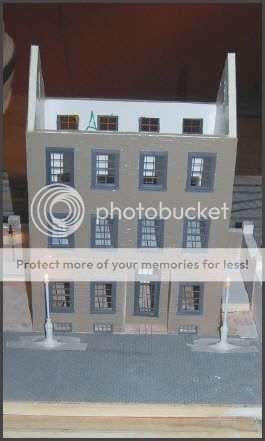
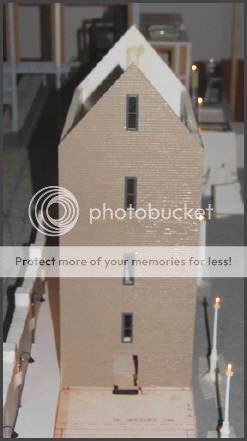
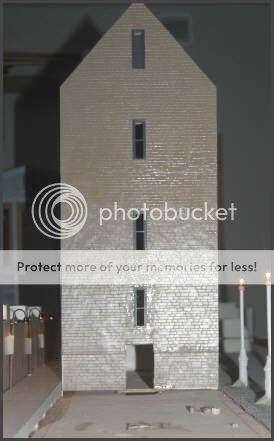
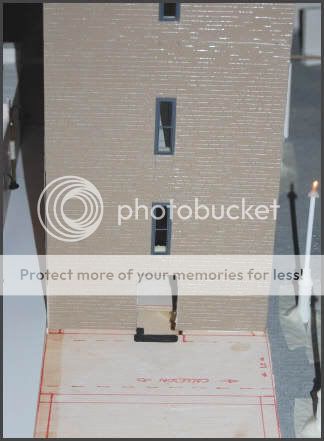
Main building...
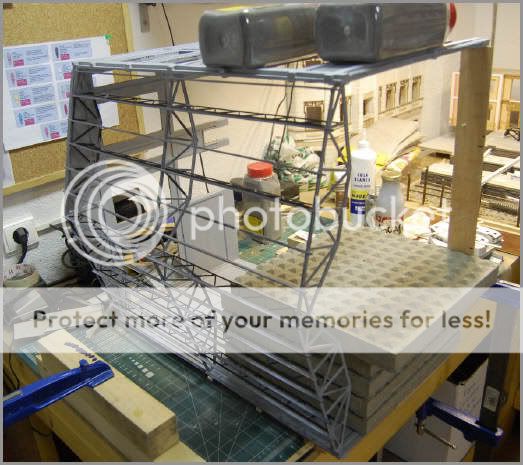
Finished second lighting tower...

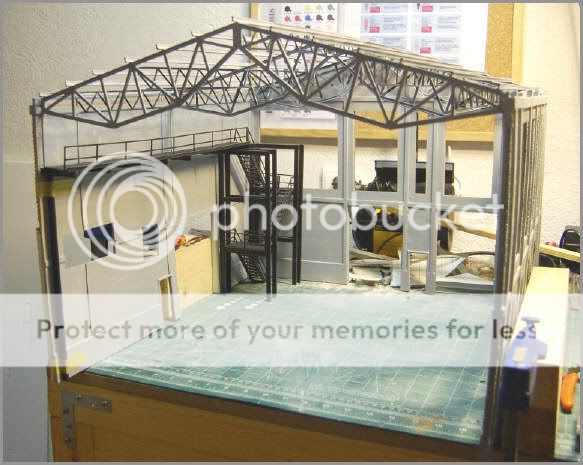
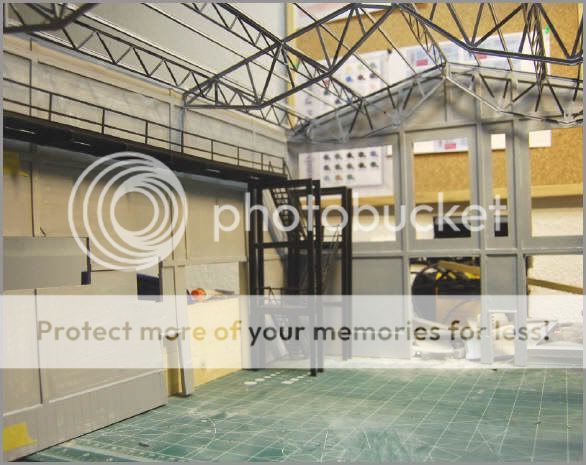
Main buildng again...
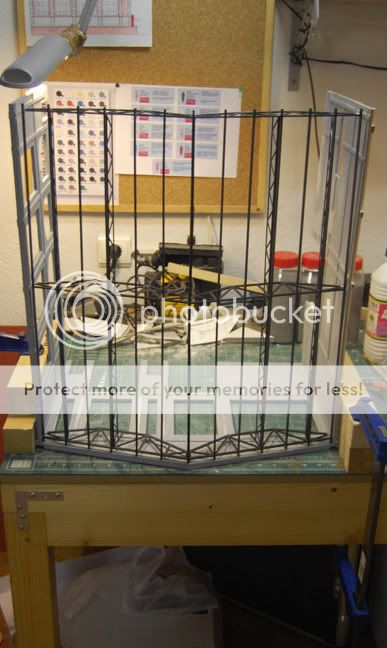
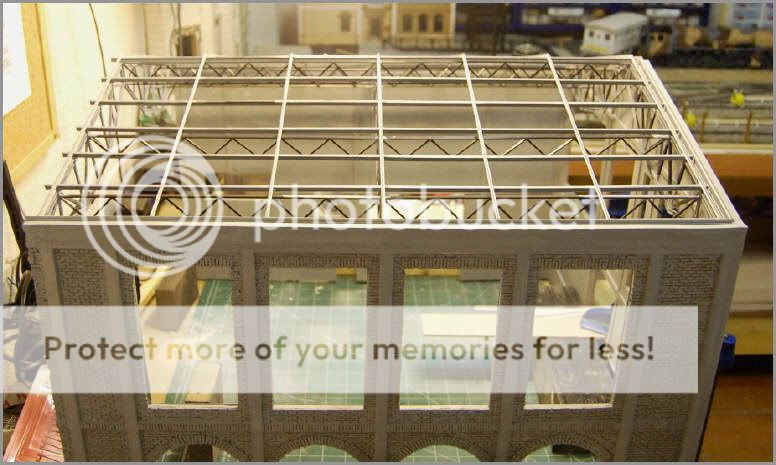
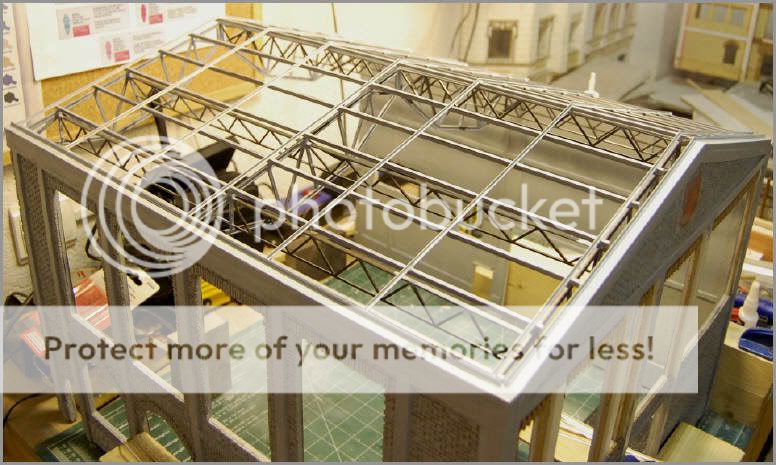
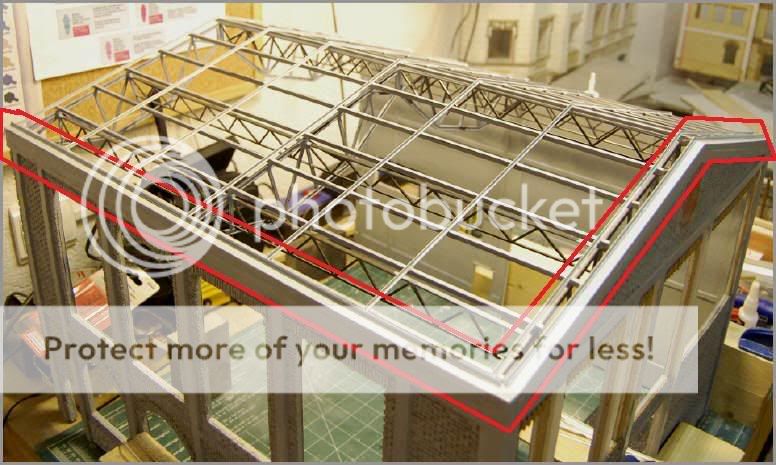
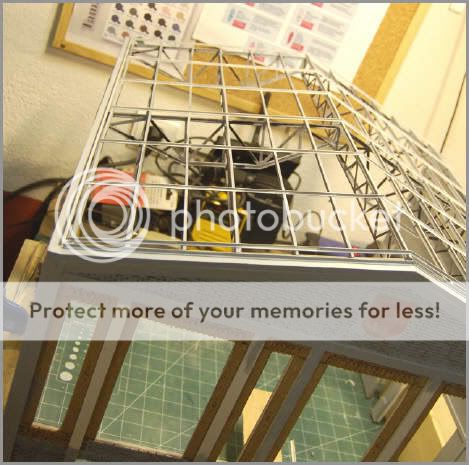
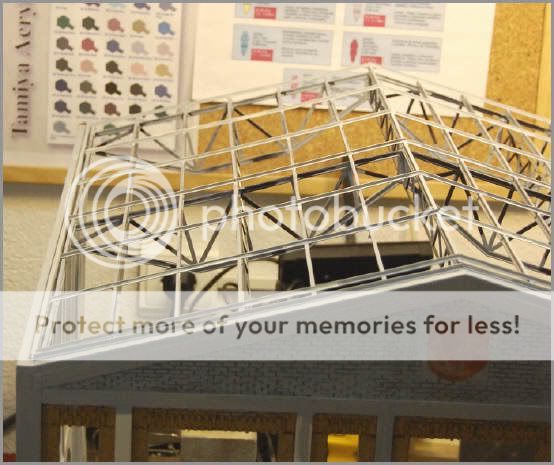
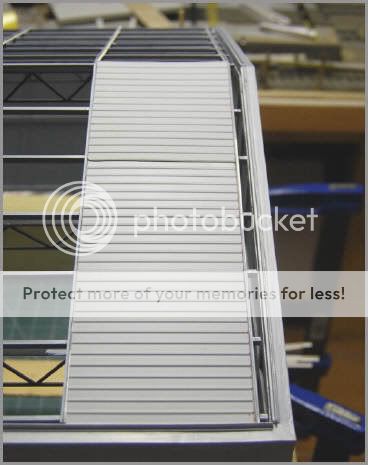
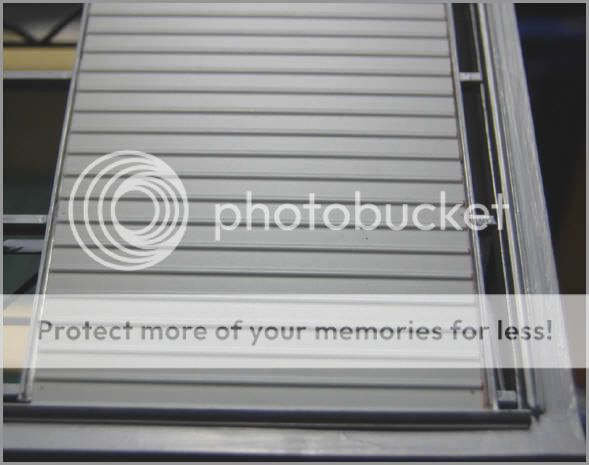
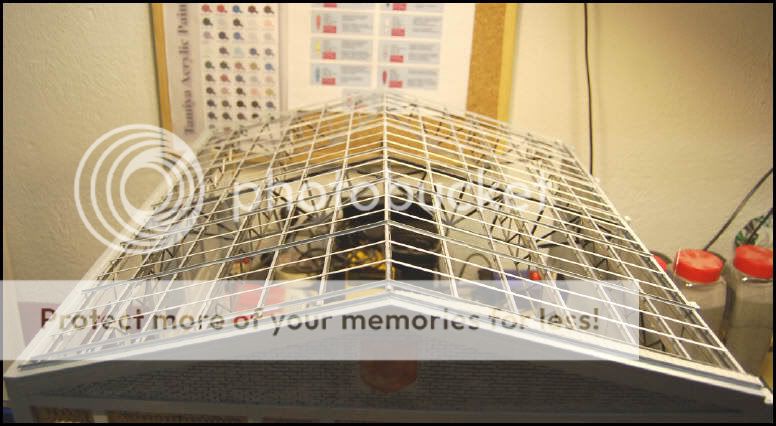
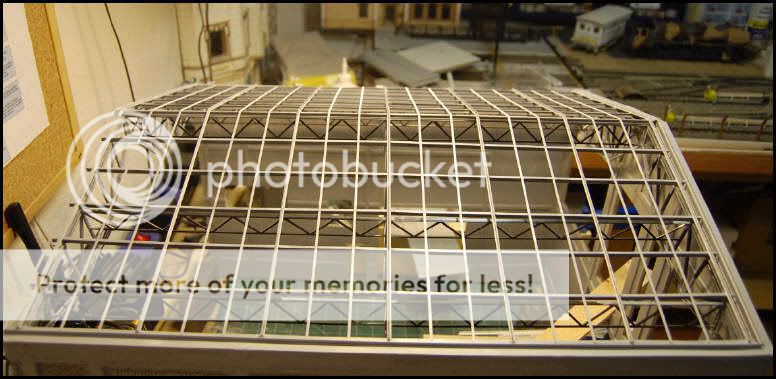
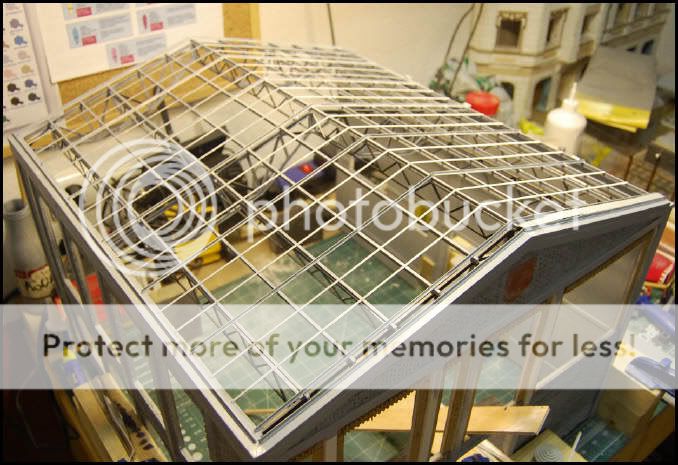
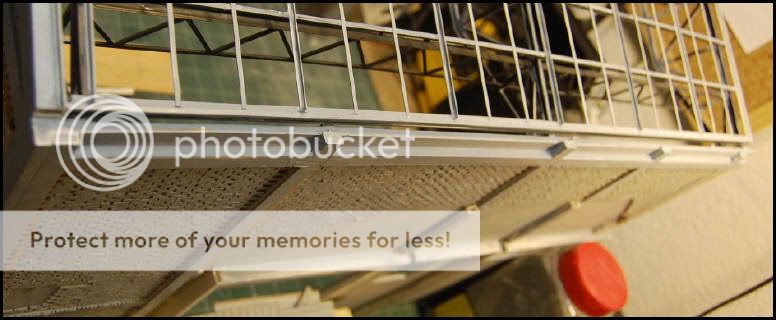
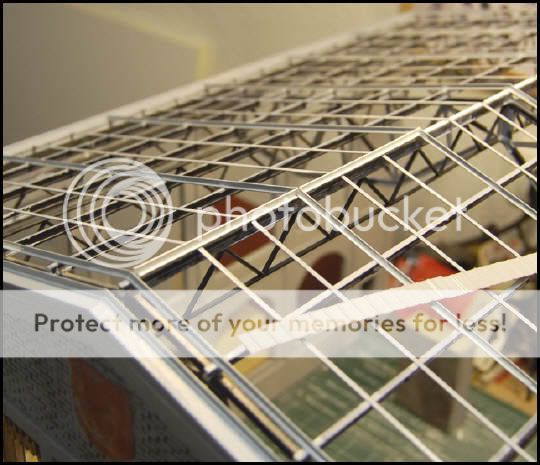
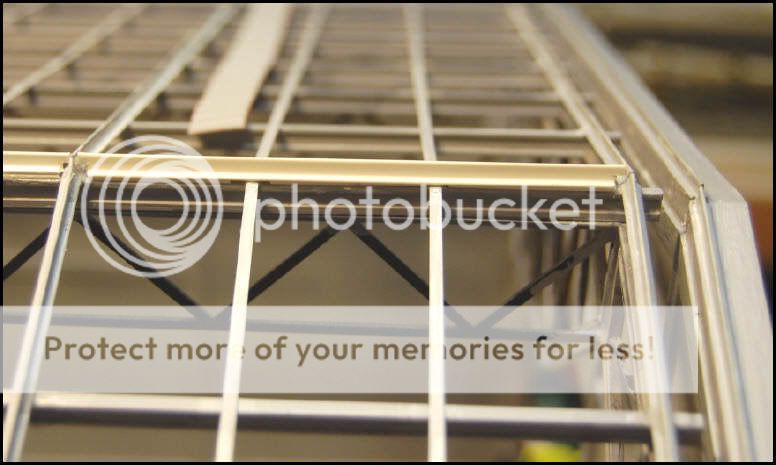
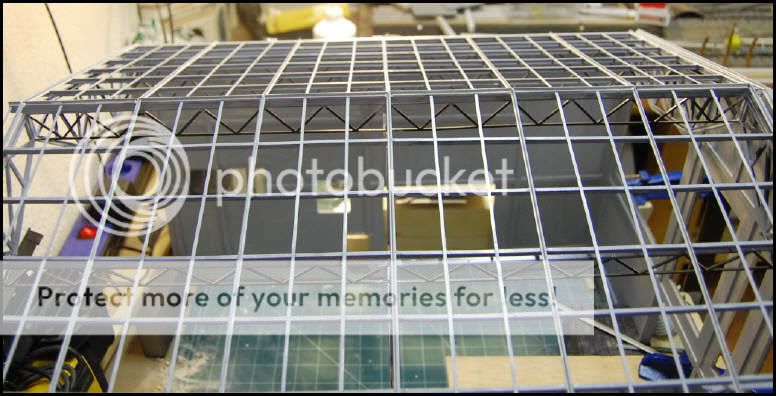
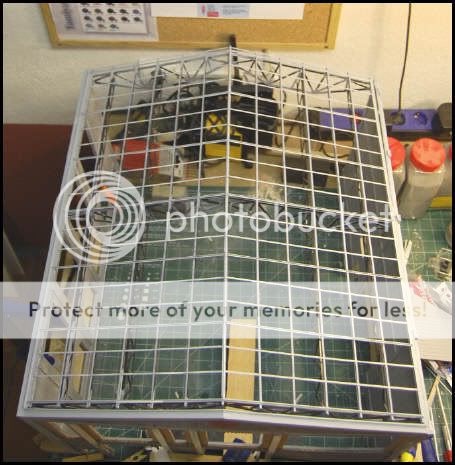
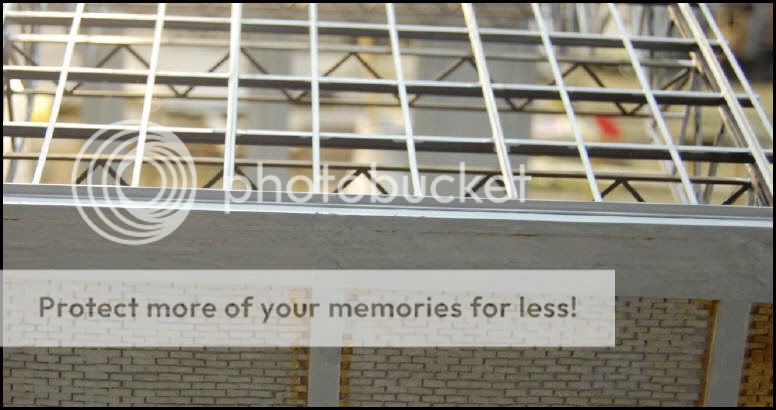
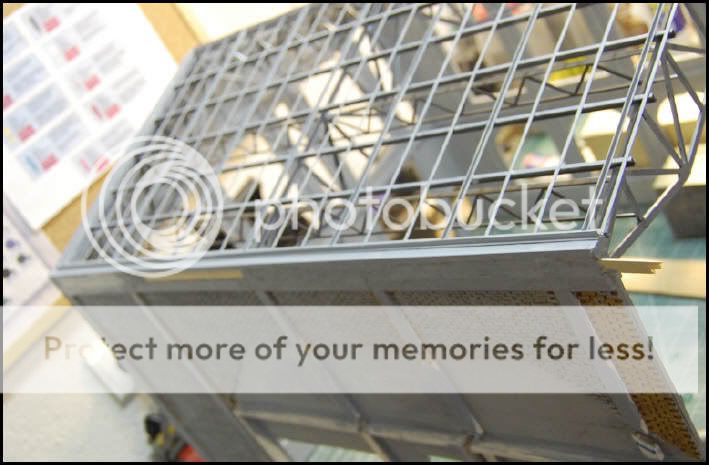
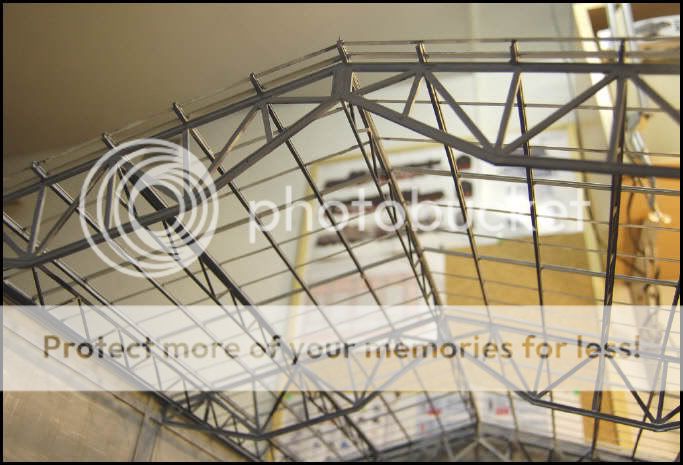
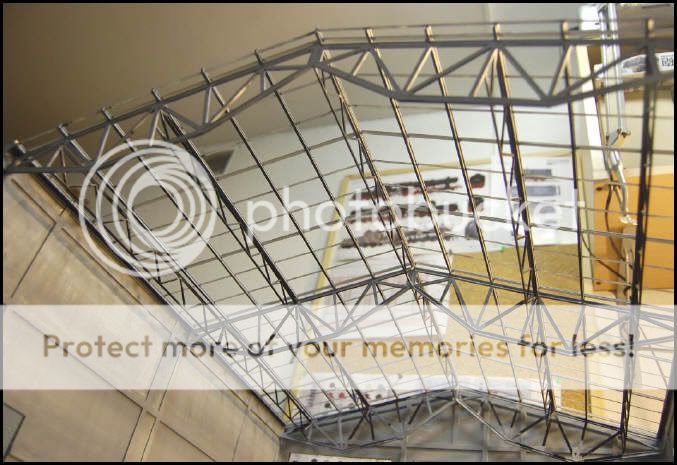
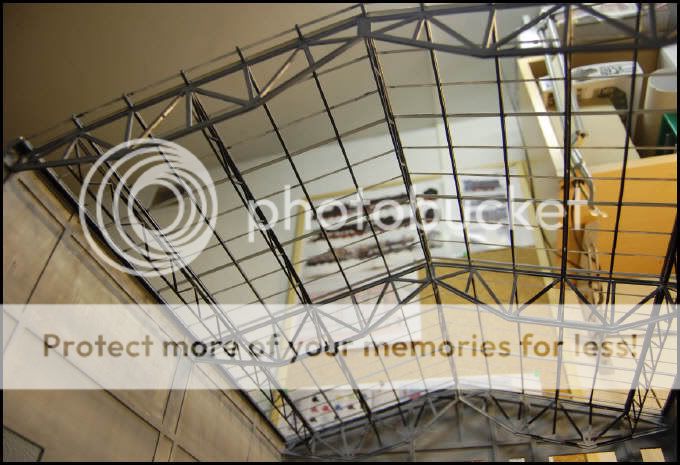
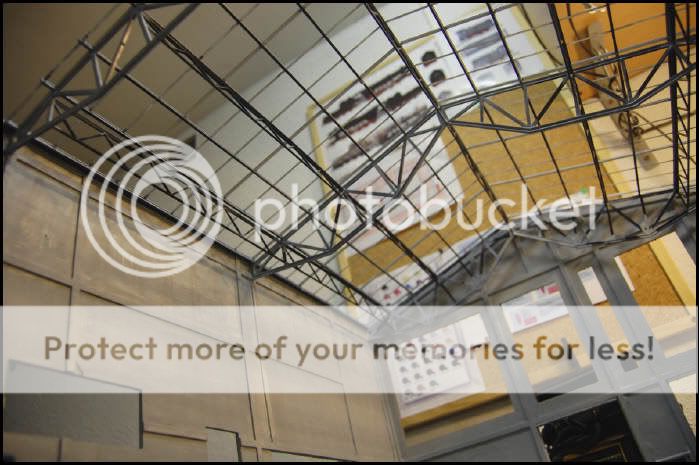
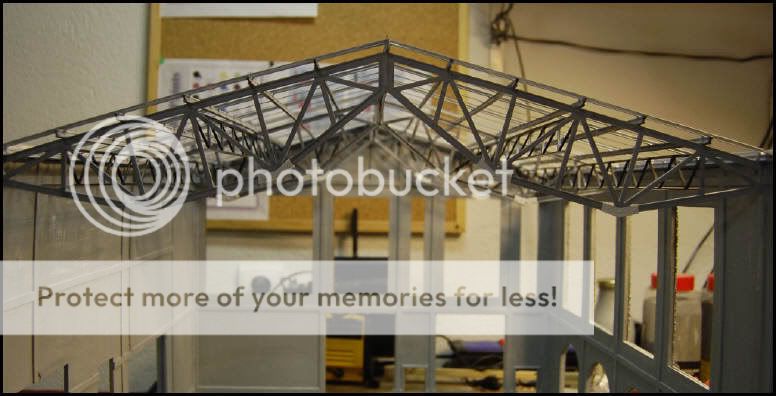
Metallic structure...
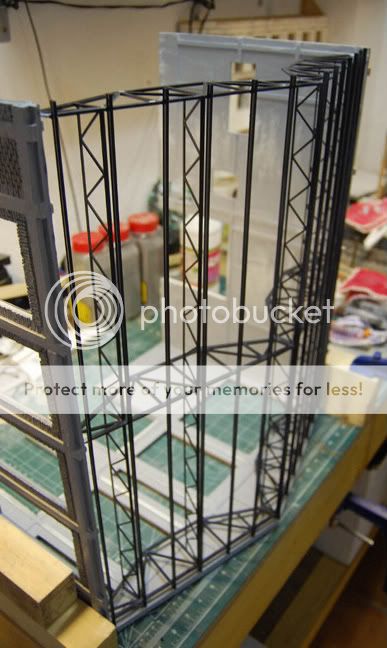
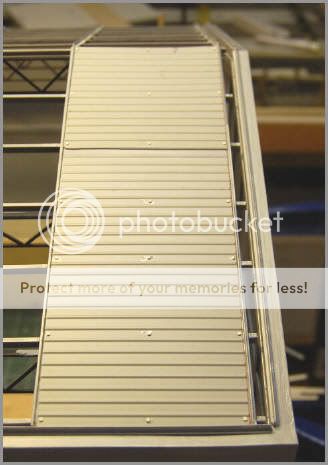
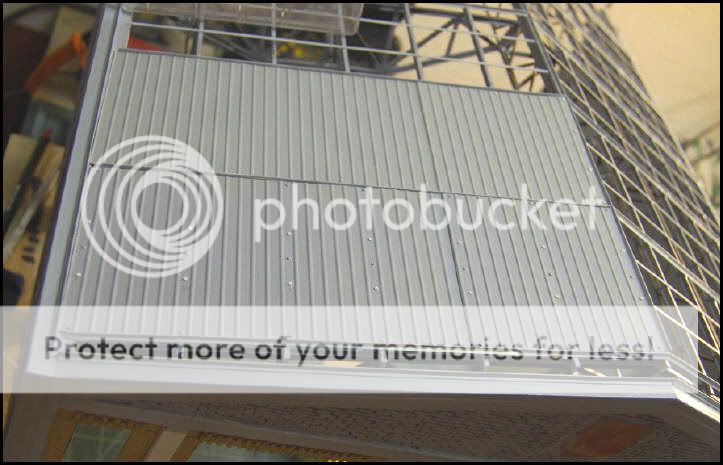
Fixing parts...
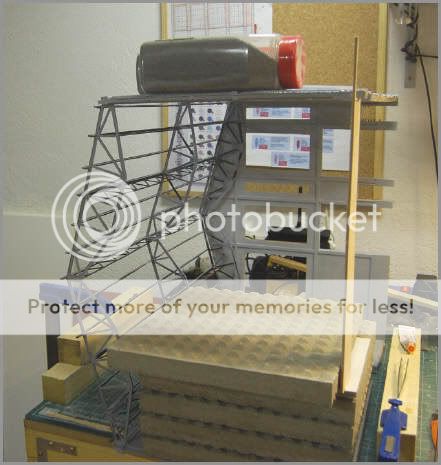
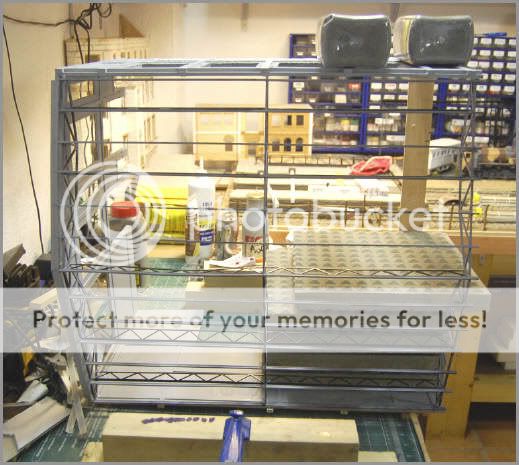
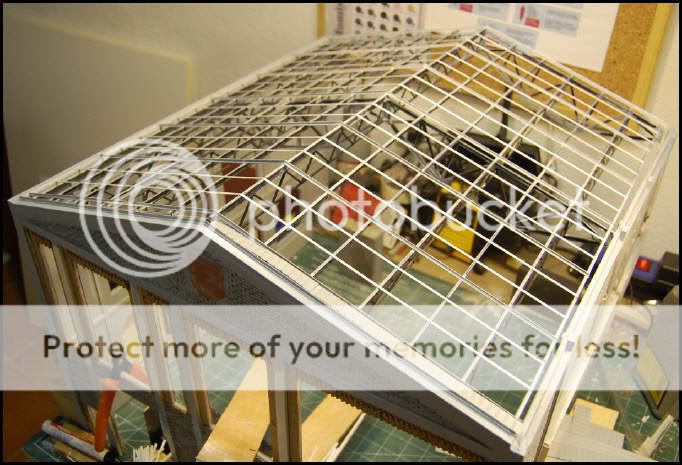
Another metallic structure...
I expect that you like it.
Best regards.
See you soon.
Yago.
______
Thank you so much, Bob.
If you liked it, wait to see this...


Thanks for see this photos.
Yago.
______
Hi kids:
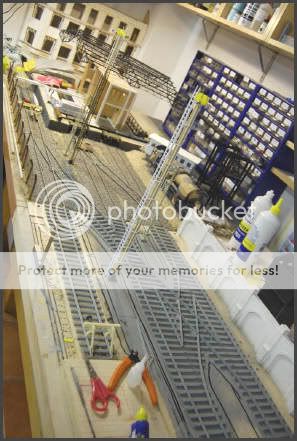
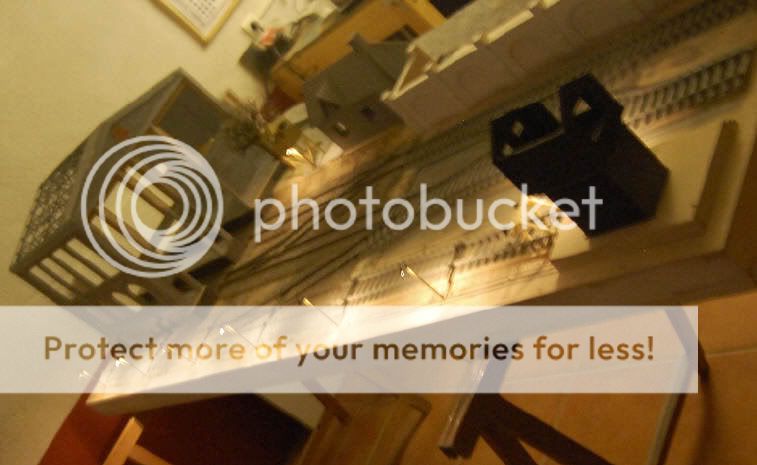
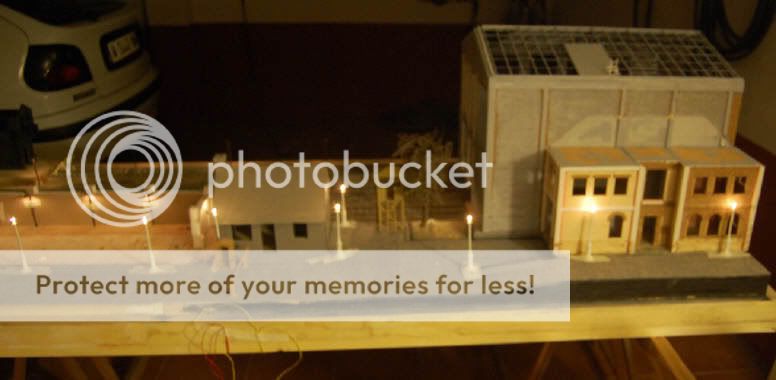
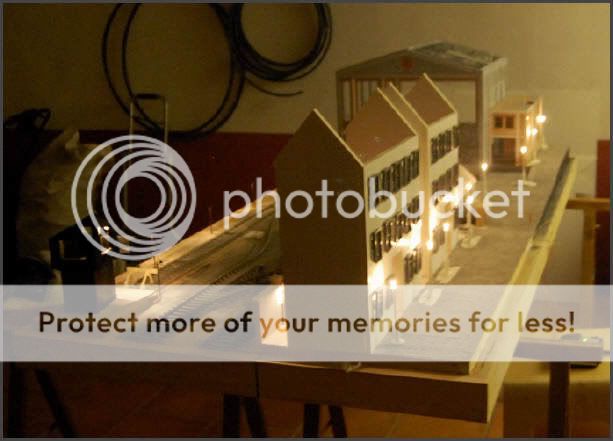
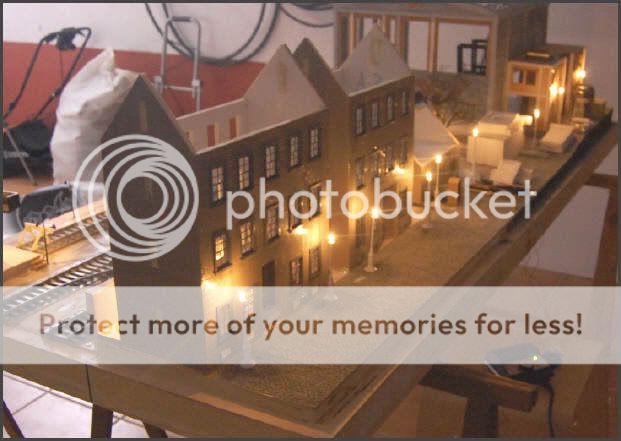
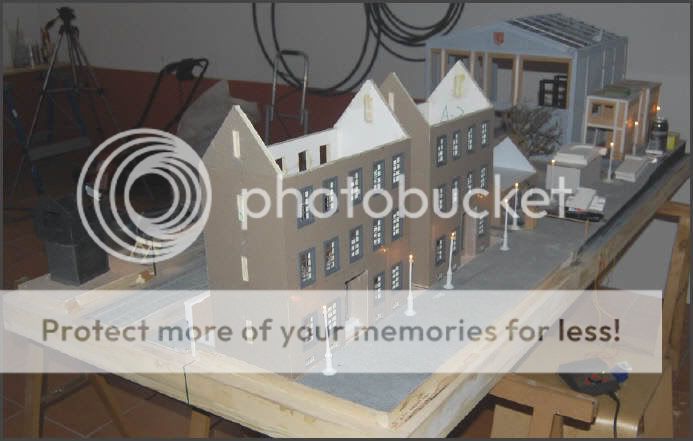
I post more photos of this dio. General views of the big dio.
Thanks for all.
Yago.
______
Carabinier has had lucky. More photos of dio.
ABER Gate.
... and check point.
See you soon.
Yago.
______
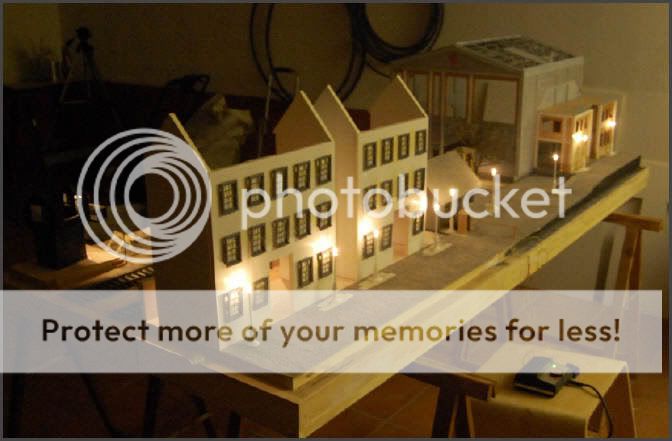
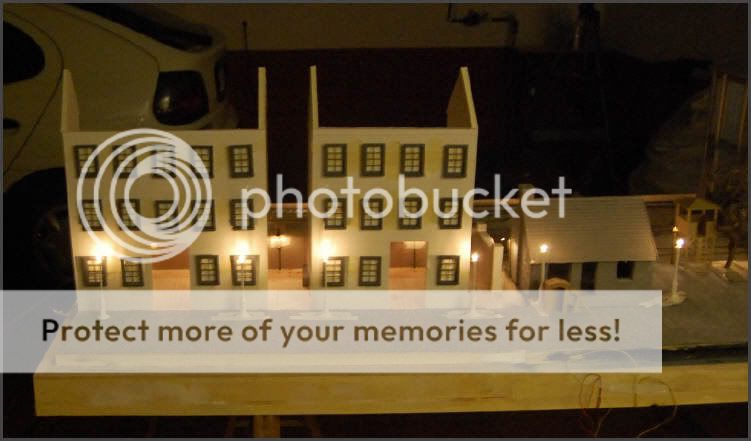
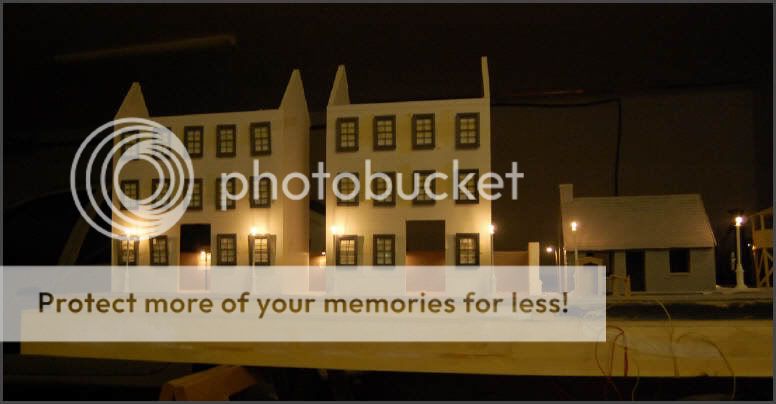
New photos for you.
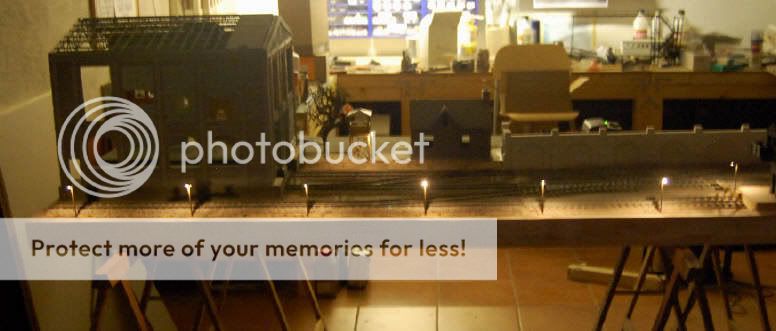
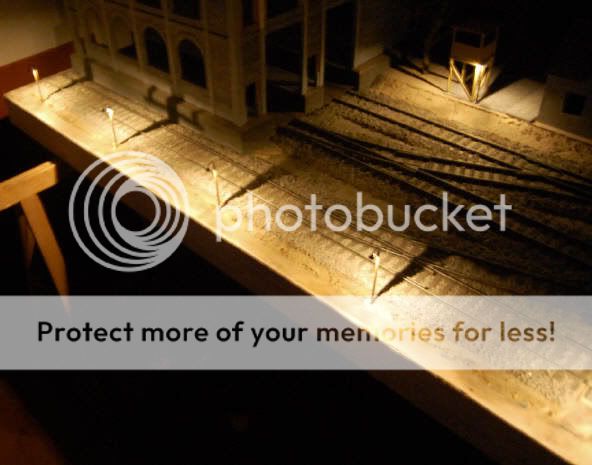
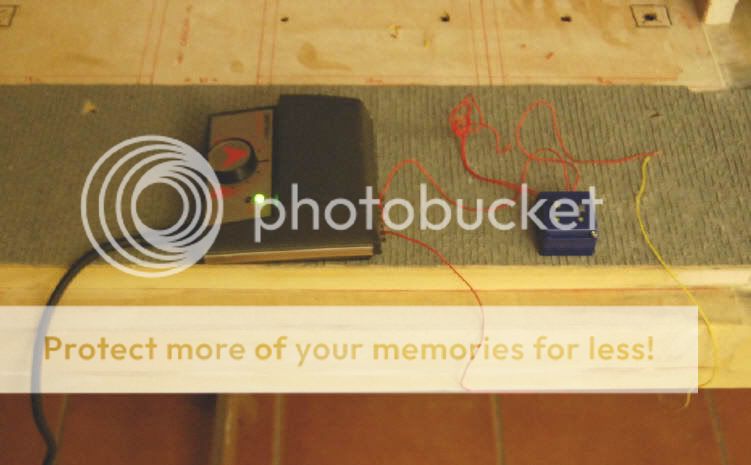
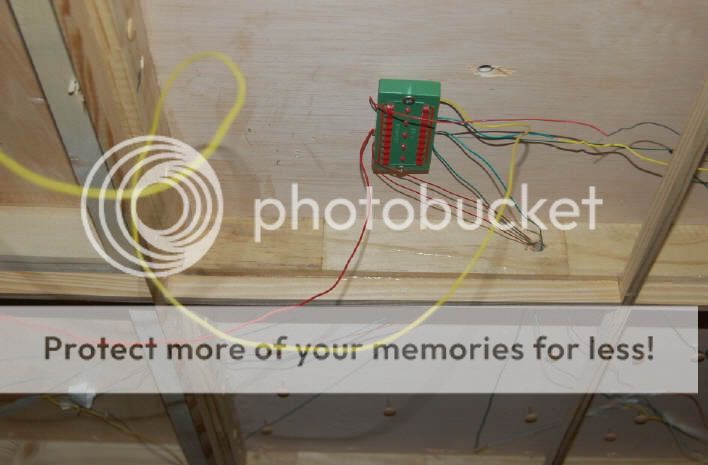
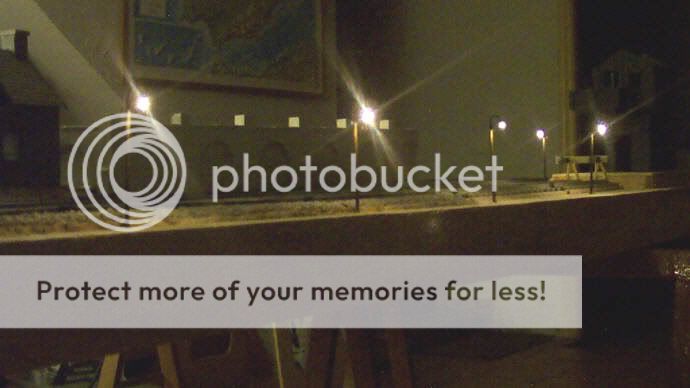
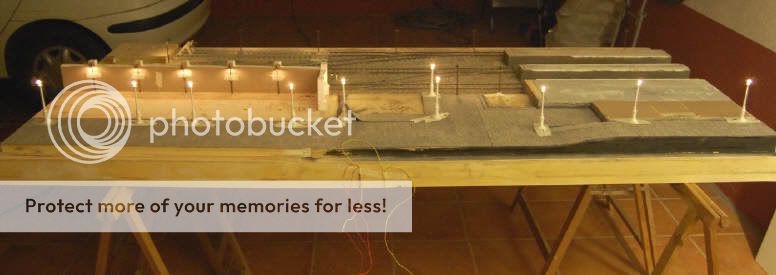
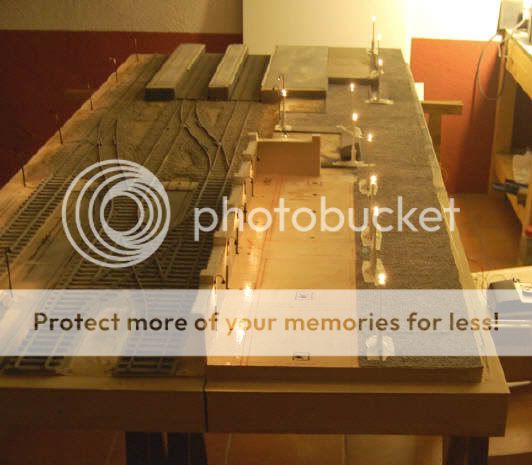
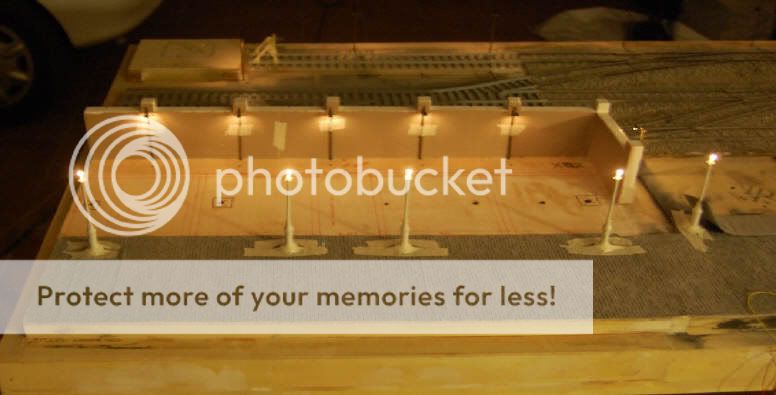
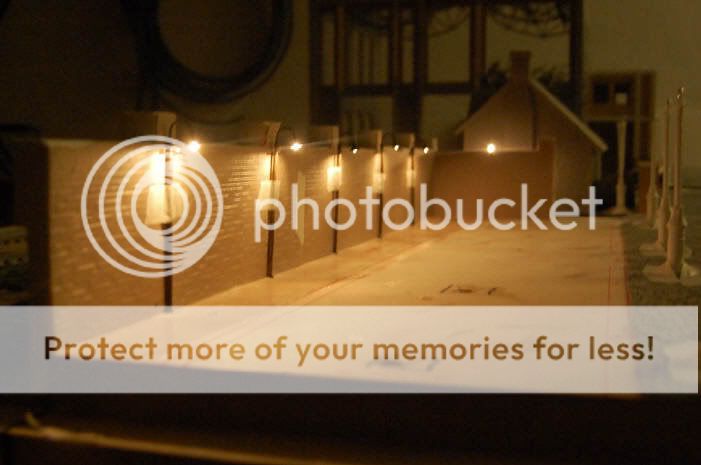
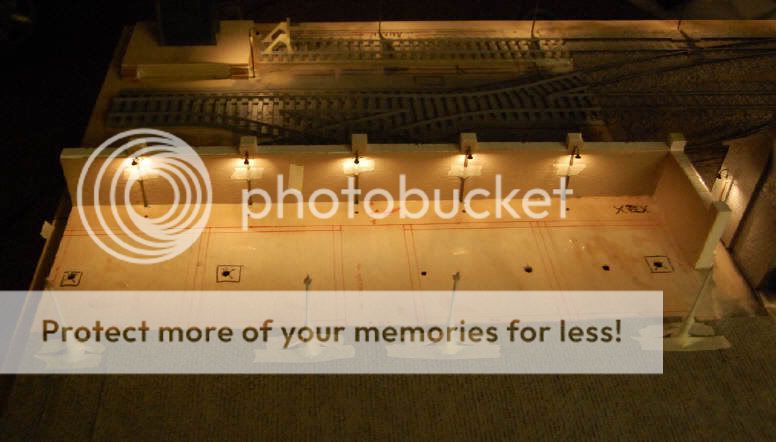
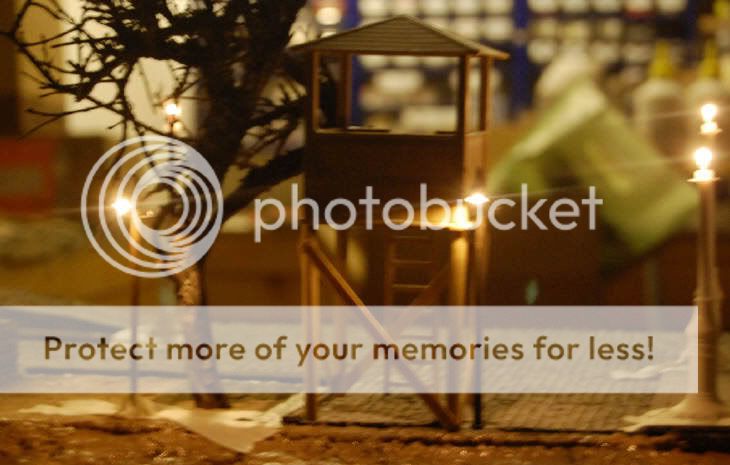
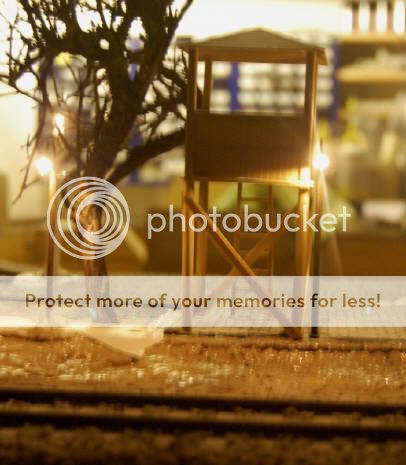
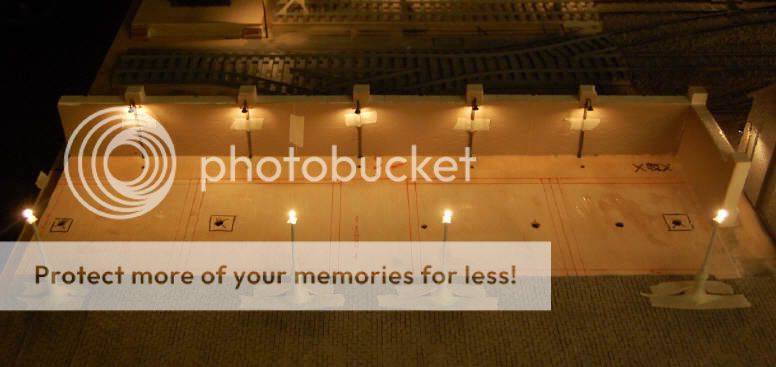
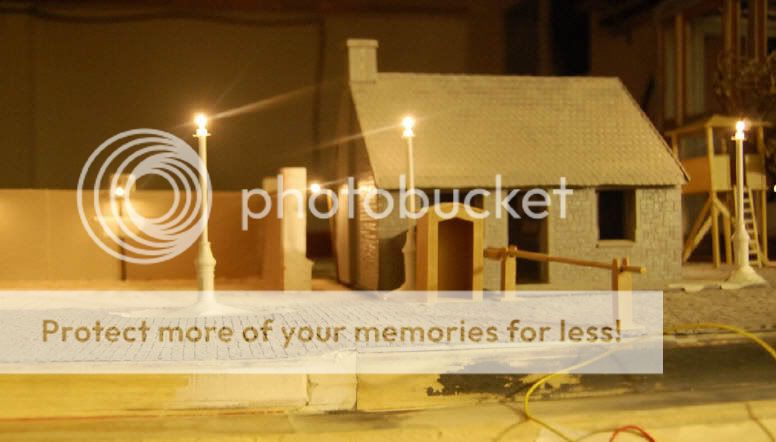
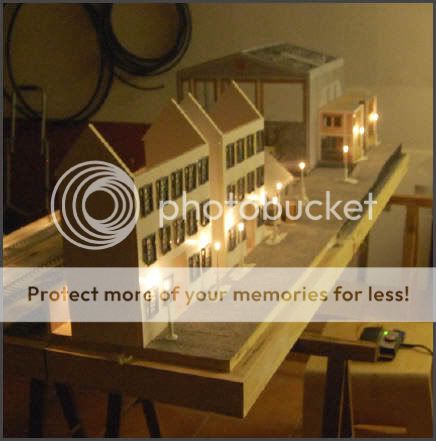
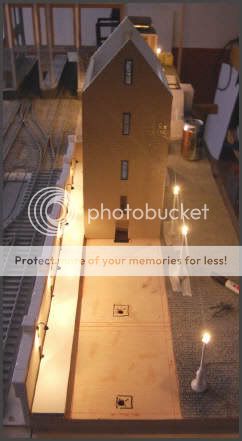
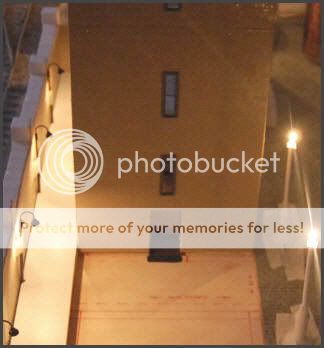
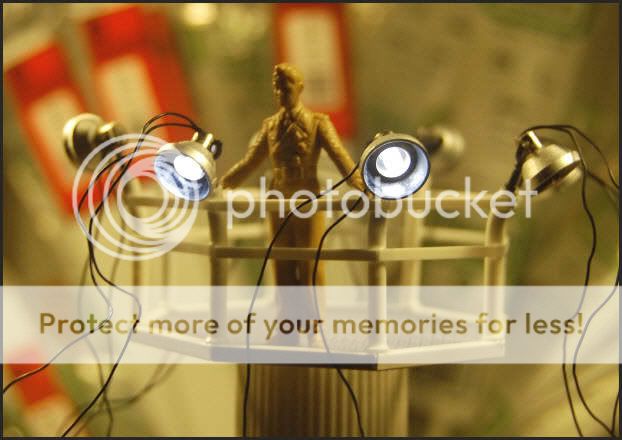
Lighting of the dio...

Thanks for seeing.
Yago.
______
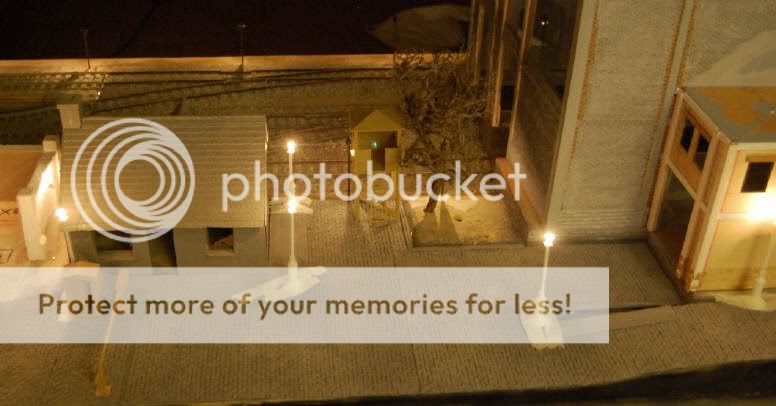
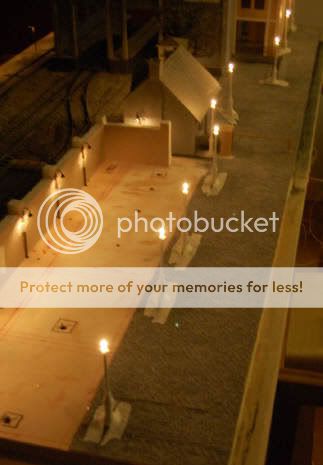
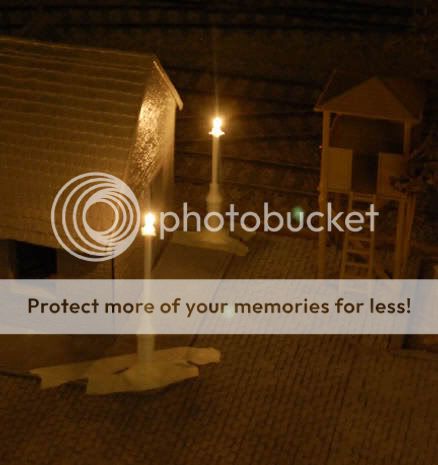
Hi kids:
I had promissed more photos of the lighting dio. You have more photos here...

____________________________________________________________


____________________________________________________________
____________________________________________________________

____________________________________________________________

See you soon with more and new photos.
Yago.
______
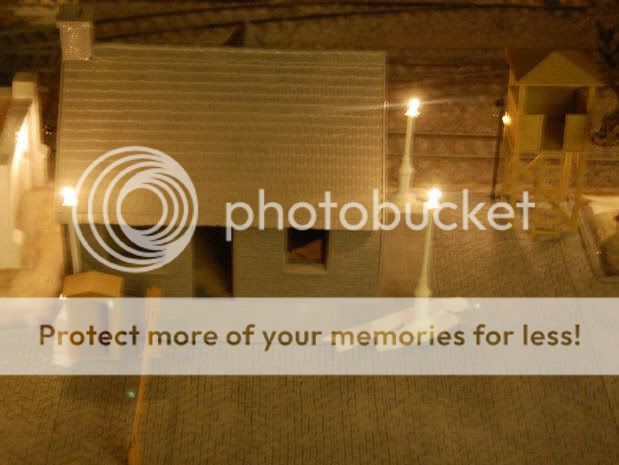
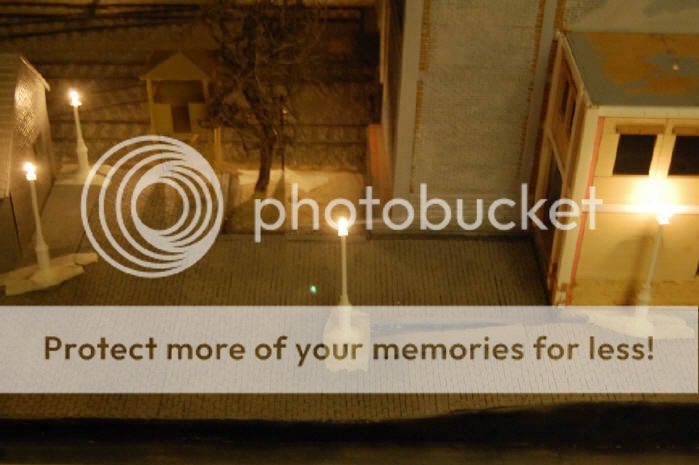
Hi kids:
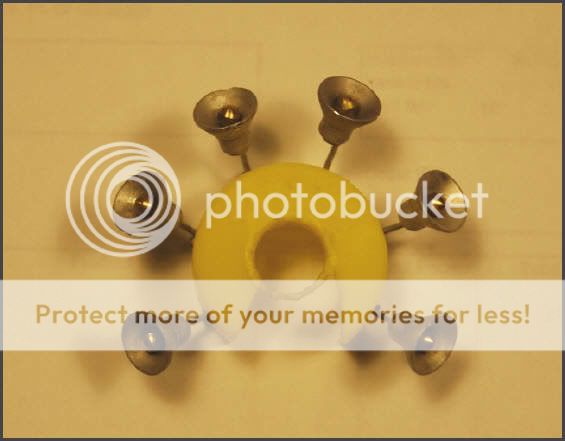
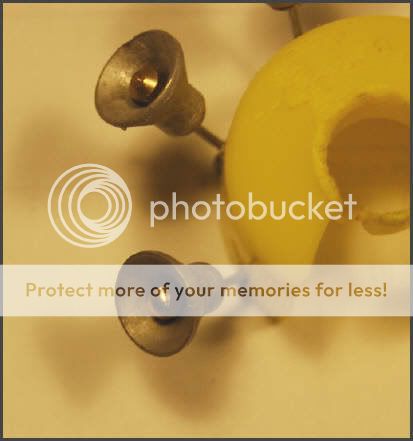
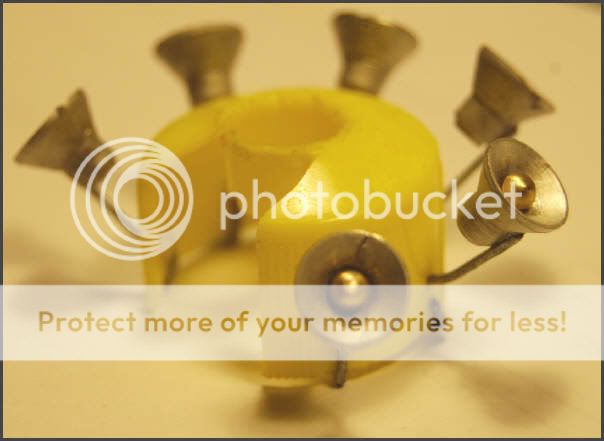
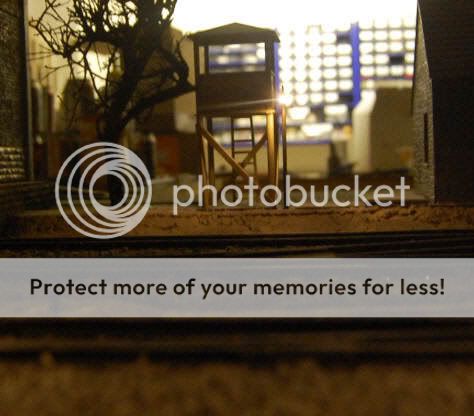
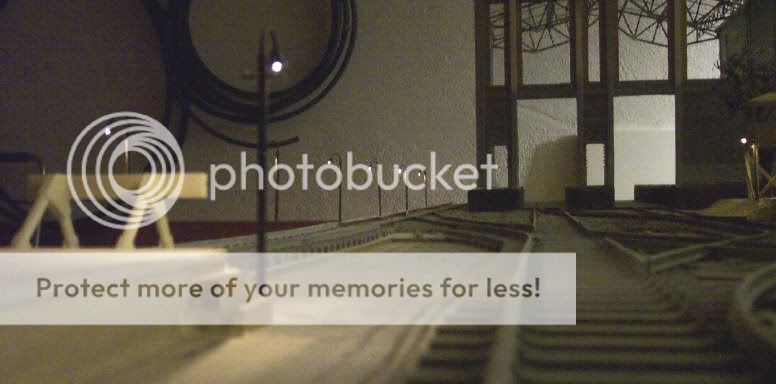
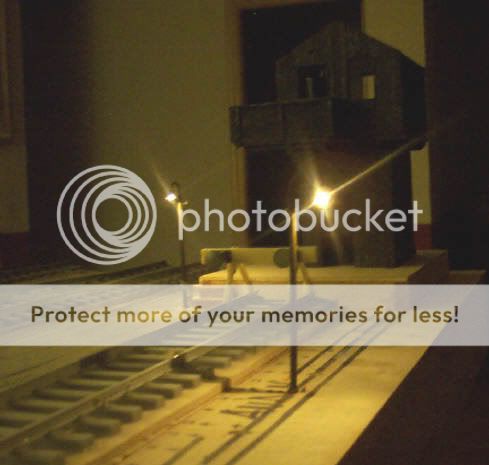
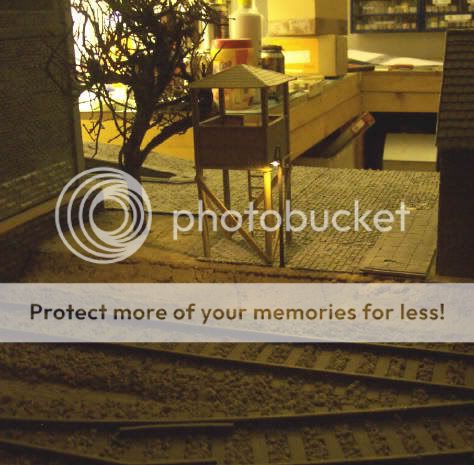
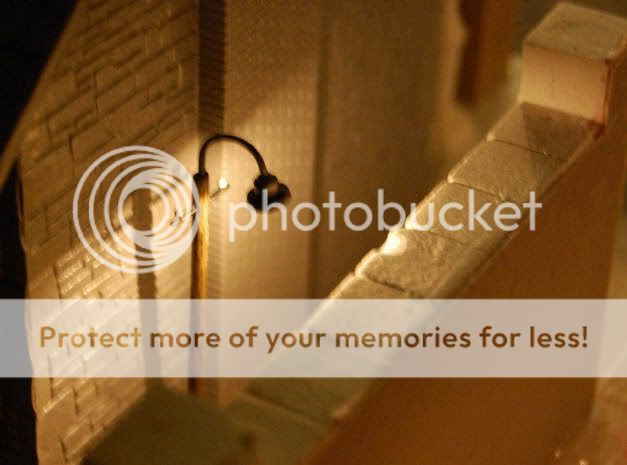
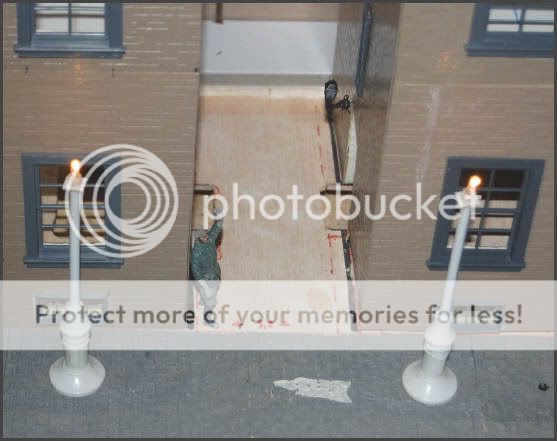
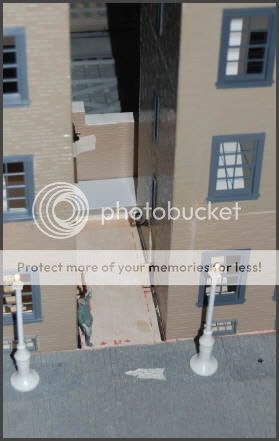
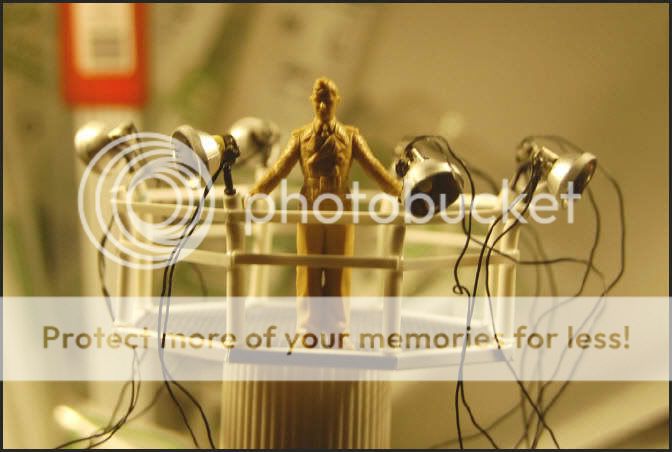
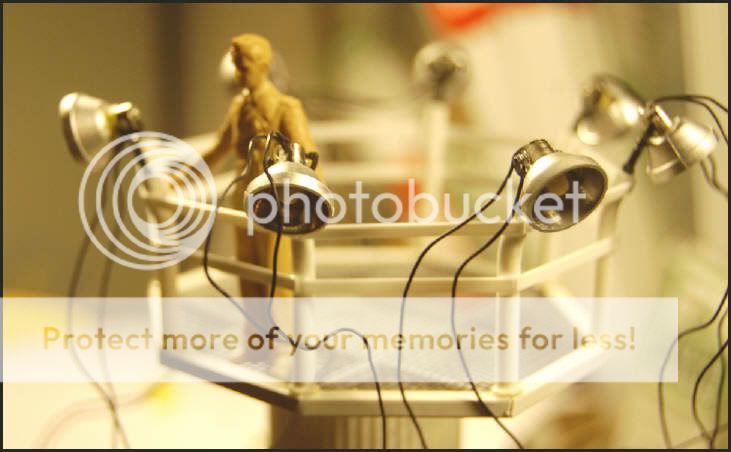
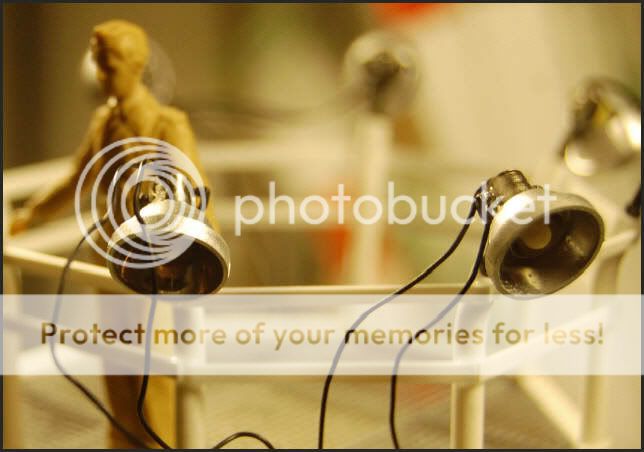
Yesterday, I showed the photos with street lamps. Today, I show the railway tower lamps.
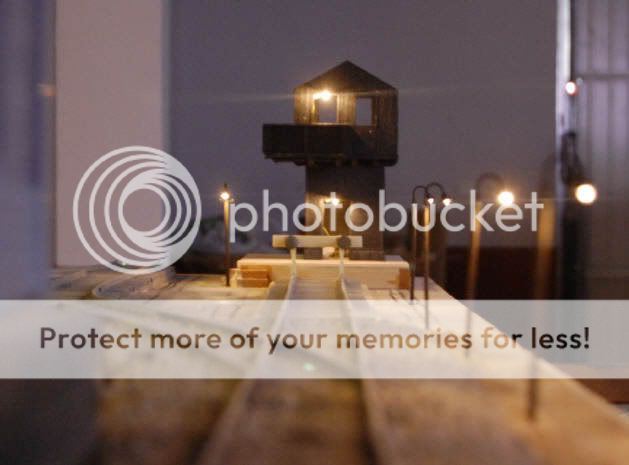
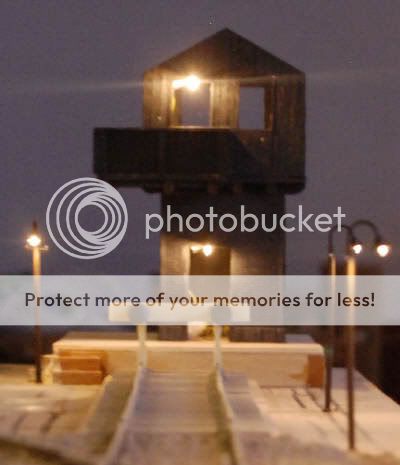
Perspective view.

Thanks for seeing.
Yago.
______
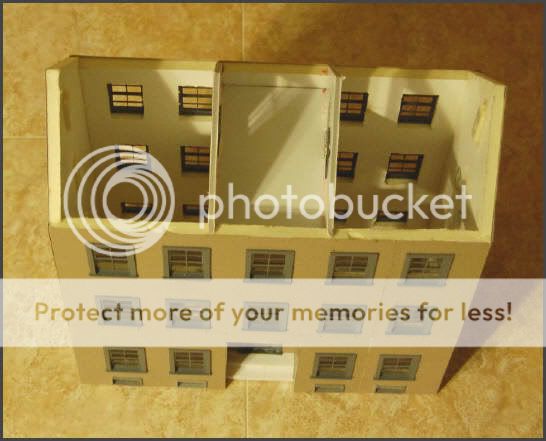
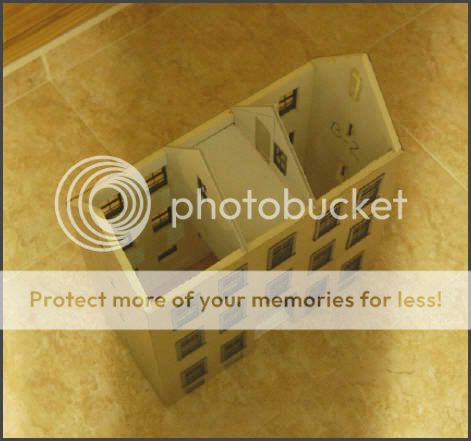
Hi kids:
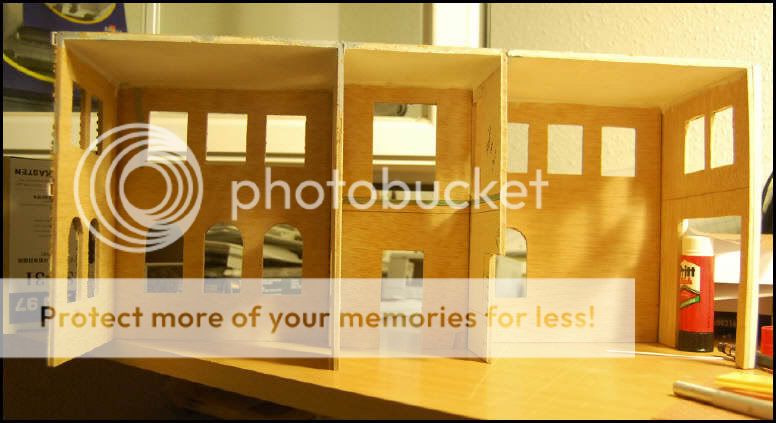
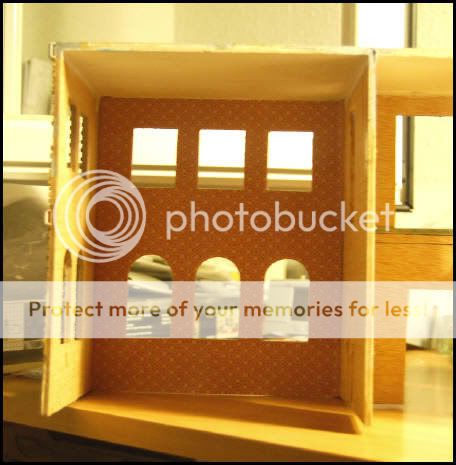
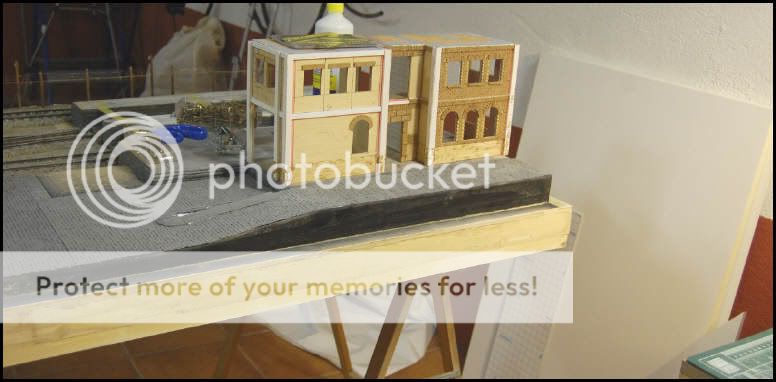
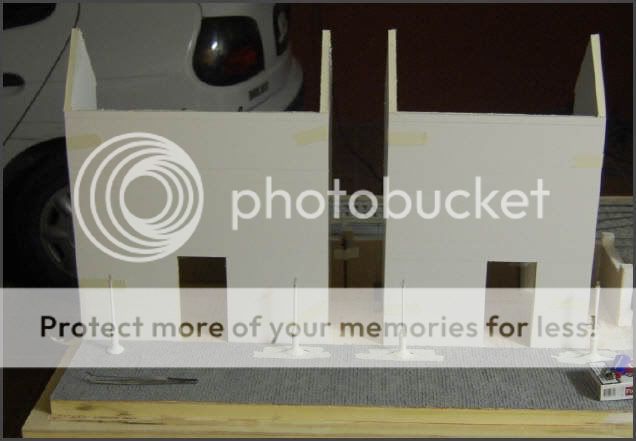
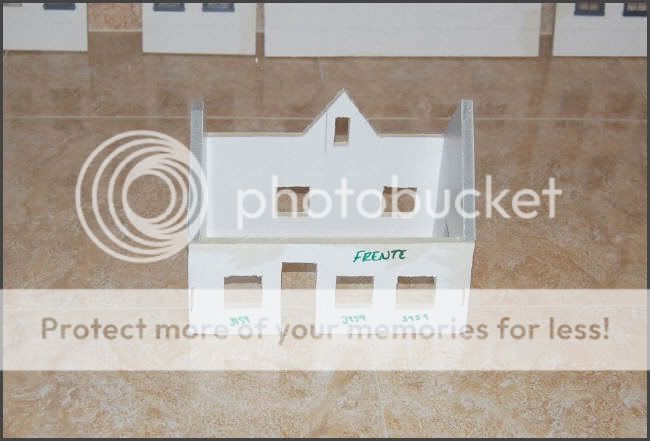
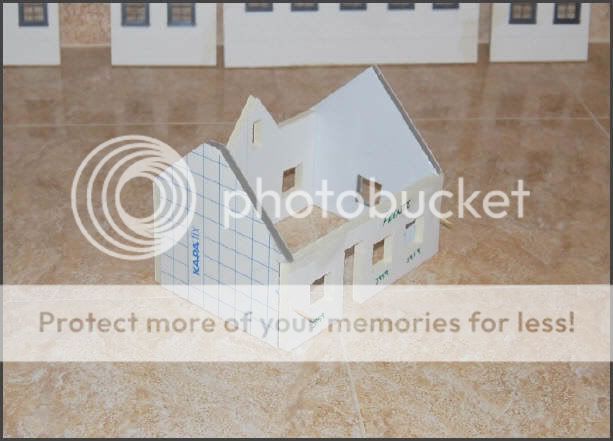
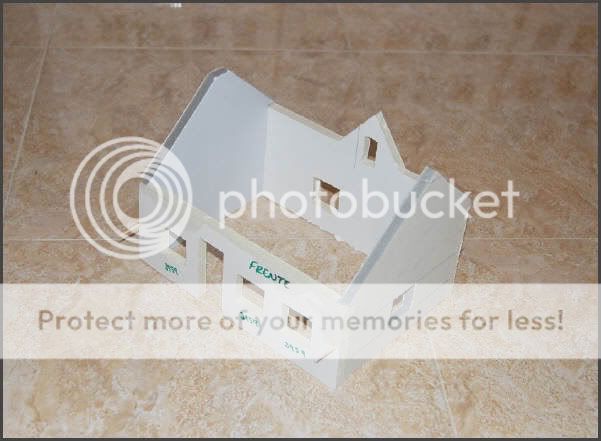
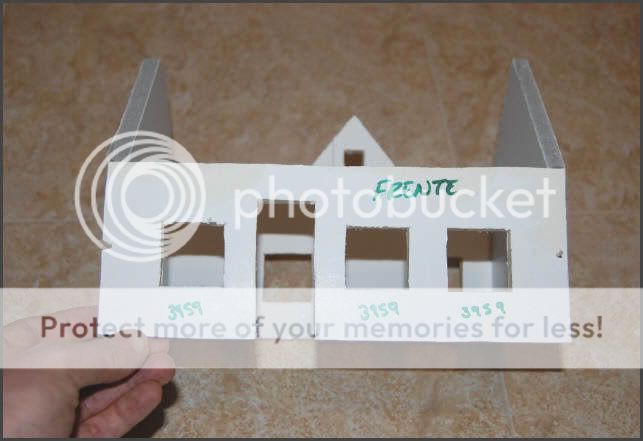
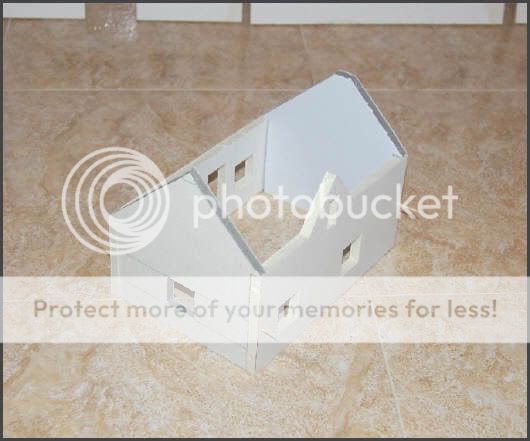
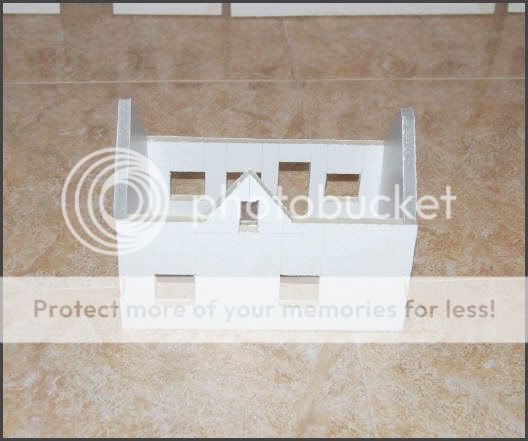
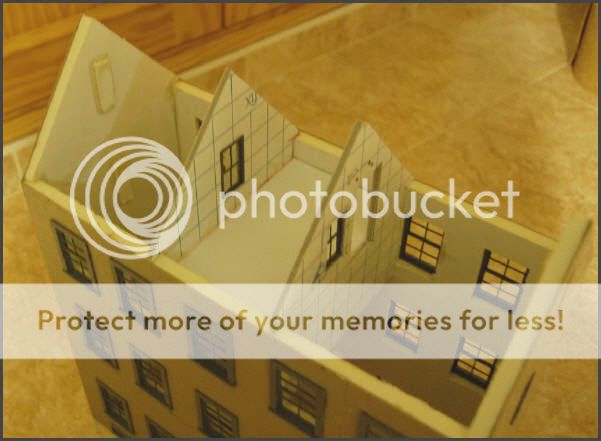
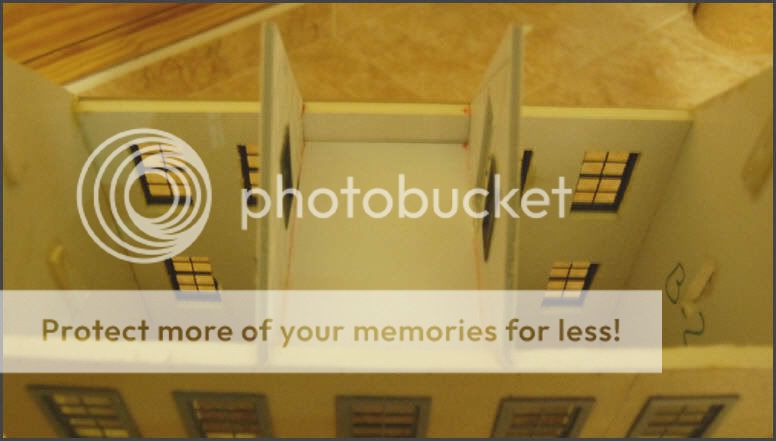
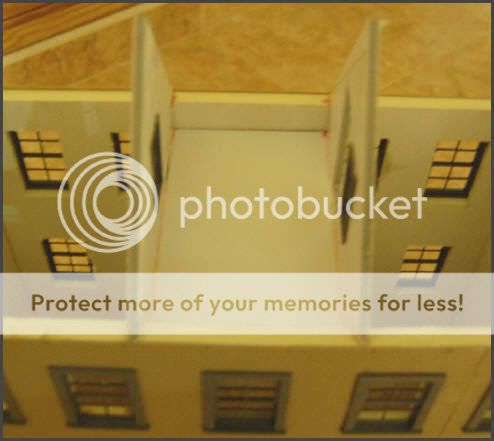
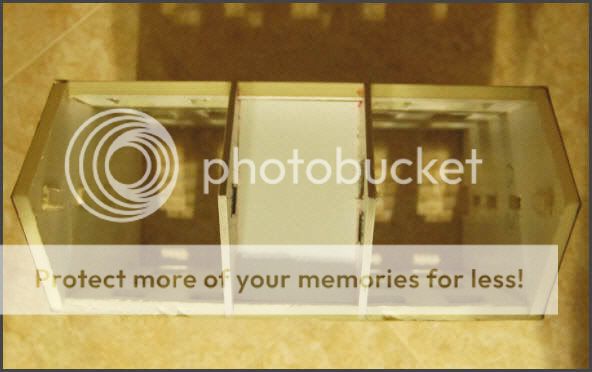
Today I did two buildings of the urban area. I built the structures, and the next week I will start to cover the facades and roofs. And I will do the attics.
I expect that you like it.
See you!!
Yago.
______
Hi kids.
I have done new photos. I'm working in the buildings.
____________________________________________________________
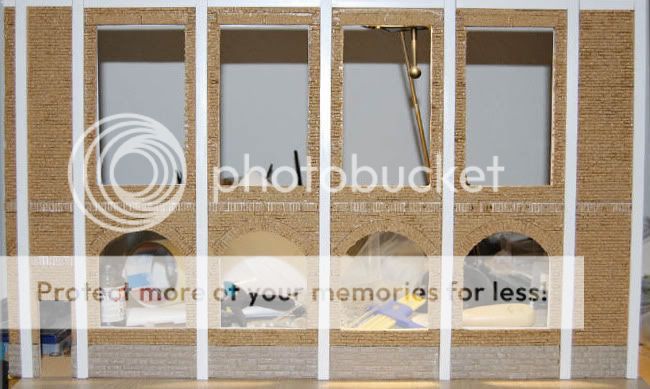
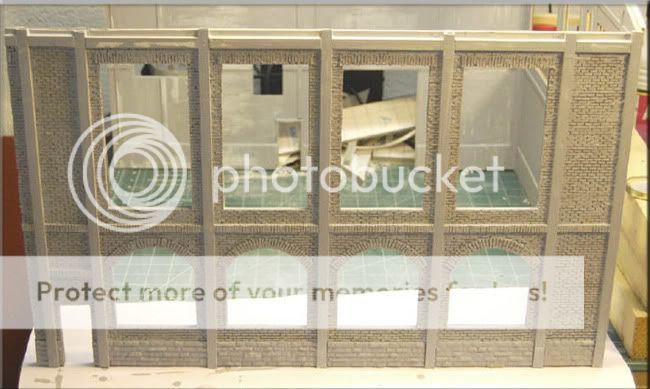
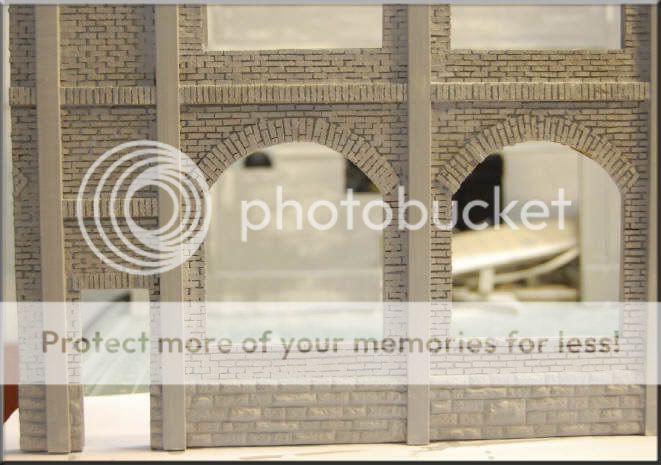
First I did a MiniArt model, but I didn't like it. I thought that I could do my own building.
____________________________________________________________
My own MiniArt replica:


See you soon with new photos.
Next step: "urban buildings".
Yago.
______
Hi kids...
More photos...
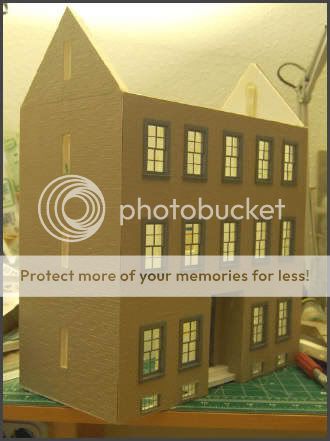
First Urban building...
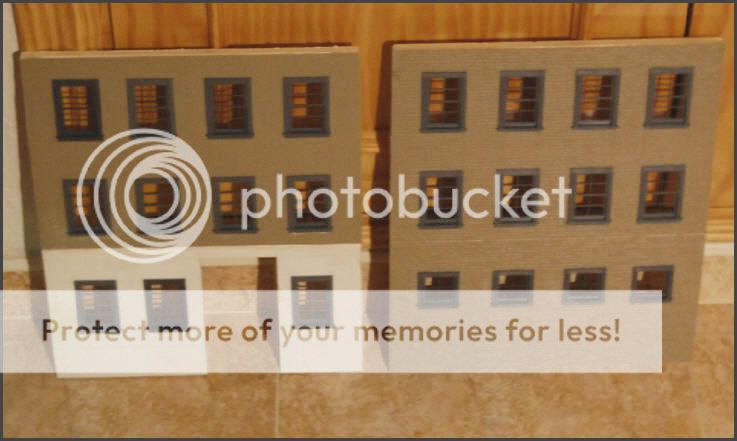
Second Urban Building coming soon!
Thanks for looking.
Best regards.
Yago.
______
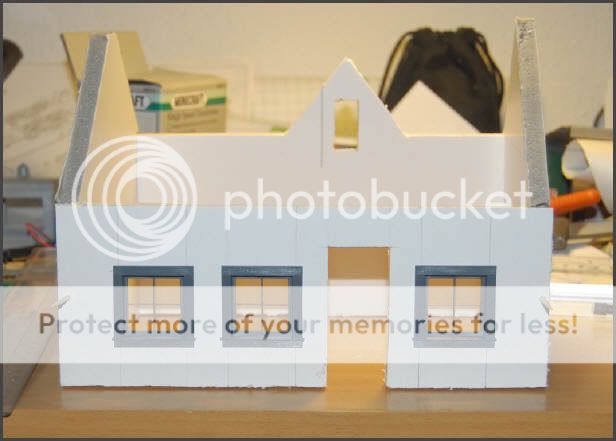
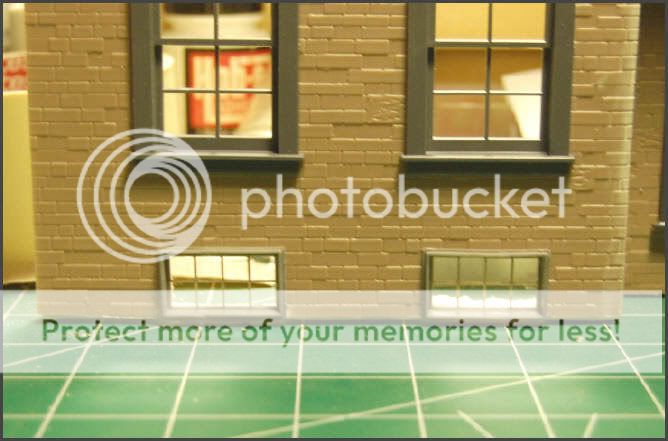
Wow?
You have to see this...
:arrow: BEFORE......................................... :arrow: AFTER...
Thanks for looking.
See you soon kids.
Yago.
_____
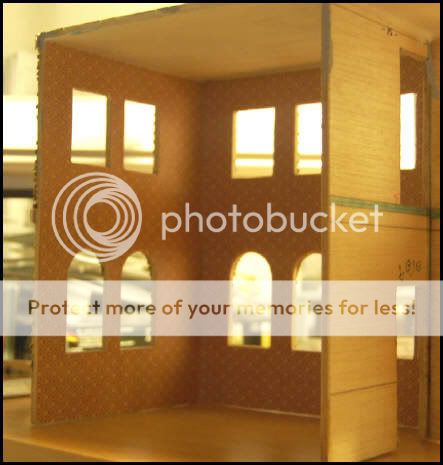
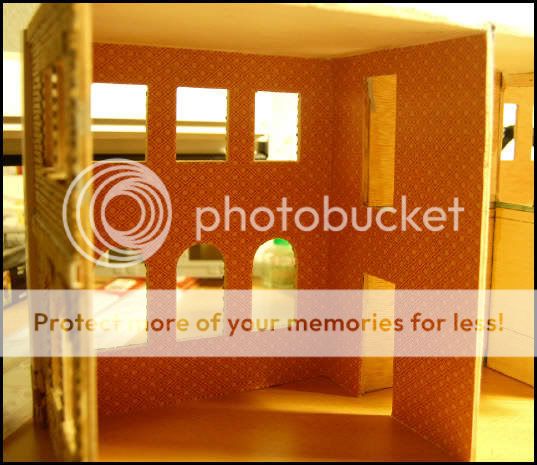
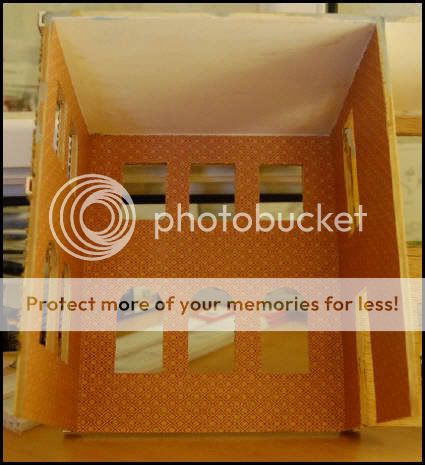
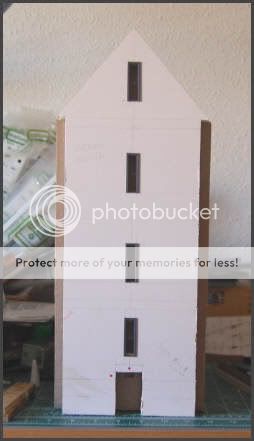
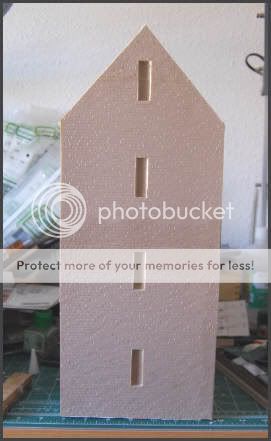
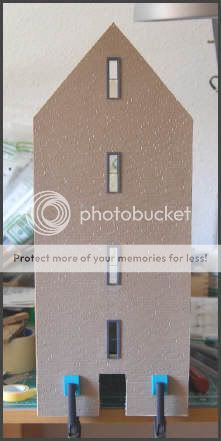
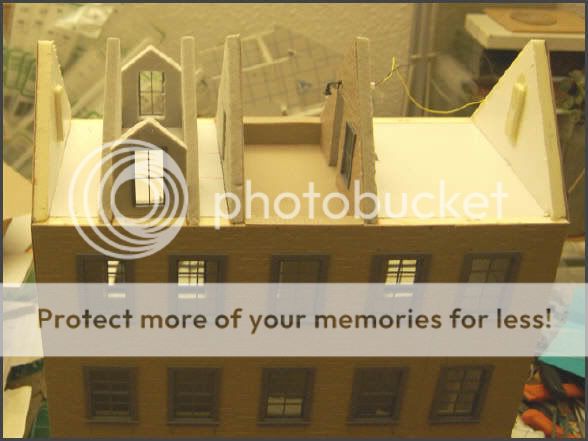
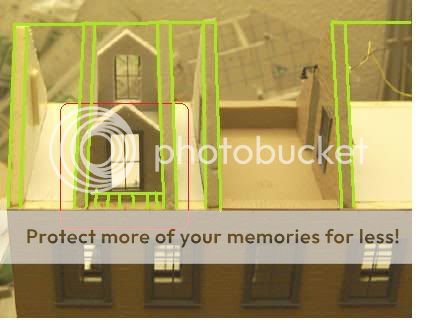
Hi kids:
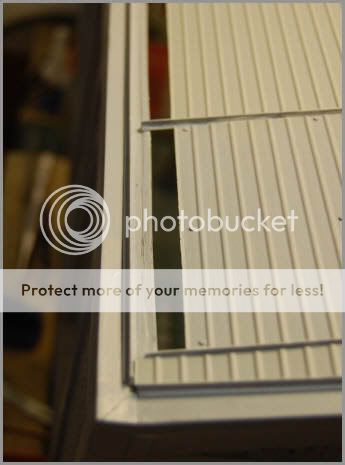
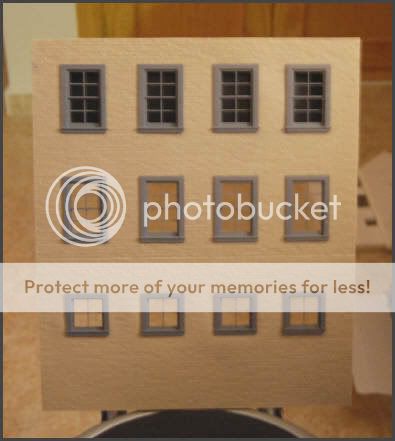
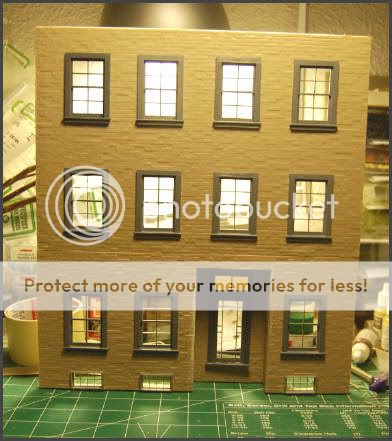
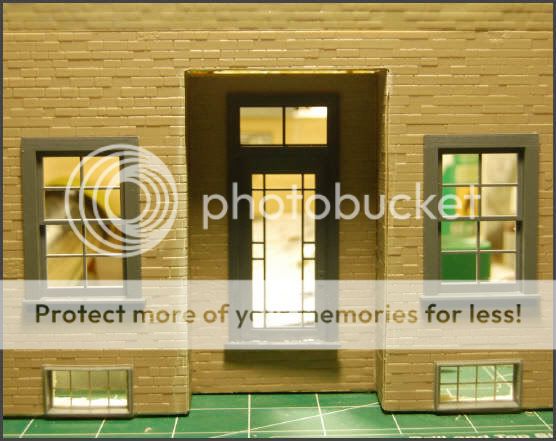
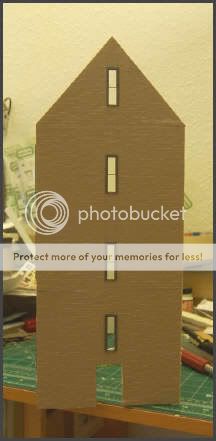
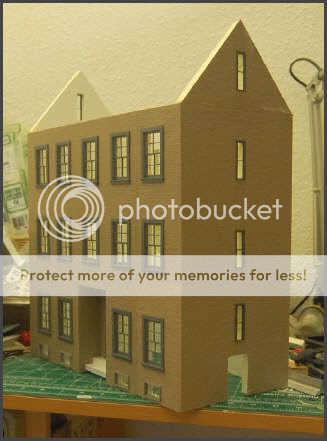
Starting of second building...
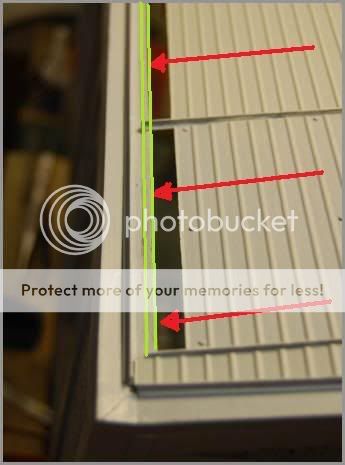
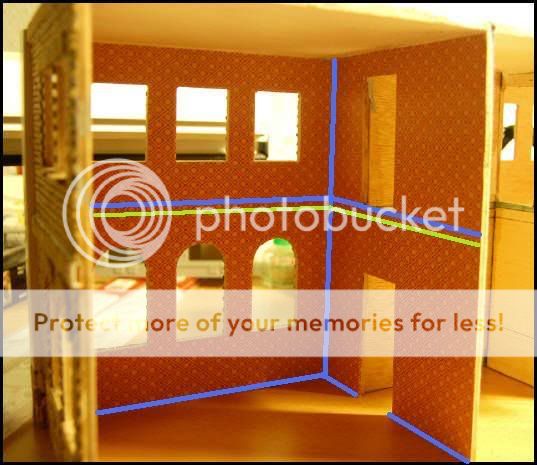
The next photo shows two colored lines.
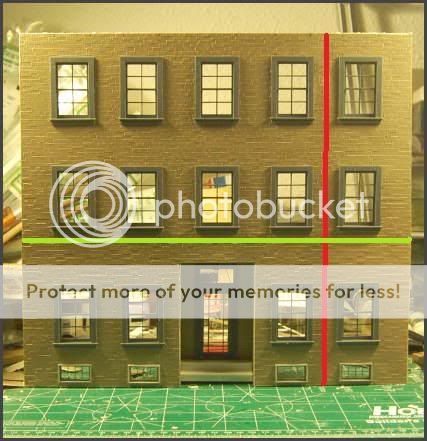
The red line will be a rainpipe, and the green line will be wiring telephone and/or wiring light.
Today or tomorros, Saturday. I'll try to finish this building.
Thanks for looking.
Yago.
______
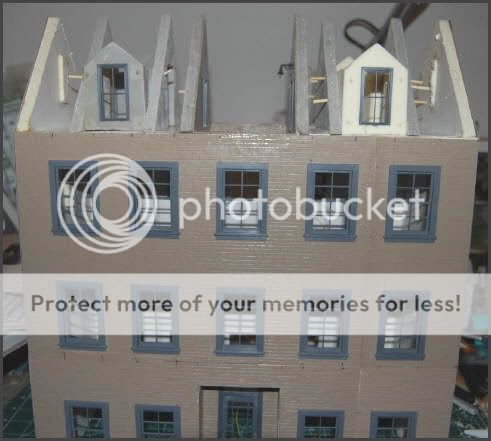
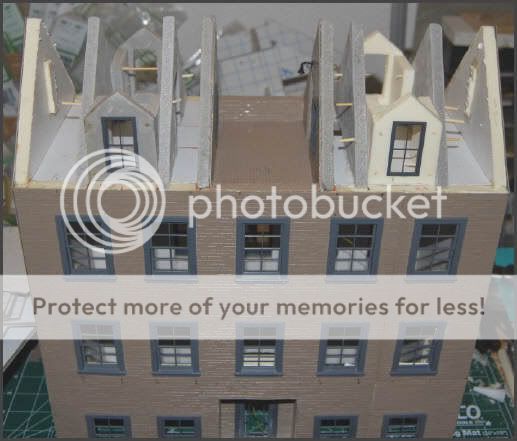
Hi kids.
Saturday...
Sunday...
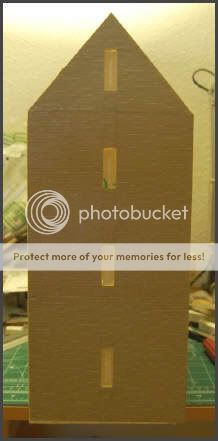
To do rear facade and photos of buildings in the dio. I'll try to do the dormers and roofs too.
Thanks.
Yago.
______
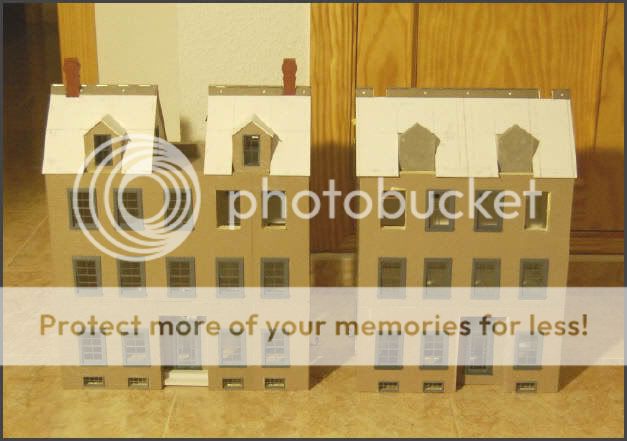
Guys, new photos of the dio...
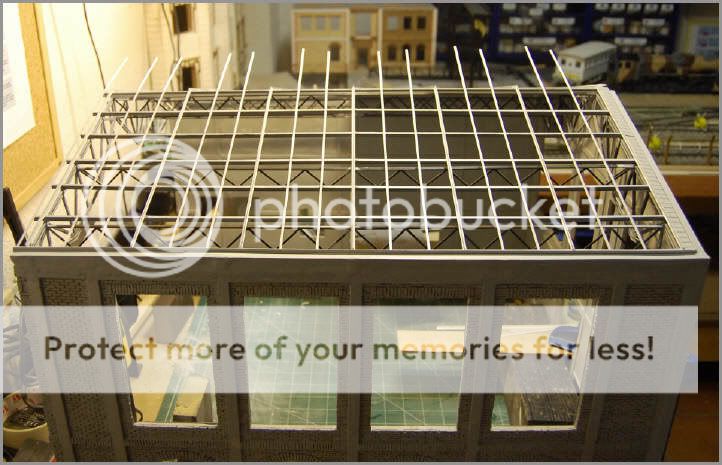
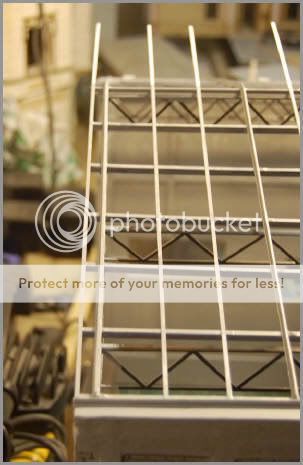
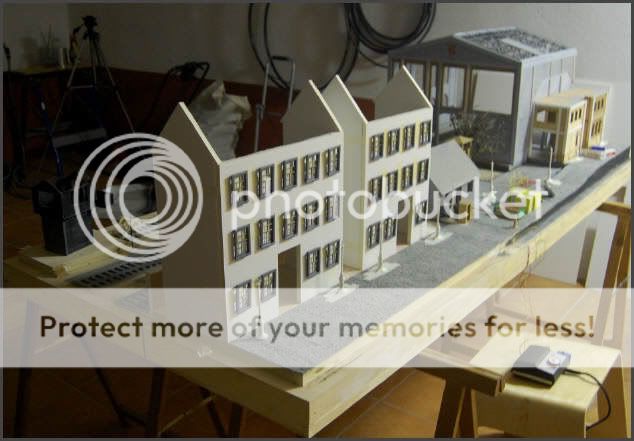
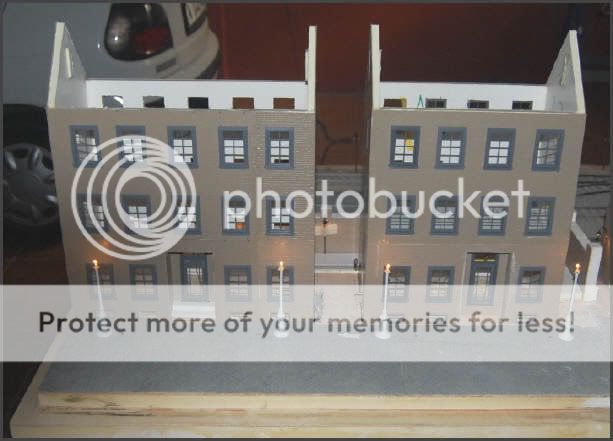
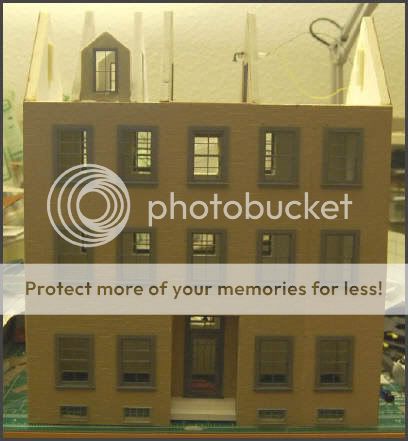
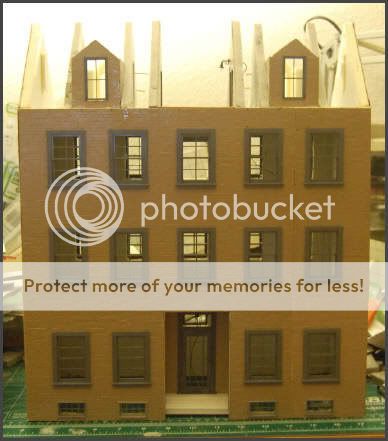
:arrow: Two urban buildings in the dio.


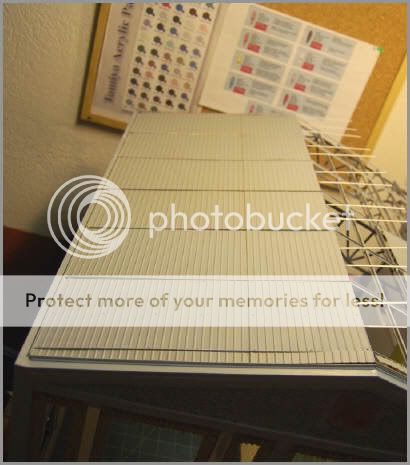
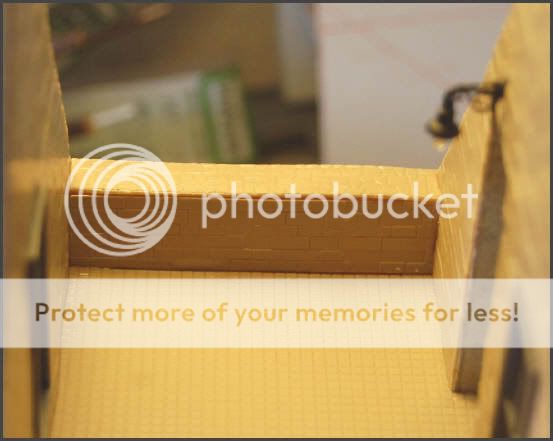
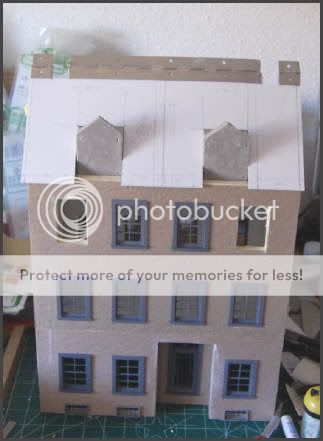
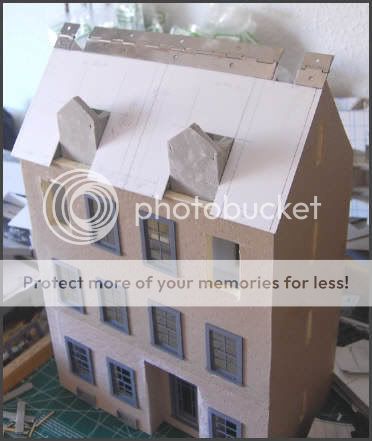
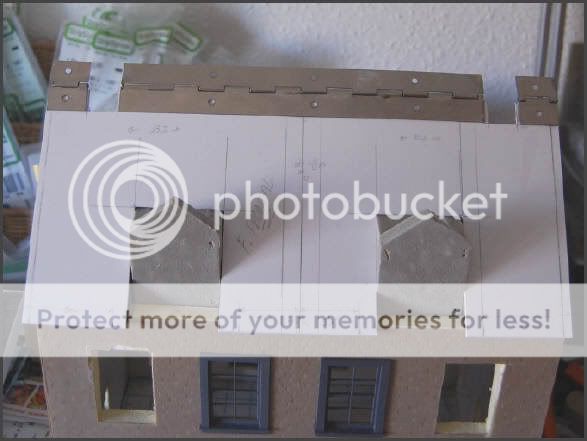
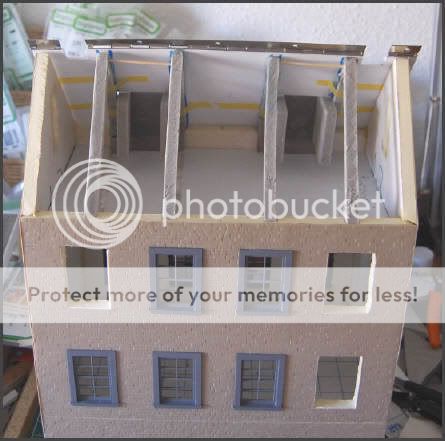
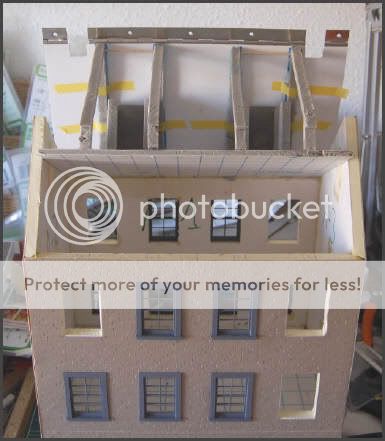
:arrow: Initial process for roof.

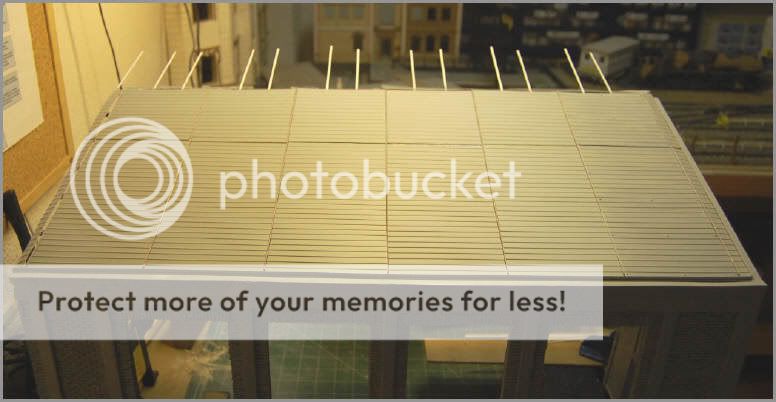
:arrow: Late process for roof.
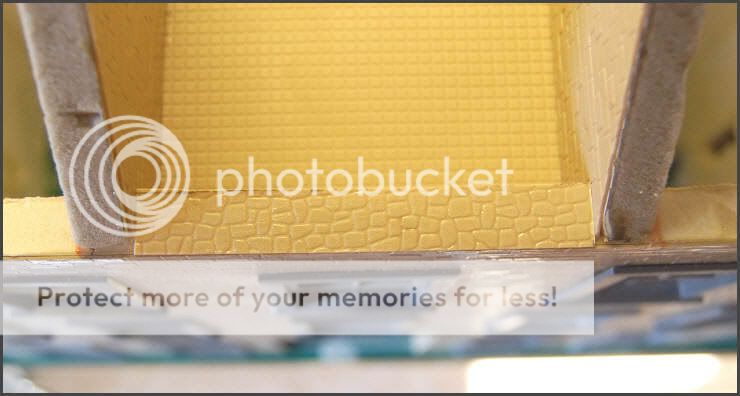
:arrow: A) Floor.

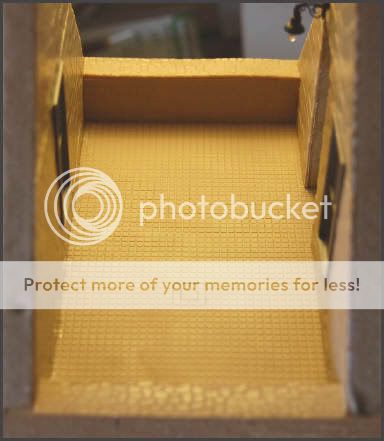
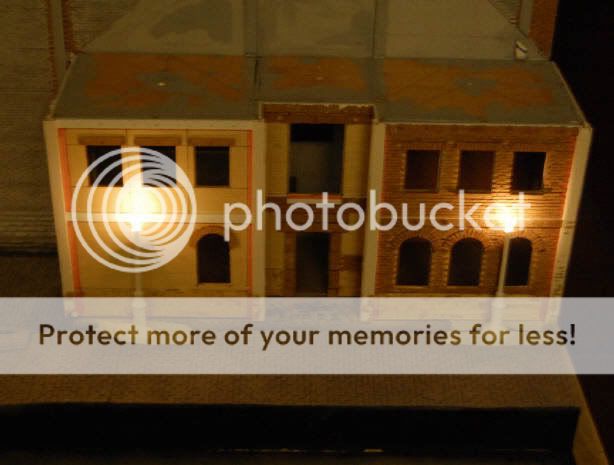
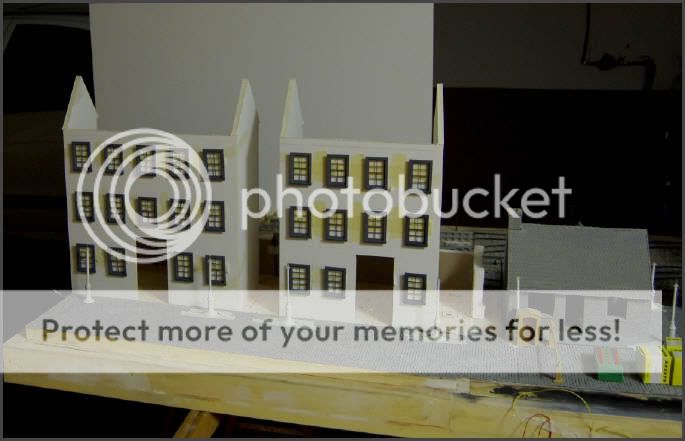
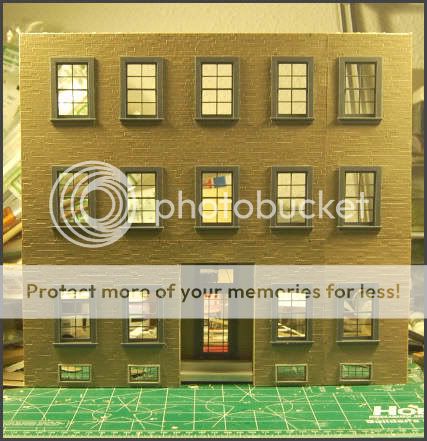
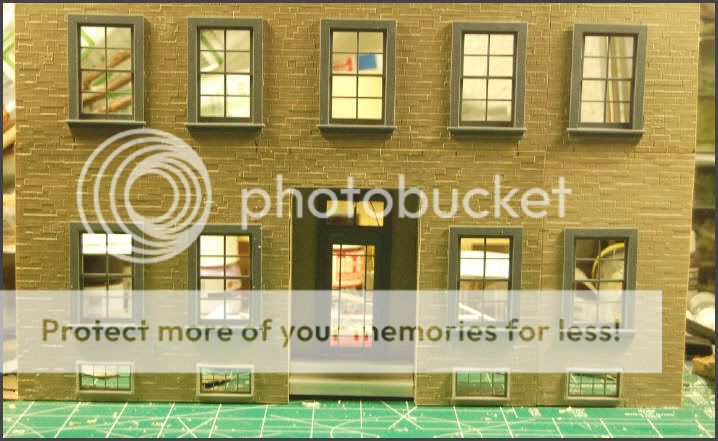
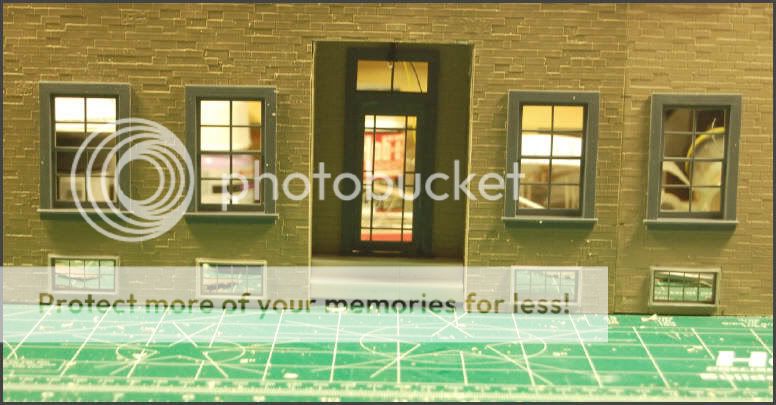
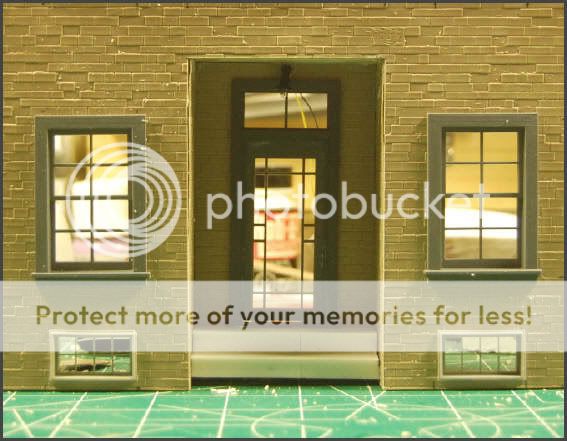
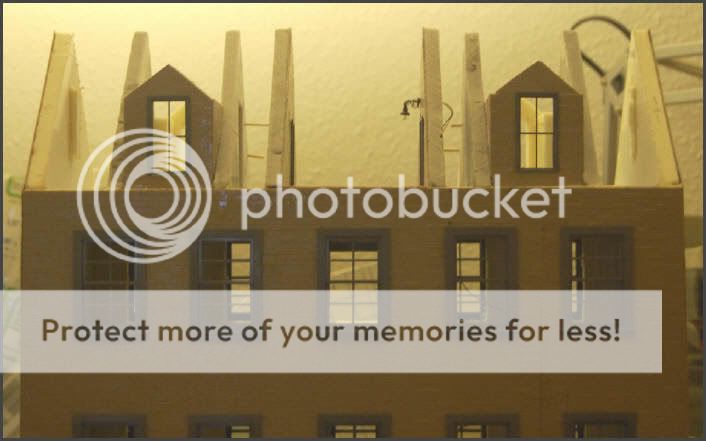
:arrow: B) Walls and lighting.

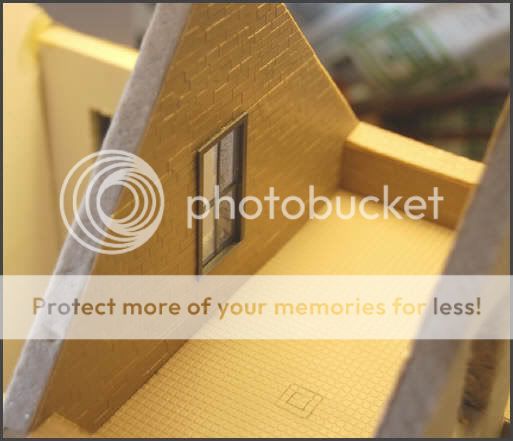
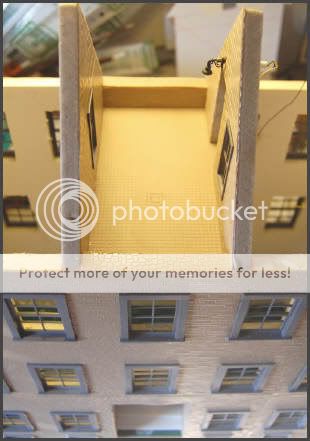
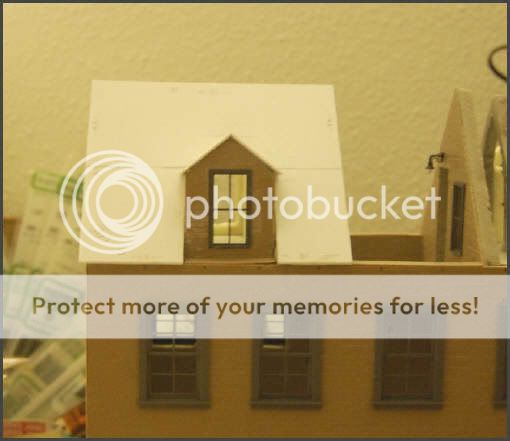
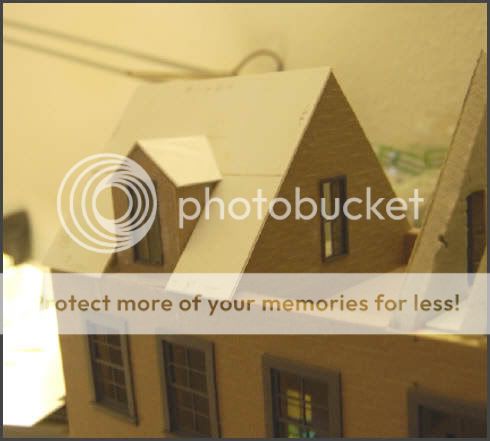
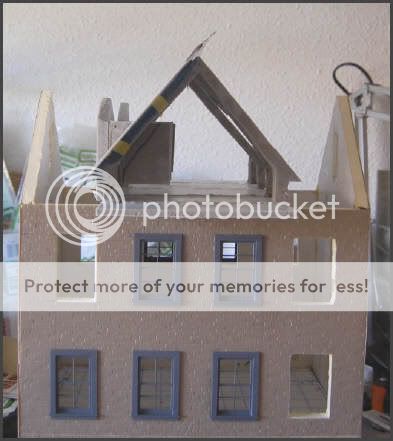
:arrow: C) 3D design for dormers.
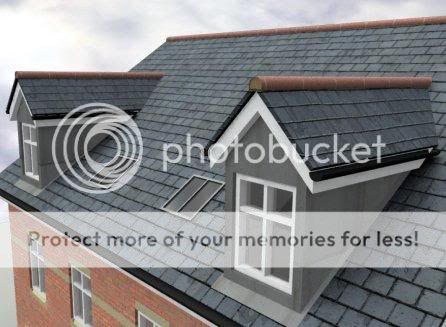
:arrow: D) Process of building the dormers and the roof.
:arrow: ?)One doubt for dormer position in the roof.
:arrow: E) Execution and final resolution.
Thanks for looking this work.
Yago.
______
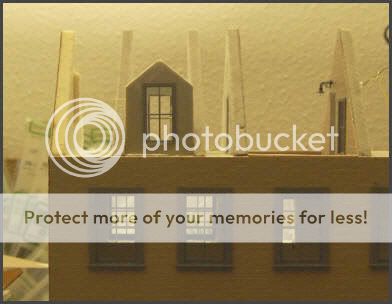
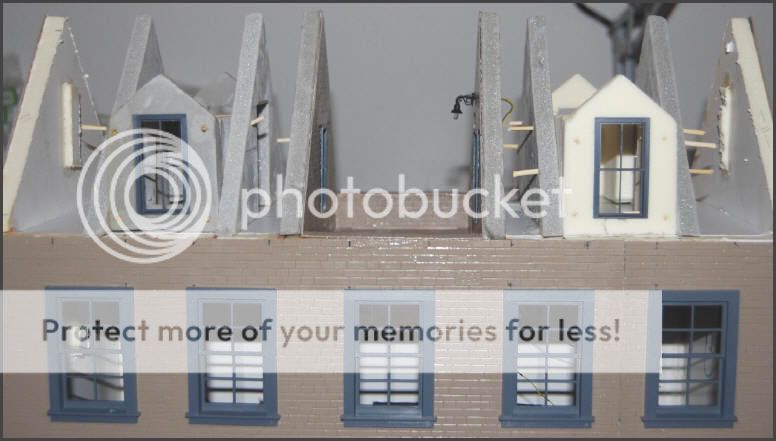
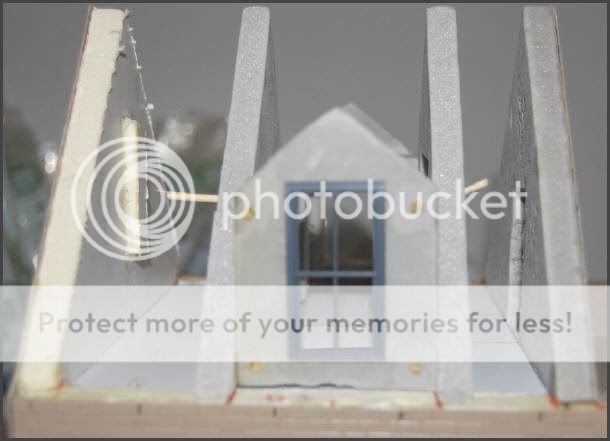
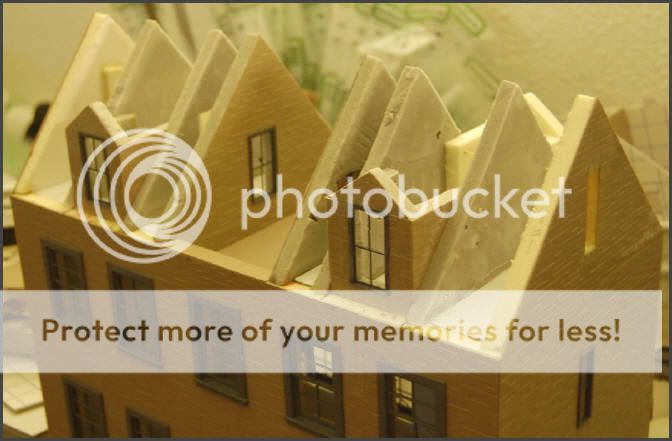
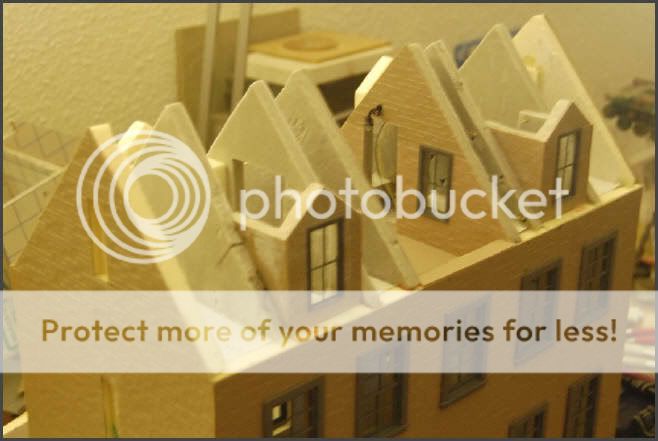
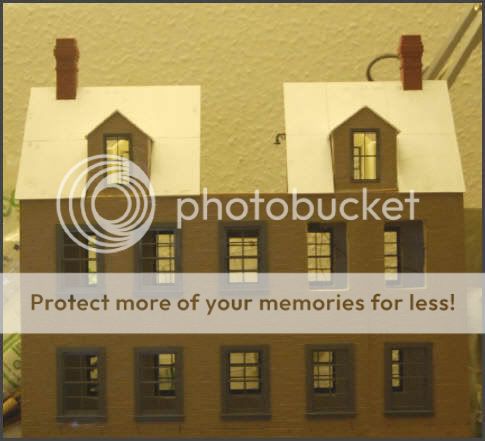
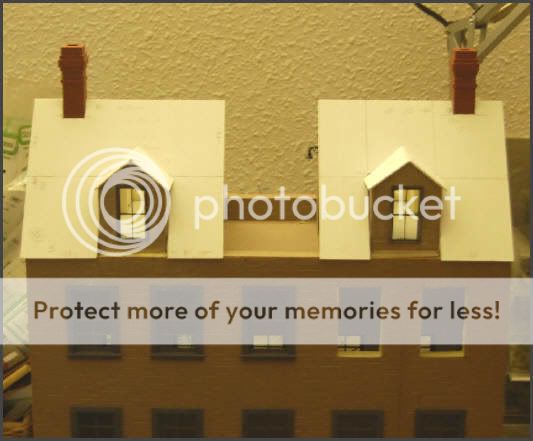
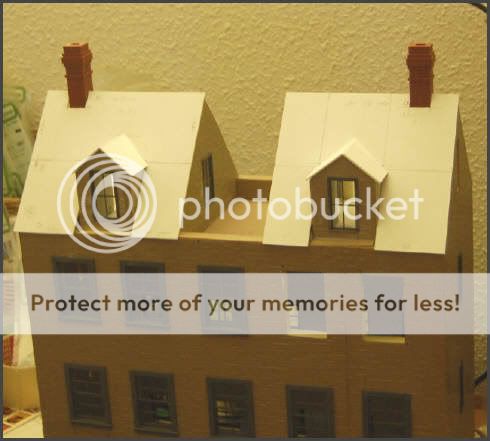
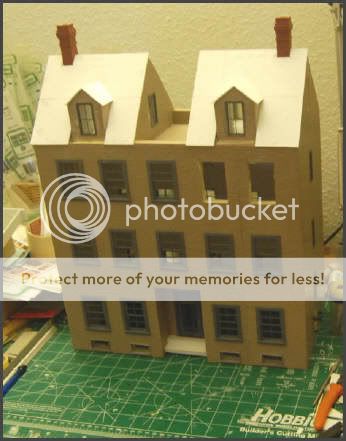
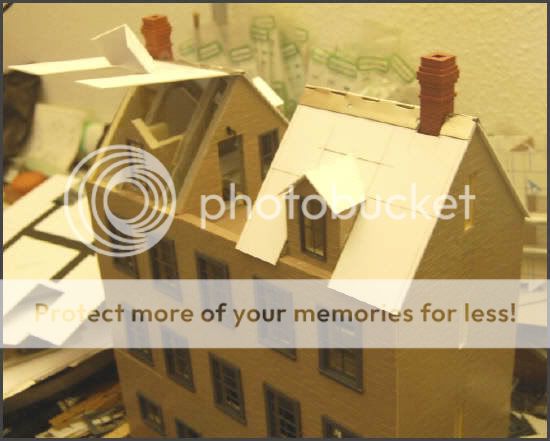
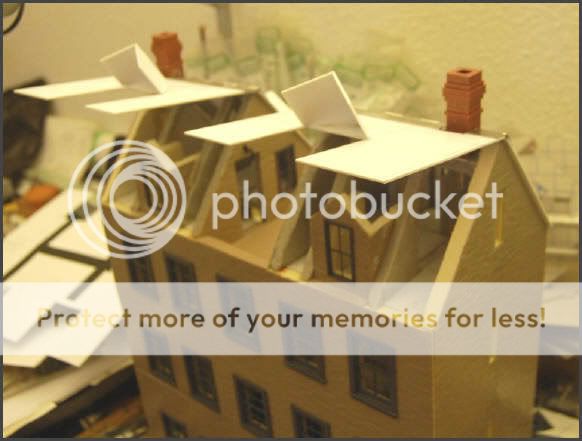
Four photos of dormers. Tomorrow, I'll do the other side of this building and I'll start the base of the roof and I'll put the chimneys.
Thanks for looking.
Yago.
______
Thanks to all for looking, Kids.
New photos seven days after...
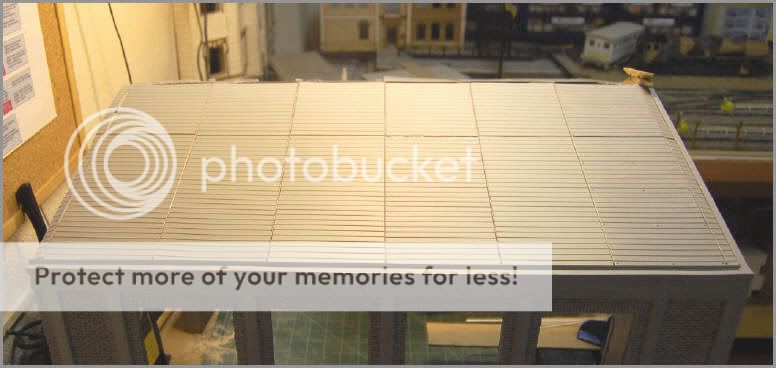
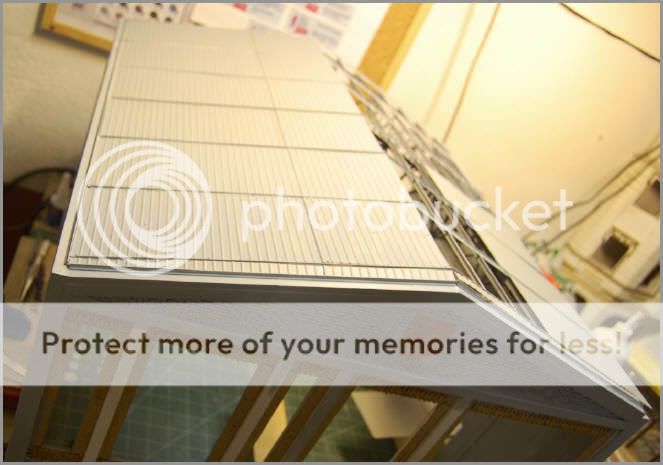
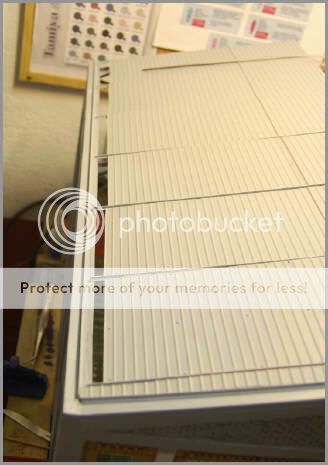
Making the roof...

The chimney... Original size and cutting marks..

:arrow: Before cutting...
:arrow: After cutting...

This week, I'll try to finish the roof of this building. And if I have time, I'll start the other building roof.
I have doubts about lighting dormers. I'm thinking the mode to put the interior lights of the dormers.
I'll post new photos in this week.
See you.
Yago.
______


_______
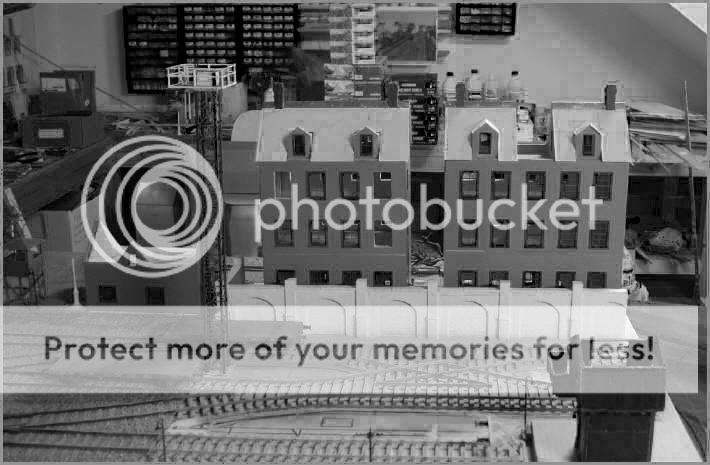
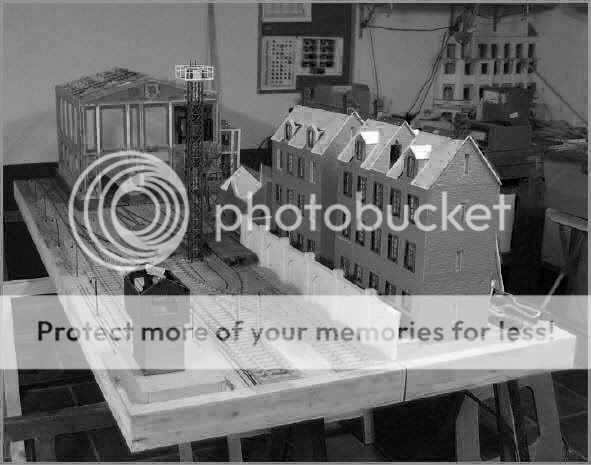
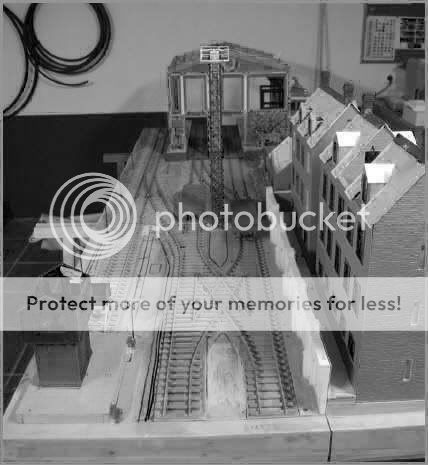
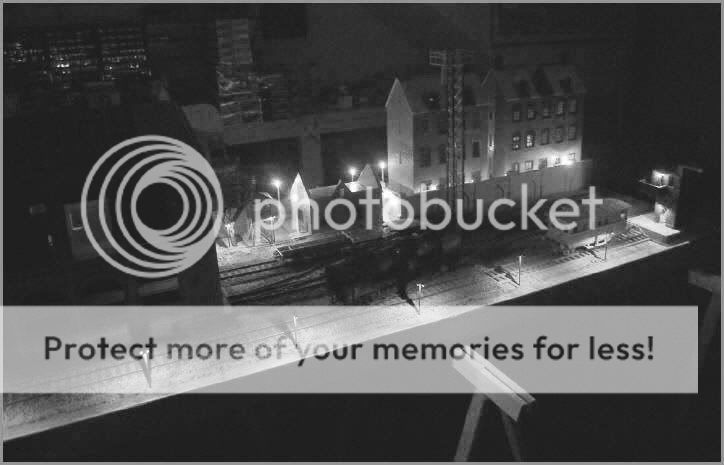
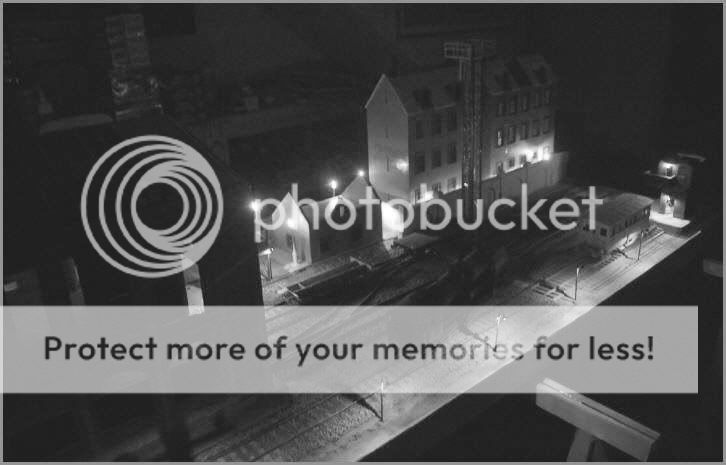
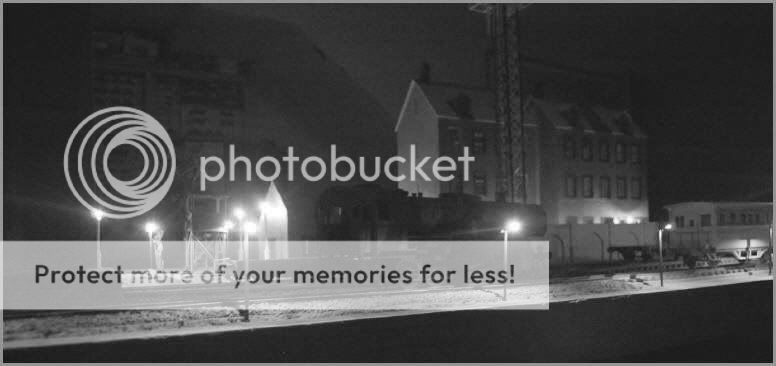
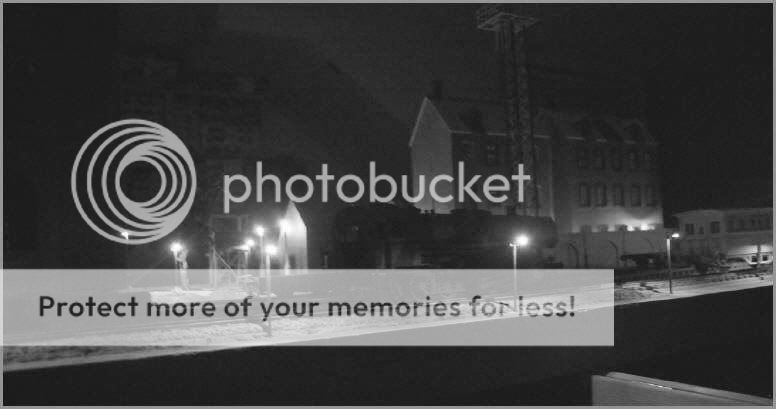
B/N PHOTOS:
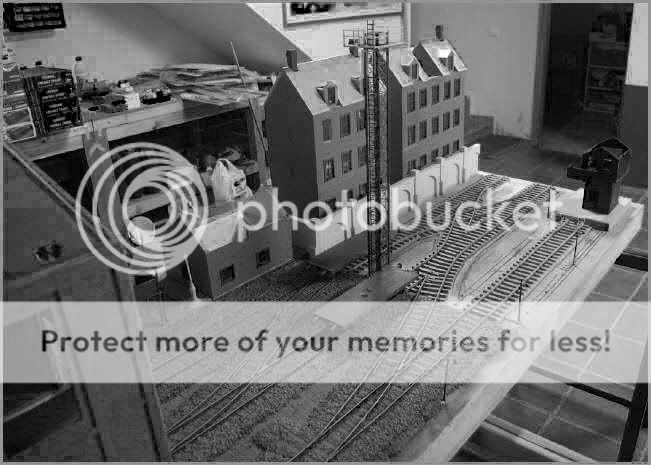
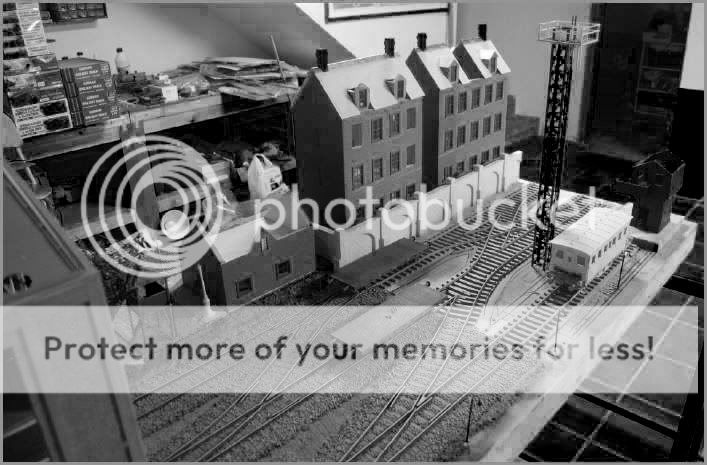
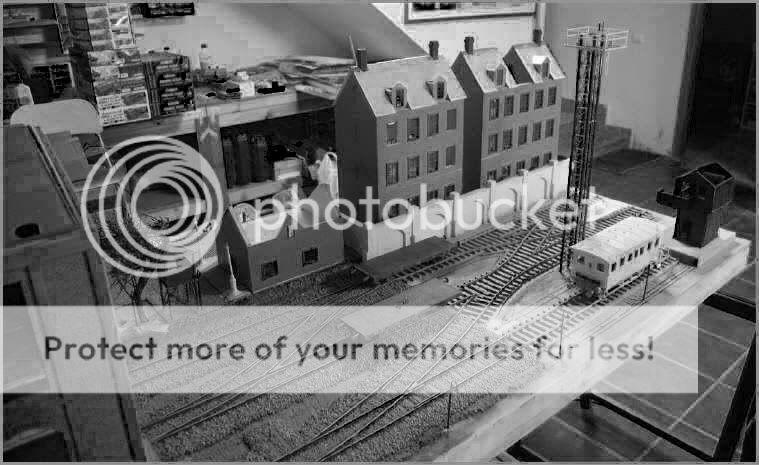
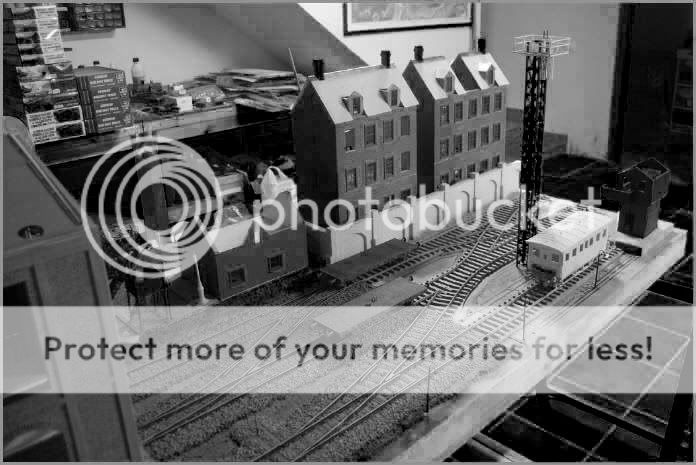
______
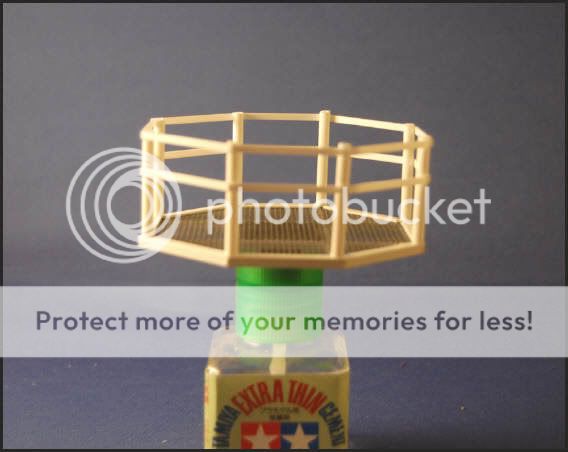
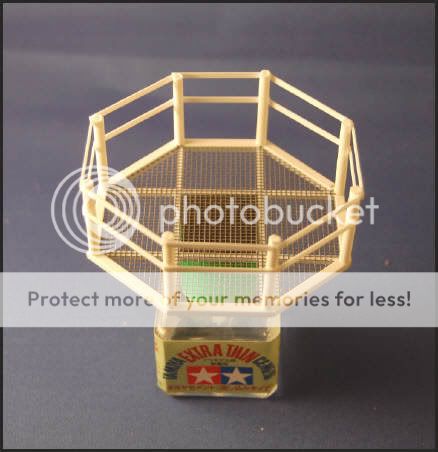
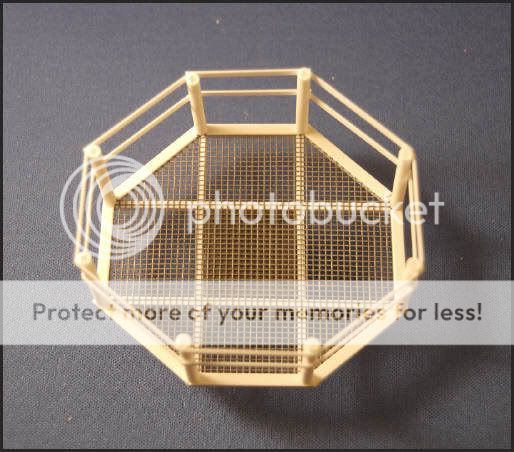
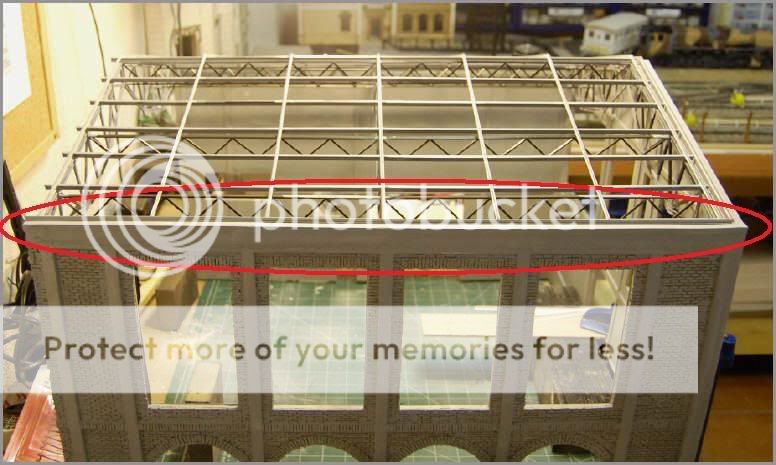
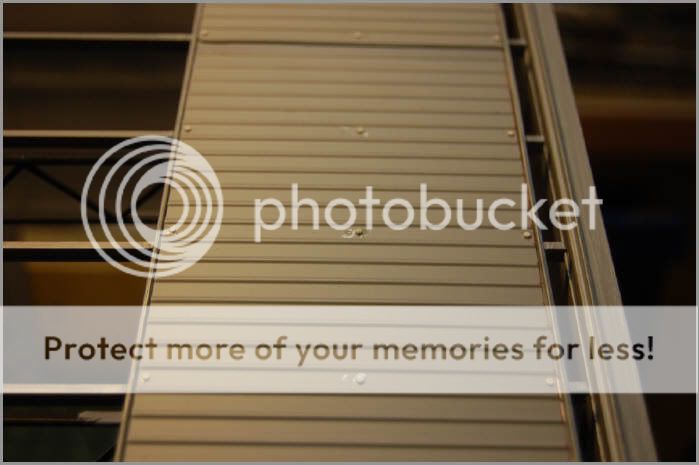
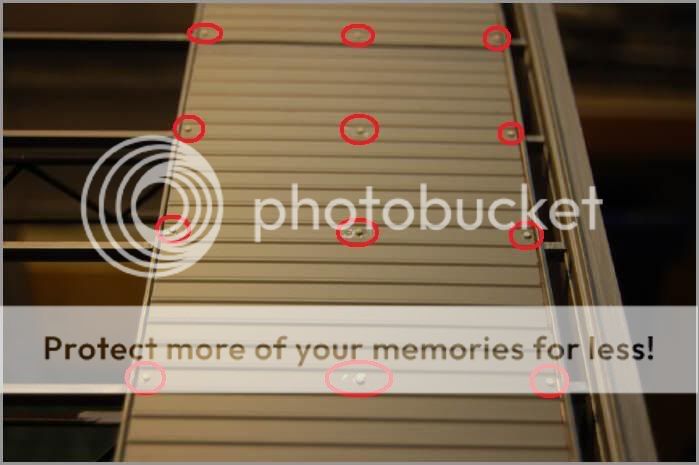
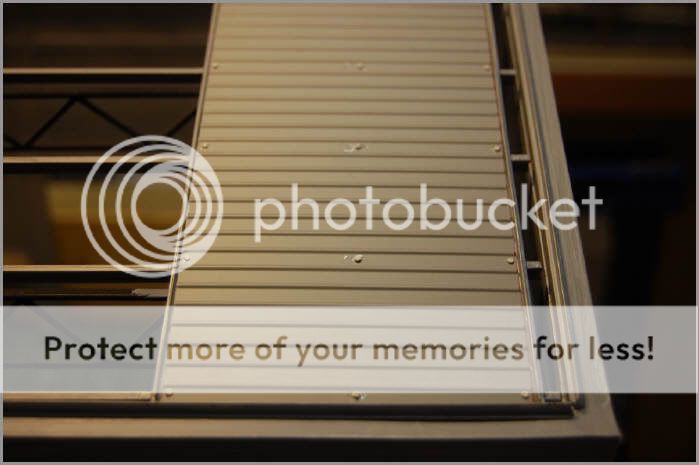
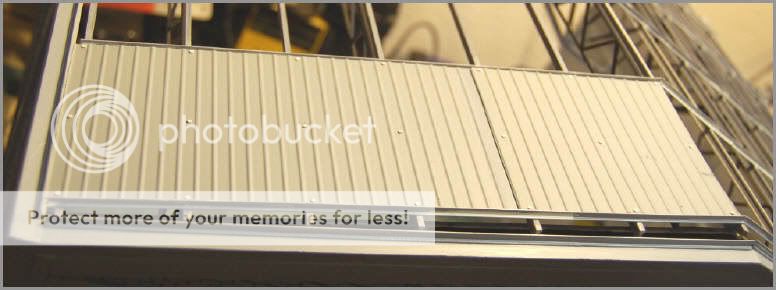
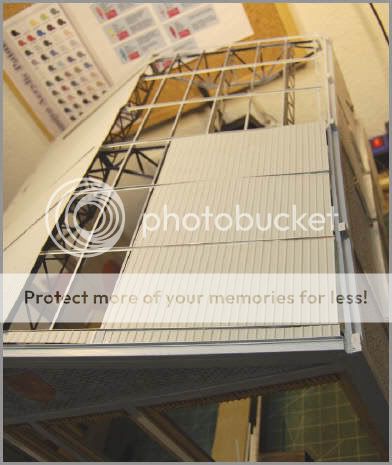
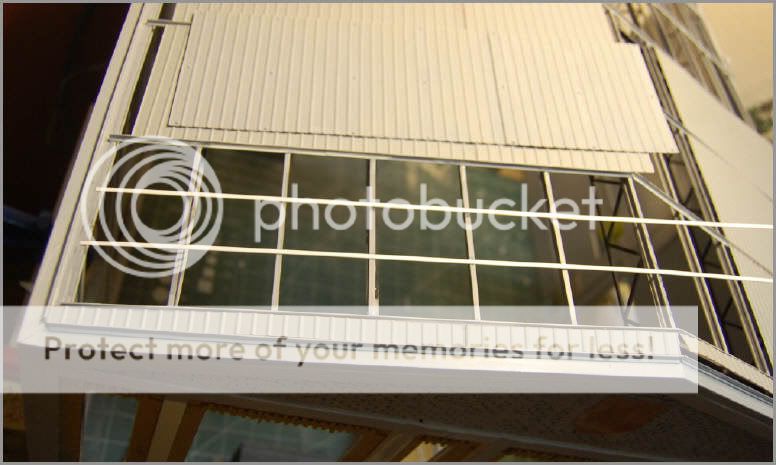
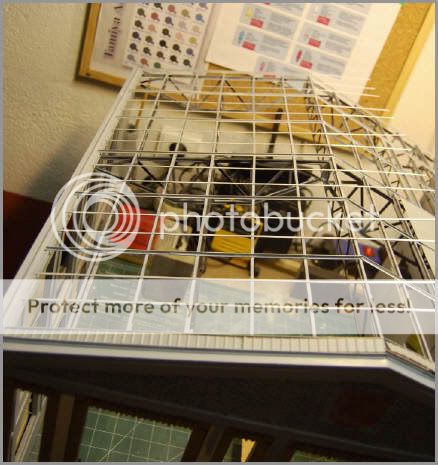
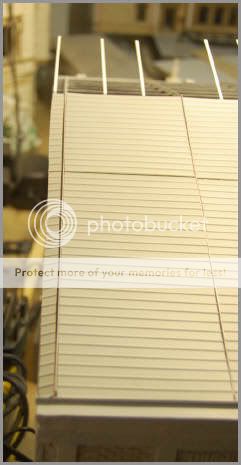
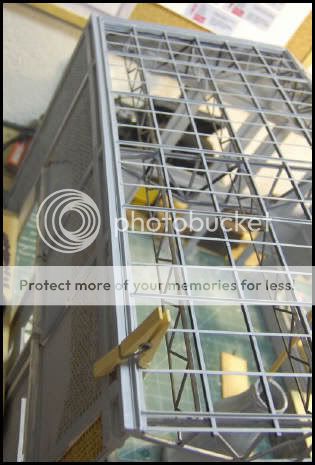
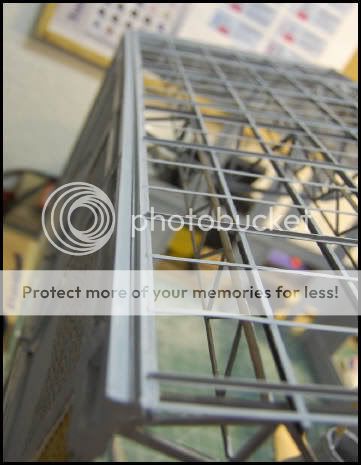
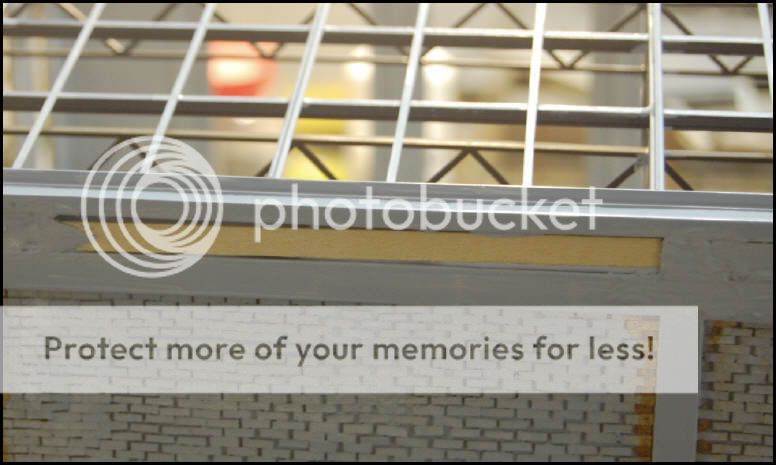
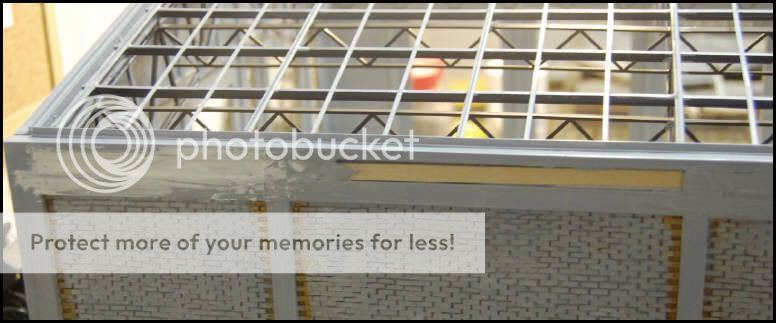
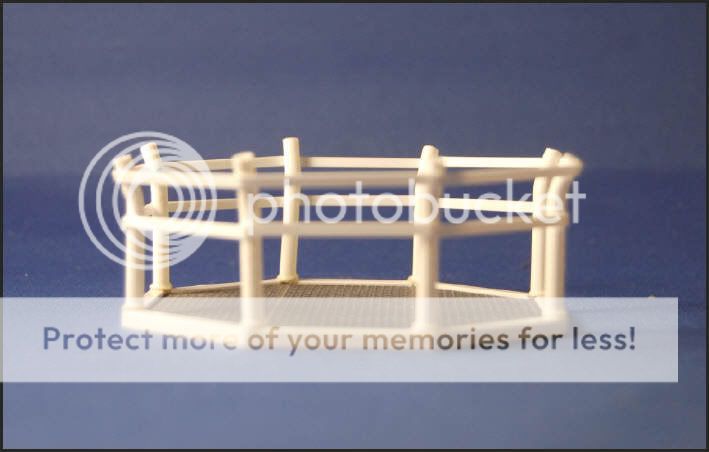
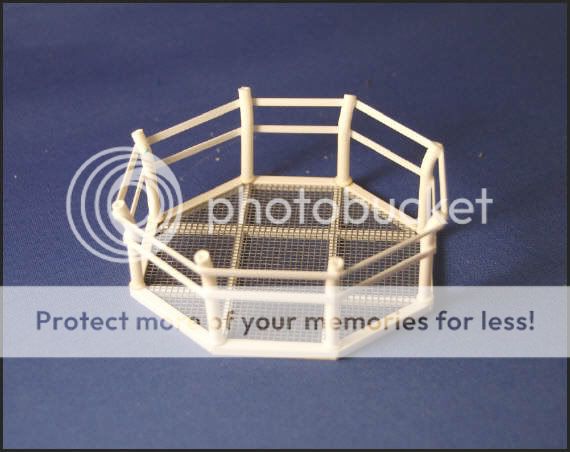
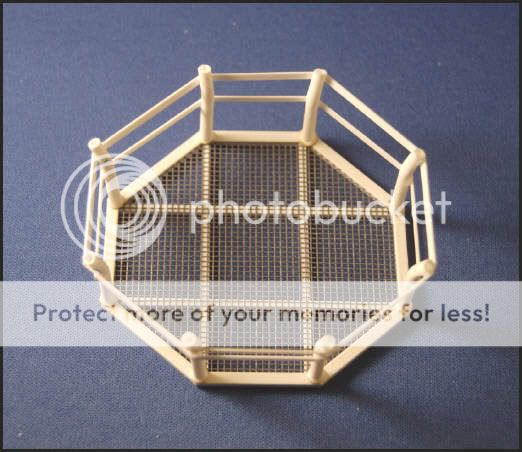
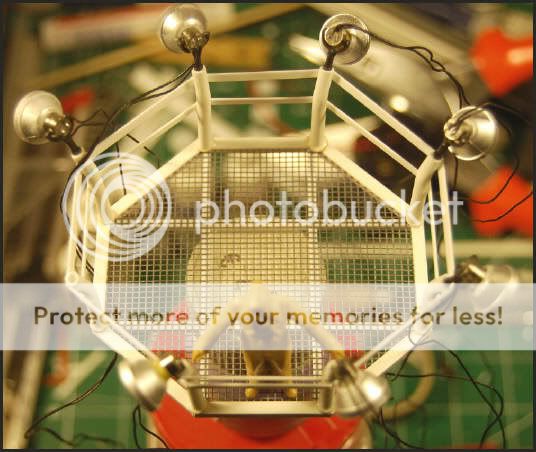
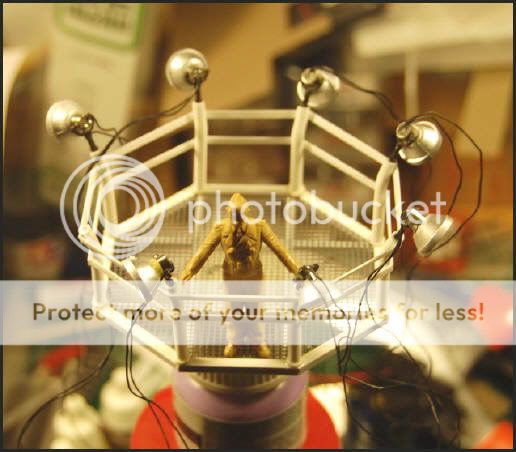
NEW RAILING...
______
COMING SOON! NEW PHOTOS AND MORE THINGS.
SEE YOU GUYS!
Yago.
I post here all photos from TNT.
Again I get to work. After they to have been some months of works at home, to the end I could mount the desk and I placed the two sections of the diorama. During these months of "inactivity", I was compiling information and material for when had time. And now that begins the good weather, I have returned to the zone of work with force and desires.
After to have taught the module of the Second Section of the diorama, and after to have explained what wanted to do, I have begun to mount the new sections.
(NOTE: See the web site on http://www.modelismo-hld.com/dioramasyvinetas/alemania19421sec/index.php & http://www.modelismo-hld.com/dioramasyvinetas/alemania19422sec/index.php)
:arrow: First I have carried out the section of dead end, that was the simplest one to carry out. Using as staff the plan of assembly of the sections of DRAGON RAILWAY TRACKS, was placing adhesive and subsequently I was putting the railways...
:arrow: Next I put the rails and I left them set. Of this section only will lack to place the stop of corresponding stop block-iron...
:arrow: After mounting that section I superimposed the railways of the other two tracks. Of that way I will know where I have to do the starts of bypasses and where will go located the crossing of ways in that section in scissors...
I expect that you like it.
A strong hug.
Yago.
___________
Hi kids!
I put new photos here.
First, I made the STOP BLOCK-IRON for died railway, and them I put it on his position...
Next, I have begun to take measures and I have placed several railways that will serve me as reference to delimit so much the space of the simple bypass like of the start of the crossing in scissors that goes subsequently...
In the end, I will not be able to reproduce all the crossing of scissors in the second section of the diorama. After it to have taken measures, I will be able to represent more or except the half of that type of crossing...
But I believe that will be sufficient and will create certain tension in the representation of the diorama.
Thanks for all.
Yago.
_________
Hi kids.
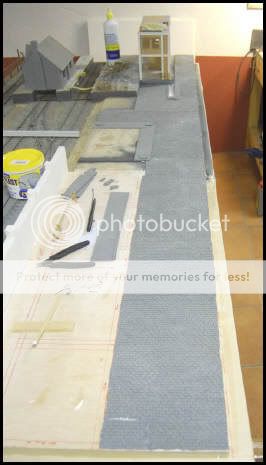
The next week I will try to give him a little more than form to the new sections of ways. I have placed the railways of the two sections and I have set the rails that will not suffer modifications.
------------------
Este fin de semana intentaré darle un poco más de forma a los nuevos tramos de vías. De momento he colocado las traviesas de los dos tramos y he fijado los raíles que no sufrirán modificaciones.
:arrow: Location of the railways of the two sections of railway tracks... (Ubicación de las traviesas de los dos tramos de vías...) :!:
:arrow: Location of the fixed rails and graphics of the ones that will be modified... (Ubicación de los raíles fijos y gráficos de los que serán modificados...) :!:
Thanks for your time.
Espero que os guste. Un fuerte abrazo.
Yago.
_________
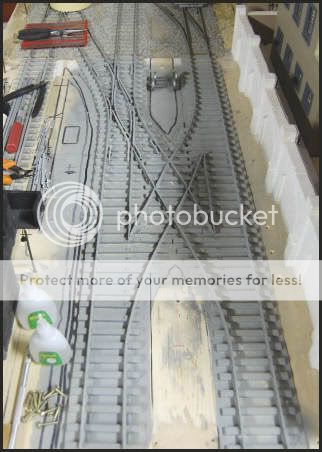
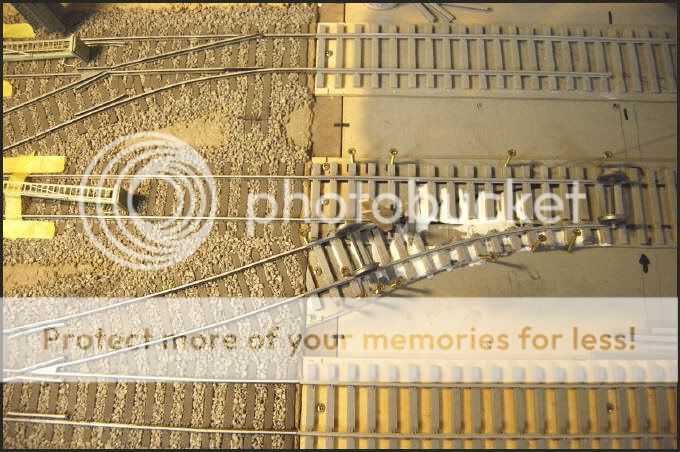
Here I post what I have been able to do today.
I have initiated the construction of the bypass that precedes the crossing of scissors and that does of link of union with it previously carried out of the 1st Section.
:arrow: General view of the union by means of rails of the Sections 1st and 2nd...
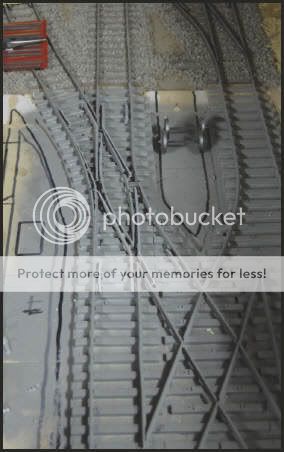
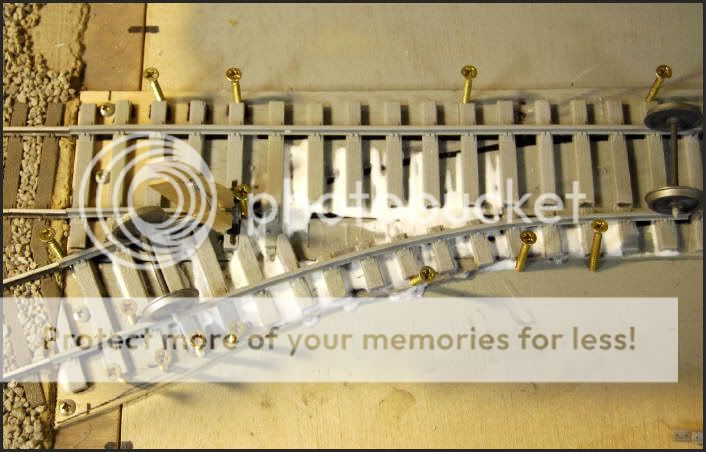
:arrow: Fat detail of the assembly of the bypass. ..
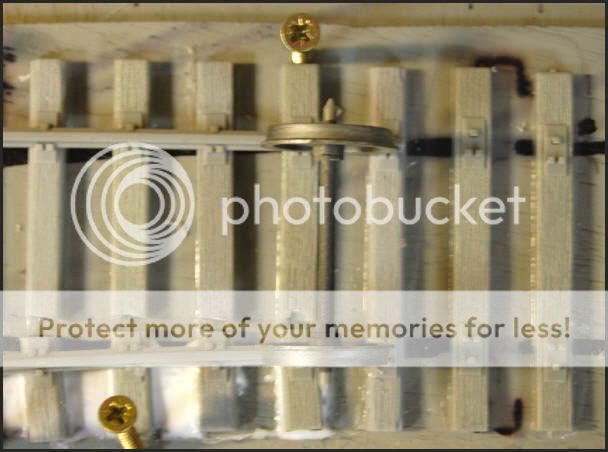
:arrow: The use of an axis of freight car with wheels aid to the assembly of the wide one of rails. In this manner themselves not surprises of disproportions will be produced further on...
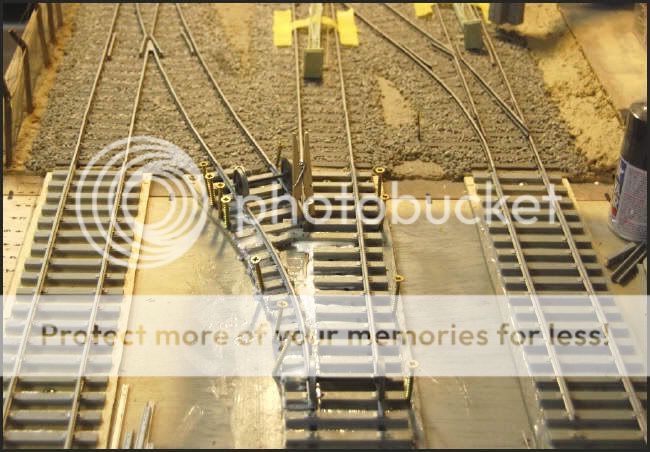
:arrow: General views of it carried out up to now...
I expect that you like it
A strong hug.
Yago.
________
Hi kids:
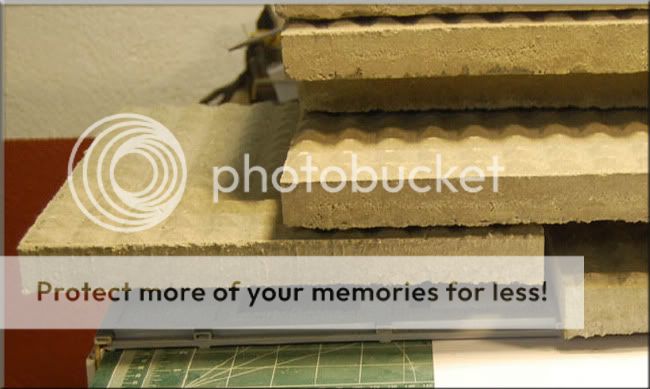
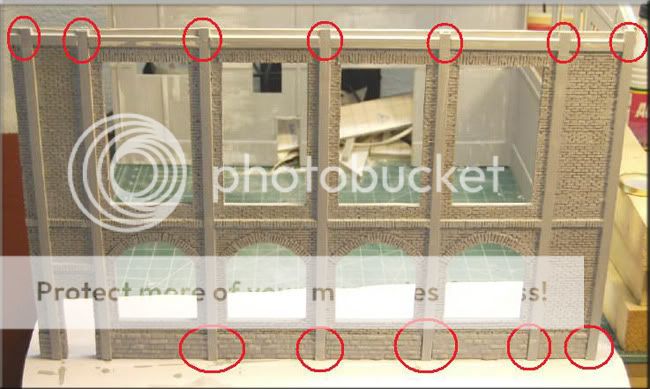
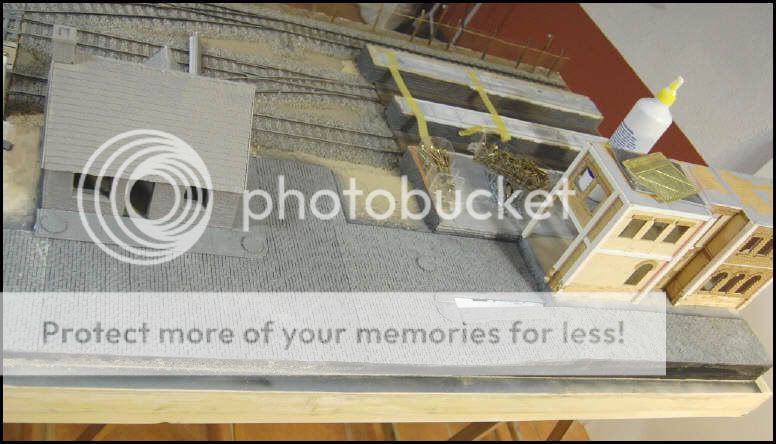
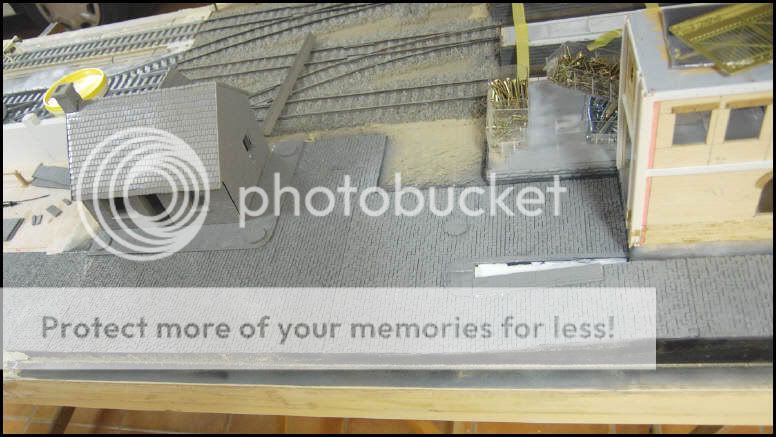
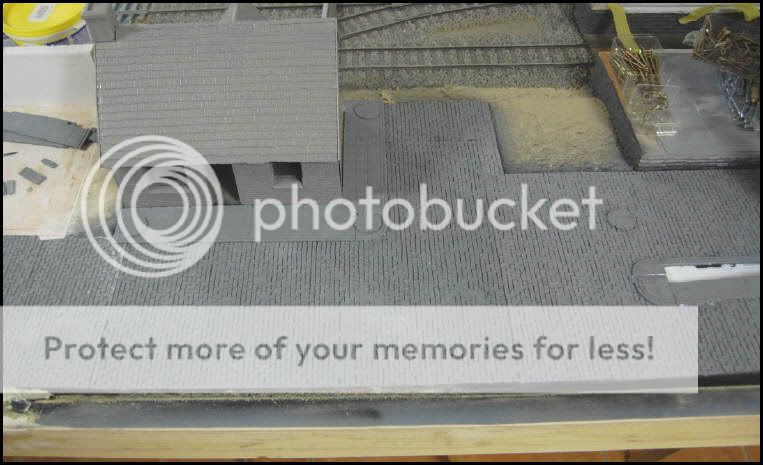
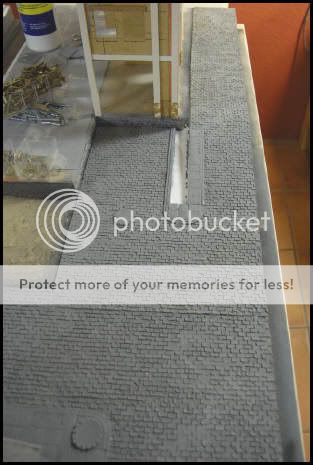
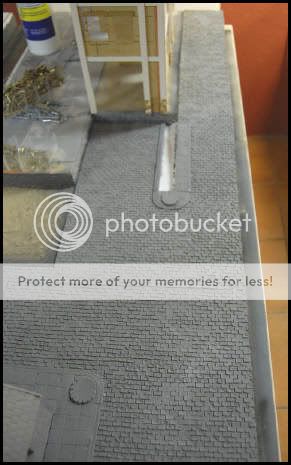
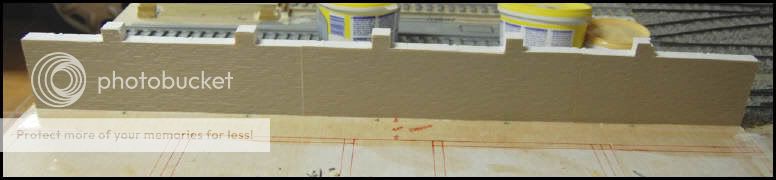
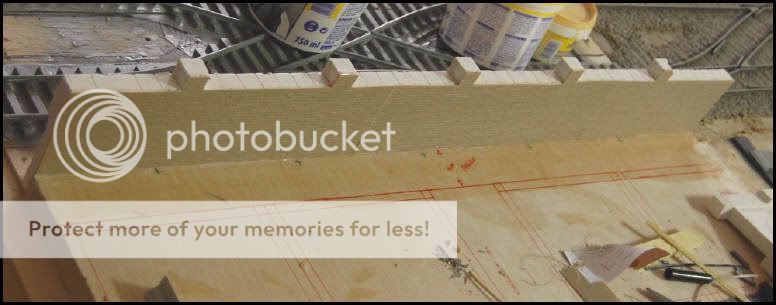
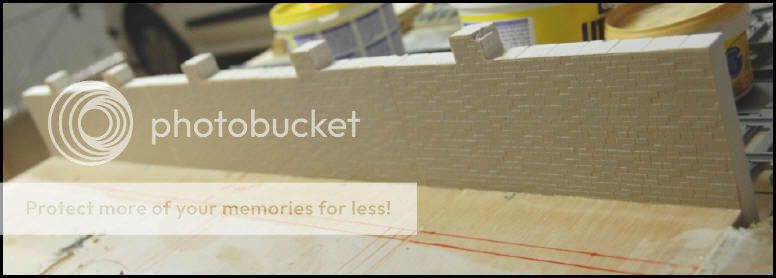
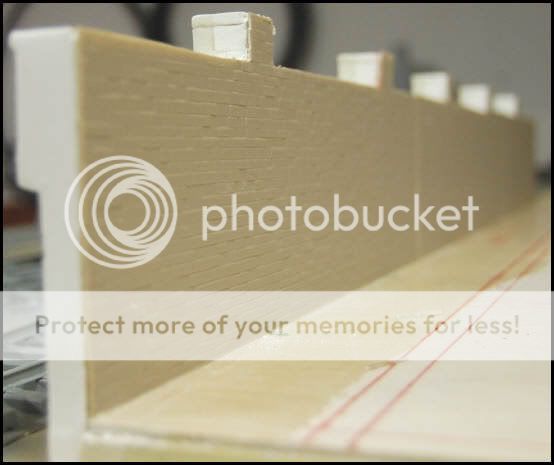
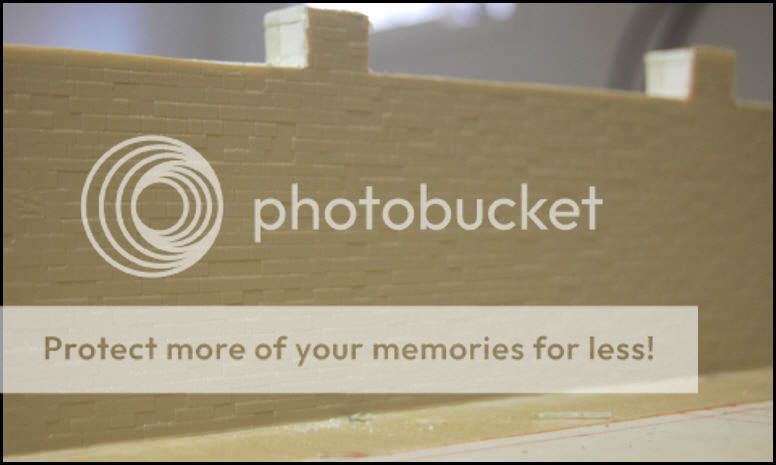
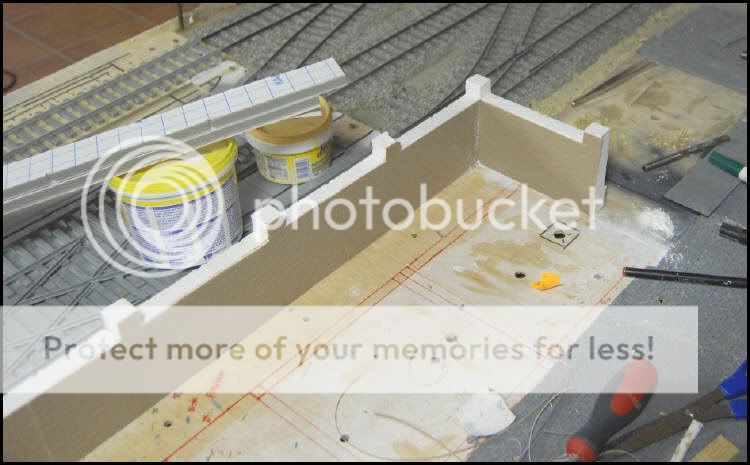
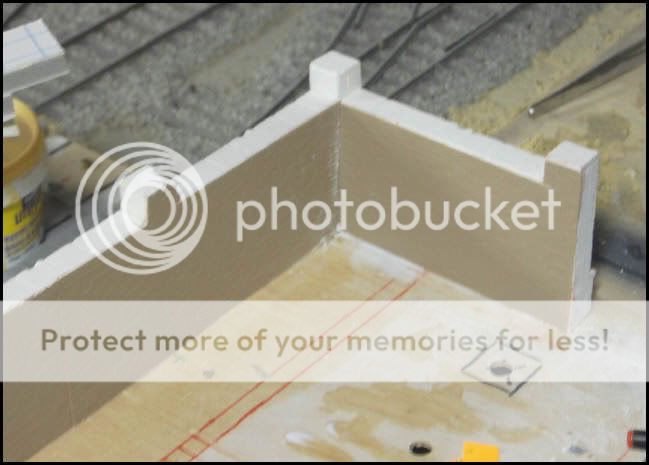
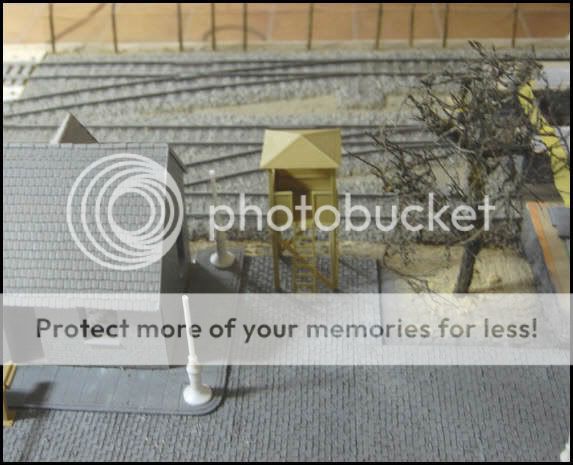
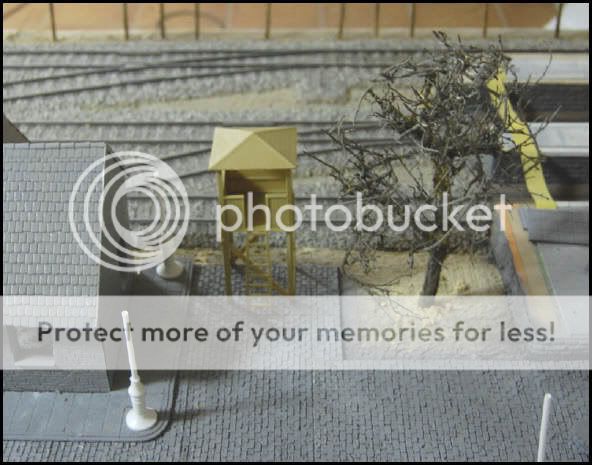
While I continue squeezing me the head, with the theme of the ways to obtain an acceptable result, I have placed the wall of separation of the railway precinct and the urban zone. I have united the pieces and I have lowered the surpluses of plaster. In the unions there I am employee white putty for be not inharmonious with the color base. One of the blocks was trimmed (the located to the right) so that could fit in the diorama, although this helps me to add something of tension and irregularity in the composition.
And on the other hand, I have carried out the base of the railway control tower. By means of ribbons of wood I have done the retaining walls, and with plywood I have done the base. Besides, the base has been quartered by means of quadrants to simulate the floor...
I expect that you like.
A strong hug.
Yago.
________
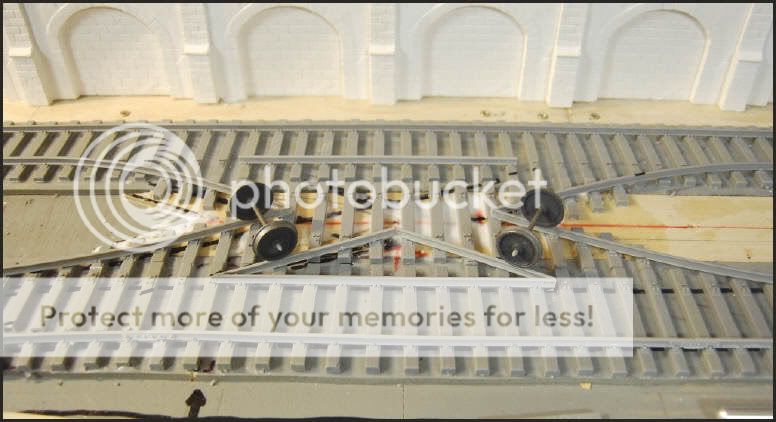
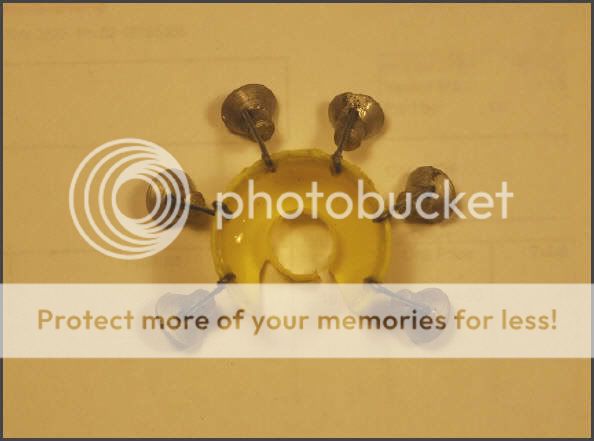
With the arrival of the sections of DRAGON Railways (that finally I obtained in eBay), I have begun with the scissor crossing. Here I post some pictures...
And here I show a caliper of wide of railway that I have done me to go placing and adjusting the rails.
I have performed him four positions to have various margins among axes.
I expect that you like.
Yago.
_________
Hi kids!
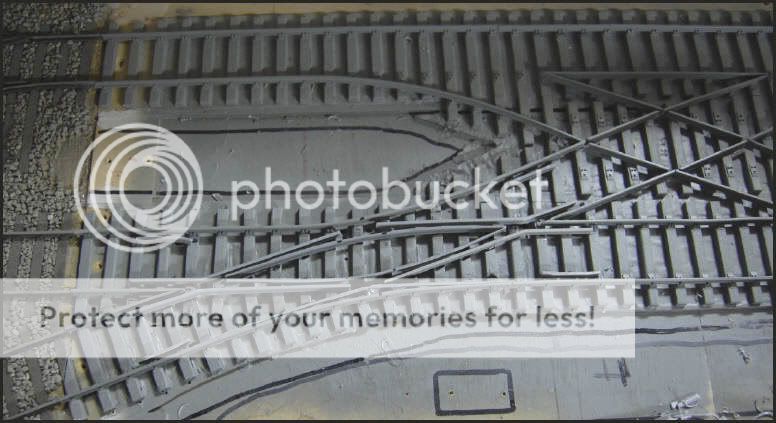
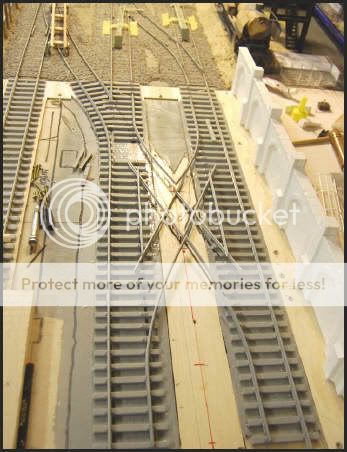
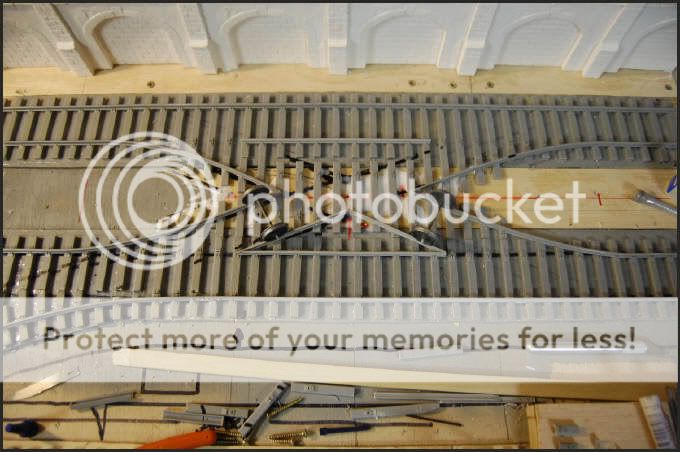
As I have commented ultimately, the summer causes to me that I'm working more and hard, is somewhat strange. But you have the test with the following pictures. I have begun to put the rails of the central part of the scissor crossing. Previously I have placed the railways in that zone...
I expect that you like.
A strong hug.
Yago.
________
Hi kids!
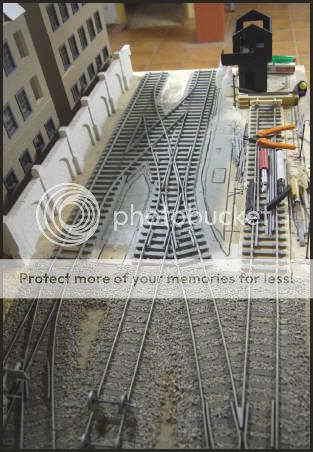
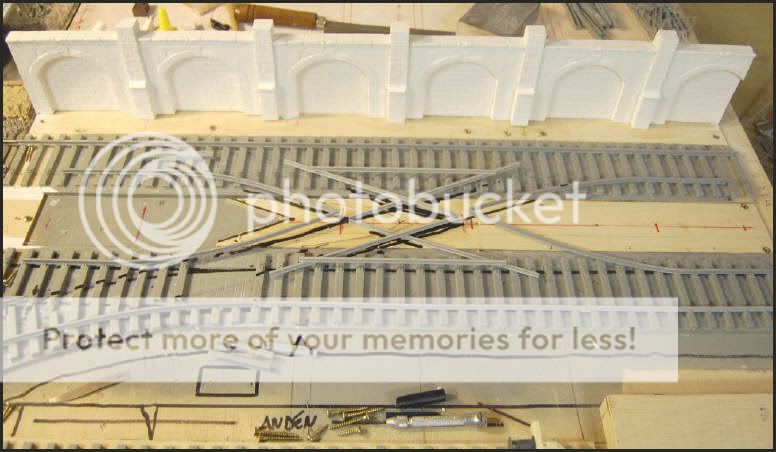
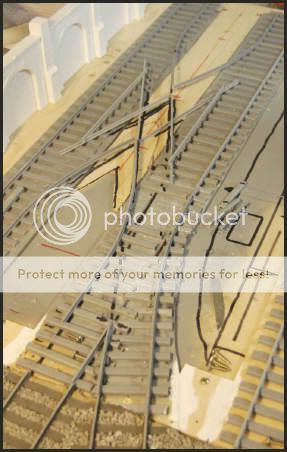
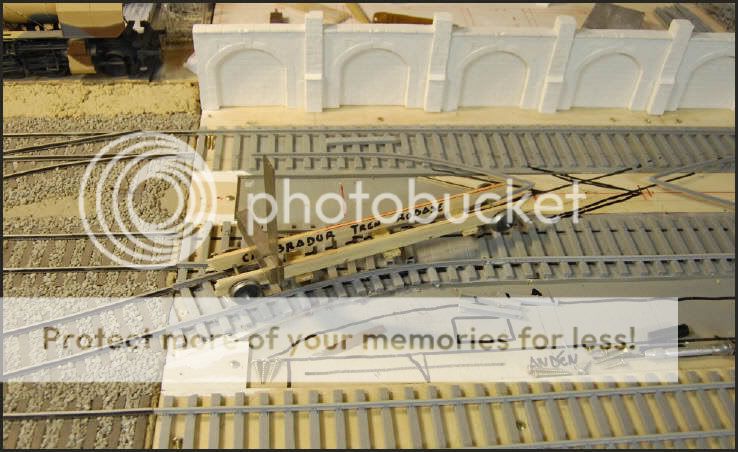
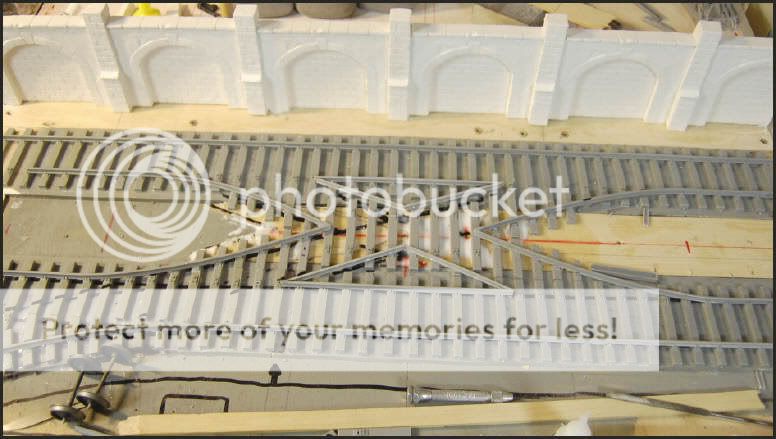
Received part of the orders of railways of DRAGON, I have managed to finish the structure of the knot or scissor crossing. Only it will remain to do the mechanisms of bypass and the reinforcements of the crossings and bypasses. Here I post some photos to see the process of assembly...
SEE THE DETAIL OF THE BLACK & WHITE PHOTO THAT THERE IS IN THE UPPER PART OF THIS IMAGE
The photo and the diorama have a great similarity, before scissor crossing appears one bypass.
It has served me as template, to a certain extent, to see the plan that should continue.
I expect that you like.
A strong hug.
Yago.
________
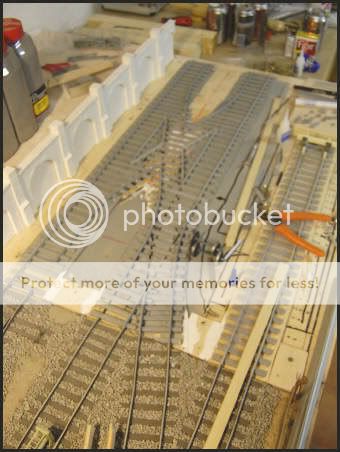
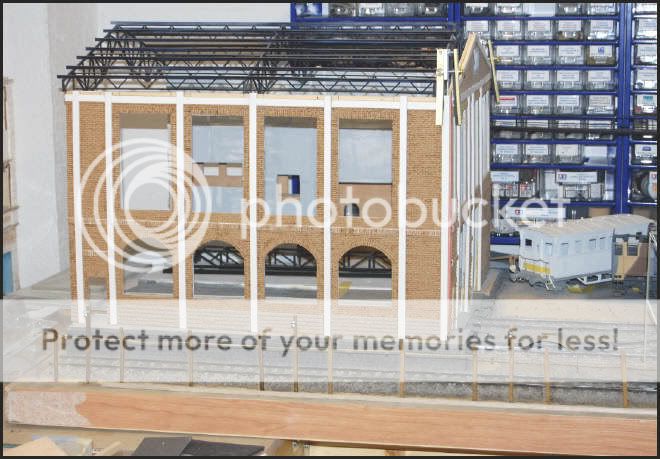
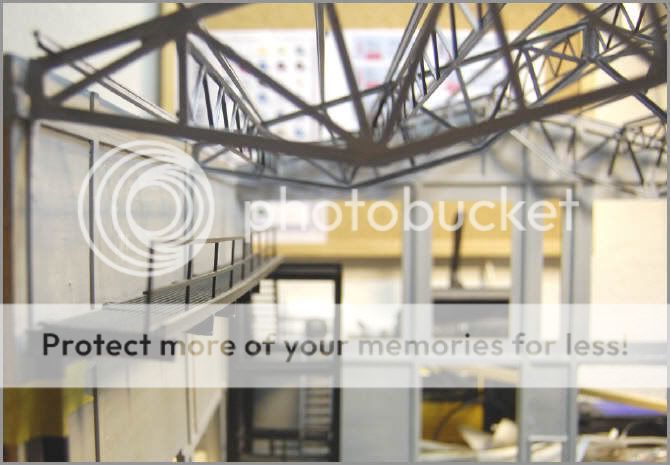
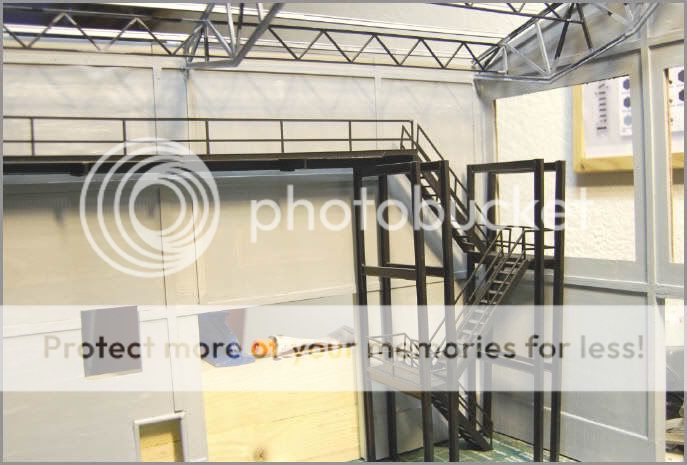
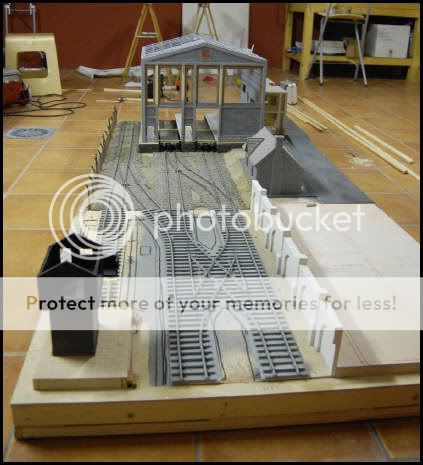
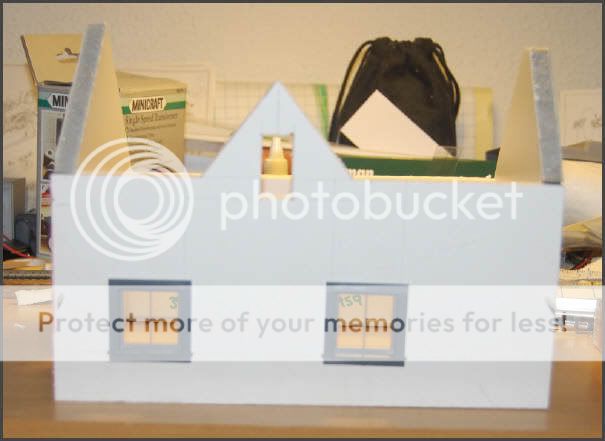
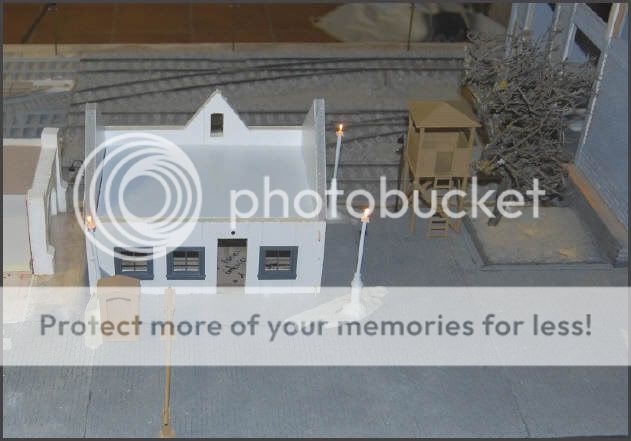
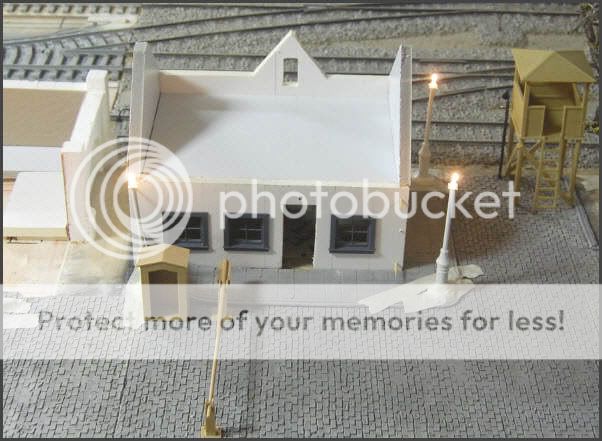
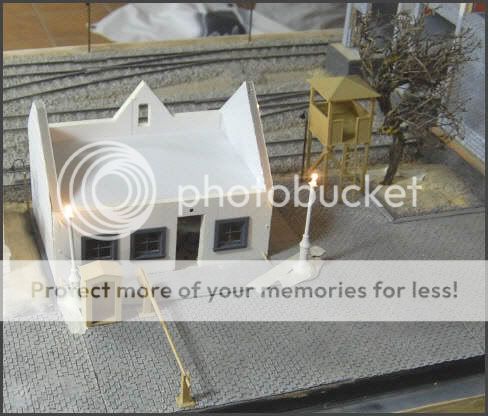
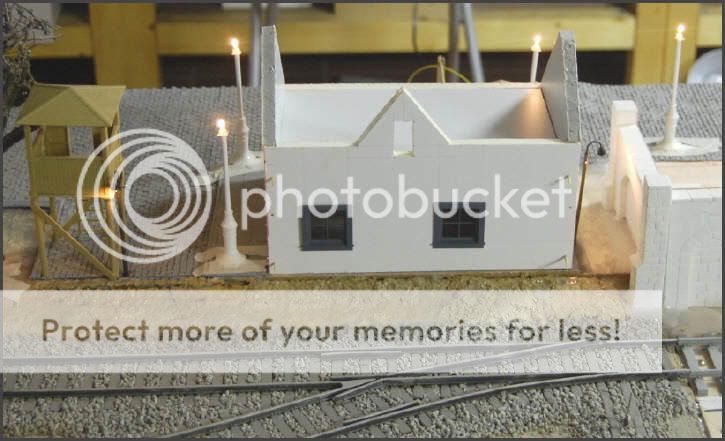
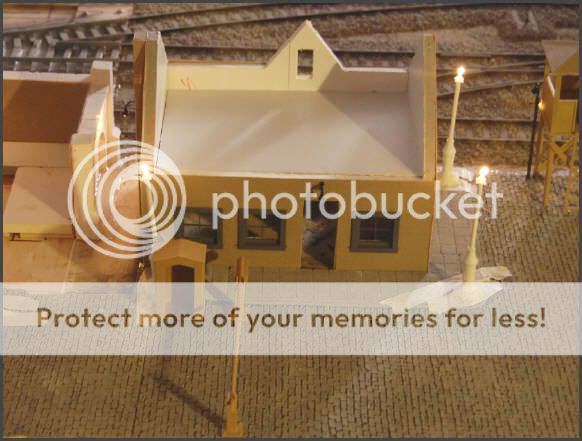
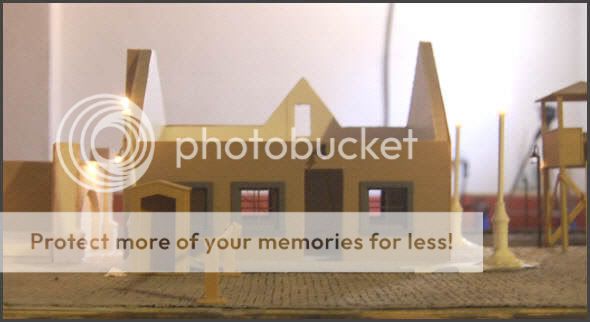
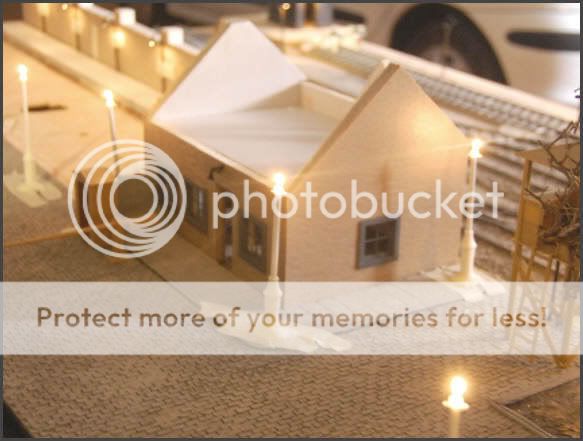
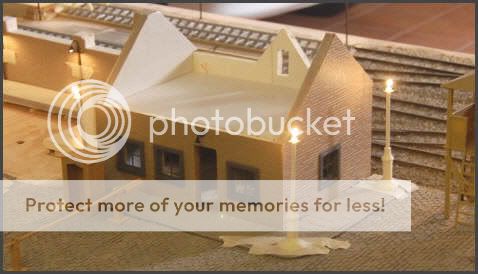
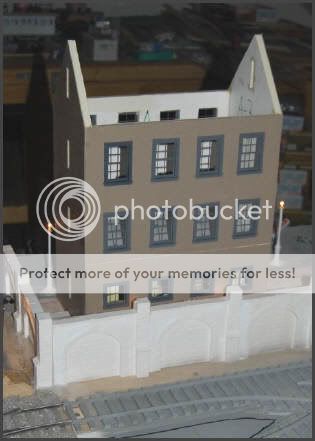
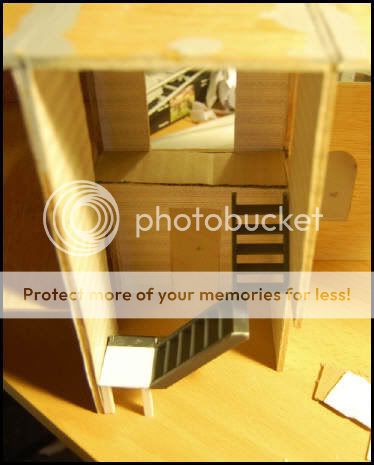
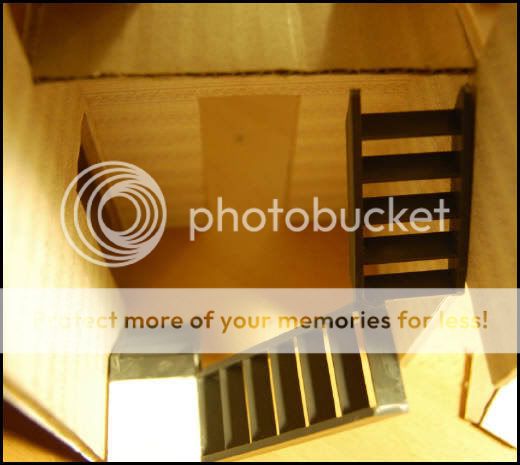
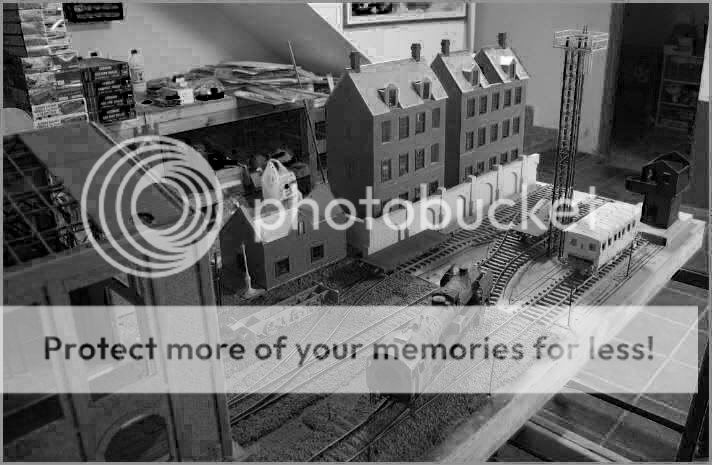
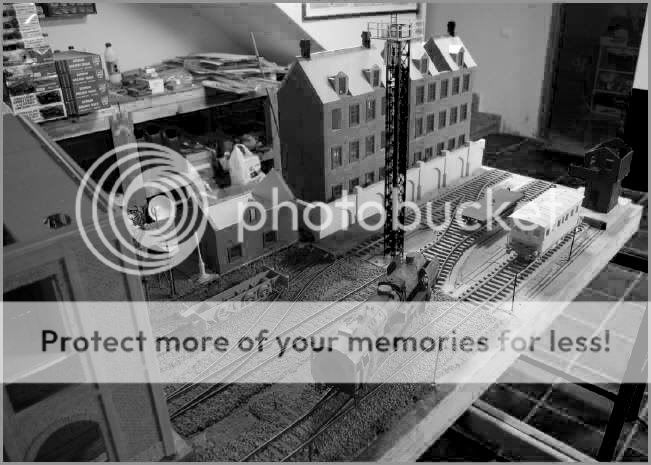
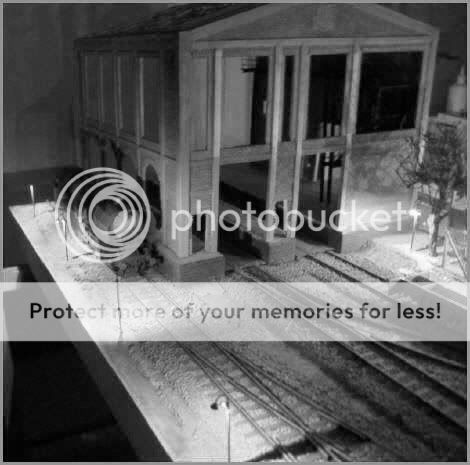
Time ago that I did ¡n't mount the diorama with the principal building and did some photos to be able to appreciate the assembly.
I expect that you like.
A strong hug.
See you soon kids.
Yago.
______
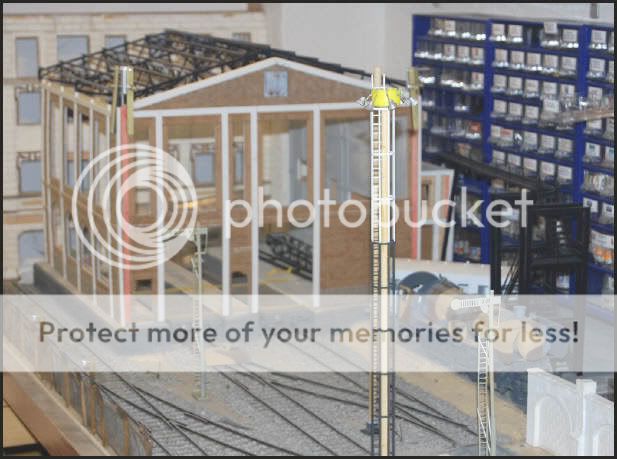
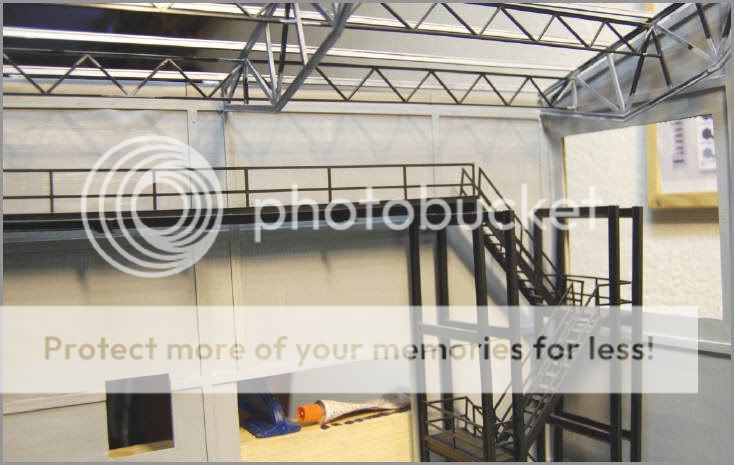
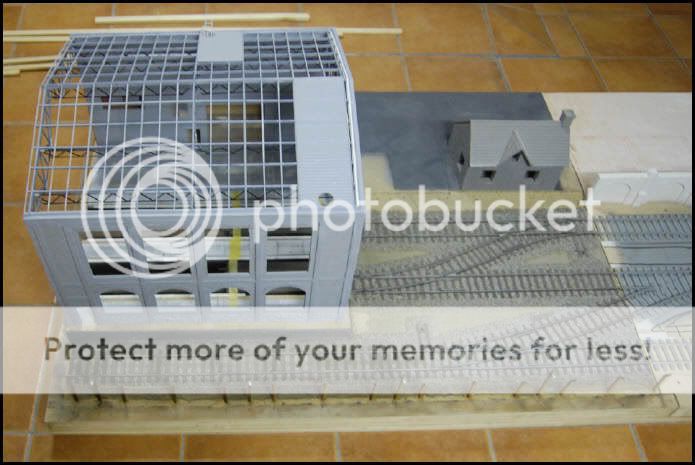
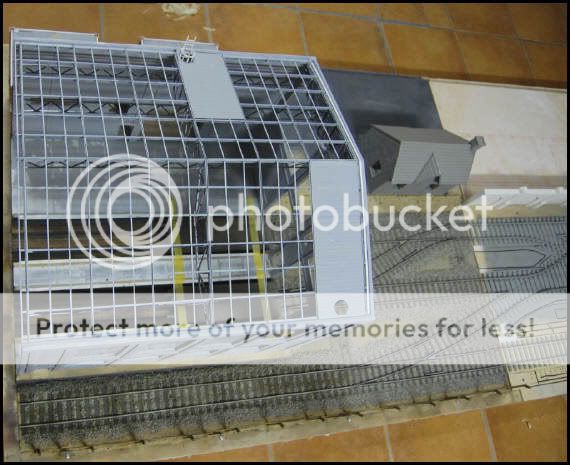
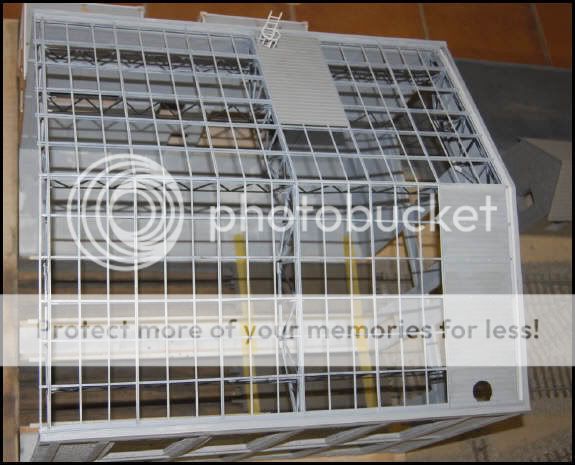
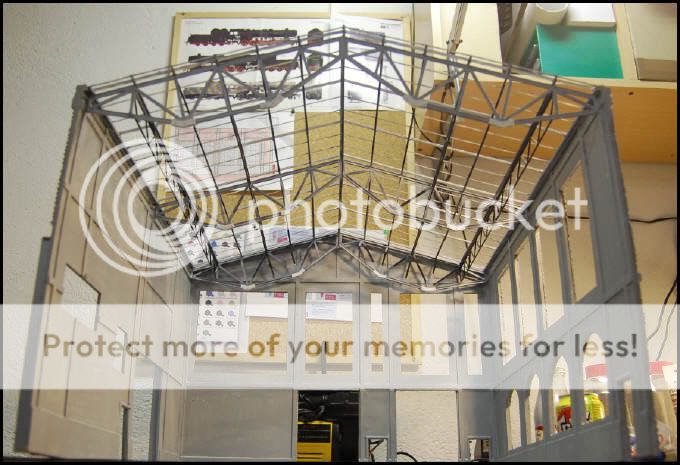
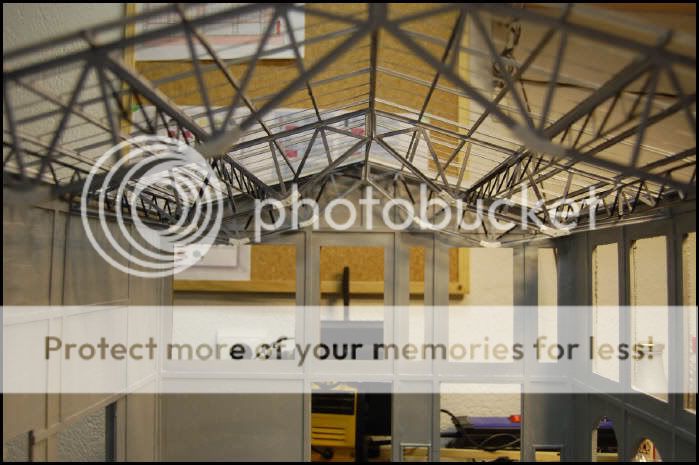
More photos:
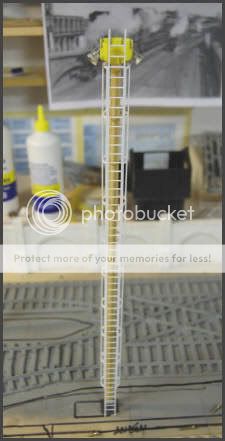
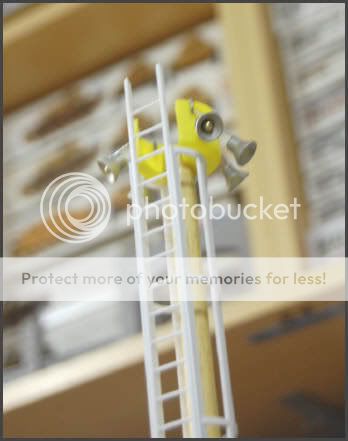
For second lighting tower...
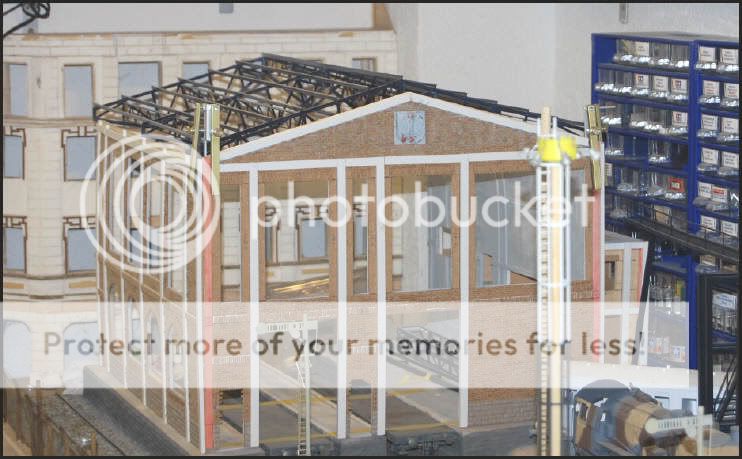
Main building...
Finished second lighting tower...
Main buildng again...
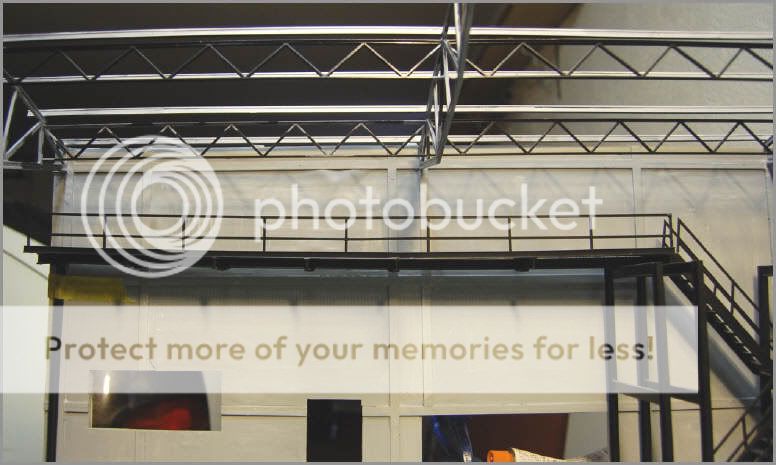
Metallic structure...
Fixing parts...
Another metallic structure...
I expect that you like it.
Best regards.
See you soon.
Yago.
______
Thank you so much, Bob.
If you liked it, wait to see this...
Thanks for see this photos.
Yago.
______
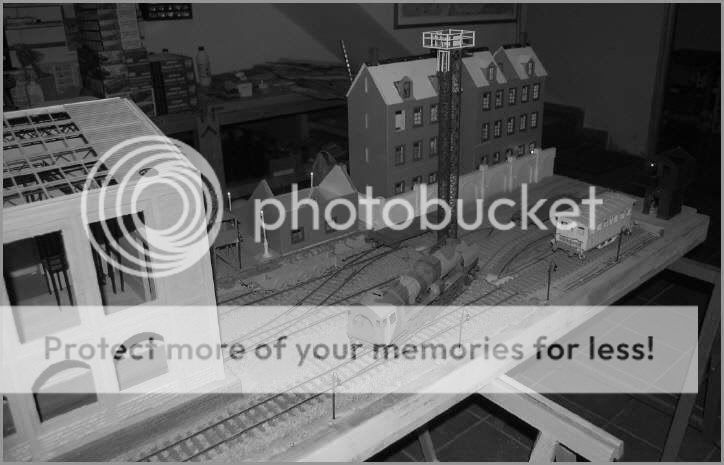
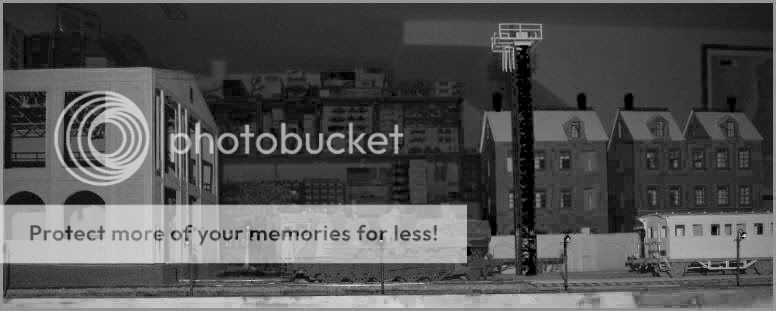
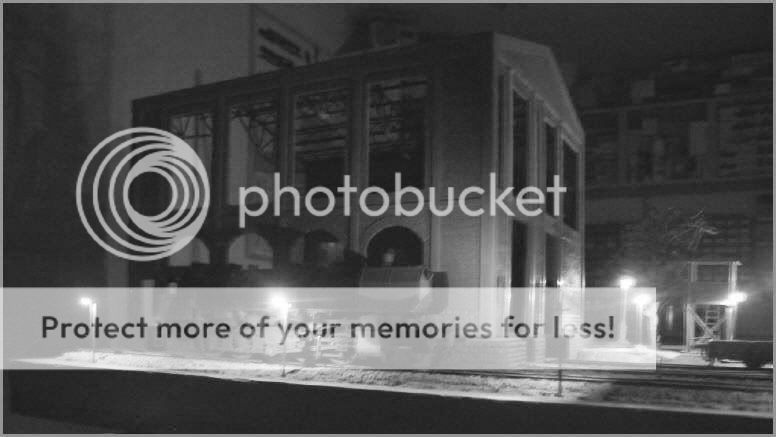
Hi kids:
I post more photos of this dio. General views of the big dio.
Thanks for all.
Yago.
______
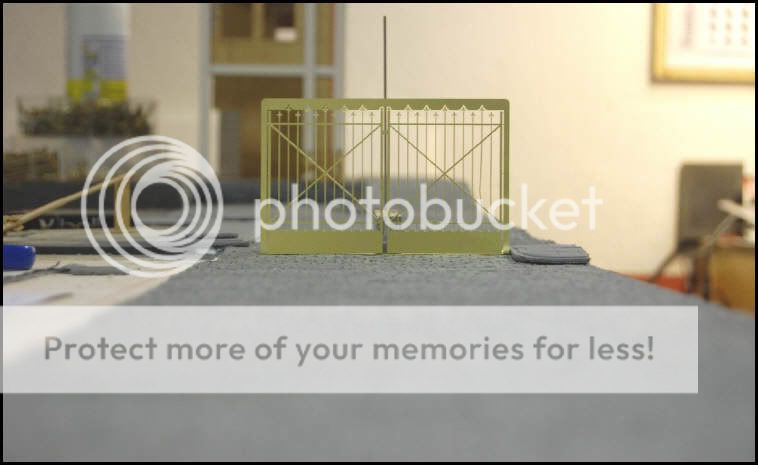
Carabinier has had lucky. More photos of dio.
ABER Gate.
... and check point.
See you soon.
Yago.
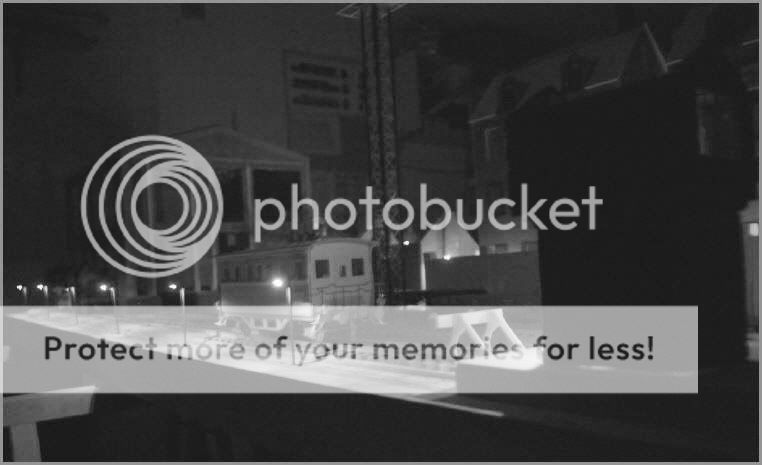
______
New photos for you.
Lighting of the dio...
Thanks for seeing.
Yago.
______
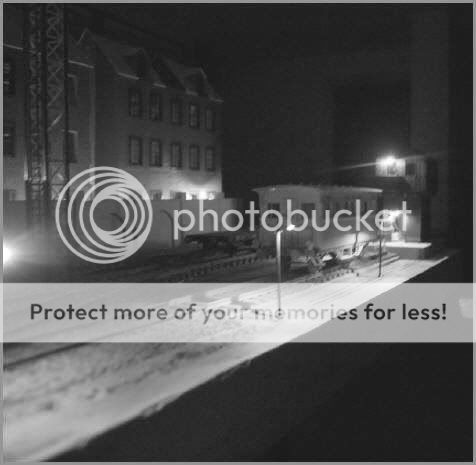
Hi kids:
I had promissed more photos of the lighting dio. You have more photos here...
____________________________________________________________
____________________________________________________________
____________________________________________________________
____________________________________________________________
See you soon with more and new photos.
Yago.
______
Hi kids:
Yesterday, I showed the photos with street lamps. Today, I show the railway tower lamps.
Perspective view.
Thanks for seeing.
Yago.
______
Hi kids:
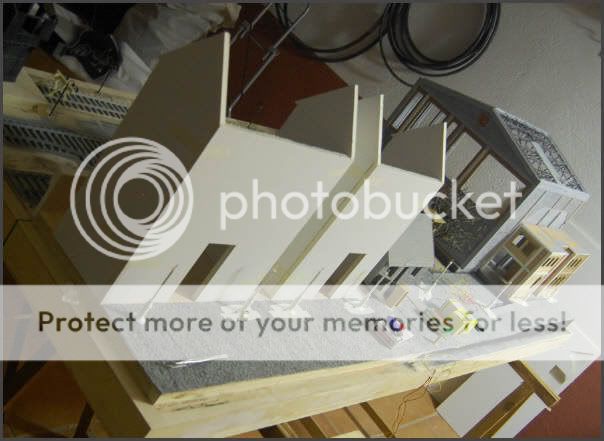
Today I did two buildings of the urban area. I built the structures, and the next week I will start to cover the facades and roofs. And I will do the attics.
I expect that you like it.
See you!!
Yago.
______
Hi kids.
I have done new photos. I'm working in the buildings.
____________________________________________________________
First I did a MiniArt model, but I didn't like it. I thought that I could do my own building.
____________________________________________________________
My own MiniArt replica:
See you soon with new photos.
Next step: "urban buildings".
Yago.
______
Hi kids...
More photos...
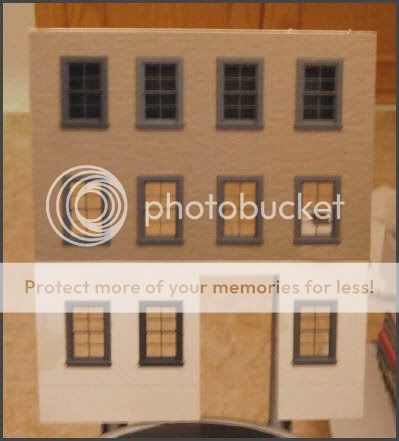
First Urban building...
Second Urban Building coming soon!
Thanks for looking.
Best regards.
Yago.
______
StuG said:Wow....! :shock:
Wow?
You have to see this...
:arrow: BEFORE......................................... :arrow: AFTER...
Thanks for looking.
See you soon kids.
Yago.
_____
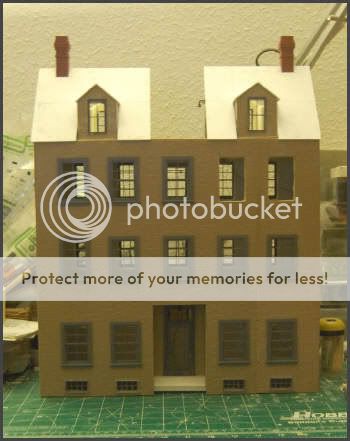
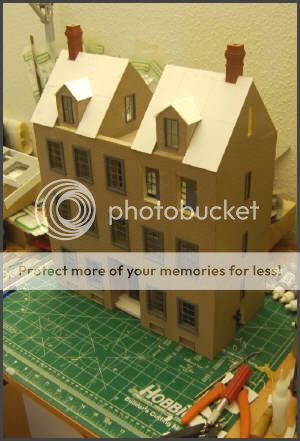
Hi kids:
Starting of second building...
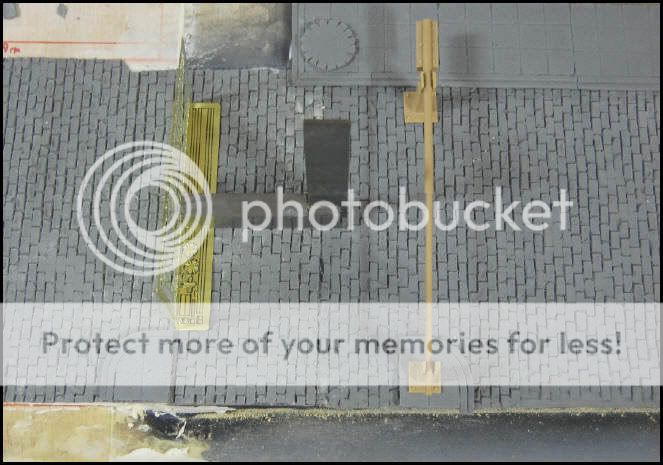
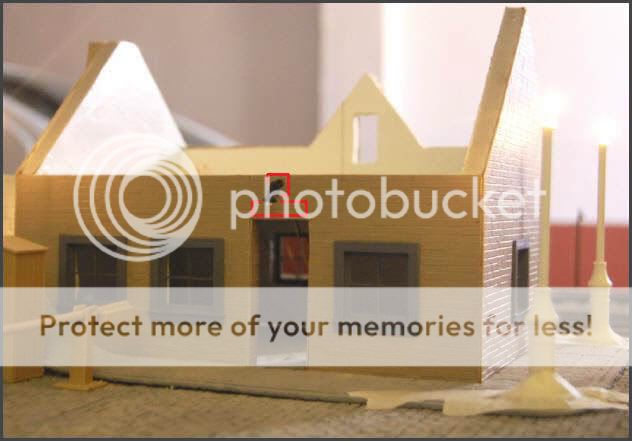
The next photo shows two colored lines.
The red line will be a rainpipe, and the green line will be wiring telephone and/or wiring light.
Today or tomorros, Saturday. I'll try to finish this building.
Thanks for looking.
Yago.
______
Hi kids.
Saturday...
Sunday...
To do rear facade and photos of buildings in the dio. I'll try to do the dormers and roofs too.
Thanks.
Yago.
______
Guys, new photos of the dio...
:arrow: Two urban buildings in the dio.
:arrow: Initial process for roof.
:arrow: Late process for roof.
:arrow: A) Floor.
:arrow: B) Walls and lighting.
:arrow: C) 3D design for dormers.
:arrow: D) Process of building the dormers and the roof.
:arrow: ?)One doubt for dormer position in the roof.
:arrow: E) Execution and final resolution.
Thanks for looking this work.
Yago.
______
Four photos of dormers. Tomorrow, I'll do the other side of this building and I'll start the base of the roof and I'll put the chimneys.
Thanks for looking.
Yago.
______
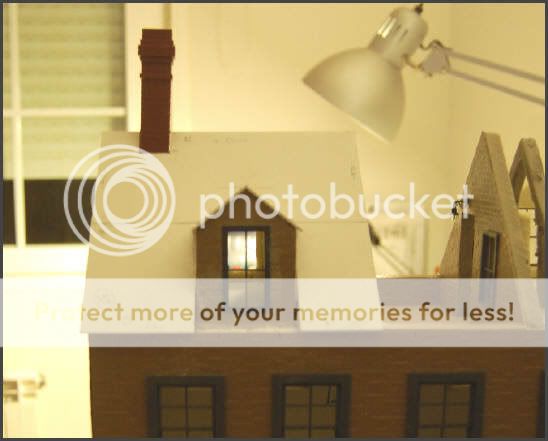
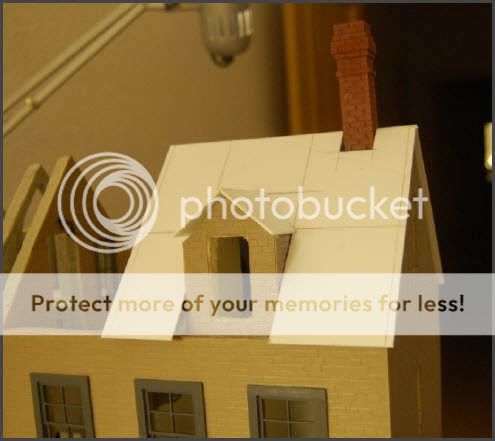
Thanks to all for looking, Kids.
New photos seven days after...
Making the roof...
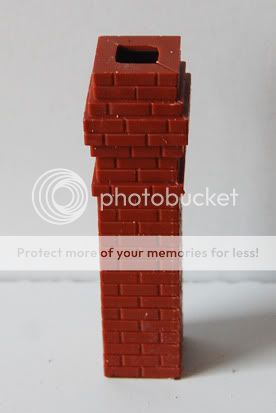
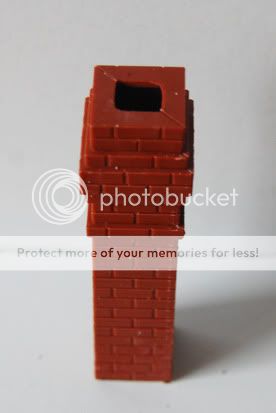
The chimney... Original size and cutting marks..
:arrow: Before cutting...
:arrow: After cutting...
This week, I'll try to finish the roof of this building. And if I have time, I'll start the other building roof.
I have doubts about lighting dormers. I'm thinking the mode to put the interior lights of the dormers.
I'll post new photos in this week.
See you.
Yago.
______
_______
B/N PHOTOS:
______
NEW RAILING...
______
COMING SOON! NEW PHOTOS AND MORE THINGS.
SEE YOU GUYS!
Yago.


")