• Modelers Alliance has updated the forum software on our website. We have migrated all post, content and user accounts but we could not migrate the passwords.
    This requires that you manually reset your password.
    Please click here, http://modelersalliance.org/forums/login to go to logon page and use the "Forgot your Password" option.

Bob's '65 GTO

Greg Kimsey

Well-known member
My elderly friend, Bob, purchased this kit from me saying he wanted to try to build it. His Parkinsons was so bad that I say no way that could happen. It didn't. He brought it back and asked if I would build it. I always say yes. He is such a lonely old man.So I have taken a short break from my Israeli F-16 to do Bob a solid.
His requests were
Body- White
Interior- Teal
Hood detached.
Convertible.
Custom version, not stock

I am trying to make this as clean as I can (no glue fingerprints, smudges, etc). This might be the cleanest engine I have ever done.
1000005608.jpg
1000005609.jpg
1000005610.jpg

I have always tried to make the sparkplug boots from one piece and cut a V at the bend, bend it and superglue. It has never worked out satisfactorily. This time I cut the boot into two tiny pieces with a 90 on one end and a 45 on the other, then slide the pieces onto the wire so the 45's meet to form a 90 degree boot. I gotta say, it worked out so well that I hate it took 50 years to try it.

I have all of the other parts primed for painting. More to come later!
 
By no means a criticism but with wires and cables on any model the manufacturer is often compromised by thickness. The model i am building at the moment has 1.5mm rubber HT leads and in 1/12 scale they would have been near 3/4" :) they would have been 8mm so about 0.6mm in scale
You often see this with spoked wheels in 1/12 they would be 0.5mm and are often supplied at 1mm + so if you get the cables to scale it makes everything else look to scale in my opinion. measure your HT leads and x by 25 ?
 
So far so good Greg! As Paddy said, sometimes you need to think outside the box a little. I have often found that the ropes, wire, and other items in kits are way oversized and adjusted for that. The devil is in the small details.
 
By no means a criticism but with wires and cables on any model the manufacturer is often compromised by thickness. The model i am building at the moment has 1.5mm rubber HT leads and in 1/12 scale they would have been near 3/4" :) they would have been 8mm so about 0.6mm in scale
You often see this with spoked wheels in 1/12 they would be 0.5mm and are often supplied at 1mm + so if you get the cables to scale it makes everything else look to scale in my opinion. measure your HT leads and x by 25 ?
My thinking was that he wants to depict a "street racing" engine and thought they had larger wires. I do have smaller yellow wires, but when I placed them near the engine I thought they looked too small. It isn't too late to change. I will do some measuring with my calipers tonight. It would give me another chance to practice the new way of making sparkplug boots.
 
Well, the size conversion made the wires .475" or 12mm. Racing ignition wires are 8 to 10mm. 10mm or .393" wire scales down to .0157" or .398mm. To be honest, my head is hurting a little now after all of that math and I have a lot of numbers written here and am a little confused. The other yellow wire I had was equivalent to .125" or 1/8" wire. Way too small. I have .015" wire in black only so I am going to paint it, because black just won't do after seeing how cool the yellow looked.
1000005611.jpg
 
All of my ignition wires are basically say 5/16 dia or .313 inch dia. .313 /25 = .0125 or 12 thousands. 1/64th dia is .016.

Here is a handy wire gauge chart. Save it to your reference area for easy reference.

american-wire-gauge-chart-1-3805690041.png


Another source of fine wire is to strip down stranded wire that is heavier. Say, stranded 22 gauge wire will give seven strands of 33 gauge or finer. This is what I do when I am trying to do super fine wiring on the back of an instrument panel.
Note to self: obtain a copy of Machinery's (Machinest's ?) Handbook.
 
In digging around I found a PDF for version 29 of the Machinery's Handbook. Here is the link, Machinery's Handbook Ver 29

This book is usually $100 or more if bought new. It has almost 4k pages. There are tables, materials references, formulas, and just about anything you might need to look up for doing any kind of engineering, design, or manufacturing. The current version is 30 so this is a good deal and worth the download.
I also dug around on the bay and bought Version 24 for about 25 bucks. I have no real need for the latest and greatest. Should have bought the book years ago, but then it would have been an earlier version. Even the ancient versions (1940's, 50's and earlier) are a good resource.
 
Last edited:
In the interest of mathematics, and as friends and modelers, do we also believe Greg needs the drill index conversion chart?
Just in case?! :drool::lol::yipee:
That and everything else you might want is in the Machinery's Handbook. I spent about an hour and a half going through it and learned a bunch of things I never knew before. Of course the details on those are hazy at this point, but I know where they are and were to find them. It also has metric stuff as well as some really obscure info. It is there.
 
Well, the painting of the wires did not work. No amount of scuffing to provide tooth for the primer did any good. I will be ordering the right size wire. On to the interior!

Bob said he wanted Teal. I do believe he will get it...
1000005623.jpg
1000005622.jpg


I am relatively pleased with it. I sprayed a gloss coat over everything in prep for the crevice wash (I know there is a term for it but it is eluding me atm), but it clouded the resin I put over the instrument dials. Hopefully some Gauzy will clear that up after the clear cures. I forgot the seatbelts until too late, so I will install them with the seats in place. Hopefully no harm no foul.
 
A white wash would work well on Black... Black is not really a colour, its just a medium for reflection of other colours and white would help with that
Just thinking out loud...
 
I think I have the interior nearly done, if not all the way. I found and printed off an owners manual for this car and have it in the passenger seat. The seatbelts are made from 2mm wide x .5mm thick flat lead wire painted black, the buckles are PE from Detail Master. After all of the oil paint dries I will put a matte clear on the carpet, satin for the seats, and gloss for the chrome. I textured for the carpet with modeling paste and a stipple brush. For the oil colors I used Titanium White, Pthalo Green, and Ivory Black, in various opacity by diluting with mineral spirits. All of the oil color on top of Vallejo Model Air "Light Green" 71.267. Most of the chrome is Molotow marker. The shifter base is Alclad Chrome of gloss black.


DSC_0042.JPG
DSC_0043.JPG
DSC_0044.JPG
DSC_0045.JPG
 
Tamiya X-22 clear for your gauge faces.
Observe, please.
20230716_192345.jpg
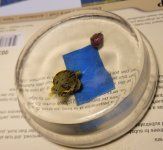
I made this clear acrylic object for a buddy who should never be without a hairy mole or Harry Mole. I wet-sanded the begeebers out of the drips and glops of the casting until it was smooth enough to present. 100 grit down to 240 grit.
20230716_232521.jpg
Applied Tamiya X-22 with a soft brush. It cures REALLY fast! One need never be afraid to sand a canopy or winder again!
TAA-DAA!
 
Tamiya X-22 clear for your gauge faces.
Observe, please.
View attachment 161101
I made this clear acrylic object for a buddy who should never be without a hairy mole or Harry Mole. I wet-sanded the begeebers out of the drips and glops of the casting until it was smooth enough to present. 100 grit down to 240 grit.
View attachment 161102
Applied Tamiya X-22 with a soft brush. It cures REALLY fast! One need never be afraid to sand a canopy or winder again!
TAA-DAA!
I do believe begeebers are on the endangered list. How dare you sir! Think of their children! ...orphaned
 
Back
Top