
-
Modelers Alliance has updated the forum software on our website. We have migrated all post, content and user accounts but we could not migrate the passwords.
This requires that you manually reset your password.
Please click here, http://modelersalliance.org/forums/login to go to logon page and use the "Forgot your Password" option.
You are using an out of date browser. It may not display this or other websites correctly.
You should upgrade or use an alternative browser.
You should upgrade or use an alternative browser.
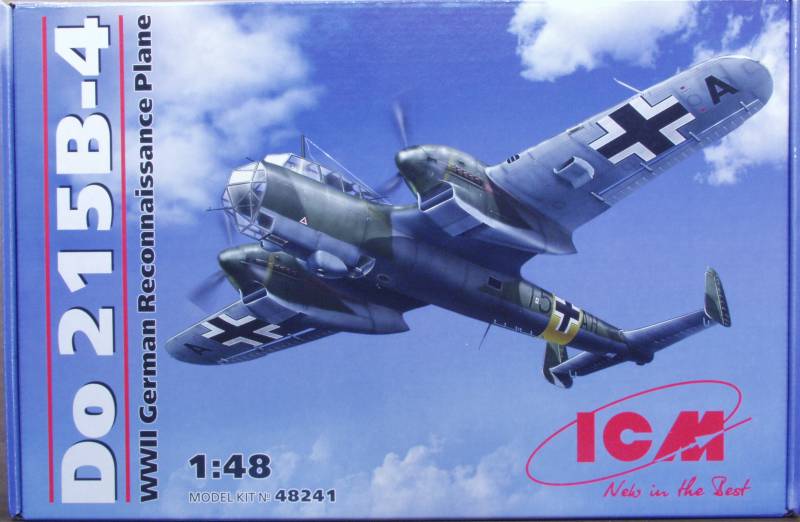
1/48 ICM Do 215B-4
- Thread starter Old Dog
- Start date

phantom II
Master at Arms
Another interesting build coming up  Looking forward to it
Cheers, Christian B)
Looking forward to it Cheers, Christian
B)Sherman 18
Master at Arms
Cool choice! 
Old Dog
Well-known member
Not wishing to do another marathon finish like I did on the Anson I decided to get going on this one. I actually started cleaning up parts and putting together simple assemblies while I was waiting for paint and coatings to dry on the Anson.
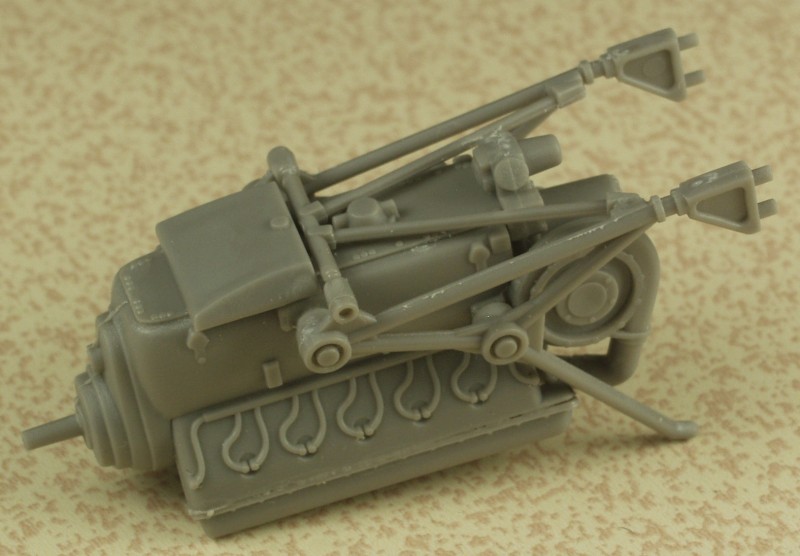
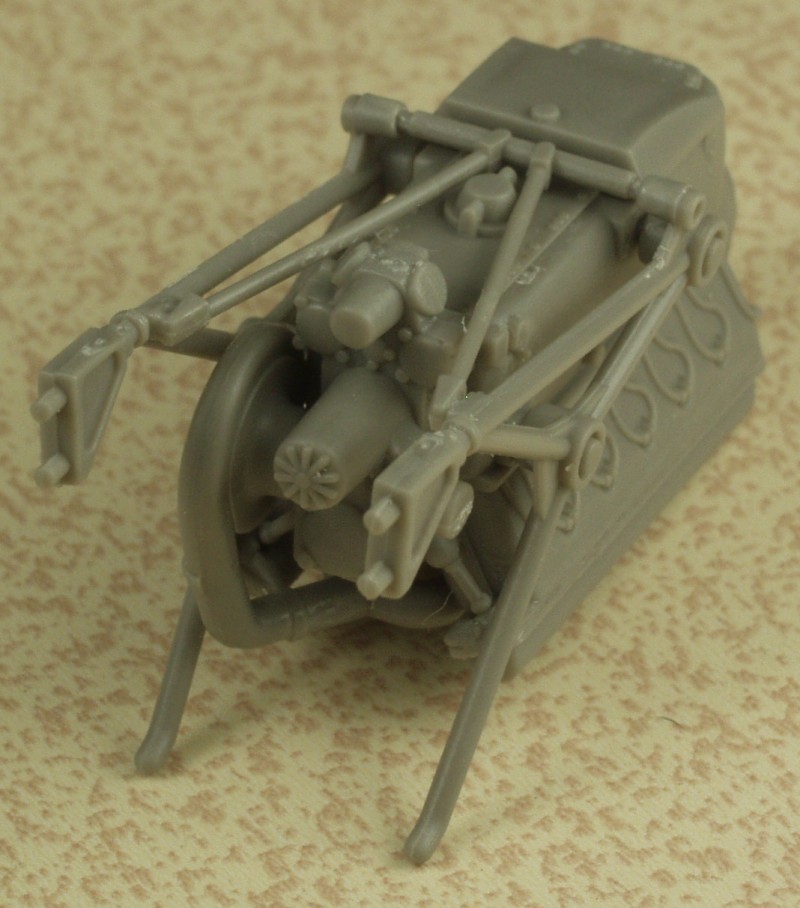
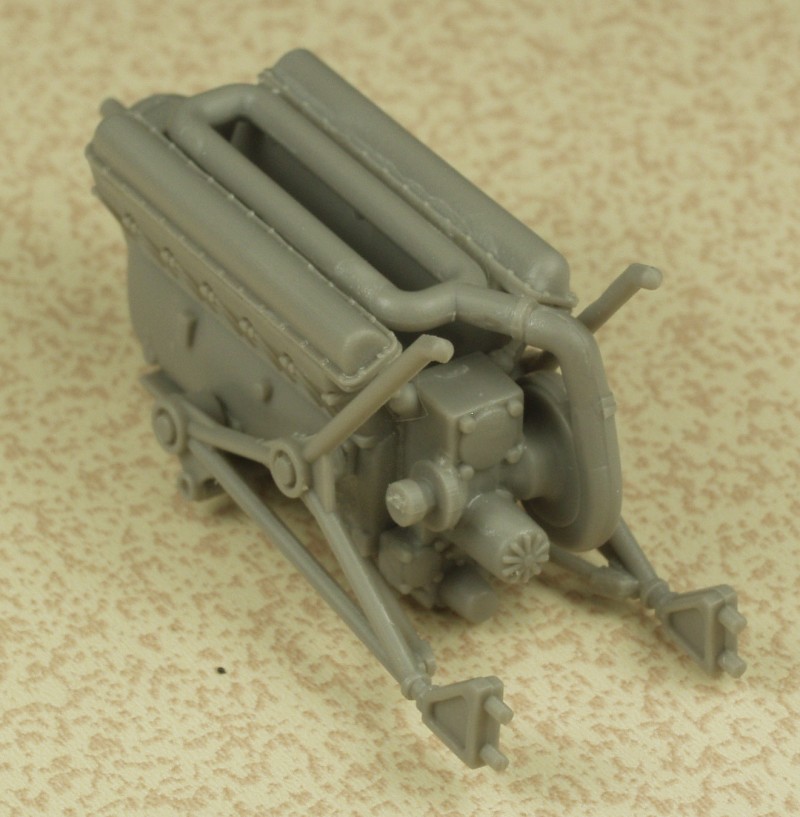
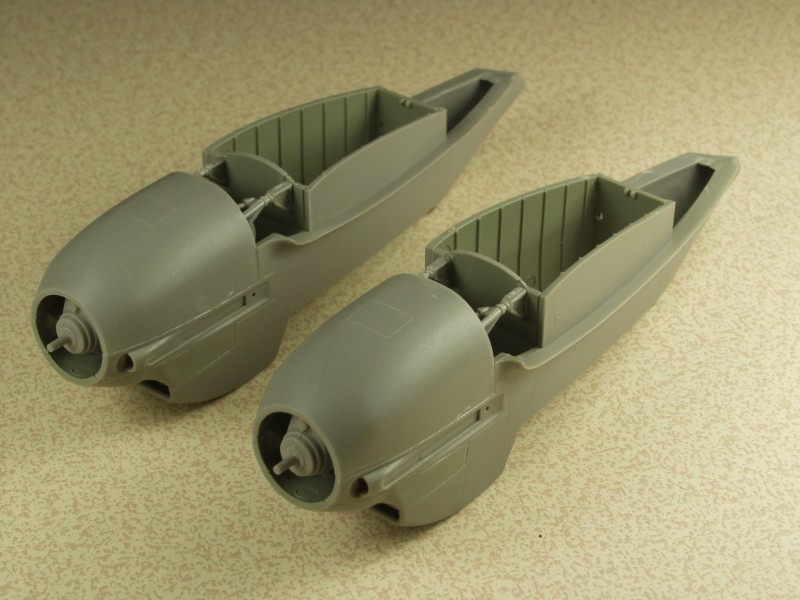
In a bit of an unusual move for me I actually started with the engines. I wanted to get a feel for how the build was going to go. I spent very little time cleaning up the parts for these as I didn't plan on having the cowlings open. also the only purpose they serve is a place to hang the props and all one really needs is the block and the engine mounts. Anyway these fit together very well and make up into a couple of real jewels should someone want to display them.
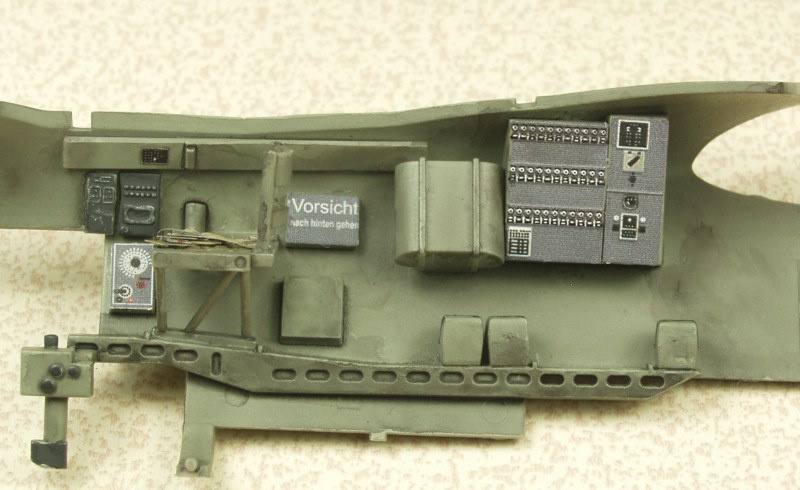
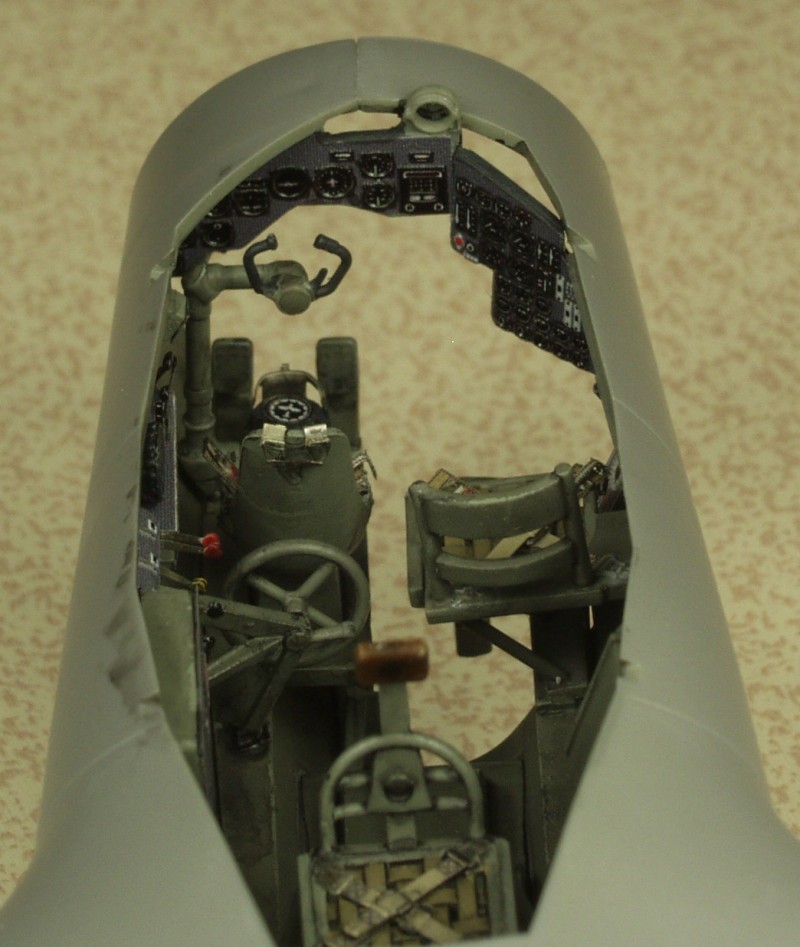
I then proceeded to the cockpit. I was also pleasantly surprised here as all of the parts had positive locators and fit as they should. I used an Eduard Zoom set for the interior and ended up using all but a couple parts.
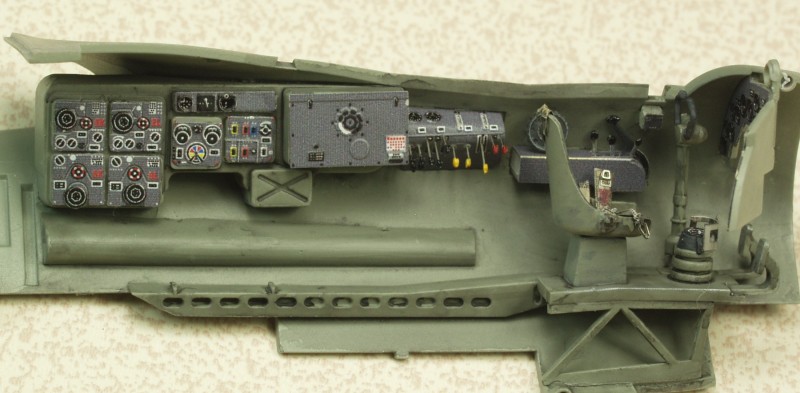
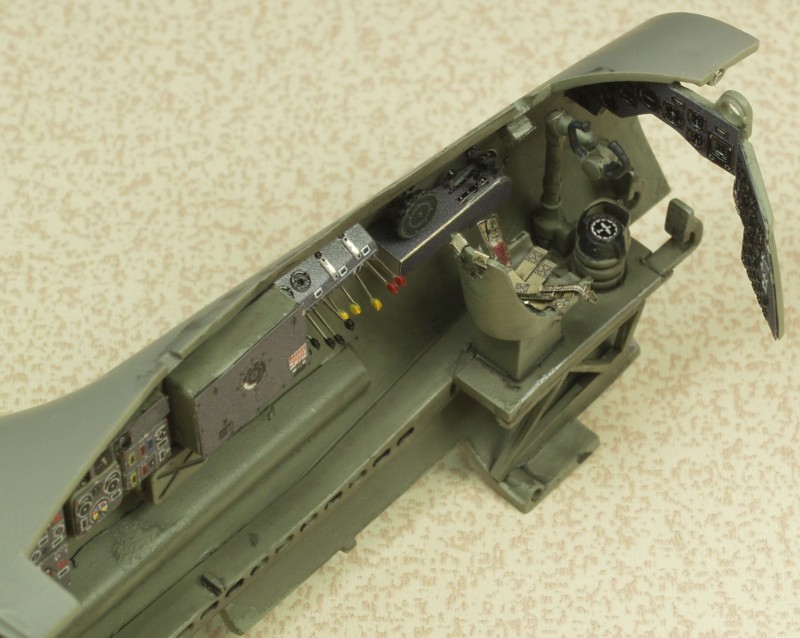
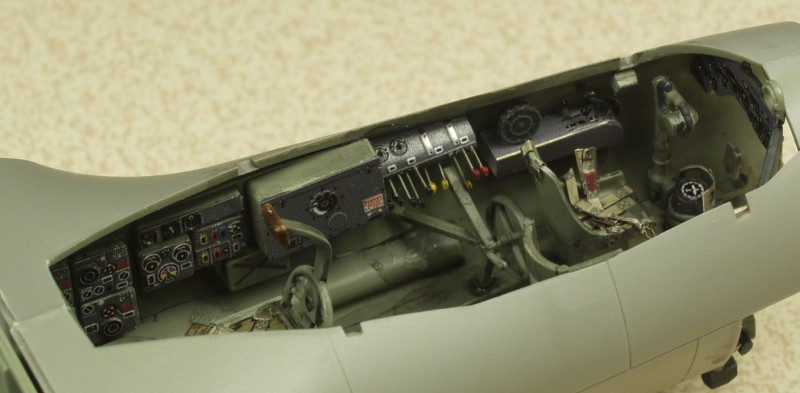
The fuselage halves were joined and the balance of the interior parts installed. Again parts fit was quite good.
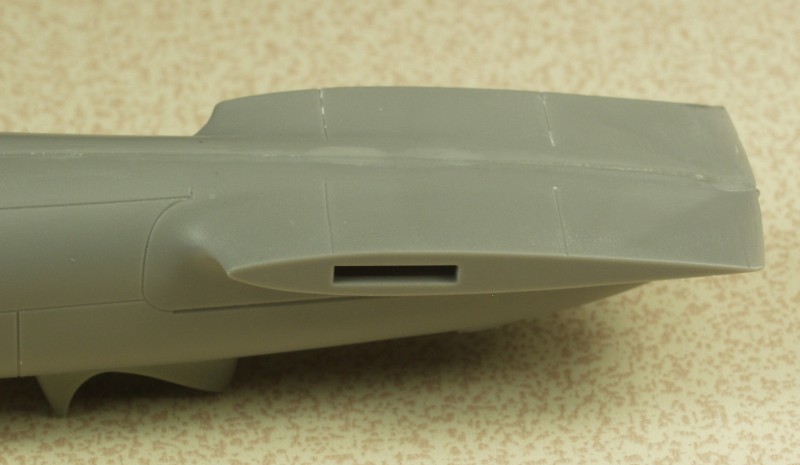
Next up will be adding an after market set to the tail plane area. None of the kits in 1/48 has ever gotten this area quite right so we'll see how that works out.
The wings are now together and the engine nacelles are built up. More to follow soon.
Thanks for looking !
In a bit of an unusual move for me I actually started with the engines. I wanted to get a feel for how the build was going to go. I spent very little time cleaning up the parts for these as I didn't plan on having the cowlings open. also the only purpose they serve is a place to hang the props and all one really needs is the block and the engine mounts. Anyway these fit together very well and make up into a couple of real jewels should someone want to display them.
I then proceeded to the cockpit. I was also pleasantly surprised here as all of the parts had positive locators and fit as they should. I used an Eduard Zoom set for the interior and ended up using all but a couple parts.
The fuselage halves were joined and the balance of the interior parts installed. Again parts fit was quite good.
Next up will be adding an after market set to the tail plane area. None of the kits in 1/48 has ever gotten this area quite right so we'll see how that works out.
The wings are now together and the engine nacelles are built up. More to follow soon.
Thanks for looking !
phantom II
Master at Arms
Really nice cockpit Gary ")
Got me wondering about the 72 version, so I looked up the review and it appears to be part with my ex Hampden.
Luckily the review for your kit is good, so I look forward to more progress
Cheers, Christian B)
Got me wondering about the 72 version, so I looked up the review
and it appears to be part with my ex Hampden.Luckily the review for your kit is good, so I look forward to more progress
Cheers, Christian B)

Old Dog
Well-known member
Thanks guys, as I mentioned earlier the engine nacelles are together. These were a bit fiddly due to the number of parts that had to be inserted then matched up side to side. They all had positive locators and once in place fit well but a couple extra hands would have helped as there is a radiator, two vent flaps, a diverter and the fore and aft gear bay bulkheads to line up. Seams were all tight but there were a couple of sink areas and a couple places where the mating areas weren't quite level and will need a little filler but nothing all that much out of the ordinary. Although it would be pretty hard to install them wrong, ICM has marked the parts with a R and L. The exhausts can be installed later making for easier painting.
The modification to the tail area uses a Vector resin upgrade set. All of the aircraft in the Dornier 17/215/217 series utilized a movable horizontal tail surface for pitch trim. This had a hump over the tail surface for the mechanism and to date only Hobbycraft has made an effort to replicate this detail. The Vector set replaces the upper portion of the fuselage with an entire horizontal tail plane. The eliminates the two seams you would have with the kit parts. It has a separate part that goes over the tail surface to emulate the mechanism cover. The next photos show the completed modification, the part that was removed and a replacement tail wheel housing that is a drop in part. The kit has a single piece part with the tail wheel molded in, the set provides a separate wheel and strut as well.
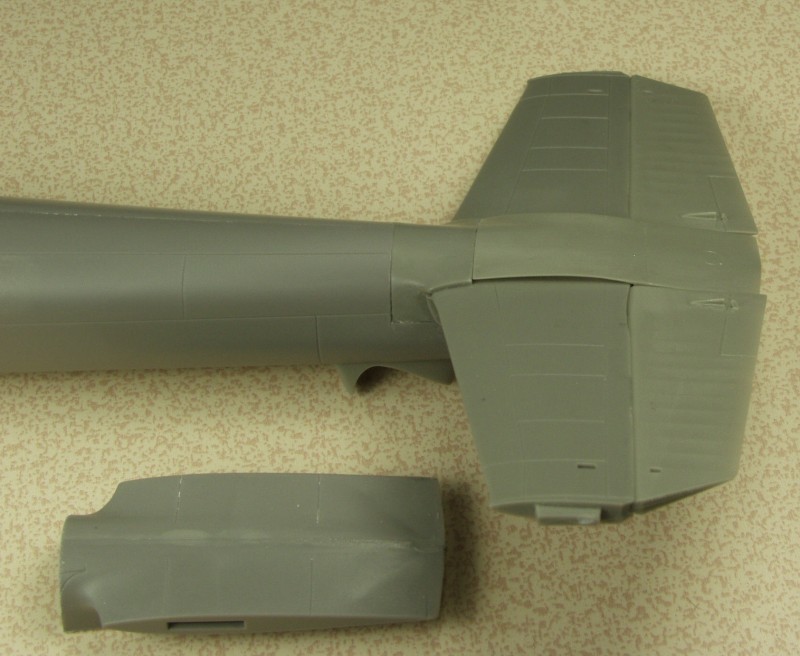
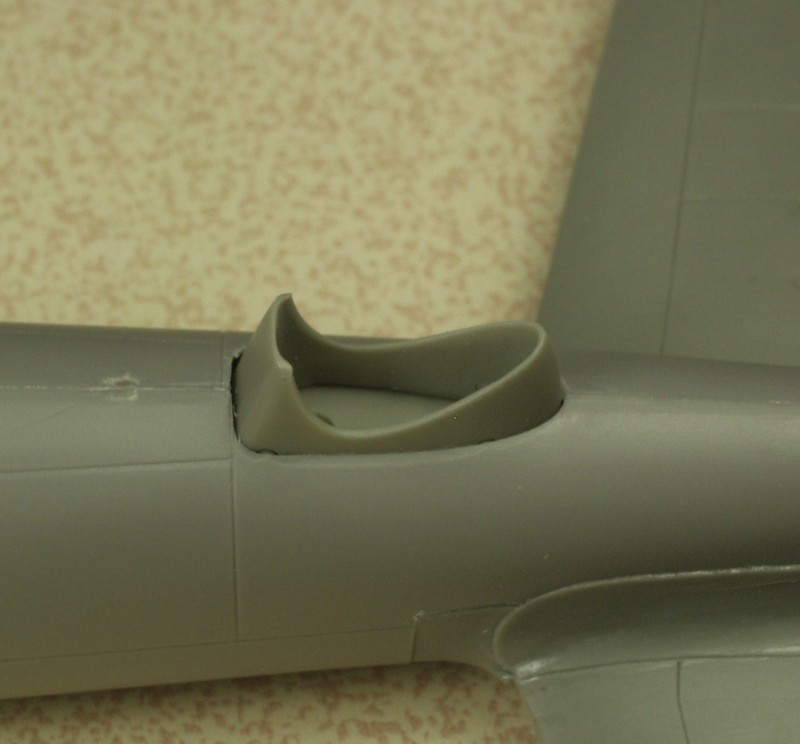
The modification to the tail area uses a Vector resin upgrade set. All of the aircraft in the Dornier 17/215/217 series utilized a movable horizontal tail surface for pitch trim. This had a hump over the tail surface for the mechanism and to date only Hobbycraft has made an effort to replicate this detail. The Vector set replaces the upper portion of the fuselage with an entire horizontal tail plane. The eliminates the two seams you would have with the kit parts. It has a separate part that goes over the tail surface to emulate the mechanism cover. The next photos show the completed modification, the part that was removed and a replacement tail wheel housing that is a drop in part. The kit has a single piece part with the tail wheel molded in, the set provides a separate wheel and strut as well.
phantom II
Master at Arms
Nice add on I was not even aware
Cheers,Christian B)
Cheers,Christian B)
Excellent looking Pit Gary, really nailing this one down ...
I agree!
Go Gary!!
Old Dog
Well-known member
OK, ready for the paint shop.
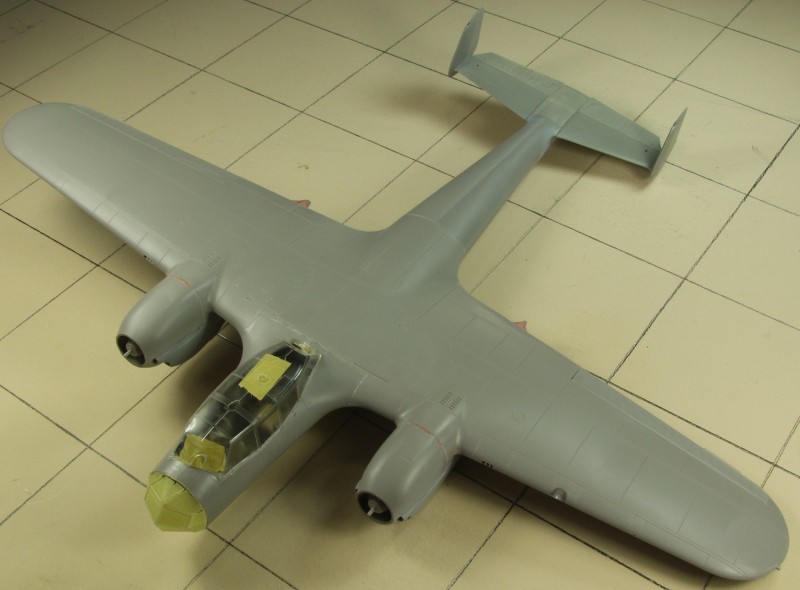
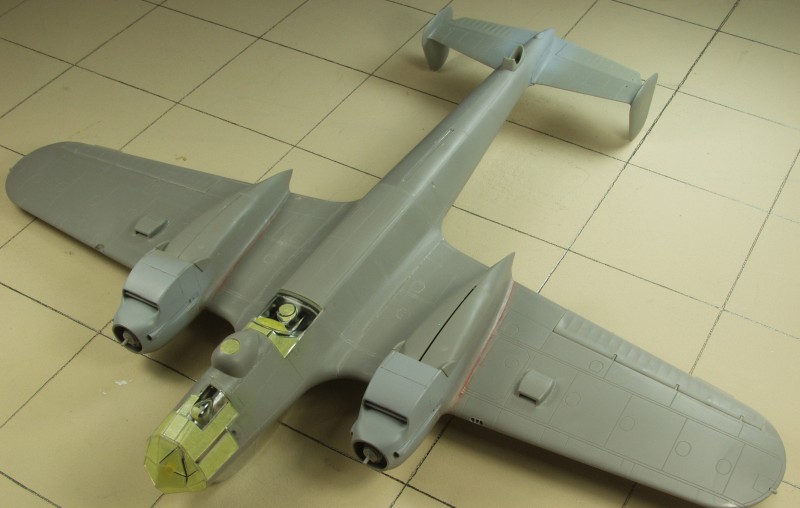
A couple of notes, I'm using the night fighter canopy to mask the cockpit for painting, it was frosted I guess so you wouldn't use the wrong one. I've had an issue of late of paint fumes getting inside and fogging the inside glass so I'm hoping to avoid that this time around. I did use a bit of filler on the engine nacelles, not visible as I primed them to check seams before attaching to the wings and along the the joints between the nacelles and wing. Overall fit was very good. I did find when test fitting the wing to the fuselage I had a bit of interference between the forward bomb bay bulkhead and the wing. Since the bomb bay will be closed I just clipped it off, it could have been left out entirely. I also noticed the lower wings didn't quite come up to the height of the fillet on the fuselage and I fixed it with a chunk of styrene, it only require about 1/32" of boost but much easier than filling and sanding in a difficult area. The gear bay doors are just press fit in place to avoid masking the gear bays.
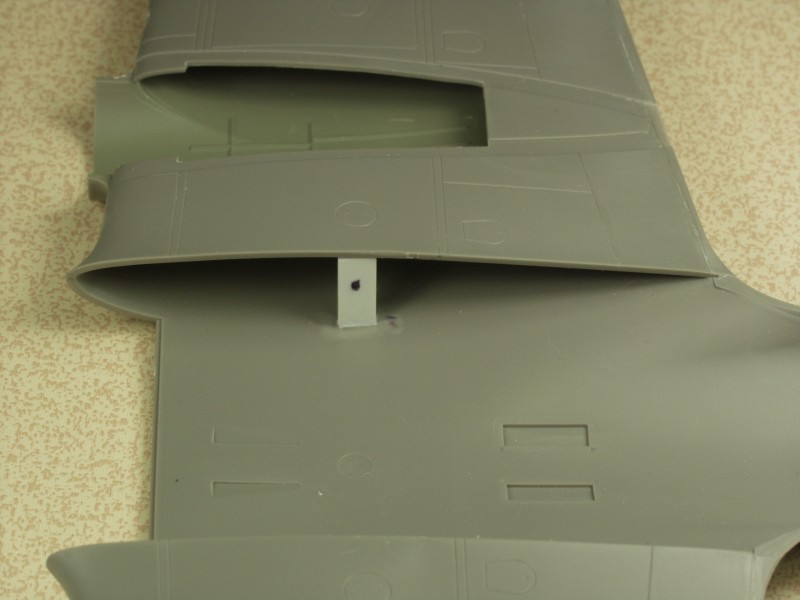
A couple of notes, I'm using the night fighter canopy to mask the cockpit for painting, it was frosted I guess so you wouldn't use the wrong one. I've had an issue of late of paint fumes getting inside and fogging the inside glass so I'm hoping to avoid that this time around. I did use a bit of filler on the engine nacelles, not visible as I primed them to check seams before attaching to the wings and along the the joints between the nacelles and wing. Overall fit was very good. I did find when test fitting the wing to the fuselage I had a bit of interference between the forward bomb bay bulkhead and the wing. Since the bomb bay will be closed I just clipped it off, it could have been left out entirely. I also noticed the lower wings didn't quite come up to the height of the fillet on the fuselage and I fixed it with a chunk of styrene, it only require about 1/32" of boost but much easier than filling and sanding in a difficult area. The gear bay doors are just press fit in place to avoid masking the gear bays.
Similar threads
- Replies
- 19
- Views
- 944
- Replies
- 19
- Views
- 821