• Modelers Alliance has updated the forum software on our website. We have migrated all post, content and user accounts but we could not migrate the passwords.
    This requires that you manually reset your password.
    Please click here, http://modelersalliance.org/forums/login to go to logon page and use the "Forgot your Password" option.

1/35 Tamiya Sdkfz 222... to be or not to be

Hello again!

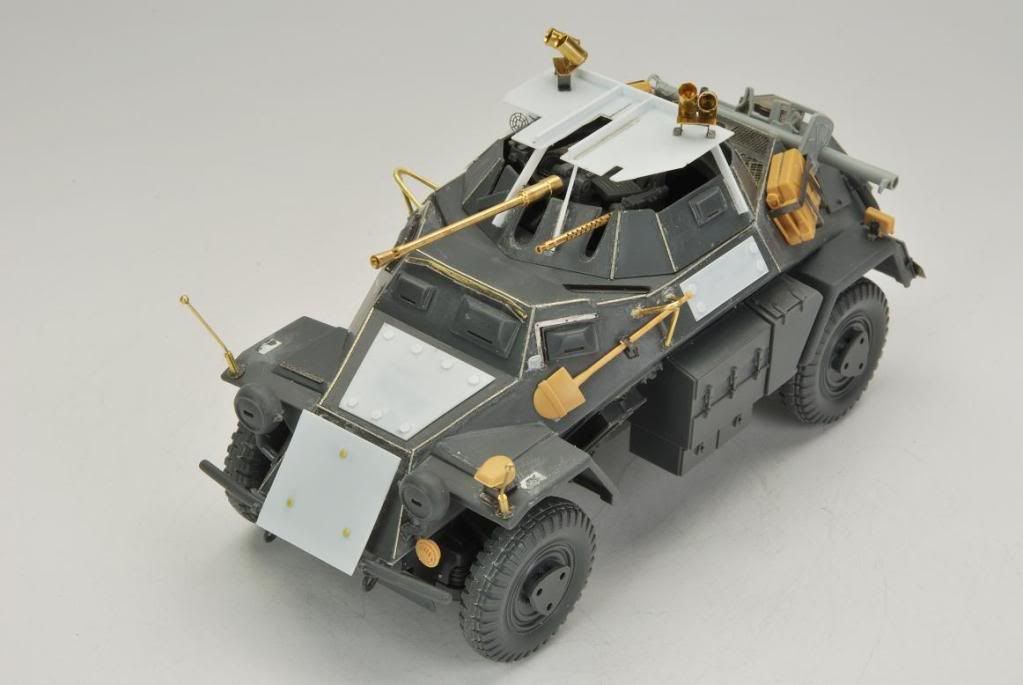
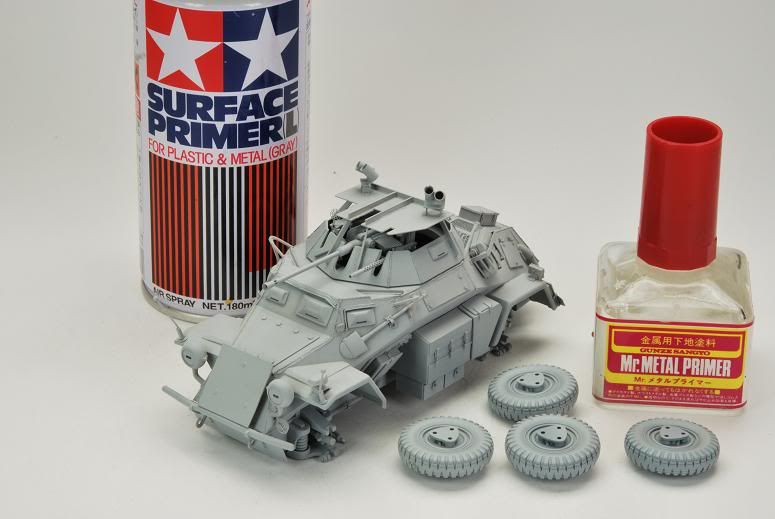
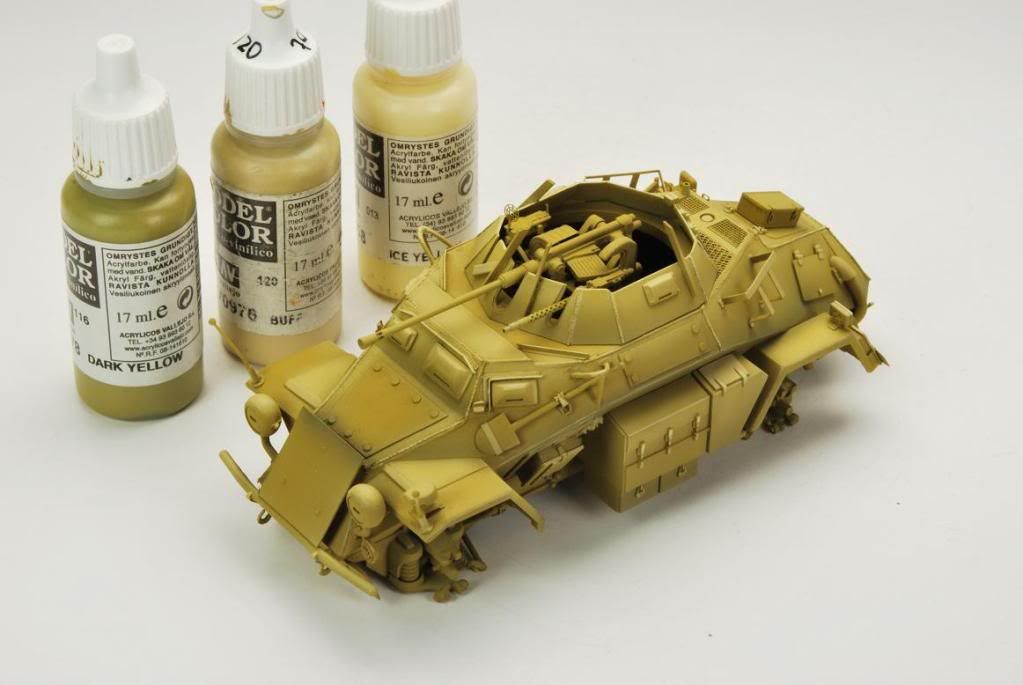
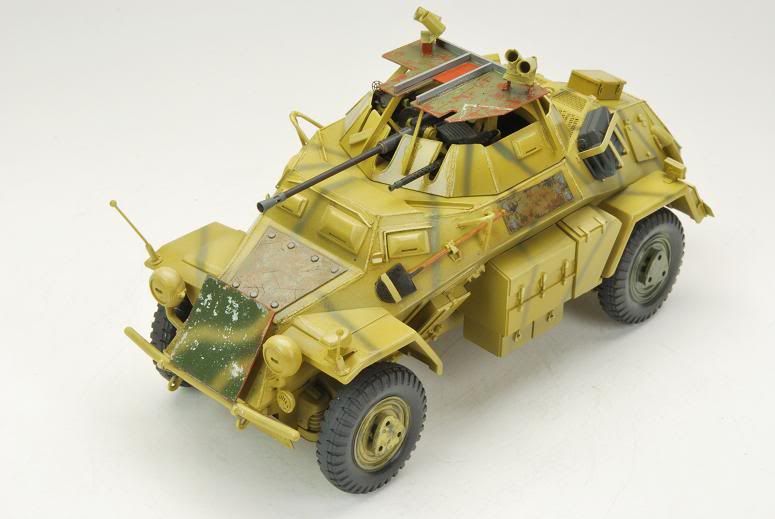
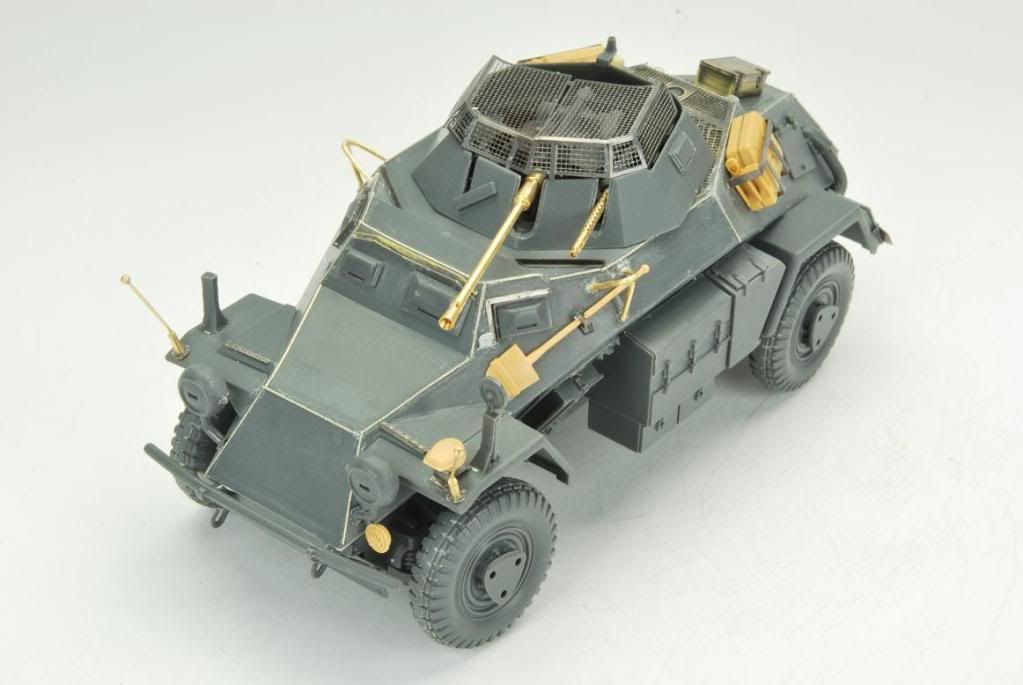
The old Tamiya kit ... just for fun (a weekend work). Some extra detailing to get a little more realistic appearance to the basic kit (from 70´s)... Eduard PE set and weld lines from Lion Roar, spare parts form other kits.... still some putty, sanding and polishing work missing.

Option 1 (mesh not attached)

The Typical Sdkfz 222 in Russia / Africa ....

DSC_0022_834.jpg


DSC_0024_836.jpg


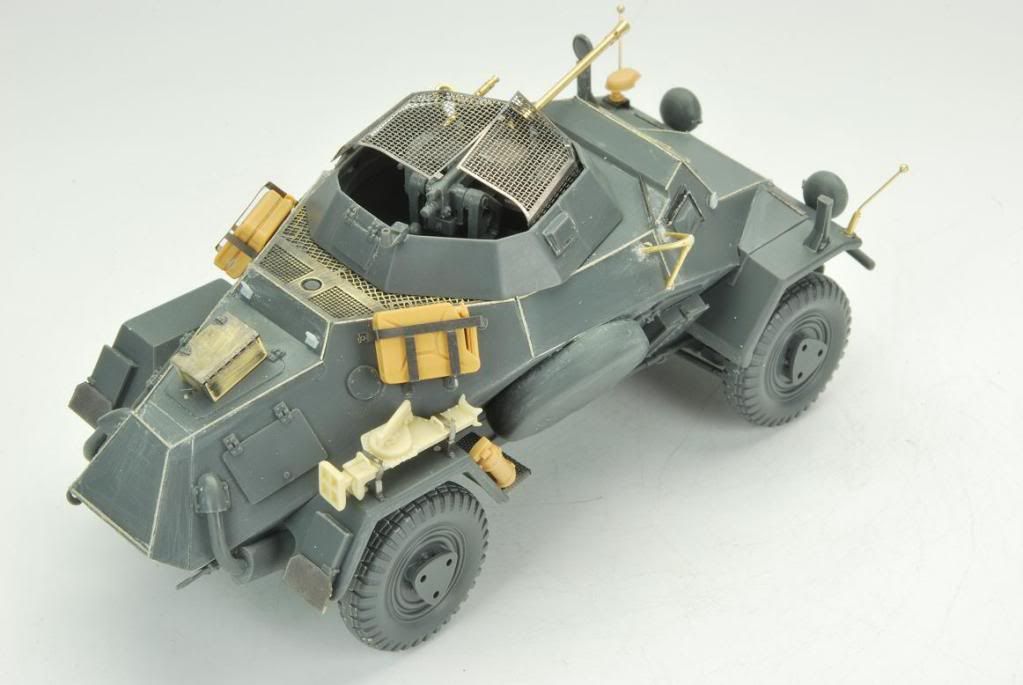
Option 2 (front and top shields not attached, just fixed with blue tac)

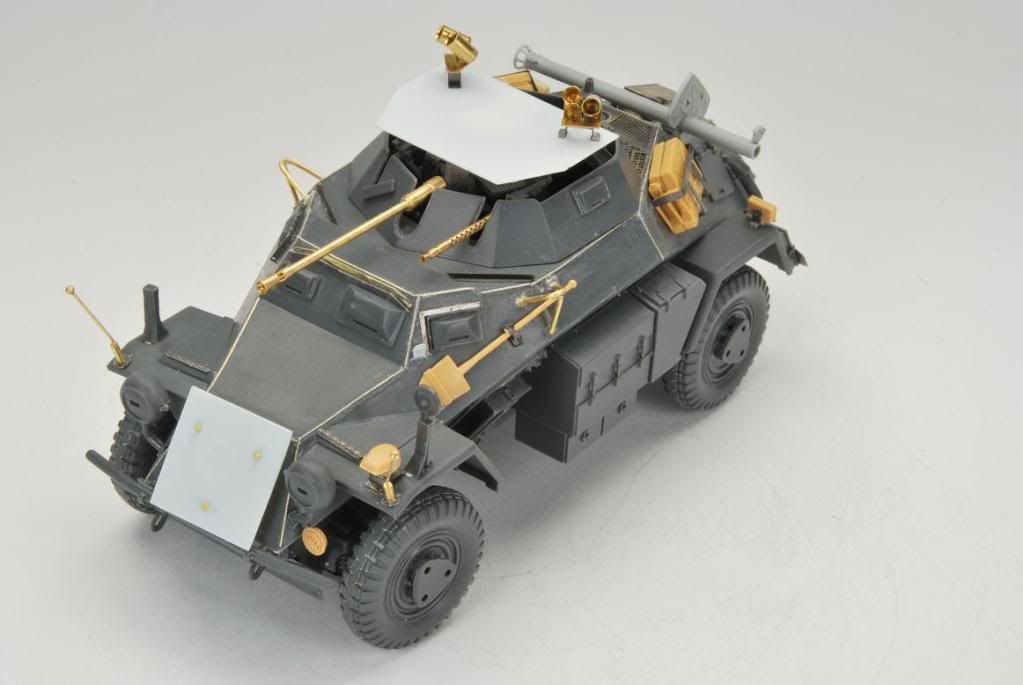
A Sci-Fi Sdkfz 222 during Berlin´s siege

DSC_0027_838.jpg


DSC_0029_840.jpg


Which version you prefer? :gogo :laugh: :laugh: :laugh:

Thanks for looking!
 
Either way, have fun! You have made the older kit look new so Option 1 will hold up against the Hobby Boss release. Perhaps after Dragon releases theirs, we can see if Tristar or they are best.

Regards,
 
Very nice. I'm particular to option 1 but the big thing is to have fun building. Option 2 being what if would lend itself to an interesting paint scheme, maybe something like the Berlin Brigade scheme as seen on this Chieftain.

chieftain-19.jpg


James
 
Option 2(y) , with an olive green and brown camouflage. As for the skid plates in color with rust markings factory !;)
 
I say Option 2 ! Mad Max it out. I dig th Plates ! An urban/Infra-red camo what if (maybe add th Infra-Red scopes?). These plates make it a Very Mean lookin' Machine !!


ERIK
 
Interesting paint work on the Chieftain..... those darn cubist graffiti artist's......

Awesome looking build jose. I'm really liking option 2 myself.

Tim
 
Dear friends .... option 2!

And Viper_MP told the real reason to make option 2.

Maybe adding some extra detailing to Big T kit, you can try to set an standard close to Tristar or Hobby (Hugo:silly: )-Boss kit. But it´s just an illusion. HB kit is far better in detail than The old Tamiya kit (from the 70´s!!!). HB´s kit also provides a COMPLETELY detailed interior. So, Option 2 is perfect for a Big T´s Sdkfz 222 as the interior (naked in the Tamiya kit) is hidden under the cover plate.

So .... option 2

DSC_0032_842.jpg


DSC_0034_844.jpg


I added some extra armor plates to the hull and also add a new and more atractive to me design to the upper plate. Now, after looking at the pictures I see that the rivets look too big, I´ll replace them with smaller rivets.

Now, a question to moderators. Should I post this kit at the "Things to Come" category? Sorry for inconveniences!

I think its fine here. Its armour and even though its whatif it isnt sci fi. So keep going. Fun build to follow.
James
 
Hello again!. Let´s start painting this one

Step 1: Primer

1.- With a brush, on metal parts, I use Gunze Sangyo´s Metal primer.

2.- Once dry, I apply Tamiya´s primer with my airbrush (I do not recomend to spray directly from the can)

3.- Once the primer is dry (24 hours minimum), with a very very very very fine sandpaper, I start to polish all the surfaces to avoid granulated zones and imperfections.

The result:

DSC_0045_855.jpg


Thanks for looking!
 
Here a new painting step ..... TUTTI FRUTTI !!!

DSC_0055_861.jpg


Base color ..... Tamiya: dark yellow + white + yellow

Tuti frutti ..... with acrylic Vallejo colors (see references in the picture)

Next step .... camo!

Thanks for looking!
 
Back
Top