
ausf
Master at Arms
Not the the gorgeous 1/350, but it's much older, smaller cousin. After all the fabrication, I'm questioning my decision, but plod ahead I will.
First up was to fit the electronics and motor in the tiny nacelles. I found tiny motor/gearboxes on eBay to do the trick, two shipped from China were $9 total. Gotta love the internet these days. The motor turns the inner cap, the electronics drive 6 LEDs to blink at different rates.
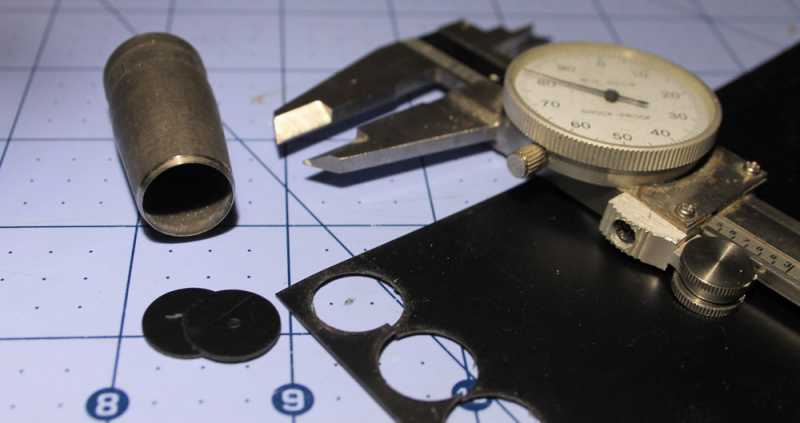
I needed to make supports for the motor shaft so I can fit the gearbox behind the LEDs. I used stock styrene, a punch, a micrometer to determine the center and my ersatz lathe, AKA Dremel:
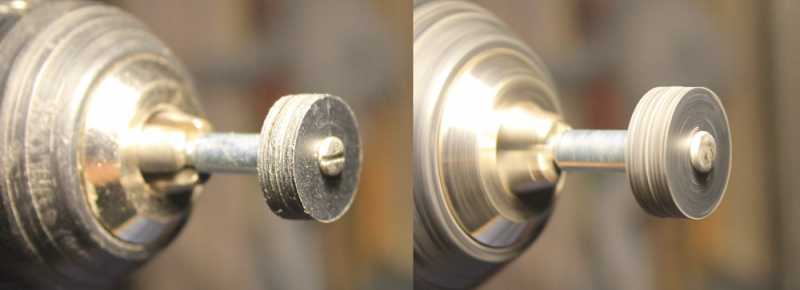

I used some copper and brass stock to fashion a shaft and bearings:

Installed with Aves, constantly had to be tested for alignment since any slight wobble will cause the inner cap to strike the outer cap while spinning.
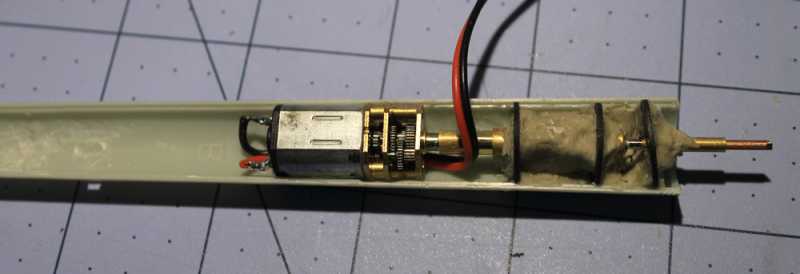
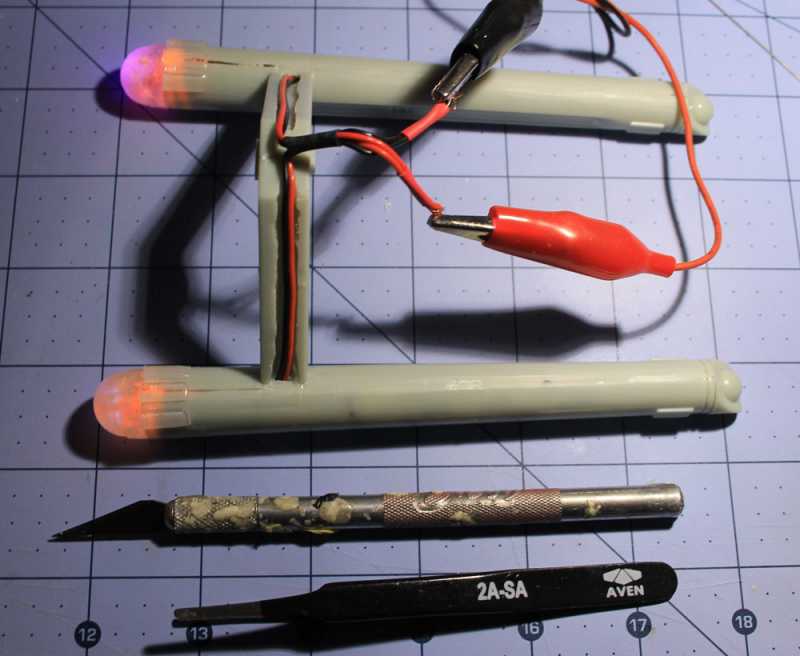
Here's everything stuck in the nacelle before closing up. A lot of confusing wiring jammed in there. Two 555 timers, caps and a mess of resistors, with 6 LED in the nose under the inner cap. It's not pretty, but it works. I used hot glue to hold and insulate:

Assembled with outer caps in place:
And the bottom with the lights on. The caps and lights are blurry since everythings movin' and blinkin'. I'll grab some video after the camera batt charges. X-acto for scale:
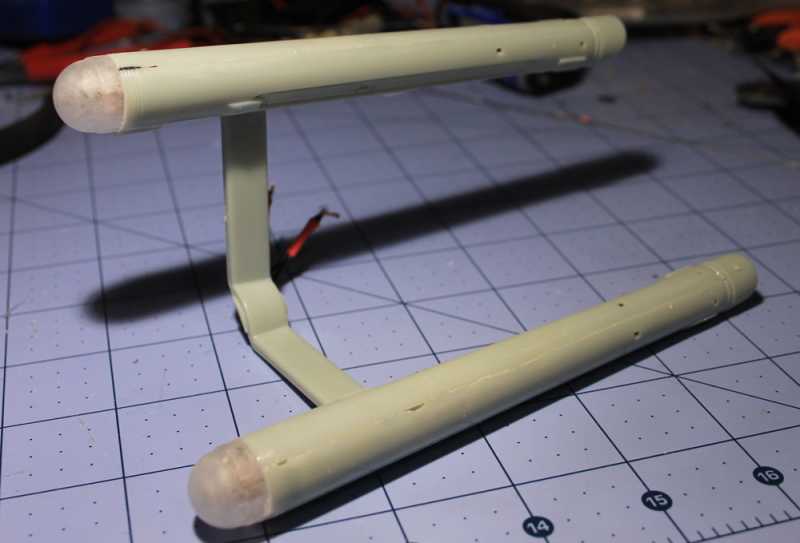
Next up is a ton of seam filling and then trying to figure out what to do with the saucer. I have a lot of cutting and window making since there are none, just decals to represent. I also need to scribe lines, etc. Yikes.
First up was to fit the electronics and motor in the tiny nacelles. I found tiny motor/gearboxes on eBay to do the trick, two shipped from China were $9 total. Gotta love the internet these days. The motor turns the inner cap, the electronics drive 6 LEDs to blink at different rates.
I needed to make supports for the motor shaft so I can fit the gearbox behind the LEDs. I used stock styrene, a punch, a micrometer to determine the center and my ersatz lathe, AKA Dremel:
I used some copper and brass stock to fashion a shaft and bearings:
Installed with Aves, constantly had to be tested for alignment since any slight wobble will cause the inner cap to strike the outer cap while spinning.
Here's everything stuck in the nacelle before closing up. A lot of confusing wiring jammed in there. Two 555 timers, caps and a mess of resistors, with 6 LED in the nose under the inner cap. It's not pretty, but it works. I used hot glue to hold and insulate:
Assembled with outer caps in place:
And the bottom with the lights on. The caps and lights are blurry since everythings movin' and blinkin'. I'll grab some video after the camera batt charges. X-acto for scale:
Next up is a ton of seam filling and then trying to figure out what to do with the saucer. I have a lot of cutting and window making since there are none, just decals to represent. I also need to scribe lines, etc. Yikes.


")