
-
Modelers Alliance has updated the forum software on our website. We have migrated all post, content and user accounts but we could not migrate the passwords.
This requires that you manually reset your password.
Please click here, http://modelersalliance.org/forums/login to go to logon page and use the "Forgot your Password" option.
You are using an out of date browser. It may not display this or other websites correctly.
You should upgrade or use an alternative browser.
You should upgrade or use an alternative browser.
CTA Build Moon Puppy Corsair
- Thread starter moon puppy
- Start date
 DAMN!!!!

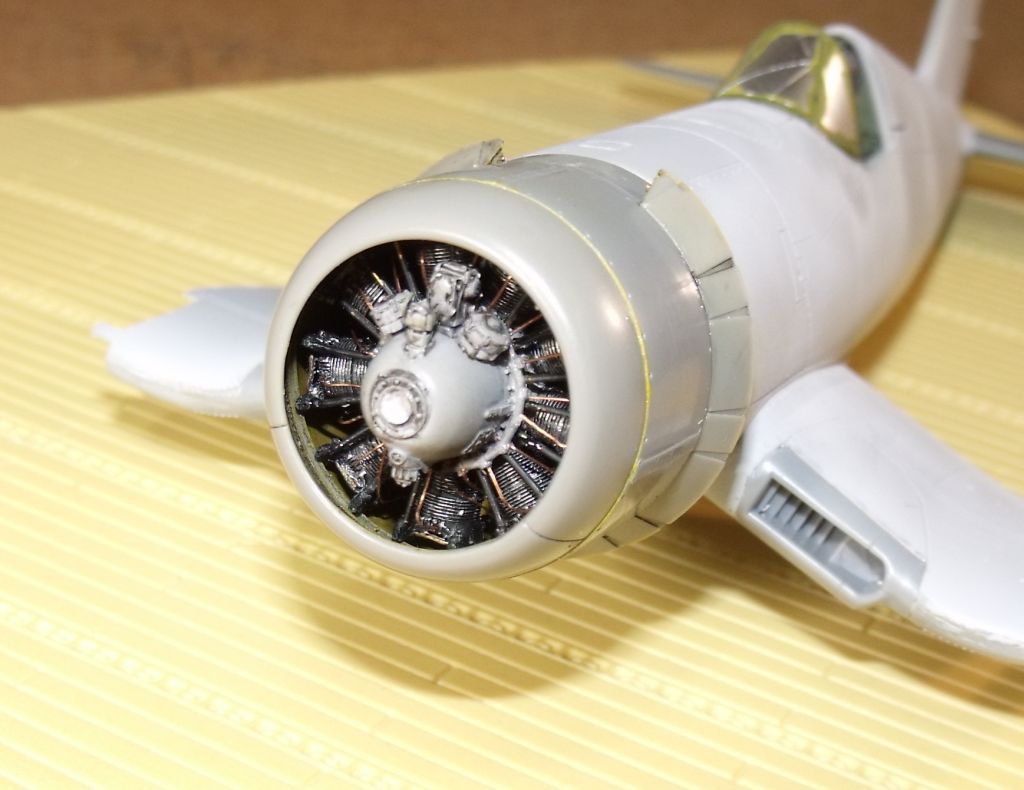
damnitall...just figured out that the engine is sticking out too far. that's why the cowl ring ribs will not fit inside. They are hitting the cylinder heads. To fix this I have to really dig back into the engine...screw it..don't tell no one. 
Hey Bob, do a 32 scale one and use the broken bits as push rods......Oh..
Trust me Paul, soon as I do this and the P38, I'm getting back to my comfort scale, 1:32, maybe a 1:35... :drinks
phantom II
Master at Arms
:woohoo: that cowling and the engine are looking real nice Bob ")
Cheers, Christian B)
Cheers, Christian B)
randy_ditton
Master at Arms
Hi Bob, This is looking mighty fine I'm with Mike, we need some info on your heat dis. technique.
Randy
I'm with Mike, we need some info on your heat dis. technique.Randy
Thanks guys, nothing to the heat distortion stuff. Actally I don't have all the colors to do it right but I can put together a little something.
looks great MP!
drill it, insert brass rod ?
broke the hell out of the prop shaft, will figure out something to make the prop sit right.
drill it, insert brass rod ?
Sherman 18
Master at Arms
Tankbuilder
Active member
Broken drill bits. I often use the broken section with the twist in a hand held pin vise.
If anyone looking for nice walkaround of a Corsair check this out.
http://www.ratomodeling.com/references/f4u_bu17995/
It actually should be an F4U-1A but someone retrofitted a birdcage canopy on it. But still good shots of the cowl ring and flaps.
http://www.ratomodeling.com/references/f4u_bu17995/
It actually should be an F4U-1A but someone retrofitted a birdcage canopy on it. But still good shots of the cowl ring and flaps.
Sherman 18
Master at Arms
Nice find!
Thanks for sharing.
Thanks for sharing.
paddy
Well-known member
Will someone please tell me why I save broken drill bits? I came to that realization this week, threw out a boat load and got my stash of bits cleaned up.
I dressed up a good bit on the front side but nothing in back, ain't going to be seen. Really could have used the kit engine for all that can be seen in there.
Just make the cowl removable ?


Too late!
Paddy I should have used the full upgrade stuff from Aires to do the cowl open like you did. The way the engine mates to the kit part on the firewall would not be correct in anyway. So I really would have had to have all that stuff that would have been at the rear of the engine, engine mounts and stuff. I couldn't even get teh intakes on this.
Paddy I should have used the full upgrade stuff from Aires to do the cowl open like you did. The way the engine mates to the kit part on the firewall would not be correct in anyway. So I really would have had to have all that stuff that would have been at the rear of the engine, engine mounts and stuff. I couldn't even get teh intakes on this.
Thanks Erik, wasn't much to it. Just started with Alclad Jet Exhaust as the base. Then a mist of their transparent Green, yellow and a shot of red. Hard to see the red. I'll try and do it on something else and see what it looks like. If you don't see it in a couple of days, you know it came out crappy
No heat stress test yet. Maybe try tomorrow.
I did get some bench time in
I'm going with the kit scheme out of box. Some of the unit markins are white on blue. They supplied decals in white. but we all know how that works out sometimes. I had the idea to make mask for the markings. So I took the decals and fixed them on some Bare Metal Foil to use as templates for the mask. How that work out??/

Not too good. Looks ok here but when I tried to lift the BMF off I couldn't get a good start. Recall that when using BMF you use more than you need and trim down the excess. Maybe I can try that on round two?

So I moved on to the US Insignias. Put the inner mask over the white then Insignia Blue, I will attempt to line up the blue mask over that and proceed with the Gloss Sea Blue overall.
Gotta blow off the roof tomorrow, last of the leaves have fallen. If I don't break my neck I'll be back on the bench after that.
I did get some bench time in
I'm going with the kit scheme out of box. Some of the unit markins are white on blue. They supplied decals in white. but we all know how that works out sometimes. I had the idea to make mask for the markings. So I took the decals and fixed them on some Bare Metal Foil to use as templates for the mask. How that work out??/
Not too good. Looks ok here but when I tried to lift the BMF off I couldn't get a good start. Recall that when using BMF you use more than you need and trim down the excess. Maybe I can try that on round two?
So I moved on to the US Insignias. Put the inner mask over the white then Insignia Blue, I will attempt to line up the blue mask over that and proceed with the Gloss Sea Blue overall.
Gotta blow off the roof tomorrow, last of the leaves have fallen. If I don't break my neck I'll be back on the bench after that.