• Modelers Alliance has updated the forum software on our website. We have migrated all post, content and user accounts but we could not migrate the passwords.
    This requires that you manually reset your password.
    Please click here, http://modelersalliance.org/forums/login to go to logon page and use the "Forgot your Password" option.

All Righty ... What's on the bench today?

EJ that is highly commendable work on that bed. Well done! That is a worthy reason for not being on the model workbench. I am proud to know you, even if we have never met in person.


I haven't gotten to me bench very often; when I have, it's only been to sand and fill. Nothing to really show. That will change this weekend when I go to Hobby Day.
 
How's this for commemorating the birth of the Supermarine Spitfire?

It's THE BOTTLE OF BRITAIN!

Build an Academy 1/48 scale Spitfire Mk.XIV and have a Spitfire Ale whilst doing it.


You can get it in a can too.

 
Well, I spent some time at the bench today & think I got a good part of the Tiger's interior together now that the paint was good N dry :D

h7f084c2_2016-03-10.JPG


hac113bd_2016-03-10.JPG


h193f8f2_2016-03-10.JPG

The gas mask canisters are there next to the shocks

hb296193_2016-03-10.JPG

I have some touch painting to do and then, I gess I'll finish adding the parts for the exhaust & attempt to steal a page from Terry's book... :evil: :hmmm
 
Excellent work guys! Everything is looking great!

I managed to get some painting and clearcoating done yesterday, and I'm heading off to Hobby Day Friday today to do more work so I should have a good, long update coming sometime next week.

Stay tuned for more.
 
I Just received My new Game for Warhammer 40K ... Spent yesterday assembling the Space Marines ...
The group minus the Biker ... I'll do Him today at Work ... :soldier

hb303048.JPG


I primed them this morning ... still kind of moist outside ...

hd9043a9.JPG


h683b200.JPG


h0ff223e.JPG


he190ebb.JPG


h52978a9.JPG


Now I get to paint them all ... the enemy's side has about 30 solder's but that nothing to a bunch of Marines ... Cheers Gerry ... :soldier
 
Ed the Tiger is coming along quite nicely! Gerry, the squad of Space Marines is also going together very well.

Today I get to be a grunt and am in Tulsa moving my Mom to a new apartment. It is a little smaller and since she has already managed to move most of the smaller stuff the big stuff should go quickly. (I really really hope) There are supposed to be a number of helpers from her church and if there are as many as there were last time, we should be done by early afternoon. (again I really really hope)


Also everyone, remember this weekend is time change to daylight savings time here in the US. Be sure to move your clocks forward an hour (like from 7an to 8am) in the morning.

It will be so nice again to leave work and it isn't dark outside! :drool
 
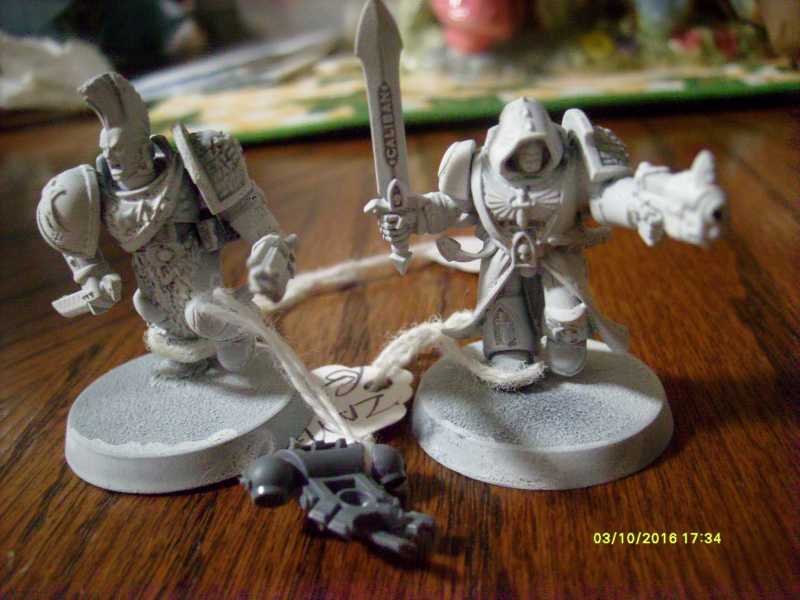
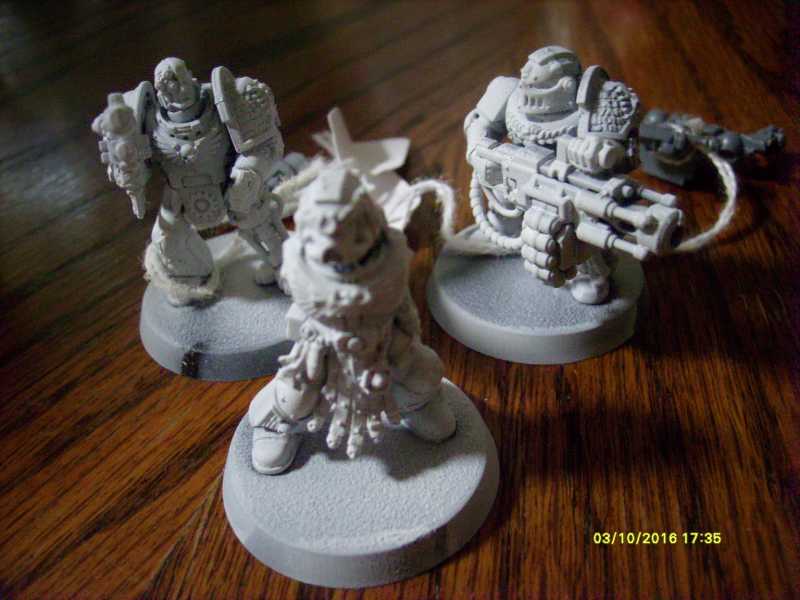
Gerry, those are looking good. Remember, those Marines don't believe in camouflage...


Paul, best of luck helping out your mom. I hope everything goes smoothly.


I was able to get quite a bit done this weekend, although not quite as much as I wanted to. A lot of things at Hobby Day weekend kept me hopping up to help out. Still, I'm pleased with the work I got done.


I'll start with some of the aircraft I'm working on.

I first shot some paint over the two WWI aircraft I'm building for the Canvas Eagles wargame. The Fokker E.III got a shot of faded olive drab on it:

WIP_Fokker_E_3_II.jpg


The Neiuport got a coat of metallic silver:

WIP_Neiuport_11_II.jpg


Later on, when I tried to apply the decals, most of them went on okay, but the words I tried to put on shattered. Also, the small roundels didn't fit on the bottom of the wings. So, since this was for a game anyway, I improvised:

WIP_Neiuport_11_III.jpg


Later on I'll seal this so the decals stay on, I hope....

I also have to paint a white stripe on the Fokker E.III before I can decal that one.


After all this, I spent hours sanding the seams on my C-118 and re-filling the wing roots and a part of the fuselage behind the cockpit canopy. I figured while I was talking long distance with my friend, I'd be able to keep making progress while we talked:

WIP_CargoHaulersCampaign_XIII.jpg


Finally, after exhausting my patience on that big model, I decided to start another simple model. This is the Italeri 1/72 scale Me-110 a friend had sent me. it was the perfect thing to start for the Twin Props Group Build on another forums so I decided now was a good time to get going on it. I started with the cockpit interior, naturally:

WIP_TwinPropsGB_II.jpg


After that, I assembled the wings and engine cowlings:

WIP_TwinPropsGB_III.jpg


Later on, I painted the interior base color. I'll add the detail painting later:

WIP_TwinPropsGB_IV.jpg


That covers my aircraft so far. Moving along, I also tried to make some progress on my USS New York. First, I shot a coat of blue over all the deck surfaces:

WIP_USS_New_York_XIV.jpg


The white stuff is where I started to apply the liquid mask to the deck. Here it is after I covered all the deck surfaces with the liquid mask so I can re-shoot the grey on the hull and superstructure:

WIP_USS_New_York_XV.jpg


Later on I hope to shoot the grey over this, as well as several other ships whose decks were also sprayed.


Moving on to my armor, I first tried to see about finishing one of my flatcars for one of my armored trains. I got this far before Hobby Day tasks and general demotivation stopped me from going further:

WIP_OnRRTracksGB_XXIV.jpg


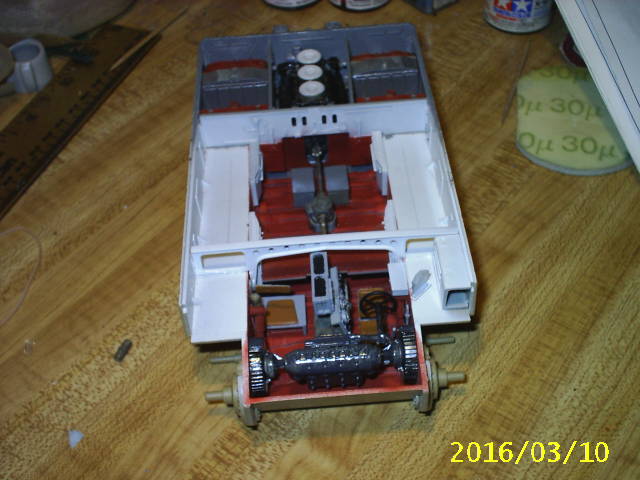
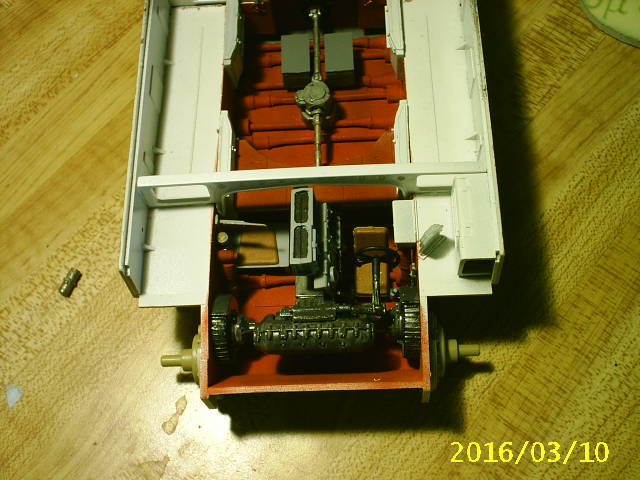
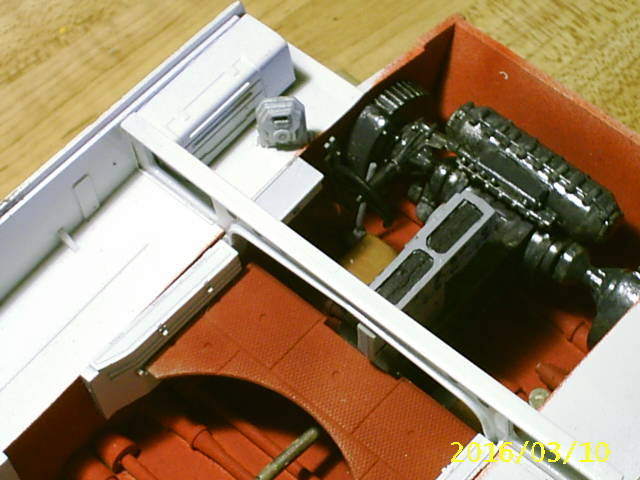
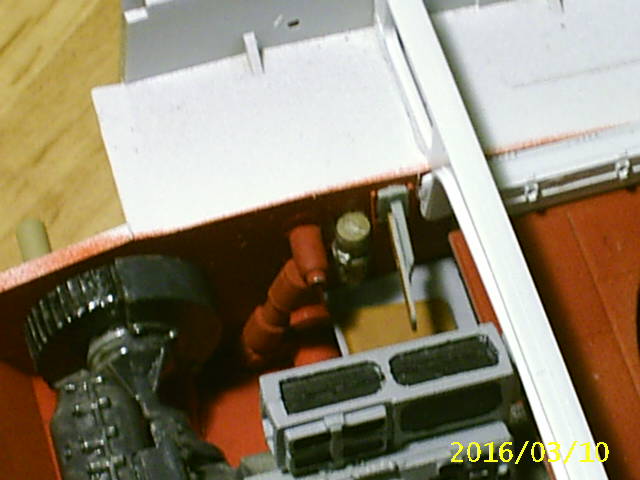
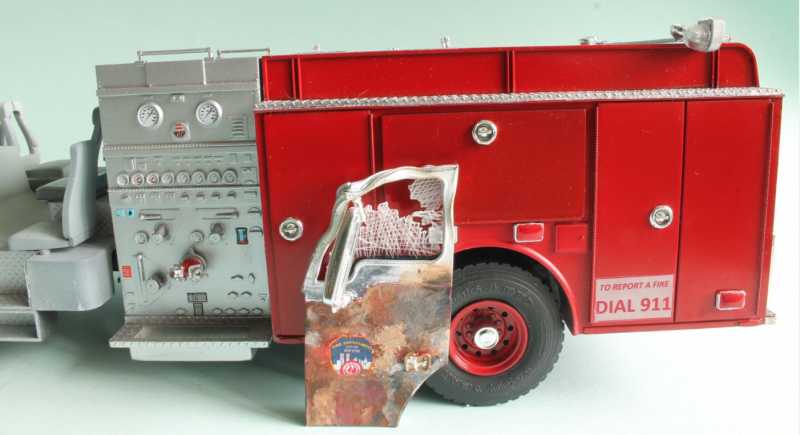
Going back to the day before, I shot a coat of red over one of my Russian Fire Trucks:

WIP_OthersLiveCampaign_VIII.jpg


While painting, I decided to pull out the grey and shot a new coat of grey over my WWI German A7V tank:

WIP_A7V_Tank_VI.jpg


Later, I masked this little beastie with Silly Putty and re-shot the Olive Drab on this tank:

WIP_A7V_Tank_VII.jpg


WIP_A7V_Tank_VIII.jpg


I think it finally looks far better now:

WIP_A7V_Tank_IX.jpg


At Hobby Day after decaling the Neiuport, I added the decals to this little guy as well:

WIP_A7V_Tank_X.jpg


WIP_A7V_Tank_XI.jpg


Finally, while painting on the day before Hobby Day, I pulled out the 1/35th scale commission build and shot a coat of black as a primer over it:

WIP_Panzer_II_35th_IV.jpg


Afterward,, when I pulled out the grey to paint the A7V, I also shot the basecoat of grey over this tank:

WIP_Panzer_II_35th_V.jpg


After that dried, I decided to modulate, or panel fade the color:

WIP_Panzer_II_35th_VI.jpg


WIP_Panzer_II_35th_VII.jpg


You can see I also painted some of the details, like the jack block and exhaust system. I also clearcoated her before taking her to Hobby Day where I added the decals after working on the Neiuport and A7V:

WIP_Panzer_II_35th_VIII.jpg


WIP_Panzer_II_35th_IX.jpg


Well, that's all for now. I was hoping to get a bit more done, but I'm pleased with my progress so far. I've got some good jumping off points for working on some of these this week, so hopefully I'll have time to spend moving some more of these further along. Until then, thanks for looking in, comments are welcome.
 
Thanks Mark these Space Marines ... will be dress more like the Black Templars ... And :woohoo:

Wow Mark ... I really don't know where to start ... So I'll just say all looks very good ... Excellent work day My friend ... I'd say you covered all modes of transport ... (y) :notworthy (y) :drinks

Me I'm still cleaning my bench there is a Ki-109 on there ... which I'll address in another thread

he3bb0c2.JPG


Also I found a Alligator lounging in my paint pallet .... :woohoo:

h3a32fdf.JPG


I hope everyone survives the Ides of March ... :salute
 
Hey everyone! Just finally feeling (almost) normal today. Got my Mom moved to her new smaller apt over the weekend. The moving went fairly easy as her church had about 8 folks come over to help. Getting it all squared away was harder as she had all the weird ideas that wouldn't work. My brother and daughter got that fixed.

What really took it out of me was the 8 hour drive in the monsoon rains across Arkansas. It usually takes about 6 1/2 hours. :bang head That and the time change and not quite enough sleep hammered me Monday and Tuesday. Went to bed right after getting home last night and finally got enough sleep. Time change still has my body clock screwed up though.

Pulled out a 1/144 He111 and took some start pics for the MMM2016 build and clipped a couple of parts loose on Monday night. Just didn't have any zip to do more than that. Might fiddle with it tonight or might do something else. That will depend on how I feel tonight.

One last thing, before leaving, I was looking at some reference Pics of the Falcon and it looks like there might be a problem with a couple of parts being mixed up. I will have to get some pics taken to show wht I noticed. The bad part is that nobody has the other part that could possibly be mixed yet. (not even those in Britan) The part in question is the inside of the lower jaw piece (located between the mandibles in front) The inner piece more closely matches the upper piece in my 5 footer pics. It is possible that both parts are the same on the kit or that they have them switched. Will have to wait and see.
 
This week I decided to get back to some projects I'd been bypassing. I need to get some of these finished up so I can move onto other models I want to get started on.

I'll start with my aircraft.

I'm building two 1/72 scale WWI aircraft for a Canvas Eagles tabletop wargame. The first one; the Fokker E.III needed some white on the tail and fuselage. So, I masked it off and sprayed the white:

WIP_Fokker_E_3_III.jpg


This turned out considerably better than my expectations, although I almost ripped the tail surfaces off trying to remove the tape!

WIP_Fokker_E_3_IV.jpg


WIP_Fokker_E_3_V.jpg


I later shot a clearcoat over this to prepare for the decals.

Next, I added the top wing to the Neiuport 11. This was a bit easier than I expected, certainly easier than the Avia B-534:

WIP_Neiuport_11_IV.jpg


WIP_Neiuport_11_V.jpg


Finally, I shot a nice light blue color on the bottom of my Madge:

WIP_Russian_Madge_XXV.jpg


It's not really easy to see in that pic, but I assure you it is there!

After this was dry, I masked the underside of the wings and tail surfaces and then shot the flat black on the de-icing boots. When the flat black was dry, I finished masking the underside of the wings, tail, and fuselage, including the de-icing boots. Then I shot the dark green color over the top of the plane.

Here's Madge sporting her nice new dark green dress:

WIP_Russian_Madge_XXVII.jpg


WIP_Russian_Madge_XXVI.jpg


WIP_Russian_Madge_XXVIII.jpg


She was later shot with a few coats of gloss to prepare for decals.


Moving on to my shipyards, I finished masking off the decks for the USS Ingraham, using liquid masking agent since there were so many bits and bobs to mask over:

WIP_USS_Ingraham_IV.jpg


I also masked off the USS Forrest Sherman using tape this time since it was all straight edges and angles. I only used a little liquid mask on this one:

WIP_USS_Forrest_Sherman_V.jpg


WIP_USS_Forrest_Sherman_Va.jpg


I then shot grey over both of these and the USS New York which had been masked before:

WIP_USS_New_York_XVI.jpg


WIP_USS_New_York_XVII.jpg


The USS New York didn't turn out as well as I'd have liked; there were too many imperfections and rough spots that will require a re-spray. I did remove the masking from the USS Ingraham and USS Forrest Sherman though, and they look pretty good. There will be a minimum of touch-up needed here.

USS Ingraham:

WIP_USS_Ingraham_V.jpg


USS Forrest Sherman:

WIP_USS_Forrest_Sherman_VI.jpg


Now I can finally move forward on these ships.


Now to my armor.

I did some more detail painting on my Russian Fire Truck, painting the wooden seats and the chassis and touching up the rims of the wheels; as well as the overspray on the tires themselves:

WIP_OthersLiveCampaign_IX.jpg


Next I went back to work on my Gigant and V-2 trailer.

The Gigant was finally painted inside and then the windows added to the cab sides and windscreen. Then I assembled everything together:

WIP_OTS2016_X.jpg


WIP_OTS2016_XI.jpg


After this, I masked off the windows in preparation for painting. Speaking of painting, I shot a coat of grey over the lower part of the Mitrailleurwagen:

WIP_OTS2016_XII.jpg


WIP_OTS2016_XIII.jpg


It was challenging, but I managed to get paint into all the little nooks and crannies without glopping up a whole mess of paint all over. This looks pretty darn good! Now all I have to do is finish some detail parts on the upper part of the trailer before I can paint it.


Well, that's about all for now. Hopefully I'll be further along on some of these; maybe even done with a couple! So, stay tuned for more, comments are always welcome. Thanks for looking in!
 
Back
Top