• Modelers Alliance has updated the forum software on our website. We have migrated all post, content and user accounts but we could not migrate the passwords.
    This requires that you manually reset your password.
    Please click here, http://modelersalliance.org/forums/login to go to logon page and use the "Forgot your Password" option.

All Righty ... What's on the bench today?

:dude (y)

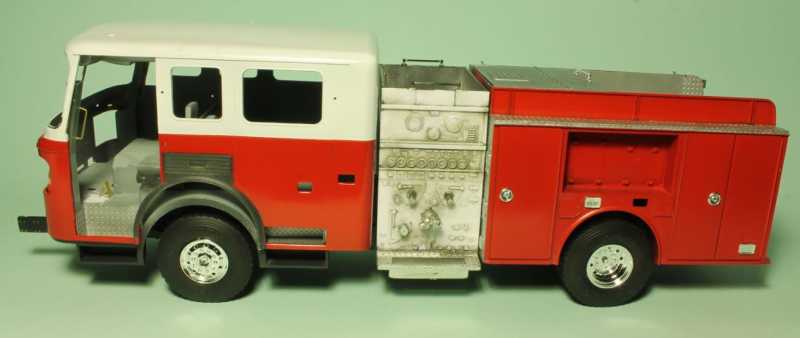
Cleaned up the Man Room this morning and cleaned up after spraying some paint. Sorry for the camera pics-- but I didn't want to take these out of the heated room to the 30 degree photo booth area with the paint so freshly sprayed....

The kitchen sprayed...still trying to decide what's on the menu for the vat...might do either pea soup or something similar...
kitch1.jpg

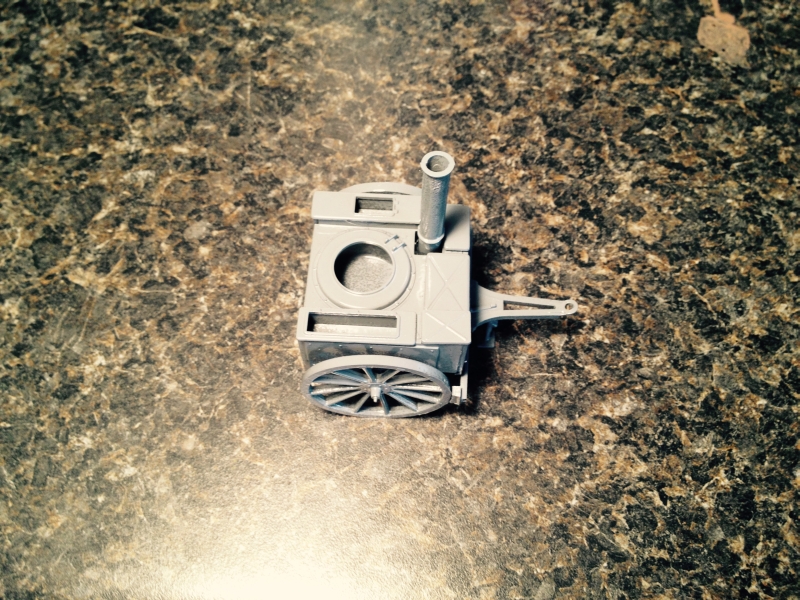
Sprayed the metal onto the 'stang...
stang1~0.jpg

And the first coat of paint on the beast-- have some touching up on filling to do and another coat....
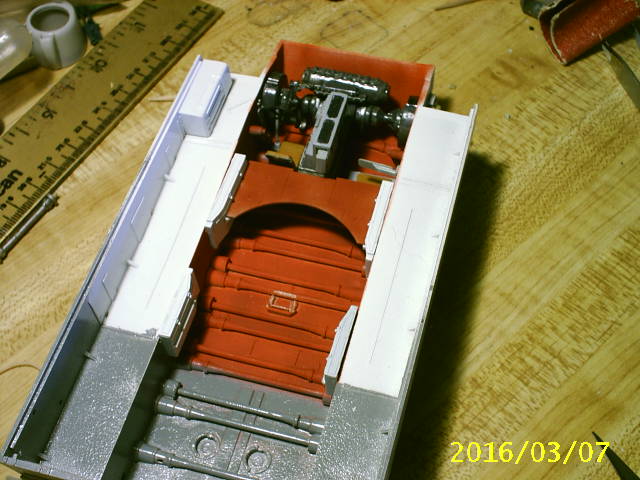
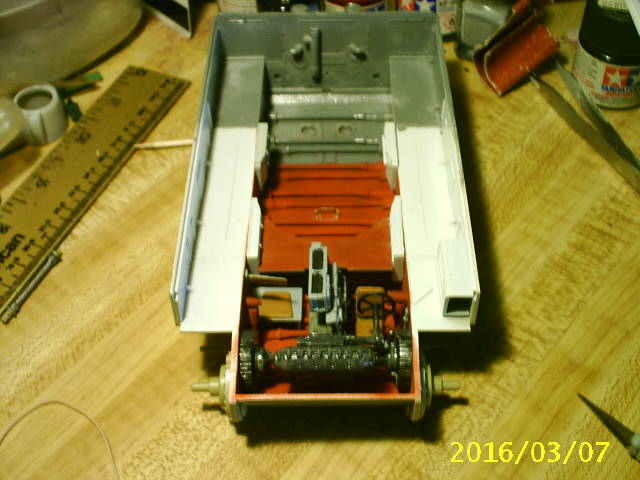
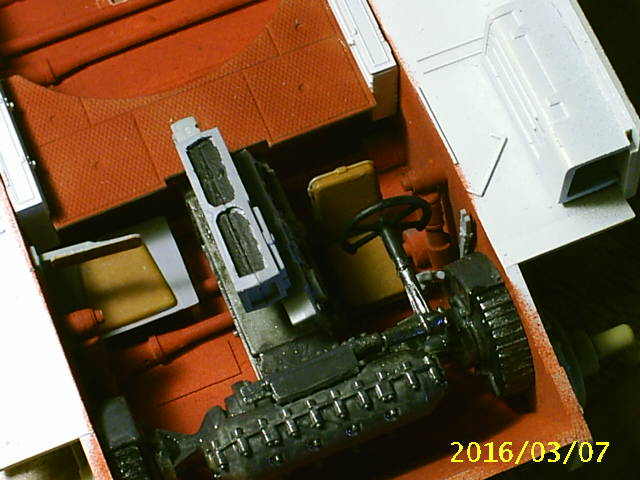
sturm2~0.jpg

sturm1~0.jpg
 
Fantastic work Mike! I have also been trying to clean up some more. Did some sanding and fixing on my C-118 Liftmaster, but I also lost my camera so I have to find it before I can get pics.

I'll keep you all posted.
 
Alas no photos yet, but got the 10th shipment on the DeAgostini Falcon and spent the weekend assembling the lower hull frame. As it was nice out yesterday I also went to Ace hardware and picked up some spray cans of grey primer and aluminum. Set up the hull plates I have and sprayed the interior surfaces for light blocking. (just in case)

I am either waving 3ft planks around with the Arizona or a 2ft salad platter with the Falcon. The Falcon is going to go to the back burner again now until some more certain parts show up.
 
On my Arizona build I finally decided that rather than modify and scratchbuild 10 mounts, to make one awesome master and cast the copies. Have the master plate made and the mold made. Sometime this week I will do the 10 castings and modify the parts I am going to use.

In addition the replacement part and shipment #11 for the Falcon showed up. (will have a bunch more on it tonight I hope) Have all the bottom plates attached now. Went through yesterday and identified the locations of all the add on red LED lights it will be getting from the full sized set, as well as those that were added to the 5 foot model. Underside photos of the later versions of either the 32" or 5ft models are minimal at best.

I am also going to have to order a fair number of white LEDs. There are somewhere about 30 small white spotlights all around the underside of the Falcon. That is in addition to the 4 large lights on either side of the 2 boarding ramp tunnels. Those openings I enlarged a fair amount and I will probably cover them over with Of course the three Falcons don't really match well. Each one is slightly (or a lot) different from the others. Even the basic shape differs from one to another. So this model is going to be an aggregate, a mix of the best and/or most recogniseable features from each of the three Falcons. Specifically based on The Empire Strikes Back.
 
Continuing to work on my production line. It consists of italeri's M-107, M-110 and m-110A2 self-propelled guns. I have the main hull assembled but not the little bits on it. Also have the gun mounts nearly finished and sure hope italeri got that C Parts tree into the mail. I just finished assembling the spade to its holder and assembled the pistons which are now curing.


Cheers
 
Nice, James! How's the fit on this Ural?

Very good. A couple of tricky parts where you really need to watch and check forward on the instructions. And I'm sorry to say some very tiny parts that did not get added to mine because they were really tiny and there was no alignment mark nor could I really figure out how they were installed. Those parts would be the locking tabs for the rocket tubes. You cant really see them though.
James
 
Holy Smokes :eek:hmy: Peter that's some kinda lay out you've got underway my friend. (y)

Tony lee :eek:ldguy

Thanks Tony.

Not shown are the other 32 road wheels.

I finf the differences in gun barrel lengths interesting.

Did you know that the 175mm gun came aFTER the 8" one?

Cheers
 
Havn't posted here in a while. No work done on my rowboat builds.
This project has been on the BIG bench. Been working on a 1:1 bed. One of my cousin's daughter has a special needs child. They have been looking for a special bed for her. These things cost between $5000.00 and $10,000.00. My son has a daughter that has cerebral palsy. Both these kids cannot walk or talk, are tube fed and other issues. My son and I snitched some pictures off the internet and used them to design and build a bed for his daughter. This was about 5 years ago and the bed materials cost about $375.00.

I just finished the new bed and installed it today. Total materials cost about $680.00, about 88 3/4 hours.

The materials


Leg parts and legs glued up


Ready for machining


Planed and trimmed


Headboards cut and edgebanded


Mortising legs for headboards


Headboards complete


Fully assembled bed


Painted and assembled bed, installed at my cousin's daughter's house.


This will be a big help for this young couple, just as it was for my son and daughter-in-law.

NEXT - back to the little fleet of wood rowboats. Also gonna start my LCM-3 / ambulance jeep / army ambulance / several figures build.

EJ
 
Bravo Zulu EJ!! (y) (y)

I managed to get the tranny into the lower hull of my Tiger-I today :D

hd72d740_2016-03-07.JPG


h2b758ba_2016-03-07.JPG


hecdd965_2016-03-07.JPG


More pics in my Tiger thread...May even try to steal a page outta the General's book.... :hmmm
 
Havn't posted here in a while. No work done on my rowboat builds.
This project has been on the BIG bench. Been working on a 1:1 bed. One of my cousin's daughter has a special needs child. They have been looking for a special bed for her. These things cost between $5000.00 and $10,000.00. My son has a daughter that has cerebral palsy. Both these kids cannot walk or talk, are tube fed and other issues. My son and I snitched some pictures off the internet and used them to design and build a bed for his daughter. This was about 5 years ago and the bed materials cost about $375.00.

I just finished the new bed and installed it today. Total materials cost about $680.00, about 88 3/4 hours.

The materials


Leg parts and legs glued up


Ready for machining


Planed and trimmed


Headboards cut and edgebanded


Mortising legs for headboards


Headboards complete


Fully assembled bed


Painted and assembled bed, installed at my cousin's daughter's house.


This will be a big help for this young couple, just as it was for my son and daughter-in-law.

NEXT - back to the little fleet of wood rowboats. Also gonna start my LCM-3 / ambulance jeep / army ambulance / several figures build.

EJ

Awesome looking bed. The store bought might be 5 to 10 thousand, but this is priceless :notworthy :notworthy :notworthy :notworthy :notworthy (y) (y) (y) (y) (y) (y)
James
 
This will be a big help for this young couple, just as it was for my son and daughter-in-law.

NEXT - back to the little fleet of wood rowboats. Also gonna start my LCM-3 / ambulance jeep / army ambulance / several figures build.

EJ


True craftsmanship there EJ, Well done!
 
Very nice carpentry EJ ... and congrats on a great looking project ... :salute

Everyone else's projects look very promising ... (y)

And Jeff looks like the same tornado hit your bench after Mine ... :rotf
 
Back
Top