
-
Modelers Alliance has updated the forum software on our website. We have migrated all post, content and user accounts but we could not migrate the passwords.
This requires that you manually reset your password.
Please click here, http://modelersalliance.org/forums/login to go to logon page and use the "Forgot your Password" option.
You are using an out of date browser. It may not display this or other websites correctly.
You should upgrade or use an alternative browser.
You should upgrade or use an alternative browser.
The return to the monastery.
- Thread starter Le2
- Start date
Plastik Smurff
Well-known member
Impresive,I'm enjoyin this. 
.Kurt.
.Kurt.

Le2
Member
Thanks for the support friends.
Well I leave this figure advanced in the absence of a few tweaks.

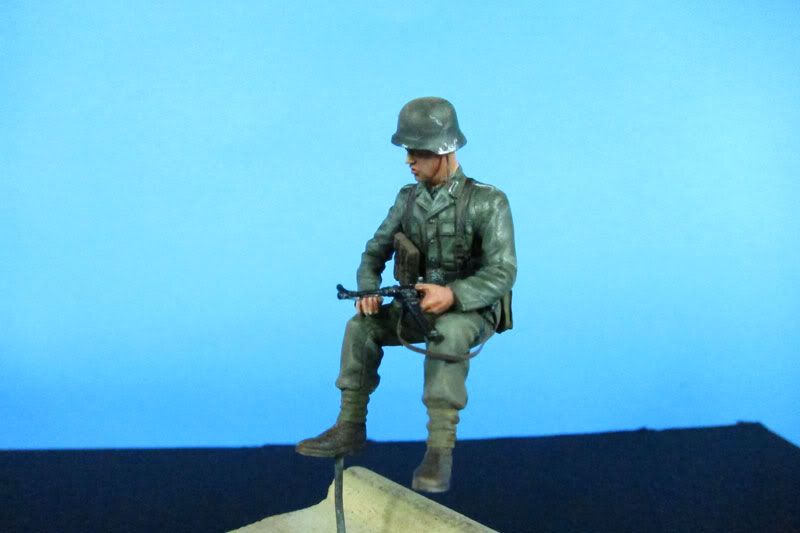
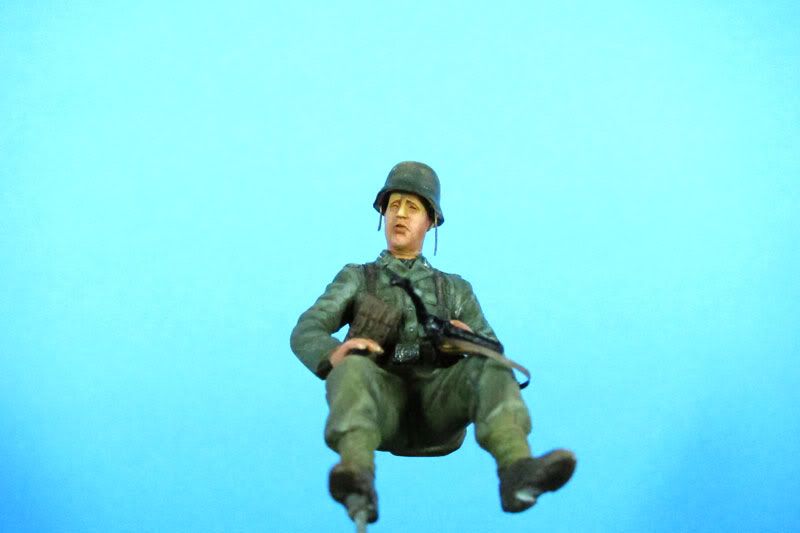
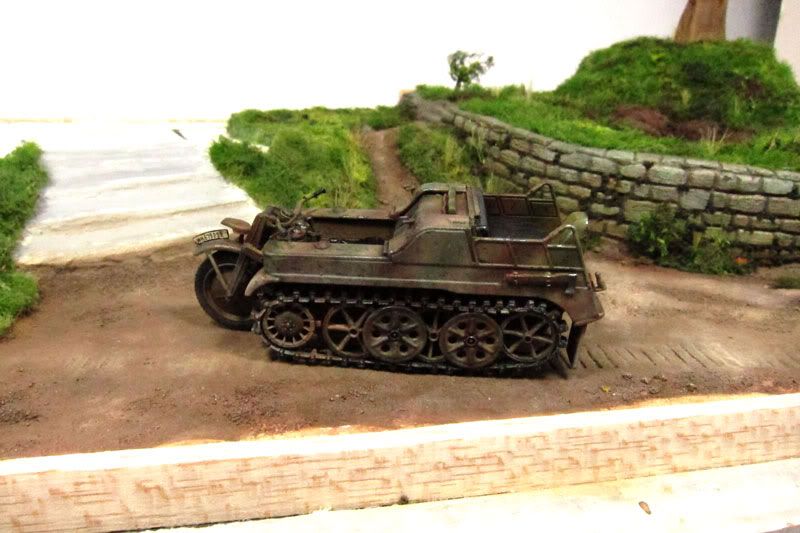
After testing a while I find that the most logical position is in this sector of the bike and let pass the little critter looks a bit.

This would be in a frontal plane.
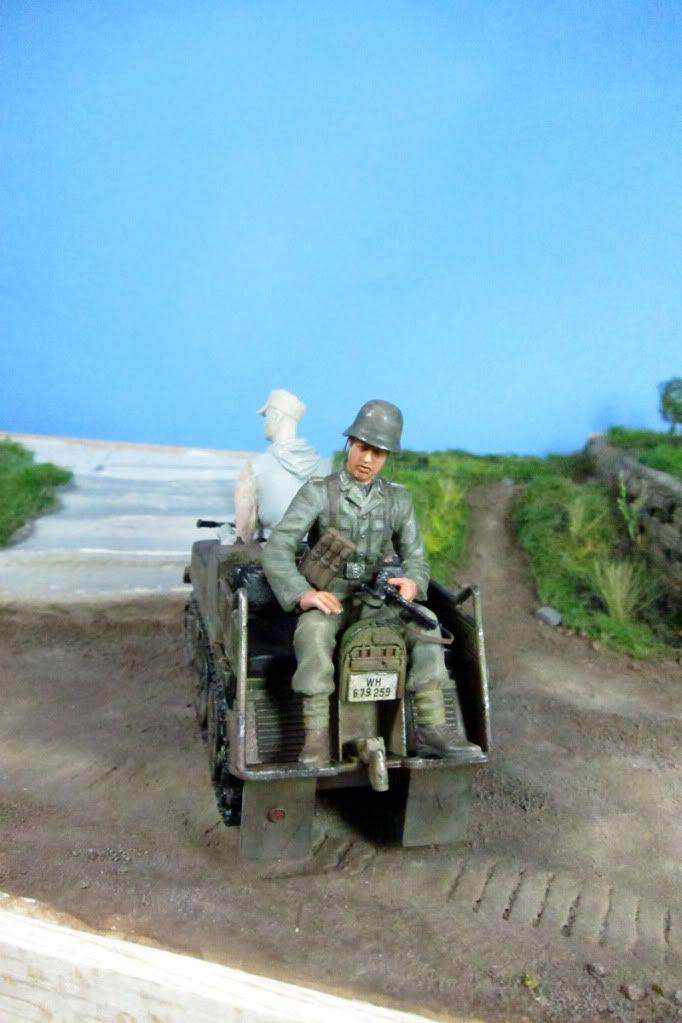
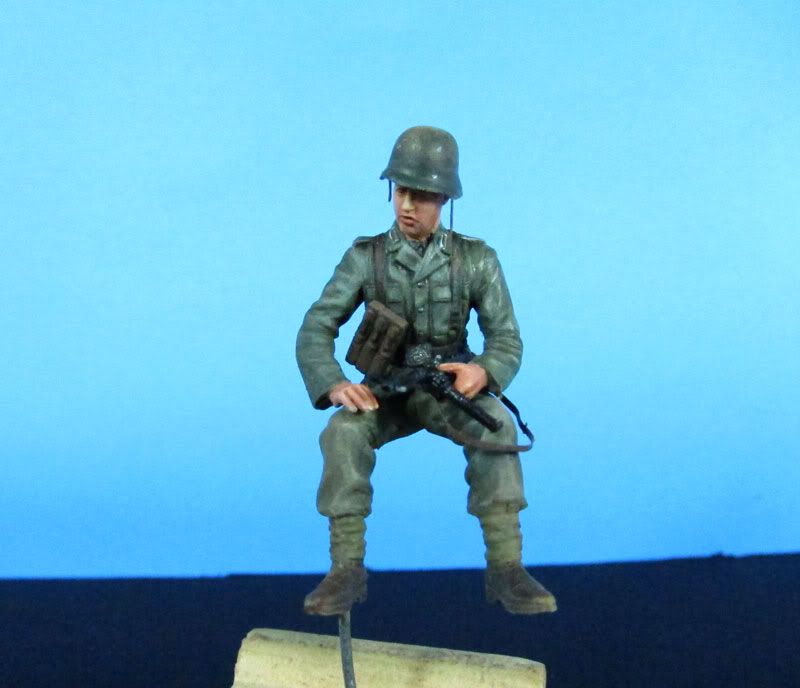
What led me to again test the distribution of the figures in the table. This option is quite convinced me. The tank crews and assistant walking wounded and add the figure says. It may explain the lack of a formal vehicle (tank etc) that add more dynamic figures and movement to the scene.
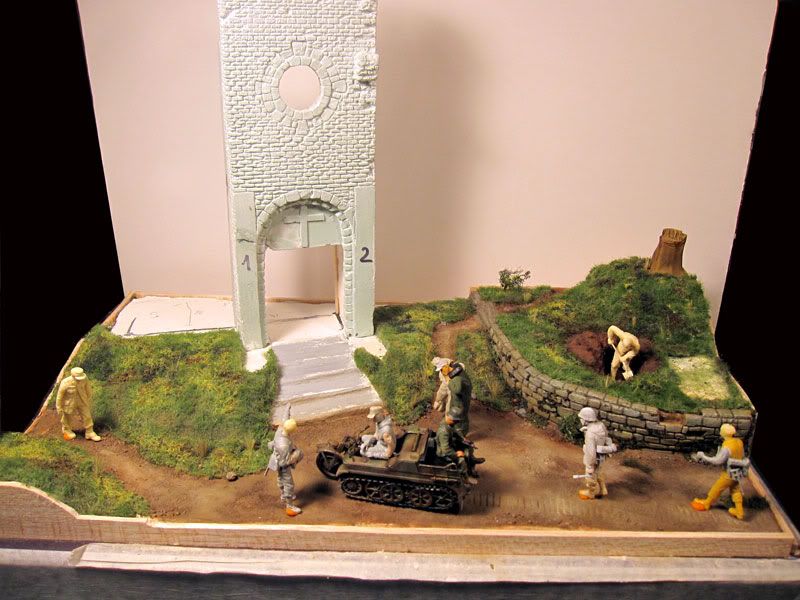
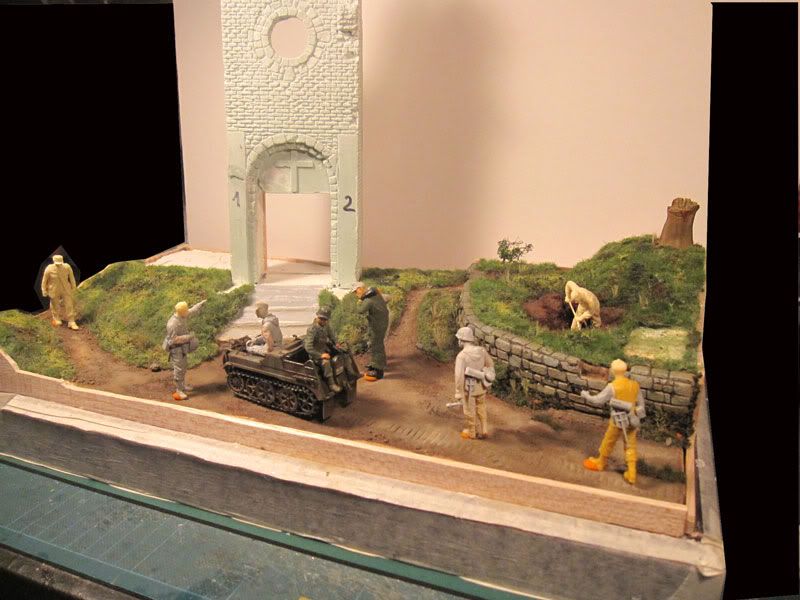
Although not shown in the photos show them the addresses it has the looks in this scheme was a point that convinced me a lot in this new setting.
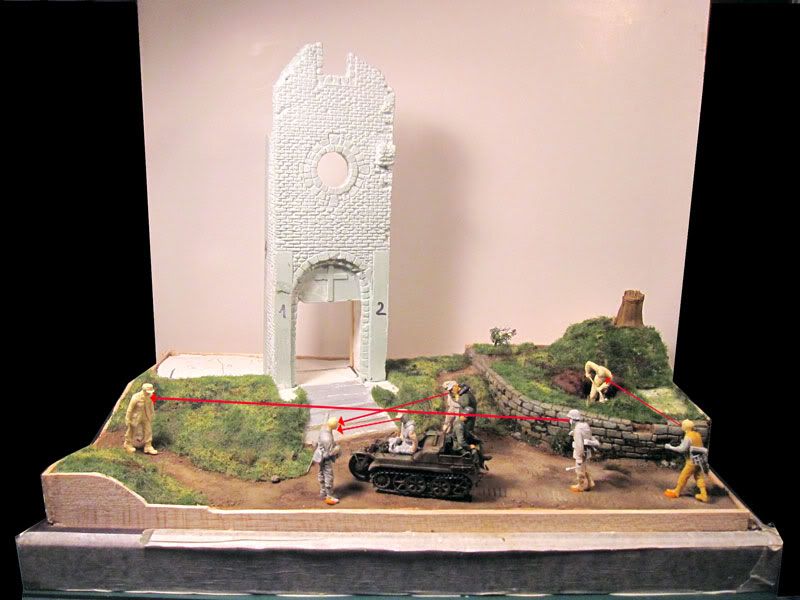
The man who indicate the way look at the couple but I forget to put that arrow.
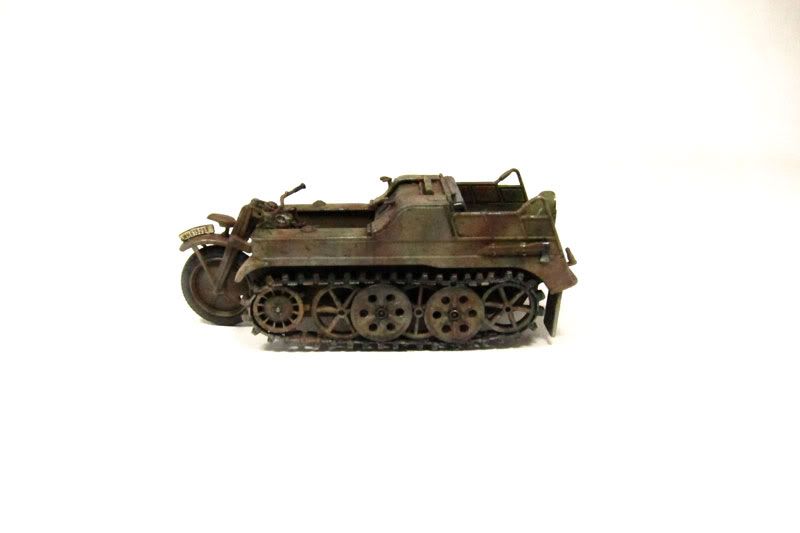
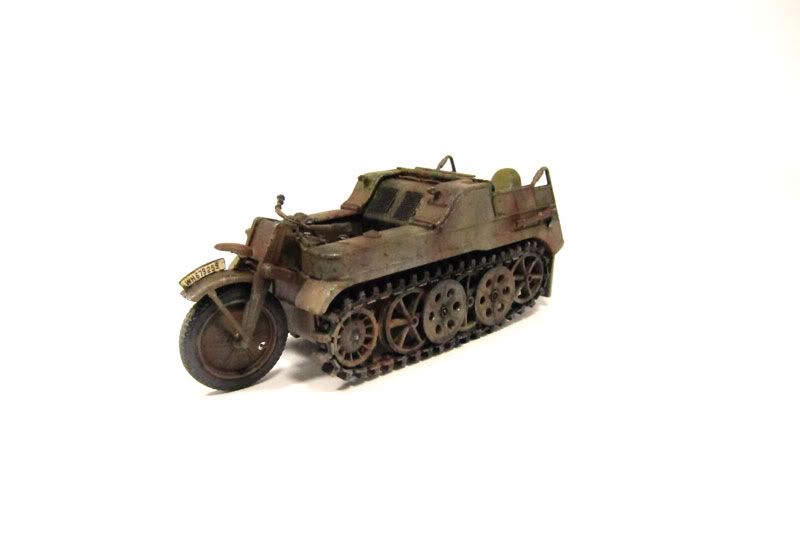
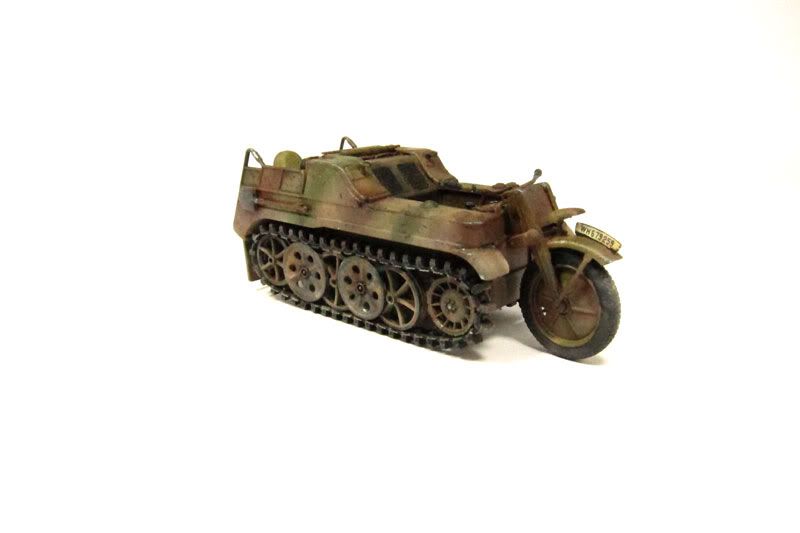
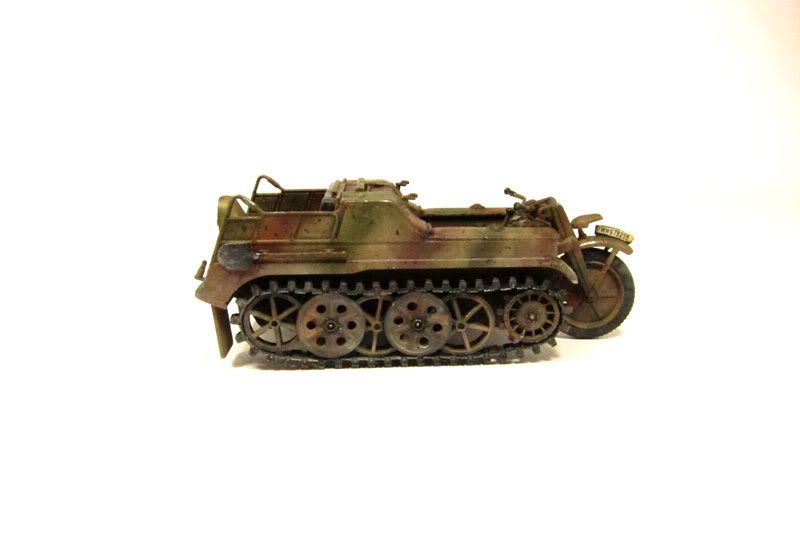
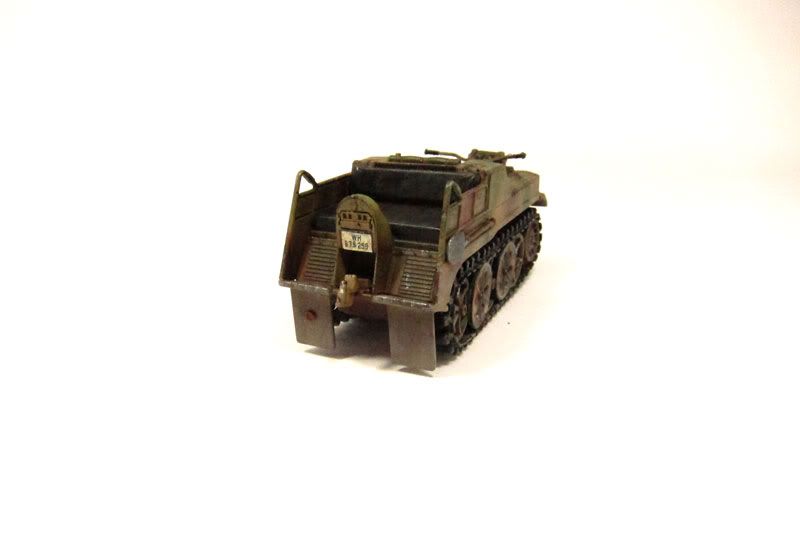
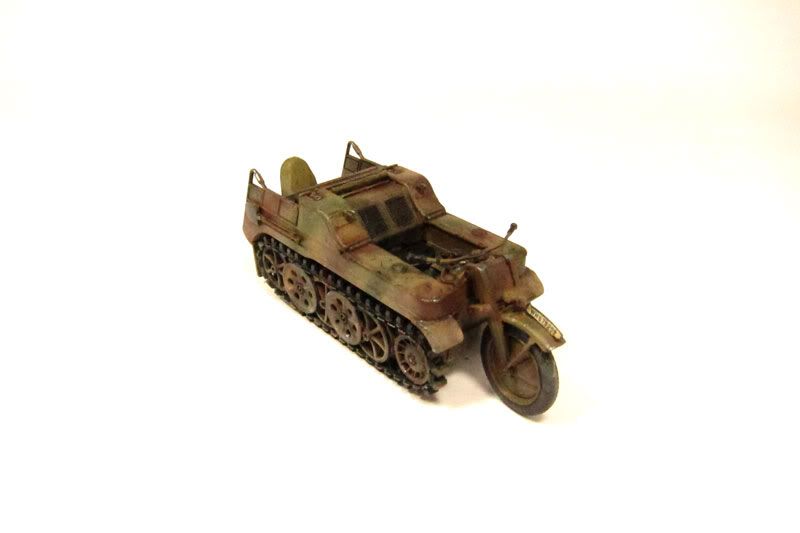
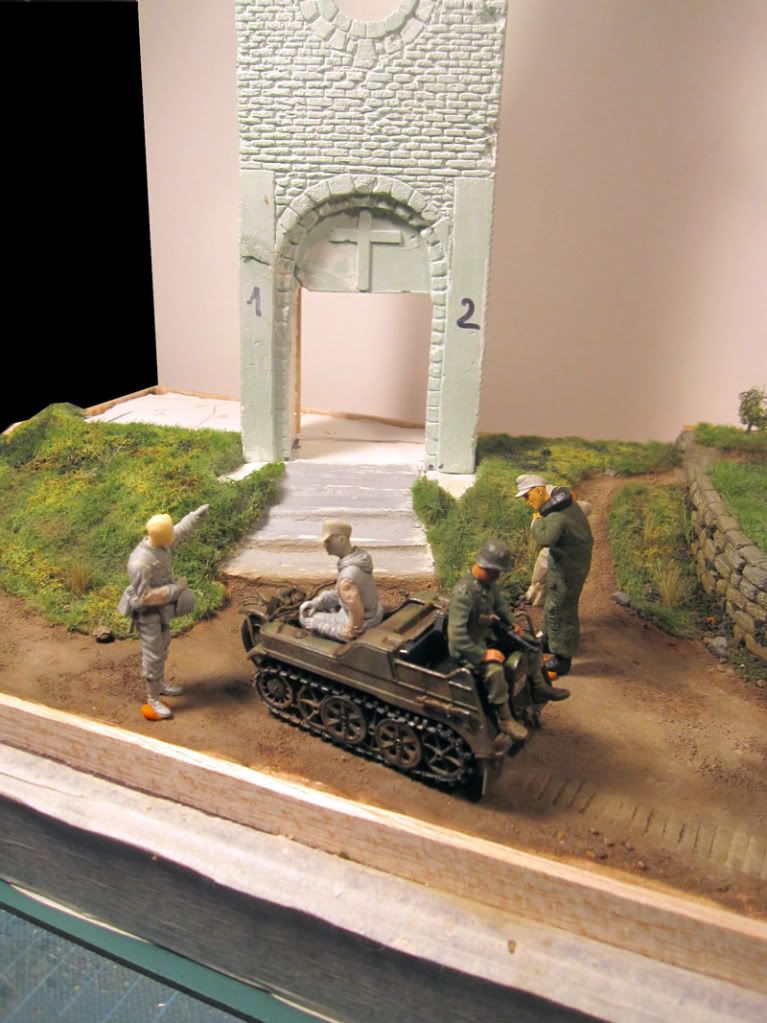
A shoot nearst to kettenkrad
I put a figure sleeping in a corner of the monastery and another one that I have yet to evaluate. But for now would be these.
Comments about all welcome as always.
Thanks for watch.
Well I leave this figure advanced in the absence of a few tweaks.
After testing a while I find that the most logical position is in this sector of the bike and let pass the little critter looks a bit.
This would be in a frontal plane.
What led me to again test the distribution of the figures in the table. This option is quite convinced me. The tank crews and assistant walking wounded and add the figure says. It may explain the lack of a formal vehicle (tank etc) that add more dynamic figures and movement to the scene.
Although not shown in the photos show them the addresses it has the looks in this scheme was a point that convinced me a lot in this new setting.
The man who indicate the way look at the couple but I forget to put that arrow.
A shoot nearst to kettenkrad
I put a figure sleeping in a corner of the monastery and another one that I have yet to evaluate. But for now would be these.
Comments about all welcome as always.
Thanks for watch.

Yago Alonso
Member
WOW WOW WOW...!
Awesome work Santi...
I would like to see more pics soon")
See you... and talk you.
Yago.
Awesome work Santi...
I would like to see more pics soon
See you... and talk you.
Yago.
WOW WOW WOW...!
Awesome work Santi...
I would like to see more pics soon
See you... and talk you.
Yago.
Speaking of more pictures, where have you been?? :hmmm :hmmm :drinks
Yago Alonso
Member
Hi Moon Puppy...
Thanks for your words...
I'll try to post anything soon.
Thanks for your words...
I'll try to post anything soon.
kryptosdaddy
Well-known member
This is awesome- i really like those kettenkrads.
Le2
Member
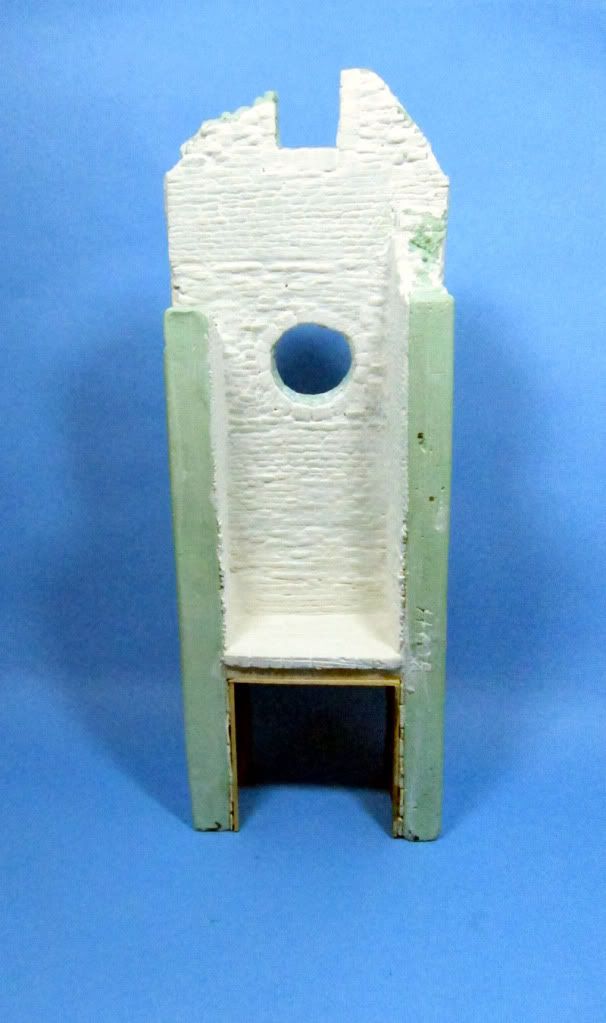
A few months ago I started working the back of the monastery and it is an area with no detail.
After doing some testing discard the cork planks to make bricks and stones because he wanted to maintain the same texture on both sides of the building. Finally I was inclined to make the whole process with dough. While the rest of the rest of the walls marking plates putty will work with the tools in this sector due to its timely and angles led me to work in a more tedious.
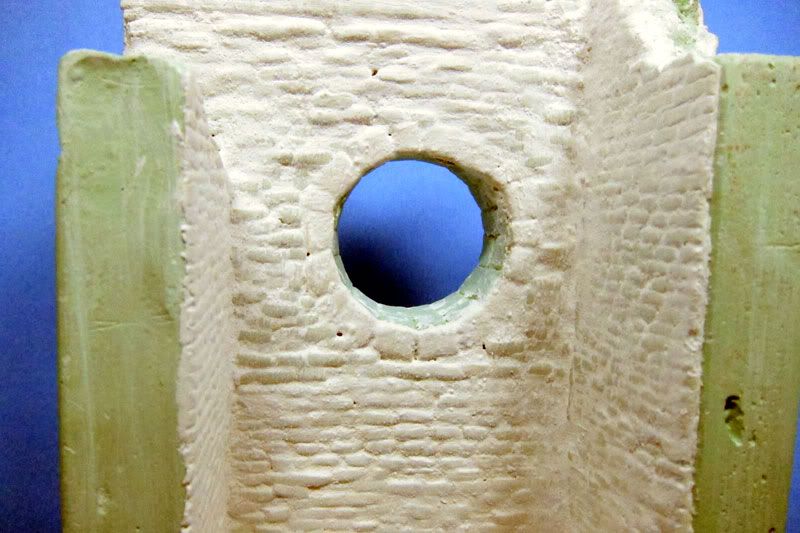
After measuring the stones and bricks create various tools.
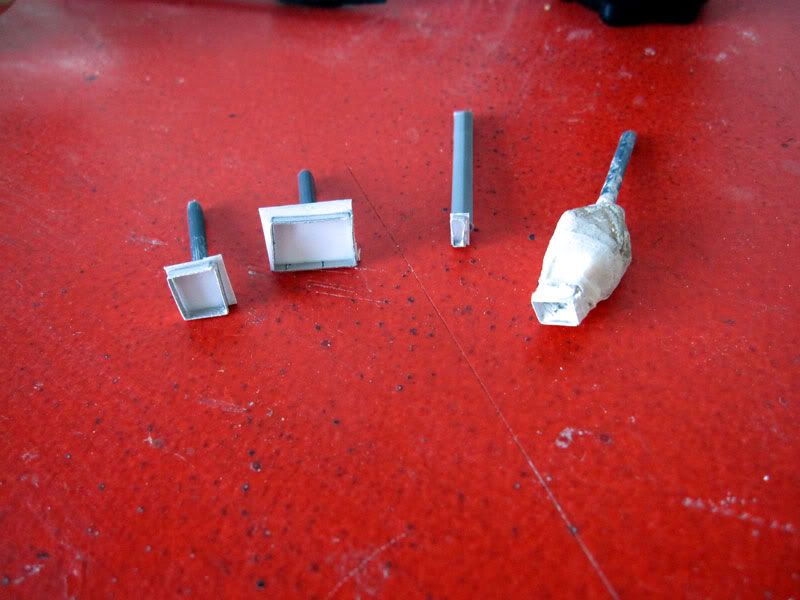
Dialed brick plates.
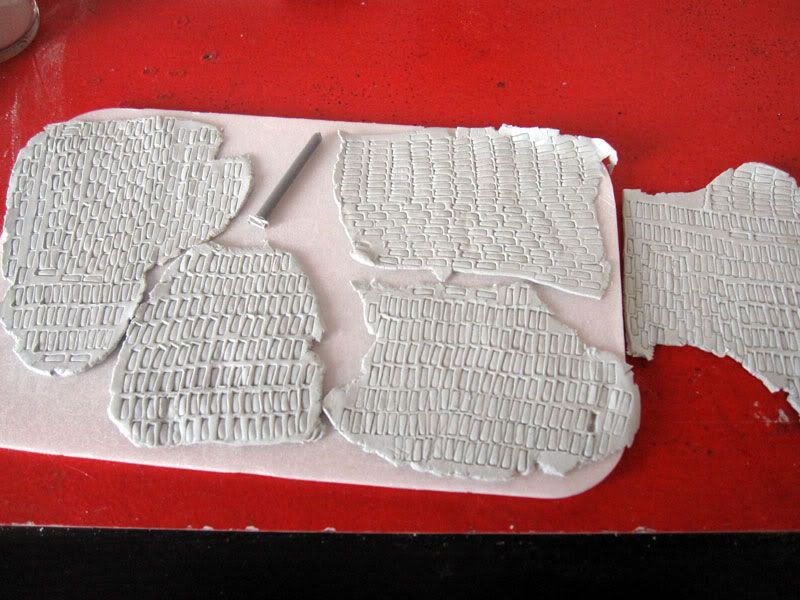
Once dry textured.
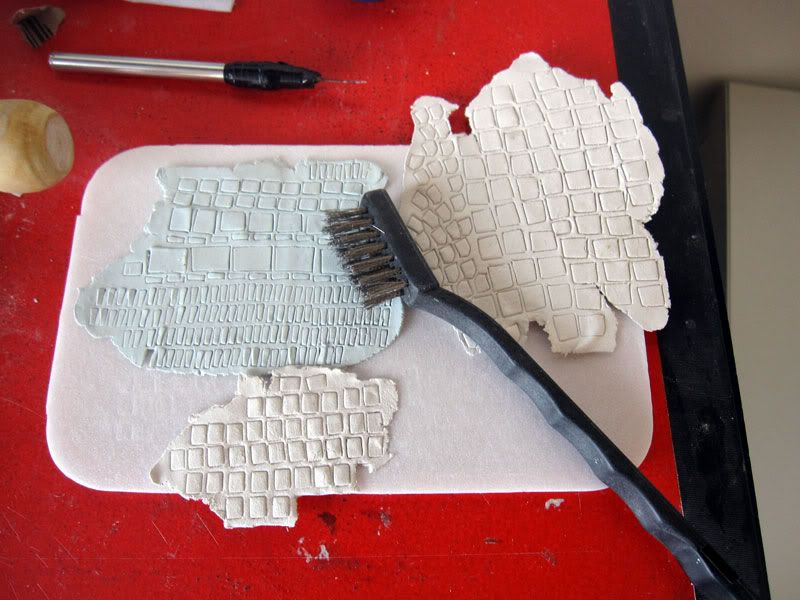
Then cut perhaps the most odious of the process but a change down after a day of strees profiteth).
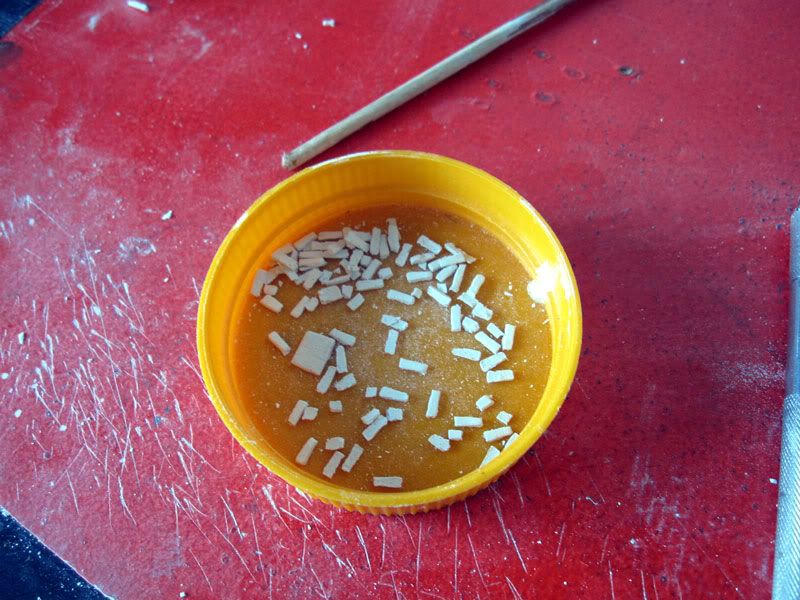
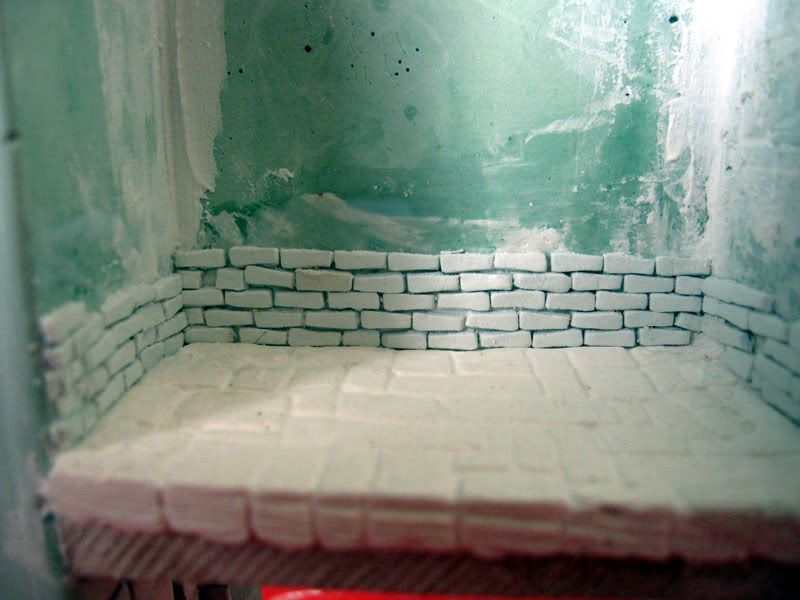
Well a few days ago I finally reached the end of sticks and glue. It was tough but I think the painting will be worth it. So you see the inner wall of the entrance area with a coat of plaster to unify. I'll give you a bit with the wire brush to touch a bit x sectors but would be. I think that now in the 2 small front walls are stone pondre small sizes to make me parentheses if you want to go crazy and then trying to match the brick lines the side walls that are in this sector.
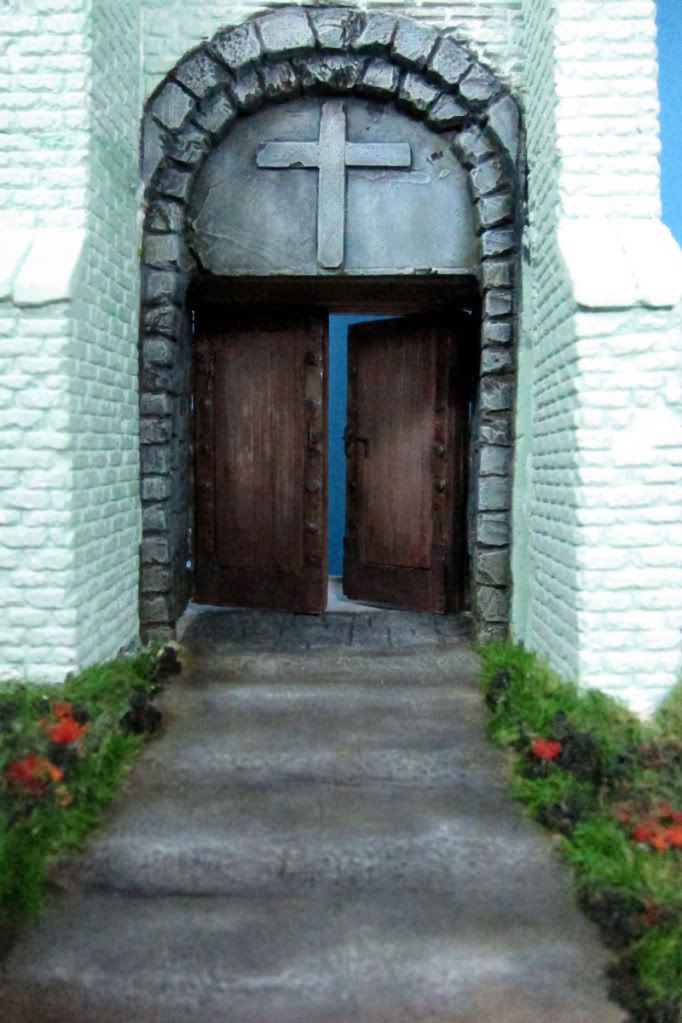
Close shoot.
Monastery doors.
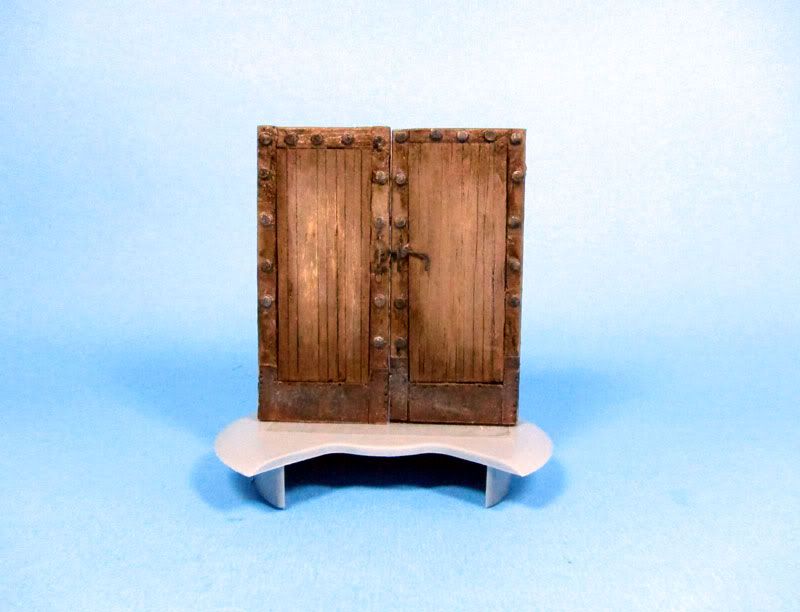
I had fun with them but then lose a little. Here presented alongside the ladder and access the part of some work.
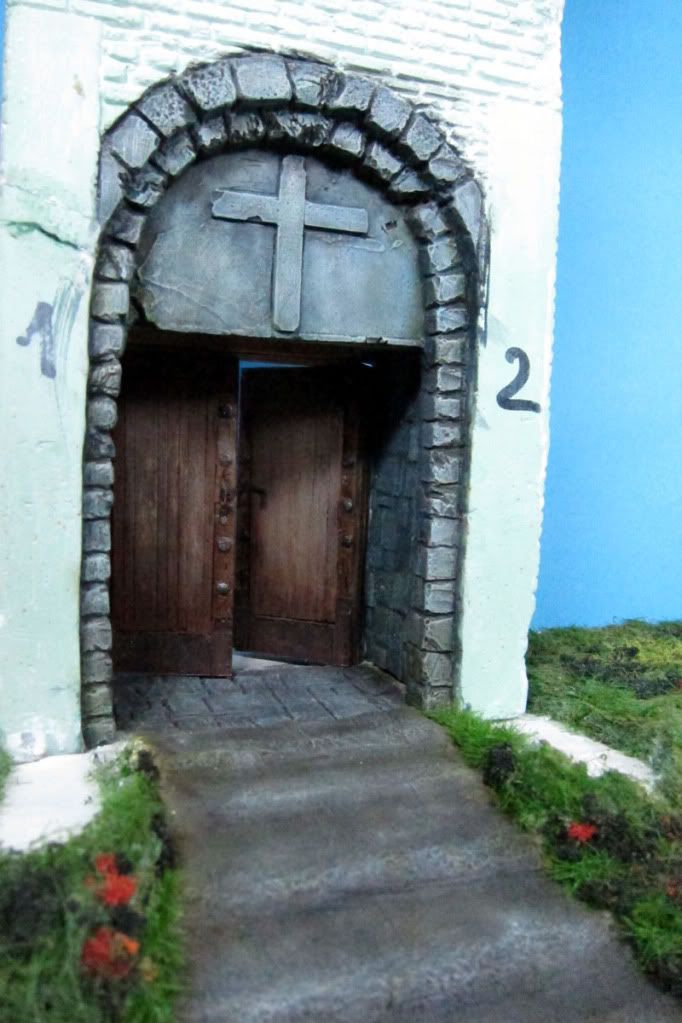
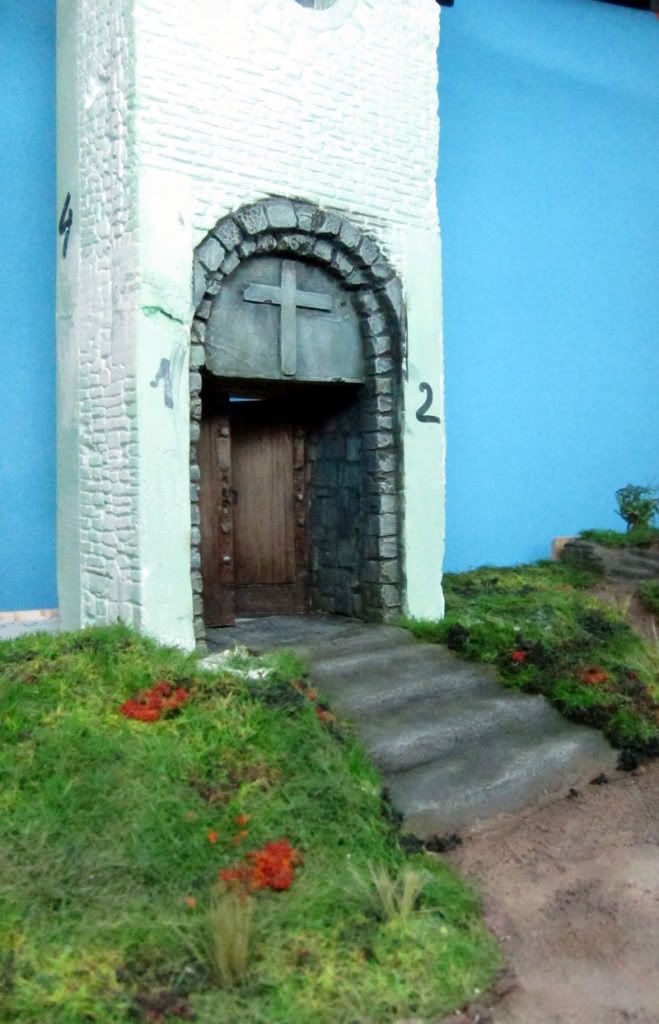
By adding the two front columns will be a little less but I think I just passed.
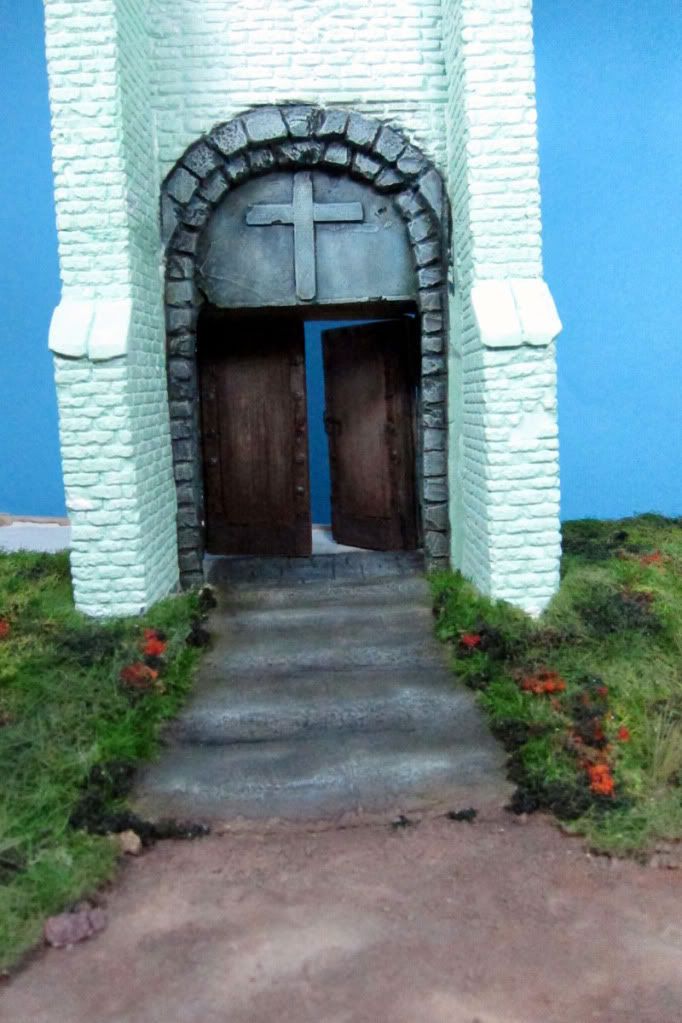
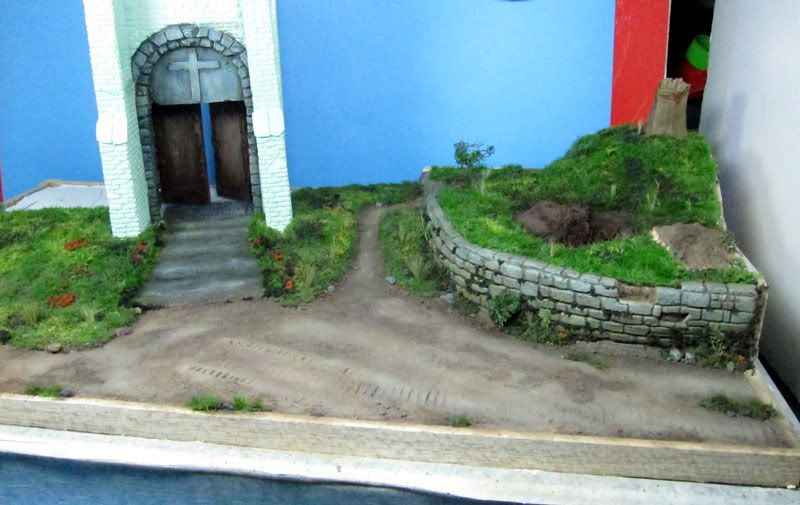
A view of the wall areas, stairs, entrance and doors to see them living together.
Thanks for watch
After doing some testing discard the cork planks to make bricks and stones because he wanted to maintain the same texture on both sides of the building. Finally I was inclined to make the whole process with dough. While the rest of the rest of the walls marking plates putty will work with the tools in this sector due to its timely and angles led me to work in a more tedious.
After measuring the stones and bricks create various tools.
Dialed brick plates.
Once dry textured.
Then cut perhaps the most odious of the process but a change down after a day of strees profiteth).
Well a few days ago I finally reached the end of sticks and glue. It was tough but I think the painting will be worth it. So you see the inner wall of the entrance area with a coat of plaster to unify. I'll give you a bit with the wire brush to touch a bit x sectors but would be. I think that now in the 2 small front walls are stone pondre small sizes to make me parentheses if you want to go crazy and then trying to match the brick lines the side walls that are in this sector.
Close shoot.
Monastery doors.
I had fun with them but then lose a little. Here presented alongside the ladder and access the part of some work.
By adding the two front columns will be a little less but I think I just passed.
A view of the wall areas, stairs, entrance and doors to see them living together.
Thanks for watch
panzerace007
Active member
Le2 ,
WoW !! Outstanding Work ! Scratch building th Walls ... brick by brick .. Crazy Awesome !!
:drinks :erik
WoW !! Outstanding Work ! Scratch building th Walls ... brick by brick .. Crazy Awesome !!
:drinks :erik

Similar threads
- Replies
- 50
- Views
- 8K
- Replies
- 138
- Views
- 33K
- Replies
- 7
- Views
- 5K