When I heard of Meng's new P-51D, I was curious as to whether they scanned an aircraft. The moment I found out they were releasing a no-glue-needed model, I lost interest and decided to wait for the Airfix kit (which they did scan an actual Mustang). When released the price was high but the reviews did state a lot of positive things about this kit. See the links at the end for reviews and builds. One day, on a lark, I looked up the kit on eBay and won it for only $15.50USD! One can never have too many Mustangs if one loves sharkmouth schemes!

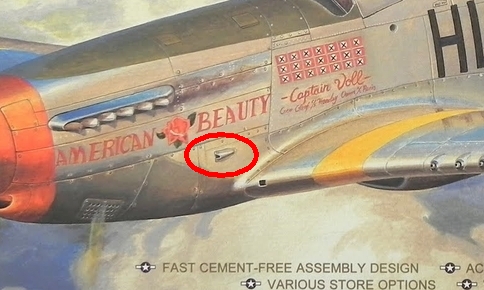
The box art. While it is nicely done, I personally do not like this one. I thought the images online had a yellowish filter but this is actually how the excellent artwork is printed on semi-matt cardboard. While I understand the Meng paid an artist to create this painting and therefore owns copyright, why isn't the artist credited?

Inside, the box isn't completely full but all sprue trees are individually wrapped with the clear parts in a sticky thick cellophane as well (similar to food plastic wrap using static cling).

The instructions remind me of Tamiya. There is a short history in Chinese, English, Japanese, and Russian. The last page, on the left here, shows one of two schemes possible. This is P-51D 44-15622, 356th FG, 9th AF, USAAF, piloted by Captain Richard Turner.

The model is completed in 13 steps and you can see that there are only a few parts on the six sprue trees (see parts map on lower left). There are a few options but no indication which one to use for the markings included. For example, on the upper left we see two canopies but no part number. Other options mentioned are the exhausts, fuel tanks or bombs, rear radiator shutter, perforated or not covers over carburetor filters on the nose, and wheel covers (should wheels up be chosen). Not mentioned are the included paddle bladed prop and corresponding spinner.

Both sides of the sprue tree marked A.


A closer look at the lower nose which is done with a multi-part mold. Panel lines are consistent (good) but the fasteners and piano hinge are recessed (bad). Luckily, not difficult to fix so I am still happy.

This is the spinner for the cuffed blades used in the kit.

This is the unmentioned spinner for the paddle bladed propeller.

A closer look at the starboard center fuselage.

Inner port side of cockpit has these pin marks which look as though they have been worked on. The throttle console is added so little (only some scuff marks) are seen.

A molded on oxygen hose lets down the starboard cockpit wall.

Sprue Tree B has parts (on the lower edge) which benefit from multi-part molds.


The guns have pilot holes.

Sprue Tree C.


On actual combat aircraft many of these panel lines and rivets were puttied over.

Sprue Tree D.


Throttle console. The shapes are basic but a nice foundation to work on.

The cockpit floor.

This is the first accurate kit included injection molded P-51D landing gear bay. Some work to do but the basic details are there.

It couldn't have been that difficult to put the NAA logos on the rudder pedals...

Sprue Tree E. Both propeller types and exhausts can be seen.


The exhausts are slide molded so starter holes are included (need enlarging).

The instrument panel is nicely molded but I plan on using Yahu's excellent replacement (even though it is not made for this kit).

Sprue Tree F for the clear parts.

Standard and Dallas style canopies are included.

The gun sight is a single part so careful painting is required to make it convincing, or simply replace it.

The decals...

Note the way that swastikas are handled? They need a second layer on top to complete them. These decals are printed by Cartograf (see next to Meng's copyright) but are shiny. They are not outsourced as they are made in Italy (see under my copyright for the photo I took).

Note the misspelling of Turner's name.
The accuracy of the kit markings have been called into question. My concern is that Meng doesn't mention which canopy, exhausts, or carburetor filter covers to use or whether the rear view mirror appears on the subjects of the decals.
American Beauty 44- 15459 (use perforated carburetor filter covers B3/B4, covered exhausts E16/E17, no rear view mirror F2, and standard canopy F5.)

A poorly colorized image:

Here is Short Fuse Sallee 44-15622 (use perforated carburetor filter covers B3/B4, uncovered exhausts E14/E15, no rear view mirror F2, and standard canopy F5.)


A different set of kill markings...

Since there are several build reviews online, I have not tested the fit of parts as people have stated that they are difficult to take apart after. I plan to replace the decals so, in the end, I am quite pleased with this kit and agree with the following build reviews:
The Modelling News
Meng's Mustang by Gary
HyperScale
Meng's P-51D Construction Blog
Here is a post with a comparison to Tamiya's kit parts:
Meng's P-51D/K build with Xtradecal's markings
The box art. While it is nicely done, I personally do not like this one. I thought the images online had a yellowish filter but this is actually how the excellent artwork is printed on semi-matt cardboard. While I understand the Meng paid an artist to create this painting and therefore owns copyright, why isn't the artist credited?
Inside, the box isn't completely full but all sprue trees are individually wrapped with the clear parts in a sticky thick cellophane as well (similar to food plastic wrap using static cling).
The instructions remind me of Tamiya. There is a short history in Chinese, English, Japanese, and Russian. The last page, on the left here, shows one of two schemes possible. This is P-51D 44-15622, 356th FG, 9th AF, USAAF, piloted by Captain Richard Turner.
The model is completed in 13 steps and you can see that there are only a few parts on the six sprue trees (see parts map on lower left). There are a few options but no indication which one to use for the markings included. For example, on the upper left we see two canopies but no part number. Other options mentioned are the exhausts, fuel tanks or bombs, rear radiator shutter, perforated or not covers over carburetor filters on the nose, and wheel covers (should wheels up be chosen). Not mentioned are the included paddle bladed prop and corresponding spinner.
Both sides of the sprue tree marked A.
A closer look at the lower nose which is done with a multi-part mold. Panel lines are consistent (good) but the fasteners and piano hinge are recessed (bad). Luckily, not difficult to fix so I am still happy.
This is the spinner for the cuffed blades used in the kit.
This is the unmentioned spinner for the paddle bladed propeller.
A closer look at the starboard center fuselage.
Inner port side of cockpit has these pin marks which look as though they have been worked on. The throttle console is added so little (only some scuff marks) are seen.
A molded on oxygen hose lets down the starboard cockpit wall.
Sprue Tree B has parts (on the lower edge) which benefit from multi-part molds.
The guns have pilot holes.
Sprue Tree C.
On actual combat aircraft many of these panel lines and rivets were puttied over.
Sprue Tree D.
Throttle console. The shapes are basic but a nice foundation to work on.
The cockpit floor.
This is the first accurate kit included injection molded P-51D landing gear bay. Some work to do but the basic details are there.
It couldn't have been that difficult to put the NAA logos on the rudder pedals...
Sprue Tree E. Both propeller types and exhausts can be seen.
The exhausts are slide molded so starter holes are included (need enlarging).
The instrument panel is nicely molded but I plan on using Yahu's excellent replacement (even though it is not made for this kit).
Sprue Tree F for the clear parts.
Standard and Dallas style canopies are included.
The gun sight is a single part so careful painting is required to make it convincing, or simply replace it.
The decals...
Note the way that swastikas are handled? They need a second layer on top to complete them. These decals are printed by Cartograf (see next to Meng's copyright) but are shiny. They are not outsourced as they are made in Italy (see under my copyright for the photo I took).
Note the misspelling of Turner's name.
The accuracy of the kit markings have been called into question. My concern is that Meng doesn't mention which canopy, exhausts, or carburetor filter covers to use or whether the rear view mirror appears on the subjects of the decals.
American Beauty 44- 15459 (use perforated carburetor filter covers B3/B4, covered exhausts E16/E17, no rear view mirror F2, and standard canopy F5.)
A poorly colorized image:
Here is Short Fuse Sallee 44-15622 (use perforated carburetor filter covers B3/B4, uncovered exhausts E14/E15, no rear view mirror F2, and standard canopy F5.)
A different set of kill markings...
Since there are several build reviews online, I have not tested the fit of parts as people have stated that they are difficult to take apart after. I plan to replace the decals so, in the end, I am quite pleased with this kit and agree with the following build reviews:
The Modelling News
Meng's Mustang by Gary
HyperScale
Meng's P-51D Construction Blog
Here is a post with a comparison to Tamiya's kit parts:
Meng's P-51D/K build with Xtradecal's markings
")