TREEMENDUS
Member
A railway based dio but these methods can be used to create convincing groundwork with or without the track.
This simple step by step shows how to create a little diorama on which to display/photograph an item of stock. The track used here is ‘O’ gauge (7mm to the foot) but the principles and materials are the same whichever scale you choose to work in. You can add as much detail as you like and spend many hours making these small scenes. This one will be kept fairly simple and depict a disused siding on a damp snowy day. ……
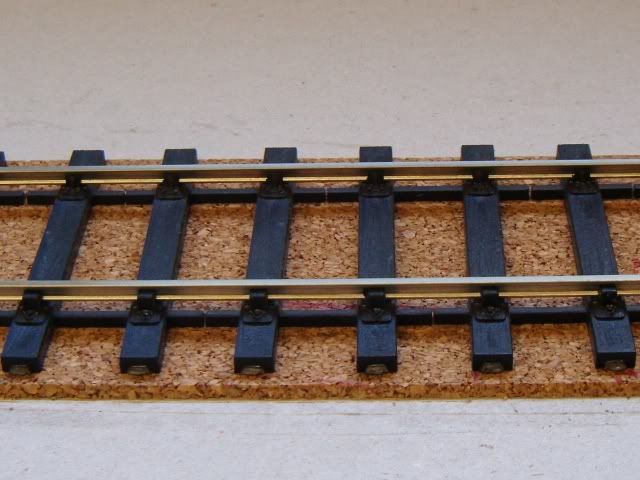
The first step is to lay down the track. The length of track depends on what you want to display/photograph - this one is for a wagon and is only 11 inches in length. Trim the track to length and put it to one side. Photo 1 To create a shoulder to the ballast I have laid the track on 2mm thick cork sheet, you could use thick card or foam to get the same result. The cork is glued to the base using neat PVA glue. The edges of the cork have been trimmed at an angle of approx 45 degrees this will result in a nice shoulder to the ballast. The track is glued in position in the centre of the cork strip again with neat PVA and kept flat with a weight until dry.
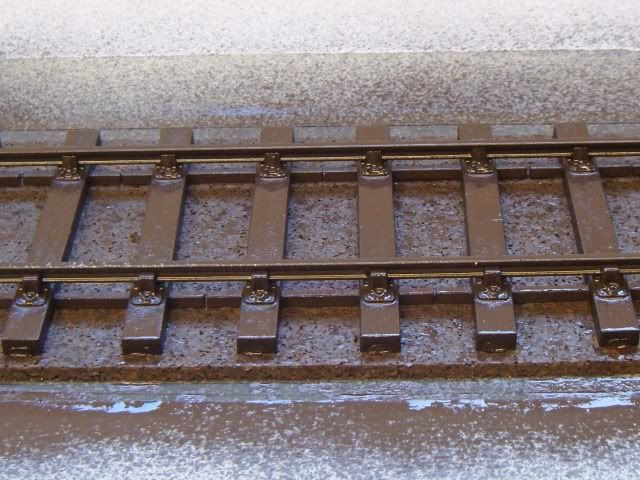
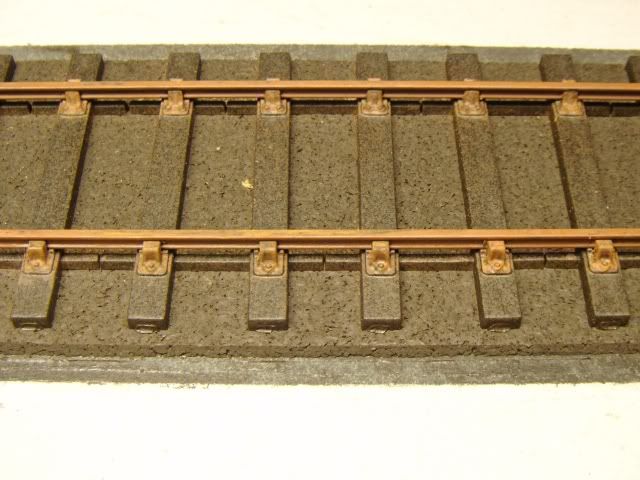
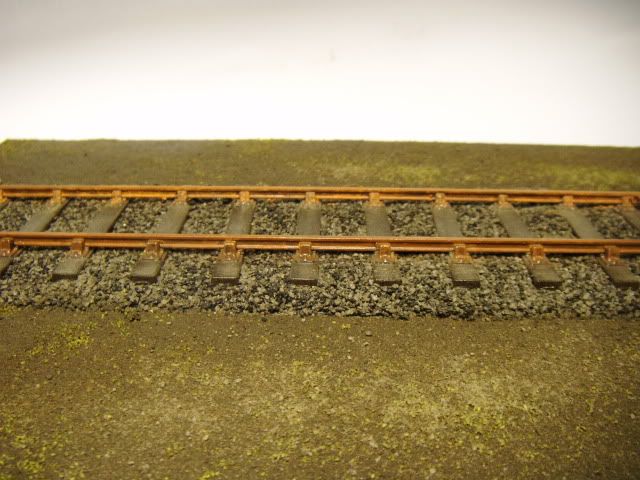
The track can be painted away from the base but I decided to paint mine after it had been stuck down. Spray with a suitable sleeper coloured paint – remember some sleepers can be dry and quite light in colour whereas others are covered in oil and grime so will look very dark, I’m going for a dark grimy look. Photo 2 I chose to spray mine with a dark brown and a light uneven coat of black. Photo 3 Next I painted the rails and dry brushed the chairs with a rust coloured paint then applied a coat of light rust pigment powder. I want mine to look like a disused piece of track so painted the tops of the rails too, to give the impression not much traffic has passed this way for some time. Leave to dry
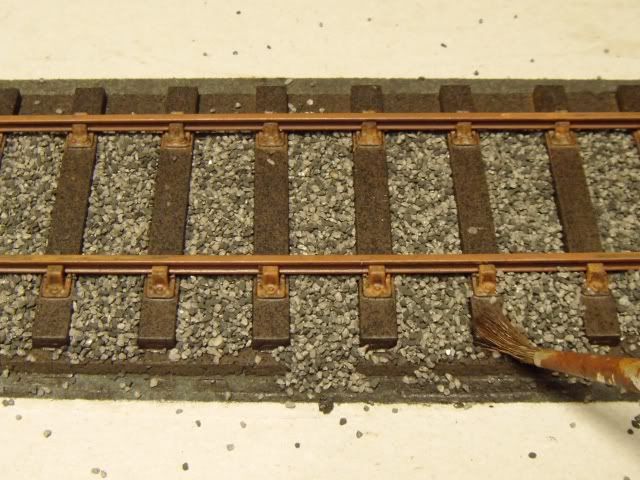
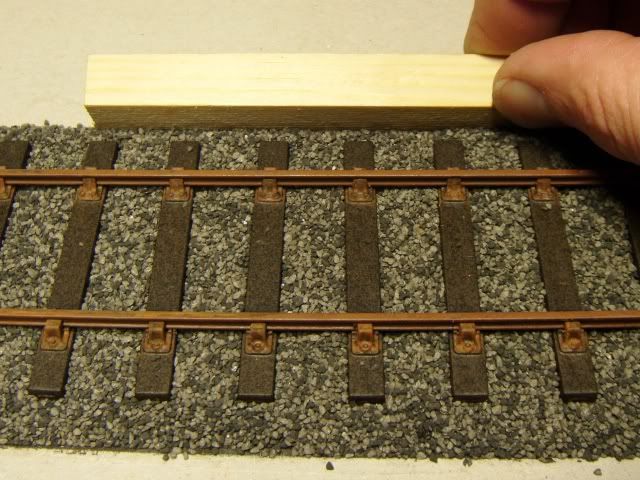
The ballast I’m using is Weathered Ballast as this will add to the dirty looking track. Photo 4 For ‘O’ gauge track take a pinch of ballast between the thumb and forefinger, two pinches are just about enough to fill the space between two sleepers, work it in to place with a small soft brush. When all the ballast is in place between the rails start adding the ballast outside the rails as far as the ends of the sleepers. Photo 5 Remember to give a neat edge to the ballast finishing it just over the chamfered track underlay.(a small block of wood is useful for this). Take time to CAREFULLY remove any unwanted ballast. To fix the ballast in place use diluted PVA glue (3 - 4 water - 1 PVA). To help it soak into the ballast I always spray the track with hairspray prior to dripping on the water/glue mixture. Leave to dry
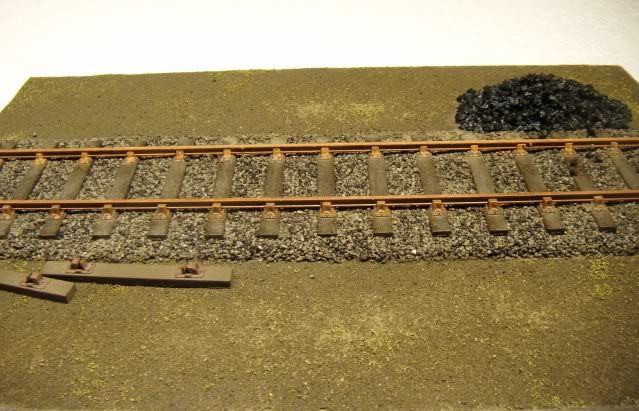
The track side area between the ballast and the hedge will be a mixture of earth, mud and weeds. The first step is to apply scenic glue to the area to be covered with Earth Powder. Photo 6 Whilst the glue is still wet I sprinkle on a good covering of Earth Powder – this will soak up the glue. A small amount of Late Summer scatter (fine) is added on top of the Earth. To help this set I spray the area with hairspray. The same method is repeated at the front at the diorama. I also brushed a little Earth Powder onto the sleepers to add to the weathering. Photo 7 A pile of Coal and a couple of sleepers add little features to the scene. Leave to dry.
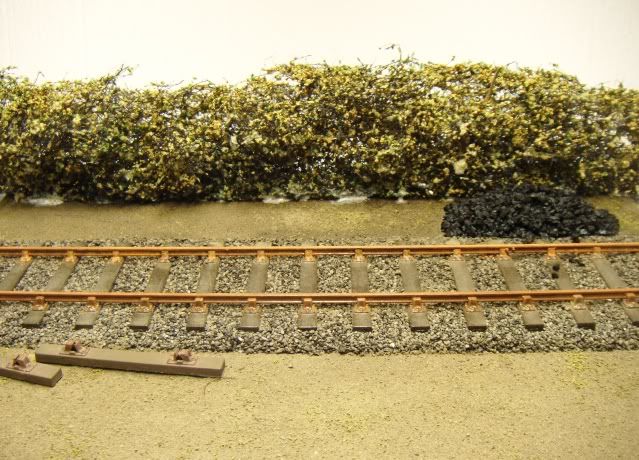
The hedge is made using Rubberised Horsehair. The Rubberised Horsehair has been cut to length and teased open to give a nice airy structure. This is then sprayed with black/dark brown paint to give it a good base colour. The horsehair is then sprayed with hairspray and lightly covered with 50/50 blend of Late Summer and Autumn Yellow Medium Scatter. To fix it all in place it has been sprayed with Scenefix glue. Photo 8 The hedge has been stuck to the base with neat PVA. This is a very simple yet very effective way of creating hedges in any scale for any season.
The weeds and tufts come next. A small piece of Raw Grass has been coloured using diluted (4 water 1 paint) Sap green acrylic paint. This is rubbed into the Raw Grass by hand and allowed to dry. Once dry a comb is run through it to separate the fibres. Photo 9 Pinch a small amount of the fibres and trim with scissors to give a flat bottom. This is dipped in neat PVA and positioned on the base. Some of the fibres have been trimmed with scissors to make tiny fibres. These are very useful for hiding joins (below the hedge for example). They are also great for adding a hint of growth on areas around the track. Forest Floor, Weathered Ballast and Coal have been added on top of the Earth Powder. This adds some more texture and colour variation to the groundwork.
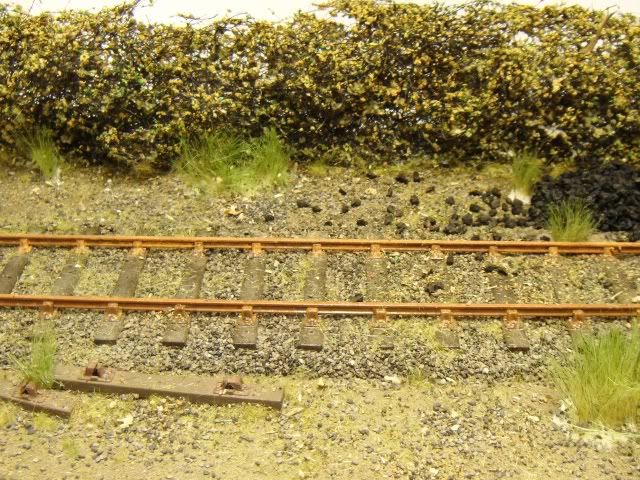
Let it snow This would be the stage where you could really go to town on detailing the groundwork adding all sorts of tiny details but as it’s Christmas this is to be a snow scene, The snow is positioned the same way as the earth powder - dilute glue and hairspray. Sprinkle the snow in all the areas you would expect it to gather as thickly or as thinly as you want. Spray with Scenefix glue and hairspray to hold it in position. .
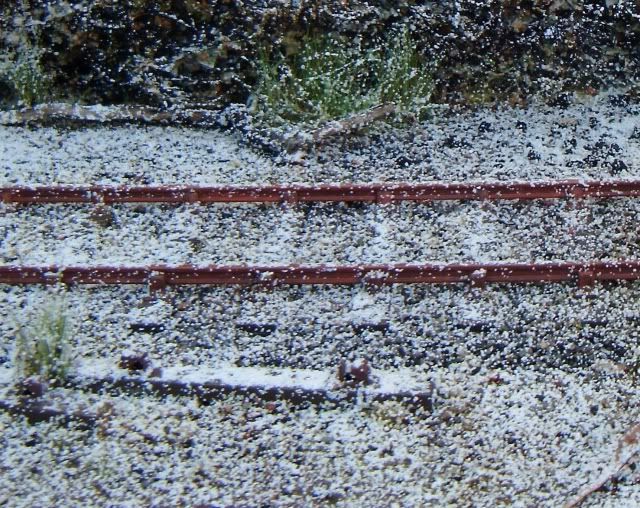
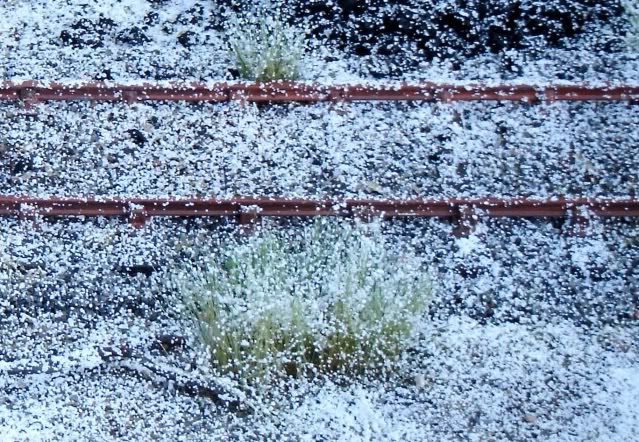
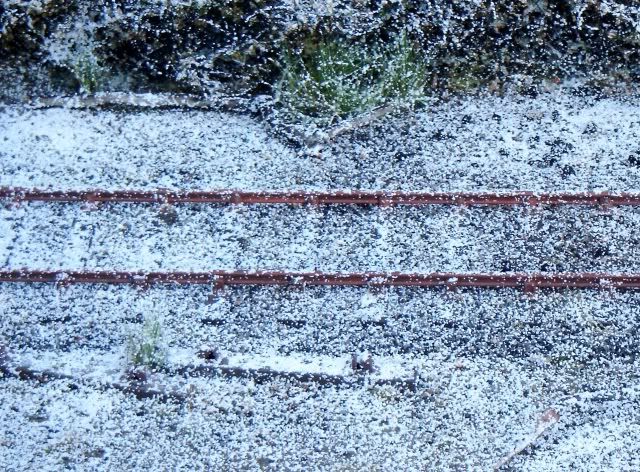
Photos 10 to 12 - The finished scene.
Thanks for looking
Ant
This simple step by step shows how to create a little diorama on which to display/photograph an item of stock. The track used here is ‘O’ gauge (7mm to the foot) but the principles and materials are the same whichever scale you choose to work in. You can add as much detail as you like and spend many hours making these small scenes. This one will be kept fairly simple and depict a disused siding on a damp snowy day. ……
The first step is to lay down the track. The length of track depends on what you want to display/photograph - this one is for a wagon and is only 11 inches in length. Trim the track to length and put it to one side. Photo 1 To create a shoulder to the ballast I have laid the track on 2mm thick cork sheet, you could use thick card or foam to get the same result. The cork is glued to the base using neat PVA glue. The edges of the cork have been trimmed at an angle of approx 45 degrees this will result in a nice shoulder to the ballast. The track is glued in position in the centre of the cork strip again with neat PVA and kept flat with a weight until dry.

The track can be painted away from the base but I decided to paint mine after it had been stuck down. Spray with a suitable sleeper coloured paint – remember some sleepers can be dry and quite light in colour whereas others are covered in oil and grime so will look very dark, I’m going for a dark grimy look. Photo 2 I chose to spray mine with a dark brown and a light uneven coat of black. Photo 3 Next I painted the rails and dry brushed the chairs with a rust coloured paint then applied a coat of light rust pigment powder. I want mine to look like a disused piece of track so painted the tops of the rails too, to give the impression not much traffic has passed this way for some time. Leave to dry


The ballast I’m using is Weathered Ballast as this will add to the dirty looking track. Photo 4 For ‘O’ gauge track take a pinch of ballast between the thumb and forefinger, two pinches are just about enough to fill the space between two sleepers, work it in to place with a small soft brush. When all the ballast is in place between the rails start adding the ballast outside the rails as far as the ends of the sleepers. Photo 5 Remember to give a neat edge to the ballast finishing it just over the chamfered track underlay.(a small block of wood is useful for this). Take time to CAREFULLY remove any unwanted ballast. To fix the ballast in place use diluted PVA glue (3 - 4 water - 1 PVA). To help it soak into the ballast I always spray the track with hairspray prior to dripping on the water/glue mixture. Leave to dry


The track side area between the ballast and the hedge will be a mixture of earth, mud and weeds. The first step is to apply scenic glue to the area to be covered with Earth Powder. Photo 6 Whilst the glue is still wet I sprinkle on a good covering of Earth Powder – this will soak up the glue. A small amount of Late Summer scatter (fine) is added on top of the Earth. To help this set I spray the area with hairspray. The same method is repeated at the front at the diorama. I also brushed a little Earth Powder onto the sleepers to add to the weathering. Photo 7 A pile of Coal and a couple of sleepers add little features to the scene. Leave to dry.


The hedge is made using Rubberised Horsehair. The Rubberised Horsehair has been cut to length and teased open to give a nice airy structure. This is then sprayed with black/dark brown paint to give it a good base colour. The horsehair is then sprayed with hairspray and lightly covered with 50/50 blend of Late Summer and Autumn Yellow Medium Scatter. To fix it all in place it has been sprayed with Scenefix glue. Photo 8 The hedge has been stuck to the base with neat PVA. This is a very simple yet very effective way of creating hedges in any scale for any season.

The weeds and tufts come next. A small piece of Raw Grass has been coloured using diluted (4 water 1 paint) Sap green acrylic paint. This is rubbed into the Raw Grass by hand and allowed to dry. Once dry a comb is run through it to separate the fibres. Photo 9 Pinch a small amount of the fibres and trim with scissors to give a flat bottom. This is dipped in neat PVA and positioned on the base. Some of the fibres have been trimmed with scissors to make tiny fibres. These are very useful for hiding joins (below the hedge for example). They are also great for adding a hint of growth on areas around the track. Forest Floor, Weathered Ballast and Coal have been added on top of the Earth Powder. This adds some more texture and colour variation to the groundwork.

Let it snow This would be the stage where you could really go to town on detailing the groundwork adding all sorts of tiny details but as it’s Christmas this is to be a snow scene, The snow is positioned the same way as the earth powder - dilute glue and hairspray. Sprinkle the snow in all the areas you would expect it to gather as thickly or as thinly as you want. Spray with Scenefix glue and hairspray to hold it in position. .
Photos 10 to 12 - The finished scene.


Thanks for looking
Ant
