
ASUKA (TASKA) 1/24 BANTAM RECONNAISSANCE CAR

HISTORY
In July 1940, the US Army approached 135 automotive manufacturers with a design specification for a vehicle that would come to be described in Army Technical Manuals as “… a general purpose, personnel, or cargo carrier especially adaptable for reconnaissance or command, and designated as ¼ ton 4x4 Truck.” The specification came with a very aggressive schedule. Bids were to be received in eleven days, the prototype to be delivered in forty-nine days, and 70 test vehicles delivered in seventy-five days.
Only two companies responded, American Bantam Car Company and Willys-Overland Motors. Despite Willys-Overlands lower cost; Bantam was awarded the contract as they were willing to commit to the Army’s schedule. On 23 Sep 1940, the Bantam Pilot, first of what would evolve into the ubiquitous jeep, was delivered to the US Army. Even as trials began, Willys and Ford were encouraged to complete and submit their prototypes. Representatives from both companies were provided access to the trials, the vehicle and the engineering drawings.
When the second round of trials began in late 1940, Bantam’s entry, now known as the Bantam Reconnaissance Car (BRC) 60, was joined by the Willys Quad and Ford Pygmy. By now the Army’s need was becoming urgent and demanding and all three vehicles were declared acceptable. In March 1941 orders for 1,500 units per company were awarded for field testing. These “pre-standardization” jeeps incorporated improvements to weaknesses discovered during the trials as well as the better ideas copied from each manufacturer resulting in remarkably similar vehicles. They also received new names; Bantam’s became the BRC 40, Willys’ the MA and Ford’s the GP. Lend-Lease requirements for the escalating war caused the Army to extend these contracts and by the end of production Bantam had delivered 2,642 BRC’s, Willys 1,553 MA’s and Ford 4,456 GP’s.
Most of the vehicles delivered under these contracts were shipped to the UK, USSR and other Allied nations under Lend-Lease terms. Some of the units were issued to US Army units for field testing, with most remaining in the US during their service. There were a few photographed in Iceland, at least one was captured by the Japanese in the Philippines and there are anecdotes that one or two may have made their way with US forces to North Africa.
By July 1941, Army concerns over meeting production demands and maintaining three different designs in the field, led to a decision to standardize production with the Willys as the base vehicle. The contract included a list of required improvements and alterations compiled during the field trials. With the arrival of the standardized jeep, the early jeeps that remained in Army service were rounded up and either sent overseas or sold as surplus with very few remaining in the US.
Bantam was unable to secure any of the subsequent contracts for the standardized jeep and spent the rest of the war building the MBT jeep trailers, aircraft parts, and torpedo motors.
THE KIT
------------------------------------
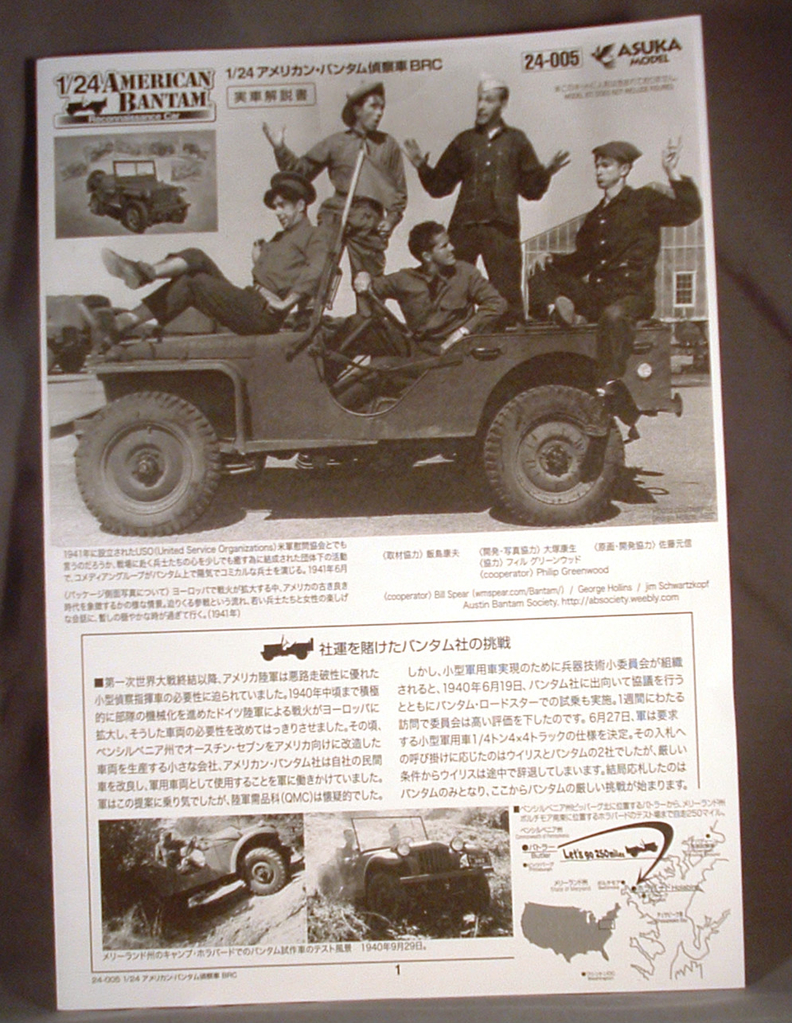
The kit arrives in a compact little box with each sprue individually wrapped. There a four olive drab sprues with parts for the chassis, body, engine and seats, one sprue of clear parts for the windscreen, head and tail-lights and instrument cluster, five vinyl tires and poly-caps to secure them to the axles and decals for engine and body placards as well as markings for three vehicles, two US Army and one British. There are two Japanese/English guides provided, one for assembly and detail painting and a second for history and camouflage and markings.
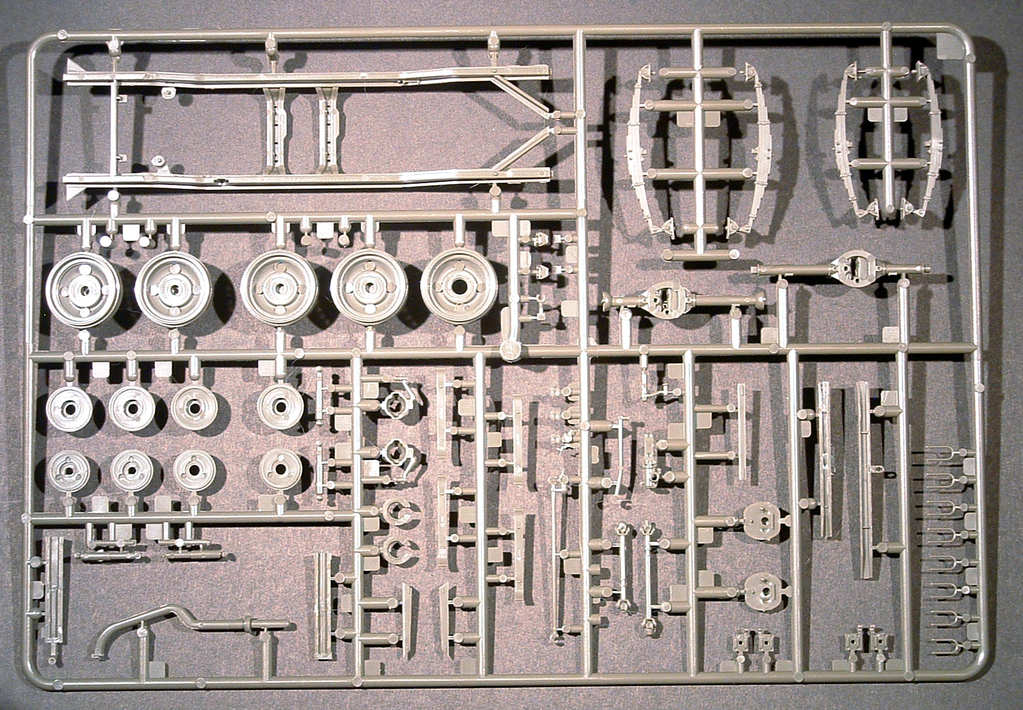
Sprue A - Chassis, suspension, wheels and the drive shafts and differentials.

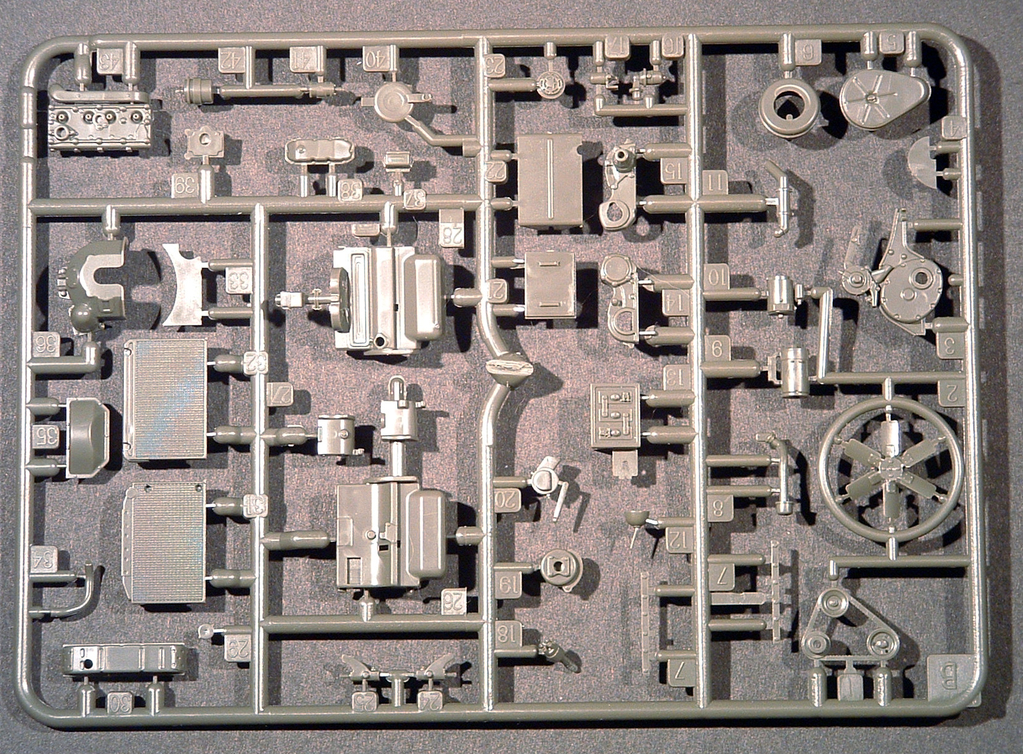
Sprue B - Engine parts

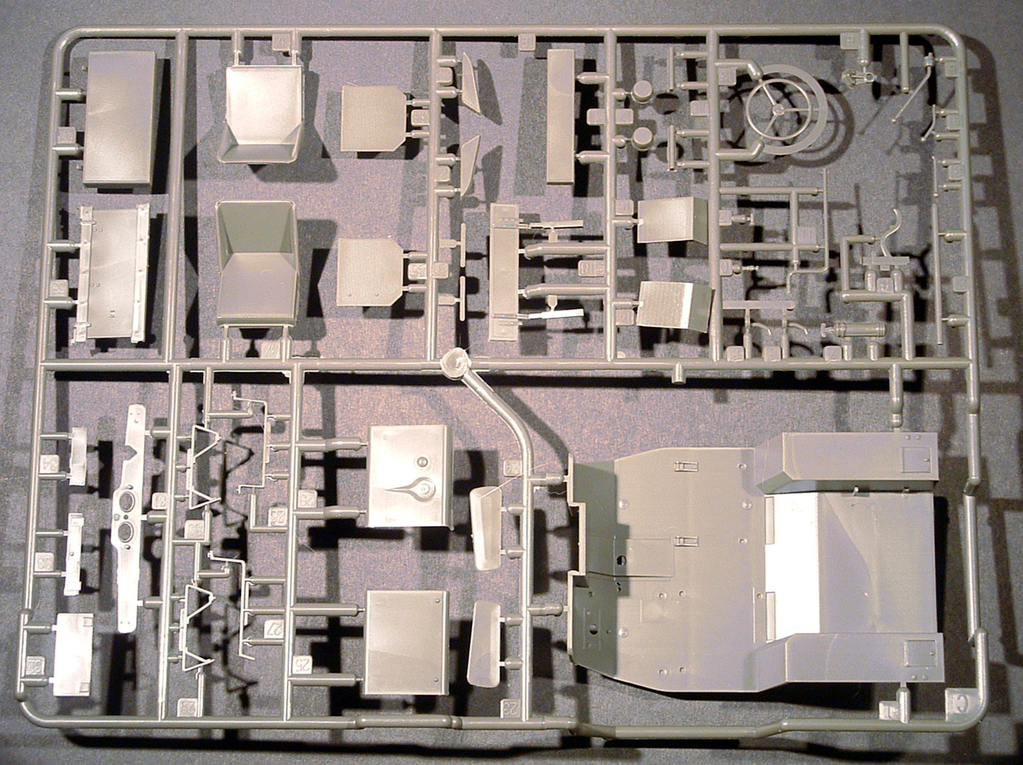
Sprue C - Body tub, steering wheel, seats and fittings.
There are light ejector marks and a couple of light sink marks to be found on the seats. Heavy ejector marks are found on the inner surfaces of the backrest. Dry fit to make sure they do not interfere with assembly.
The underside of the tub has a mix of slightly raised and sunken ejector marks. Some of these may be hidden by the chassis assembly. Again, dry fit to determine those that can be left and those that should be removed.
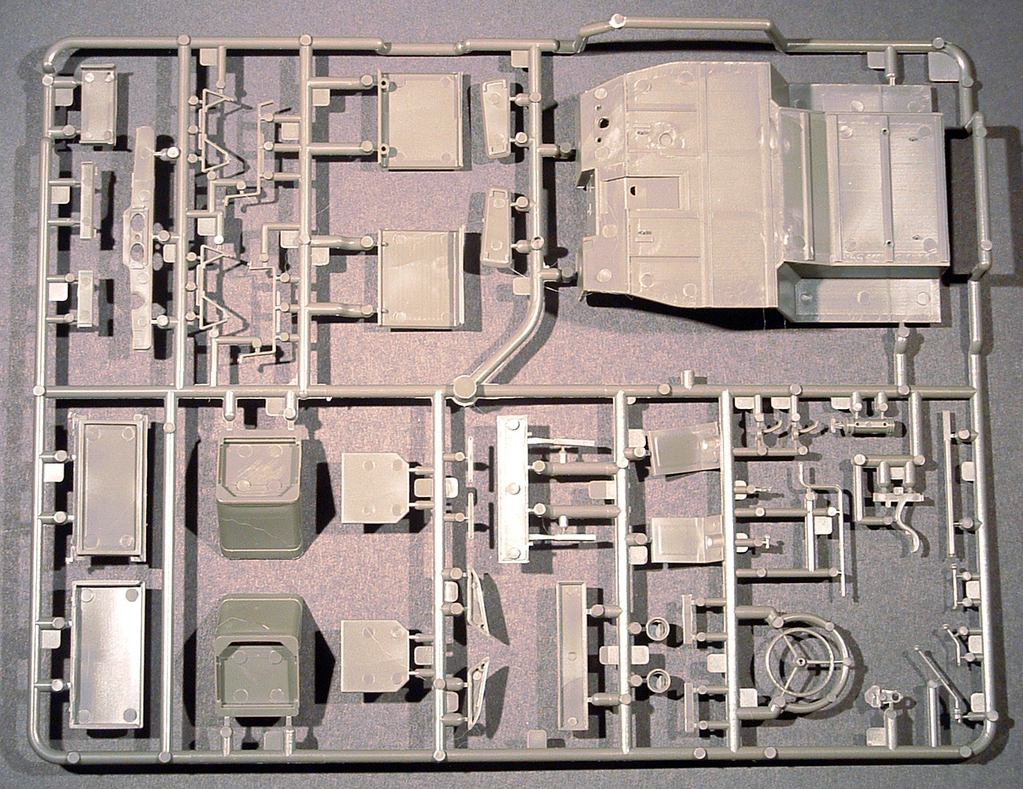
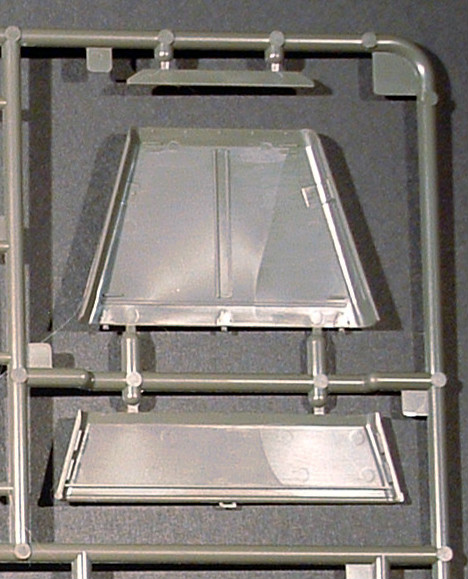
Sprue D - Body sides, hood, grille and wind shield.
The moulded on tie-downs found on the body sides could be hollowed out (if you are feeling lucky) or replaced by some bent wire.
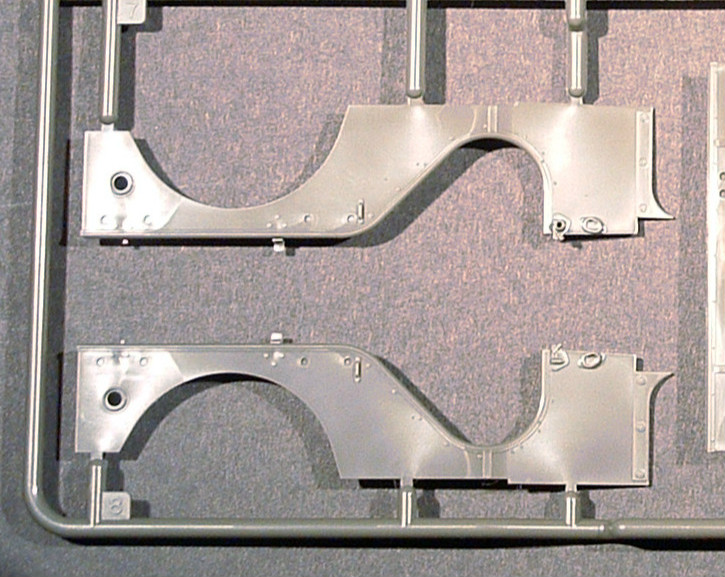
A few light ejector marks on the inside won't be difficult to fill or sand.

A few more marks on the inside of the hood. These could be ignored if the engine compartment will not be on display.
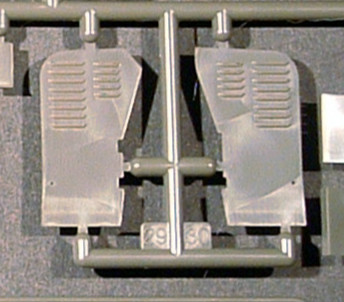
Nicely moulded hollow vents on the engine compartment side panels.
On the real BRC the windshield could be opened slightly for venting. This is not an option on the kit, limited to only up or down positions. All the fittings are present to represent the tilt mechanism, wipers and locks found on the frame and will look suitably busy. An inspired modeller could likely modify the frame to show the windshield in the vent position.

Clear Sprue

Vinyl tires and clear poly caps. The tires are not a pitch black and have a flat finish and should not require painting, just weathering along with the rest of the vehicle.

Decals for 3 vehicles, placards and instruments.

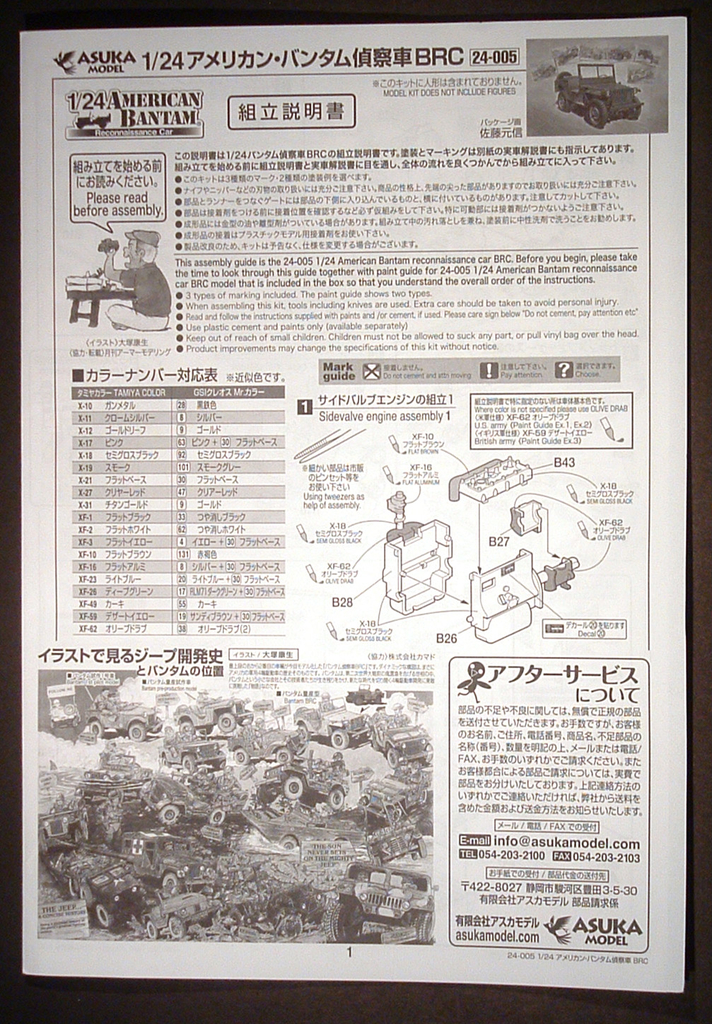
Instruction sheets are clear and well drawn. Detail painting is called out along the way using Tamiya numbers with a chart on the first page to cross reference these with GSI callouts.

No taking breaks until after the completion of Step 16.
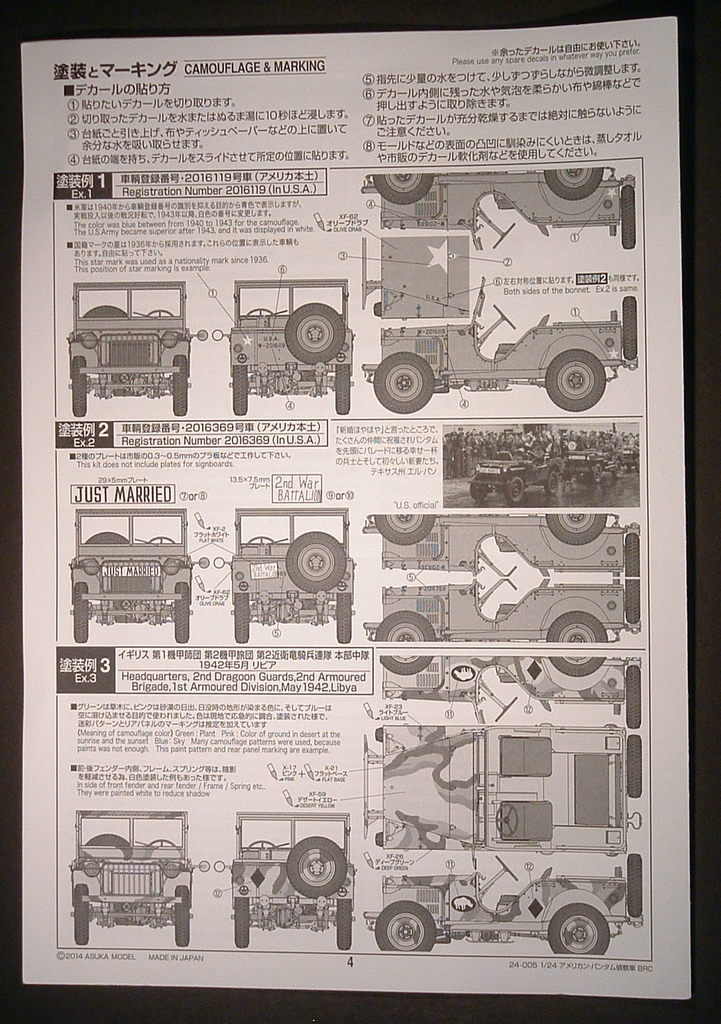
The second pamphlet in the kit is a history and marking guide. The first two options are for US based vehicles from unidentified units in the standard Olive Drab with light blue serial numbers appropriate for time frame. Option 1 portrays a plain Jane US Army vehicle. Option 2 has the basic US Army markings with added personal markings appropriate for its use in a wedding party.
The third option is for a British vehicle in North Africa. It is based on a series photos and film from the IWM documenting the Duke of Gloucester's visit in May 1942. The multi-colour camouflage pattern depicted has been discussed on many forums following the releases of the Mini-Art 1/35 BRC that used a similar scheme. A more accurate scheme for this vehicle during the Duke's visit would have been overall Light Stone with a disruptive pattern of the original Olive Drab, Black or Very Dark Brown. Also visible in the photos is the white Cross of St Andrew with a dark border on the hood, used as an air recognition symbol between January and August 1942 when the RAF style roundel was adopted. It was also painted across the windshield when it was folded down. A photo showing the rear of this vehicle shows an Arm of Service marking of a white 67 on what should be a red square for an armoured regiment. This marking would indicate that it belongs to the 10th Royal Hussars, vice 2nd Dragoon Guards, making the HQ diamond blue, for third senior regiment in the brigade, not the red supplied.
Also visible in the IWM photos is a sun compass mounted in front of the driver that is not included in the kit. And for the ultimate detailer, there are three different tread patterns visible on the tires.
Conclusions
From pictures found on-line the kit looks to be very accurate with finely moulded details. The Continental engine is nicely detailed and just needs wires and cables available for the scale auto modellers to bring it to life. There are a good number of ejector marks to be found. A few are quite prominent, but most are very fine and will be quickly filled and/or sanded. Some will likely be hidden during assembly so dry fit to see how many will be visible if you wish to save some time.
For fans of British vehicles, the markings are the weakest point of the kit. Fortunately, there were not many (in some cases none) applied to these vehicles so with some research a modeller can create markings of their choice.
This is a fine addition to the Asuka 1/24 scale military line. A search of the web show prices starting at $30 and up.
Highly recommended.
HISTORY
In July 1940, the US Army approached 135 automotive manufacturers with a design specification for a vehicle that would come to be described in Army Technical Manuals as “… a general purpose, personnel, or cargo carrier especially adaptable for reconnaissance or command, and designated as ¼ ton 4x4 Truck.” The specification came with a very aggressive schedule. Bids were to be received in eleven days, the prototype to be delivered in forty-nine days, and 70 test vehicles delivered in seventy-five days.
Only two companies responded, American Bantam Car Company and Willys-Overland Motors. Despite Willys-Overlands lower cost; Bantam was awarded the contract as they were willing to commit to the Army’s schedule. On 23 Sep 1940, the Bantam Pilot, first of what would evolve into the ubiquitous jeep, was delivered to the US Army. Even as trials began, Willys and Ford were encouraged to complete and submit their prototypes. Representatives from both companies were provided access to the trials, the vehicle and the engineering drawings.
When the second round of trials began in late 1940, Bantam’s entry, now known as the Bantam Reconnaissance Car (BRC) 60, was joined by the Willys Quad and Ford Pygmy. By now the Army’s need was becoming urgent and demanding and all three vehicles were declared acceptable. In March 1941 orders for 1,500 units per company were awarded for field testing. These “pre-standardization” jeeps incorporated improvements to weaknesses discovered during the trials as well as the better ideas copied from each manufacturer resulting in remarkably similar vehicles. They also received new names; Bantam’s became the BRC 40, Willys’ the MA and Ford’s the GP. Lend-Lease requirements for the escalating war caused the Army to extend these contracts and by the end of production Bantam had delivered 2,642 BRC’s, Willys 1,553 MA’s and Ford 4,456 GP’s.
Most of the vehicles delivered under these contracts were shipped to the UK, USSR and other Allied nations under Lend-Lease terms. Some of the units were issued to US Army units for field testing, with most remaining in the US during their service. There were a few photographed in Iceland, at least one was captured by the Japanese in the Philippines and there are anecdotes that one or two may have made their way with US forces to North Africa.
By July 1941, Army concerns over meeting production demands and maintaining three different designs in the field, led to a decision to standardize production with the Willys as the base vehicle. The contract included a list of required improvements and alterations compiled during the field trials. With the arrival of the standardized jeep, the early jeeps that remained in Army service were rounded up and either sent overseas or sold as surplus with very few remaining in the US.
Bantam was unable to secure any of the subsequent contracts for the standardized jeep and spent the rest of the war building the MBT jeep trailers, aircraft parts, and torpedo motors.
THE KIT
------------------------------------
The kit arrives in a compact little box with each sprue individually wrapped. There a four olive drab sprues with parts for the chassis, body, engine and seats, one sprue of clear parts for the windscreen, head and tail-lights and instrument cluster, five vinyl tires and poly-caps to secure them to the axles and decals for engine and body placards as well as markings for three vehicles, two US Army and one British. There are two Japanese/English guides provided, one for assembly and detail painting and a second for history and camouflage and markings.
Sprue A - Chassis, suspension, wheels and the drive shafts and differentials.
Sprue B - Engine parts
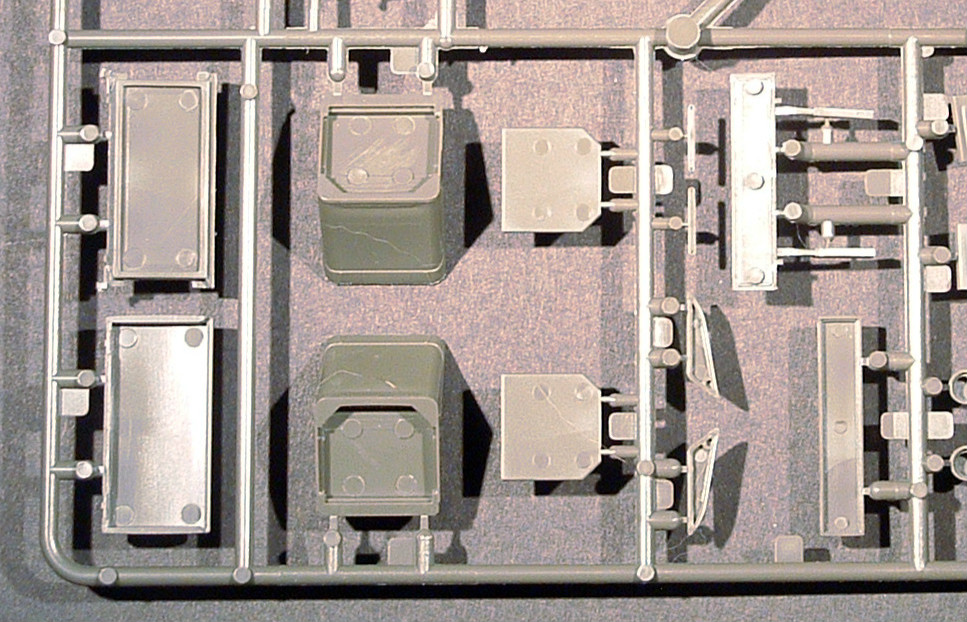
Sprue C - Body tub, steering wheel, seats and fittings.
There are light ejector marks and a couple of light sink marks to be found on the seats. Heavy ejector marks are found on the inner surfaces of the backrest. Dry fit to make sure they do not interfere with assembly.
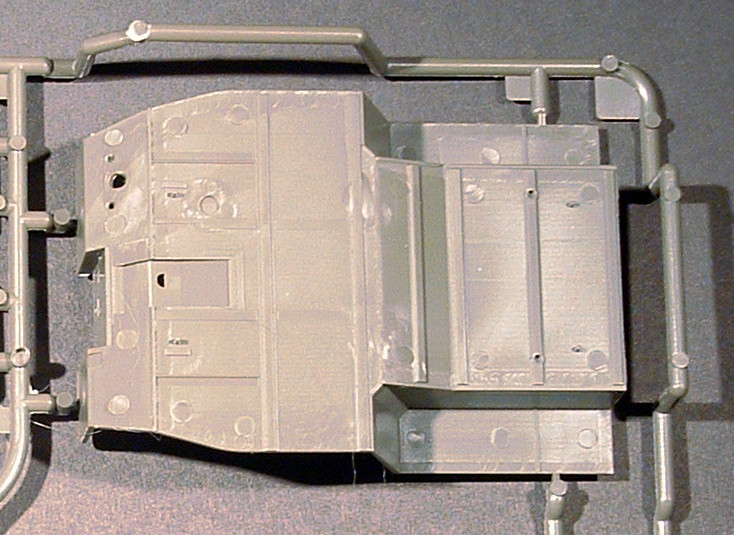
The underside of the tub has a mix of slightly raised and sunken ejector marks. Some of these may be hidden by the chassis assembly. Again, dry fit to determine those that can be left and those that should be removed.
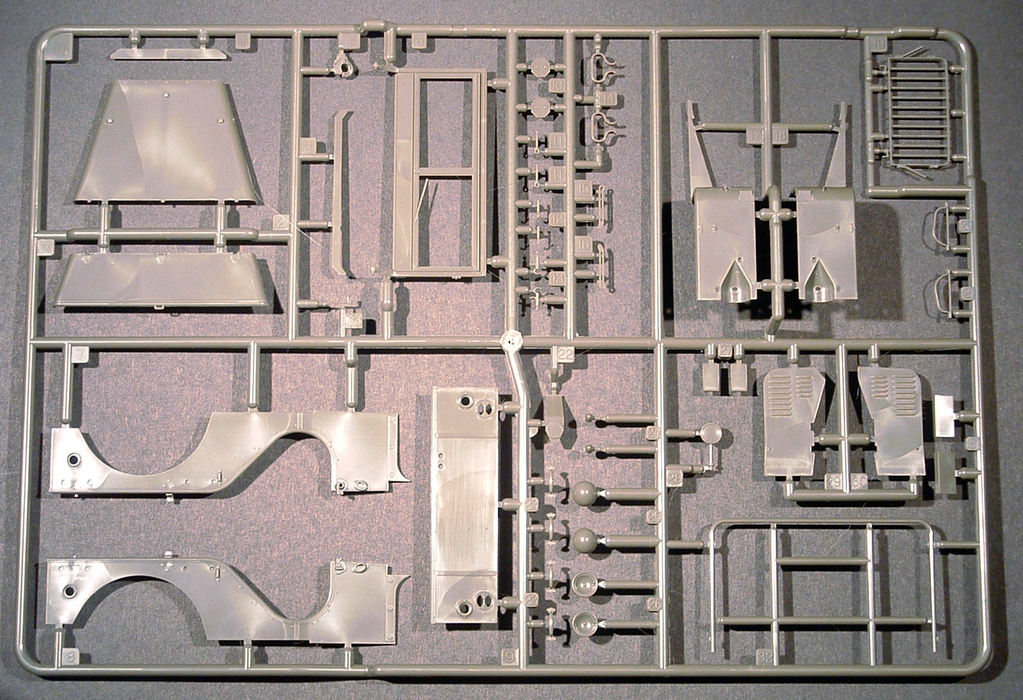
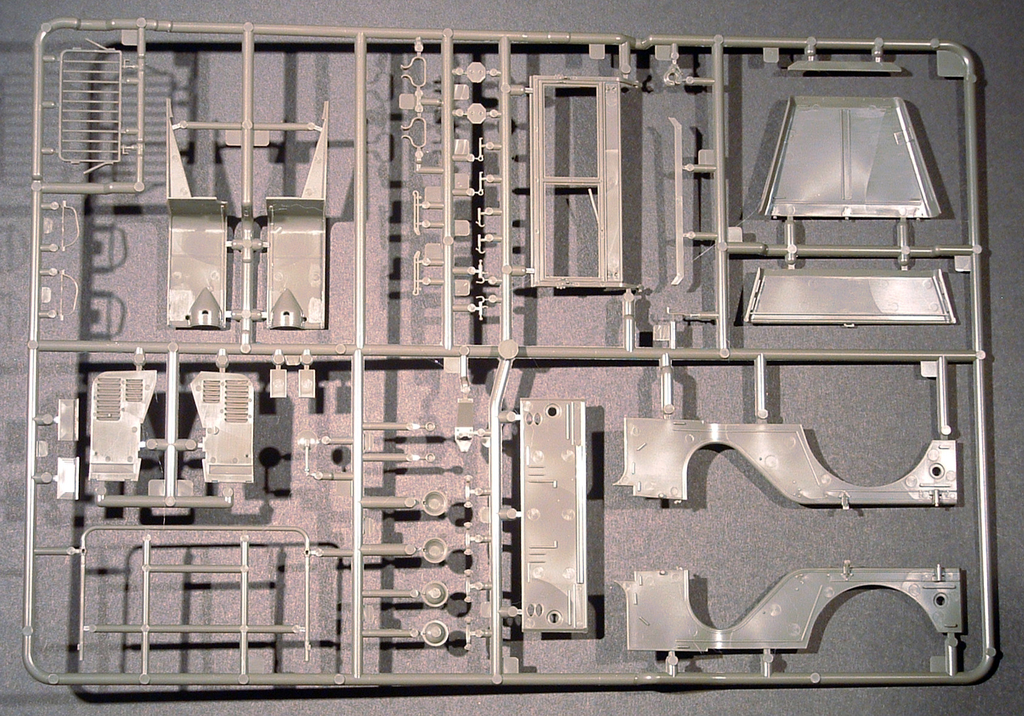
Sprue D - Body sides, hood, grille and wind shield.
The moulded on tie-downs found on the body sides could be hollowed out (if you are feeling lucky) or replaced by some bent wire.
A few light ejector marks on the inside won't be difficult to fill or sand.
A few more marks on the inside of the hood. These could be ignored if the engine compartment will not be on display.
Nicely moulded hollow vents on the engine compartment side panels.
On the real BRC the windshield could be opened slightly for venting. This is not an option on the kit, limited to only up or down positions. All the fittings are present to represent the tilt mechanism, wipers and locks found on the frame and will look suitably busy. An inspired modeller could likely modify the frame to show the windshield in the vent position.
Clear Sprue
Vinyl tires and clear poly caps. The tires are not a pitch black and have a flat finish and should not require painting, just weathering along with the rest of the vehicle.
Decals for 3 vehicles, placards and instruments.
Instruction sheets are clear and well drawn. Detail painting is called out along the way using Tamiya numbers with a chart on the first page to cross reference these with GSI callouts.
No taking breaks until after the completion of Step 16.
The second pamphlet in the kit is a history and marking guide. The first two options are for US based vehicles from unidentified units in the standard Olive Drab with light blue serial numbers appropriate for time frame. Option 1 portrays a plain Jane US Army vehicle. Option 2 has the basic US Army markings with added personal markings appropriate for its use in a wedding party.
The third option is for a British vehicle in North Africa. It is based on a series photos and film from the IWM documenting the Duke of Gloucester's visit in May 1942. The multi-colour camouflage pattern depicted has been discussed on many forums following the releases of the Mini-Art 1/35 BRC that used a similar scheme. A more accurate scheme for this vehicle during the Duke's visit would have been overall Light Stone with a disruptive pattern of the original Olive Drab, Black or Very Dark Brown. Also visible in the photos is the white Cross of St Andrew with a dark border on the hood, used as an air recognition symbol between January and August 1942 when the RAF style roundel was adopted. It was also painted across the windshield when it was folded down. A photo showing the rear of this vehicle shows an Arm of Service marking of a white 67 on what should be a red square for an armoured regiment. This marking would indicate that it belongs to the 10th Royal Hussars, vice 2nd Dragoon Guards, making the HQ diamond blue, for third senior regiment in the brigade, not the red supplied.
Also visible in the IWM photos is a sun compass mounted in front of the driver that is not included in the kit. And for the ultimate detailer, there are three different tread patterns visible on the tires.
Conclusions
From pictures found on-line the kit looks to be very accurate with finely moulded details. The Continental engine is nicely detailed and just needs wires and cables available for the scale auto modellers to bring it to life. There are a good number of ejector marks to be found. A few are quite prominent, but most are very fine and will be quickly filled and/or sanded. Some will likely be hidden during assembly so dry fit to see how many will be visible if you wish to save some time.
For fans of British vehicles, the markings are the weakest point of the kit. Fortunately, there were not many (in some cases none) applied to these vehicles so with some research a modeller can create markings of their choice.
This is a fine addition to the Asuka 1/24 scale military line. A search of the web show prices starting at $30 and up.
Highly recommended.