
-
Modelers Alliance has updated the forum software on our website. We have migrated all post, content and user accounts but we could not migrate the passwords.
This requires that you manually reset your password.
Please click here, http://modelersalliance.org/forums/login to go to logon page and use the "Forgot your Password" option.
You are using an out of date browser. It may not display this or other websites correctly.
You should upgrade or use an alternative browser.
You should upgrade or use an alternative browser.
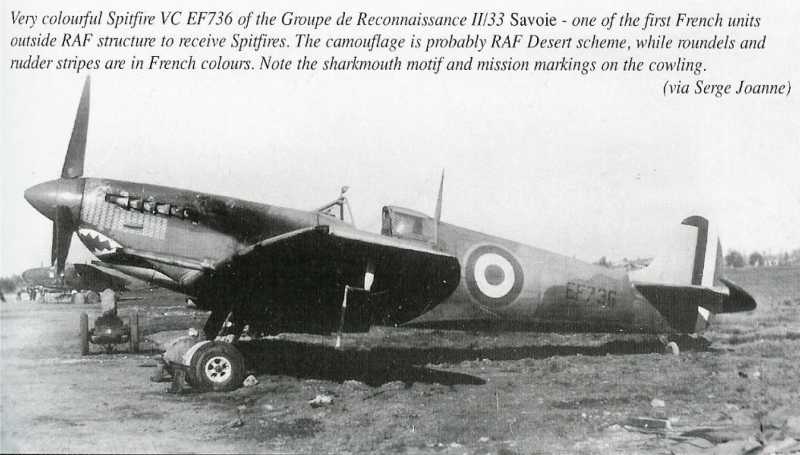
USAAC Spitfire Mk VC
- Thread starter Sharkmouth
- Start date
phantom II
Master at Arms
Hmmmm :hmmm Nice grin.
Cheers, B)
Cheers, B)
Duke Maddog
Well-known member
Good info. Looking forward to seeing more.
Not much but I did remove the wheel well detail to replace it. Simply didn't have time to take new photos.
Regards,
Regards,

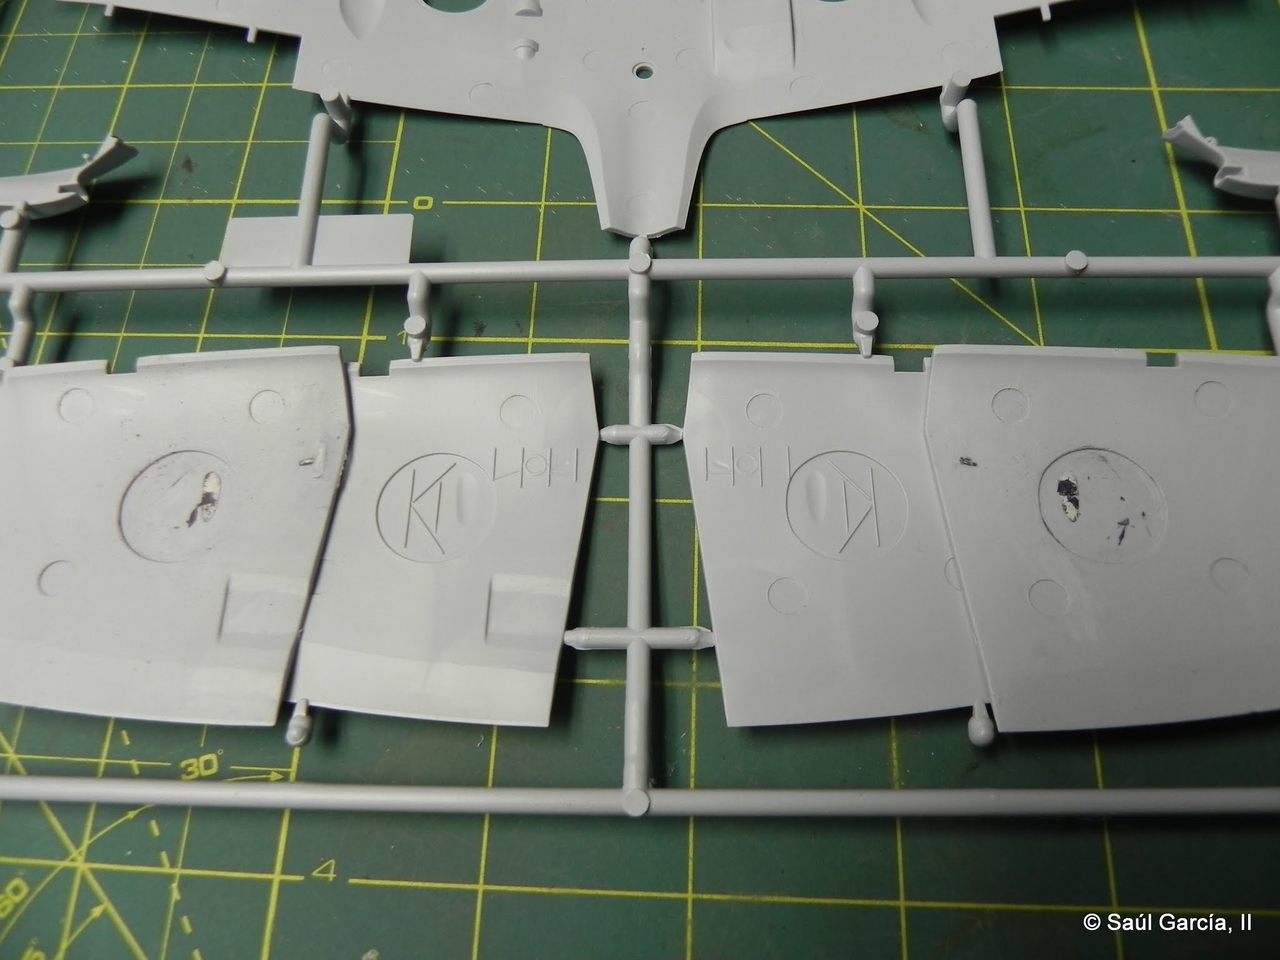
Had a sick day so I put in a few hours to clean up my workbench and work on the wings. boring stuff, primed, filled, sanded... twice so far. Then it is time to restore the panel lines.
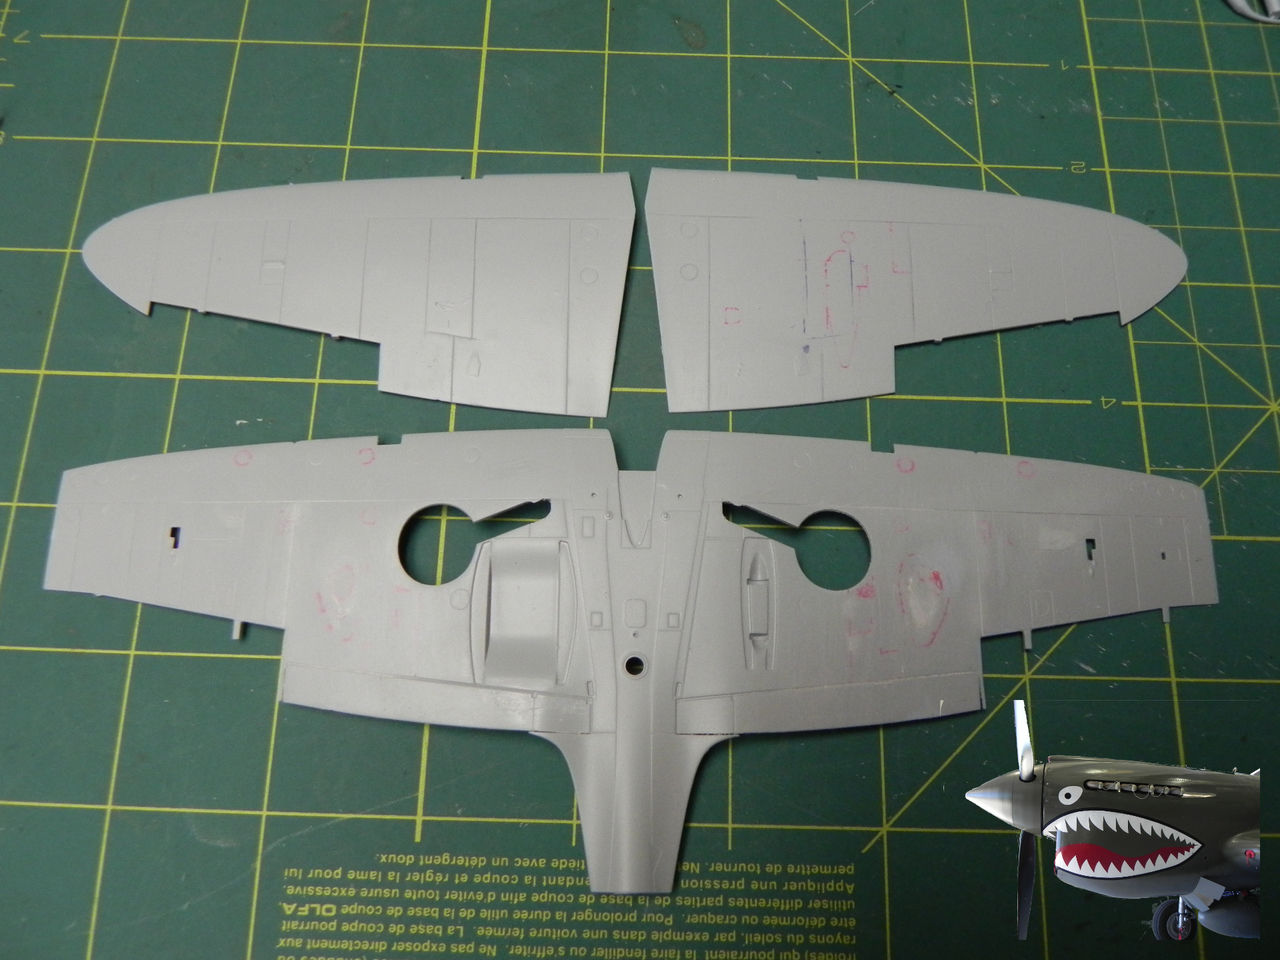
I also started the cockpit since I got in the Eduard PE. Mostly drilling out the holes and adding new lightening holes.
Regards,
I also started the cockpit since I got in the Eduard PE. Mostly drilling out the holes and adding new lightening holes.
Regards,
phantom II
Master at Arms
Yup , I agree . Not a glorious task  . Keep at it Saul.
Cheers, Christian B)
. Keep at it Saul.Cheers, Christian B)

Duke Maddog
Well-known member
Looking great. You got this. Take care and get better soon.
centaur567
Well-known member
I hate doing panel lines. Great job!! Gary S.
I saw someone posting on Facebook about a great tip they discovered. They attached the pre-painted Eduard self adhesive (SA series) instrument panels to tape to simulate glass. Well, I had tried that years ago and found that the tape's adhesive would dry out and turn amber at worst, yellow dust at best.
So, here is what I did after some more thought. I simply used cellophane, but not tape. Cellophane sheets are used for protecting papers and on some packages. There is no adhesive so you use what you want (PVA works best).
In this photo, the panel has a pebbly finish which is fine. The cellophane is already in place to simulate glass.
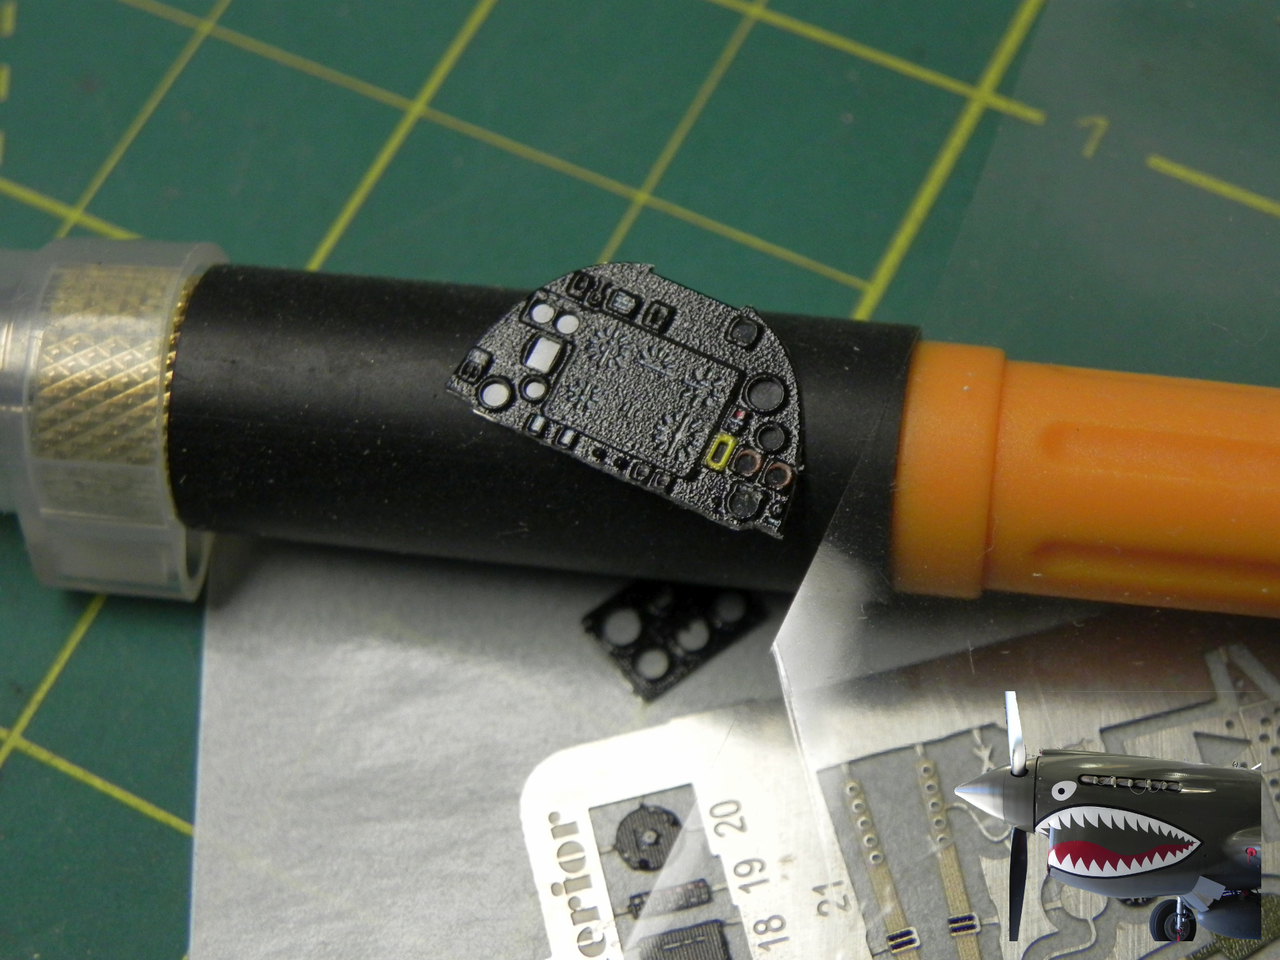
Here, we see that the finish is actually horizontal lines. I don't care for it and prefer Yahu's approach. However, I will keep this one as I plan to have a pilot that will limit the focus into the cockpit, sort of a cockpit blocker.
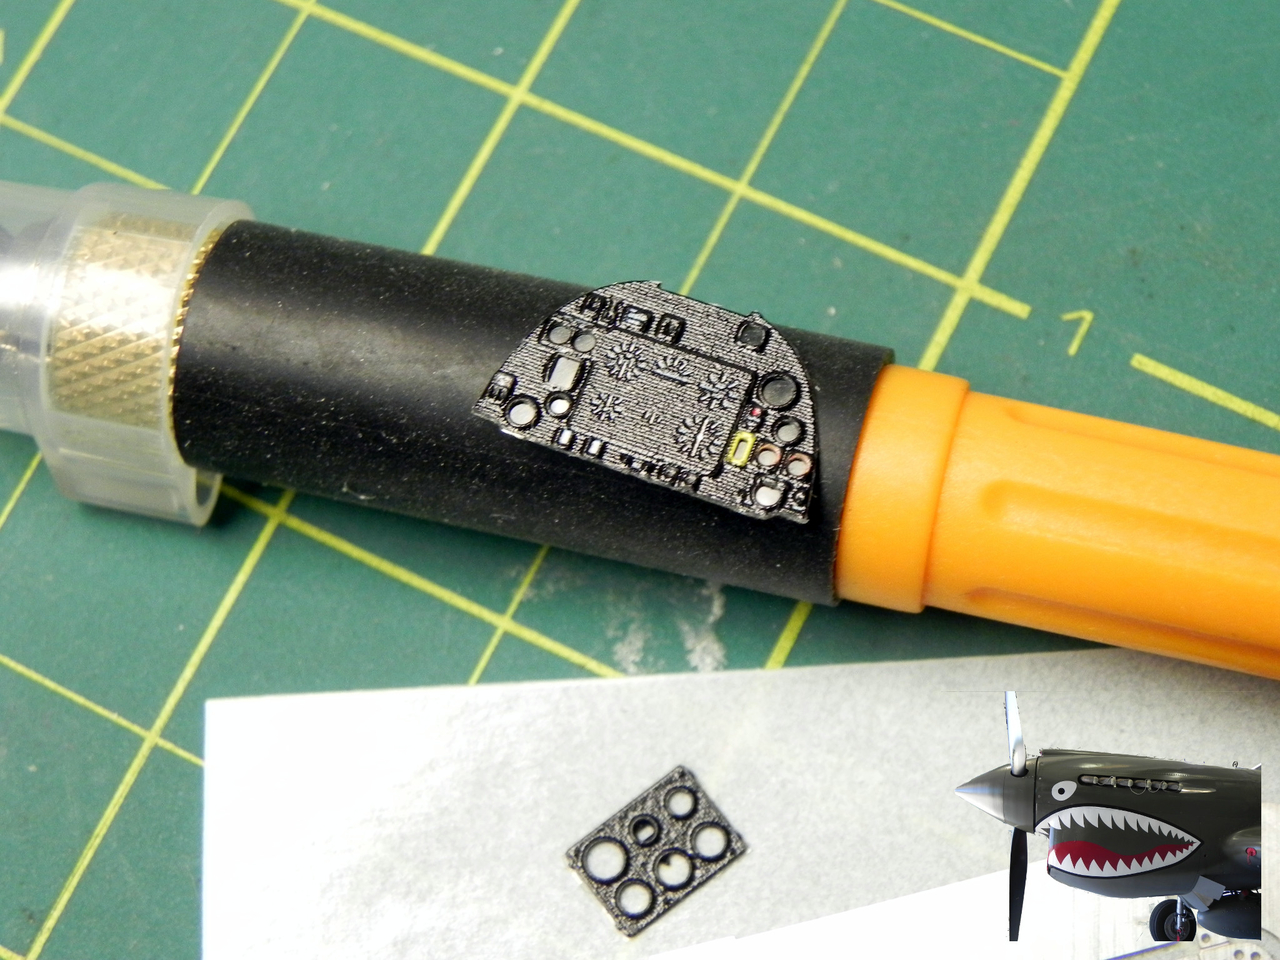
In the photos above you can see the effect. Simply cut the panels needing the glass off the fret and press onto the cellophane. Then trim away the excess cellophane. I will state that you should use a brand new and sharp knife. I've found the sharpest to be Swann-Morton scalpels and Olfa plus X-Acto Z blades for hobby knife handles.
Regards,
So, here is what I did after some more thought. I simply used cellophane, but not tape. Cellophane sheets are used for protecting papers and on some packages. There is no adhesive so you use what you want (PVA works best).
In this photo, the panel has a pebbly finish which is fine. The cellophane is already in place to simulate glass.
Here, we see that the finish is actually horizontal lines. I don't care for it and prefer Yahu's approach. However, I will keep this one as I plan to have a pilot that will limit the focus into the cockpit, sort of a cockpit blocker.
In the photos above you can see the effect. Simply cut the panels needing the glass off the fret and press onto the cellophane. Then trim away the excess cellophane. I will state that you should use a brand new and sharp knife. I've found the sharpest to be Swann-Morton scalpels and Olfa plus X-Acto Z blades for hobby knife handles.
Regards,
Work on the exhausts started... one side is completed but I need to work on the other for the after picture.
Here is the before:
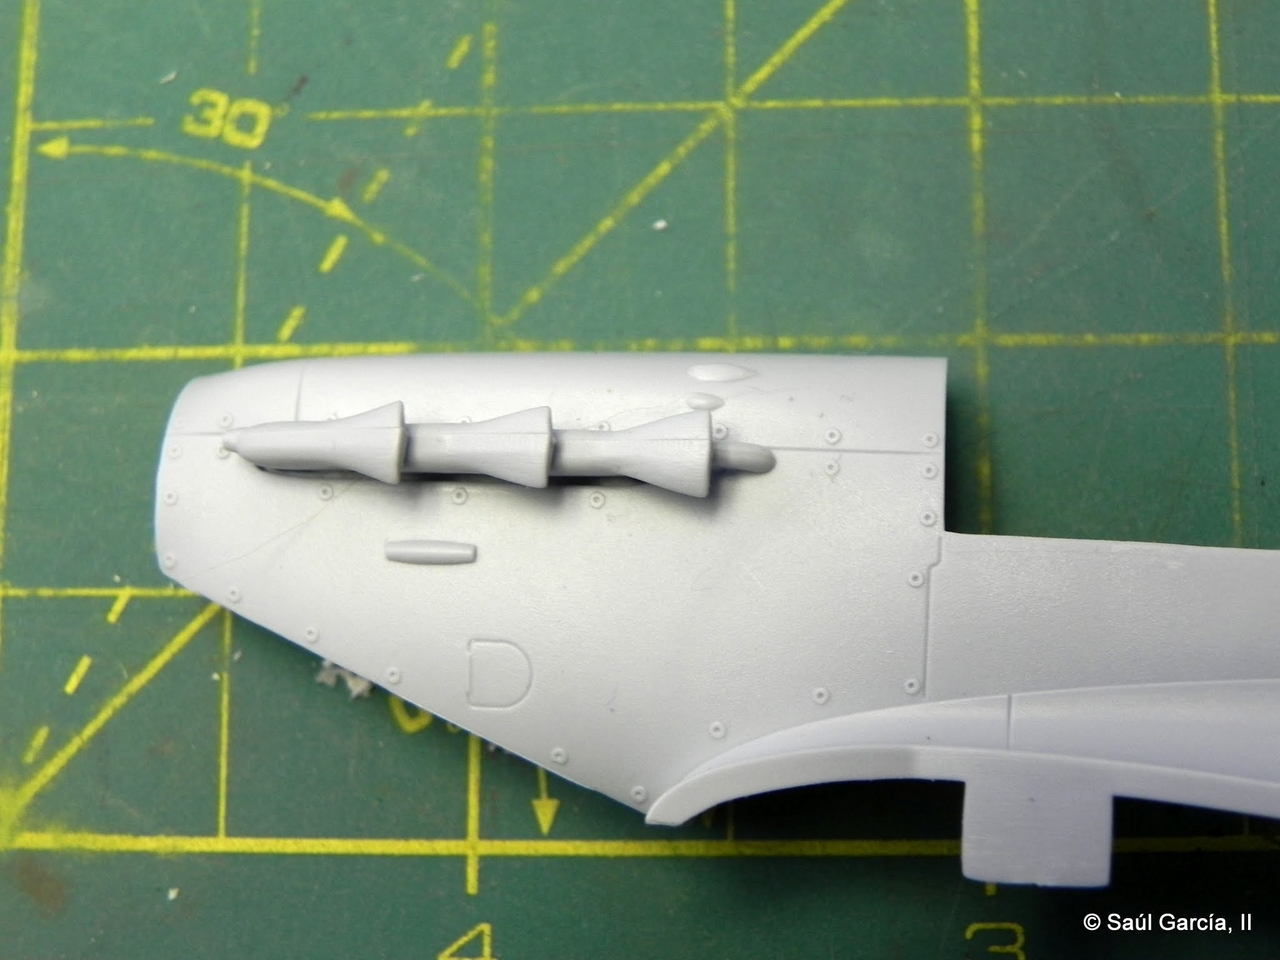
I need to cut the gun heat intensifier tube from the rear of the exhaust and plate over the entry hole on the nose.
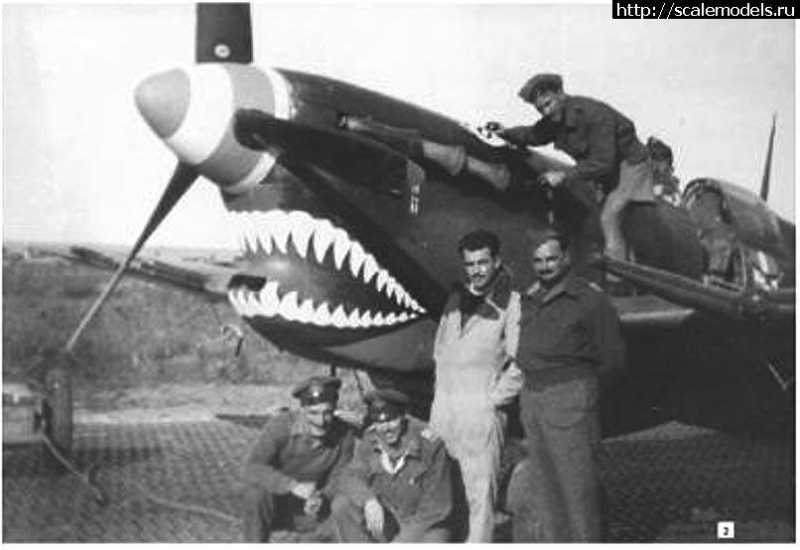
Compare to the photos of Chappie:
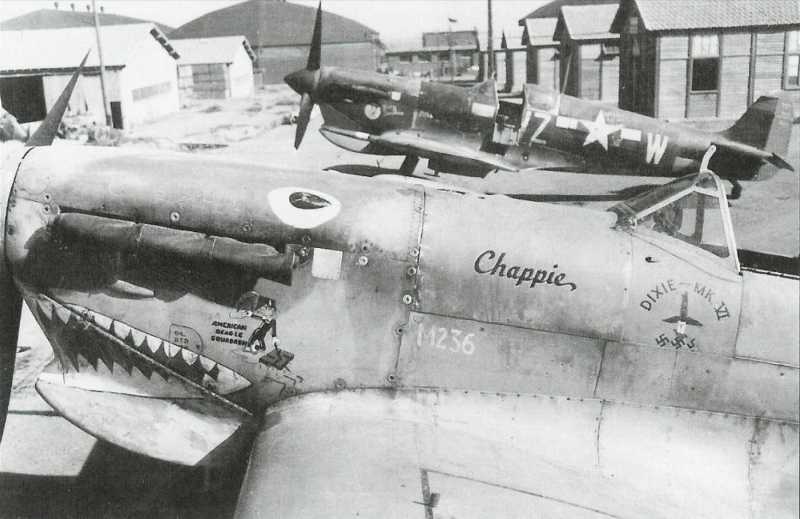
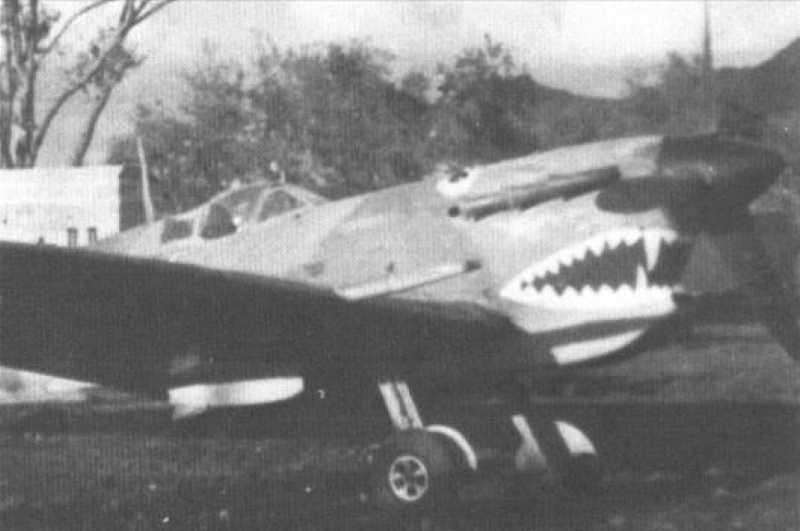
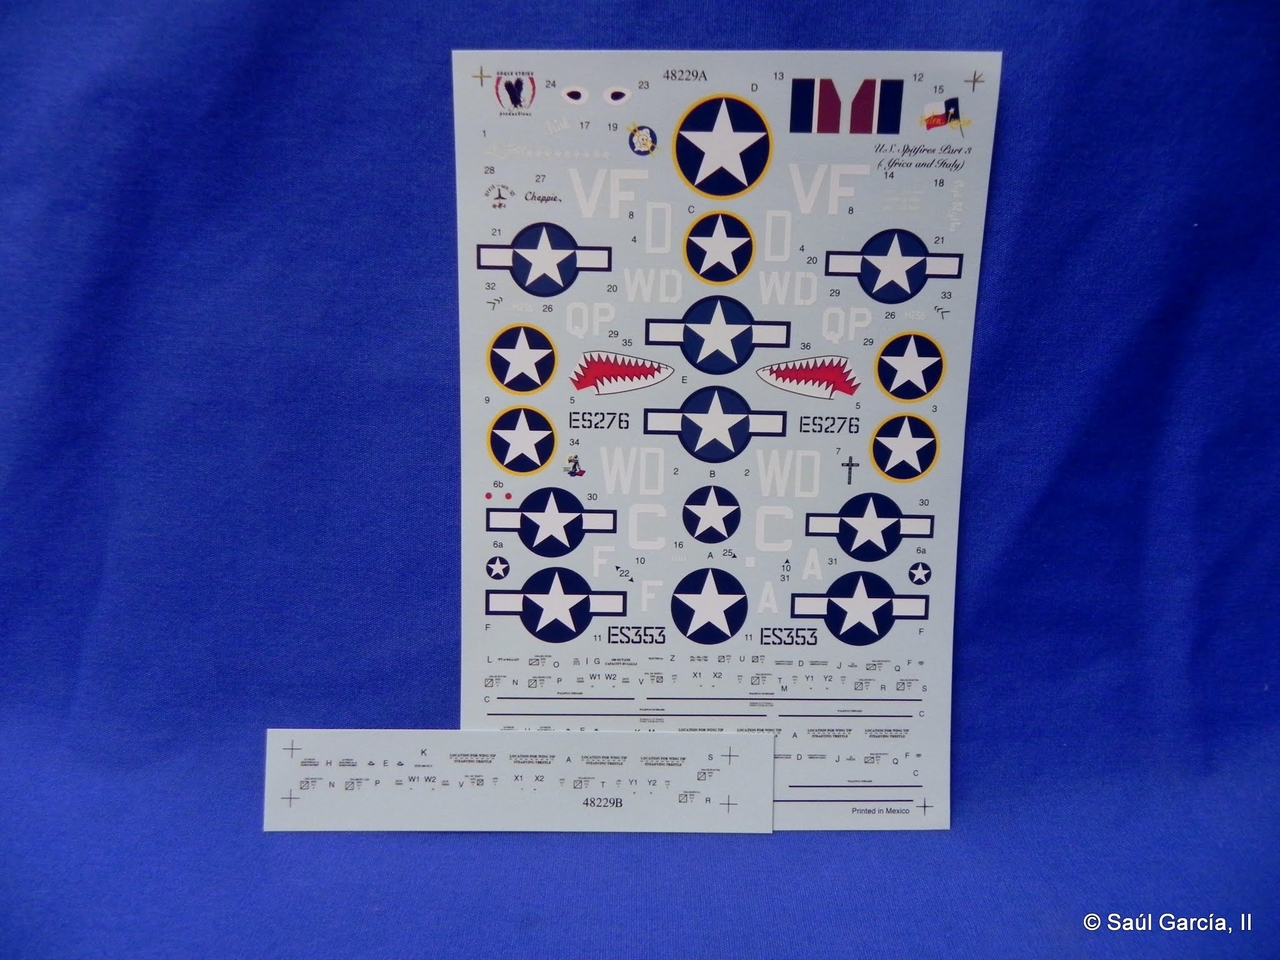
While you're at it, look at the long teeth at the front and compare to the decals which lack them!
I have some painting work to do...
Regards,
Here is the before:
I need to cut the gun heat intensifier tube from the rear of the exhaust and plate over the entry hole on the nose.
Compare to the photos of Chappie:
While you're at it, look at the long teeth at the front and compare to the decals which lack them!
I have some painting work to do...
Regards,
Duke Maddog
Well-known member
Most impressive. I'm looking forward to seeing the teeth work.
Neat trick, I agree with you about Eduard, the texture is just weird and not really to scale. Looking good Saul. 
Crap... wasted one hour cutting the bolts & washers from the Airfix head armor along with the head rest and placing them all on the Eduard PE armor replacement. I thought I was ahead of the game until I look at the photographs of the real deal and it seems that they don't have headrests!

you can even see it on the subject aircraft! :evil:

Well, took off the headrest, and ensuring the marks are gone and need to scratch the bolts/washers which got lost during the repair. The good news? I have time today to fix it and post an update!
Yes, I know...
:nopics
Regards,
you can even see it on the subject aircraft! :evil:
Well, took off the headrest, and ensuring the marks are gone and need to scratch the bolts/washers which got lost during the repair. The good news? I have time today to fix it and post an update!
Yes, I know...
:nopics
Regards,
I'm about to cut foil for oxygen bottle straps when I realize... maybe I'm into sharks a bit too much?
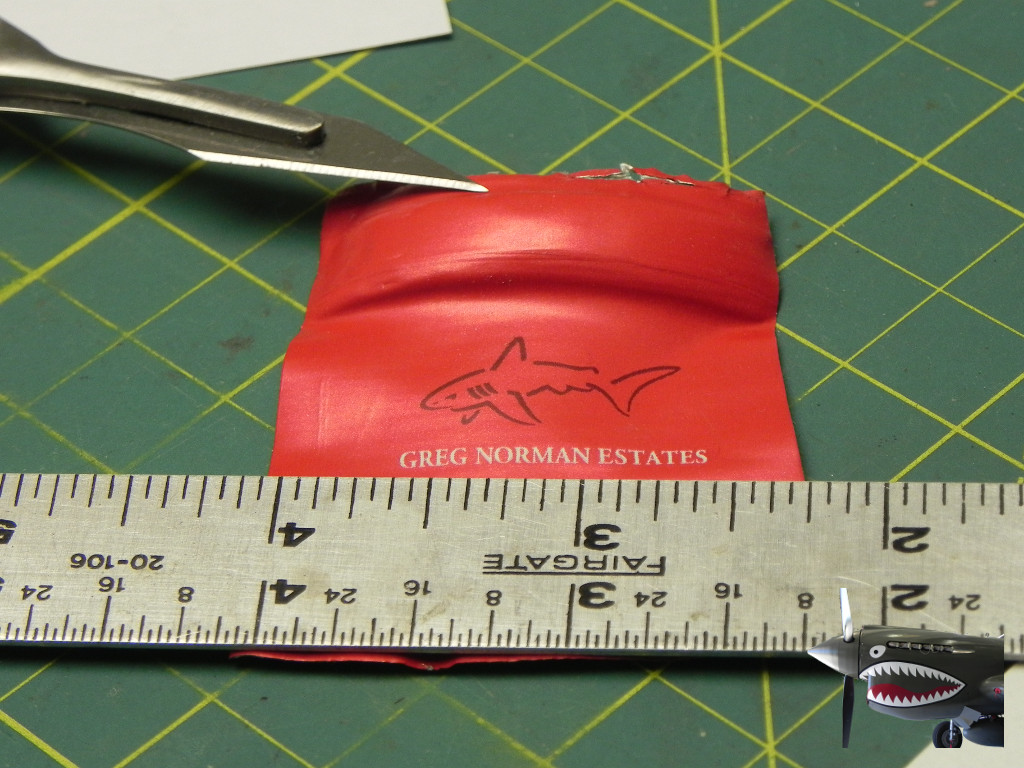
Regards,
Regards,
Are you even conscious of it? It might be some subliminal thing.