
-
Modelers Alliance has updated the forum software on our website. We have migrated all post, content and user accounts but we could not migrate the passwords.
This requires that you manually reset your password.
Please click here, http://modelersalliance.org/forums/login to go to logon page and use the "Forgot your Password" option.
You are using an out of date browser. It may not display this or other websites correctly.
You should upgrade or use an alternative browser.
You should upgrade or use an alternative browser.
Ants' "Duel in the sun" dio
- Thread starter TREEMENDUS
- Start date
jose luis lopez
Member
Wooow .... wow .... wow ...
.... those rust effects are top notch!
... those buildings are just reality in scale ...
... Good!!!!
.... those rust effects are top notch!
... those buildings are just reality in scale ...
... Good!!!!
I don't know how I missed this in the past. Maybe one day I should go back and look over all this stuff and see what I have missed
Ant this is great! You've nailed that rusting roof and the ground work! Can't wait to see more.
Ant this is great! You've nailed that rusting roof and the ground work! Can't wait to see more.
TREEMENDUS
Member
Jose, MP - Thanks for looking and cheers for your comments.
I have painted the wooden wall of the barn since my last post and have started to add some scenics to the ground. I will post more photos very soon.
I have painted the wooden wall of the barn since my last post and have started to add some scenics to the ground. I will post more photos very soon.
TREEMENDUS
Member
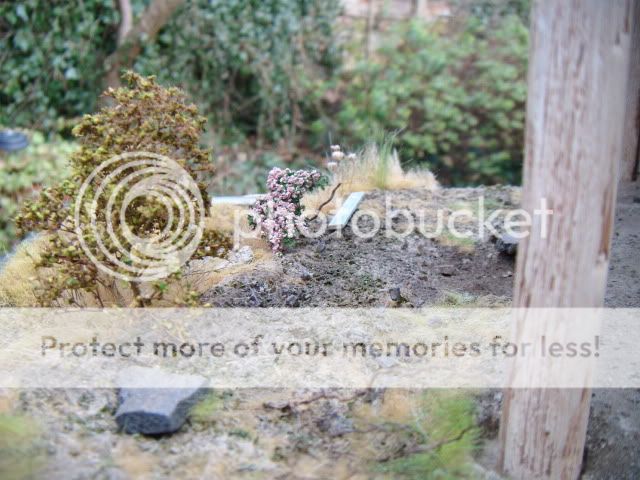
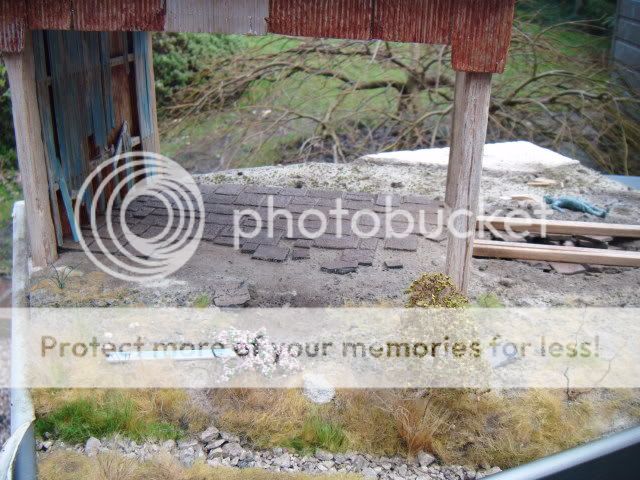
The next stage to groundcover was to add some lighter coloured earth powder to give a drier look to the ground. This was intentionally kept away from the crater areas to give the impression of newly exposed earth.
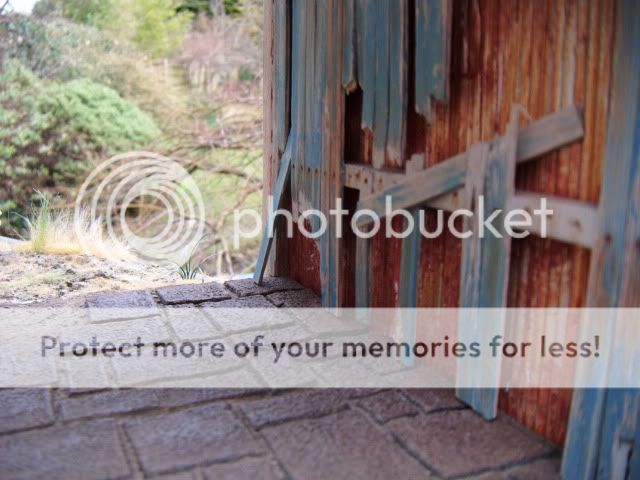
The planking in the barn has been given some paint and weathering etc. When the dio is fully assembled the whole thing will be weathered again to blend everything together.
Next, the first stages of adding foliage to the dio can begin. I am starting in the front left hand corner of this build and working my way towards the rear right hand side. There will be a big difference between the two corners as far as appearence goes.
This is the first stage and some thinning out of the long grasses will be done at a later stage.
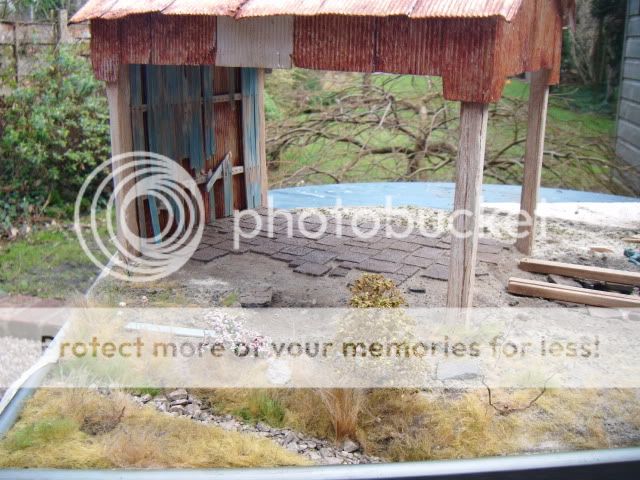
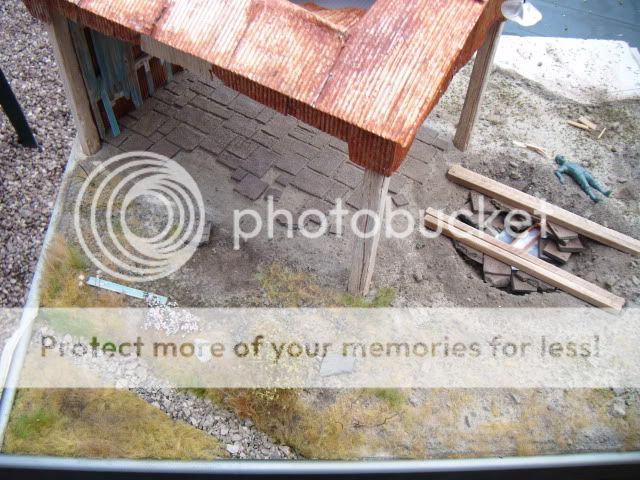
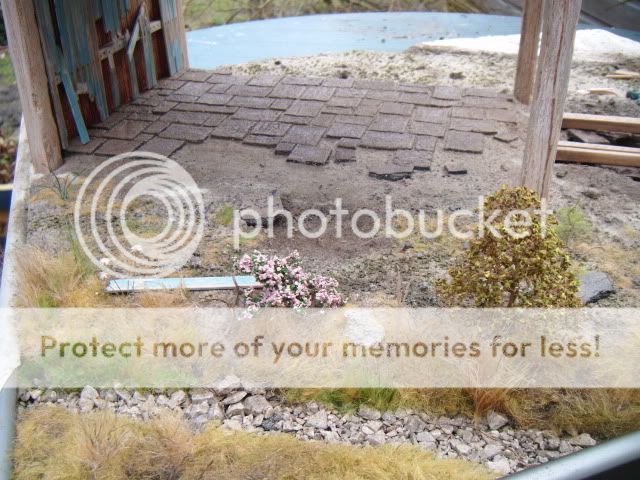
This shows the flattened dead grasses on the "farmyard". Some fresher looking tufts will be added at the next stage.
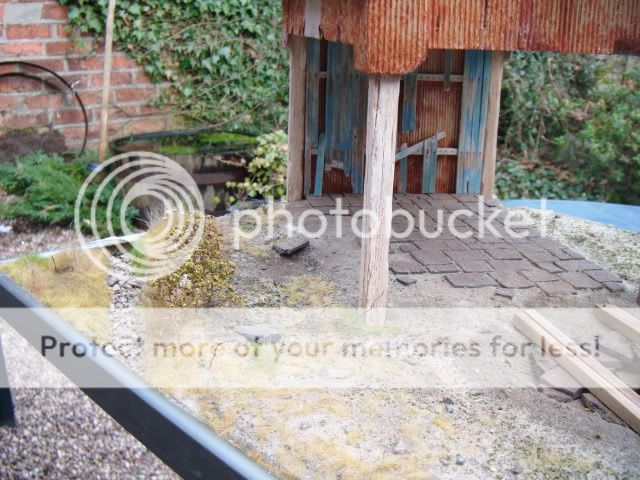
A view from front to back. The dead soldier gives a clue as to what the rear of the dio will look like.
Many thanks for taking a look.
Ant
The planking in the barn has been given some paint and weathering etc. When the dio is fully assembled the whole thing will be weathered again to blend everything together.
Next, the first stages of adding foliage to the dio can begin. I am starting in the front left hand corner of this build and working my way towards the rear right hand side. There will be a big difference between the two corners as far as appearence goes.
This is the first stage and some thinning out of the long grasses will be done at a later stage.
This shows the flattened dead grasses on the "farmyard". Some fresher looking tufts will be added at the next stage.
A view from front to back. The dead soldier gives a clue as to what the rear of the dio will look like.
Many thanks for taking a look.
Ant
Kreighshoer
Active member
mighty fine work anthony! :cheer:
TREEMENDUS
Member
Thanks very much. I hope to get some more work done and photos posted soon.
Claude Joachim
New member
Great groundwork, well done.
I also like your idea to put the alufoil over the cardboard, that's one to remember!
Cheers
Claude
I also like your idea to put the alufoil over the cardboard, that's one to remember!
Cheers
Claude
TREEMENDUS
Member
Cheers Martyn.
Thanks very much Claude. There is still lots of work to do on the groundwork. I tend to build it up in layers, going over the same area more than once. I find this way as the scenics progress I can get a nice balance throughout the whole thing. As for the corrugated barn to be honest with you I have never seen/done this before so it was a bit of a gamble, which seems to have paid off. One thing I will point out is that if anyone wants to try this method is that you don't need to be to precise with the cutting of the foil before it is applied. You can easily overlap the foil without any real trace, Especially once it is painted/weathered.
Thanks for looking. More soon
Ant
shawngehling
Active member
Claude,
Your diorama looks great too.
Nice.
Shawn
Your diorama looks great too.
Nice.
Shawn
shawngehling
Active member
Ant,
It still looks great to me... Keep up the great work,
Can't wait to see more photos as you go.
Shawn
It still looks great to me... Keep up the great work,
Can't wait to see more photos as you go.
Shawn
TREEMENDUS
Member
The Pine tree.
Basic wire armature, with "bark" applied

Seamoss has been added to represent the finer branches. This has been covered in a Pine coloured scatter.

In its position on the base.
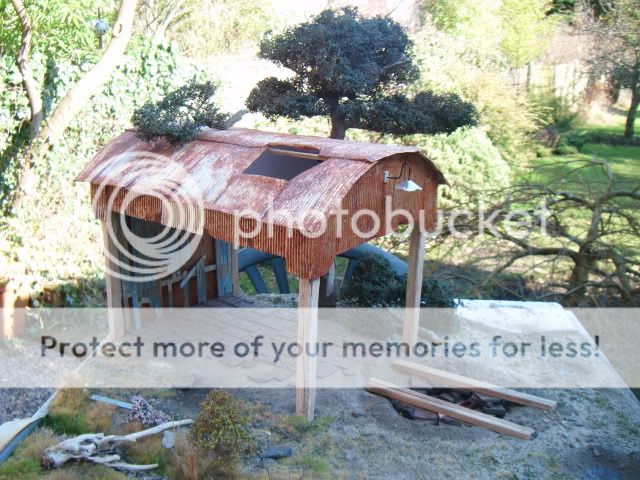
Next step is to attempt a ruined farmhouse in the rear left hand corner.
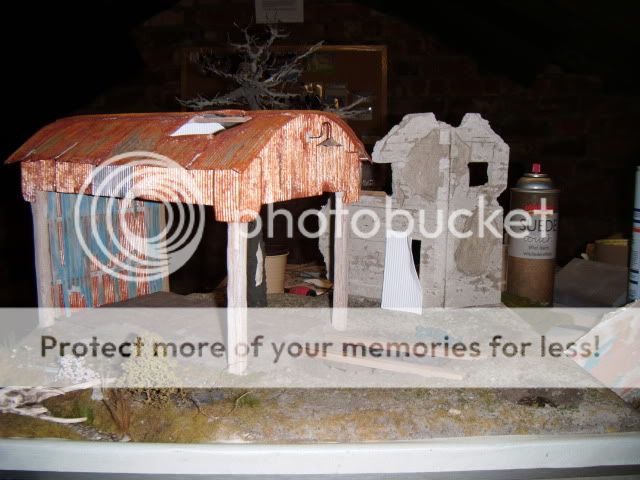
Thanks for looking. Now where did I put that Halftrack?
Ant
Basic wire armature, with "bark" applied
Seamoss has been added to represent the finer branches. This has been covered in a Pine coloured scatter.
In its position on the base.
Next step is to attempt a ruined farmhouse in the rear left hand corner.
Thanks for looking. Now where did I put that Halftrack?
Ant
shawngehling
Active member
Ant,
Everything looks great... Tree is WOW...
Farmhouse parts/pieces should fit right in.
Keep posting pics so we can follow.
So it that guy sunning himself or what? hmy:
hmy: 
Shawn
Everything looks great... Tree is WOW...
Farmhouse parts/pieces should fit right in.
Keep posting pics so we can follow.
So it that guy sunning himself or what?
hmy: Shawn
TREEMENDUS
Member
Thanks Adam - Still lots to do and tweak
Thanks Shawn - There is going to be a group of figures (3-4) at the rear right hand side, in front of the house. The sunbather may stay. He might even be covered over with a beach towel. :laugh:
As ever cheers for taking the time to look and comment.
Thanks Shawn - There is going to be a group of figures (3-4) at the rear right hand side, in front of the house. The sunbather may stay. He might even be covered over with a beach towel. :laugh:
As ever cheers for taking the time to look and comment.
randy_ditton
Master at Arms
Hi Ant, This is really coming out great! Good variety in the ground cover. Will be watching for more.
Randy
Randy
D

