centaur567
Well-known member
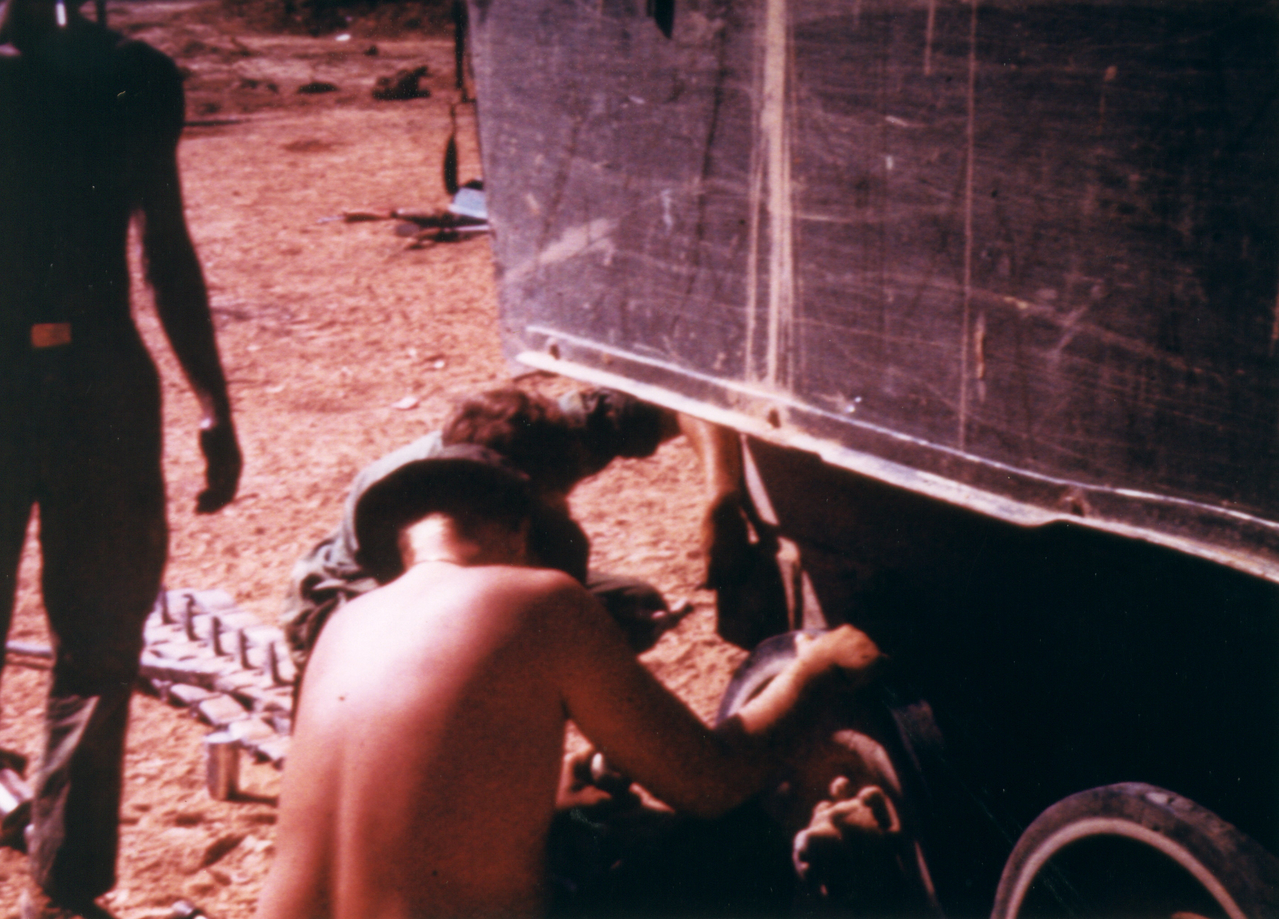
I recognize some of those pics from my hutches walls. Great job on the interior. Gary S.

Modelers Alliance has updated the forum software on our website. We have migrated all post, content and user accounts but we could not migrate the passwords.
This requires that you manually reset your password.
Please click here, http://modelersalliance.org/forums/login to go to logon page and use the "Forgot your Password" option.
")
Thanks Guys.
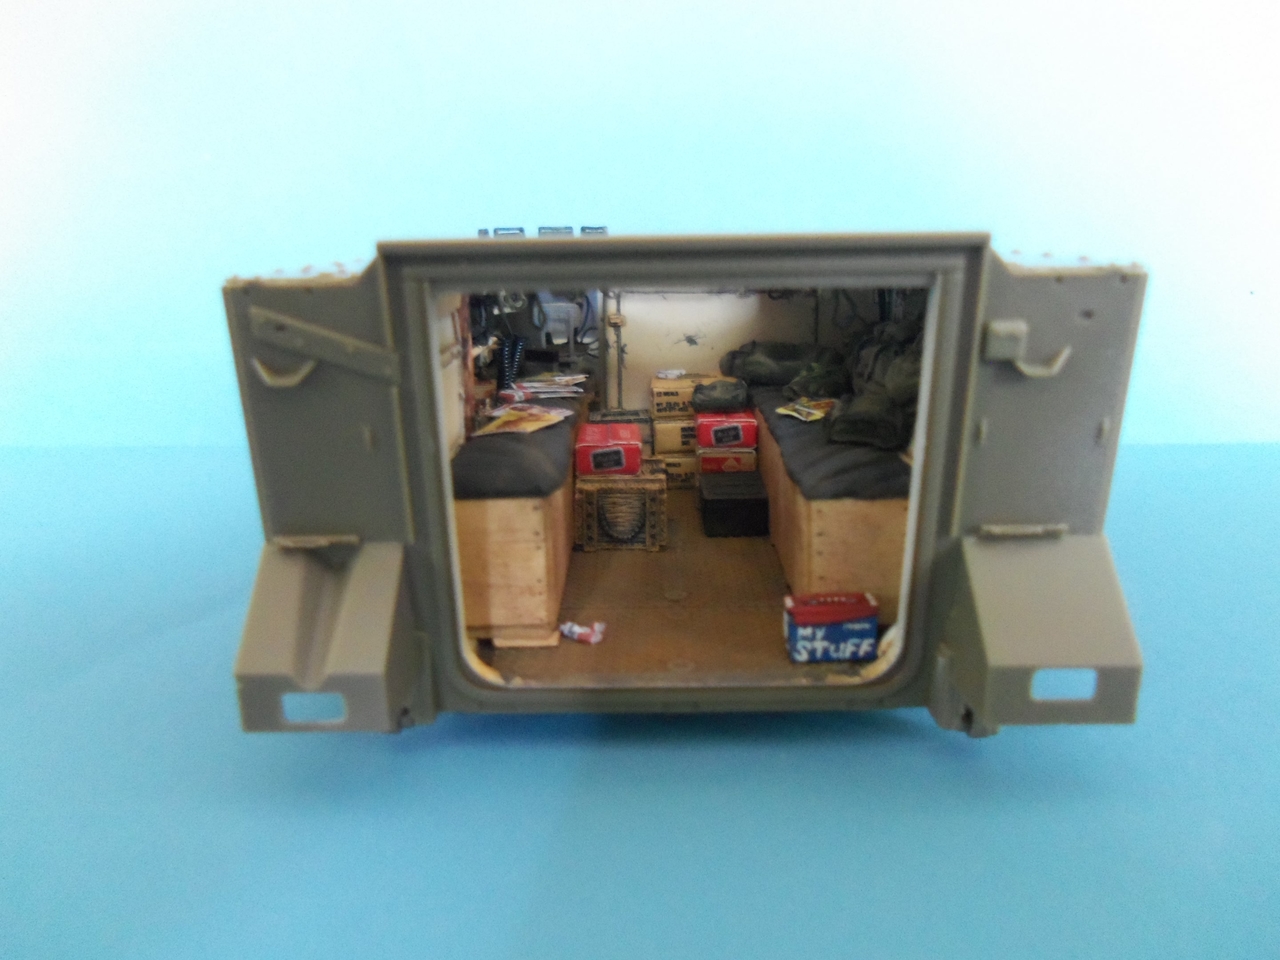
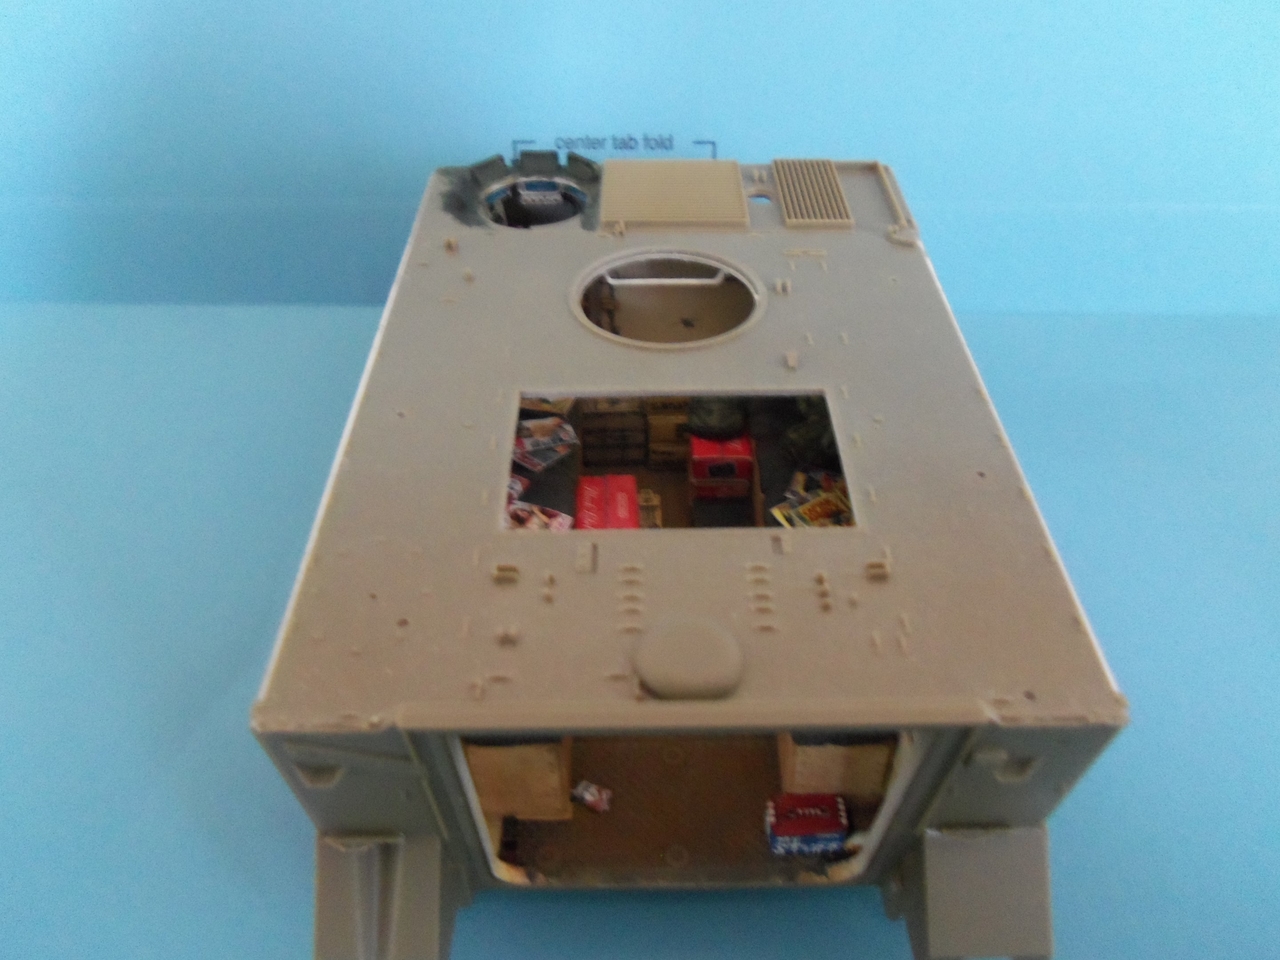
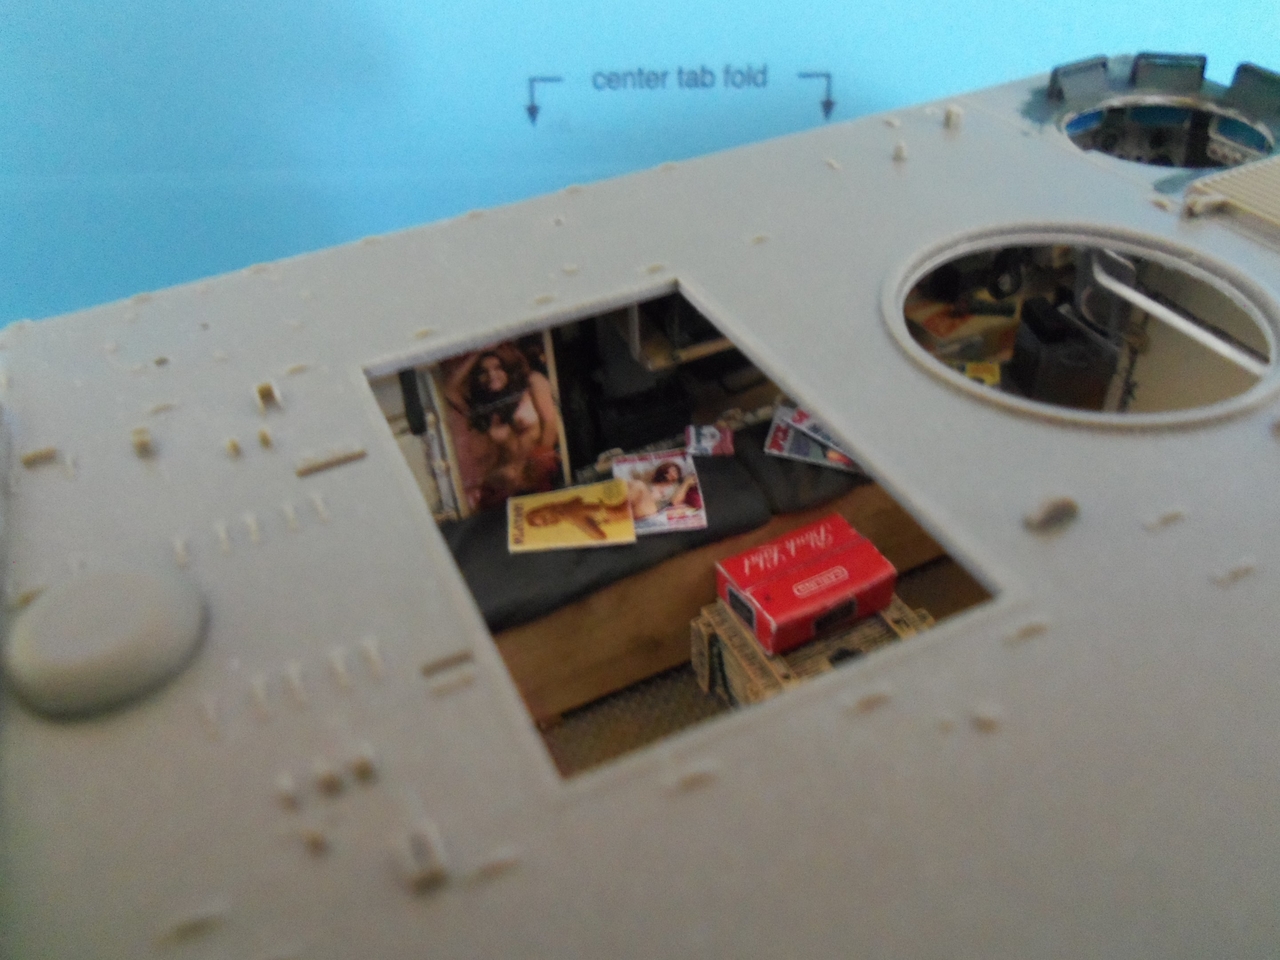
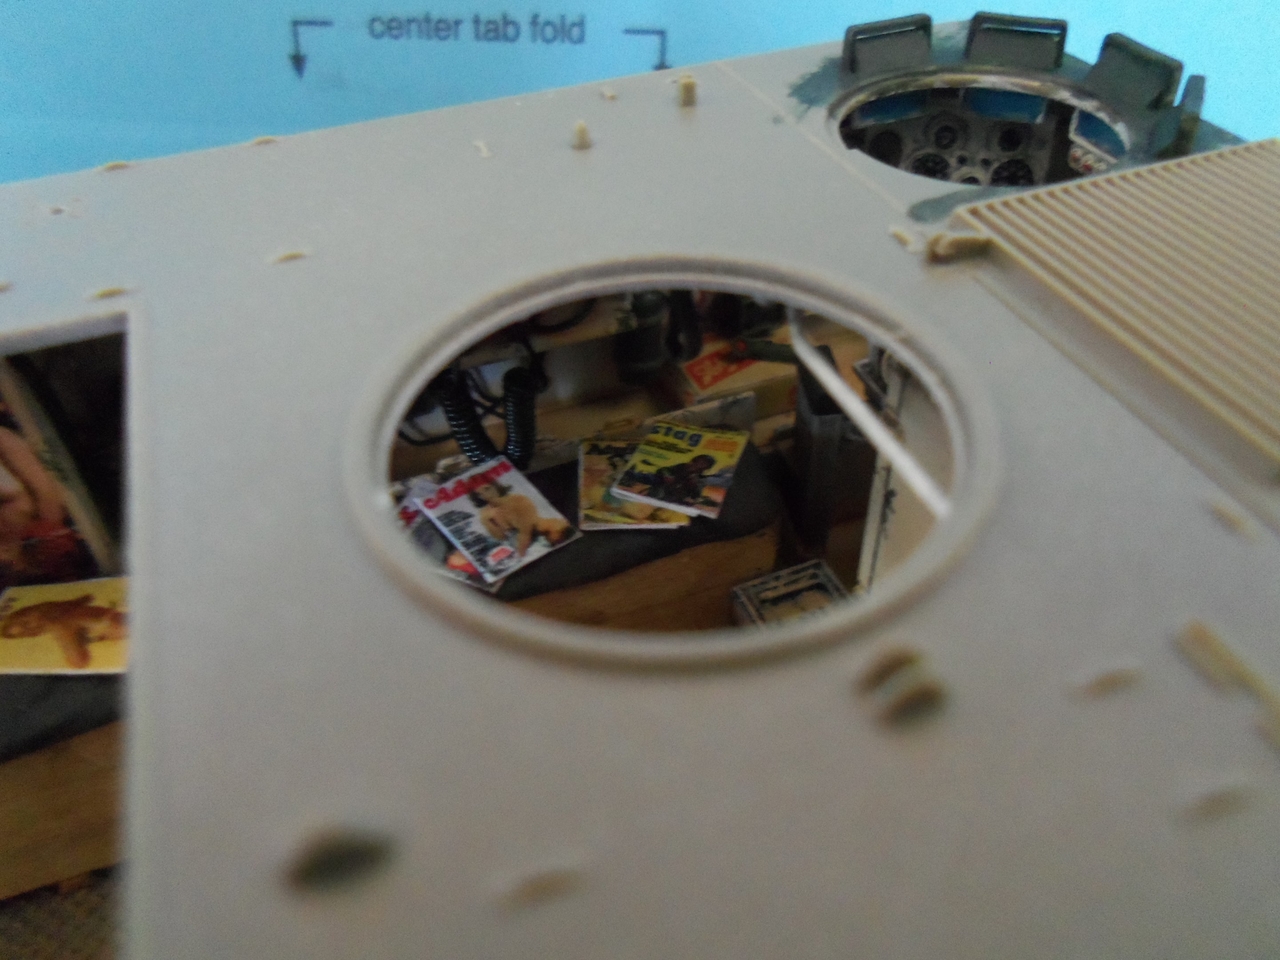
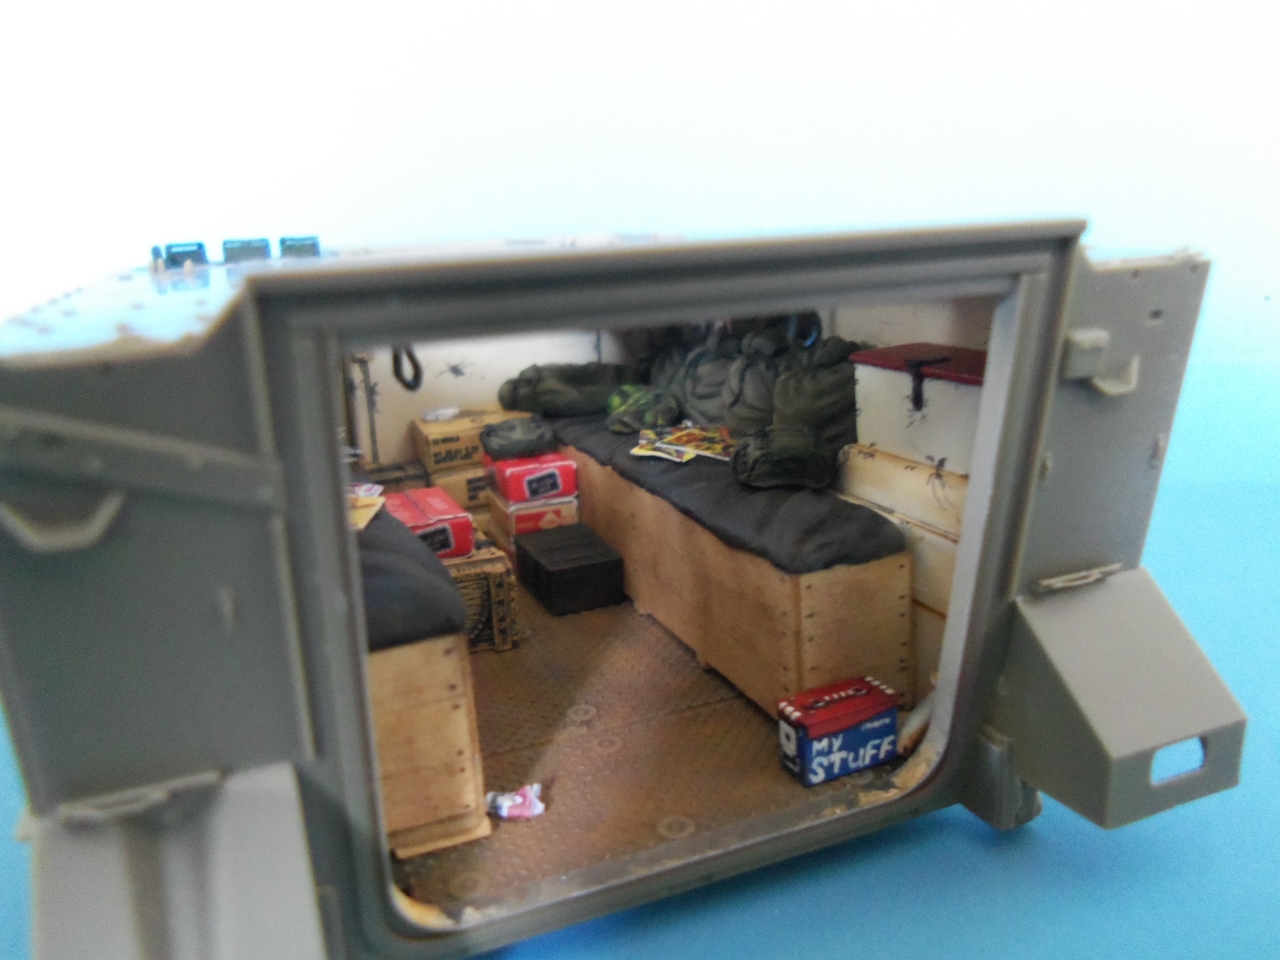
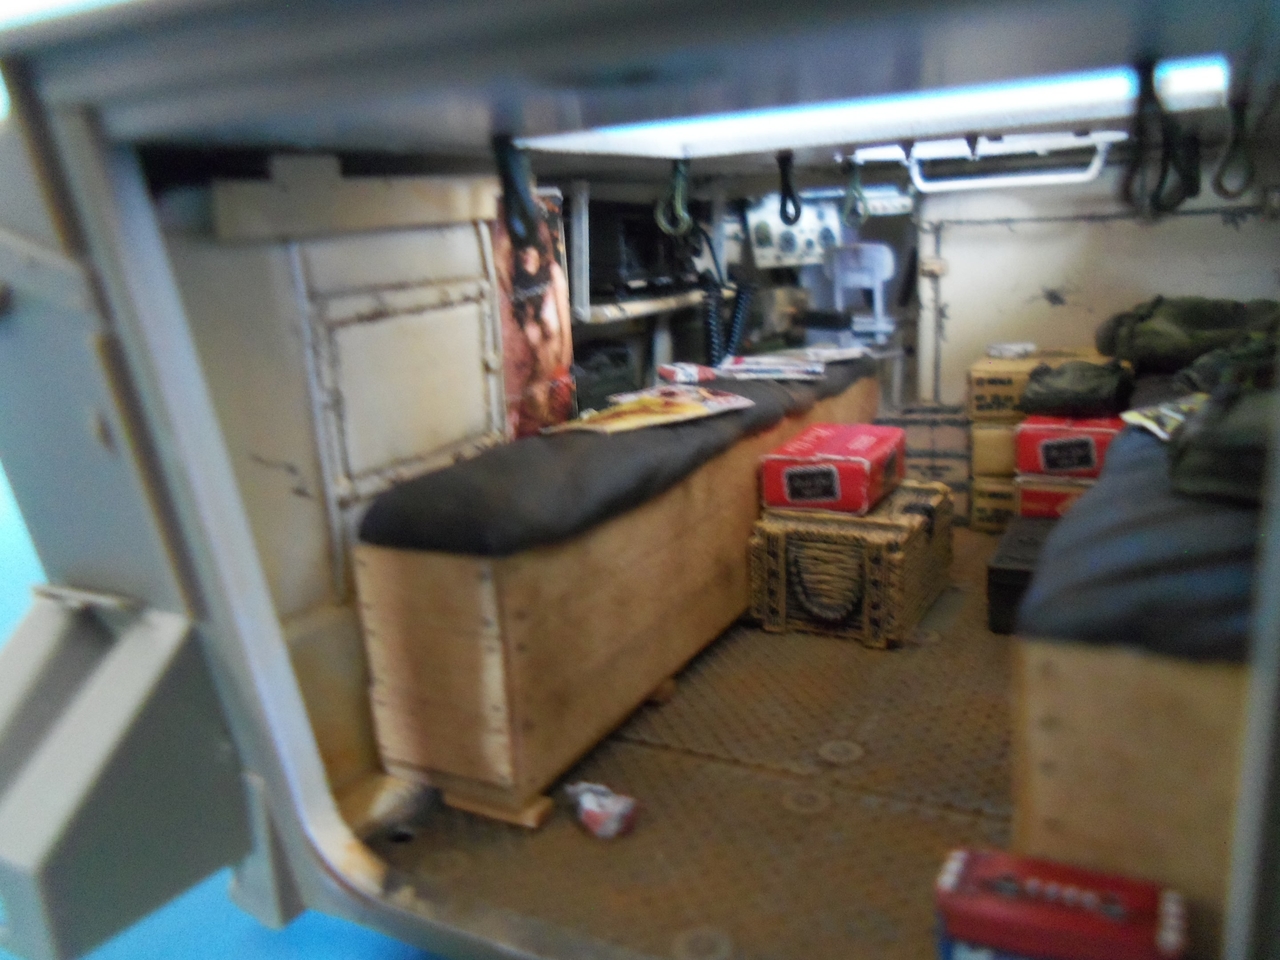
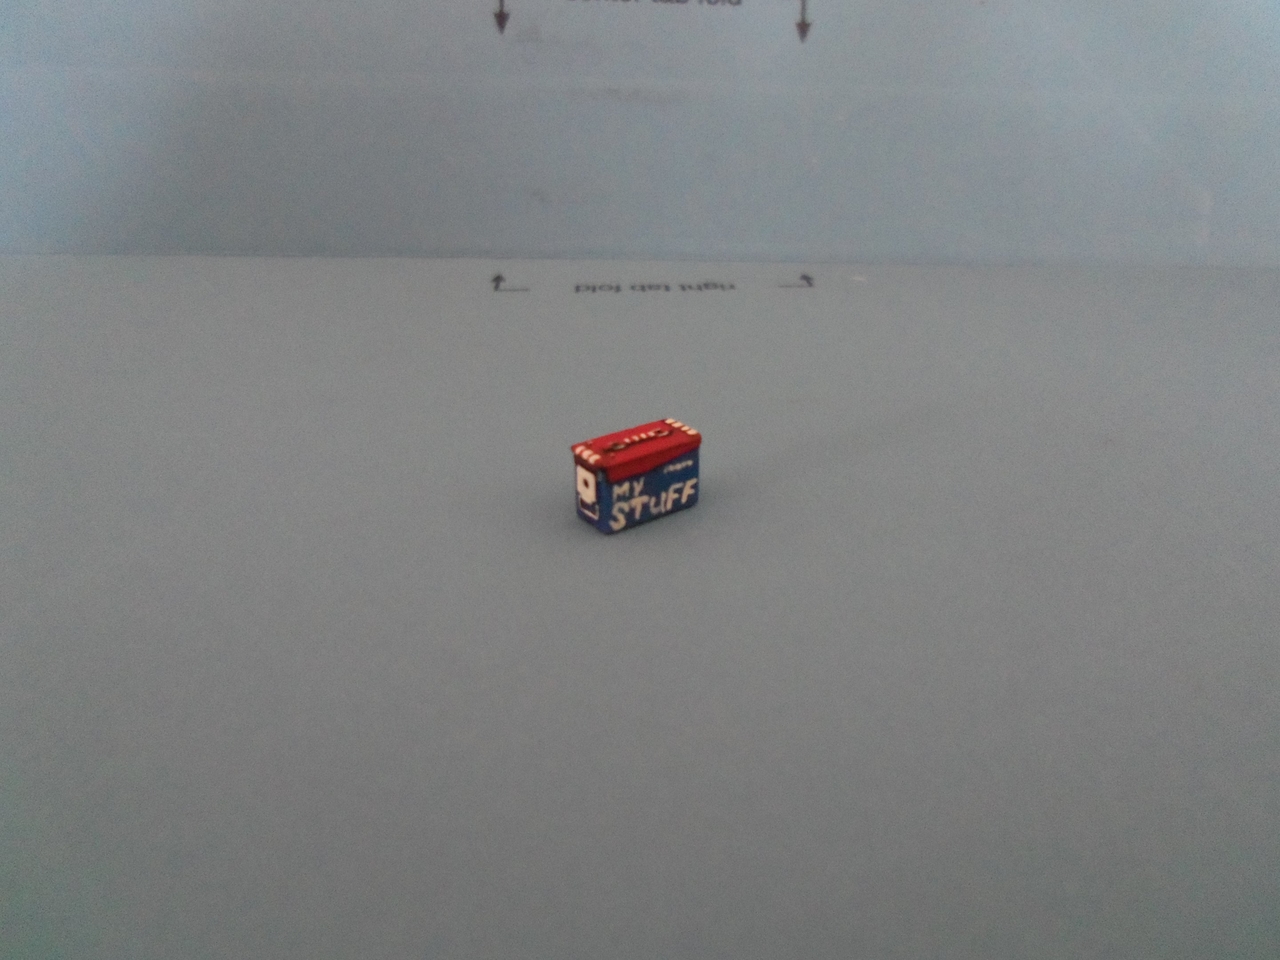
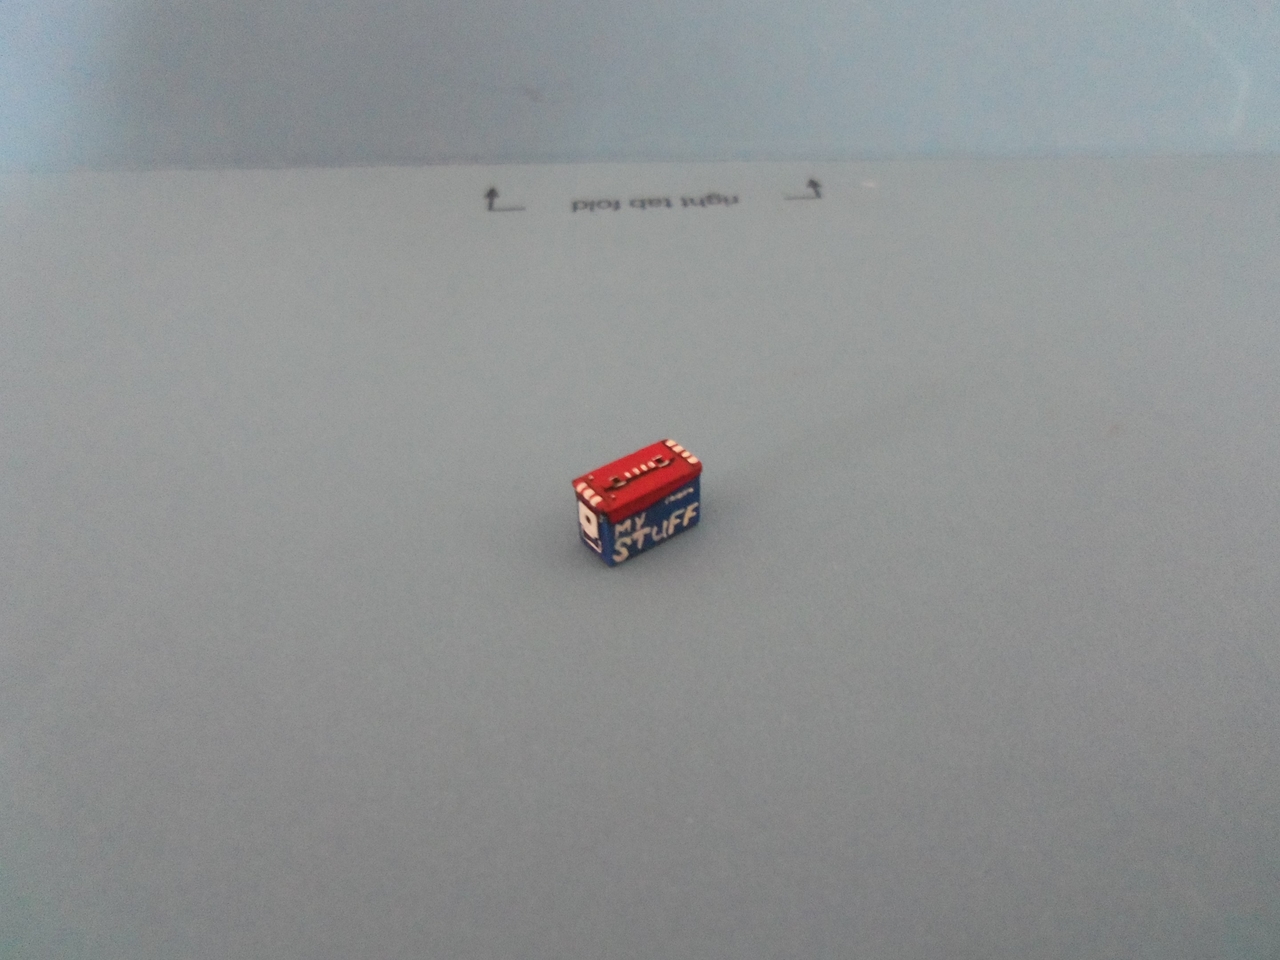
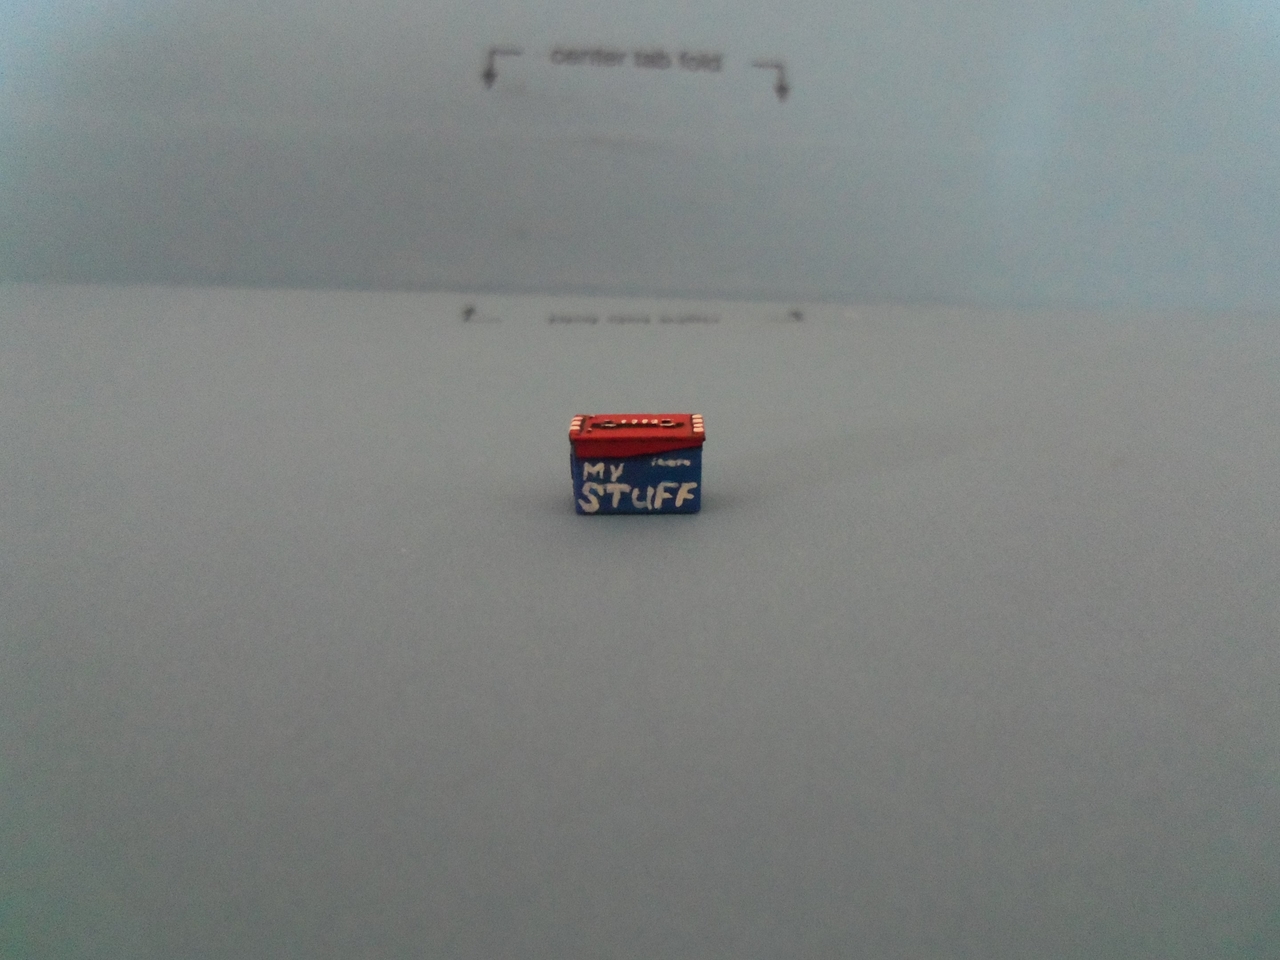
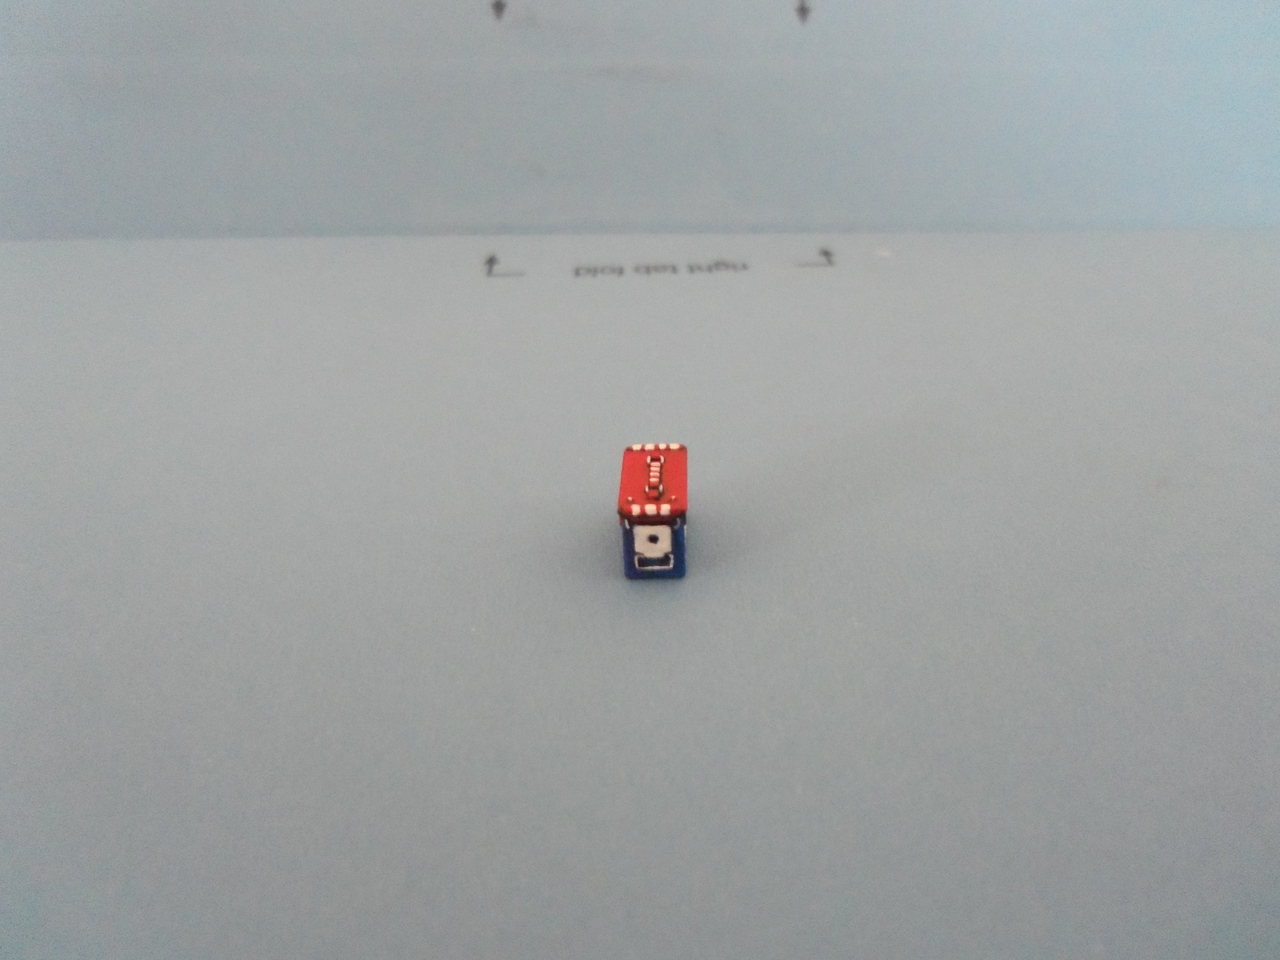
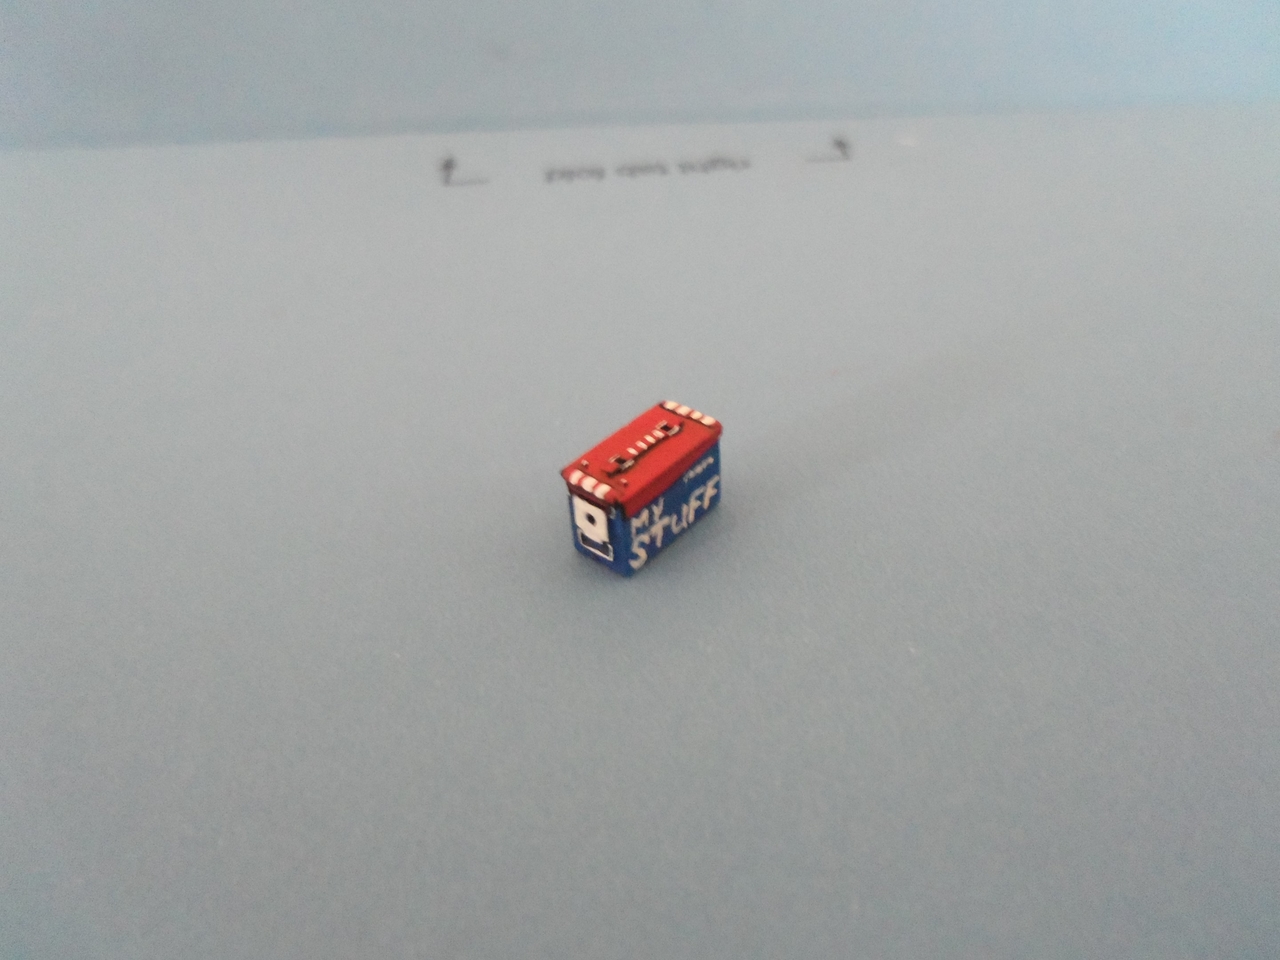
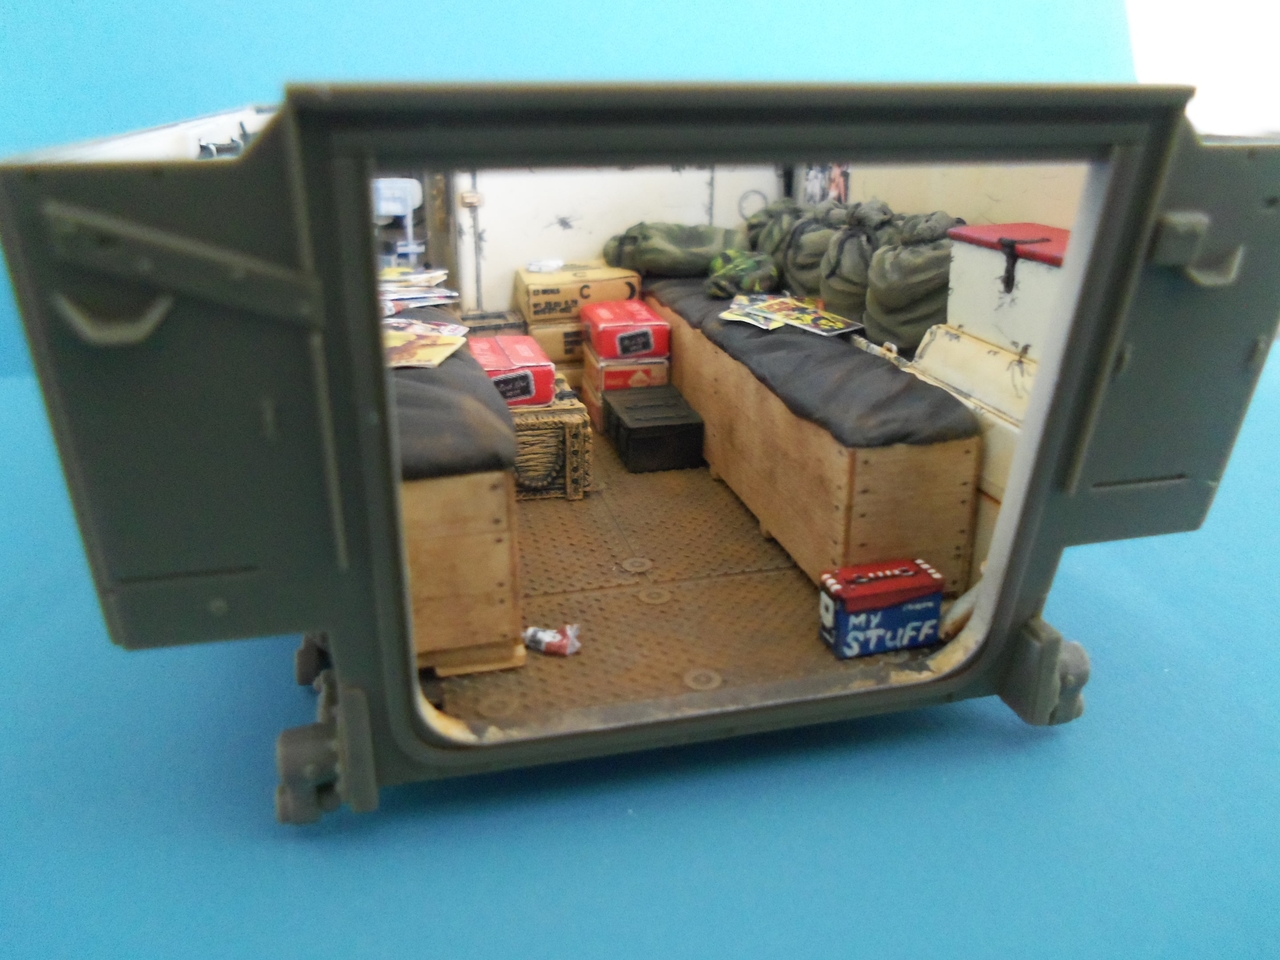
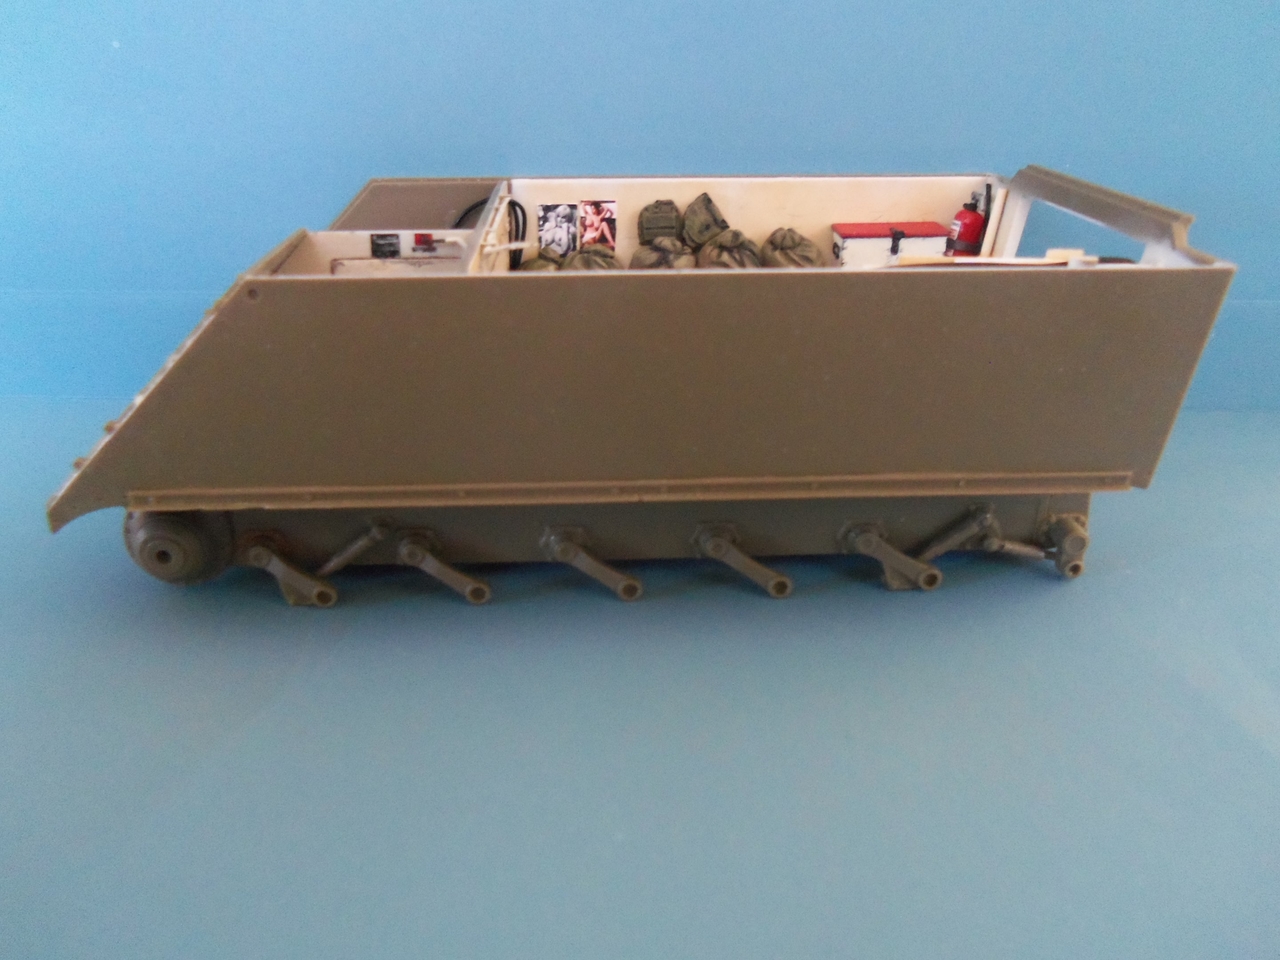
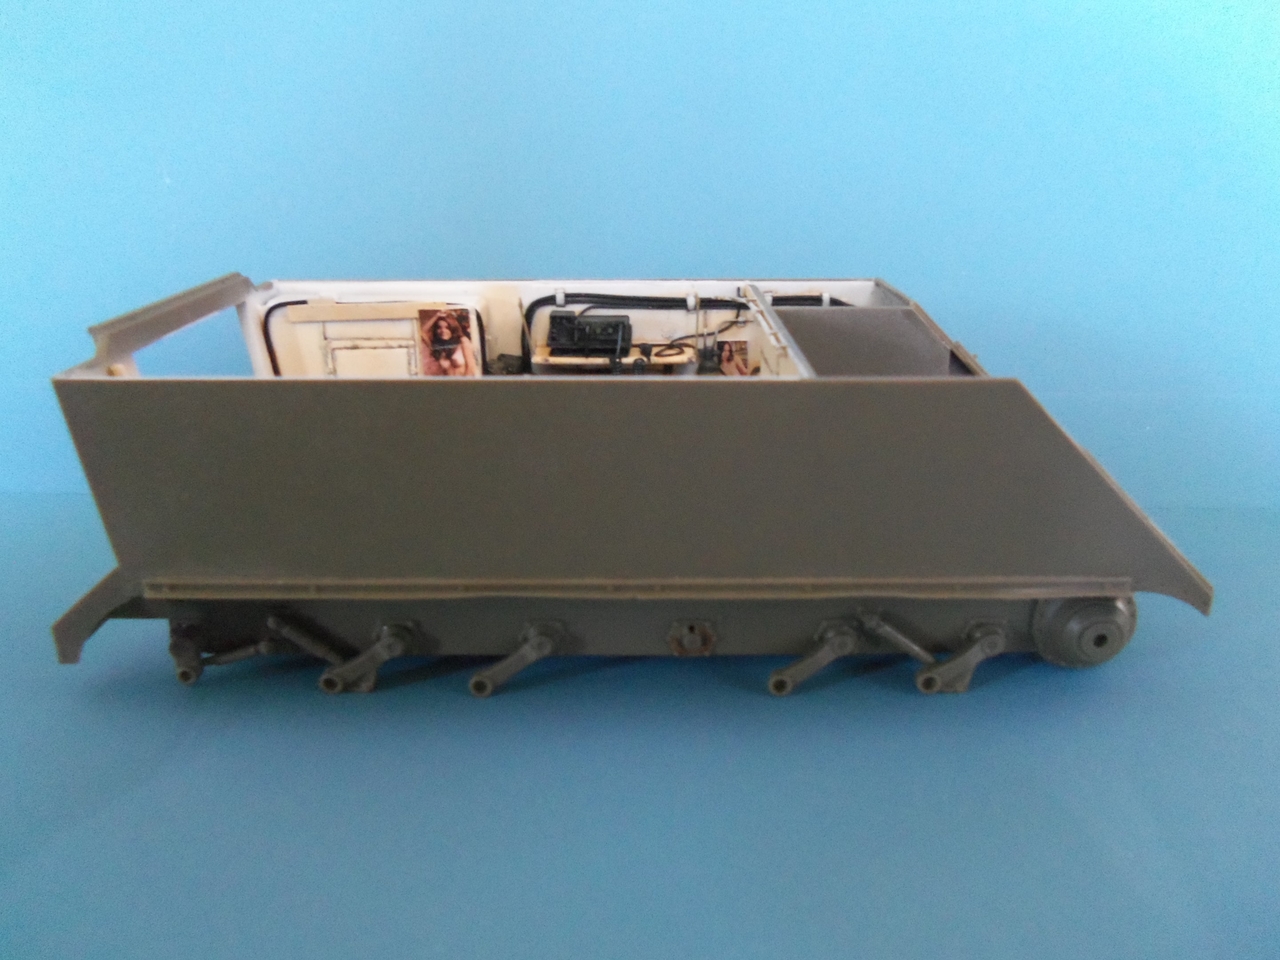
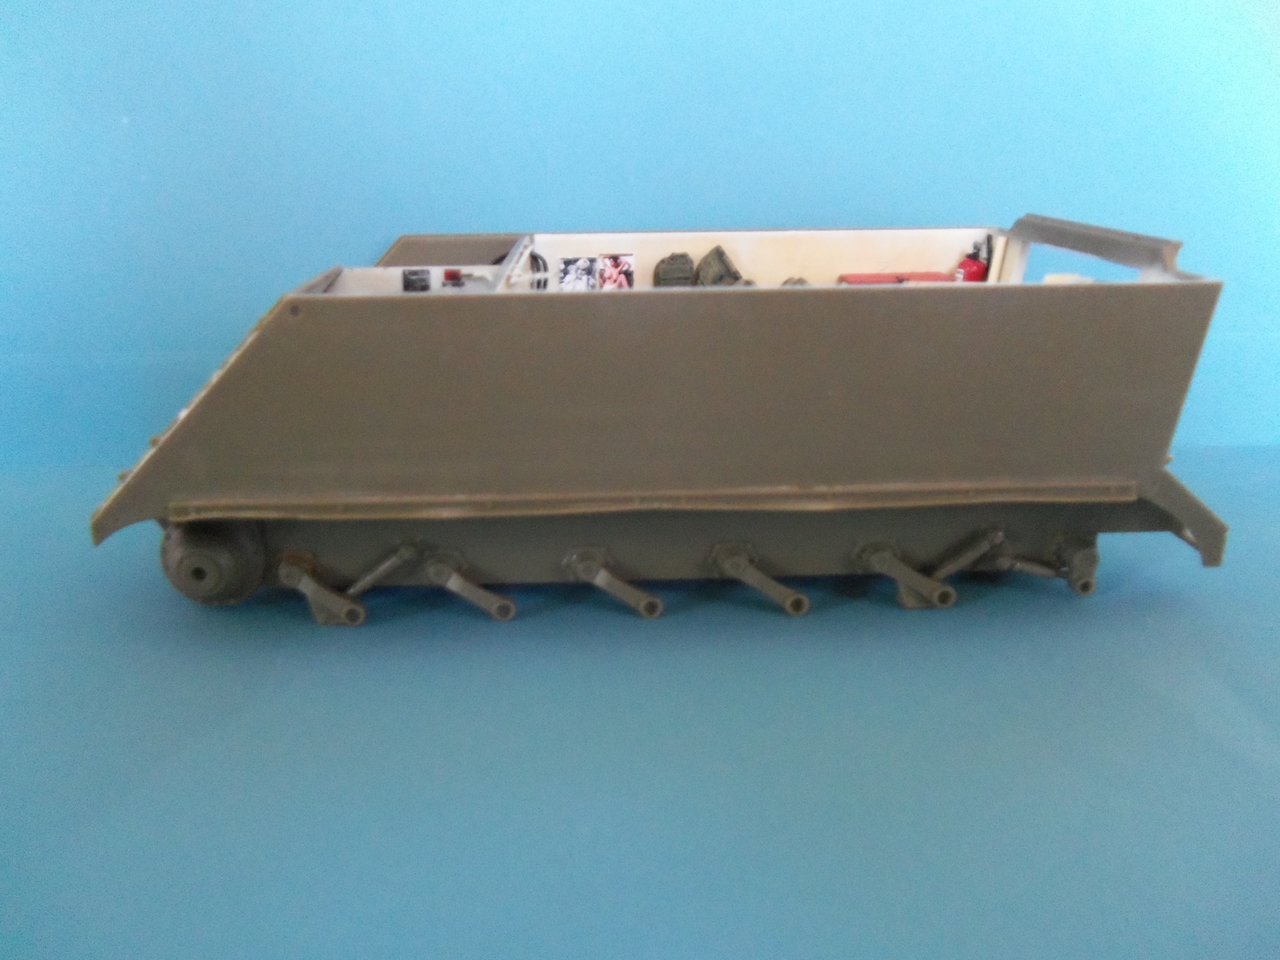
I haven't gotten as far on this project over the last few days as I would have liked, but I made some progress nonetheless. I have all kinds of stowage and accessories for this track that are in various stages of painting. One of the more colorful items that is complete is this ammo can used for personal stuff (letters from home, writing paper, pens, etc) by one of the crew members. To make sure it was not confused with somebody else's can, he painted it in Red, White, and Blue. Here it is in miniature.
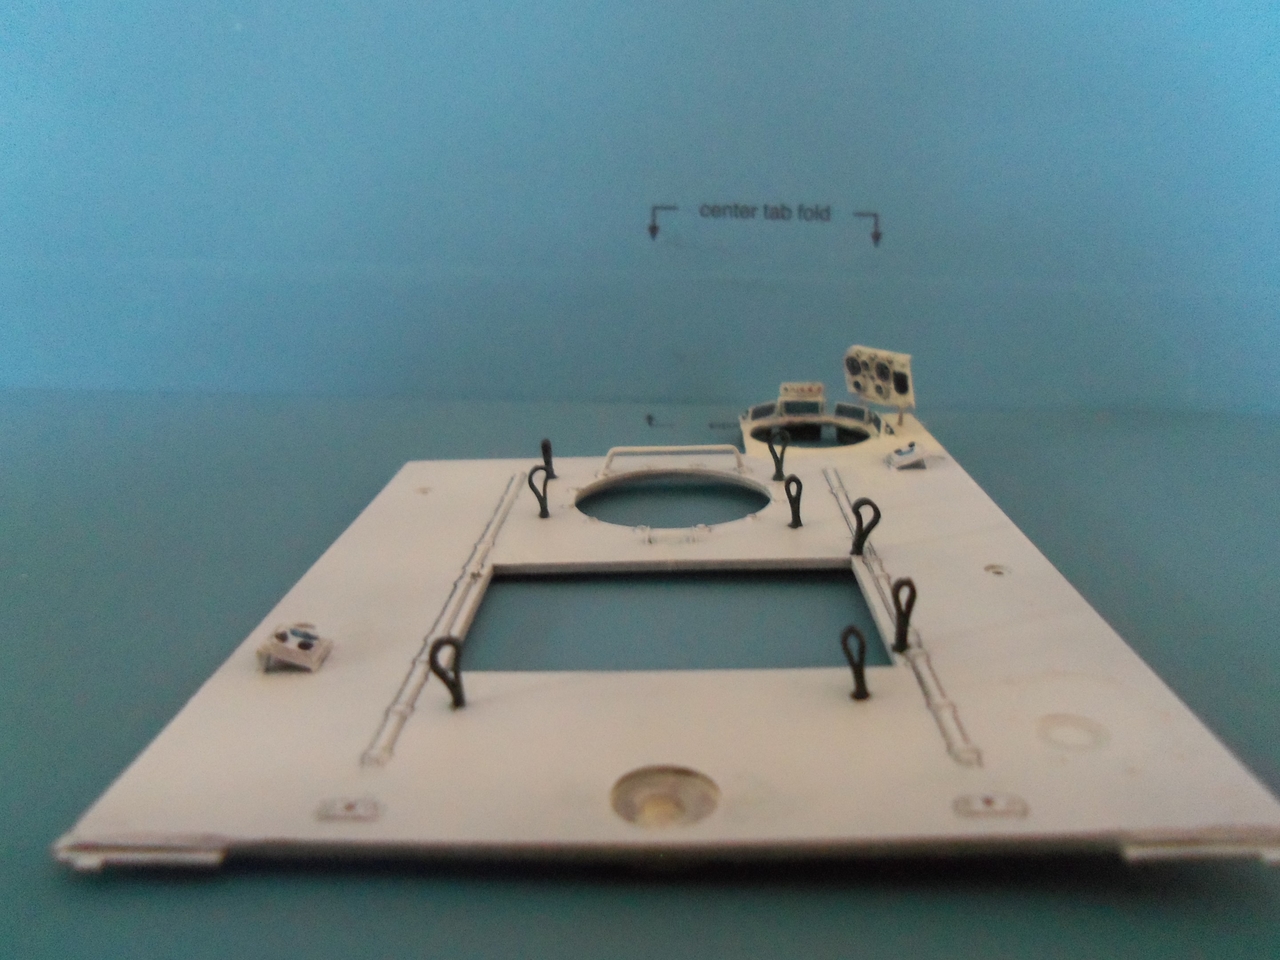
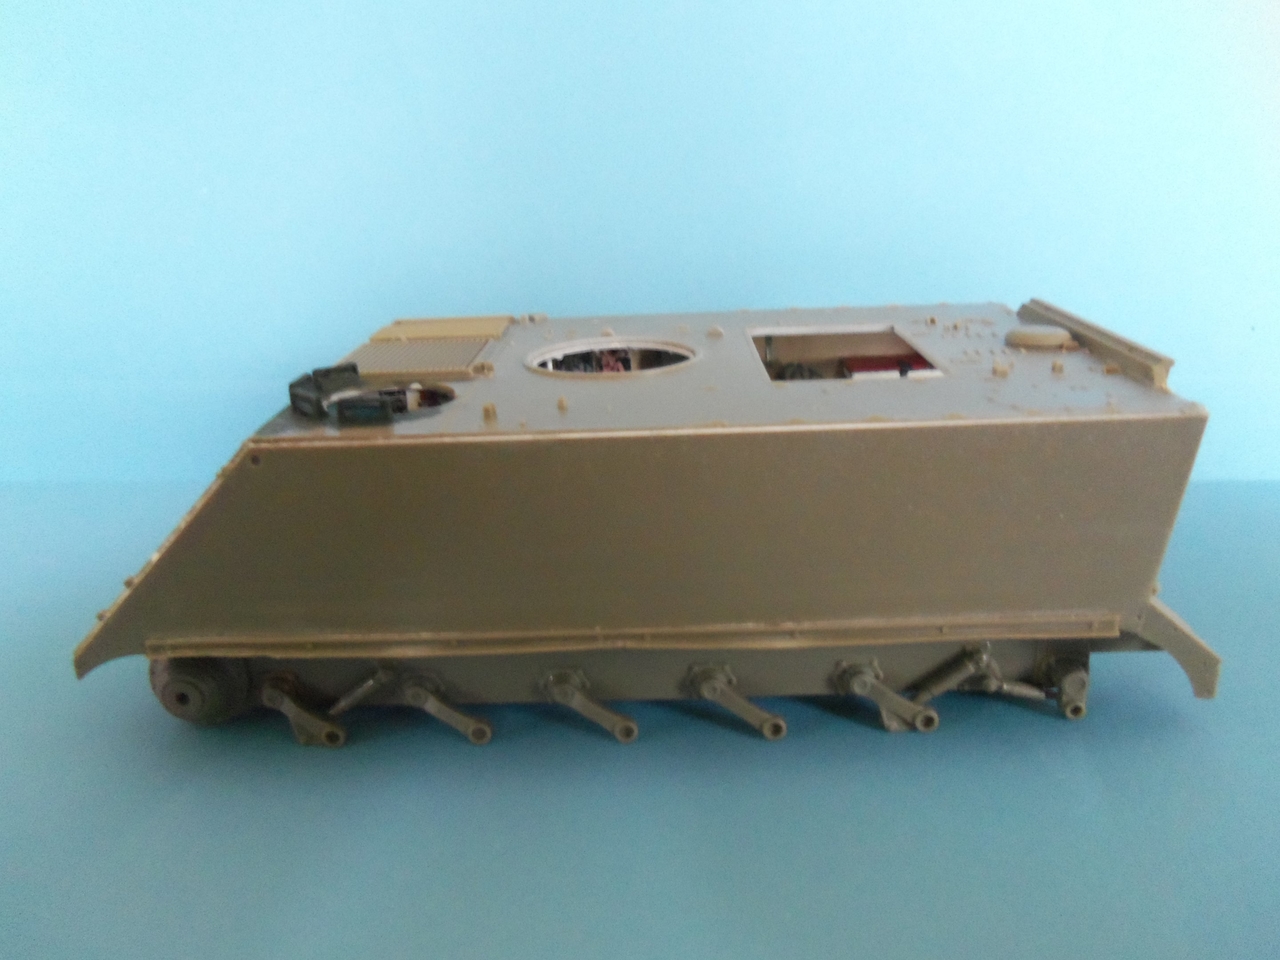
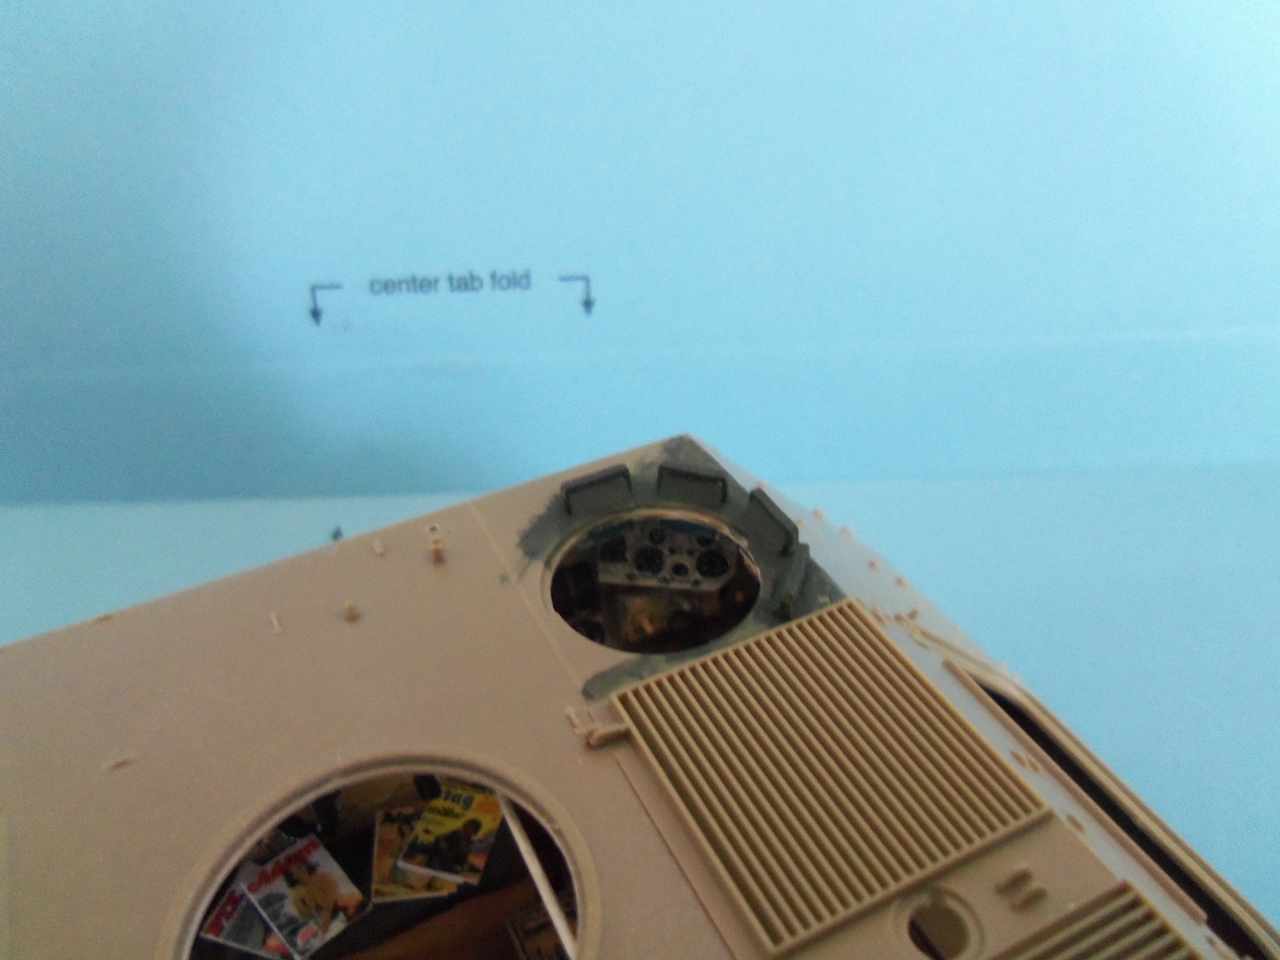
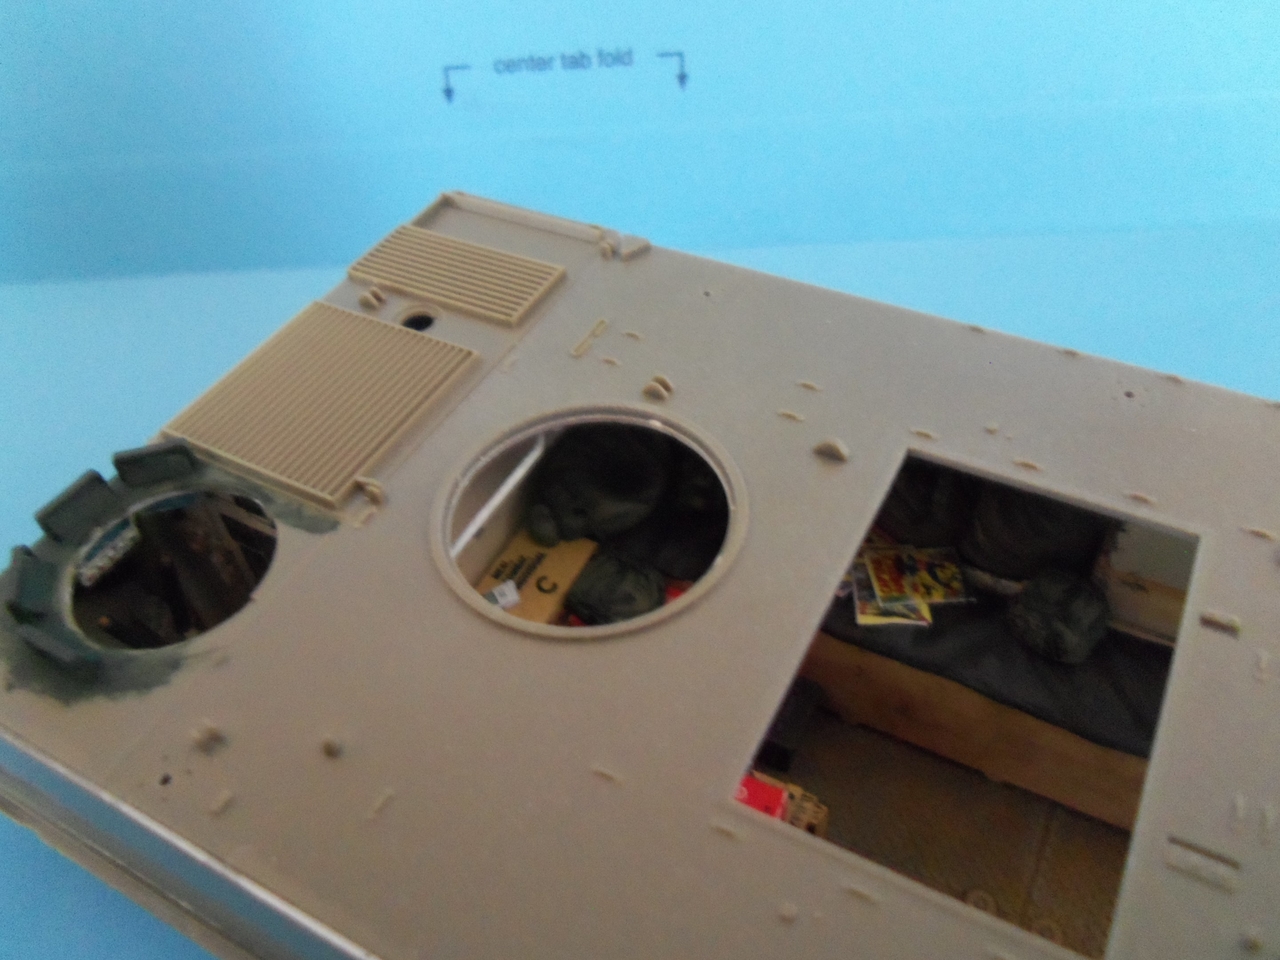
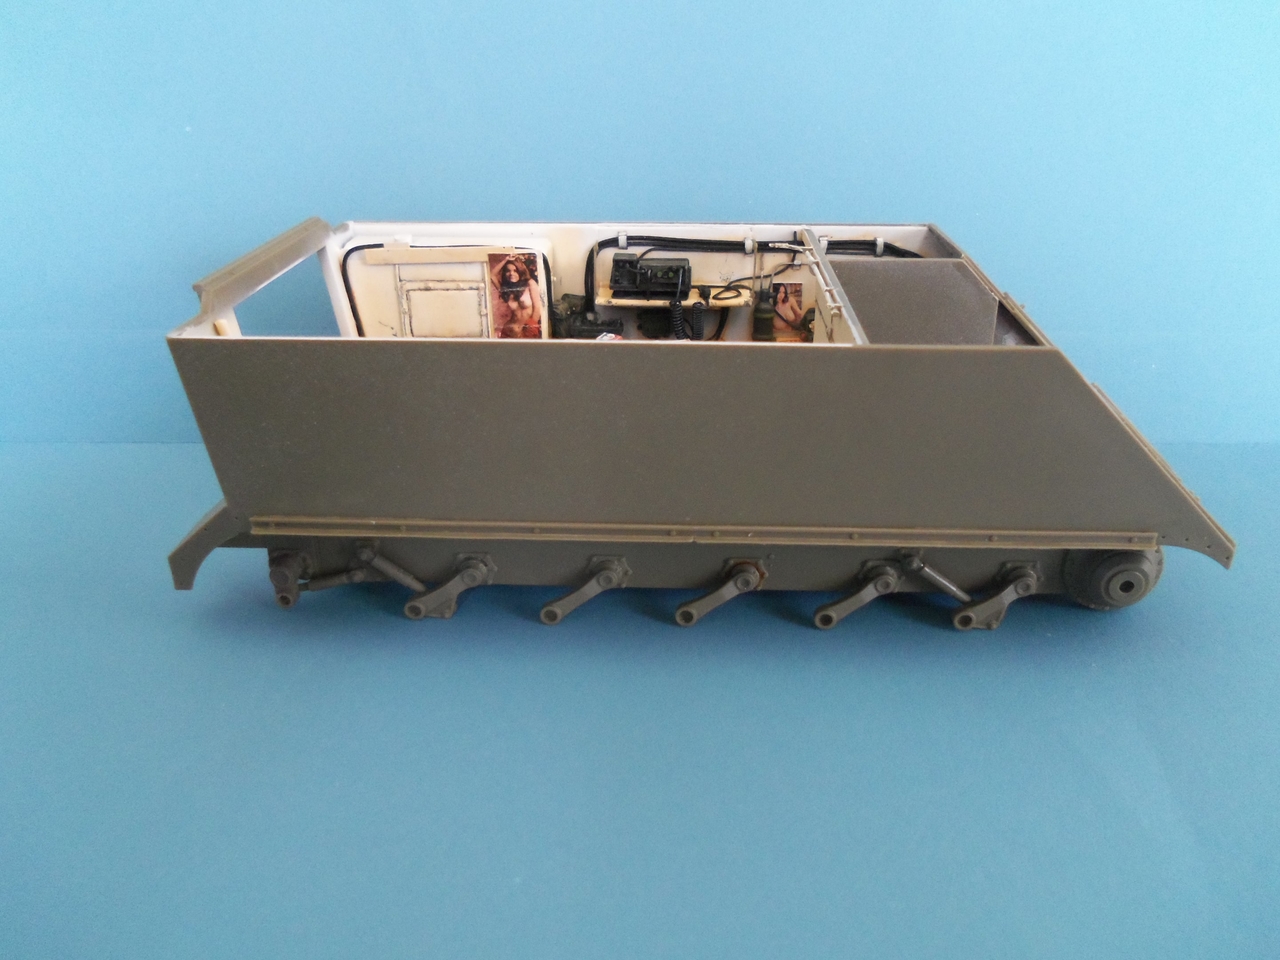
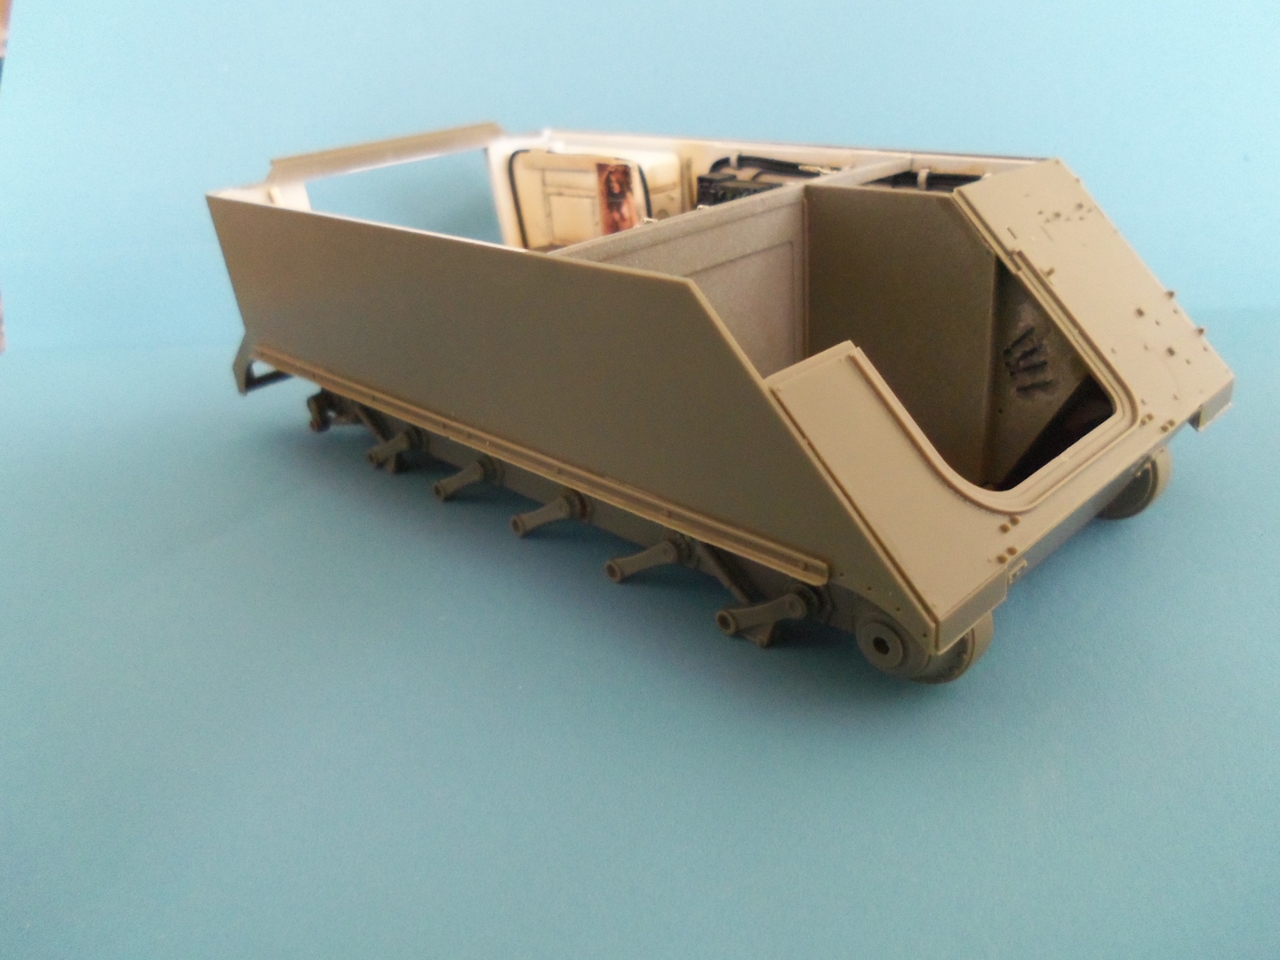
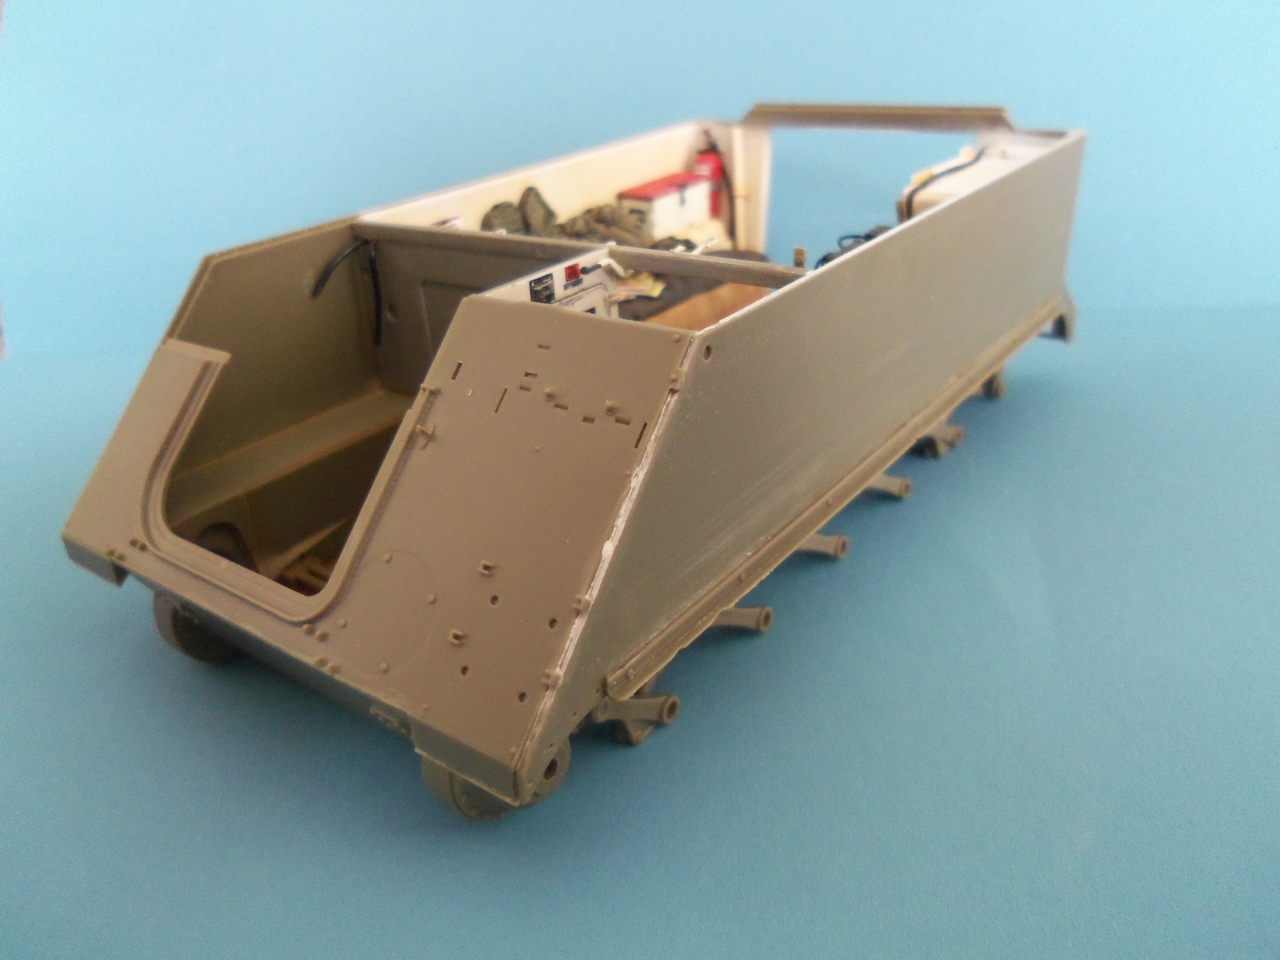
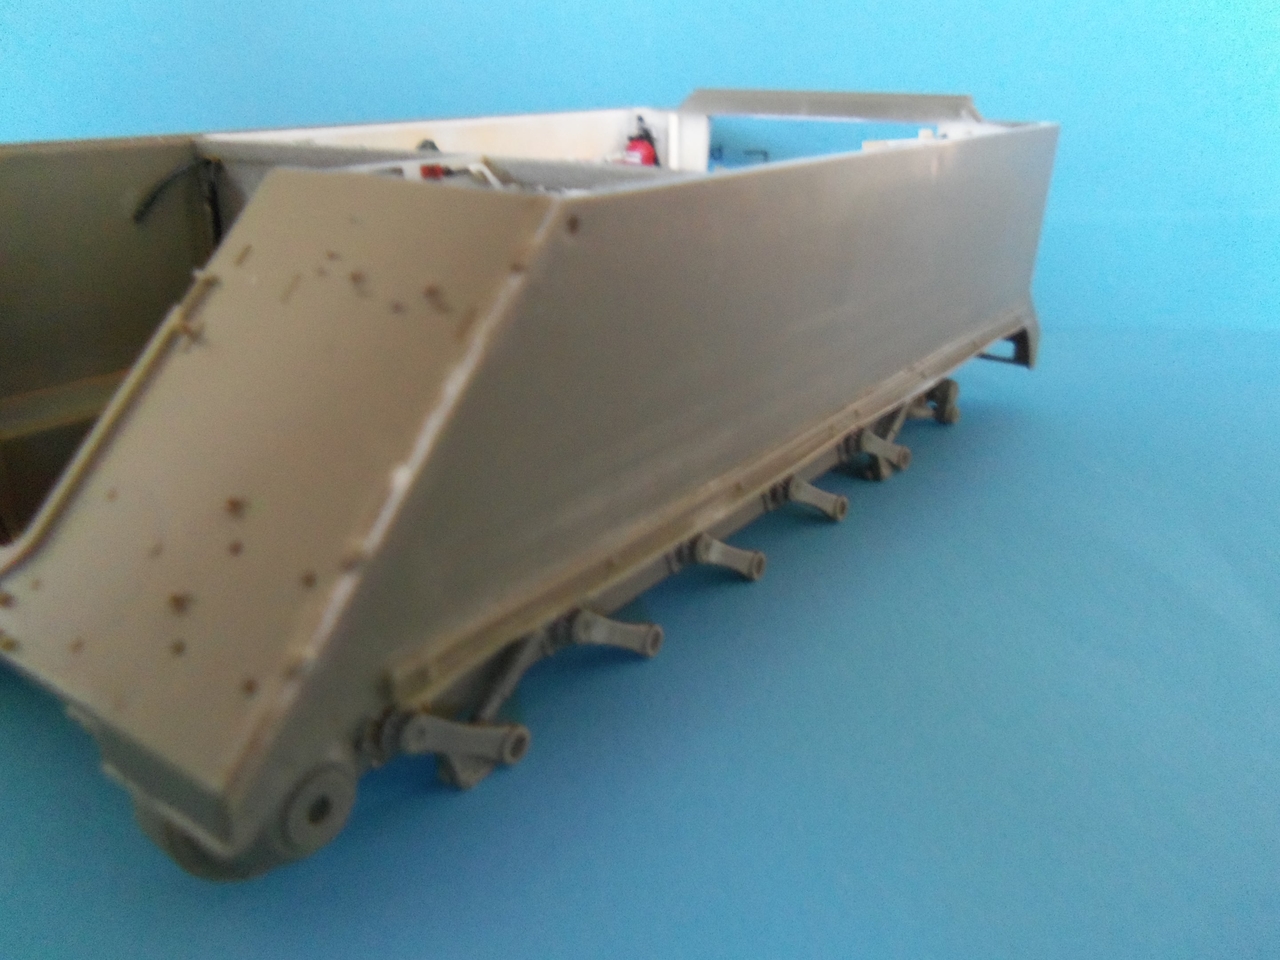
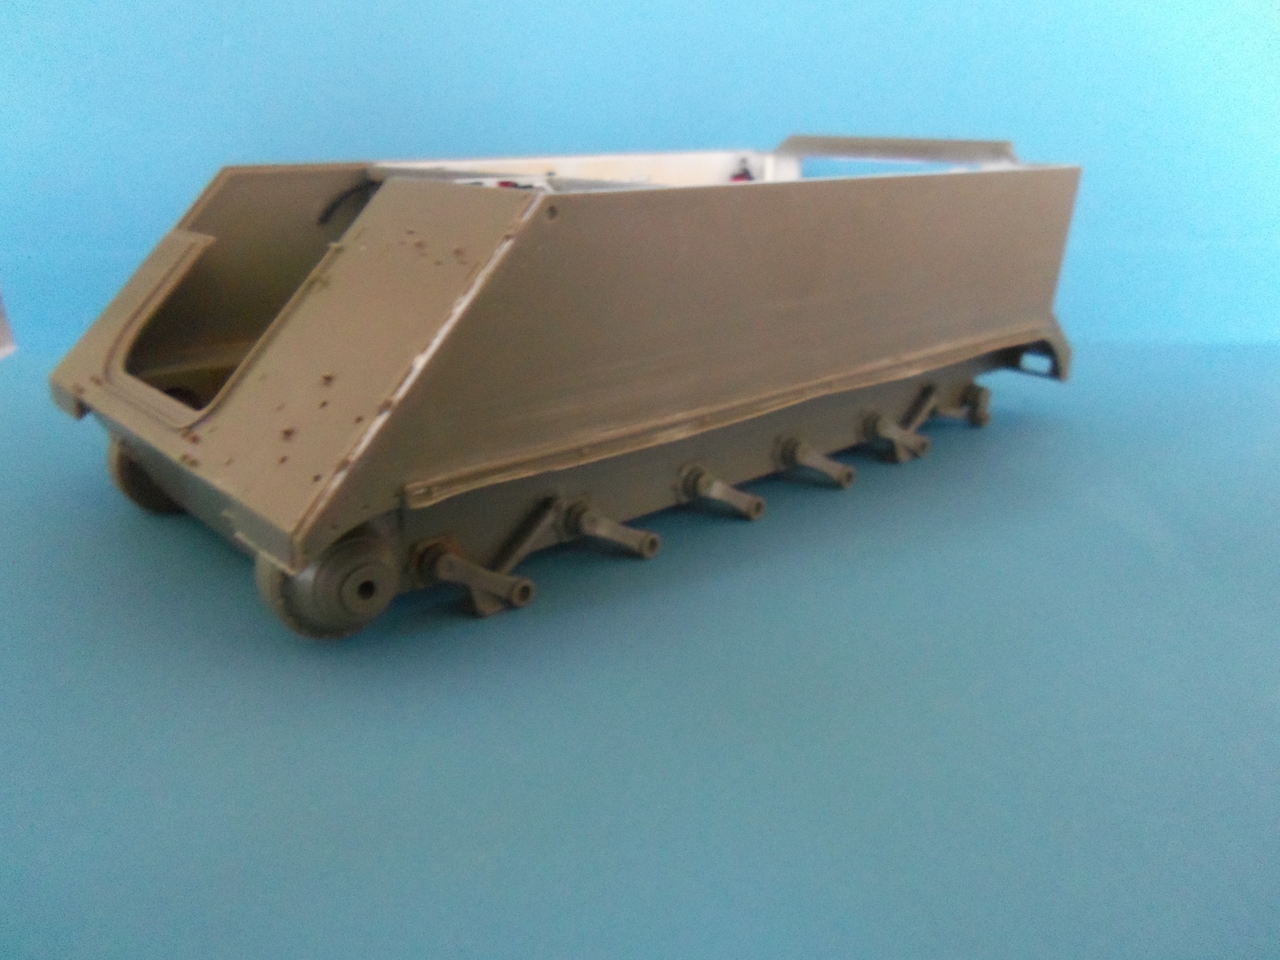
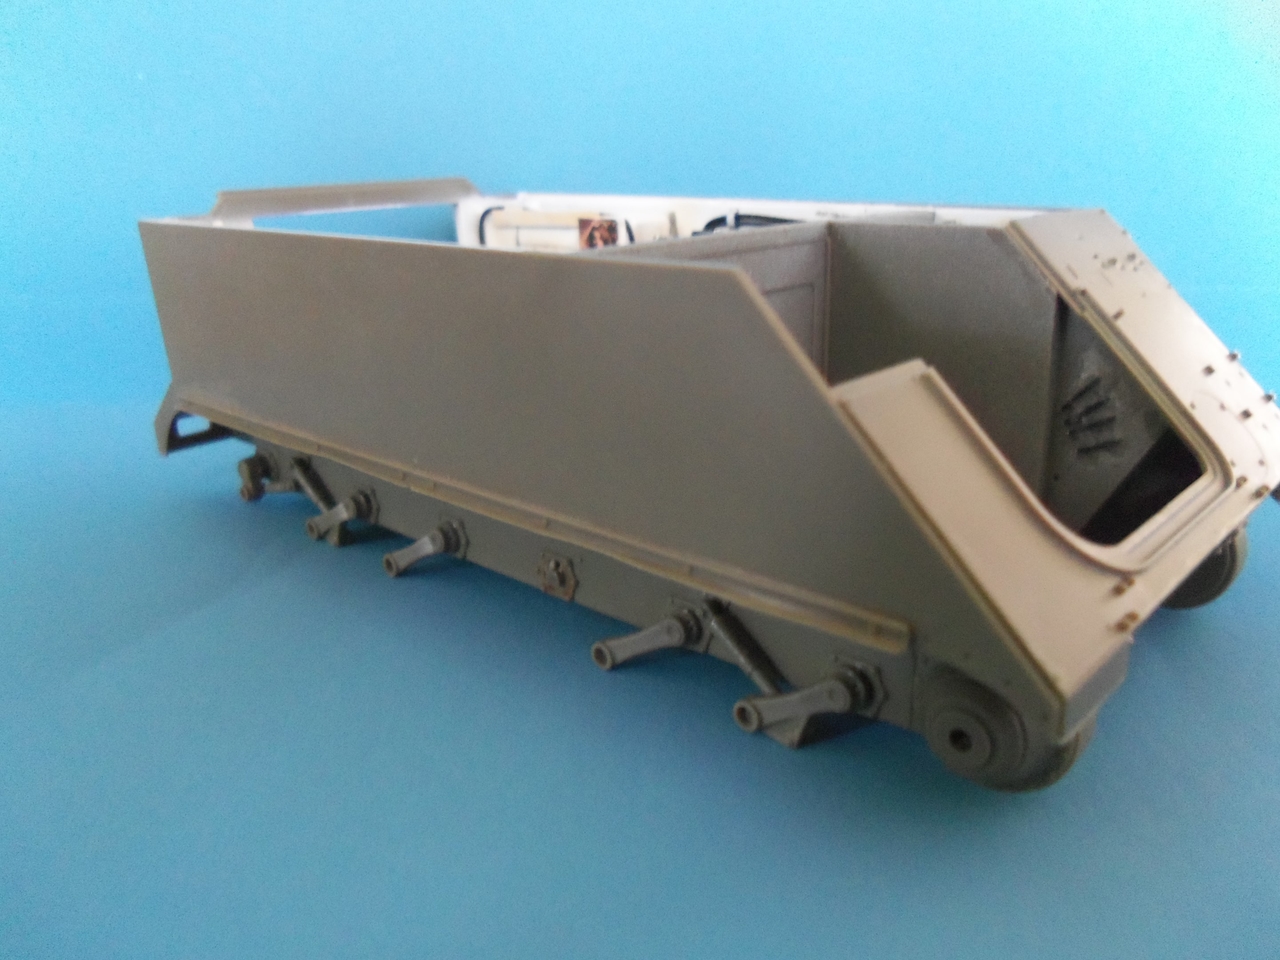
I also put some items in the driver's area such as his personal effects ammo can and a flashlight with red lens. A few ammo cans were placed on the floor in the troop compartment and a fire extinguisher was mounted in on the back wall on the right side near the bilge pump pipe.
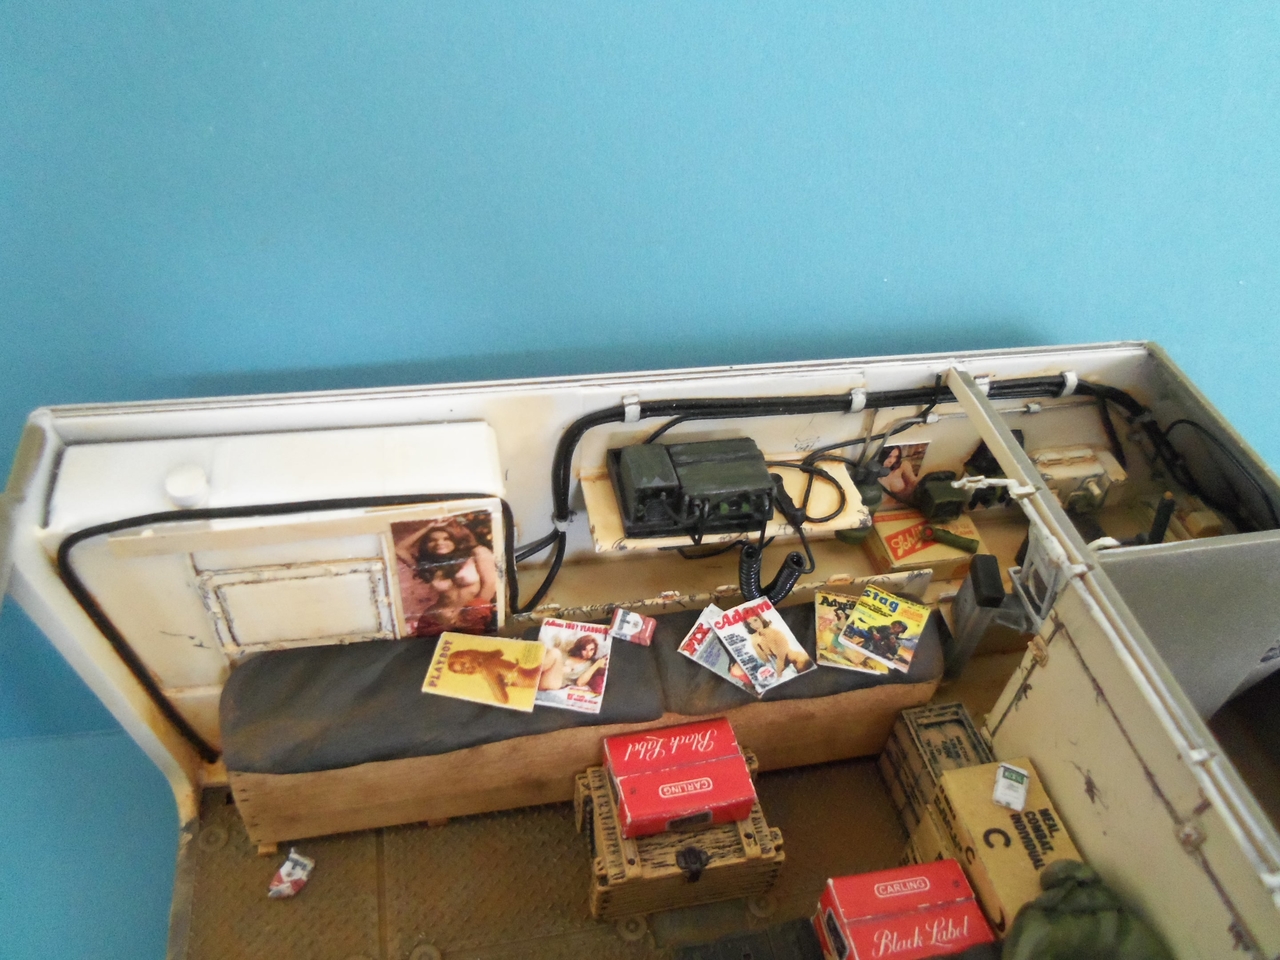
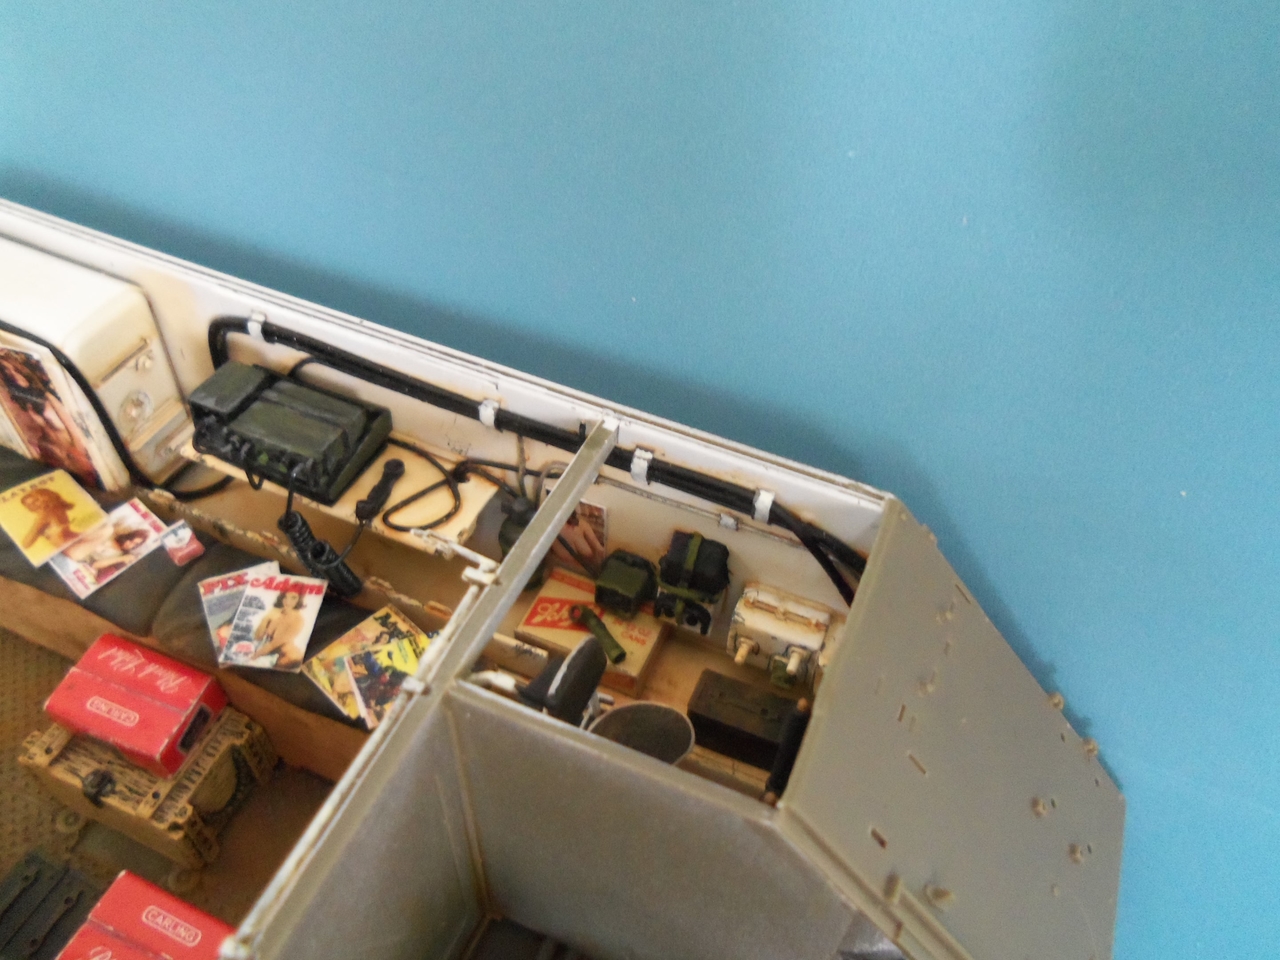
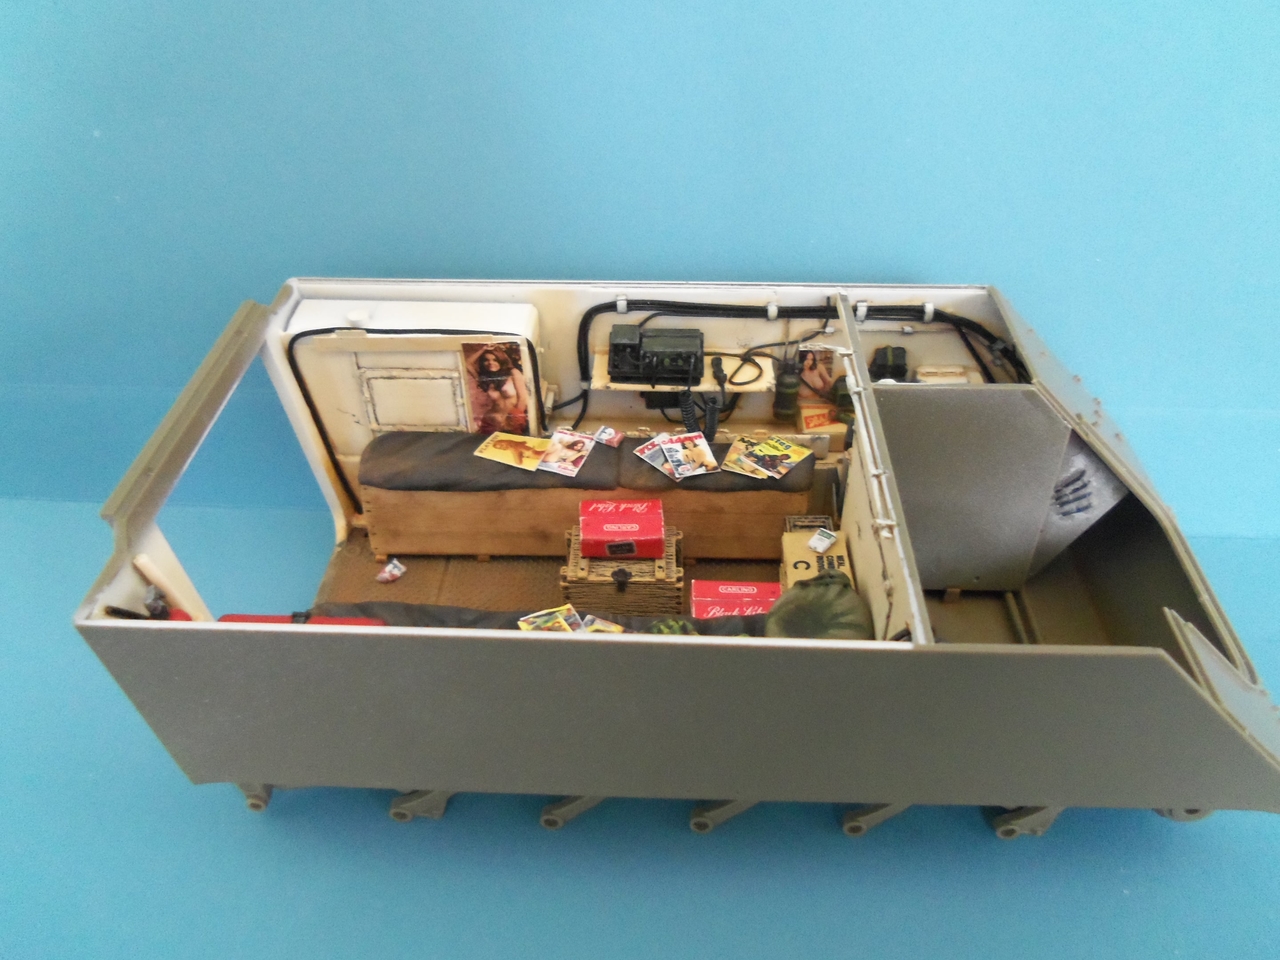
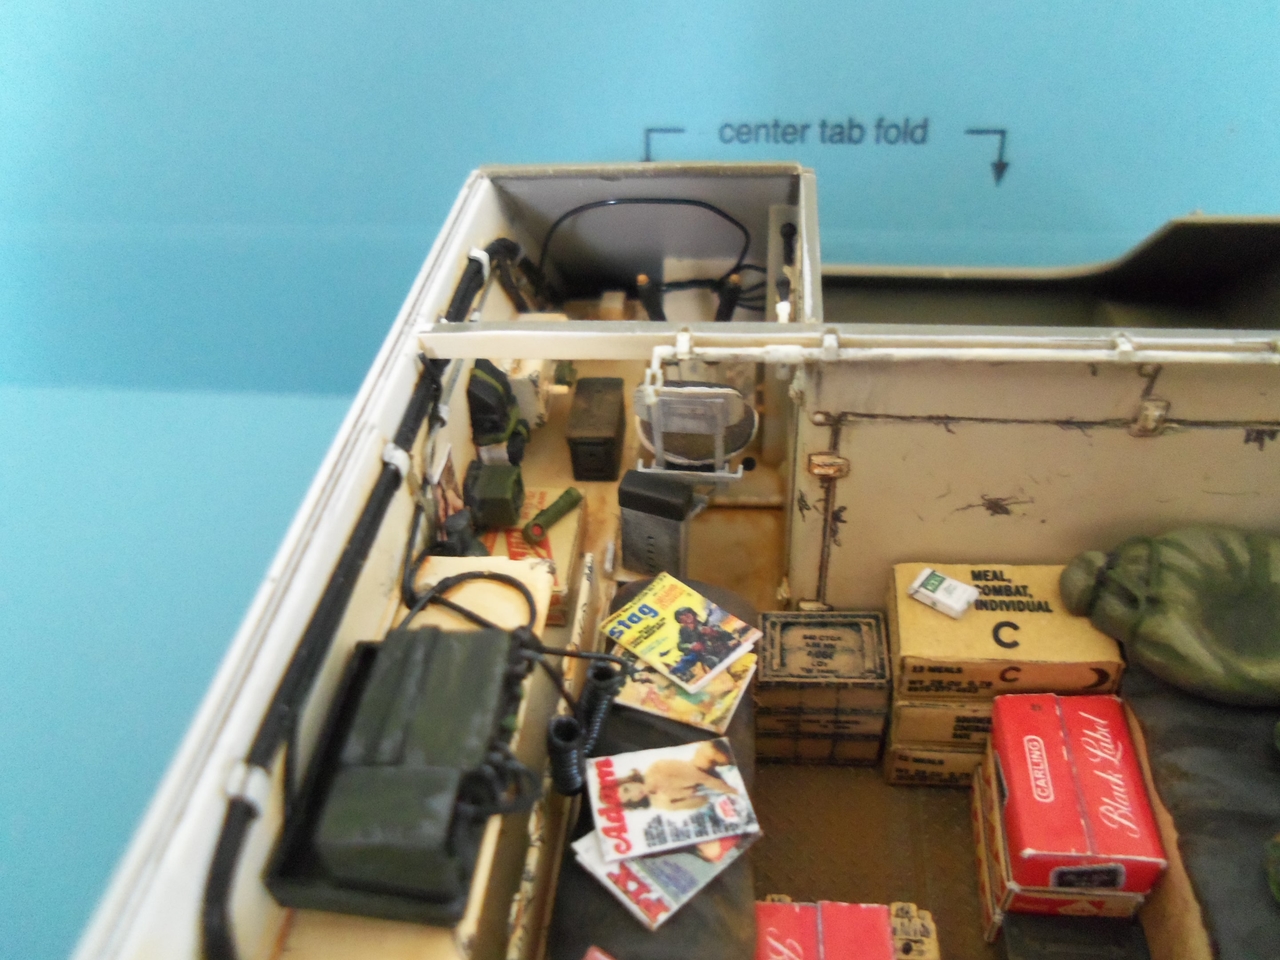
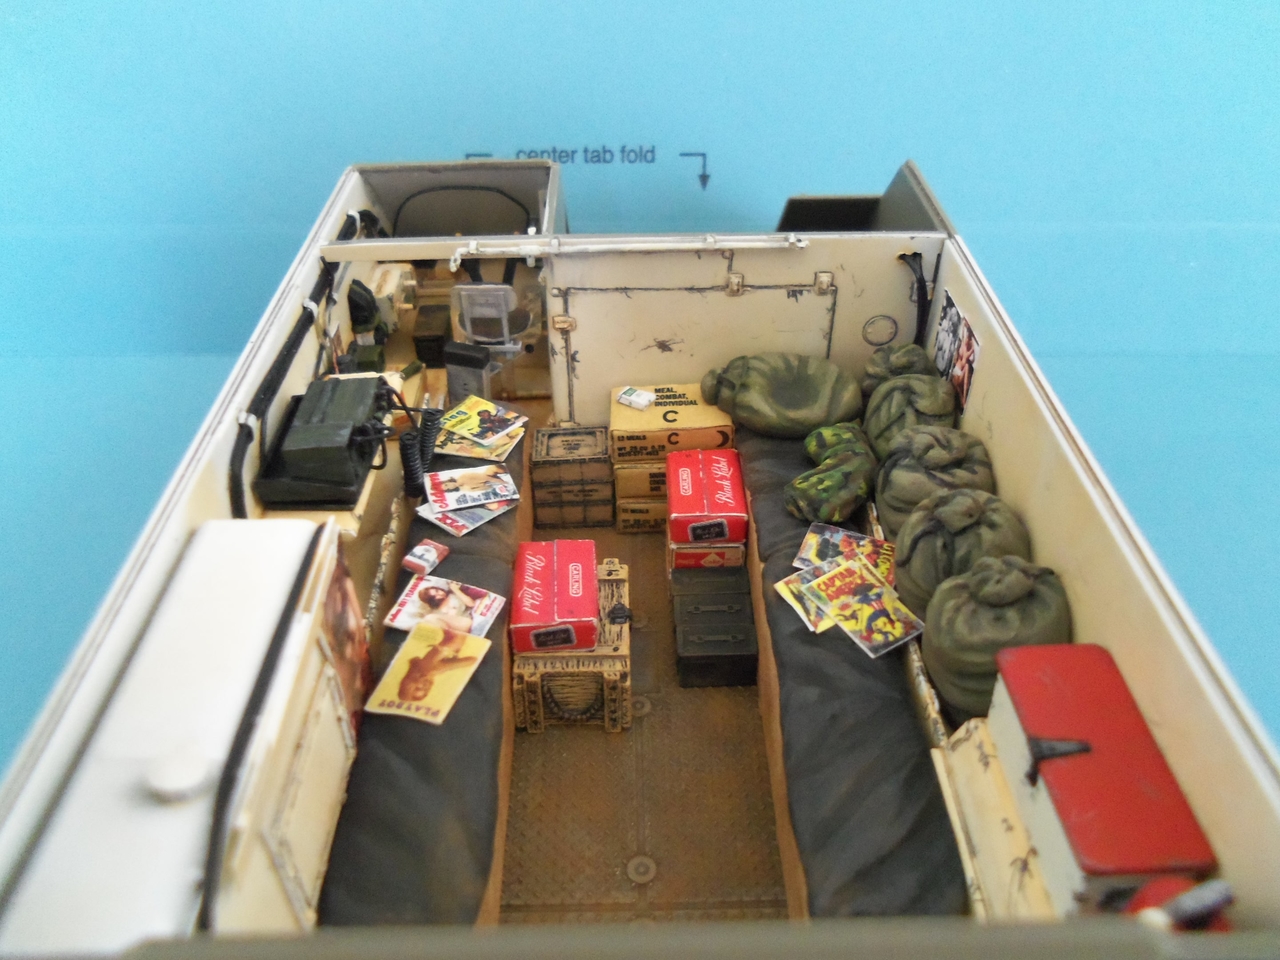
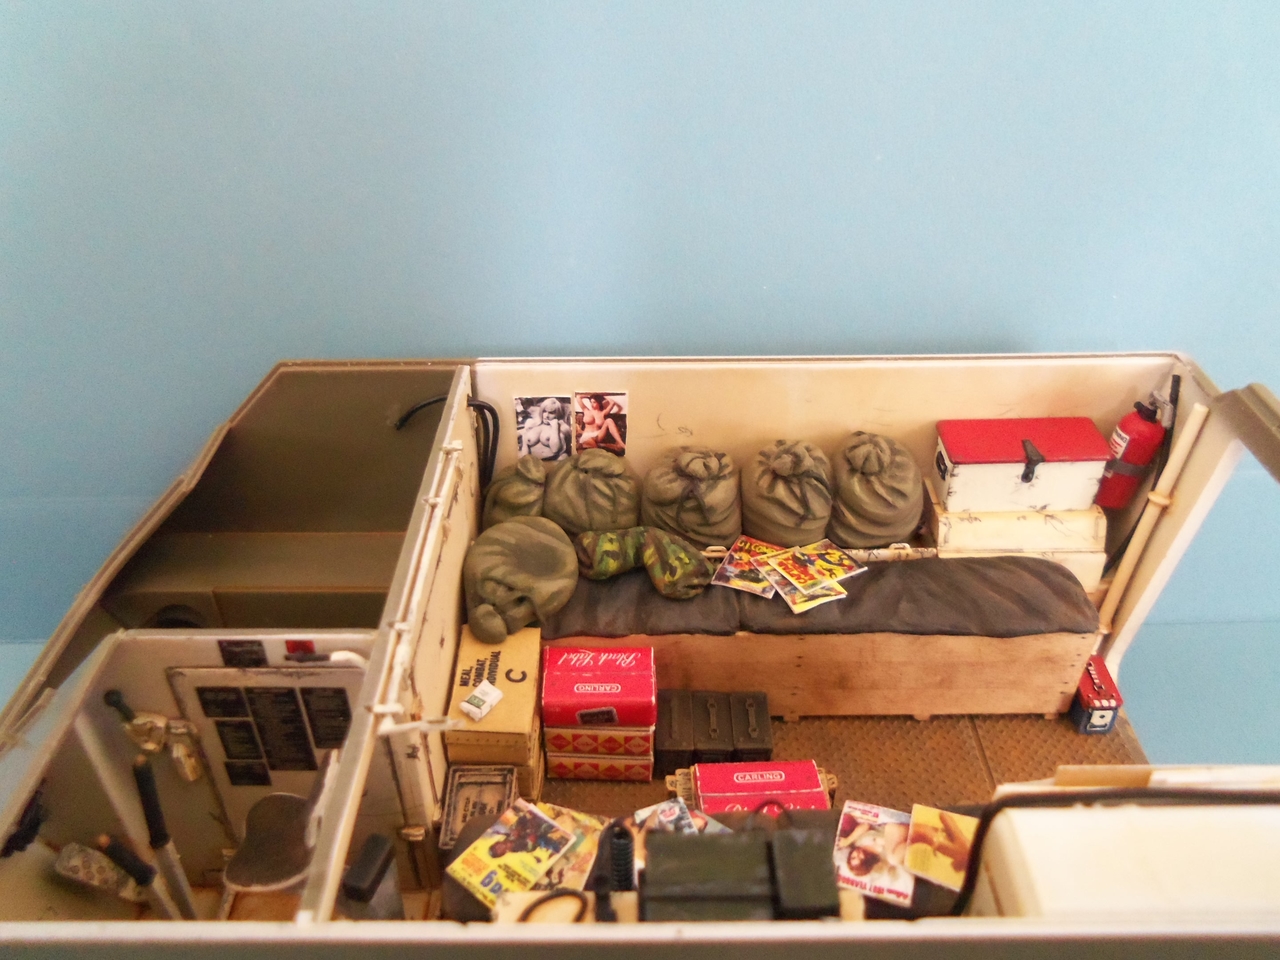
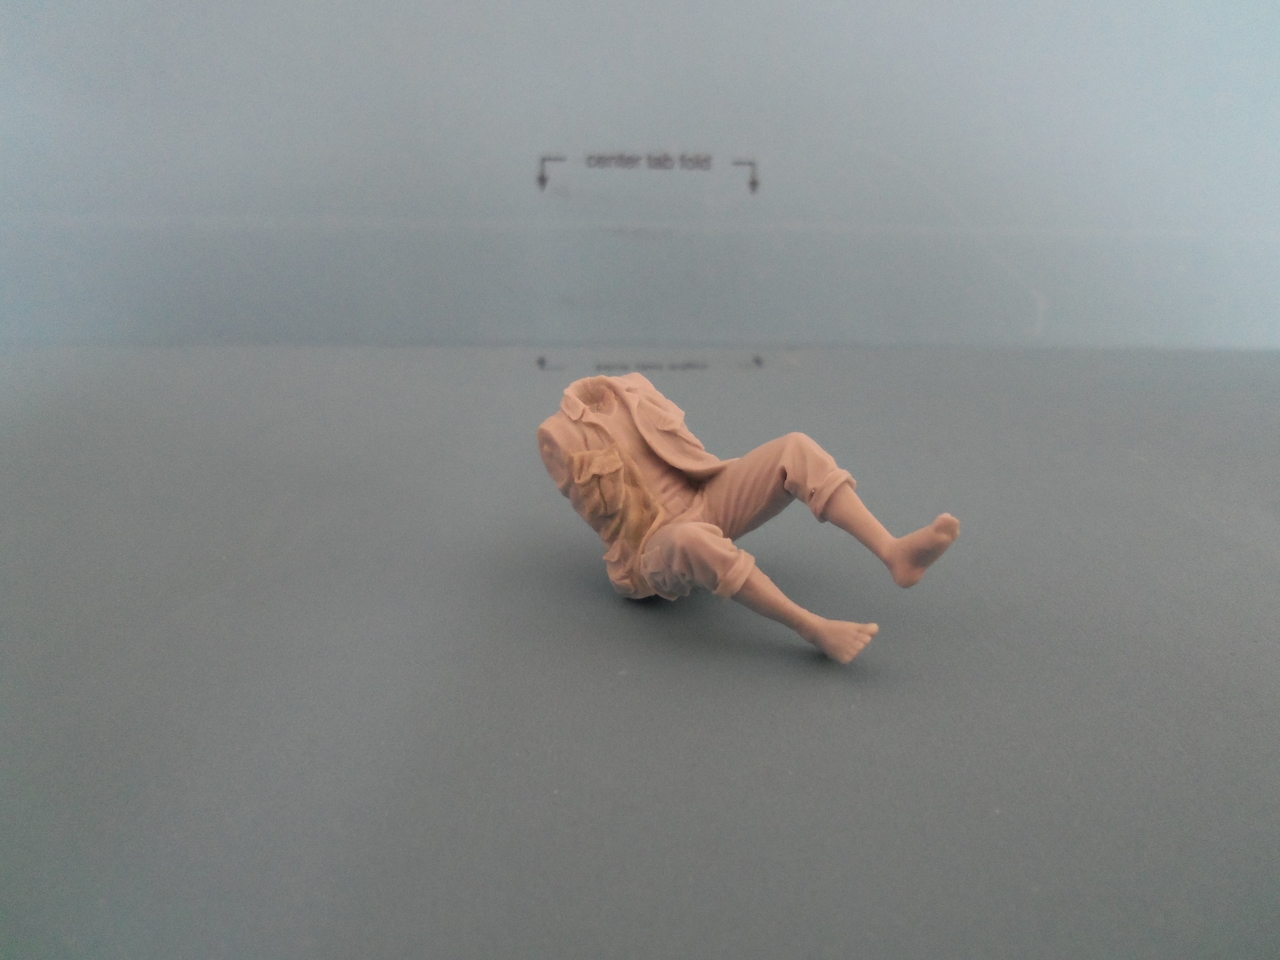
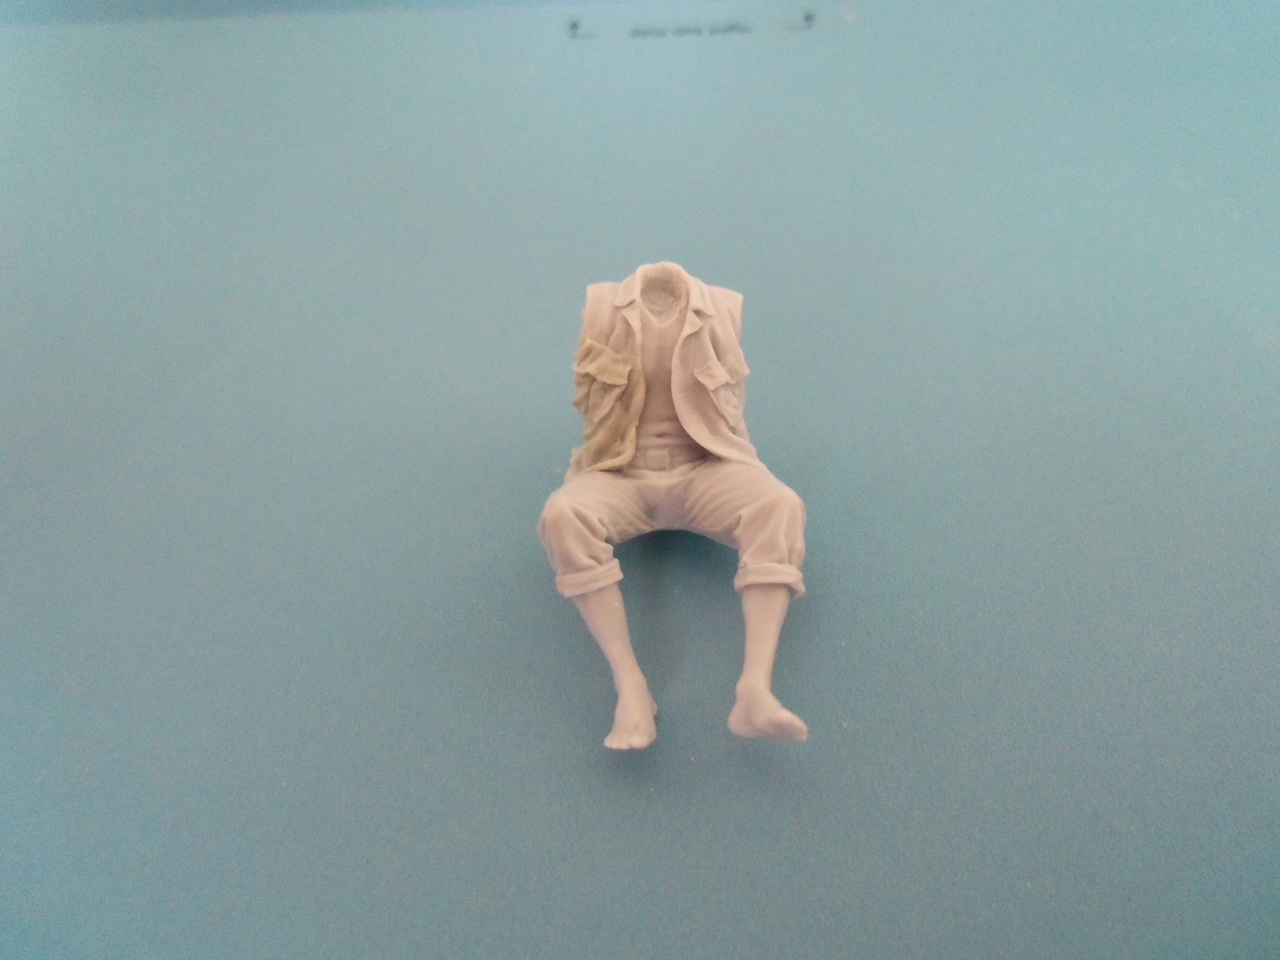
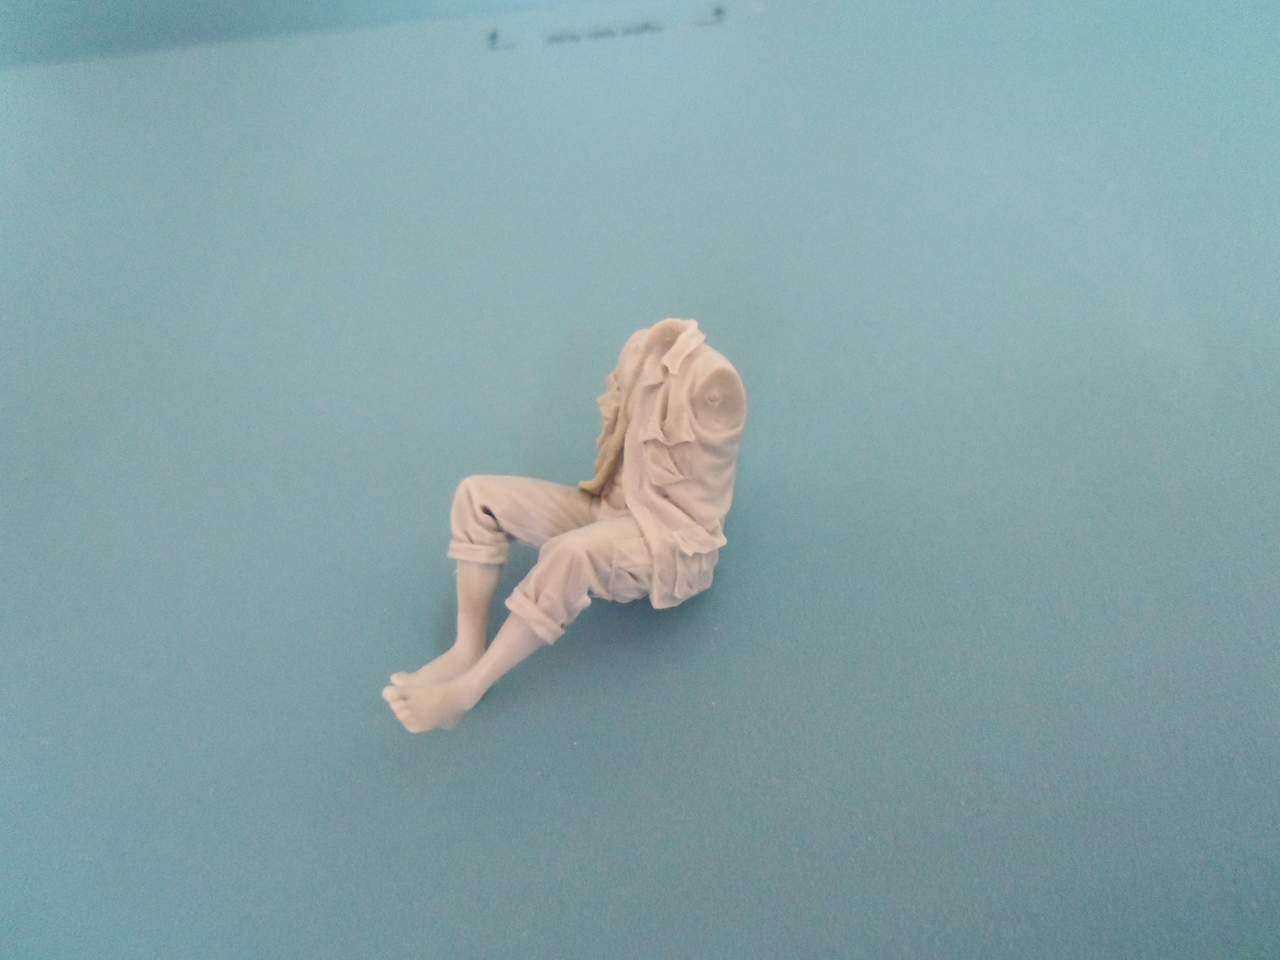
I will be placing some spare man-pack radios and accessory bags in the space under the radio shelf. There will be some web gear in various spots in the interior. I am also planning on placing a figure either reading a magazine or sitting with his head in his hands like he is tired in the troop compartment.
Thanks for looking.
Cheers,
James

Thanks, Guys. I am glad y'all like it so far.
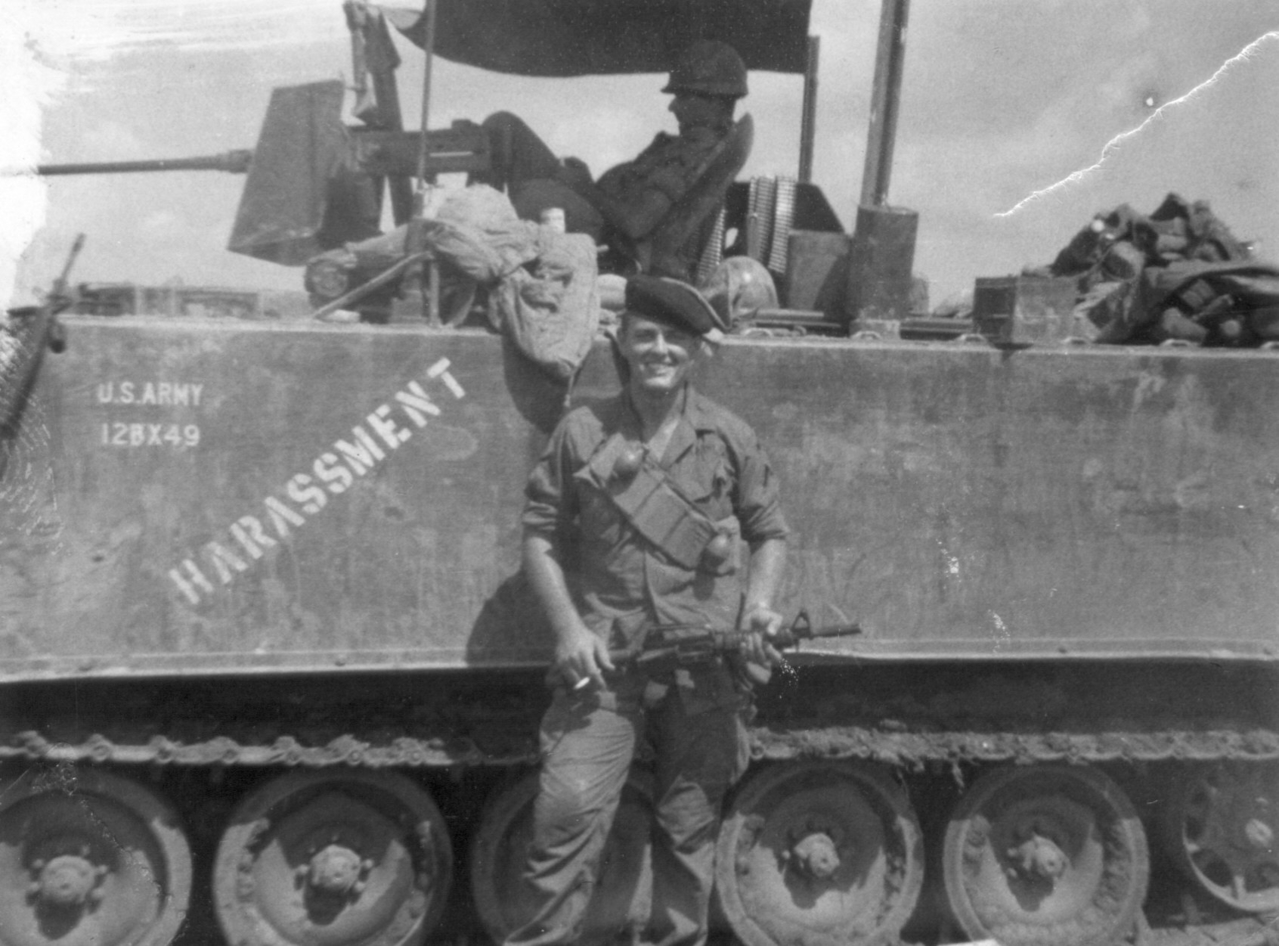
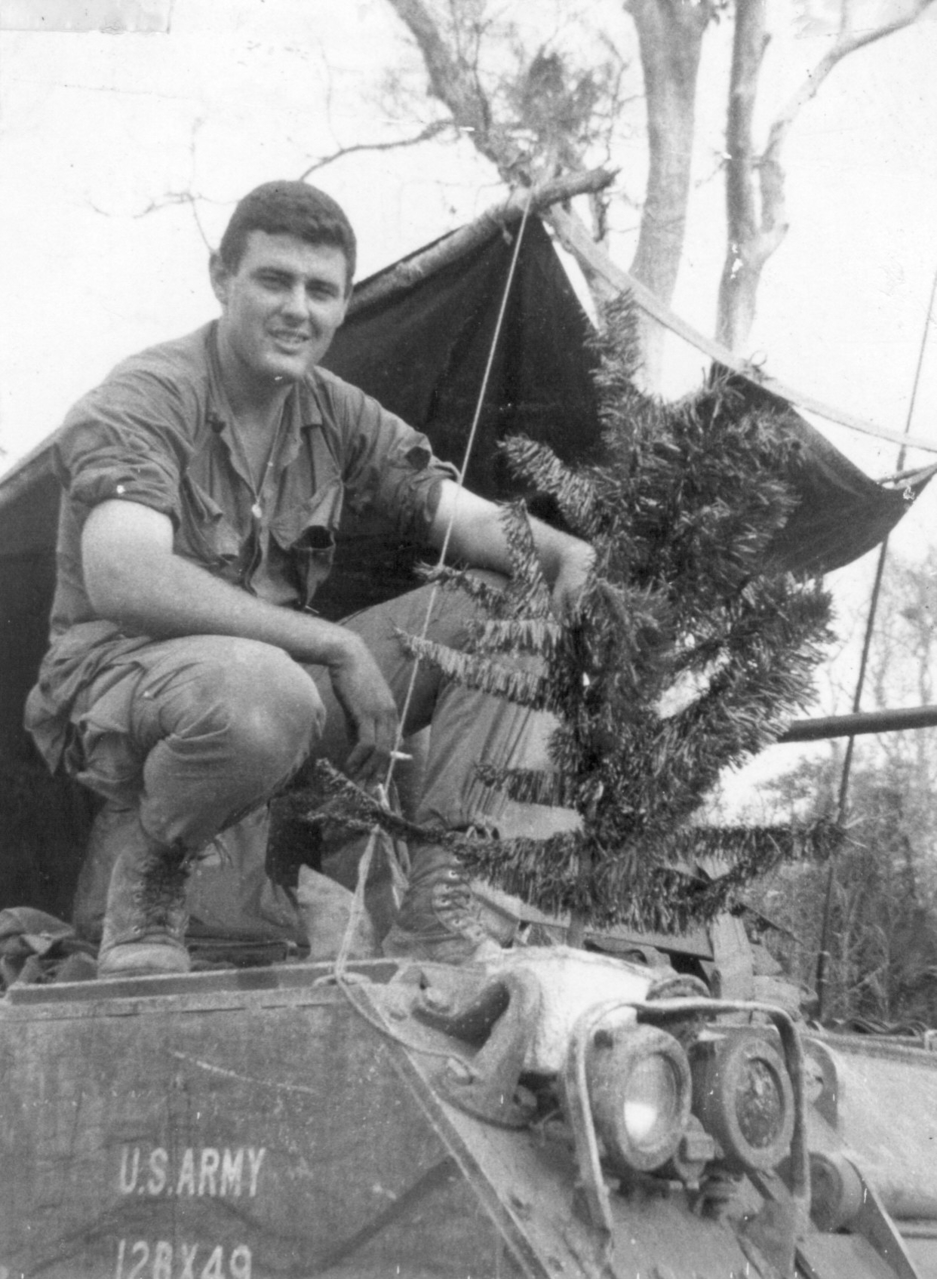
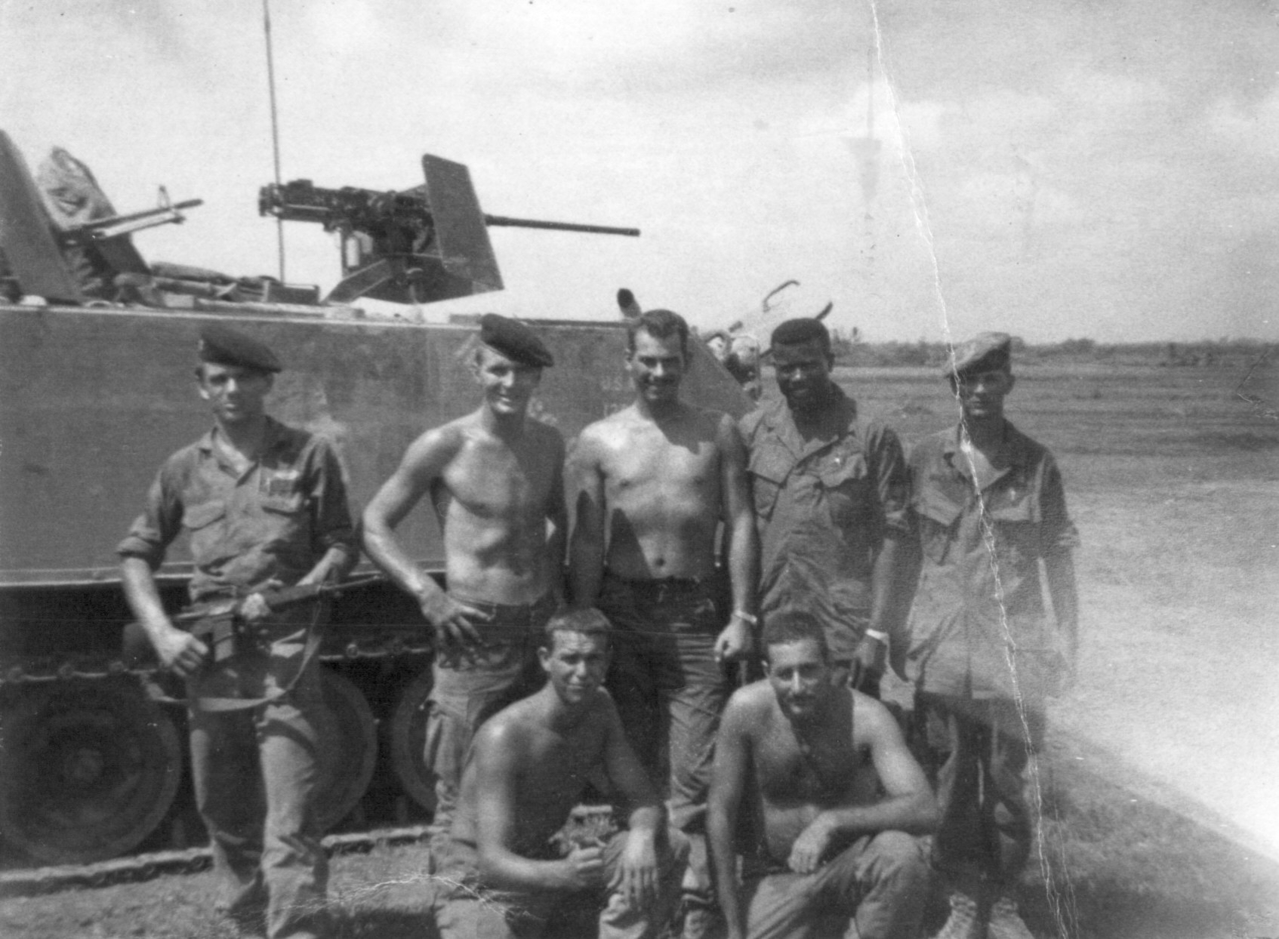
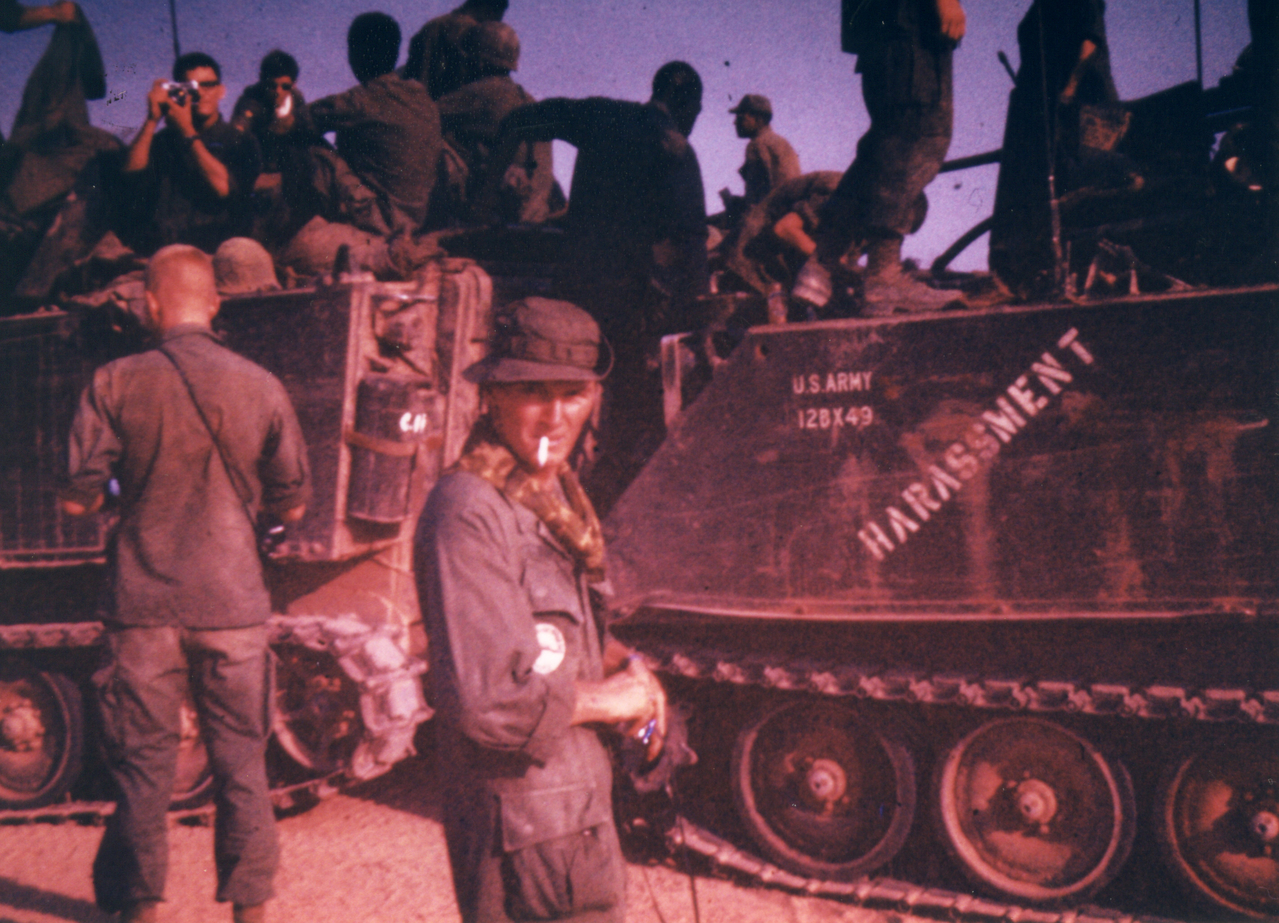
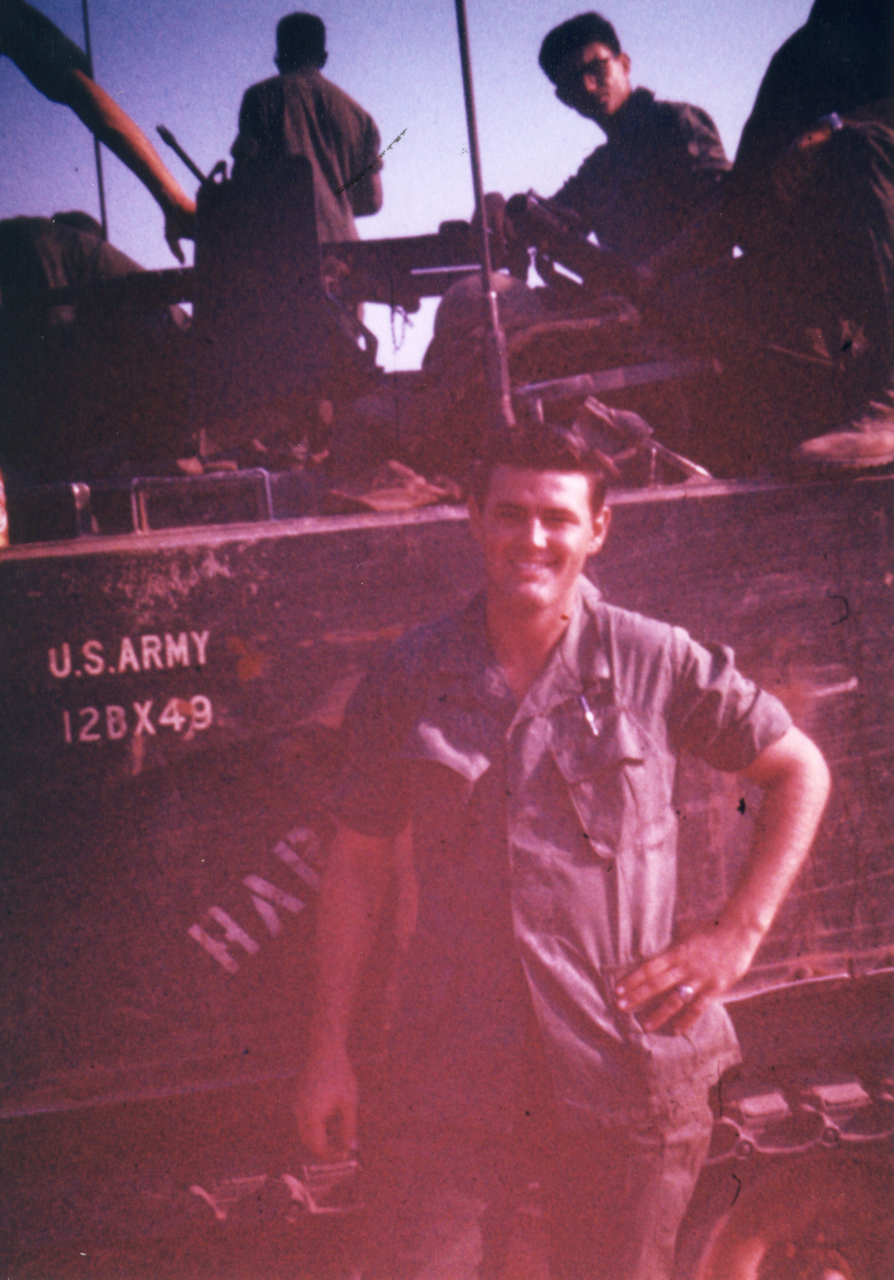
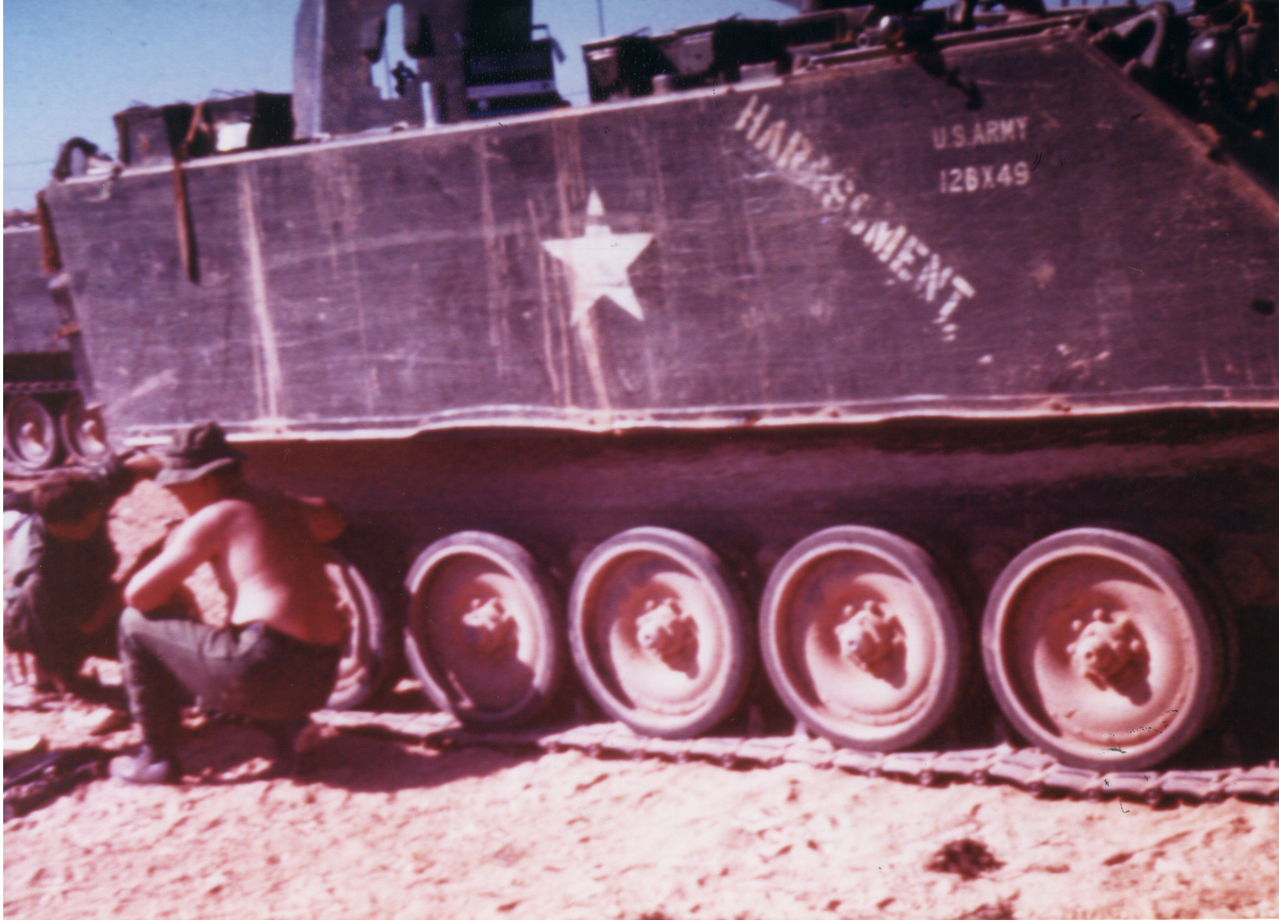
I just found out that my friend Bill Rambow who was in this unit and whose track and crew are featured in my "Breakfast in the Boonies" diorama is in contact with the driver of HARASSMENT. Hopefully I will be able to talk to him prior to finishing out the details so I can make as accurate a model of this track as my ability allow.
Cheers,
James