• Modelers Alliance has updated the forum software on our website. We have migrated all post, content and user accounts but we could not migrate the passwords.
    This requires that you manually reset your password.
    Please click here, http://modelersalliance.org/forums/login to go to logon page and use the "Forgot your Password" option.

Adam Baker: Befehlsjager 38 (Complete!)

Adam Baker: DML 1/35 Befehlsjager 38 Ausf.M

Been plugging away on this build, but havent really made enough project for me to feel it warranted an update. I finally feel I have enough done to make a small update.

I've done a lot of searching on the internet looking for reference info & such, w/o a whole lot of luck, but I have found a few builds of Marder III Ausf M and one or two other Befehlsjager builds.

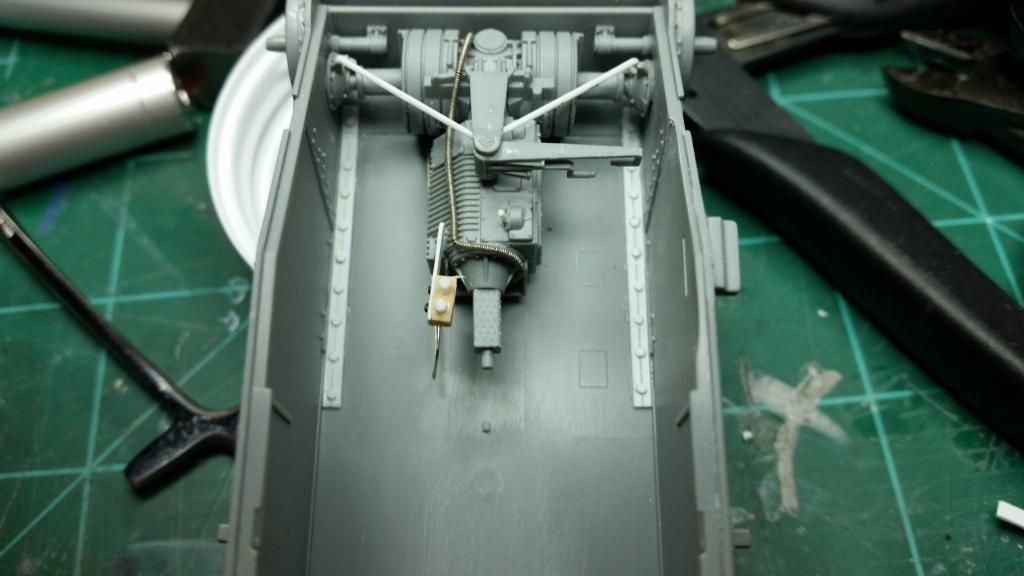
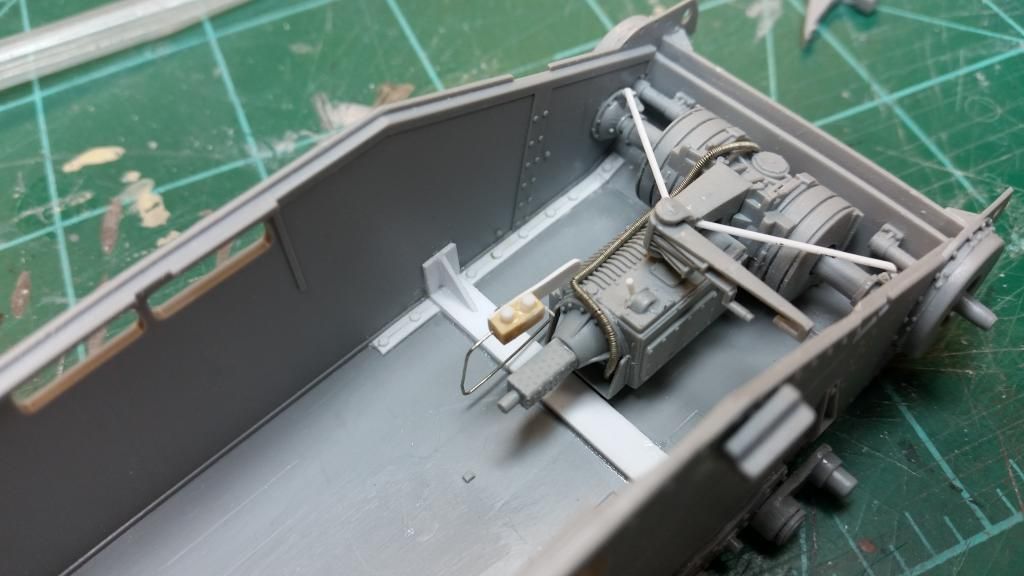
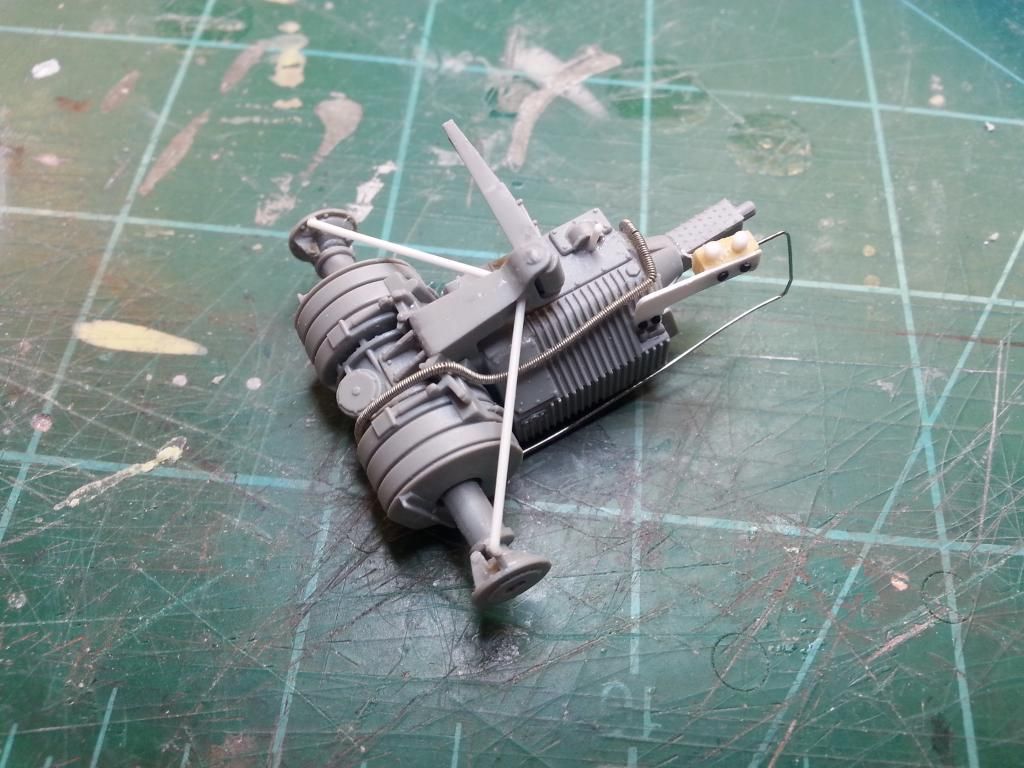
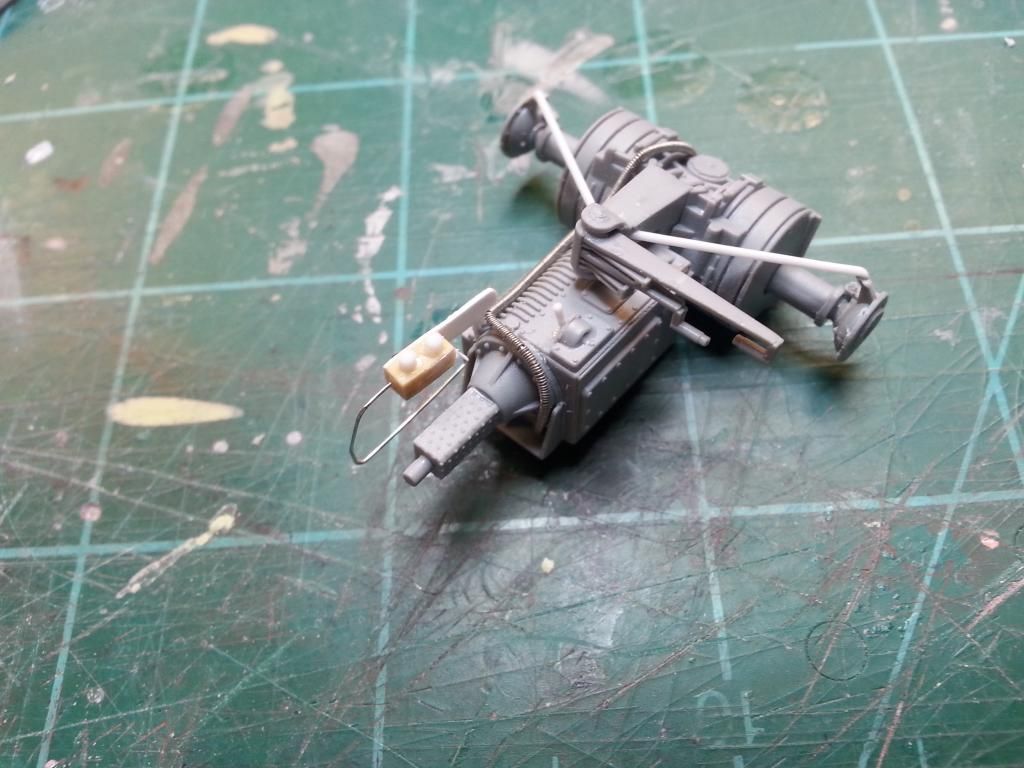
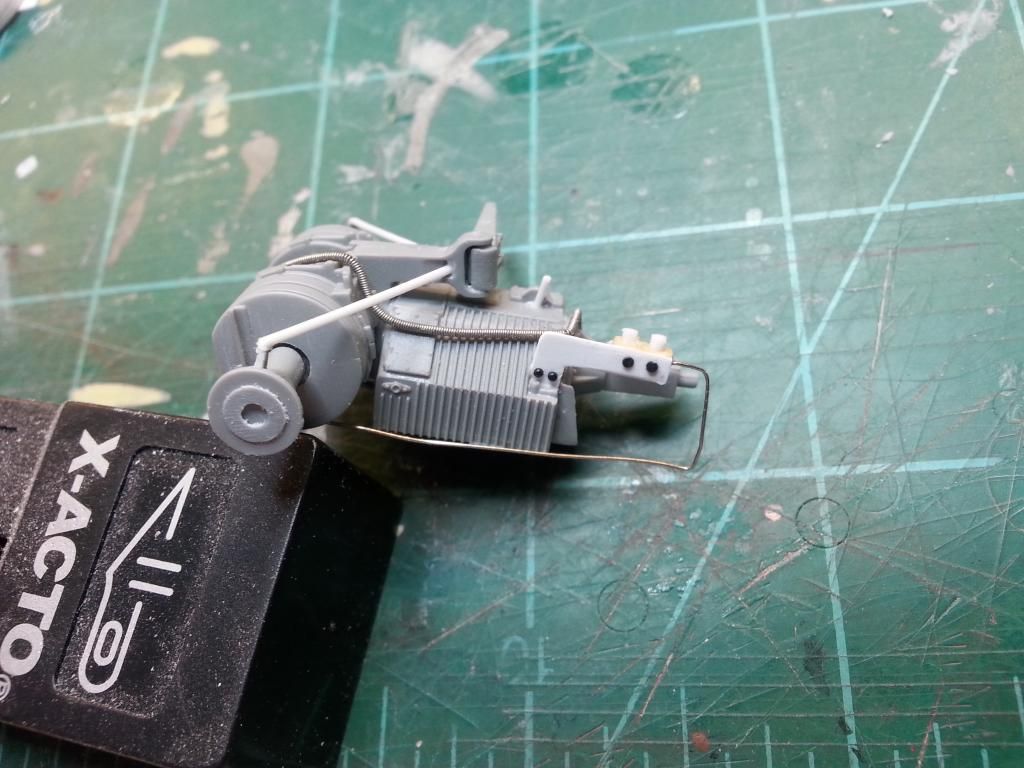
First is the transmission. Found a Marder III build that had detail I liked that seemed to match what few images of the real thing I've been able to find. Appears to have some kind of master cylinder or something on the left side of the transmission, w/ a fluid line that runs down along the floor and under the transmission. And then there's some kind of line that runs across the top of the tailhousing and then along the top left side and over the top. And then there are 2 rods that I assume are part of the steering system. The master cylinder is a block of resin that I cut & sanded to shape, then drilled holes and put a couple pieces of .040" rod in the top, and then used .015" styrene sheet to hold it in place. To add some detail, I used CMK button head rivets (those were a real blast to work with, let me tell you).

Befehlsjager019.jpg


Befehlsjager020.jpg


Befehlsjager021.jpg


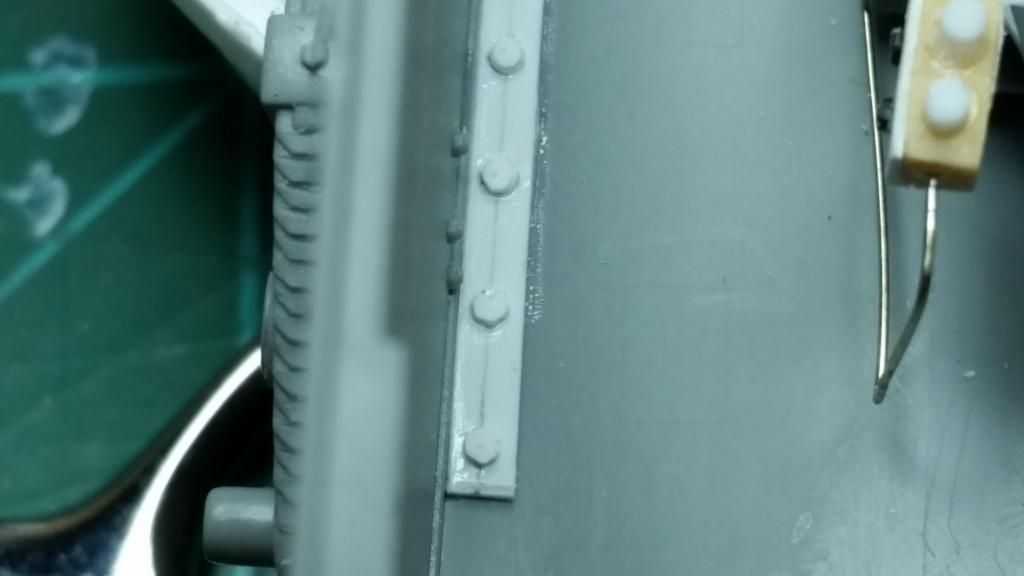
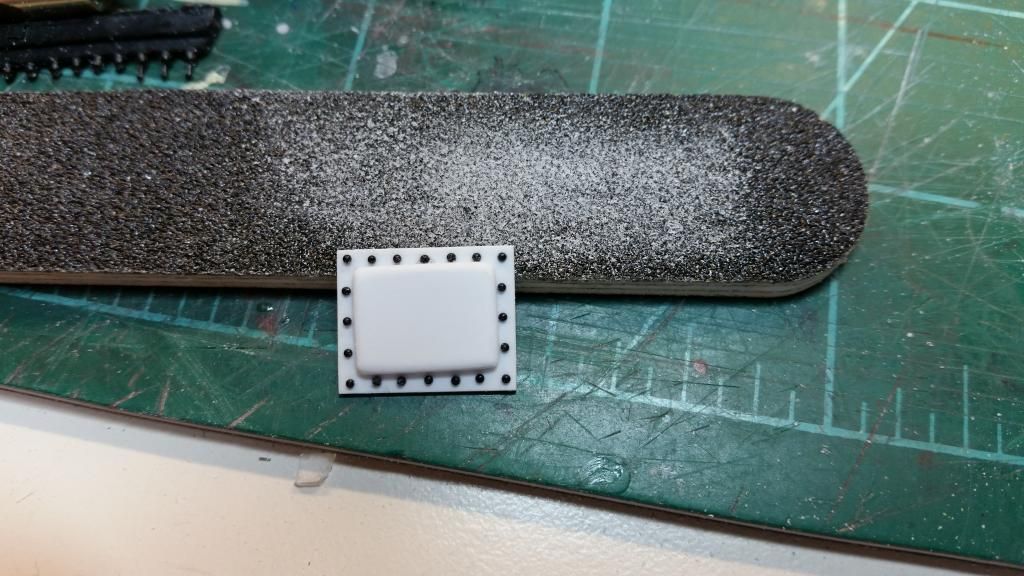
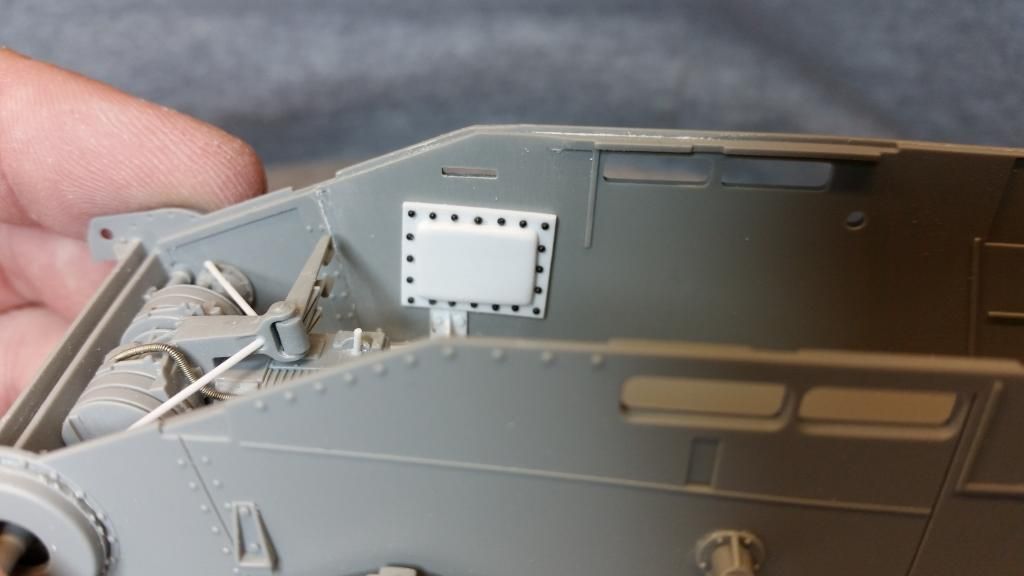
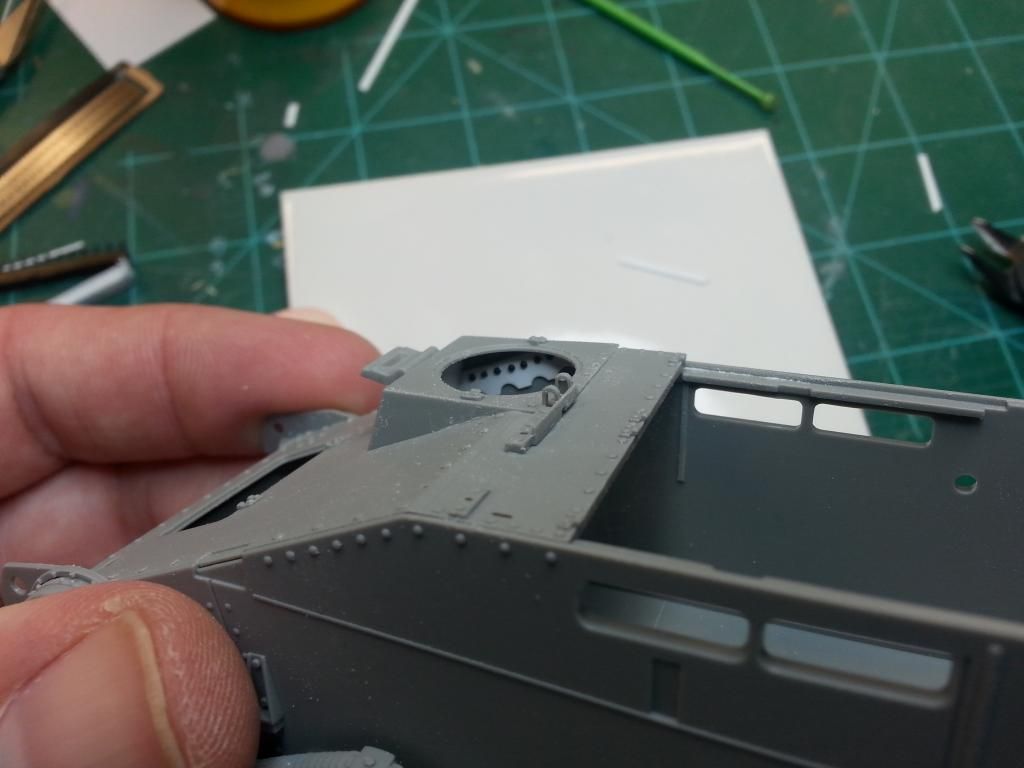
The next bit of detailing is on the drivers hatch. On the real thing, there's a large metal rib holding the body and the hatch assembly in place, that I decided to try to reproduce. Its not especially accurate compared to the real thing, but it gets the point across and I'm pretty happy w/ the results. What I'm really happy about, is that it will hide the seam between the hatch panel and the body when assembled (y)

Befehlsjager016.jpg


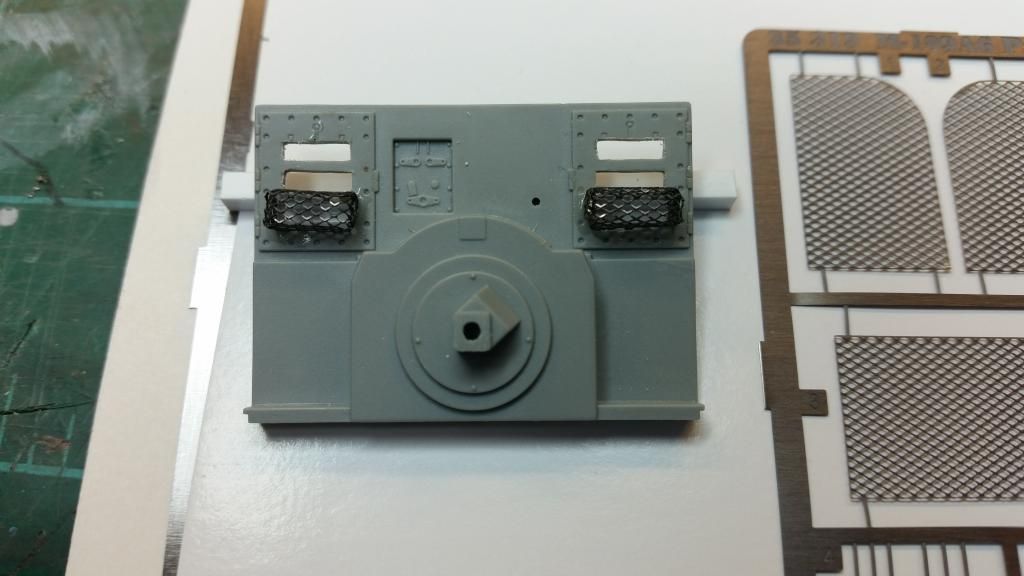
And from the inside. This piece has 7 of the CMK rivets, and I have to say it sucked working them in place, haha. I probably launched just as many off into oblivion before finally getting all the holes filled.

Befehlsjager018.jpg


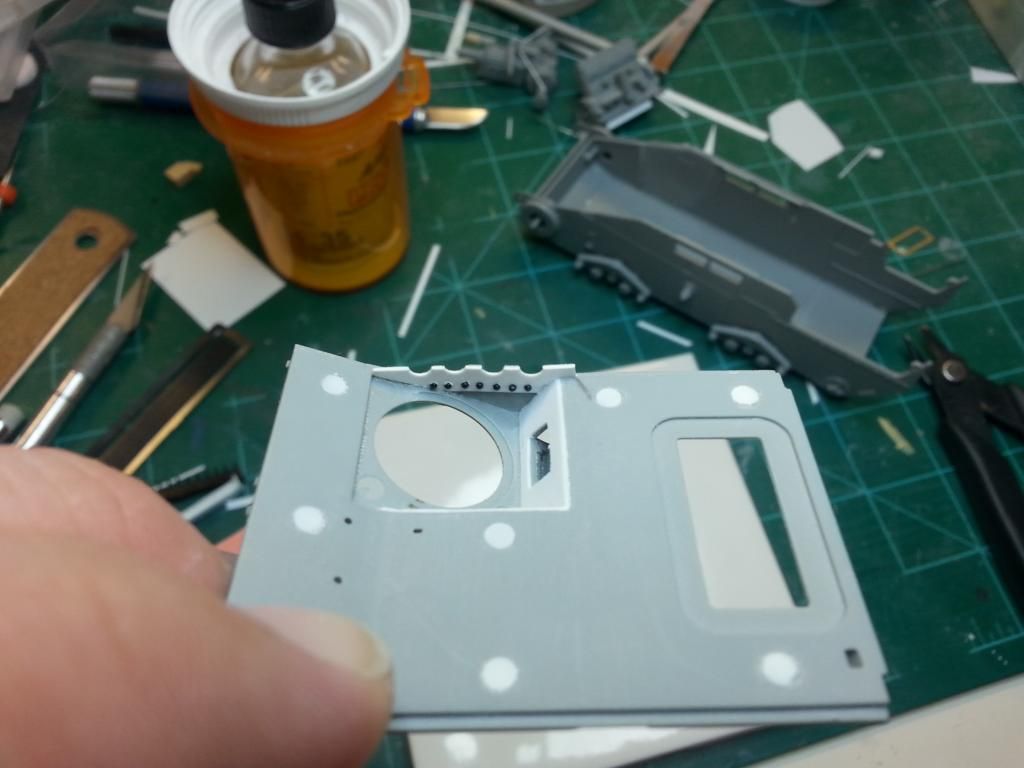
Next detail to add on the hatch is a small instrument panel that's not included with the kit. Without that, it leaves that area very open, so I ordered a set of Archer Fine Transfer's so that I could have gauges. Hoping to get that made and put in tonight.
 
Adam Baker: DML 1/35 Befehlsjager 38 Ausf.M

Been really quite on this build for awhile. Got several things I've wanted to do, but been really intimidated by it, and the couple attempt's at a couple of those things have been complete failures, so its taken most of what mojo I had to model and killed it.

But tonight I pulled it out and decided to add some detail using the new RP Toolz punches I got last week. On the real thing, there's a strip down each side of the driver compartment w/ large bolt heads on them, that I decided to create.

I used .015" thick styrene sheet for the strips and then the same sheet to punch out 1mm bolt heads.

Overall I'm very happy w/ how the strips came out. Plan on using the hex punch to create bolt heads in several more places that need them. I've also decided to redo the strip I added to the drivers hatch, that i showed in the last update, using punched hex heads instead of the rivets I used.

Befehlsjager022.jpg


Befehlsjager023.jpg
 
Adam Baker: DML 1/35 Befehlsjager 38 Ausf.M

Pretty cool Adam, makes the cost of that punch worth it now doesn't it?
 
Adam Baker: DML 1/35 Befehlsjager 38 Ausf.M

Very nice detailing, Adam- cheers! I've got to get me one of those hex punch sets!
 
Adam Baker: DML 1/35 Befehlsjager 38 Ausf.M

It's really nice Chuk. As far as I know there are only 2 distributors for RP Toolz in the US. Michigan Toy Soldier and Last Cavalry both carry them. I got mine direct from RP Toolz b/c it was cheaper to get all 3 punch sets w/ free shipping from Hungary, than it was for me to get just 2 sets w/ shipping from either place here in the US.
 
Adam Baker: DML 1/35 Befehlsjager 38 Ausf.M

Very nice work Adam! One of my fav vehicles.


Befenjager Sounds like an German drink somebody sneezed into :drinks

I really, really hope you've never tried Jagermeister...

Tom
 
Adam Baker: DML 1/35 Befehlsjager 38 Ausf.M

Thanks guys, I'm really happy w/ the results last night, and tonight I tried something else new that I'd never done before.

While researching other builds of this model, and coming across a handful of reference images of original vehicles, I saw that in the drivers compartment, over the vents between that compartment, and the engine compartment behind it, that there is a metal mesh box that covers the lowest opening. The images only showed a cover over the lowest opening on the driver side, but I'm thinking that it would make make sense for this to be on both sides. So I decided to give it a shot and make covers since I didn't have those covers.

First attempted using mesh from a tea strainer, but it was just too stiff. Had a really hard time working with it, and it just never formed the way I wanted/needed it to. So I decided to go through the extra photoetch sets I have that I picked up when my LHS was closing. I didn't have the kits for these PE sets, but I figured for the price, I was going to get them. In my set, I found a set for the Italeri M109-A6 Paladin, and in it were mesh engine covers, that I thought would work, so I gave it a shot, and below is what I ended up with. Not perfect, but I'm happy w/ the results, and they wont be real easy to see when its closed up, so I'm not worried about the shape not being totally right.

On the left is the bulkhead w/ the screens on. On the right is what the screen looked like originally, I used the lower rectangular screen to make the two covers.

Befehlsjager024.jpg


Befehlsjager025.jpg


Tomorrow night I'm going to give a shot at trying to make a structural member that runs across the floor behind the transmission.
 
Adam Baker: DML 1/35 Befehlsjager 38 Ausf.M

Was able to sit at my bench for about an hour last night, and was able to make a bit more progress on this last night. Looking at references of the real thing, and at a couple people's builds, I saw that there was a structural cross member that runs across the floor of the drivers compartment that includes a couple of triangular gussets, so I gave it a shot on adding those. I think it came out pretty good.

Befehlsjager026.jpg


Befehlsjager027.jpg


Befehlsjager028.jpg


I thought I'd taken pictures of the part when I was completely done, but I didn't. The only difference was going back w/ some punched hex pieces to have bolt heads on the crossmember. Hopefully tonight I'll get a chance to sit down and add some more detailing, but it's my wifes b-day today, so I don't think I'll get much bench time tonight.
 
Adam Baker: DML 1/35 Befehlsjager 38 Ausf.M

Nice work going on, should look great mate when all done (y)
 
Adam Baker: DML 1/35 Befehlsjager 38 Ausf.M

Just tell her "Not tonight dear, I have a headache" :eek:hmy:

You're going all out huh buddy

Tony lee :D
 
Adam Baker: DML 1/35 Befehlsjager 38 Ausf.M

Thanks guys.

Tony, yea, I guess its kinda turning out that way. I made the mistake of going online when I started and looking at other builds, and it just kinda went from there, haha. Plus now I have a ready made excuse to use my new toys (punch sets) haha.
 
Adam Baker: DML 1/35 Befehlsjager 38 Ausf.M

Another short update, this time I was able to finally get the drivers knee pad that mounts on the wall of the drivers compartment. Spent about 2 hrs working on it last night, making 2 or 3 attempts w/o ever succeeding in getting something I liked the look up, so I got on it again tonight, and finally got what I liked.

A base of .030" styrene, w/ CMK resin rivet heads, and then the pad itself is a piece of .030 & .020 laminated together. Overall I'm very happy w/ the look. Its not perfect, but it wont be overly visible once its closed up, so it should look just fine in place.

Befehlsjager029.jpg


And here's about where it will be places.

Befehlsjager030.jpg


Following the various references I've got, I still need to add the gas & brake pedals, and then various electrical boxes & such in place, and then it'll be time to move on to the engine compartment. Right now I'm hoping I might be able to swing all of next week off, but it doesnt look like it'll happen, but I am hopeful to get at least a couple extra days besides Wednesday & Thursday, that I'd be able to use working on this.
 
Back
Top