
-
Modelers Alliance has updated the forum software on our website. We have migrated all post, content and user accounts but we could not migrate the passwords.
This requires that you manually reset your password.
Please click here, http://modelersalliance.org/forums/login to go to logon page and use the "Forgot your Password" option.
You are using an out of date browser. It may not display this or other websites correctly.
You should upgrade or use an alternative browser.
You should upgrade or use an alternative browser.
2017 Modeler's New Year's Resolution Thread
- Thread starter Duke Maddog
- Start date

phantom II
Master at Arms
Gee, mine is so easy> Same as last year and the year before " Do not make any resolutions "
Instead, live life and build models . . .
Instead, live life and build models . . .
Duke Maddog
Well-known member
Gary, those look very good. It appears you aren't too far from being done. Feel free to work on them and post the progress here; I'd love to see your finished models.
James, some say resolutions were made to be broken, but I try to actually achieve my goals I set. I've already started on three of mine; I have about five or six more to complete.
Phantom, that's a good practice. This is simply here to help motivate anyone with Shelf Queens to get them finished. It doesn't even need to be a resolution; just a desire to 'Git-r-Done'.
phantom II
Master at Arms
Gary, those look very good. It appears you aren't too far from being done. Feel free to work on them and post the progress here; I'd love to see your finished models.
James, some say resolutions were made to be broken, but I try to actually achieve my goals I set. I've already started on three of mine; I have about five or six more to complete.
Phantom, that's a good practice. This is simply here to help motivate anyone with Shelf Queens to get them finished. It doesn't even need to be a resolution; just a desire to 'Git-r-Done'.
My bad ...You titled it " 2017 Modeler's New Year's Resolution Thread "
I try to live by " say what you mean and mean what you say ' . A better descriptive title would have been more useful, as " build your self queens in 2017 "
Just a thought .
Less to remember that way.Cheers,
Duke Maddog
Well-known member
Gary, those look very good. It appears you aren't too far from being done. Feel free to work on them and post the progress here; I'd love to see your finished models.
James, some say resolutions were made to be broken, but I try to actually achieve my goals I set. I've already started on three of mine; I have about five or six more to complete.
Phantom, that's a good practice. This is simply here to help motivate anyone with Shelf Queens to get them finished. It doesn't even need to be a resolution; just a desire to 'Git-r-Done'.
My bad ...You titled it " 2017 Modeler's New Year's Resolution Thread "
I try to live by " say what you mean and mean what you say ' . A better descriptive title would have been more useful, as " build your self queens in 2017 "
Just a thought .
Cheers,
My apologies for responding so late and for the improper wording. I titled it that way because some others had mentioned doing a "Modeler's New Year's Resolution" to finish some shelf queens this year. In that spirit I titled this Thread that way. I also like to follow the "say what you mean and mean what you say" policy too. If everyone else feels like I should, I shall change the title.
Let me know people; I like to try and keep everyone happy as much as is possible, especially if it gives everyone the motivation and encouragement to finish your shelf queens.
Duke Maddog
Well-known member
That's also good but I think that Phantom has a concern about the word "resolution". Anyway, this was simply set up to help encourage people to finish a shelf queen. Having a thread dedicated to it where people can all post their work in a community-like setting sometimes helps others get started and stay motivated. It wasn't my wish to turn people away due to poor choice of words.
Model on my friends. I have some more progress made, so stay tuned.
Model on my friends. I have some more progress made, so stay tuned.
sharkman
Master at Arms
Gary, those look very good. It appears you aren't too far from being done. Feel free to work on them and post the progress here; I'd love to see your finished models.
James, some say resolutions were made to be broken, but I try to actually achieve my goals I set. I've already started on three of mine; I have about five or six more to complete.
Phantom, that's a good practice. This is simply here to help motivate anyone with Shelf Queens to get them finished. It doesn't even need to be a resolution; just a desire to 'Git-r-Done'.
My bad ...You titled it " 2017 Modeler's New Year's Resolution Thread "
I try to live by " say what you mean and mean what you say ' . A better descriptive title would have been more useful, as " build your self queens in 2017 "
Just a thought .
Cheers,
My apologies for responding so late and for the improper wording. I titled it that way because some others had mentioned doing a "Modeler's New Year's Resolution" to finish some shelf queens this year. In that spirit I titled this Thread that way. I also like to follow the "say what you mean and mean what you say" policy too. If everyone else feels like I should, I shall change the title.
Let me know people; I like to try and keep everyone happy as much as is possible, especially if it gives everyone the motivation and encouragement to finish your shelf queens.
Just got back from 2 weeks of field work, been away for a bit!
I'm pretty sure I was the instigator of this, so I will accept all blame! :salute I had wanted to tackle some of the half finished kits I have laying around this year because they are starting to stack up! That was my resolution for this coming year and Mark joined in.
I think it is great to have a central place to try and finish some of those shelf queens and Mark is right, a community based thread should help. Good job Mark in setting this up! I will try to add my own to it in due time!

Duke Maddog
Well-known member
Thanks Warren. I look forward to seeing what you have to contribute. Meanwhile, here's what I managed to get done on some of my Shelf Queens. These will also be posted in the "What's on the Workbench?" Thread for those who don't check in here.
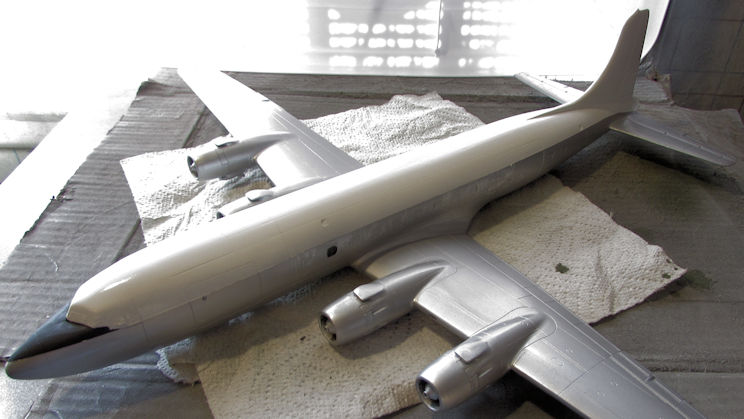
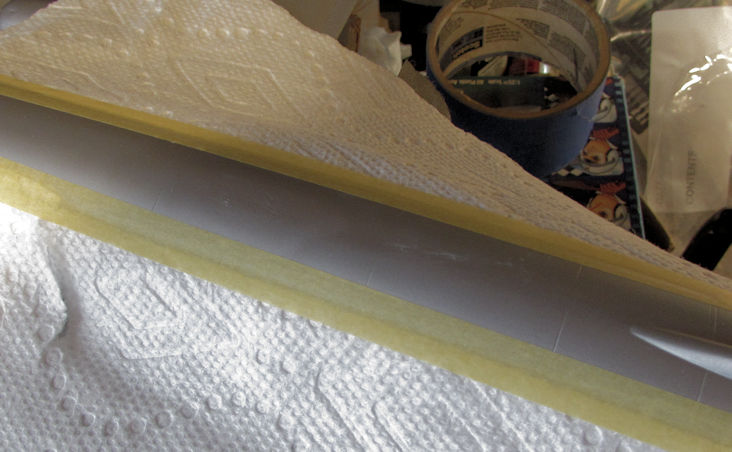
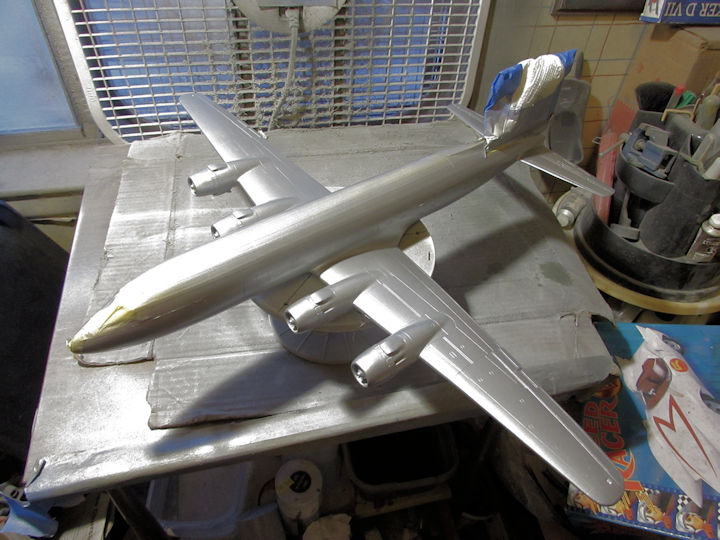
When I got back to these, I took some time to remove the masking from the C-118 to see how things look. I was very pleased with the white cover, but a mite disappointed at the slight setback of lifted paint. Some of the Tamiya peeled off with the tape, so I'll have to re-mask this again to get the silver/aluminum coat re-shot.
It's a bit hard to see, but a close look will will show where things peeled:
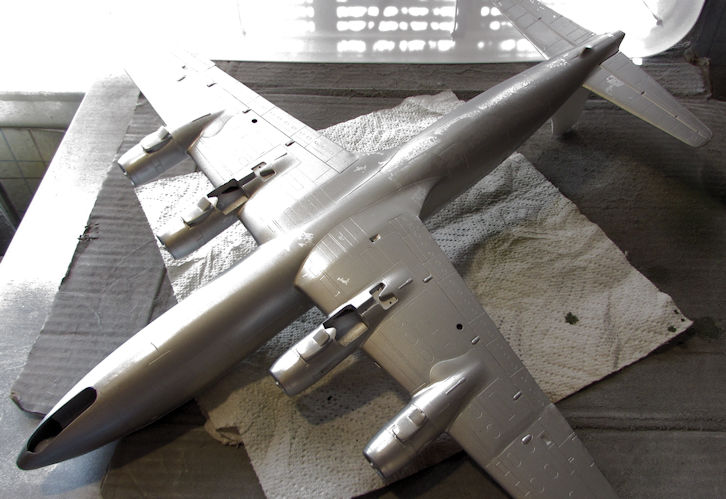
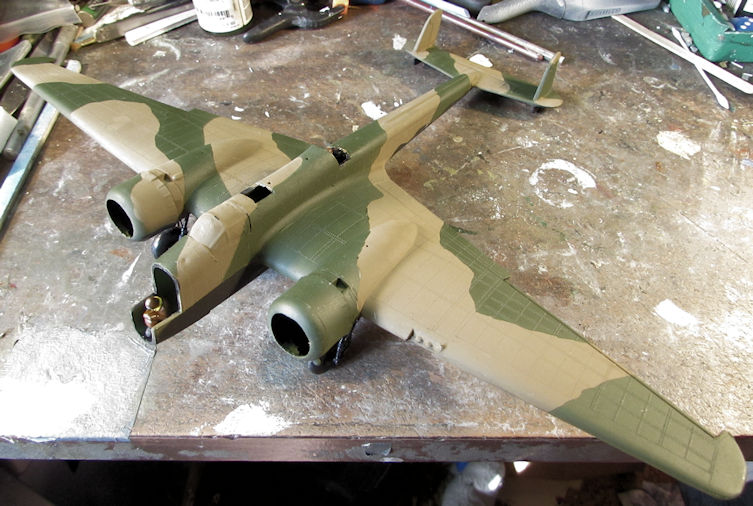
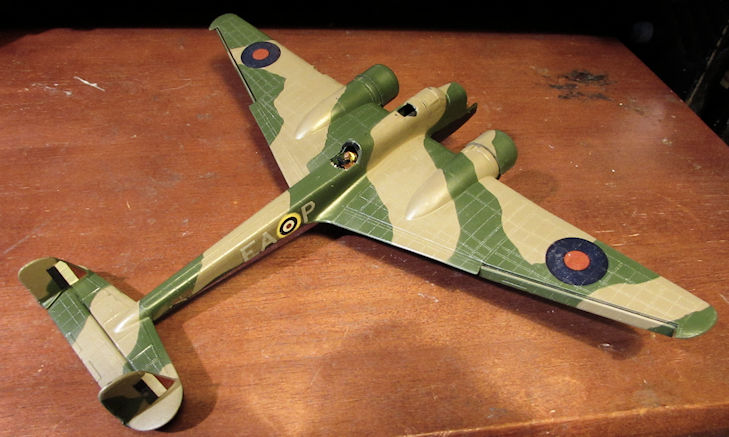
While I was airbrushing, I finally shot a coat of light tan on the Hampden for the first color:
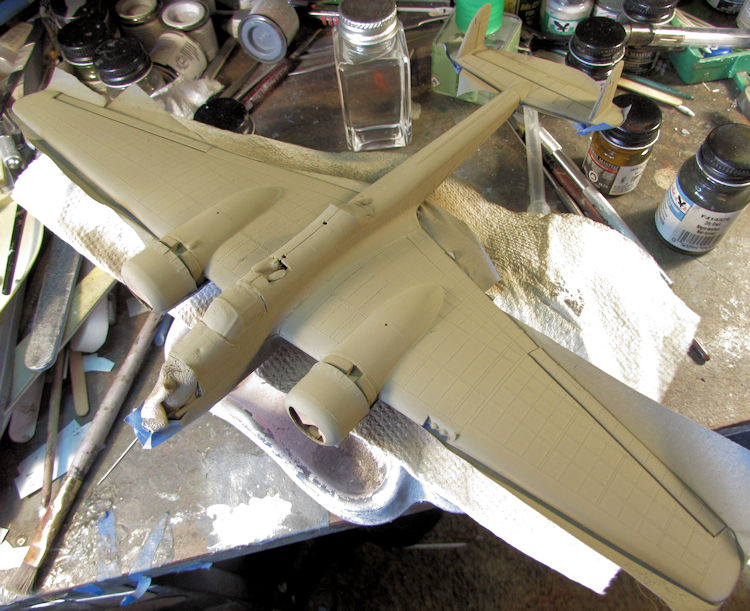
I saw the seam above and got it fixed. Later on I masked off the tan with Silly Putty to prepare for the second color:

Finally, I got the dark green shot on this:
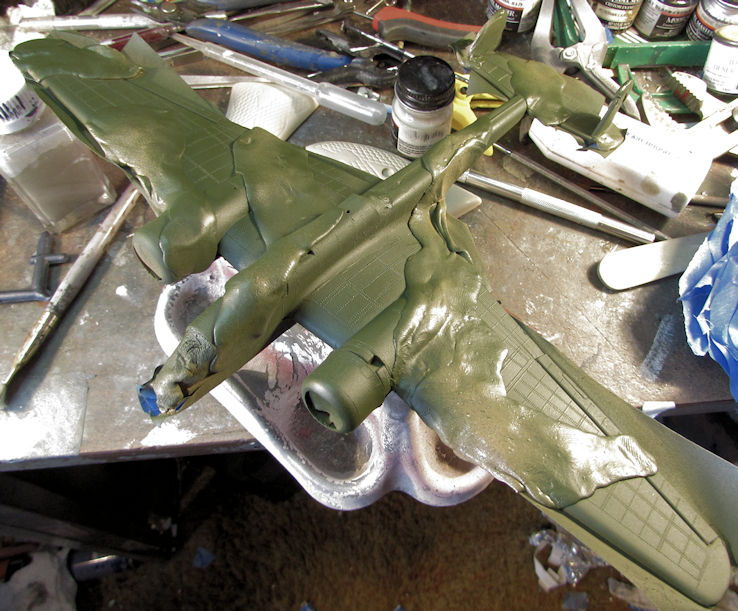
Afterward I peeled off all the Silly Putty to see how well things look. I'm fairly pleased at how this looks now:
Now to clearcoat this and apply the decals. I did coat them with a liquid decal film before hand to prepare them for the application.
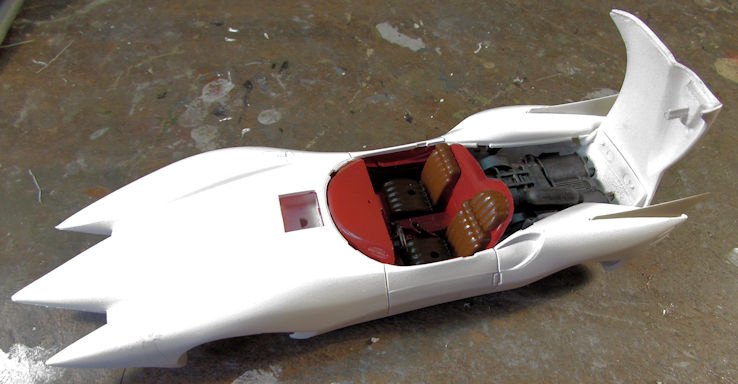
Finally while everything was drying and setting up, I pulled out the Mach 5. I painted the engine with Oily Black first:
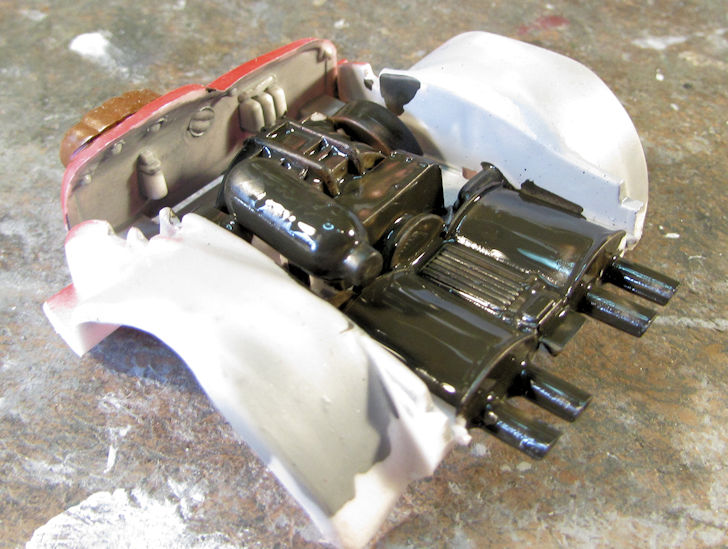
Later on when that dried, I dry-brushed it with Steel to bring out a metallic look to this:
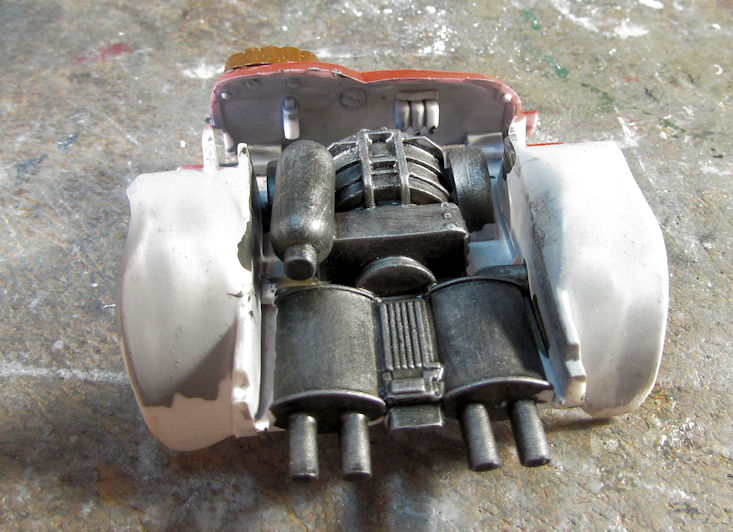
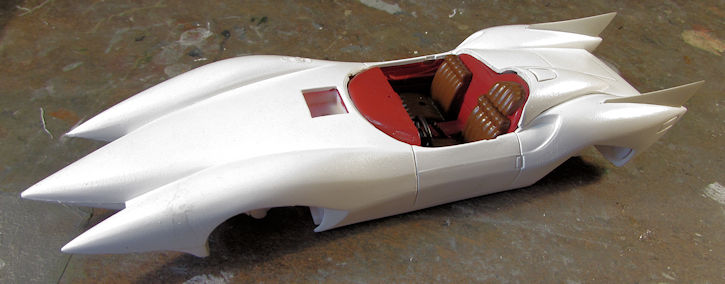
Now I assembled the whole interior into the body and closed it up inside with the chassis. That way, I can fix the seams on the front of this model and make it smooth and white:
The engine looks pretty good in there now:
That's all I have for now on these. Not sure when I can get back to these, but at least there's some progress done so far. Thanks all for looking in, comments are welcome.
When I got back to these, I took some time to remove the masking from the C-118 to see how things look. I was very pleased with the white cover, but a mite disappointed at the slight setback of lifted paint. Some of the Tamiya peeled off with the tape, so I'll have to re-mask this again to get the silver/aluminum coat re-shot.
It's a bit hard to see, but a close look will will show where things peeled:
While I was airbrushing, I finally shot a coat of light tan on the Hampden for the first color:
I saw the seam above and got it fixed. Later on I masked off the tan with Silly Putty to prepare for the second color:
Finally, I got the dark green shot on this:
Afterward I peeled off all the Silly Putty to see how well things look. I'm fairly pleased at how this looks now:
Now to clearcoat this and apply the decals. I did coat them with a liquid decal film before hand to prepare them for the application.
Finally while everything was drying and setting up, I pulled out the Mach 5. I painted the engine with Oily Black first:
Later on when that dried, I dry-brushed it with Steel to bring out a metallic look to this:
Now I assembled the whole interior into the body and closed it up inside with the chassis. That way, I can fix the seams on the front of this model and make it smooth and white:
The engine looks pretty good in there now:
That's all I have for now on these. Not sure when I can get back to these, but at least there's some progress done so far. Thanks all for looking in, comments are welcome.
Duke Maddog
Well-known member
Here is my latest progress I was able to do a few days during this week, as well as at Hobby Day.
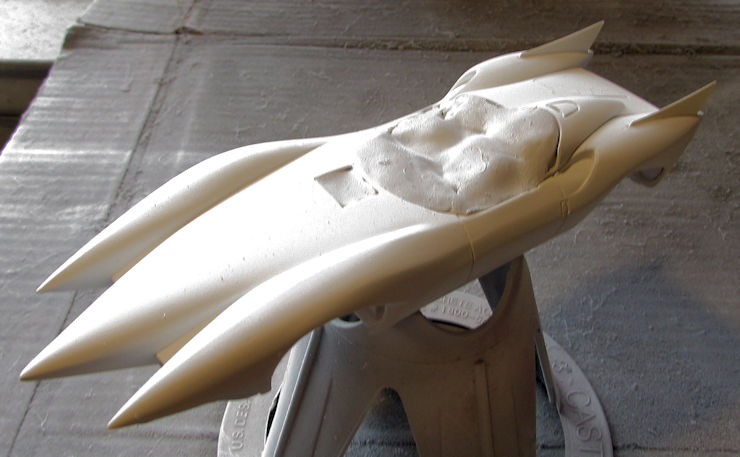
I'll start out with the Speed Racer car: I shot another coat of white over it. You can see how rough that coat is so there's going to be more sanding smooth and re-coating in my future:
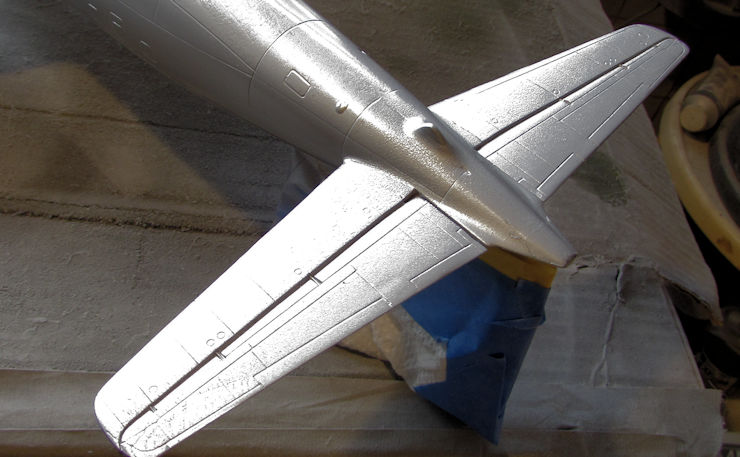
Now on to some of my Shelf Queens. Earlier this week I tried to shoot a new coat of Gloss Aluminum on the C-118. The paint cracked. I'm guessing I was shooting too close. It's kinda hard to see in these pics, but it's there:
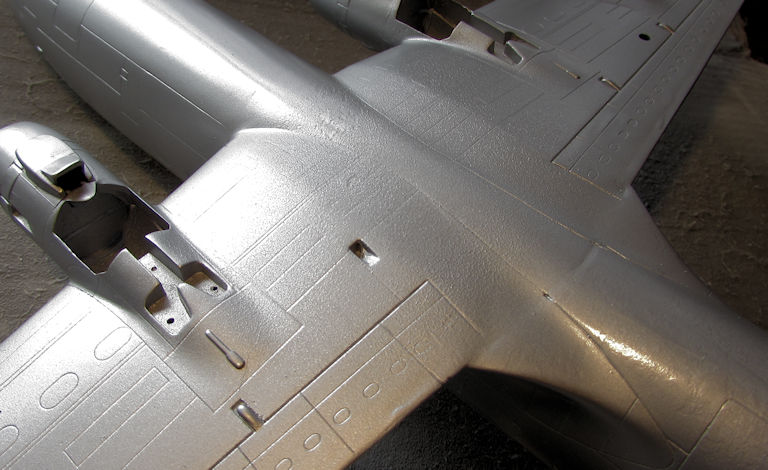
So, I sanded the cracked paint smooth again and then shot another coat. Since I'd gone down to bare plastic in some places, this coat turned out blotchy:
Again, kinda hard to see in that pic; but it was very obvious in person. So, I sanded smooth again, then applied some Mr. Surfacer 1000 from the spray can. When it dried, I buffed it smooth and re-shot the Gloss Aluminum. Much better; I can move on with this now:

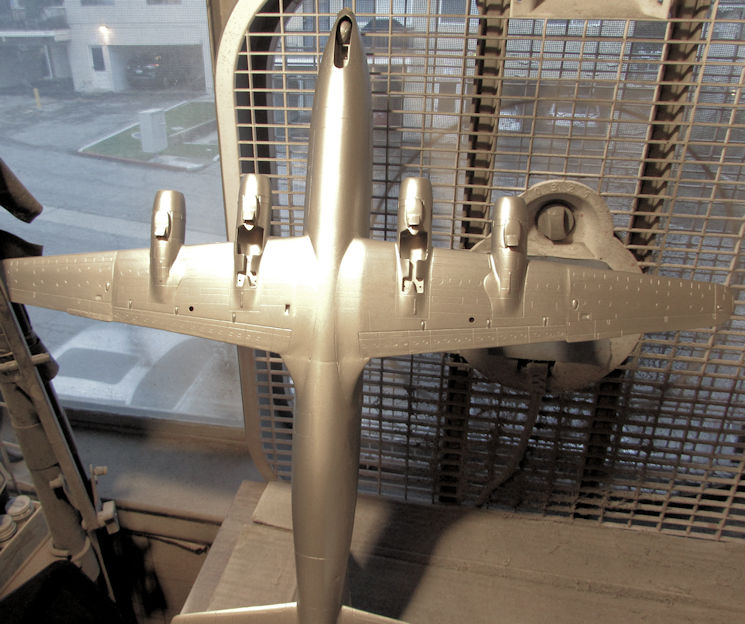
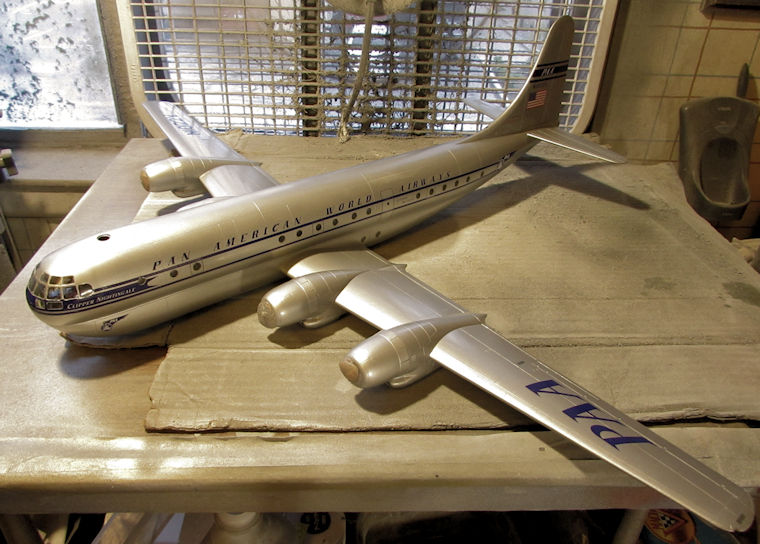
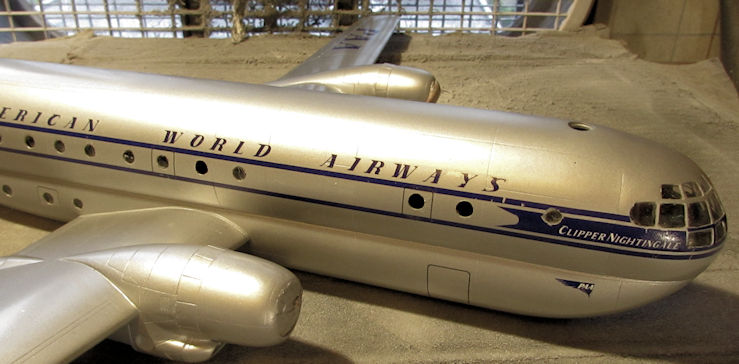
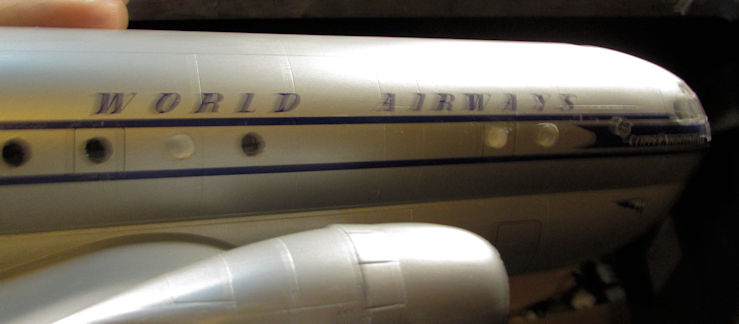
While I was working on my large planes, I pulled out the B-377 and applied the decals to the fuselage. What a challenge that was! They broke a lot, and also didn't fit where they were supposed to so I did the best I could. Finally, I had them more or less acceptable. It even took a few applications of Solvaset to get these to lay down right:
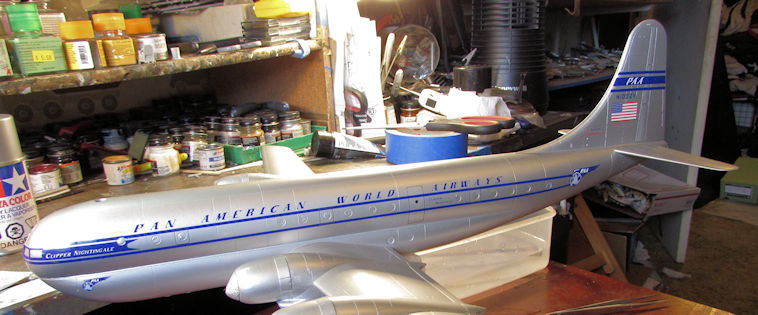
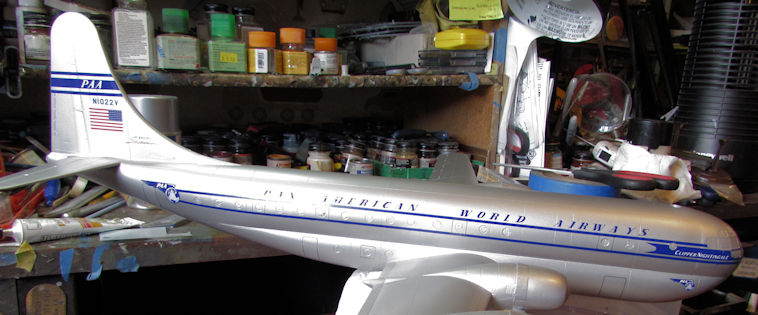
A few days and a clearcoat or two later, I applied the decals to the wings. Not nearly so difficult as the fuselage, but there were a few challenges. One frustration I had was the globe portion of one of the front decals disappeared. I have no idea where it went and I have nothing available to fix it so this will remain that way. Despite that, I'm thrilled with the way this looks now:
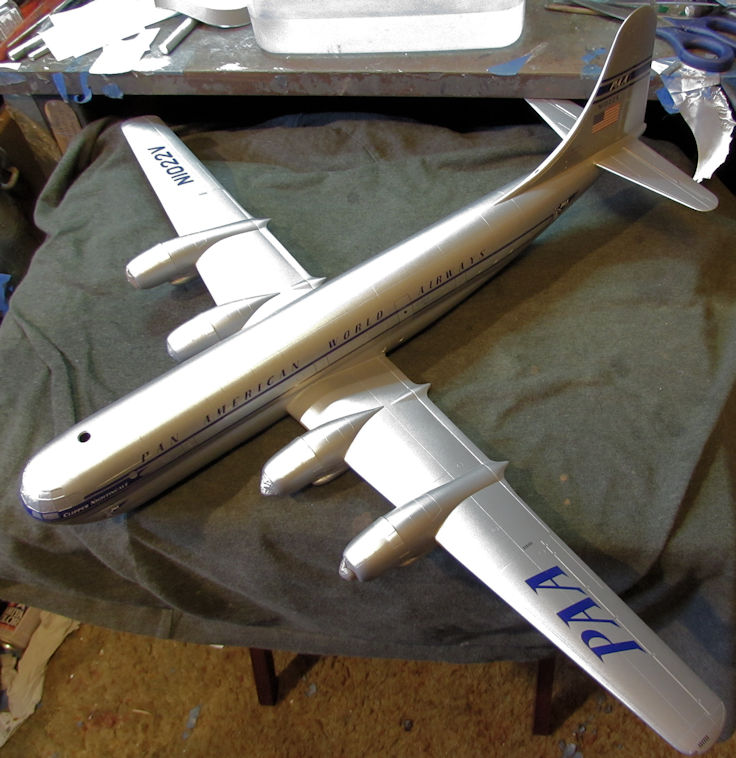
Now to shoot another clearcoat to seal everything once again and I'll be able to move on and finish this. I can't wait!
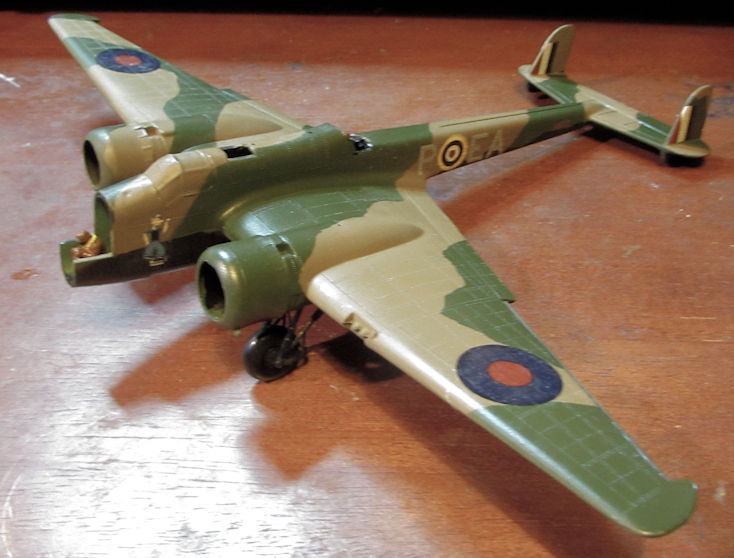
Speaking of models I can't wait to finish, I also applied the ancient Airfix decals to the HP Hampden in order to move forward on this. These took copious amounts of Solvaset to settle down well, but I'm happy with the results so far:
Now this one is ready for a clearcoat before I start the finishing on this. That makes three clearcoats I have to apply; The C-118 will need another before I'm comfortable with any further handling of that model.
That's about all I have done so far in this short update. I hope you enjoy. Stay tuned for more; there's some rainy days coming that will allow me to get more done.
Thanks for looking in, comments are welcome.
I'll start out with the Speed Racer car: I shot another coat of white over it. You can see how rough that coat is so there's going to be more sanding smooth and re-coating in my future:
Now on to some of my Shelf Queens. Earlier this week I tried to shoot a new coat of Gloss Aluminum on the C-118. The paint cracked. I'm guessing I was shooting too close. It's kinda hard to see in these pics, but it's there:
So, I sanded the cracked paint smooth again and then shot another coat. Since I'd gone down to bare plastic in some places, this coat turned out blotchy:
Again, kinda hard to see in that pic; but it was very obvious in person. So, I sanded smooth again, then applied some Mr. Surfacer 1000 from the spray can. When it dried, I buffed it smooth and re-shot the Gloss Aluminum. Much better; I can move on with this now:
While I was working on my large planes, I pulled out the B-377 and applied the decals to the fuselage. What a challenge that was! They broke a lot, and also didn't fit where they were supposed to so I did the best I could. Finally, I had them more or less acceptable. It even took a few applications of Solvaset to get these to lay down right:
A few days and a clearcoat or two later, I applied the decals to the wings. Not nearly so difficult as the fuselage, but there were a few challenges. One frustration I had was the globe portion of one of the front decals disappeared. I have no idea where it went and I have nothing available to fix it so this will remain that way. Despite that, I'm thrilled with the way this looks now:
Now to shoot another clearcoat to seal everything once again and I'll be able to move on and finish this. I can't wait!
Speaking of models I can't wait to finish, I also applied the ancient Airfix decals to the HP Hampden in order to move forward on this. These took copious amounts of Solvaset to settle down well, but I'm happy with the results so far:
Now this one is ready for a clearcoat before I start the finishing on this. That makes three clearcoats I have to apply; The C-118 will need another before I'm comfortable with any further handling of that model.
That's about all I have done so far in this short update. I hope you enjoy. Stay tuned for more; there's some rainy days coming that will allow me to get more done.
Thanks for looking in, comments are welcome.
Duke Maddog
Well-known member
Thanks Sharkman! I'll be looking forward to seeing what you do. Meanwhile, savor every moment with the kids.
Duke Maddog
Well-known member
Bring them on Dave! I look forward to seeing them. And thanks for the compliment!
sharkman
Master at Arms
Ok, most of the shelf queens I have I've already started threads for on here so I'll continue those builds there. I do have these 4 that currently don't have a home so these will be posted on this thread.
First up, the Defiant I started just before Christmas

Next is an Arado Ar 196 that I've been making a few mods to.

A Tamiya Zero.

Thought I might do this one up as a hypothetical German scheme

and lastly, an all resin Sinifer HD780

First up, the Defiant I started just before Christmas

Next is an Arado Ar 196 that I've been making a few mods to.

A Tamiya Zero.

Thought I might do this one up as a hypothetical German scheme

and lastly, an all resin Sinifer HD780

Duke Maddog
Well-known member
Those all look fantastic. Some even look like you'll get them over the finish line fairly quick too. I admire the excellence of your work on each of these. I really hope to see that Zero in those hypothetical markings, that will be interesting!
Bring them on my friend!
Bring them on my friend!
Duke Maddog
Well-known member
Hello everyone and welcome to my newest small update and another exciting episode of "One Step Forward, Two Steps Back"! Yes, in trying to finish these two large aircraft I'm working on, I have encountered even more setbacks. It's as if these two refuse to be completed.
Let's start with the big B-377...
I had finished re-coating this and set it aside to dry and later picked it up to start removing the window masking. That's when I found this. It's hard to see in the pic, but it is a blemish on my perfect upper fuselage from running clearcoat:
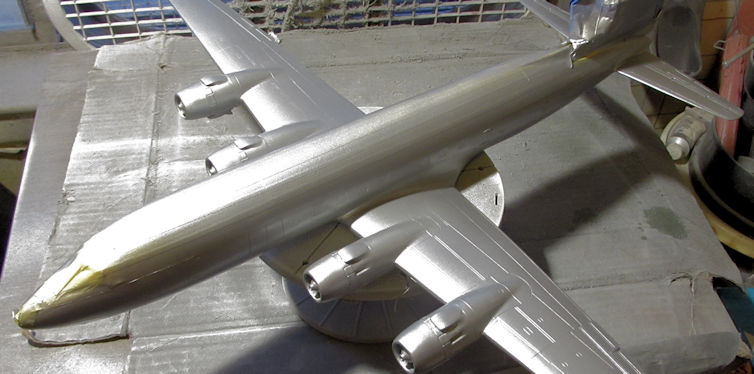
So, after masking as seen in this previous pic; I sanded this smooth and re-shot it with the now-decanted Tamiya Gloss Aluminum. I think I got it close enough to how it was before:
Finally, I felt I could move along on this. I decided to remove all the window masking to prevent my breaking the landing gear and gear doors (among other things) later on. It seemed to go pretty well at the start:
Then I got to the other side. You can see how windows 1,2 and 4 fell inside the plane. Now I have a wonderful little high-pitched rattle inside this plane! Yippee!
Well, they weren't coming out so I did the only thing I could. Out came the window making fluid and now I have new windows:
My apologies for that poor pic, I was so frustrated with those three windows!
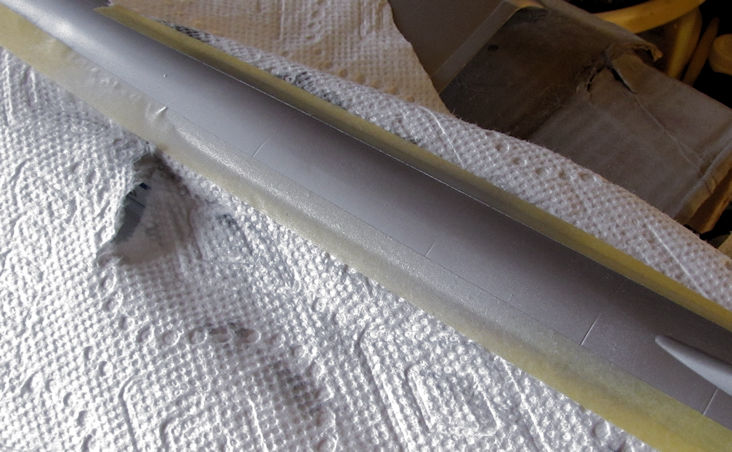
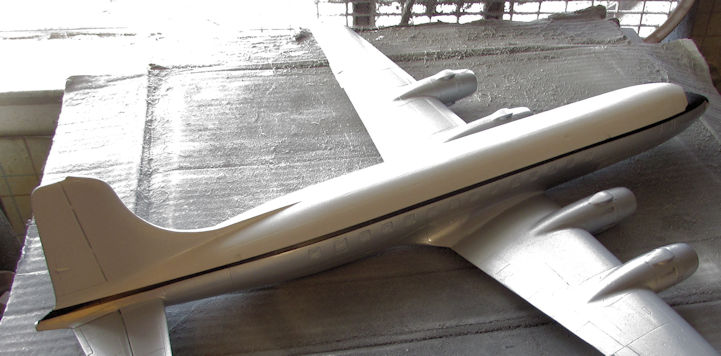
Moving on to Episode Two of "One Step Forward, Two Steps Back", we have my efforts to fix the aluminum coat on the C-118 which cracked. As you recall, I had shot the plane thusly:

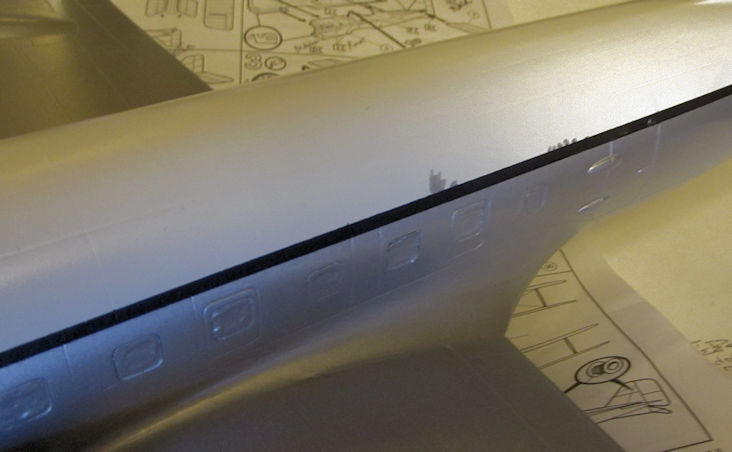
Later I peeled off the Tamiya tape and lo and behold; it pulled a little of the white off with it, despite my clearcoating efforts! Okay, no problem; I was able to hide most of it under the 'cheat line'. Still some of it remained visible:
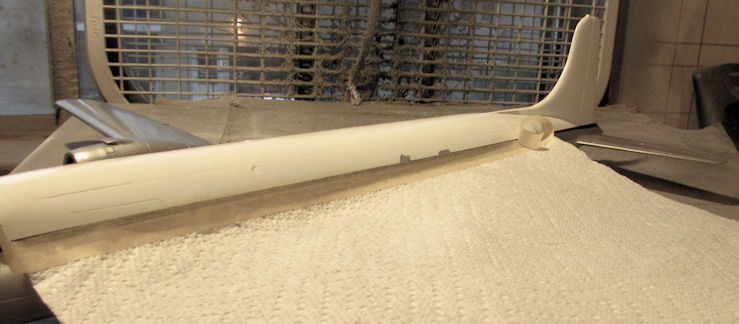
I primed it with a brush, masked it off again using the same technique with the B-377 and then decanted some white again. Here it is ready for me to spray:
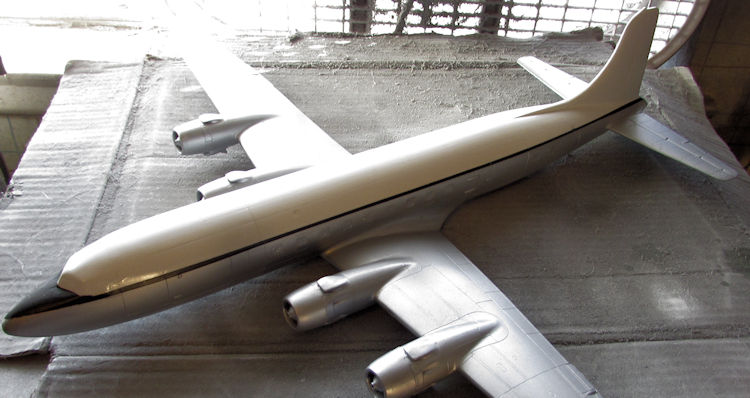
Later on after spraying a couple coats of white and clearcoat; I pulled the Tamiya tape off and was gifted with a pain free and complete finish:
Finally! Now I can move forward on this.... again! Given the difficulty I've had in the past with this and with the B-377 decals, I pulled the decals for the C-118 and applied Liquid Decal Film to them. I just don't want to take any more chances!
That's all I got done for now. I hope you like it. Thanks for looking in, comments are welcome.
Let's start with the big B-377...
I had finished re-coating this and set it aside to dry and later picked it up to start removing the window masking. That's when I found this. It's hard to see in the pic, but it is a blemish on my perfect upper fuselage from running clearcoat:
So, after masking as seen in this previous pic; I sanded this smooth and re-shot it with the now-decanted Tamiya Gloss Aluminum. I think I got it close enough to how it was before:
Finally, I felt I could move along on this. I decided to remove all the window masking to prevent my breaking the landing gear and gear doors (among other things) later on. It seemed to go pretty well at the start:
Then I got to the other side. You can see how windows 1,2 and 4 fell inside the plane. Now I have a wonderful little high-pitched rattle inside this plane! Yippee!
Well, they weren't coming out so I did the only thing I could. Out came the window making fluid and now I have new windows:
My apologies for that poor pic, I was so frustrated with those three windows!
Moving on to Episode Two of "One Step Forward, Two Steps Back", we have my efforts to fix the aluminum coat on the C-118 which cracked. As you recall, I had shot the plane thusly:
Later I peeled off the Tamiya tape and lo and behold; it pulled a little of the white off with it, despite my clearcoating efforts! Okay, no problem; I was able to hide most of it under the 'cheat line'. Still some of it remained visible:
I primed it with a brush, masked it off again using the same technique with the B-377 and then decanted some white again. Here it is ready for me to spray:
Later on after spraying a couple coats of white and clearcoat; I pulled the Tamiya tape off and was gifted with a pain free and complete finish:
Finally! Now I can move forward on this.... again! Given the difficulty I've had in the past with this and with the B-377 decals, I pulled the decals for the C-118 and applied Liquid Decal Film to them. I just don't want to take any more chances!
That's all I got done for now. I hope you like it. Thanks for looking in, comments are welcome.
Duke Maddog
Well-known member
Hey all, here's some further small updates here.
I puttered around doing some detail stuff to the Hampden which I did not take pics of. That bird is practically done anyway; I might as well wait and post pics of the finished model.
Later on, I pulled out my Soviet Carrier Baku and started to decal the deck. These are some delicate decals indeed and they don't lay down very well. However once I got started; I realized that I still needed to paint a yellow strip down one section of the deck, some of which has to be covered by decals. That put an end to this task right here:
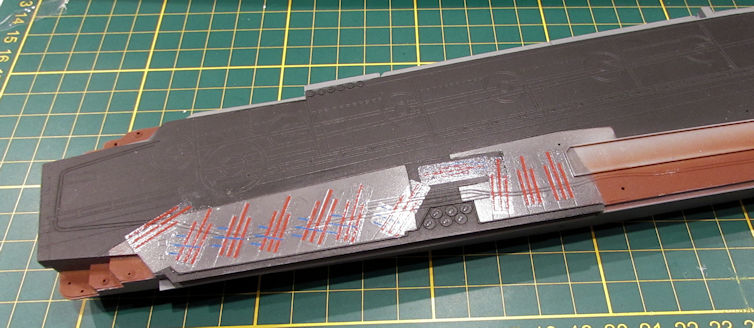
Yes, later on I did apply some decal solvent to eliminate the silvering. The yellow stripe is now painted and I can hopefully move forward on this again.
Finally, I started on the P/E screen for my T-14 Armata tank. It was tough; I didn't get very far:
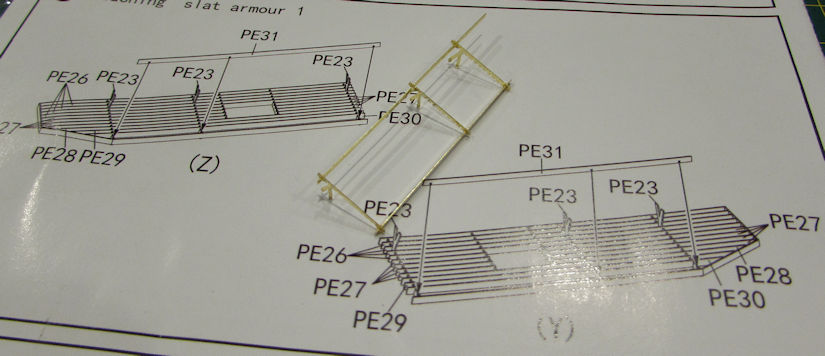
You can see how much more needs to be done; but that took me about 45 minutes or so to do as it is. And I have one more of these to do.....
That's all I have for now on my Shelf Queens so far. How about all you other guys? Show me what you got!
I puttered around doing some detail stuff to the Hampden which I did not take pics of. That bird is practically done anyway; I might as well wait and post pics of the finished model.
Later on, I pulled out my Soviet Carrier Baku and started to decal the deck. These are some delicate decals indeed and they don't lay down very well. However once I got started; I realized that I still needed to paint a yellow strip down one section of the deck, some of which has to be covered by decals. That put an end to this task right here:
Yes, later on I did apply some decal solvent to eliminate the silvering. The yellow stripe is now painted and I can hopefully move forward on this again.
Finally, I started on the P/E screen for my T-14 Armata tank. It was tough; I didn't get very far:
You can see how much more needs to be done; but that took me about 45 minutes or so to do as it is. And I have one more of these to do.....
That's all I have for now on my Shelf Queens so far. How about all you other guys? Show me what you got!
Looks good Mark.