
-
Modelers Alliance has updated the forum software on our website. We have migrated all post, content and user accounts but we could not migrate the passwords.
This requires that you manually reset your password.
Please click here, http://modelersalliance.org/forums/login to go to logon page and use the "Forgot your Password" option.
You are using an out of date browser. It may not display this or other websites correctly.
You should upgrade or use an alternative browser.
You should upgrade or use an alternative browser.
1/72 Me 323 Gigant (Incredible Shrinking Resin!)
- Thread starter Heavens Eagle
- Start date
Heavens Eagle
Well-known member
Me 323 Gigant in 1/72 update Sat how to resin part
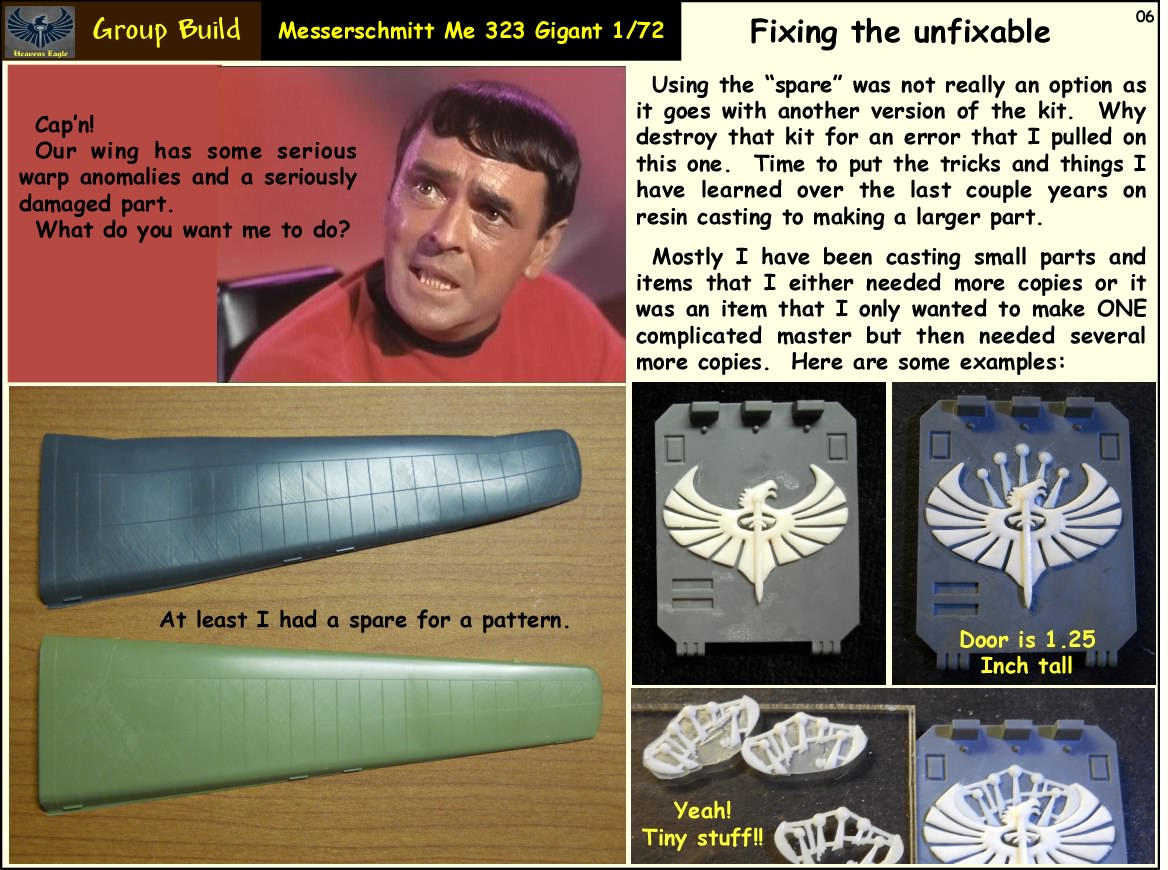
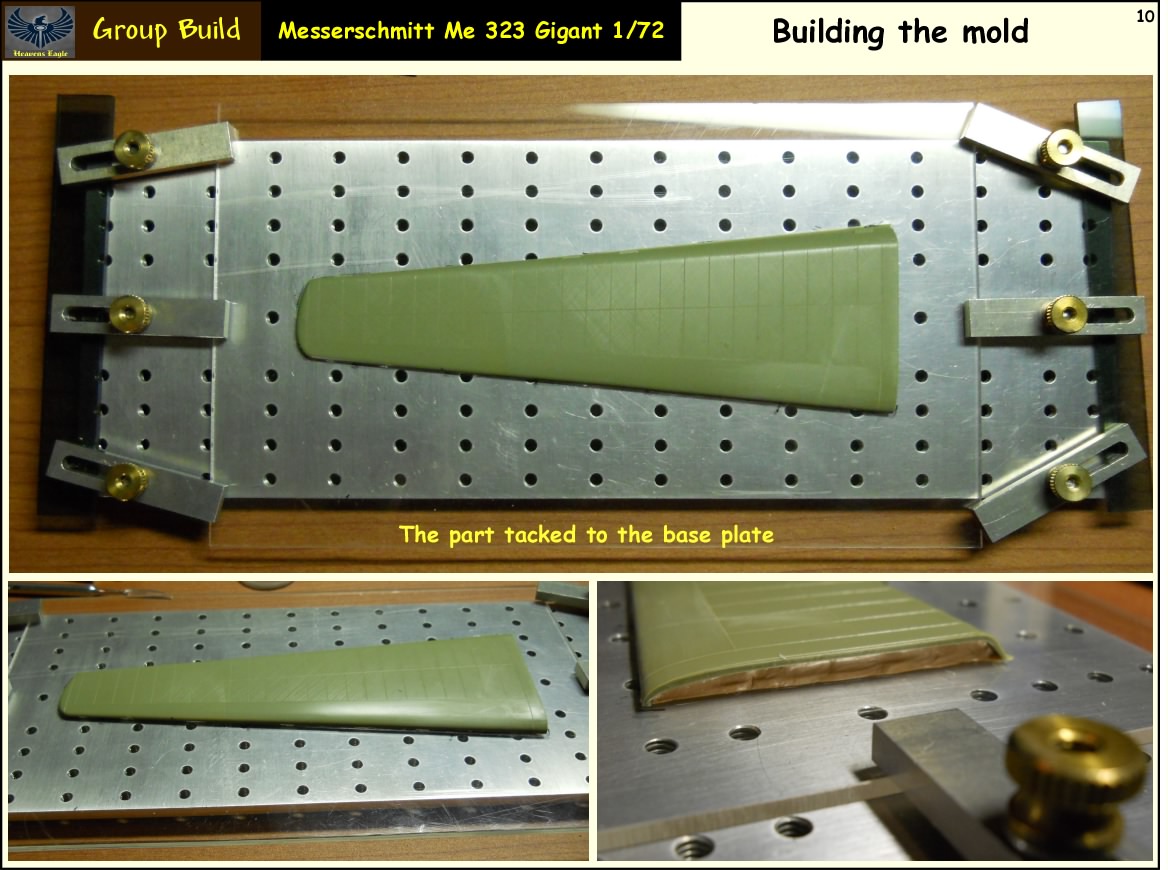
Hey everyone! Have a HUGE update this time. It is a step by step of how I made the replacement part of the one I destroyed last week. It helped to have the other kit for the pattern on the part.
Hopefully you will find this to be clearer than the proverbial mud pile. Also since there are so many photos, I will split it up into a couple of posts. Don't worry it will all be uploaded today, just like to break it up for a reasonable page length.
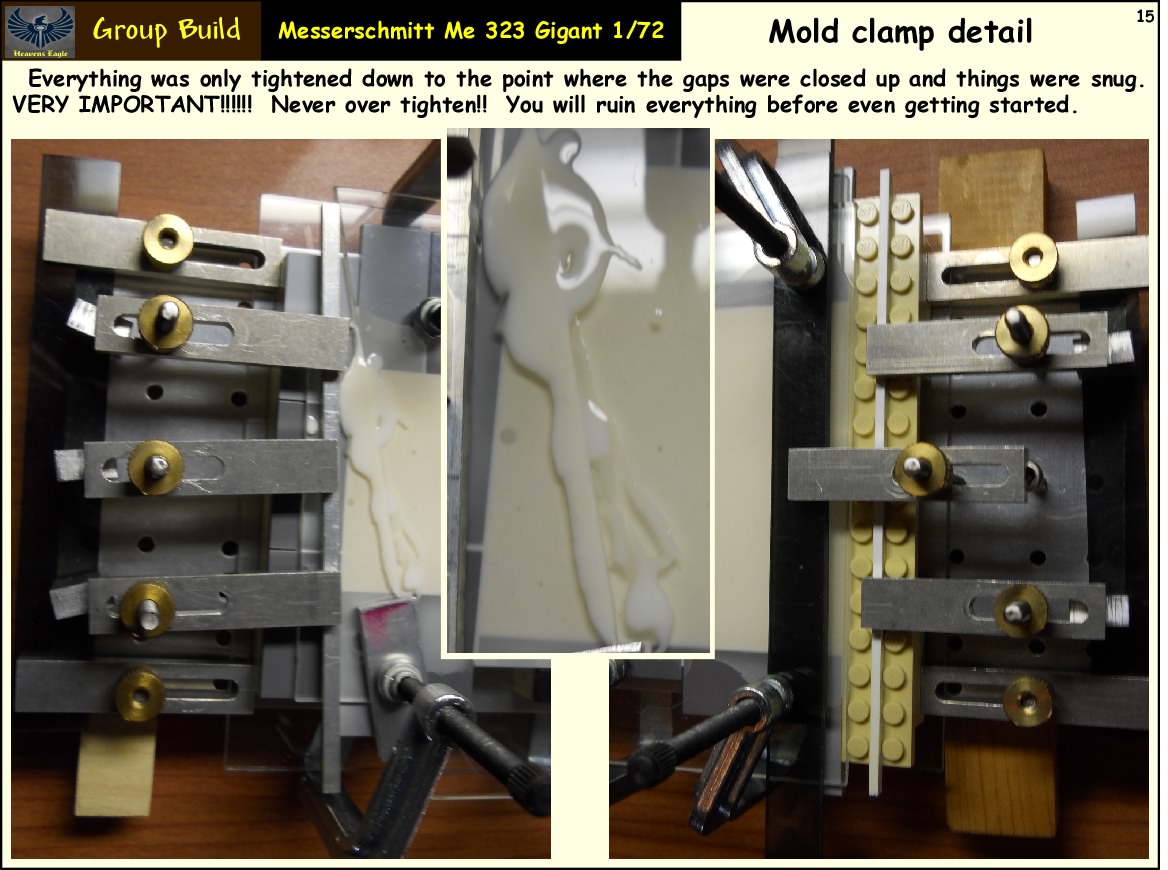
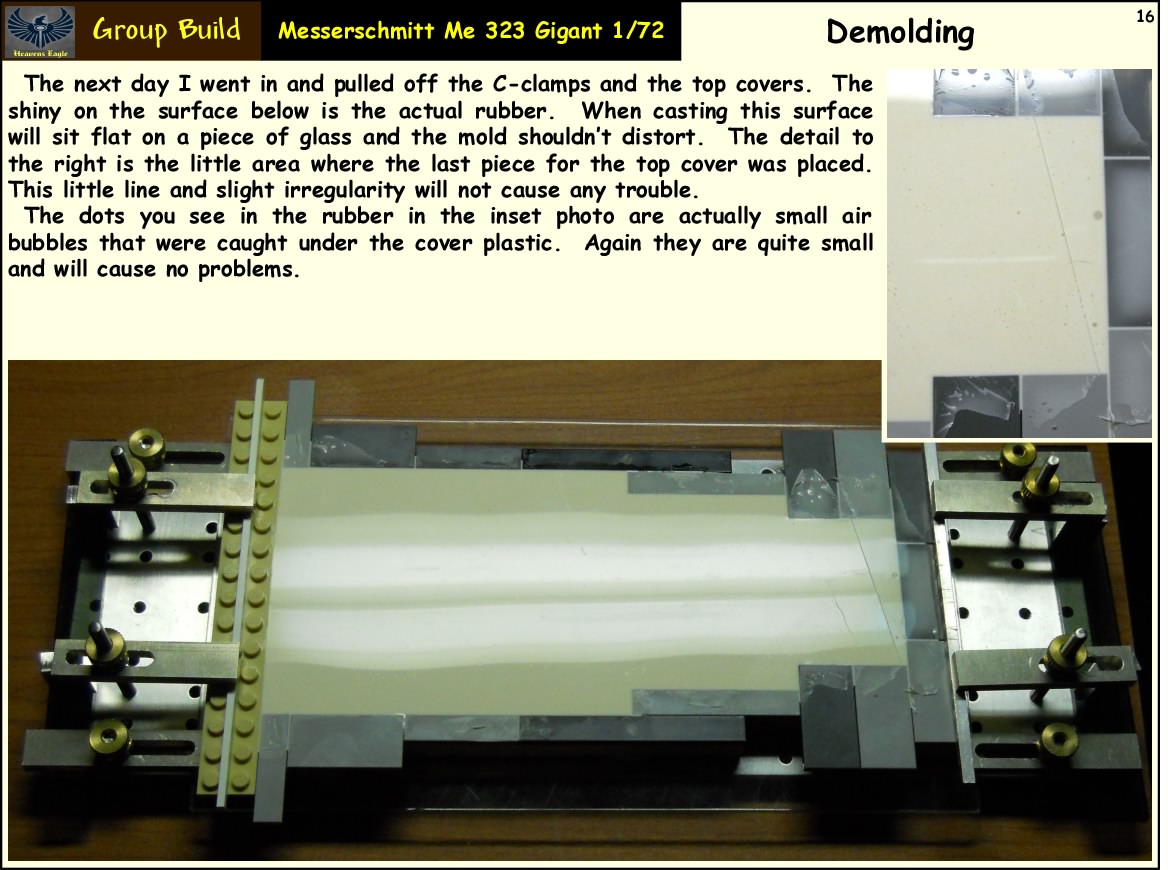
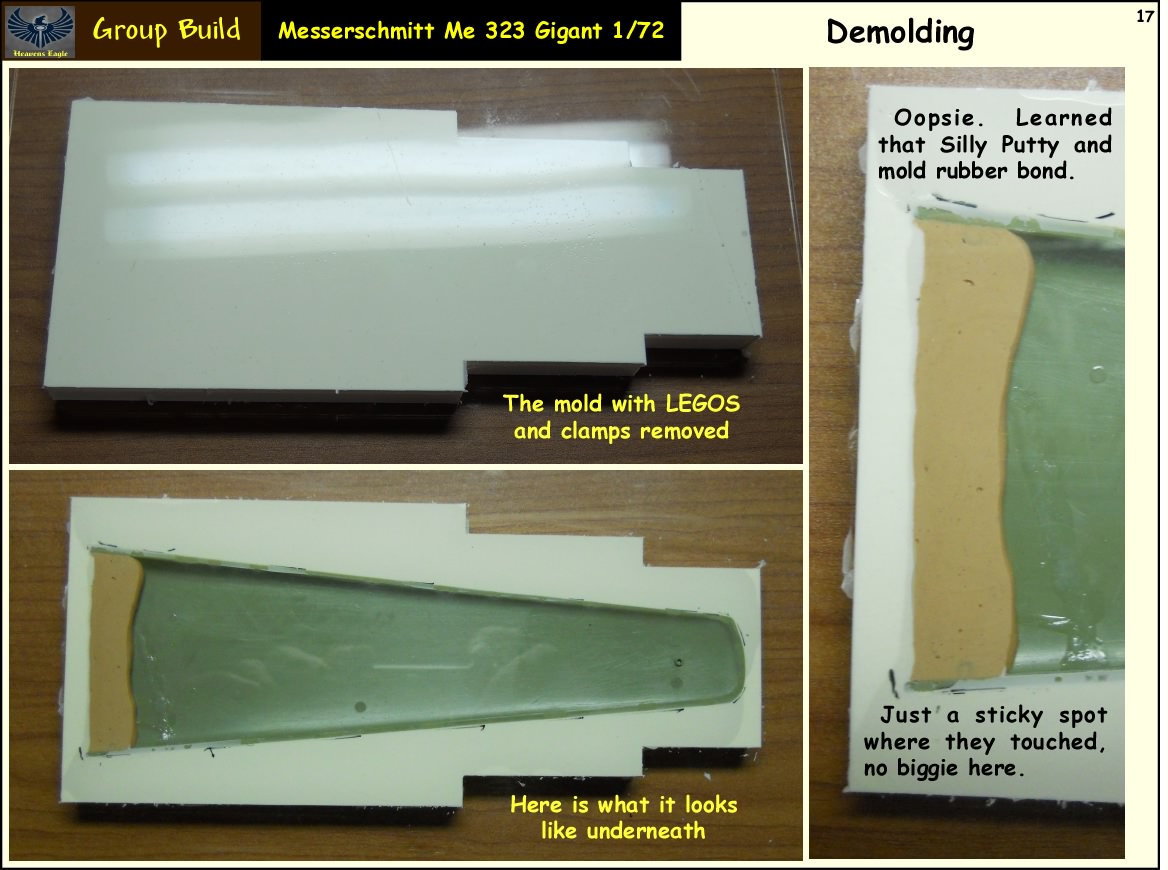
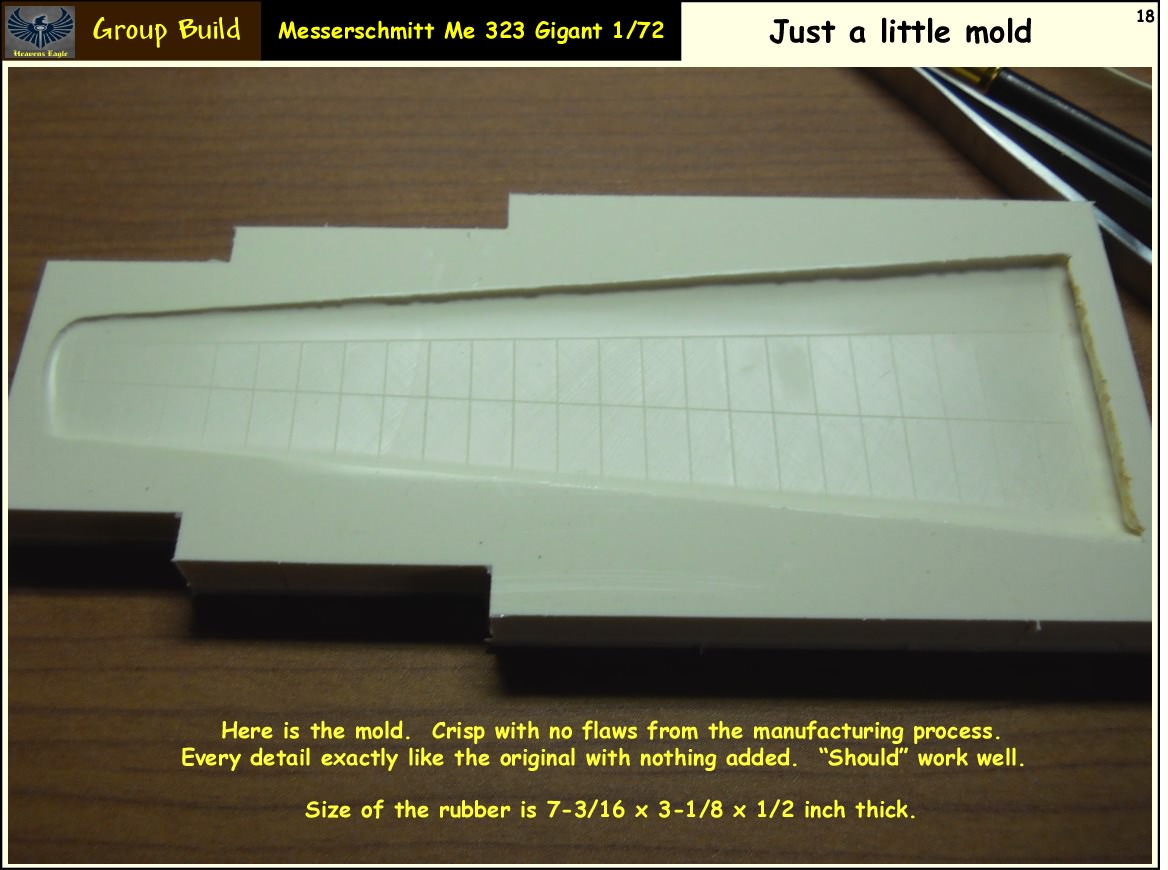
Without further adeu here we go:

There is the first installment, hang on the second will be along briefly.
Hey everyone! Have a HUGE update this time. It is a step by step of how I made the replacement part of the one I destroyed last week. It helped to have the other kit for the pattern on the part.
Hopefully you will find this to be clearer than the proverbial mud pile. Also since there are so many photos, I will split it up into a couple of posts. Don't worry it will all be uploaded today, just like to break it up for a reasonable page length.
Without further adeu here we go:
There is the first installment, hang on the second will be along briefly.
Heavens Eagle
Well-known member
Me 323 Gigant in 1/72 update Sat how to resin part
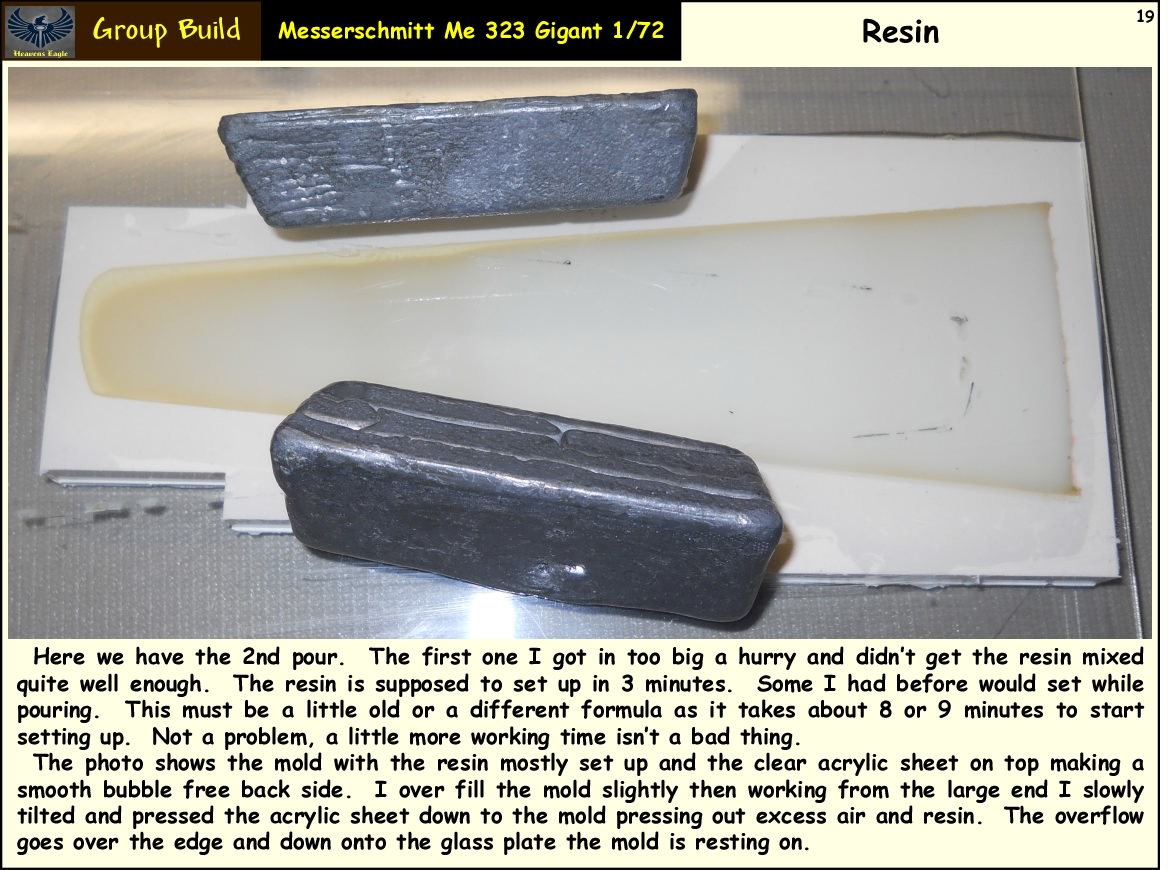
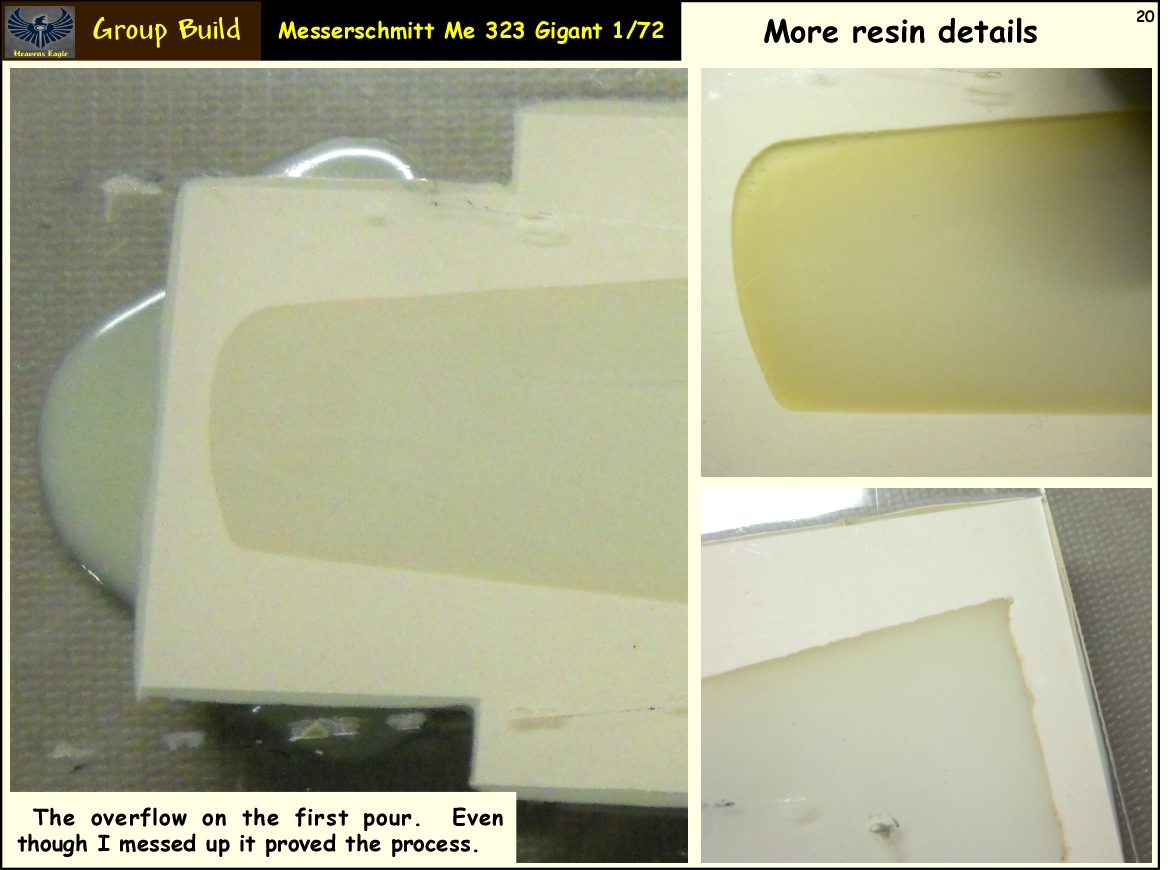
Part deux of the R for Resin post


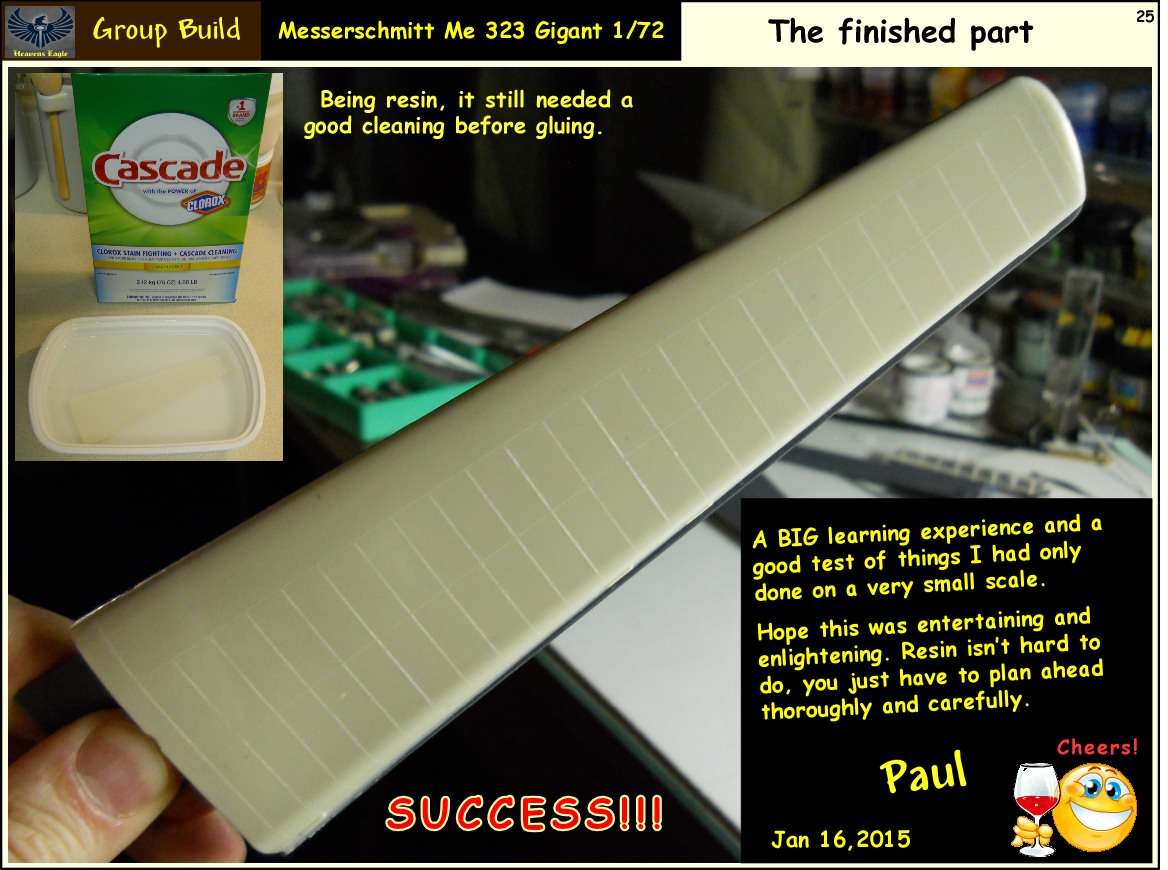
Hope that was helpful folks! While it might seem to be a bit complex, it really isn't. All this was done with a resin starter set I bought at Hobby Lobby. It cost about $75 and I will probably have to buy more resin because it will be bad before I use it all up. But then again who knows, I might need 30 or 40 of some item and that could use it up. So far so good.
As a finish note I already have the main wing all assembled. It is a horribly fitting model, but I was able to make it work. :pinch:
I suspect there will be some big red spots on the hobby room wall by the time it is finished.
Have been looking at the fuselage and it is another nightmare. The ribs along the sides are all wrong and are just a bit too prominent. Sanding time for that which will also help with the sink marks that are all over the place in it.
Till next time, thanks for looking in! :laugh:
Part deux of the R for Resin post
Hope that was helpful folks!
While it might seem to be a bit complex, it really isn't. All this was done with a resin starter set I bought at Hobby Lobby. It cost about $75 and I will probably have to buy more resin because it will be bad before I use it all up. But then again who knows, I might need 30 or 40 of some item and that could use it up. So far so good.As a finish note I already have the main wing all assembled. It is a horribly fitting model, but I was able to make it work. :pinch:
I suspect there will be some big red spots on the hobby room wall by the time it is finished.
Have been looking at the fuselage and it is another nightmare. The ribs along the sides are all wrong and are just a bit too prominent. Sanding time for that which will also help with the sink marks that are all over the place in it.
Till next time, thanks for looking in! :laugh:

phantom II
Master at Arms
Me 323 Gigant in 1/72 update Sat how to resin part
 :facepalm
Cheers, Christian B)
:facepalm Cheers, Christian B)
Me 323 Gigant in 1/72 update Sat how to resin part
Learning? I feel like I just got out of school. Excellent Paul, sit back and enjoy a Fat Tire. :drinks :drink
Learning? I feel like I just got out of school. Excellent Paul, sit back and enjoy a Fat Tire. :drinks :drink
Me 323 Gigant in 1/72 ( Rated R for resin)
Paul, I doff my cap to thee! That was a real lesson in mold making, casting and even a bit about milling! Your careful analysis and execution is a lesson in itself- planning is everything! Your presentation pulls it all together and I think you've nailed it.
A question- how long did it take to mill out the wing? I did use a crappy Dremel drill press with the Dremel tool mounted in it to mill the undersides of my u-boat decks to open up the drain slots. It worked, but was messy, loud and took quite a while.
Thanks for taking the time to prepare this wonderful episode - cheers, my friend!
Plastik Smurff
Active member
Me 323 Gigant in 1/72 ( Rated R for resin)
One heluva job
One heluva job

phantom II
Master at Arms
Me 323 Gigant in 1/72 ( Rated R for resin)
Excellent how to Paul
Cheers, Christian B)
Excellent how to Paul
Cheers, Christian B)
Heavens Eagle
Well-known member
Me 323 Gigant in 1/72 ( Rated R for resin)
Thank you all for all your positive comments. Those always help so much when the build mojo gets low. :zen You guys have all been inspiring me to do more and to try and do it well. All I can do in return is to try and show you things I figure out and how I do them.
Thanks for the Kudos Chuck. As to how long it took, I really don't know, I started and kept going till I removed enough weight. I use the mill as it is quite tight and stable though the main reason is because I can really slow it down maybe about 150 RPM (or less). I have an older Dremel with the rising table drill press that I sometimes use for similar milling like you did on the sub. With that I have a very old external Dremel speed control and slow it way down as well. Less probability of a bad slip up with the slow speeds.
Best guess probably most of an evening.
Thank you all for all your positive comments.
Those always help so much when the build mojo gets low. :zen You guys have all been inspiring me to do more and to try and do it well. All I can do in return is to try and show you things I figure out and how I do them. Paul, I doff my cap to thee! That was a real lesson in mold making, casting and even a bit about milling! Your careful analysis and execution is a lesson in itself- planning is everything! Your presentation pulls it all together and I think you've nailed it.
A question- how long did it take to mill out the wing? I did use a crappy Dremel drill press with the Dremel tool mounted in it to mill the undersides of my u-boat decks to open up the drain slots. It worked, but was messy, loud and took quite a while.
Thanks for taking the time to prepare this wonderful episode - cheers, my friend!
Thanks for the Kudos Chuck. As to how long it took, I really don't know, I started and kept going till I removed enough weight. I use the mill as it is quite tight and stable though the main reason is because I can really slow it down maybe about 150 RPM (or less). I have an older Dremel with the rising table drill press that I sometimes use for similar milling like you did on the sub. With that I have a very old external Dremel speed control and slow it way down as well. Less probability of a bad slip up with the slow speeds.
Best guess probably most of an evening.
Skinny_Mike
Well-known member
Me 323 Gigant in 1/72 ( Rated R for resin)
Thanks so much for the tutorial in casting! Simple amazing!
Mike
Thanks so much for the tutorial in casting! Simple amazing!
Mike
Heavens Eagle
Well-known member
Me 323 Gigant in 1/72 ( Rated R for resin)
Hey everyone, thanks for the kind comments!
This weekend I got a lot done. Have the wing all assembled. Decided that as it fit together so poorly that the ends had to be permanently attached, So it'll be a big-un! :facepalm
Then I turned my attention to the fuselage. Looked, studied, studied photos, compared and finally went "It's a no good!!!"
The windows are in the wrong places, the stringer detail on the outside is wrong and poorly done, the framing detail on the inside is wrong and poorly done. In addition I want the side thickness to be a bit thinner. (picky old cuss aren't I )
In addition I hate the thick ucky "windows" the kit has on the sides. So I took photos, got on the 'puter and did a scale layout in my favorite program and planned on how to redo all the stringers, windows and framework to match the photos and references I have.
Sunday I proceeded to use evergreen to fill in the windows, sanded down the outside, removed all the framing back to behind the side door, and used my drill technique to thin the sides down to about .025 of an inch. Still have to sand the inside of one side smooth but am almost ready to start adding back all the detail correctly. :S (Have a good plan for that too)
Anyway am goin and blowin. Taking a bunch of photos as I go. Will have some new stuff up soon. :Hiay
Hey everyone, thanks for the kind comments!
This weekend I got a lot done. Have the wing all assembled. Decided that as it fit together so poorly that the ends had to be permanently attached, So it'll be a big-un! :facepalm
Then I turned my attention to the fuselage. Looked, studied, studied photos, compared and finally went "It's a no good!!!"
The windows are in the wrong places, the stringer detail on the outside is wrong and poorly done, the framing detail on the inside is wrong and poorly done. In addition I want the side thickness to be a bit thinner. (picky old cuss aren't I
)In addition I hate the thick ucky "windows" the kit has on the sides. So I took photos, got on the 'puter and did a scale layout in my favorite program and planned on how to redo all the stringers, windows and framework to match the photos and references I have.
Sunday I proceeded to use evergreen to fill in the windows, sanded down the outside, removed all the framing back to behind the side door, and used my drill technique to thin the sides down to about .025 of an inch. Still have to sand the inside of one side smooth but am almost ready to start adding back all the detail correctly. :S
(Have a good plan for that too)Anyway am goin and blowin. Taking a bunch of photos as I go. Will have some new stuff up soon. :Hiay
Heavens Eagle
Well-known member
Me 323 Gigant in 1/72 ( Rated R for resin)
Ummm :hmmm Most of it? :huh:
Ummm :hmmm Most of it? :huh: