
-
Modelers Alliance has updated the forum software on our website. We have migrated all post, content and user accounts but we could not migrate the passwords.
This requires that you manually reset your password.
Please click here, http://modelersalliance.org/forums/login to go to logon page and use the "Forgot your Password" option.
You are using an out of date browser. It may not display this or other websites correctly.
You should upgrade or use an alternative browser.
You should upgrade or use an alternative browser.
1/32 BF 110 C-7(ZG1 support for Stalingrad)
- Thread starter Brokeneagle
- Start date

phantom II
Master at Arms
I must say, that's an interesting looking gizmo to not be pure fiction 
Cheers, Christian B)
Cheers, Christian B)
Brokeneagle
Master at Arms
Hello again,
thank you to all the new posters/ watchers. Welcome aboard the dismantling of a 110.
MP yeah I think that IP should really rock!.
....continuing to build and 'mulling' over what the scene will look like. I am thinking of also adding an abandoned German truck but I need to consider further.
I was fooling around with my concept this afternoon and thought I would sketch out my idea. Using the port side photo angle as a reference, I have added the port side engine and the mg's [still sitting in the nose]. I don't want to strip out all the detail, so I am going to have it as ZG1 left in a hurry - gives it more interest. :hmmm
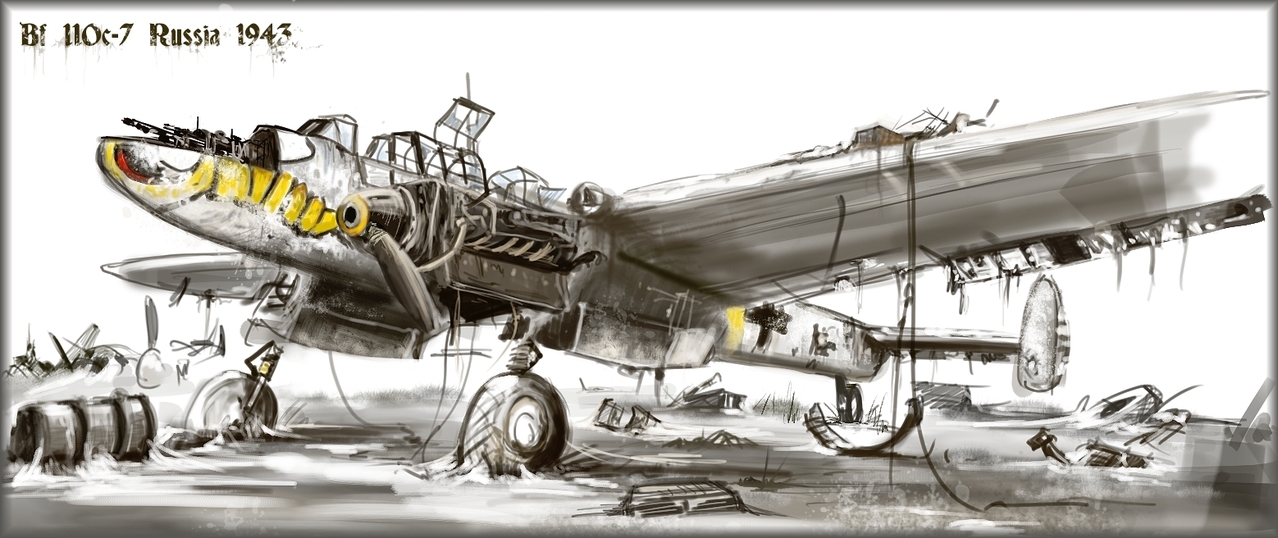
I will keep thinking about the rest of the debri and rubbish as I want to add another major piece of detail separate to the Russians that will be in the scene - maybe even a refuelling cart from VLS.
Ian.
thank you to all the new posters/ watchers. Welcome aboard the dismantling of a 110.
MP yeah I think that IP should really rock!.
....continuing to build and 'mulling' over what the scene will look like. I am thinking of also adding an abandoned German truck but I need to consider further.
I was fooling around with my concept this afternoon and thought I would sketch out my idea. Using the port side photo angle as a reference, I have added the port side engine and the mg's [still sitting in the nose]. I don't want to strip out all the detail, so I am going to have it as ZG1 left in a hurry - gives it more interest. :hmmm
I will keep thinking about the rest of the debri and rubbish as I want to add another major piece of detail separate to the Russians that will be in the scene - maybe even a refuelling cart from VLS.
Ian.
Heavens Eagle
Well-known member
Just a thought I had when looking at your drawing. If there is too much debris and it is too busy, it makes it harder to really look at the model and what is going on. :hmmm
The sketch is really a great start and your sketching and art ability I truly respect and admire. Looking forward to seeing the construction Ian!
The sketch is really a great start and your sketching and art ability I truly respect and admire. Looking forward to seeing the construction Ian!
Flyingbabydoc
Well-known member
I second that! I am really looking Forward to this build. I have a Special interest in Bf.110 and right now starting to work on a Diorama of my own (nothing as fancy as yours). Will watch closely your Progress!
Cheers
Alex
Cheers
Alex
White_Wolf
Master at Arms
I will, no disrespect of course, position myself on different coordinates in regards to details. I personally think that a model might be the star of a diorama, sort of speak. I personally believe that a great base and terrain, plus as much detail around the star element of the diorama (usually a model) can only enhance it.
As a general rule, I do not believe there is such a thing as too much detail.
Ian mate, you're the artist and everything that I have seen so far about your work only leads me to believe this is going to be a great piece of work.
Cheers,
Laurence
As a general rule, I do not believe there is such a thing as too much detail.
Ian mate, you're the artist and everything that I have seen so far about your work only leads me to believe this is going to be a great piece of work.
Cheers,
Laurence
Skinny_Mike
Well-known member
Watching this with a ton of interest, and taking notes!
Thanks for sharing your work Ian!
:drinks
Thanks for sharing your work Ian!
:drinks
Paulw
Well-known member
This is a grand kit, Ian. Mine stalled because I messed up the pit but maybe soon I can get back into it.
I bit of warning about the engine nacelle to wing fillets. DRY FIT,DRY FIT, DRY FIT... did I mention to dry fit first? On that particular step the parts may be mislabeled and/or crossed referenced in the instructions. This caused plenty of frustration for me when assembling the same kit in 48 and the anomaly exists in the 32 kit as well.
I hope I could help.
Brokeneagle
Master at Arms
Hello again.thanks to all for the advice and interest.
Details are a funny thing and they need to be balanced so I will be careful to not overdo it but the target of this type of diorama is the detail. I feel confident that I should be ok but please jump in at any time and let me know what you think.
I hope to complete this build by the end of January 2017. I am using this target date to keep myself on track so let's see how i go. :smack
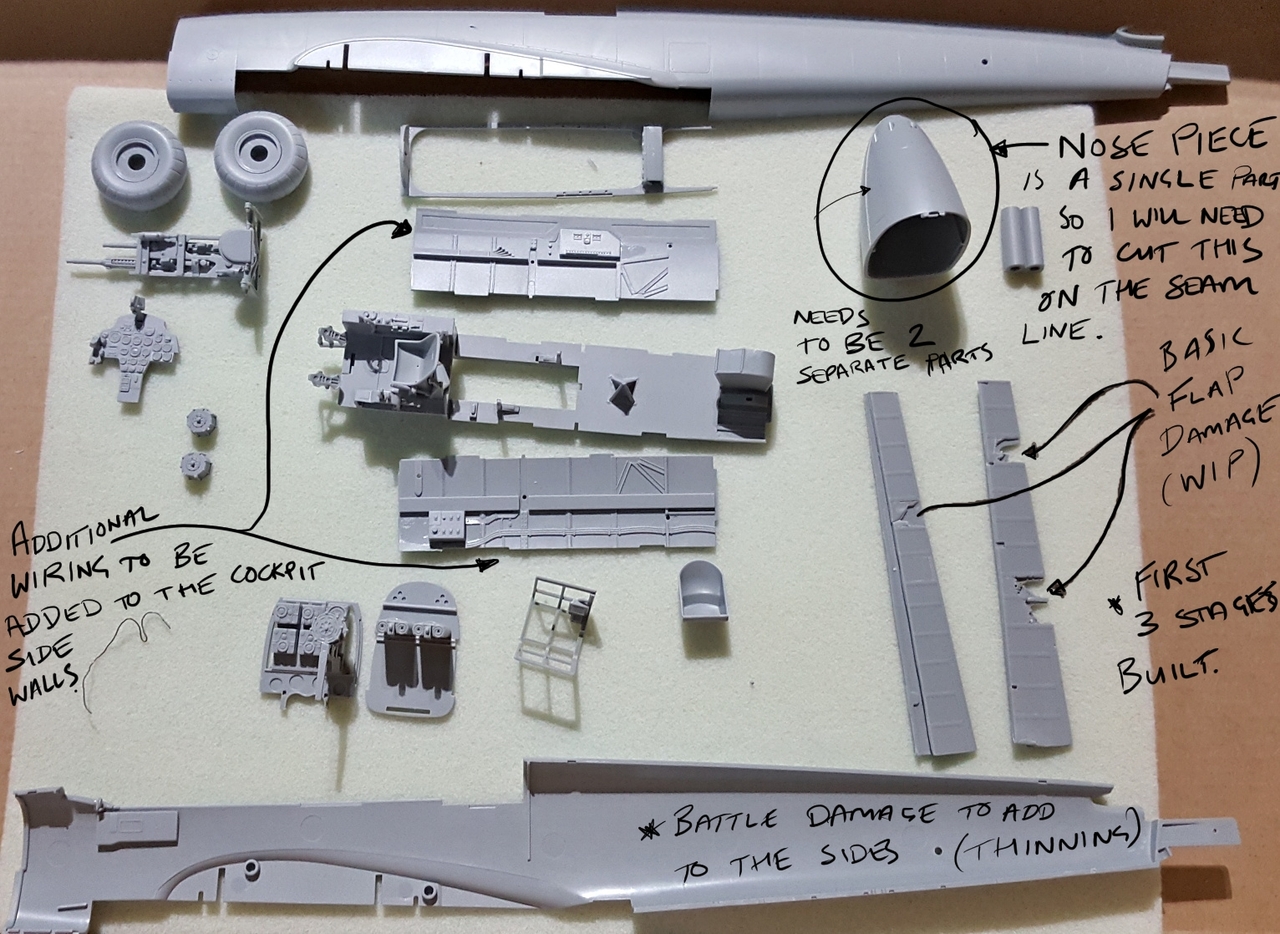
I have built the first 3 stages so far and will keep an eye out once i get to the engines and landing gear as Paul and James have both warned me of. The review by Brett Green has also picked these areas out and I have noted this on the instructions.
I am currently on the cockpit, which has very nice detail but will need further wiring to really bring it to life. I will be adding this next.
1. The flaps have been cut out from the wings and reshaped to fit independently, plus battle damage has been started on the canvas. This is quite difficult as I need to cut away the plastic but retain the shape so I don't have to scratch build the whole flap.
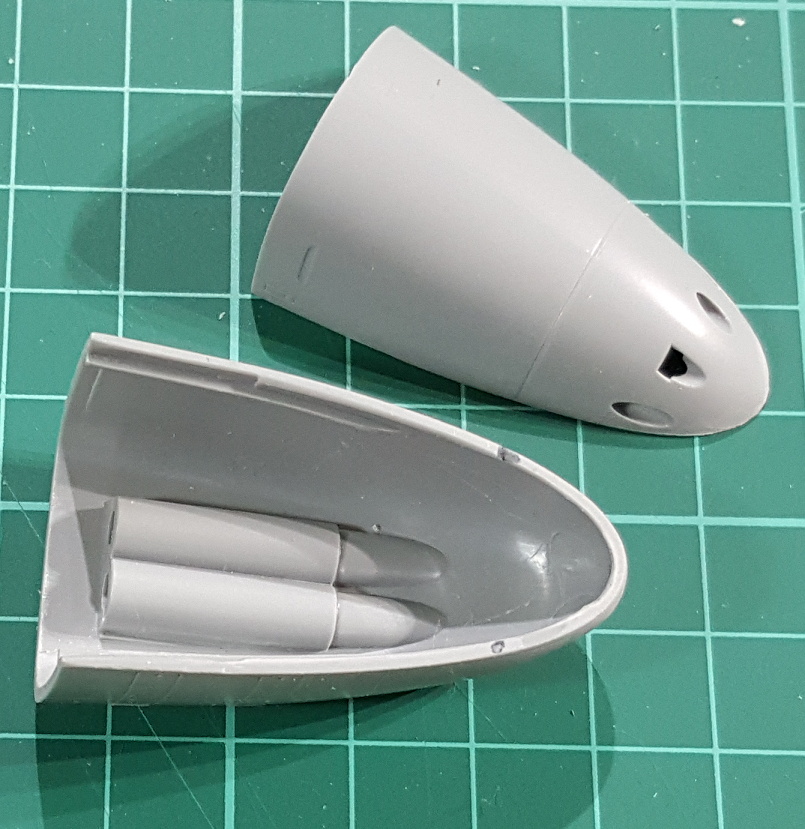
2. the nose section comes as one part as seen in the photo. I will need to cut this in half to hav the mg's exposed as per the image. I have already cut this now and will show in my next post.
White_Wolf
Master at Arms
Following this closely - I'd like to be able to do battle damage to airplanes, fuselage and all.
Great stuff Ian, keep it coming.
Laurence
Great stuff Ian, keep it coming.
Laurence
Brokeneagle
Master at Arms
Hello everyone,
this is moving a little slower than I had hoped but I am still pressing forward.
Latest progress.....
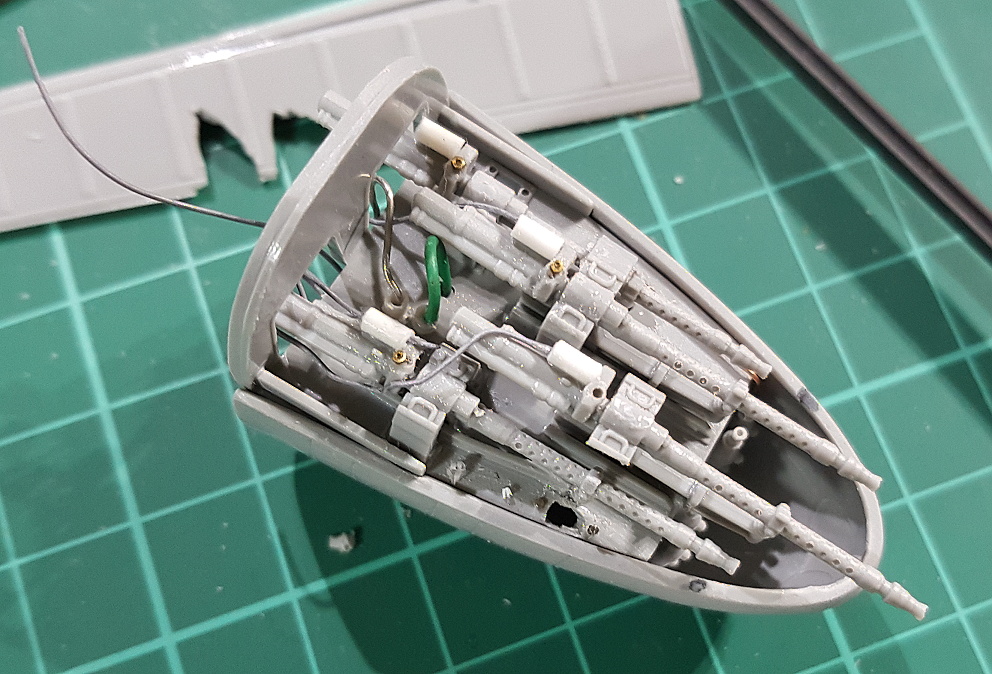
1. I separated the nose cone into 2 halves so i could show the exposed mg's. The Kit has this piece molded as one.
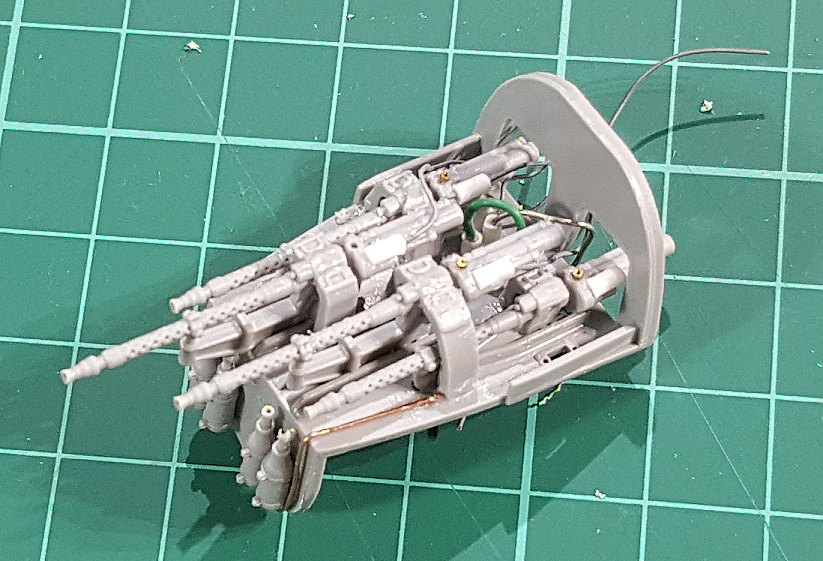
2.Some detailing om the Mg bay - using wires and some brass nuts as well as holes drilled out etc. More wiring to be added to the lower front area as well as some bracing.
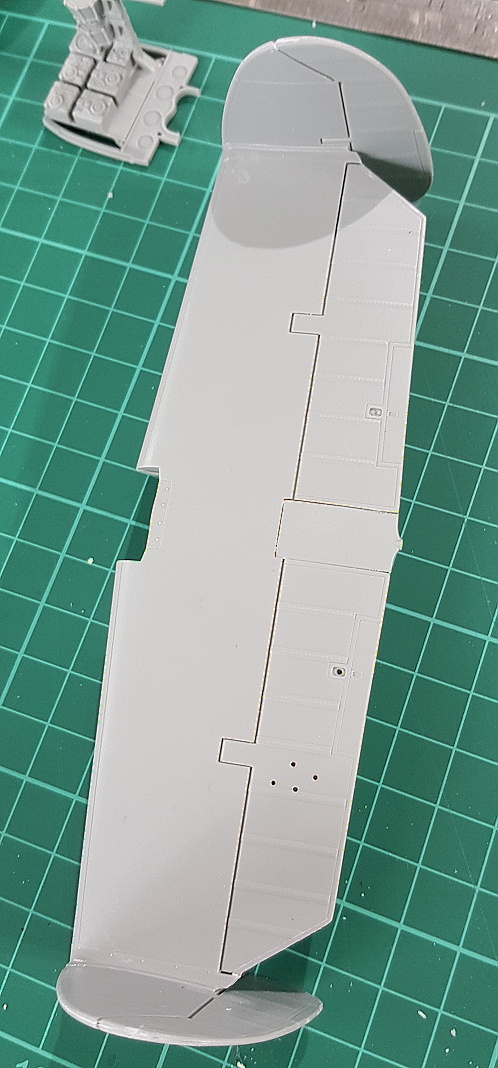
3. rear wing done with some drilling in progess to damage the canvas sections.
4.Started on the engines, which will also require a little extra work.
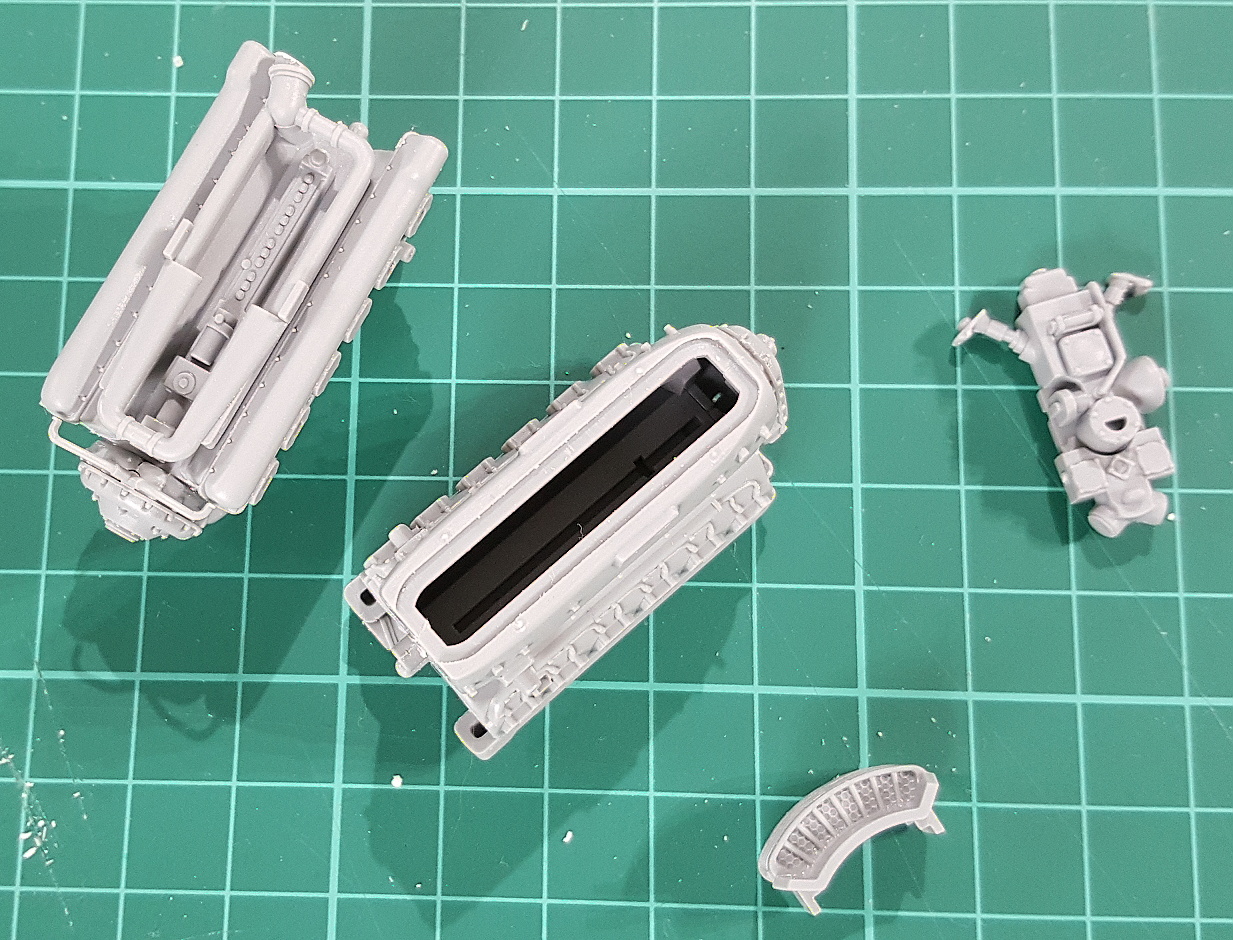
5. Replacing the rear gunners ammo drum storage mountings. The original was all molded but i thought that it would have at least one empty rack if it was left in a hurry. I could have both racks empty but I would like to make use of the nicely molded ammo drums...hmmm maybe I will have a few on the floor and scattered on the ground outside.
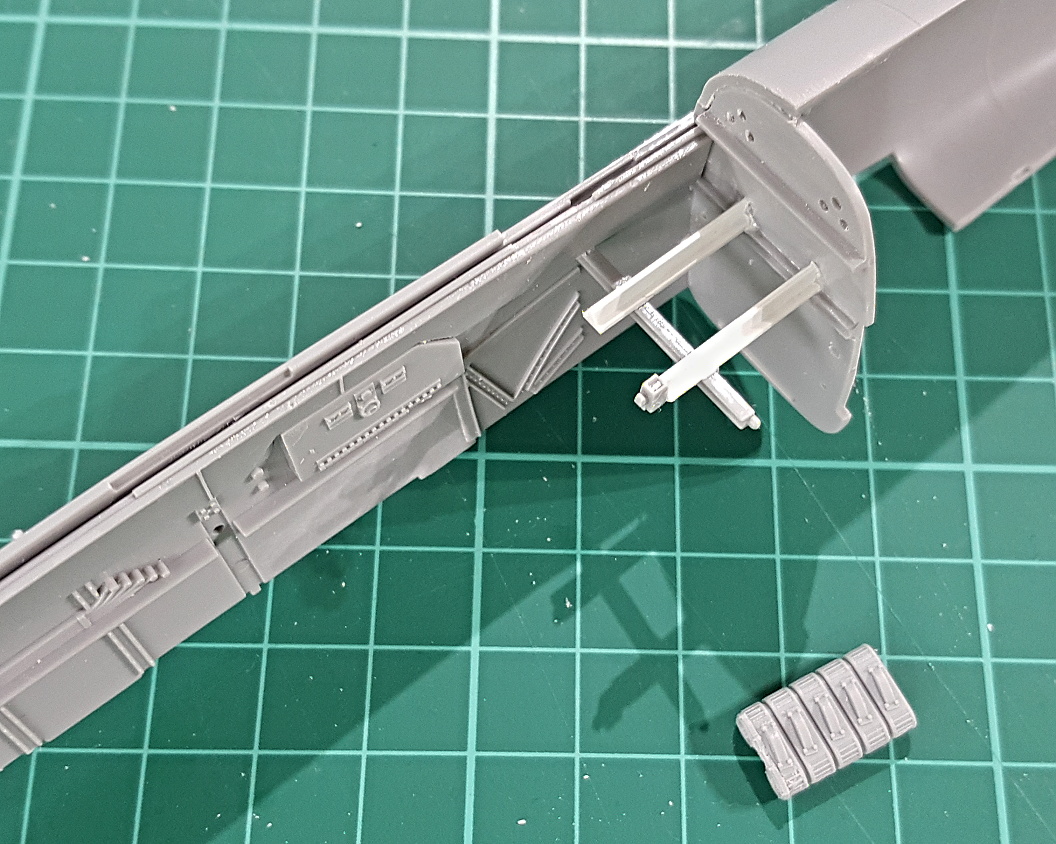
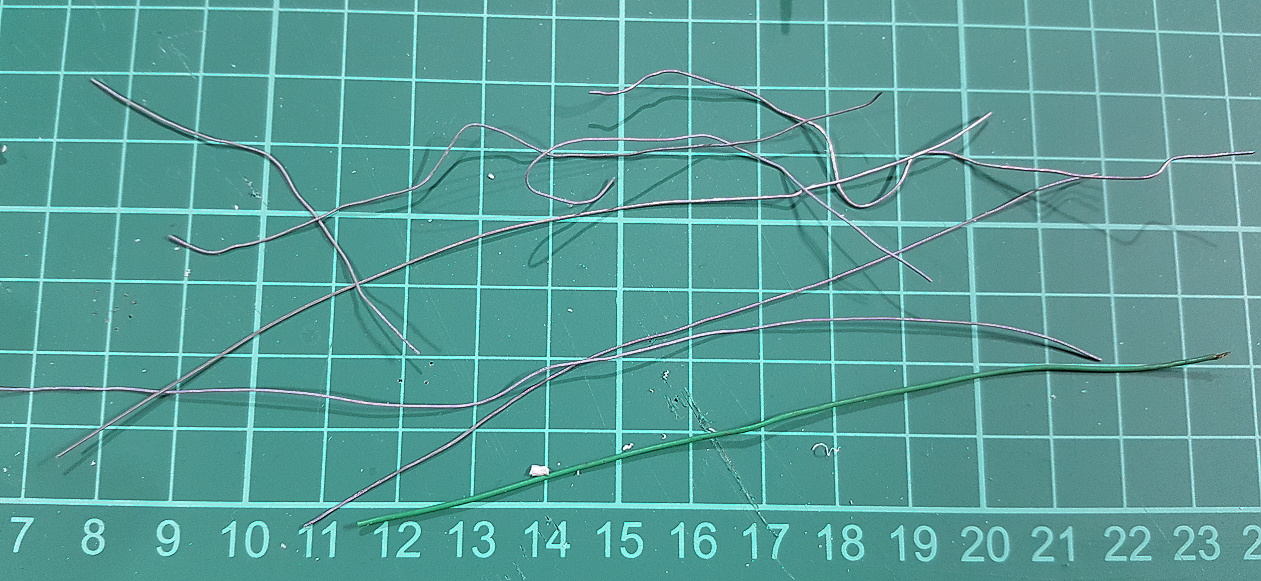
6.Getting wires ready for the cocpit walls.
so I need to spend a fair bit of time on the cockpit with this one which always slows me down so I need to focus!
Ian.
this is moving a little slower than I had hoped but I am still pressing forward.
Latest progress.....
1. I separated the nose cone into 2 halves so i could show the exposed mg's. The Kit has this piece molded as one.
2.Some detailing om the Mg bay - using wires and some brass nuts as well as holes drilled out etc. More wiring to be added to the lower front area as well as some bracing.
3. rear wing done with some drilling in progess to damage the canvas sections.
4.Started on the engines, which will also require a little extra work.
5. Replacing the rear gunners ammo drum storage mountings. The original was all molded but i thought that it would have at least one empty rack if it was left in a hurry. I could have both racks empty but I would like to make use of the nicely molded ammo drums...hmmm maybe I will have a few on the floor and scattered on the ground outside.
6.Getting wires ready for the cocpit walls.
so I need to spend a fair bit of time on the cockpit with this one which always slows me down so I need to focus!
Ian.
Killer!!! 
Shapin' up nicely Ian!
Bob
Bob
 ... the machine gun bay looks great!