-
Modelers Alliance has updated the forum software on our website. We have migrated all post, content and user accounts but we could not migrate the passwords.
This requires that you manually reset your password.
Please click here, http://modelersalliance.org/forums/login to go to logon page and use the "Forgot your Password" option.
You are using an out of date browser. It may not display this or other websites correctly.
You should upgrade or use an alternative browser.
You should upgrade or use an alternative browser.
The latest Something I 've been doing.........MENG WW1 A7V and MKV Male - Feb 10th 2025
- Thread starter Brokeneagle
- Start date
Brokeneagle
Master at Arms
Thank you for looking and the positive feedback, though not really deserved at this point as there is a long way to go.
I really just want to get back to U-boats and modern Russian armour!
I really just want to get back to U-boats and modern Russian armour!

Brokeneagle
Master at Arms
Some more progress on both tanks........
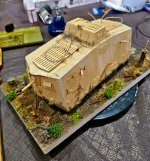
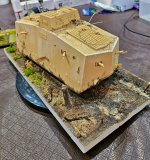
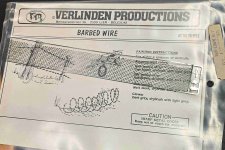
The A7V has somefinal work on the roof cables but the base and the rest of the tank are ready for paint. Also, I am still needing to add a little more barbed wire.

The British MKV is finally ready for paint.
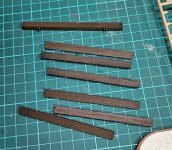
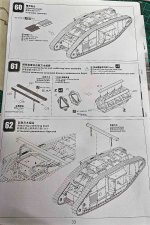
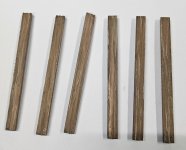
I added wood grain to the plain wooden beams for the trench crossing device as they were made from cut beams and being 1917 and on a tank I don't think they would have been polished smooth. I think they would have been quite a rough finish.


The beams and the frames have now been painted in black as a base for the steel and wood colors.
The tank is also finished . I have used a thinned down white modelling clay to fill the gaps and add some light mud textures before the black base coat. I started adding the black by brush to some of the areas like the gun cutouts and the track base plates where the airbrush might struggle to get all the angles.


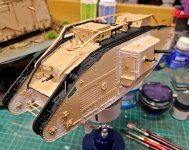
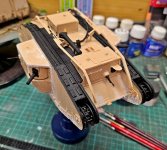
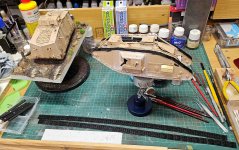
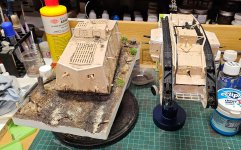
Decals and Chain to go on after first paint.

The A7V has somefinal work on the roof cables but the base and the rest of the tank are ready for paint. Also, I am still needing to add a little more barbed wire.


The British MKV is finally ready for paint.
I added wood grain to the plain wooden beams for the trench crossing device as they were made from cut beams and being 1917 and on a tank I don't think they would have been polished smooth. I think they would have been quite a rough finish.
The beams and the frames have now been painted in black as a base for the steel and wood colors.
The tank is also finished . I have used a thinned down white modelling clay to fill the gaps and add some light mud textures before the black base coat. I started adding the black by brush to some of the areas like the gun cutouts and the track base plates where the airbrush might struggle to get all the angles.


Decals and Chain to go on after first paint.
Last edited:
Love it Ian 

Brokeneagle
Master at Arms
After a good break in December I have completed a little more on both of these tanks. Progress should continue in a linear fashion now 
Earlier in December I base-coated both tanks black and German grey.

The A7V then recieved a full overspray of Dark Yellow with a little bit of white added.
Base Ground work unpainted still at this stage. I will get to that later....


British MkV also recieved a couple of layers of green, the first being a little darker that the second. The second being a lighter ghosting to create some shadows etc.


The next phase will be the decals and painted markings on both and then I can begin the weathering. The best part! .
.
Earlier in December I base-coated both tanks black and German grey.
The A7V then recieved a full overspray of Dark Yellow with a little bit of white added.
Base Ground work unpainted still at this stage. I will get to that later....
British MkV also recieved a couple of layers of green, the first being a little darker that the second. The second being a lighter ghosting to create some shadows etc.
The next phase will be the decals and painted markings on both and then I can begin the weathering. The best part!
Ian's drab is completed build for some folks. Looking good Ian, can't wait for more. 

Brokeneagle
Master at Arms
A little more progress.............
A7V recieved the green and brown cammo for tri-colour base coat......I realised I attached the base a little early making the painting of the tank more difficult than it should have been. Next -up decals on and MG's painted.


The MkV got the tracks on and painted grey, some dirty corners started and the red and white stipes at the front masked off.


A7V recieved the green and brown cammo for tri-colour base coat......I realised I attached the base a little early making the painting of the tank more difficult than it should have been. Next -up decals on and MG's painted.
The MkV got the tracks on and painted grey, some dirty corners started and the red and white stipes at the front masked off.
Brokeneagle
Master at Arms
Thanks Steve, the wood grain worked out OK....actually better than I thought.Some pretty realistic work you've made of those planks, impressive. I always seem to jack up my wood grains, oh well. Love the progress on both, outstanding work!
Brokeneagle
Master at Arms
Latest bits and pieces ...........
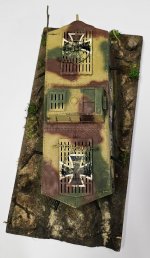
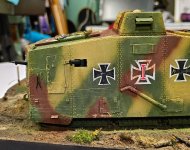
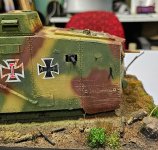
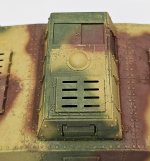
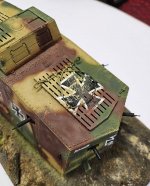
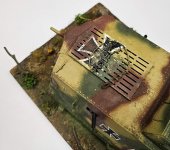
A7V - Weathering(Stage 1)Acrylic basecoat.
Since my last post, the A7V has had the tri-color basecoat weathered with different shades of the acrylics. This was done by adding darker and lighter mixes of the base colors with various brushes to achieve staining, fading and 'stippling' (now coined as mapping by the new age boys). Then some scratches were added in the lowest base color - light, dark yellow.
It still looks horrible but it will get better from here.
The large crosses on top have been scratched-up pretty severly with acrylics as base weathering effects. .......this will all look better as it gets toned down with the next couple of weathering stages. I had to cover a major mistake in getting to the decal stage and realising I couldn't get the crosses under the already attached cables on the roof. I cut up the decals, which kind of worked for 3/4's of the application. I figured the act of getting cables off and on and general combat/ shrapnel during combat would have a pretty rough effect on those pretty crosses on the roof. It's hard to see them under the dust on the original ref but they probably won't be as weathered as mine. Artistic licence. Also weathering will be a little different on my model - more of what I want to do rather than just follow the picture.

One important aspect on the next stage is to fade off the white cross outline on each side set around the red I figure. The reference has them as nearly completely covered. They don't really say much on the color guide in the kit.
The next stage of weathering using mud, dust and washes should tie it all together, with a final stage to highlight and shadow.


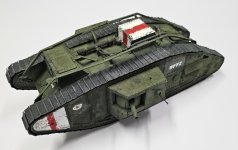
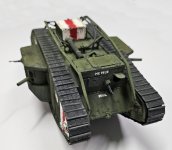
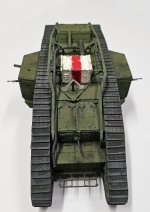
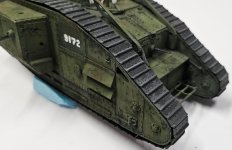
MkV - Weathering(Stage 1)Acrylic basecoat.
This one has been done in the same way as the A7V, so I won't repeat myself. The next stages of weathering will tone down and tie together the base effects and highlight the features. The red and white stripes were very hard to mask and I will do it differently next time - the roof piece will be painted seperately before attaching.
You will have probably noticed that the numbers on each side don't match. This is because I had a weird thing happen. I finished putting on the decals and let them set overnight on the workshop bench - I came down in the morning and the left hand side number had just disappeared; not on the tank, not on the bench and not on the floor. ??...and it had been fixed in place with decal set etc. like the others and they are all still there. So I just used a similar number off the decal sheet, i can live with it.




A7V - Weathering(Stage 1)Acrylic basecoat.
Since my last post, the A7V has had the tri-color basecoat weathered with different shades of the acrylics. This was done by adding darker and lighter mixes of the base colors with various brushes to achieve staining, fading and 'stippling' (now coined as mapping by the new age boys). Then some scratches were added in the lowest base color - light, dark yellow.
It still looks horrible but it will get better from here.
The large crosses on top have been scratched-up pretty severly with acrylics as base weathering effects.
 .......this will all look better as it gets toned down with the next couple of weathering stages. I had to cover a major mistake in getting to the decal stage and realising I couldn't get the crosses under the already attached cables on the roof. I cut up the decals, which kind of worked for 3/4's of the application. I figured the act of getting cables off and on and general combat/ shrapnel during combat would have a pretty rough effect on those pretty crosses on the roof. It's hard to see them under the dust on the original ref but they probably won't be as weathered as mine. Artistic licence. Also weathering will be a little different on my model - more of what I want to do rather than just follow the picture.
One important aspect on the next stage is to fade off the white cross outline on each side set around the red I figure. The reference has them as nearly completely covered. They don't really say much on the color guide in the kit.
The next stage of weathering using mud, dust and washes should tie it all together, with a final stage to highlight and shadow.


MkV - Weathering(Stage 1)Acrylic basecoat.
This one has been done in the same way as the A7V, so I won't repeat myself. The next stages of weathering will tone down and tie together the base effects and highlight the features. The red and white stripes were very hard to mask and I will do it differently next time - the roof piece will be painted seperately before attaching.
You will have probably noticed that the numbers on each side don't match. This is because I had a weird thing happen. I finished putting on the decals and let them set overnight on the workshop bench - I came down in the morning and the left hand side number had just disappeared; not on the tank, not on the bench and not on the floor. ??...and it had been fixed in place with decal set etc. like the others and they are all still there. So I just used a similar number off the decal sheet, i can live with it.


Last edited:
Love it, the "base" weathering. 

Brokeneagle
Master at Arms
Some more progress on these WW1 Leviathans.......
First Up, I hand painted in the rest of the cross on the A7V roof. This will still get plenty of dust and dirt and be mostly hidden but it makes for a better base.

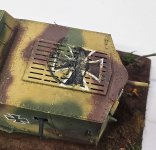
Thats all for the A7V.
MkV - Weathering(Stage 2)Oil base and Acrylic pigments.
The green shade and color has been impossible to capture with my phone camera so this is not exactly what it looks like. I think I will take the final shots with my SLR.
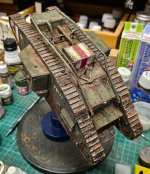
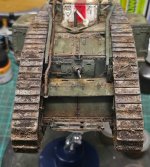
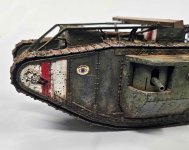
The rest has been done on the weathering of the MKV male - such a fun kit to paint. It has a very unique look which provides so many weathering opportunities. I added dried sea grass and dirt to the roof and tracks randomly. This tank will be shown as stopped in a shell crater in 'no mans land', so the mud will be a mix of wet and dry effects.
Just 'bloody good fun, what?'


and as you can see in the photo above, I managed to fix the incorrect number decal issue with a bit of white oil paint and green base color.
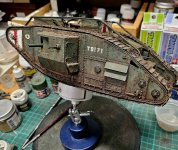
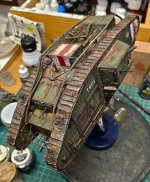
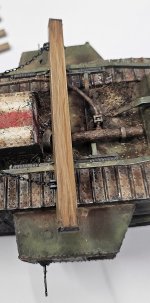
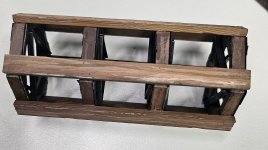
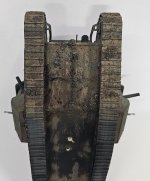
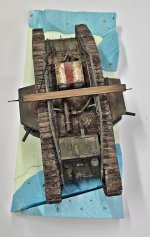
Next was the wooden unditching beam and trench crossing device both stored on the roof. I also added the chains holding the rear lower platform as these were not suppied in the kit.
I painted these with Vallejo Acrylics, watered down in multiple layers, using a wet palette, over a base color of Tamiya black. I then enhanced the model with some final touches of rust and dirt but there still needs to be more weathering done on the unditching beam and the trench crossing device. I also need to finish the chains holding these in place.
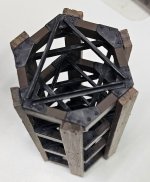
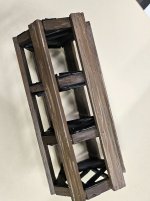
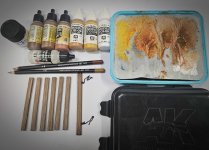
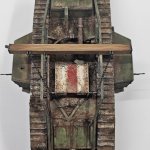
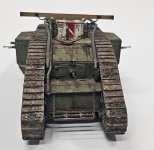
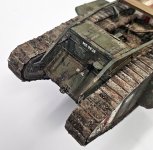
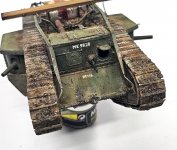
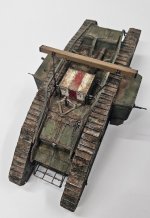



Next up is the base and attaching the tank and then painting the figure.
So far.......


First Up, I hand painted in the rest of the cross on the A7V roof. This will still get plenty of dust and dirt and be mostly hidden but it makes for a better base.

Thats all for the A7V.
MkV - Weathering(Stage 2)Oil base and Acrylic pigments.
The green shade and color has been impossible to capture with my phone camera so this is not exactly what it looks like. I think I will take the final shots with my SLR.
The rest has been done on the weathering of the MKV male - such a fun kit to paint. It has a very unique look which provides so many weathering opportunities. I added dried sea grass and dirt to the roof and tracks randomly. This tank will be shown as stopped in a shell crater in 'no mans land', so the mud will be a mix of wet and dry effects.
Just 'bloody good fun, what?'
and as you can see in the photo above, I managed to fix the incorrect number decal issue with a bit of white oil paint and green base color.


Next was the wooden unditching beam and trench crossing device both stored on the roof. I also added the chains holding the rear lower platform as these were not suppied in the kit.
I painted these with Vallejo Acrylics, watered down in multiple layers, using a wet palette, over a base color of Tamiya black. I then enhanced the model with some final touches of rust and dirt but there still needs to be more weathering done on the unditching beam and the trench crossing device. I also need to finish the chains holding these in place.


Next up is the base and attaching the tank and then painting the figure.
So far.......

Last edited:
Looks like fun sure nuff, 


