• Modelers Alliance has updated the forum software on our website. We have migrated all post, content and user accounts but we could not migrate the passwords.
    This requires that you manually reset your password.
    Please click here, http://modelersalliance.org/forums/login to go to logon page and use the "Forgot your Password" option.

Tamiya Krupp Protze Kfz69

AndyFettes

Master at Arms
Here`s my entry into the freezing cold steel campaign

I thought Id like to do a simple out of the box job with a few home made updates and some Archer decals

A white wash scheme is also in order here to try and improve my painting skills and of course some mud for good measure

Im thinking an abandoned vehicle in a snowy scene

Anyway heres the opening shots

IMG_4129.JPG

IMG_4131.JPG

IMG_4132.JPG

IMG_4133.JPG


Andy :)
 
Thanks all,...

Ive just been nosing through the instruction sheet and I forgot how good Tamiya stuff really is, yes i know its taken a bit of a back seat as regards Dragon and Tasca and the like when producing fine kits but still a very viable manufacturer and considering its been since the 70s that I first started modelling Tamiya I think my first Catalogue was from 1976

So first step a through read of the instruction manual and setting out of sprues :D
 
Looking forward to this one,Andy!

Are you going to do some figures with it? :yipee

Greetings,Ron.
 
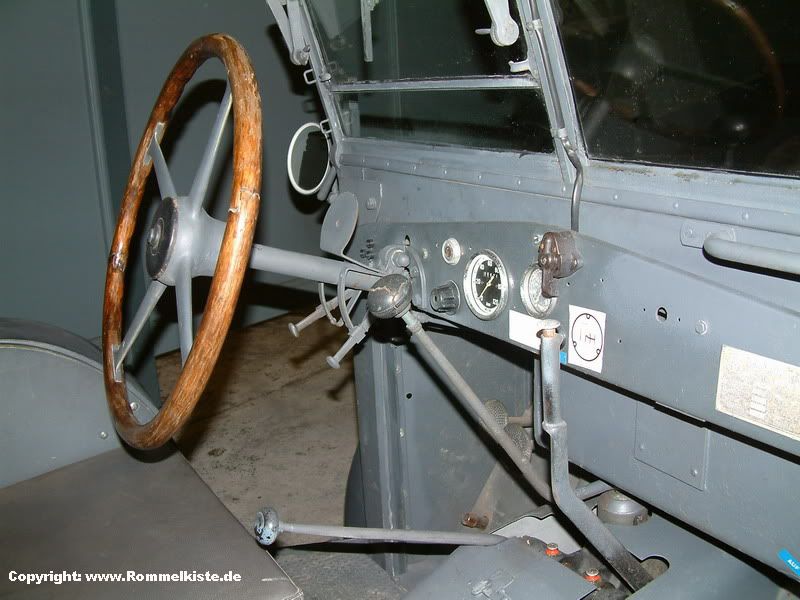
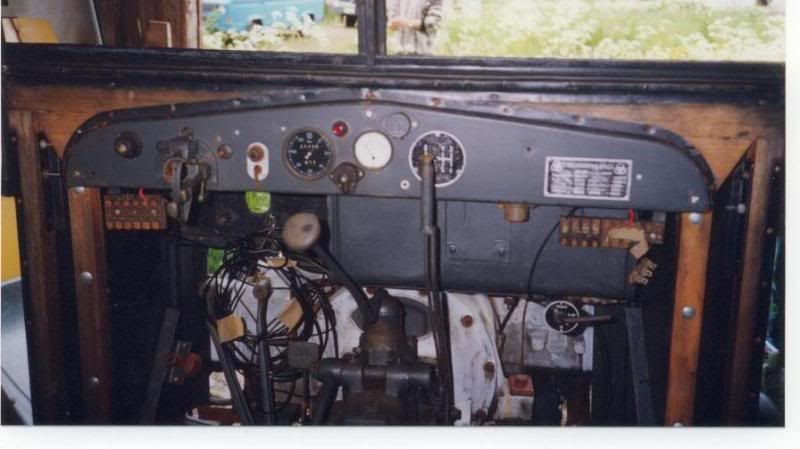
I am I am however I am having a spot of bother finding good pics of the cab area,..I have the toadmans pictures and sadly the kit is nothing like the photos,...groan !!

Ive also posted a cry for help in the erm,....help me section

:D

Other than that Ive done abit today pics to follow
 
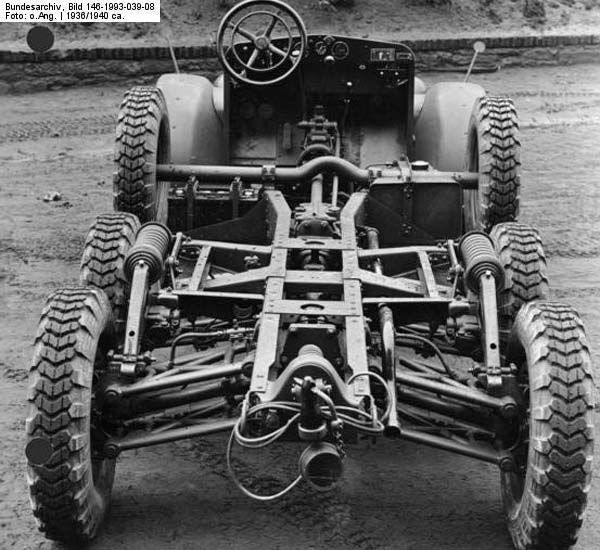
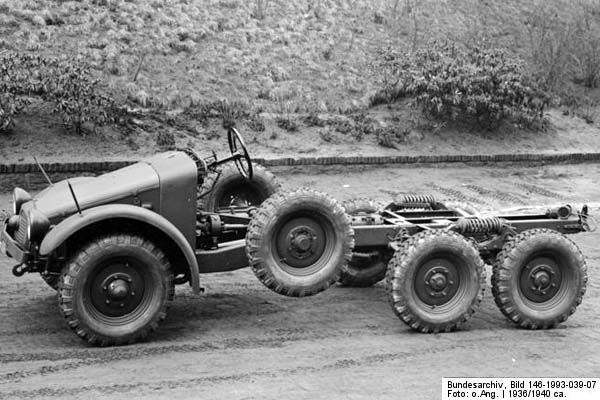
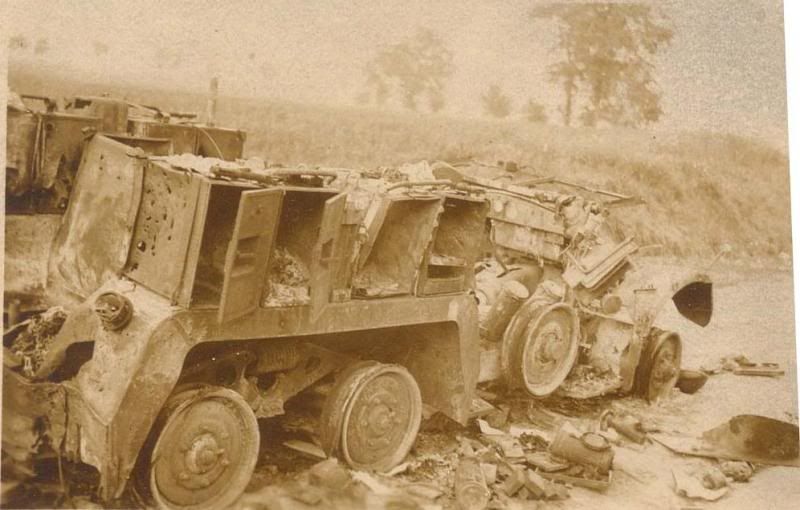
Maybe this might help, the 69 and the 70 were essentially the same vehicle, the 69 being more of a munitions carrier and the 70 a personal carrier, so if you search for the 70 you will find more of what you are looking for. From memory there is an "earlier" and "later" chassis

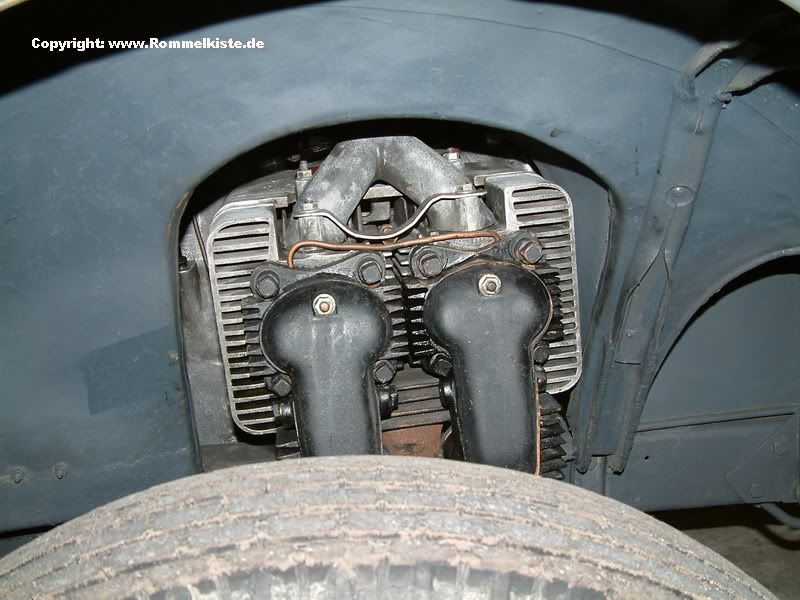
The chassis of the Krupp L 2 H 143 can be seen on this photo. It seems that it is an early production model because of the narrow bumper which was introduced during serial production of the Krupp L 2 H 43. A typical feature of the L 2 H 143 was the increased distance between the two rear axles. The chassis of the Krupp L 2 H 143, now seen from the rear. The front axle was designed as a Faustachse - ? - which was connected to the frame with half-springs. Additional shock absorbers were fitted. The rear axles were designed as Pendelachsen – swing axles. Suspension arms connected the wheels with the frame. These independent suspended wheels were coil spring mounted. A bumper was introduced during serial production of the Krupp L 2 H 43. This was noticeable broadened for the production run of the Krupp L 2 H 143. The new engine Krupp M 304 had a power of 60 HP. Despite the same rotation speed and capacity, the power was increased by 5 HP compared to the predecessor engine Krupp M 302.
ThechassisoftheKruppL2H143a.jpg

ThechassisoftheKruppL2H143.jpg

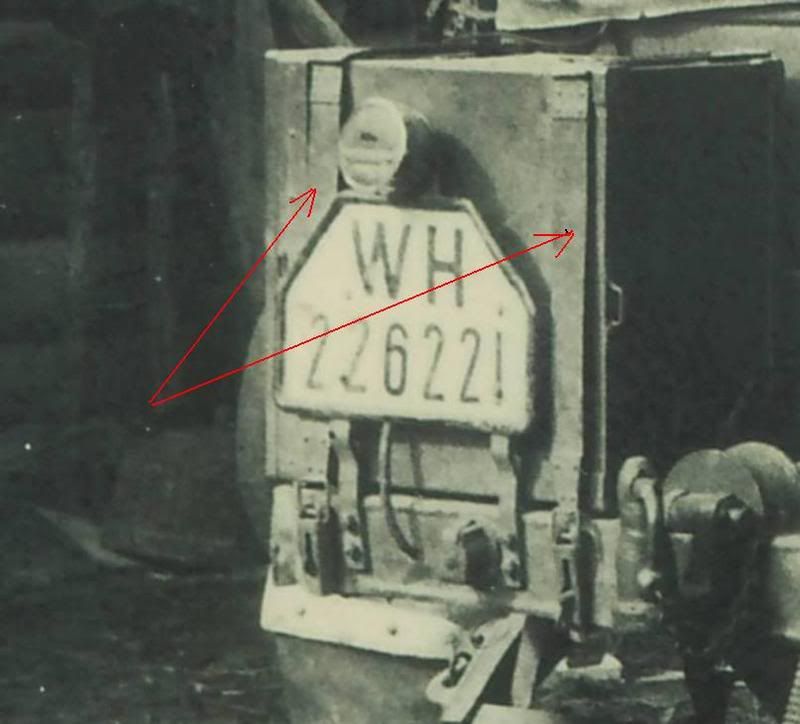
Most of these are the 70, some are the 69. I'm not sure how the 1/35 kit is at the rear, but the Dragon kit 1/72 version, which I'm building, is a direct pantogragh down of Tamiya's (which is a very good thing)1/48 kit and the licence bracket and rear signals are wrong on that kit.

Krupprotze12.jpg

kruppprotzekw9.jpg

Krupprotze09.jpg


Back of the 70
Vastleggeninvolledigscherm24-9-2010151722.jpg


The 69 and parts
kopi2avimage0003m.jpg

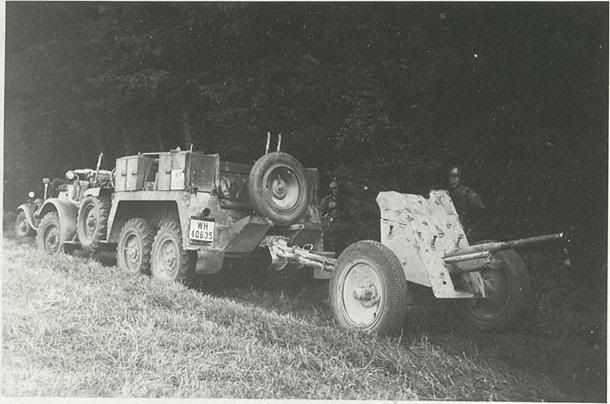
kruppProtzeWH40635mit3_7cmPak_Baydeww2.jpg

kruppProtzeWestfeldzug_W.jpg

kopiavimg0810.jpg

picture207u.jpg


I'm sorry I do not recall where I got these pics from.
 
Dear Andy.

...great choice... one of my favourites...I´ll follow witha big interest :popcorn

...btw,great reference photos on this thread :dude

Best! :drinks

Luiz.
 
Update

Heres a bit of mucking about with the cab area it is NOT accurate in any way shape of form

IMG_4134.JPG


Hers my rendition of a muddy dirty wheel arch or least it will be when painted

IMG_4135.JPG


and finally here`s a very comfortable looking seat and again it will be when painted right up ( in fact Im rather relishing the though of painting up this leather

IMG_4136.JPG
 
Christian,.. I use Vallejo sandy Paste stippled with a medium sized brush

I like to do it this way as it hides some big old sink holes that would have been a pain to fill plus looks good when painted up and weathered
 
Update

Heres a bit of mucking about with the cab area it is NOT accurate in any way shape of form

IMG_4134.JPG


Hers my rendition of a muddy dirty wheel arch or least it will be when painted

IMG_4135.JPG


and finally here`s a very comfortable looking seat and again it will be when painted right up ( in fact Im rather relishing the though of painting up this leather

IMG_4136.JPG

I've always liked that technique Andy, accomplishes so much, hiding the sink holes, texturing the mud, BAM!

:soldier :mpup
 
Back
Top