
Hello fellow modelers.
On this thread I will share a simple technique I use often to mass produce parts to be used in making scratch scenery.
Dave's Trick # 2
Making rubber molds for plaster blocks
Using silicone rubber to make molds in order to create unlimited number of modeling pieces is not a new technique. It was created and refined by train modelers and wargammers in order to create their sceneries.
I have been using this technique for a few years now and I have to say I love it! It is perfect for building structures for 1/35 military dioramas. Even if it looks a little intimidating, its quite simple and easy to master.
The first thing to do is to make your masters. These are the pieces you want to copy. I usually make my masters in plaster also, this because plaster is easy to sculpt and sand into shape. Geometrical and straight shapes are the easiest to cast. The important thing is for the part to have a flat side. This will be the side facing down when you pour the rubber.
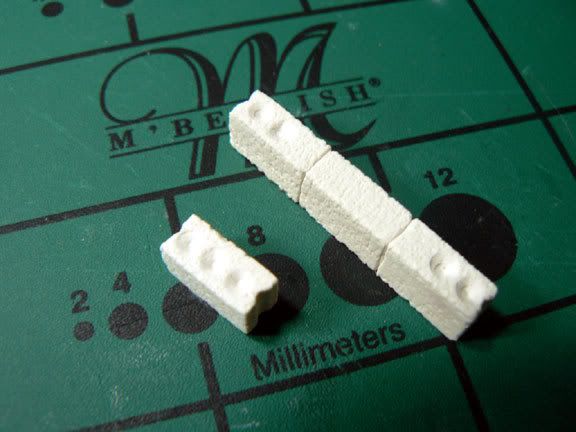
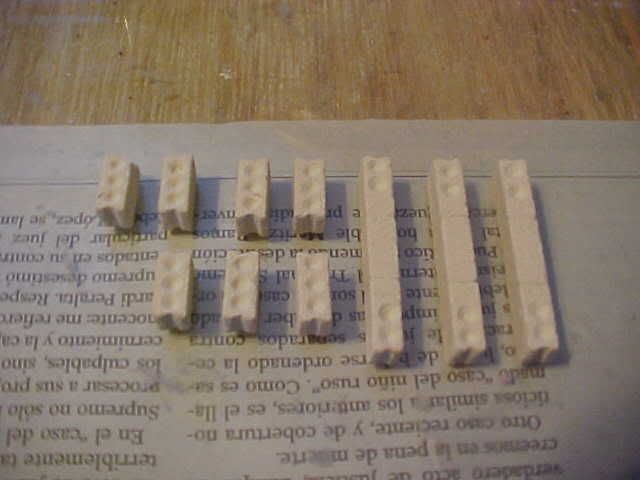
If you are making building blocks for structures your measurements must be precise. I can’t stress this enough. Otherwise your pieces won’t be interchangeable. The best thing is to make a good number of masters, this will make duplicating faster.
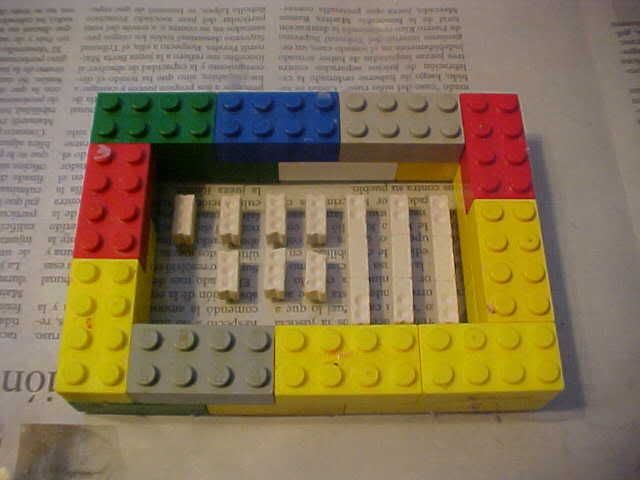
I like to make my molds on top of a piece of glass. The benefit of this is that the glass is not going to bend and therefore warping of the mold will be avoided. Once the masters are done I secure them to the glass using School Rubber Cement. This is done to prevent the parts from floating once the rubber is pour. Floating parts will ruin your mold!

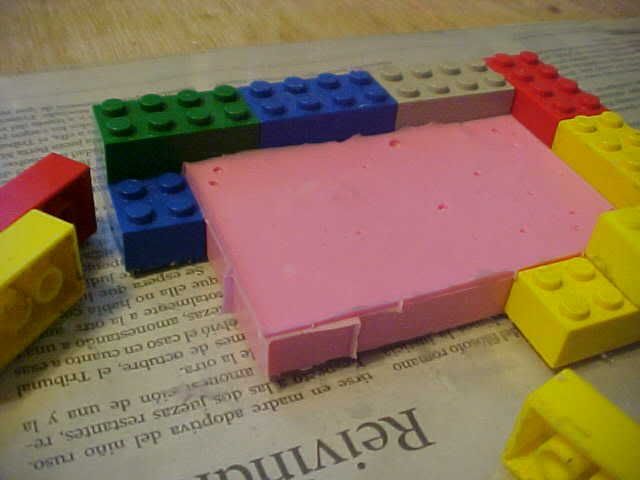
Once they are secured I build the case for the mold. For this I use LEGOS. (Don’t worry no kids were harm during this exercise ). A coat of rubber cement was applied to bond the legos to the glass. It is best for the legos to be new, as they will fit tight and will prevent leaks.. If the legos are old place some tape around the outer edge of the case once you build it. (Or be patient, the kids will get tired of those Christmas presents before long ) Make sure to leave about half (1/2) inch from the pieces to the wall.
There are many types of rubber available. Some places you can get it from is at www.MicroMark.com, or www.Smooth-on.com The best rubber to use for your first try is one that comes in equal parts and mixes 50% and 50%. The one I use mixes one part of catalytic (the red liquid that makes it dry) for every ten parts of rubber. And you have to weigh it and stuff... , so the easiest way to go is the 50/50.

After the rubber is mixed it is poured into the mold. It takes quite a while to dry. The best thing is to leave it overnight.
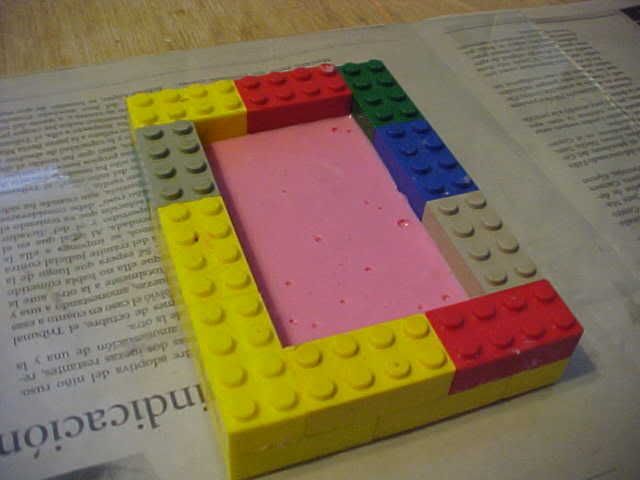
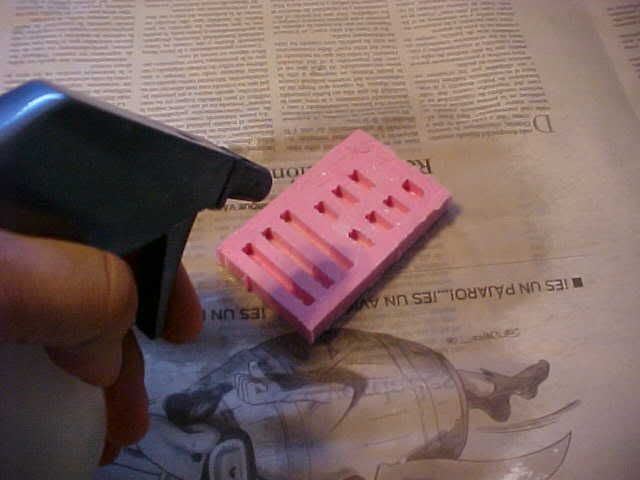
After the rubber is dry you can remove the lego case. The rubber cement comes away really easy.
You can then flex the mold to remove the masters.
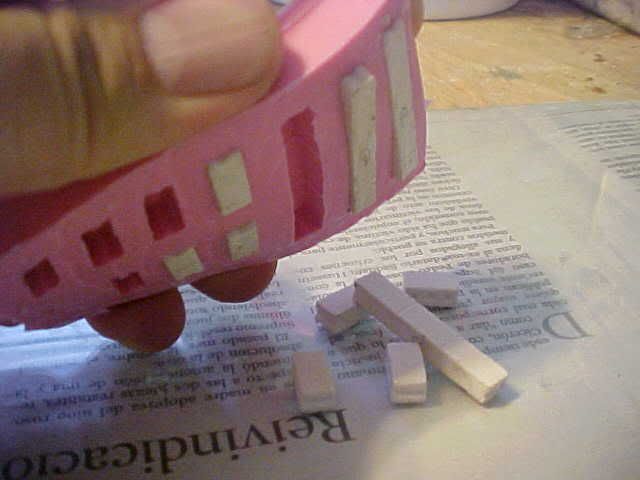
Your mold is complete!

Now it is time to cast some more pieces. A very important step is to spray the mold with a mixture of water with a few drops of dishwasher soap in it. This is known as “wet water”. What happens is that water has a very high surface tension; this causes the water to kind of stay out of the details of the mold. Since plaster is diluted in water this will result in plaster not entering small details creating ugly bubbles in your pieces. I use dishwasher soap because it is designed not to foam, and therefore won’t create new bubble in your pieces.

Without wet water

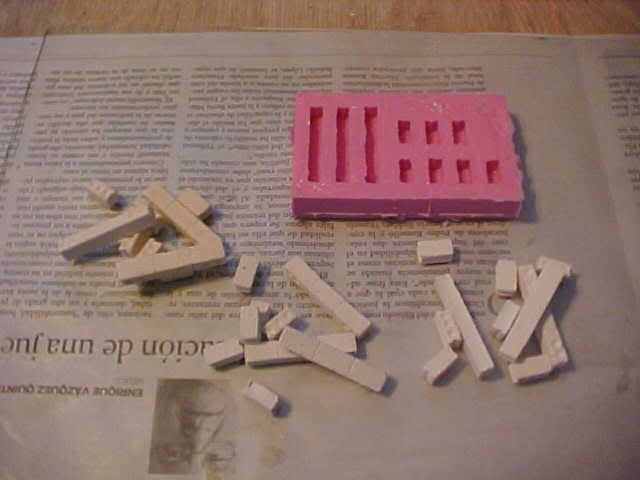
We then fill the mold with plaster.

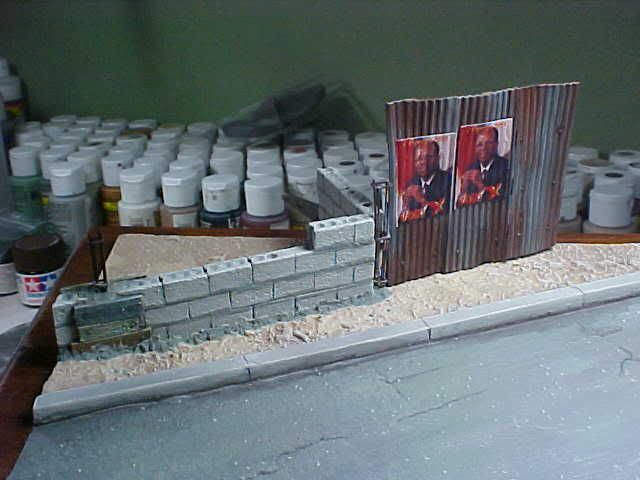
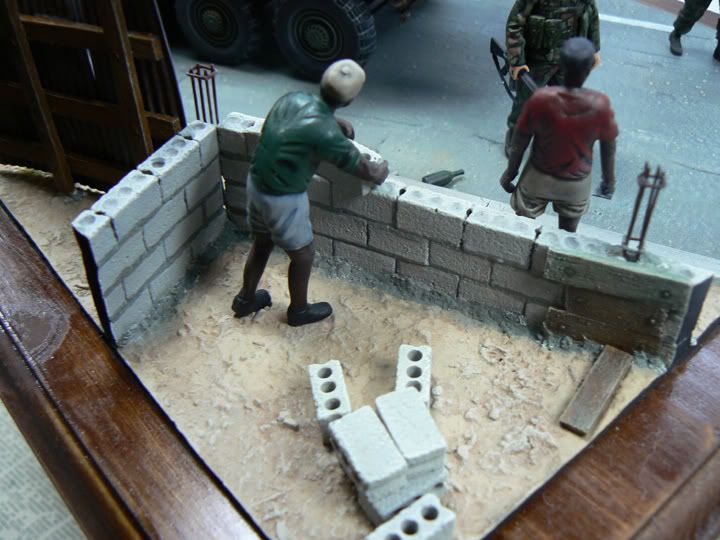
Now you can make as many pieces as you need.
All you have to do now is let the plaster dry overnight and build away!!
I hope this brief description of this technique was helpful. If you are like me and you like building dioramas, this is a very useful tool.
Until next time
Model on!
Dave
On this thread I will share a simple technique I use often to mass produce parts to be used in making scratch scenery.
Dave's Trick # 2
Making rubber molds for plaster blocks
Using silicone rubber to make molds in order to create unlimited number of modeling pieces is not a new technique. It was created and refined by train modelers and wargammers in order to create their sceneries.
I have been using this technique for a few years now and I have to say I love it! It is perfect for building structures for 1/35 military dioramas. Even if it looks a little intimidating, its quite simple and easy to master.
The first thing to do is to make your masters. These are the pieces you want to copy. I usually make my masters in plaster also, this because plaster is easy to sculpt and sand into shape. Geometrical and straight shapes are the easiest to cast. The important thing is for the part to have a flat side. This will be the side facing down when you pour the rubber.
If you are making building blocks for structures your measurements must be precise. I can’t stress this enough. Otherwise your pieces won’t be interchangeable. The best thing is to make a good number of masters, this will make duplicating faster.
I like to make my molds on top of a piece of glass. The benefit of this is that the glass is not going to bend and therefore warping of the mold will be avoided. Once the masters are done I secure them to the glass using School Rubber Cement. This is done to prevent the parts from floating once the rubber is pour. Floating parts will ruin your mold!
Once they are secured I build the case for the mold. For this I use LEGOS. (Don’t worry no kids were harm during this exercise
). A coat of rubber cement was applied to bond the legos to the glass. It is best for the legos to be new, as they will fit tight and will prevent leaks.. If the legos are old place some tape around the outer edge of the case once you build it. (Or be patient, the kids will get tired of those Christmas presents before long ) Make sure to leave about half (1/2) inch from the pieces to the wall.
There are many types of rubber available. Some places you can get it from is at www.MicroMark.com, or www.Smooth-on.com The best rubber to use for your first try is one that comes in equal parts and mixes 50% and 50%. The one I use mixes one part of catalytic (the red liquid that makes it dry) for every ten parts of rubber. And you have to weigh it and stuff...
, so the easiest way to go is the 50/50.
After the rubber is mixed it is poured into the mold. It takes quite a while to dry. The best thing is to leave it overnight.
After the rubber is dry you can remove the lego case. The rubber cement comes away really easy.
You can then flex the mold to remove the masters.
Your mold is complete!
Now it is time to cast some more pieces. A very important step is to spray the mold with a mixture of water with a few drops of dishwasher soap in it. This is known as “wet water”. What happens is that water has a very high surface tension; this causes the water to kind of stay out of the details of the mold. Since plaster is diluted in water this will result in plaster not entering small details creating ugly bubbles in your pieces. I use dishwasher soap because it is designed not to foam, and therefore won’t create new bubble in your pieces.
Without wet water
We then fill the mold with plaster.
Now you can make as many pieces as you need.
All you have to do now is let the plaster dry overnight and build away!!
I hope this brief description of this technique was helpful. If you are like me and you like building dioramas, this is a very useful tool.
Until next time
Model on!
Dave