I want you to show me how to mask a straight line over a complex surface like this. I tried it on the IL2 and just could not do it, think it's a disability I have...I can't draw a straight line to save me.

-
Modelers Alliance has updated the forum software on our website. We have migrated all post, content and user accounts but we could not migrate the passwords.
This requires that you manually reset your password.
Please click here, http://modelersalliance.org/forums/login to go to logon page and use the "Forgot your Password" option.
You are using an out of date browser. It may not display this or other websites correctly.
You should upgrade or use an alternative browser.
You should upgrade or use an alternative browser.
F4U-4
- Thread starter ij001
- Start date
ij001
Well-known member
I want you to show me how to mask a straight line over a complex surface like this.
I will try my very best, bud.... No guarantees :coolio
Ian
phantom II
Master at Arms
I want you to show me how to mask a straight line over a complex surface like this. I tried it on the IL2 and just could not do it, think it's a disability I have...I can't draw a straight line to save me.
I'll tell you Bob it's very tricky . The stripes on the clog are ever changing curves . All the measuring in the world won't get it done . You'll have to eye ball it

Start out with some very thinly sliced tape and re position it as required , then use wider tape to mask from there .
 Sounds easier than it is . Just a lot of trial and error.
Cheers, Christian B)
ij001
Well-known member
I agree, Chris. Whenever I've done it, I used a convenient panel line to start off, then after that it's Mk1 eyeball and experience/practice !!...
...and a willingness to strip it off an try again :facepalm
But a good 'cheat' for this one will be to spray the 'Willow Green' across the fuselage and fuselage, then measure the width off the Superscale sheet, mask, paint the overall Glossy Sea Blue then I can carefully cut the decal 1mm or so in from the white edging and use them to 'pin-stripe' the painted bands.
...What could possibly go wrong :gogo
Ian
Yep, sort of a reverse mask, but you still have to get that bugger straight. :facepalm
phantom II
Master at Arms
I agree, Chris. Whenever I've done it, I used a convenient panel line to start off, then after that it's Mk1 eyeball and experience/practice !!...
...and a willingness to strip it off an try again :facepalm
But a good 'cheat' for this one will be to spray the 'Willow Green' across the fuselage and fuselage, then measure the width off the Superscale sheet, mask, paint the overall Glossy Sea Blue then I can carefully cut the decal 1mm or so in from the white edging and use them to 'pin-stripe' the painted bands.
...What could possibly go wrong :gogo
Ian
Seems like a very sound strategy to me
 What could possibly go wrong
  Let me see....
Good luck. An awful lot of stripes etc . Christian B)
ij001
Well-known member
Today was going to be a good day. I'd managed to complete almost all of the 'chores' that I'd normally do on a Tuesday, yesterday to create more 'me time' today AND last night after phoning HMRC back in the UK, I found that the $2600 tax bill they said I owed from 2012, was written-off as their mistake - Yep, today was going to be a good day.
I've been working on-and-off on the cockpit of the -4 for a couple of weeks and today planned to bring it all together and get the fuselage halves joined-up. I reckoned that I could probably get about three possibly four hours uninterrupted bench time. After an hour, I'm done !!
There's a number of reasons for this, so in no particular order:
Hobbyboss have over-engineered this kit to a point where it is virtually impossible to make any progress without spending three or four hours on BUILDING each sub assembly. Example - there are four parts to assemble to create the floor pan (there's a choice of two) and fore/aft bulkheads for the 'pit, add then you add that the control column linkage and various tiny levers and hydraulic reservoirs (only one of which can just be seen). Next you need to build the side consoles (there's a choice of four with interchangeable vertical panels) the IP is excellent, and there's a choice of three and a separate overlay for the radar configured -5N... and they all look virtually the same. The two piece seat is dainty at best with almost no gluing surface and will merrily snap-in-half if there's a draft in the room.
Which brings me to another question.... What the h*ll has Hobbyboss made this kit of - it cannot be plastic as we know it because it's almost completely impervious to 'weld'-type adhesive. I tell you, when you do eventually find a surface to add cement to, it just slides right off :facepalm - Arghhh !!. Nevertheless I persevered and eventually managed to get the seat in-situ with the Eduard lap belts in place. Then I test-fitted the side consoles... of course they didn't fit neatly so out came a blade to scrape away the console mounts, and off went the seat, the harnesses and my temper.
I have to say right here, the Vought Corsair is one of my very favourite aircraft types, I love building them, and it is only this passion for the aircraft that stopped me drop-kicking the whole thing across the garden this morning. And I haven't even told you about the seventeen-piece engine and thirteen-piece rear undercarriage sub assemblies which have to be built/painted BEFORE you can join the fuselage halves together... and guess what ??, even tho' you wont see most of the detail it needs to be done to hold the bl**dy thing together - :angry: :angry:
:hmmm This is supposed to be a relaxing hobby, right ??
Ian
What solvent you using? I remember some plastic that didn't react well with the standard stuff but it was a very long time ago. I don't think I have even seen a Hobbyboss kit.
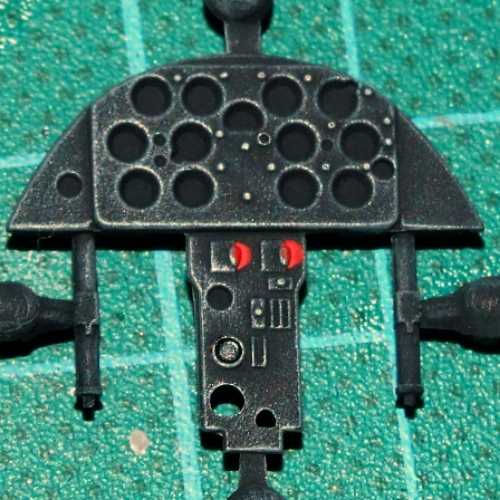
IP looks great.
IP looks great.
Hobbyboss have over-engineered this kit to a point where it is virtually impossible to make any progress without spending three or four hours on BUILDING each sub assembly.
Some would call that value (if it was properly engineered to fit and not fight.
Which brings me to another question.... What the h*ll has Hobbyboss made this kit of - it cannot be plastic as we know it because it's almost completely impervious to 'weld'-type adhesive.
Sounds like the ABS blen plastic Trumpeter used in the beginning with their T-55 toys... ahem... models.
:hmmm This is supposed to be a relaxing hobby, right ??
Only if it is a new tool Tamiya kit! Mind you, every company seems to have a great kit (very good engineering, fit, accuracy... even Trumpeter and Hobby Boss) but Tamiya is consistently relaxing builds. In other words, not enough of a challenge for me so I have to futz around with it and never finish! I hang my head in shame.
Regards,
phantom II
Master at Arms
Holly molly ! You are having a bad day :fencing
Sorry to hear about the tax surprise. Frankly I'm sick and tired of anything to do with Government Tax included . Luckily, my wife is an accountant so, she deals with that part.
My idea of a good tail wheel assembly is something I can install when the kit is done. Otherwise it will get broken. Another reason why I enjoy brass pieces when I can substitute something for kit parts
I have no experience with Hobbyboss plastic but I wonder if plastrut cement would work on it. I've heard somewhere it might be closer to ABS cement.
I hope tomorrow goes better. :v Cheers, Christian B)
Sorry to hear about the tax surprise.
...I wonder if plastrut cement would work on it. I've heard somewhere it might be closer to ABS cement.
Christian, Ian stated that the tax bill was a mistake on their part so it wasn't good news but GREAT news.
You're correct about the Plastruct cement used for ABS plastic. Just remember that they make two kinds. also, you might find it cheaper at a plumber's supply company to buy the ABS cement as it is popular with plastic pipes.
Regards,
phantom II
Master at Arms
Thanks for the correction . I know I read it at least twice and concluded the worst. This is one time I am glad to be wrong
Good news from a government agency is rare indeed . Glad to hear that.
Maybe now, you can order the laser with which to melt the plastic together
Cheers, Christian B)
Good news from a government agency is rare indeed . Glad to hear that.
Maybe now, you can order the laser with which to melt the plastic together
Cheers, Christian B)
ij001
Well-known member
....good thinking guys, but it isn't ABS (I remember LS & Marui using ABS on their 1:1 scale hand-guns & rifles), that said it does have some of the qualities of ABS.... the aforementioned reluctance to adhere using 'weld' type glue.
What I ended-up doing was using a 'point' of CA, holding with fine-point pliers where it was possible, otherwise fingers :pinch: , then dripping-in very strong Weld and holding again whilst the capillary action of the surfaces took effect.
Very, very time consuming. I think, also, the tiny gluing surfaces have compounded the problem too. Going to have another run at it this afternoon, at least try and get the 'pit finished & photographed... maybe :idonno
Ian
ij001
Well-known member
:vmad
…so this morning the weather has broken-back, there’s a low overhead which is keeping the warm damp air in-situ and the temp is up to around 11deg at 0930… mild enough to get into the garage and my workbench .
Within three minutes of picking-up the –4 and making a start on the interior, the seat had snapped in-half again and fallen off its’ mounting and the carefully draped lap belts had arranged a picnic with Clive the Carpet-Monster !!
Thassit – I’m not an impatient modeller but this project just made it to my ‘Ahhhh F*ck*t List’. Time to pack it away and reach for the Tamiya –1A.
Ian
…so this morning the weather has broken-back, there’s a low overhead which is keeping the warm damp air in-situ and the temp is up to around 11deg at 0930… mild enough to get into the garage and my workbench
.Within three minutes of picking-up the –4 and making a start on the interior, the seat had snapped in-half again and fallen off its’ mounting and the carefully draped lap belts had arranged a picnic with Clive the Carpet-Monster !!
Thassit – I’m not an impatient modeller but this project just made it to my ‘Ahhhh F*ck*t List’. Time to pack it away and reach for the Tamiya –1A.
Ian
Sherman 18
Master at Arms
:hmmm This is supposed to be a relaxing hobby, right ??
Ian[/color][/quote]
maybe it is happening to those of us doing PTO :idonno
No agentg does not seem to be having issues.
I feel your pain.
:zen :zen :zen :zen :zen :zen :zen
Ian[/color][/quote]
maybe it is happening to those of us doing PTO :idonno
No agentg does not seem to be having issues.
I feel your pain.
:zen :zen :zen :zen :zen :zen :zen