jose luis lopez
Member
Hellooooooooooo!!!
Nice to return here again after some weeks of relax and holydays. And the best way to survive the return to rutine ... is ... yesssss!, you´re right, making kits!!
And this is the victim on my workbench now: a 1/48 AFV Club Tiger I
The kit is just ... wonderful. Nice fits, impressive detailing ... and for a modeller like me who do not like too much assembling kits and extra-detailing, is the perfect choice.
I just added the armorscale metal barrel for the gun and the friulmodel tracks (I REALLY love Friul tracks, I always use them if possible)
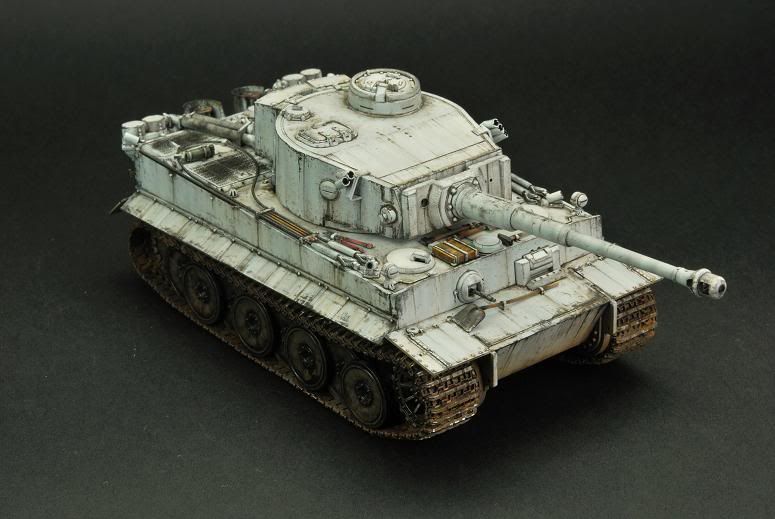
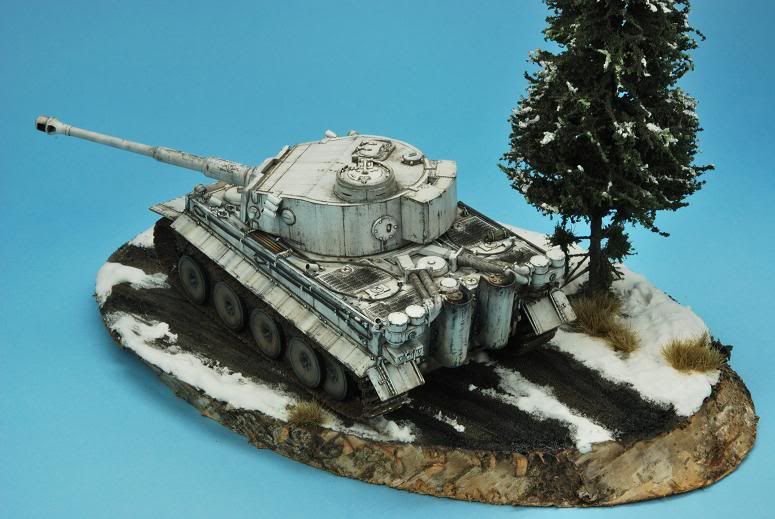
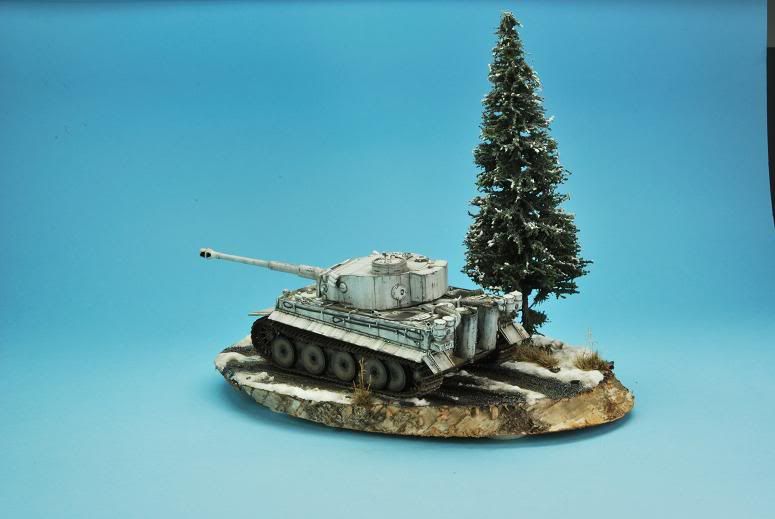
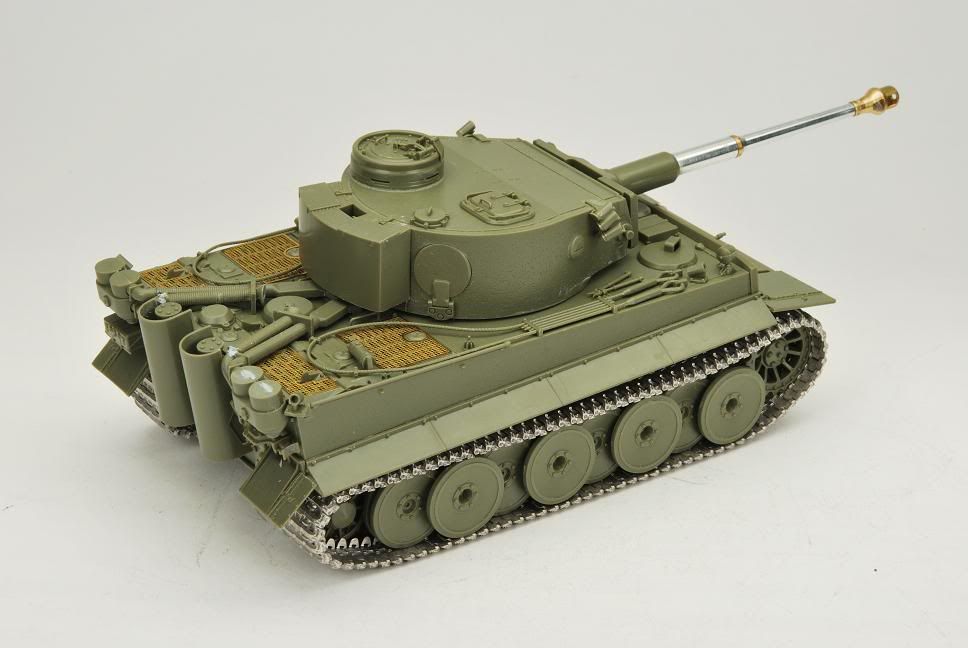
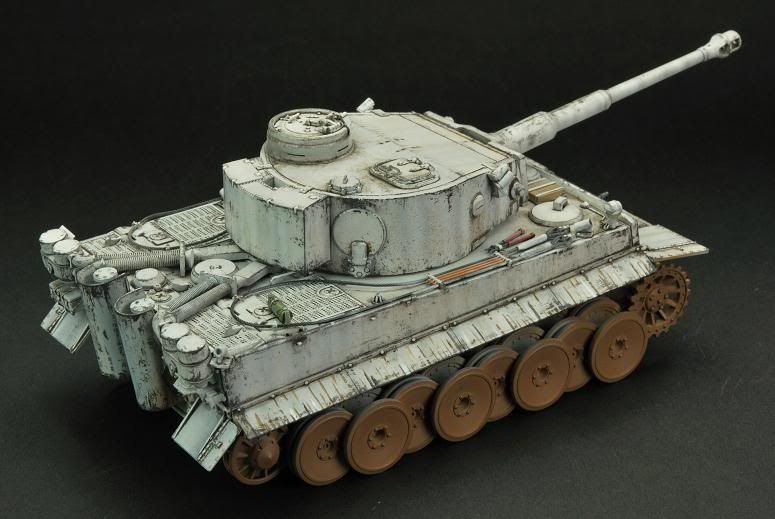
Here, you can see the model assembled:
Step 1: Priming
I normally use Gunze 1200 primer or Tamiya´s metal and plastic primer for this task. I spray the Tamiya´s primer directly in a cup, and then, I airbrush the product allover the kit in thin layers. No matter if in the first aplication you do not cover all the kit. With Gunze´s product. is the same, but I thin the product with Gunze´s thinner about 50%-50%. You can also use any other primers, like Vallejo´s, Andrea´s, or even just a light gray coat of paint if you do not have metal surfaces that can make the paint to peel off.

Do you have problems when priming? Rough surface full of awfull grains? No matter!! Me too!!. Just do the following.
- With a rough brush, carefully try to remove the dirt ans dry particles over the tank´s surface.
- If this fails, use a ultra fine sand paper and with patience, sand and polish all the surface. Be carefully with PE and little parts . know, carpet´s monster is always lurking ...
The result should be and absolutely soft and polished surfaces. This will help you to get a really nice base coat in next step.
Step 2: Base Color
Using Tamiya´s white and panzer grey, I started airbrushing the different surfaces of the vehicle. I always try to paint different shades in the diferent surfaces and textures of the tank to have a more colur rich appearance.You know, I love color modulation, altough I preffer to call it "tutti-frutti"!
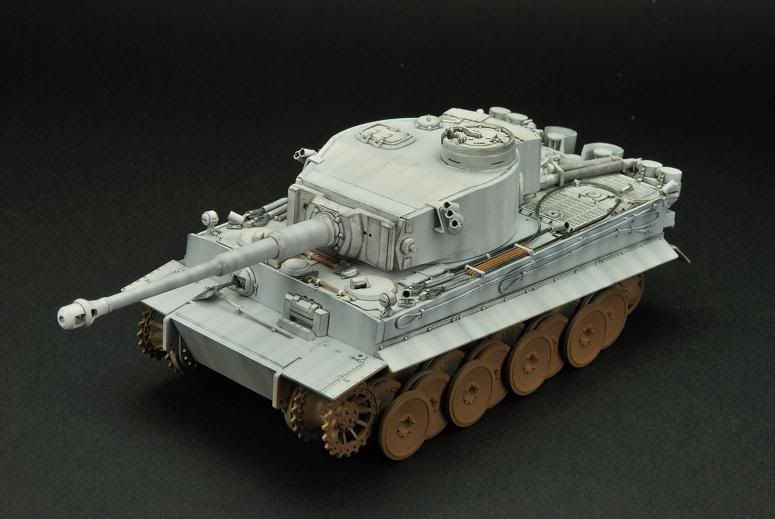
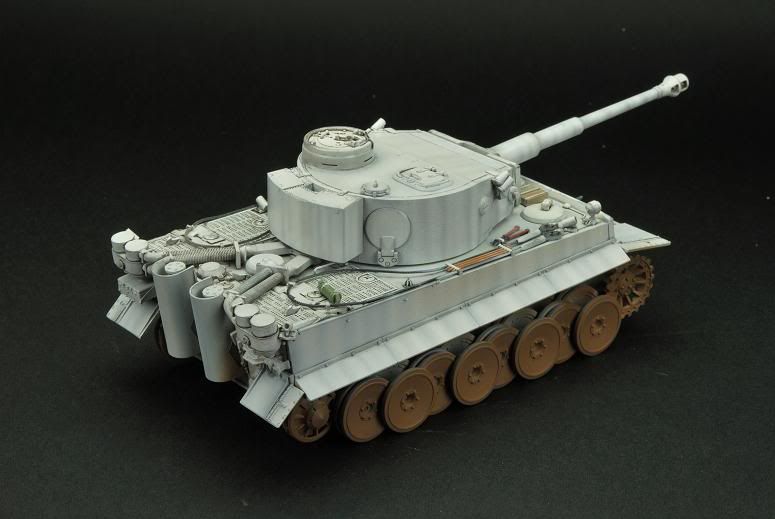
I also added some vertical strains using panzer grey in order to help to the future painting steps. If you´re going to dirt a surface, let´s do it since the first moment! (Luciano Rodrigez dixit). That´s the reason why I painted with XF-72 the lower part of the tank and the wheels.
Take your time, this is the most important step. Use masking tape if neccesary to help you painting in different color shades the different surfaces. Work a little ... stop working, look at your kit for a moment ... think, continue working ... be relax work listening to your favourite music!
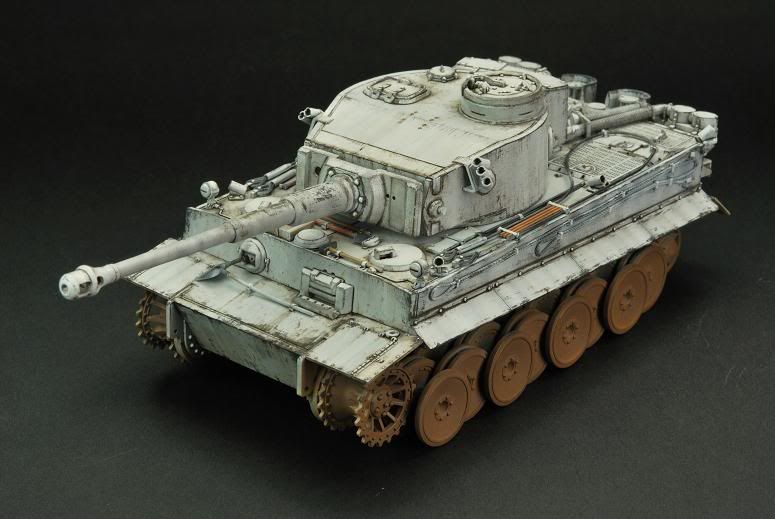
Once you´re happy with the result (well ... actually I´m never completely happy with the result, bur the kits must be finished!!), I always add a really nice coat of Tamiya´s clear airbrushed to have a glossy finish.
Yes, you read correctly. Glossy finish. This glossy finish is perfect for the pin washing were I use Tamiya´s enamel paint (90% black + 10% matt earth). The thinned paint runs really easyly over the surface with this gloss finish. And do not be worried, once you continue working, oils, filters ... will make the kit matt!
Step 3: Dirt, scratches and chips. Drybrushing!!
Yes, again you read correctly. Who said drybrush is dead??. The technique is easy.
Using any acrylic paint, your favourite, apply the technique of drybrushing in the tradicional manner, focusing on the edges and areas close to them. Just use your common sense and some imagination to get an atractive and realistic result.
Before the paint gets dry, with a cotton swab you can change to your will the shape of the spots, using a dental teeth for more precision when required.
Step 4: "Cold dirt"
Using again acrylic pains (oils can be also perfectly used at well), I start to add some cold dirt all over the tank.... but ... what´s cold dirt? No .. not necessary to put your paints in the refigerator") , "Cold dirt" is just a way to say that you should only use "cold" colors like black, grey, dark brown (with any trace of red!), so on
, "Cold dirt" is just a way to say that you should only use "cold" colors like black, grey, dark brown (with any trace of red!), so on
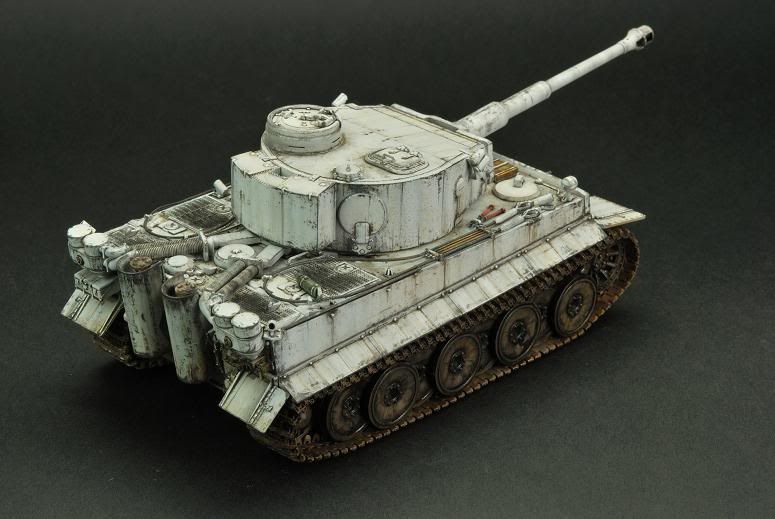
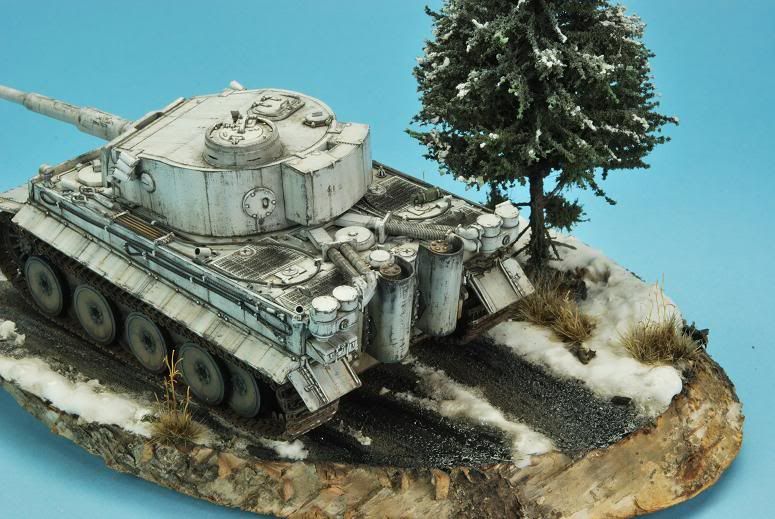
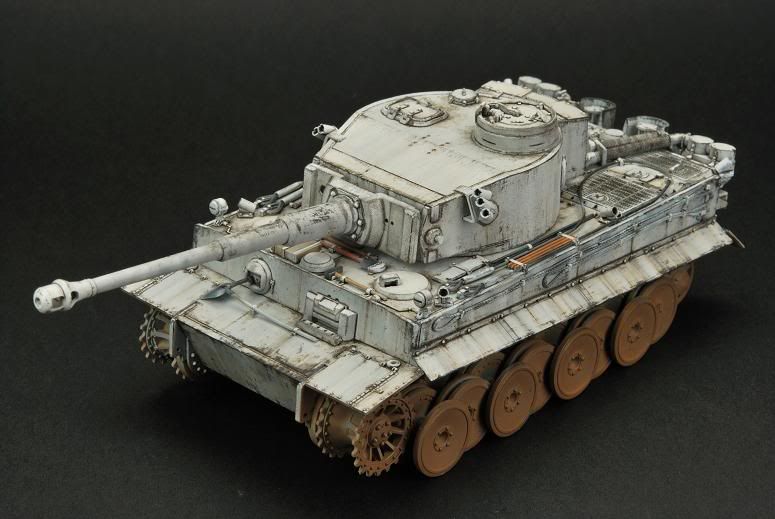
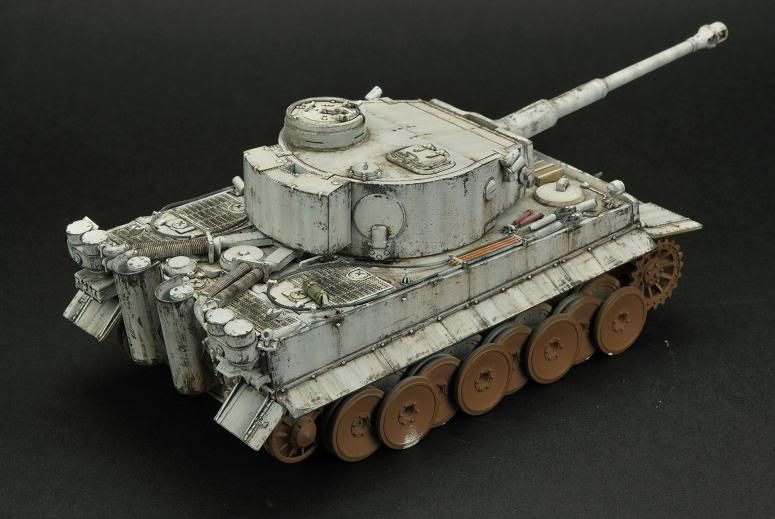
Here, the results:
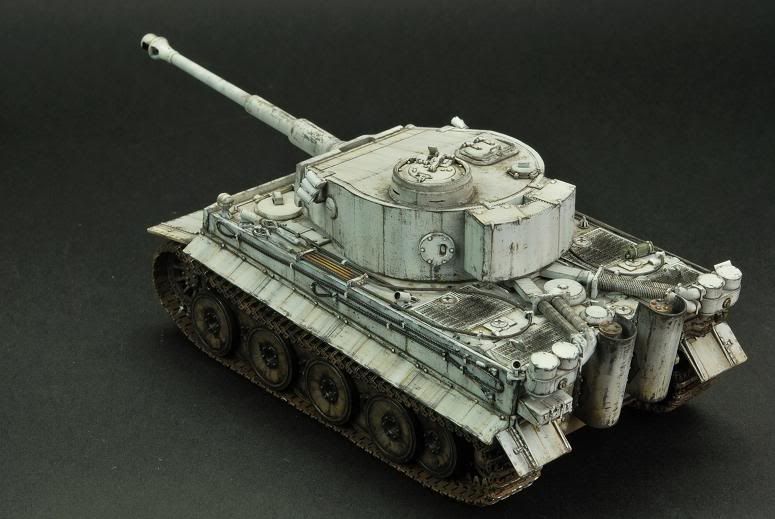
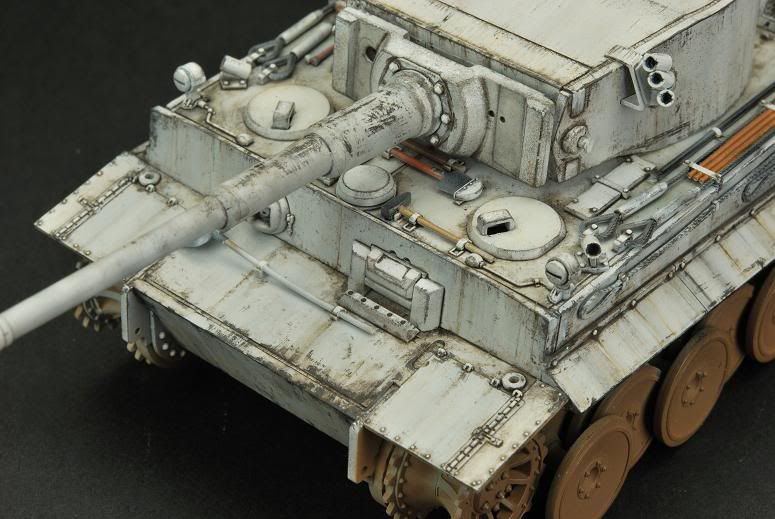
in detail ....

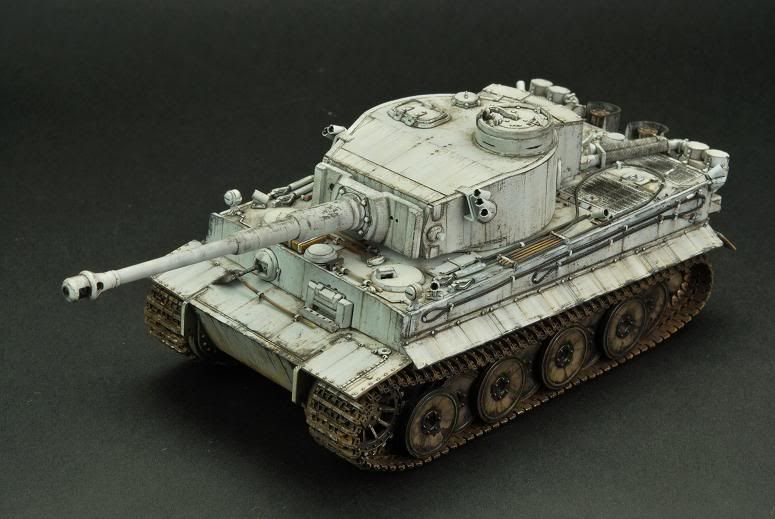
Next step ... vertical dry strains and ... let´s start painting the wheels!!
Nice to return to T&T. Stay tunned! ... soon I´ll post more steps... VERY SOON!
As always, any opinion or suggestion, will be highly apreciated.
Nice to return here again after some weeks of relax and holydays. And the best way to survive the return to rutine ... is ... yesssss!, you´re right, making kits!!
And this is the victim on my workbench now: a 1/48 AFV Club Tiger I
The kit is just ... wonderful. Nice fits, impressive detailing ... and for a modeller like me who do not like too much assembling kits and extra-detailing, is the perfect choice.
I just added the armorscale metal barrel for the gun and the friulmodel tracks (I REALLY love Friul tracks, I always use them if possible)
Here, you can see the model assembled:
Step 1: Priming
I normally use Gunze 1200 primer or Tamiya´s metal and plastic primer for this task. I spray the Tamiya´s primer directly in a cup, and then, I airbrush the product allover the kit in thin layers. No matter if in the first aplication you do not cover all the kit. With Gunze´s product. is the same, but I thin the product with Gunze´s thinner about 50%-50%. You can also use any other primers, like Vallejo´s, Andrea´s, or even just a light gray coat of paint if you do not have metal surfaces that can make the paint to peel off.
Do you have problems when priming? Rough surface full of awfull grains? No matter!! Me too!!. Just do the following.
- With a rough brush, carefully try to remove the dirt ans dry particles over the tank´s surface.
- If this fails, use a ultra fine sand paper and with patience, sand and polish all the surface. Be carefully with PE and little parts . know, carpet´s monster is always lurking ...
The result should be and absolutely soft and polished surfaces. This will help you to get a really nice base coat in next step.
Step 2: Base Color
Using Tamiya´s white and panzer grey, I started airbrushing the different surfaces of the vehicle. I always try to paint different shades in the diferent surfaces and textures of the tank to have a more colur rich appearance.You know, I love color modulation, altough I preffer to call it "tutti-frutti"!
I also added some vertical strains using panzer grey in order to help to the future painting steps. If you´re going to dirt a surface, let´s do it since the first moment! (Luciano Rodrigez dixit). That´s the reason why I painted with XF-72 the lower part of the tank and the wheels.
Take your time, this is the most important step. Use masking tape if neccesary to help you painting in different color shades the different surfaces. Work a little ... stop working, look at your kit for a moment ... think, continue working ... be relax work listening to your favourite music!
Once you´re happy with the result (well ... actually I´m never completely happy with the result, bur the kits must be finished!!), I always add a really nice coat of Tamiya´s clear airbrushed to have a glossy finish.
Yes, you read correctly. Glossy finish. This glossy finish is perfect for the pin washing were I use Tamiya´s enamel paint (90% black + 10% matt earth). The thinned paint runs really easyly over the surface with this gloss finish. And do not be worried, once you continue working, oils, filters ... will make the kit matt!
Step 3: Dirt, scratches and chips. Drybrushing!!
Yes, again you read correctly. Who said drybrush is dead??. The technique is easy.
Using any acrylic paint, your favourite, apply the technique of drybrushing in the tradicional manner, focusing on the edges and areas close to them. Just use your common sense and some imagination to get an atractive and realistic result.
Before the paint gets dry, with a cotton swab you can change to your will the shape of the spots, using a dental teeth for more precision when required.
Step 4: "Cold dirt"
Using again acrylic pains (oils can be also perfectly used at well), I start to add some cold dirt all over the tank.... but ... what´s cold dirt? No .. not necessary to put your paints in the refigerator
, "Cold dirt" is just a way to say that you should only use "cold" colors like black, grey, dark brown (with any trace of red!), so onHere, the results:
in detail ....
Next step ... vertical dry strains and ... let´s start painting the wheels!!
Nice to return to T&T. Stay tunned! ... soon I´ll post more steps... VERY SOON!
As always, any opinion or suggestion, will be highly apreciated.