-
Modelers Alliance has updated the forum software on our website. We have migrated all post, content and user accounts but we could not migrate the passwords.
This requires that you manually reset your password.
Please click here, http://modelersalliance.org/forums/login to go to logon page and use the "Forgot your Password" option.
You are using an out of date browser. It may not display this or other websites correctly.
You should upgrade or use an alternative browser.
You should upgrade or use an alternative browser.
1/24 Fw 190 D9 Frankfurt 1945 27th March update
- Thread starter Brokeneagle
- Start date
Heavens Eagle
Well-known member
1/24 Fw 190 D9 Frankfurt 1945 27 Feb update
Interesting!

Interesting!

Brokeneagle
Master at Arms
1/24 Fw 190 D9 Frankfurt 1945 4 March update
 Thanks for the interest and comments everyone.
....and thanks for the extra help with the engine detail Christian.
A few more details as work progresses.
Please remember while looking at these photos that they are taken at a macro level and highlight the 'ugliness of the build process that would normally not be seen by the eye at this close a magnification. In other words it's not as bad as it looks and I will continue to clean and finish these parts as the build progresses.
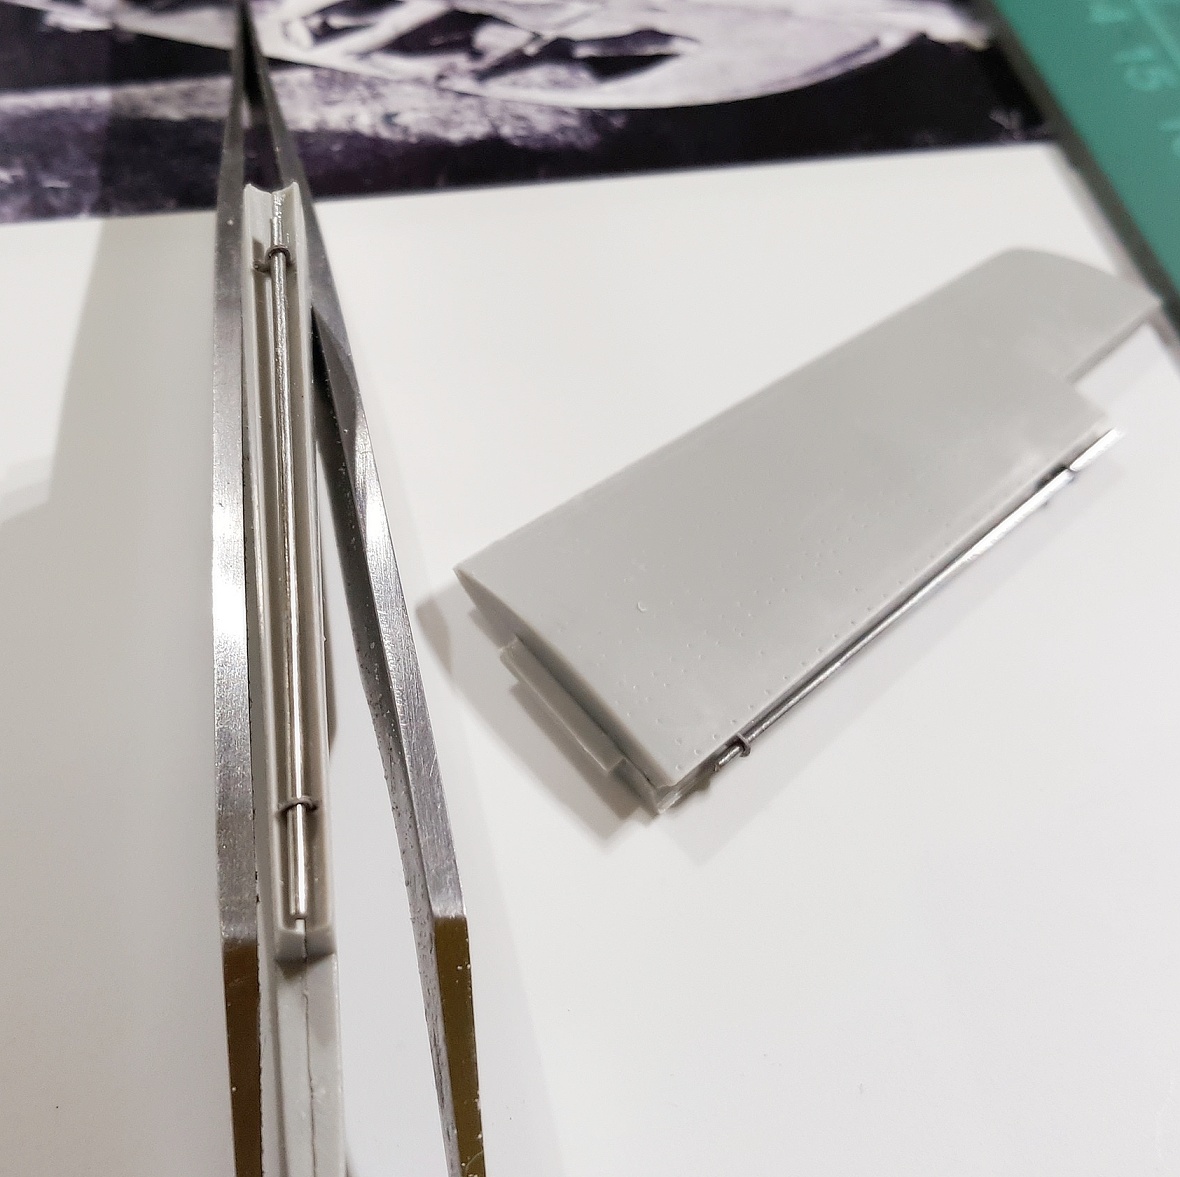
I have started working on the rear wings and I thought that i would include a photo of the metal rod approach that Trumpeter uses for attaching the flaps.
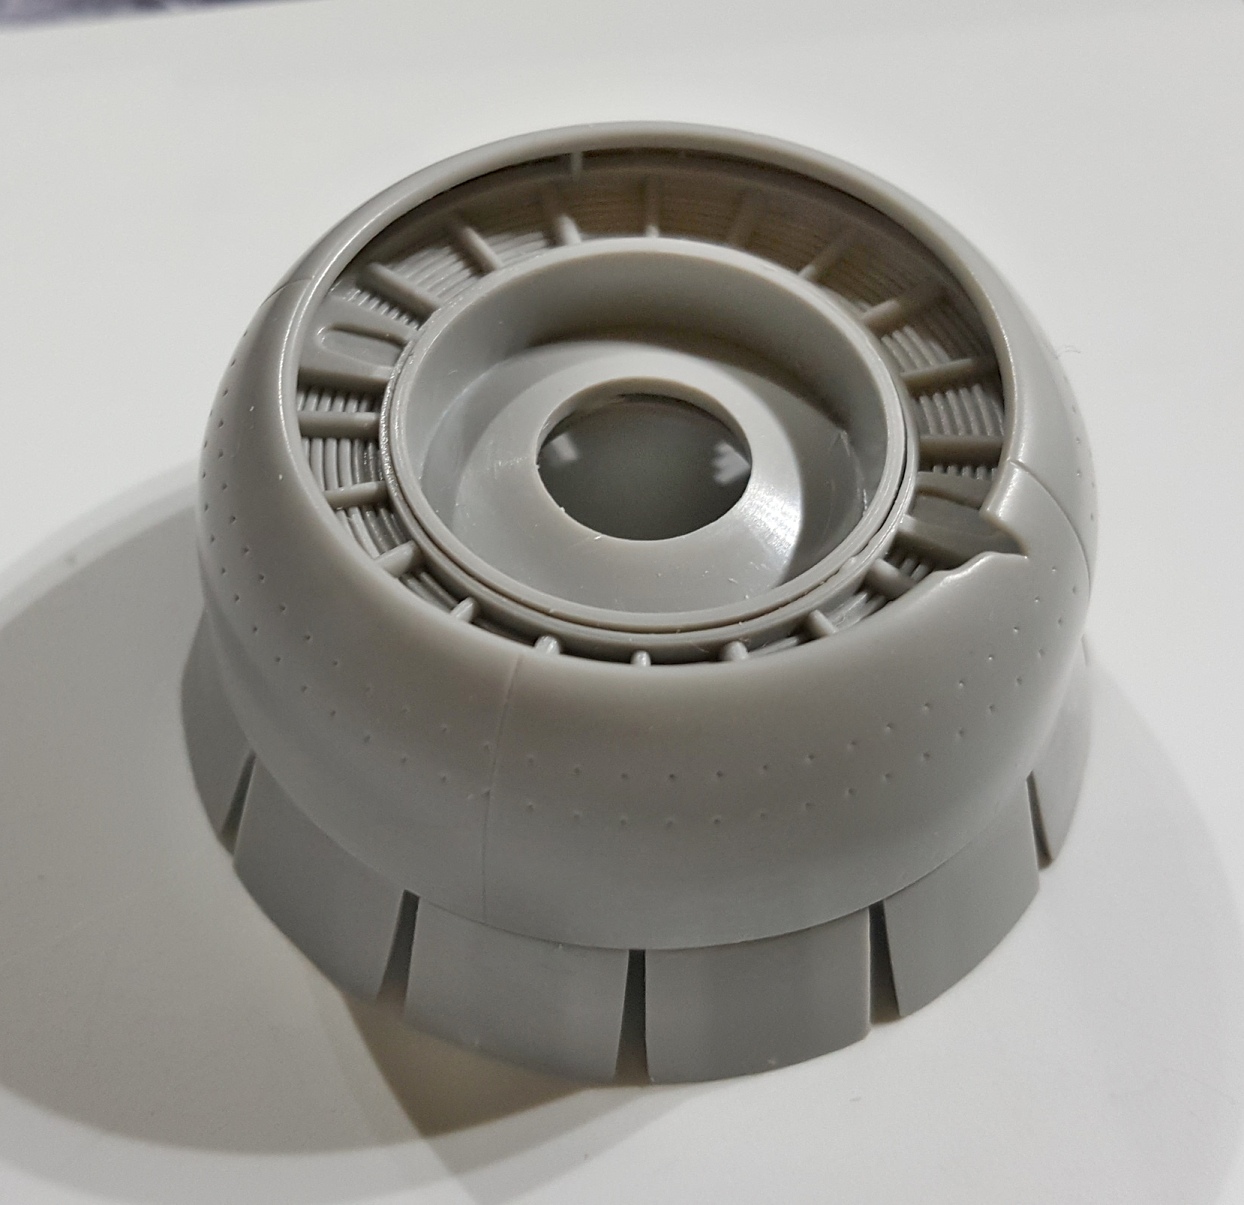
More progress on the engine cowling - the first shot shows a deformity straight out of the box where the plastic hasn't filled the mold correctly. I used this to my advantage and made it part of the damage from the landing.
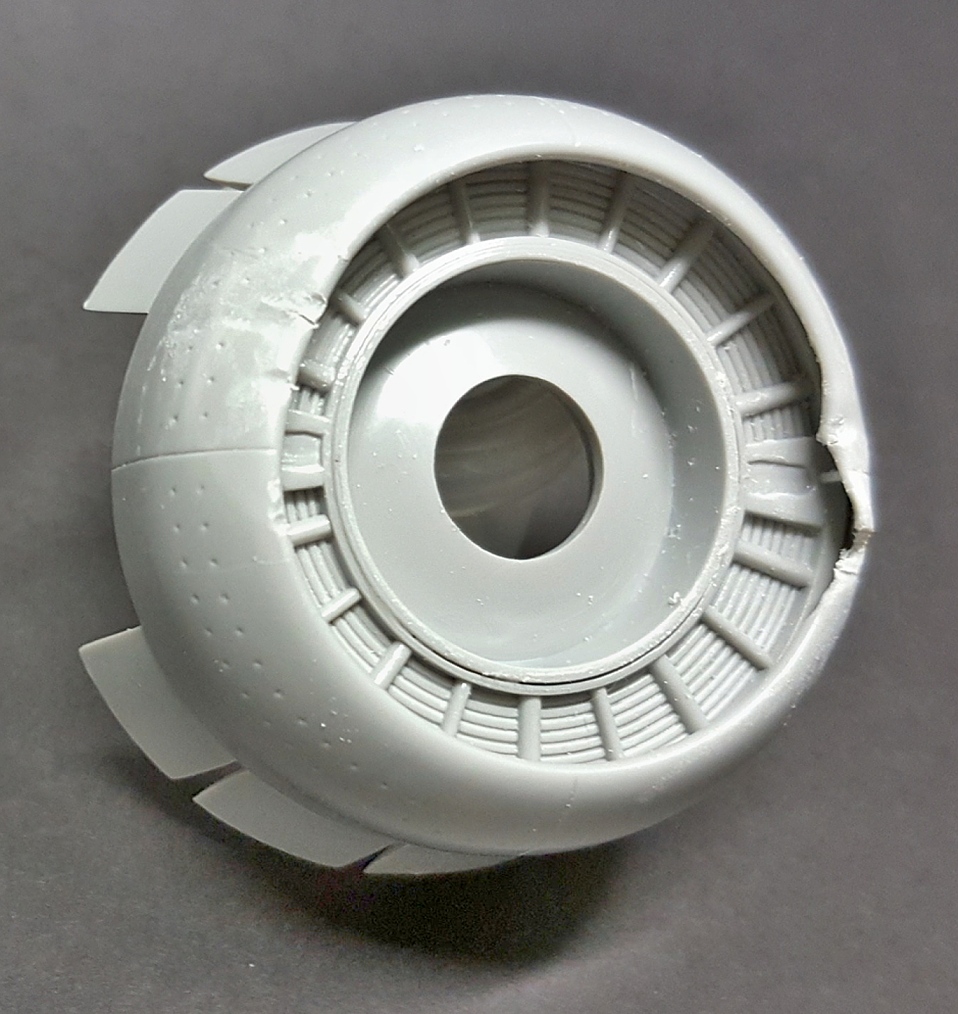
Here you can start to see the beating the metal around the nose has taken on the forced landing..... that missing tear has become a bent metal tear
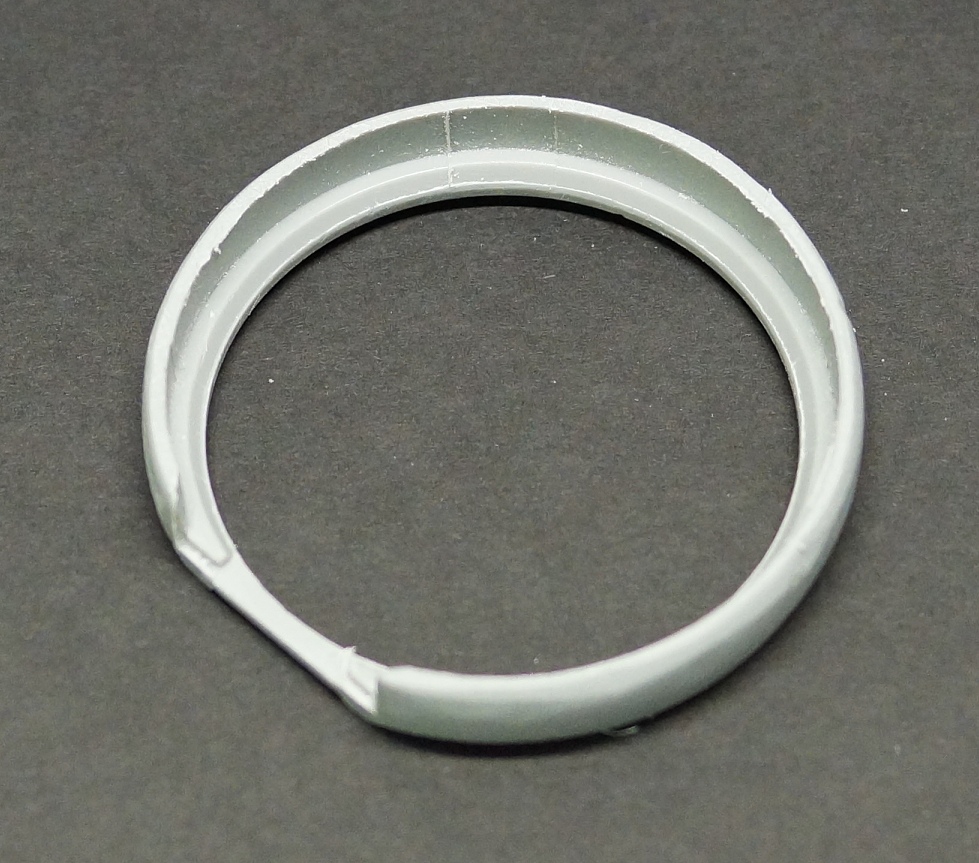
The kit supplies you with an inner ring, which is missing a ton of detail and does not fit properly either once you start adding the mods needed for the detail under the adjusting slats behind the nose cowl. I have started modifying it for the mods needed.
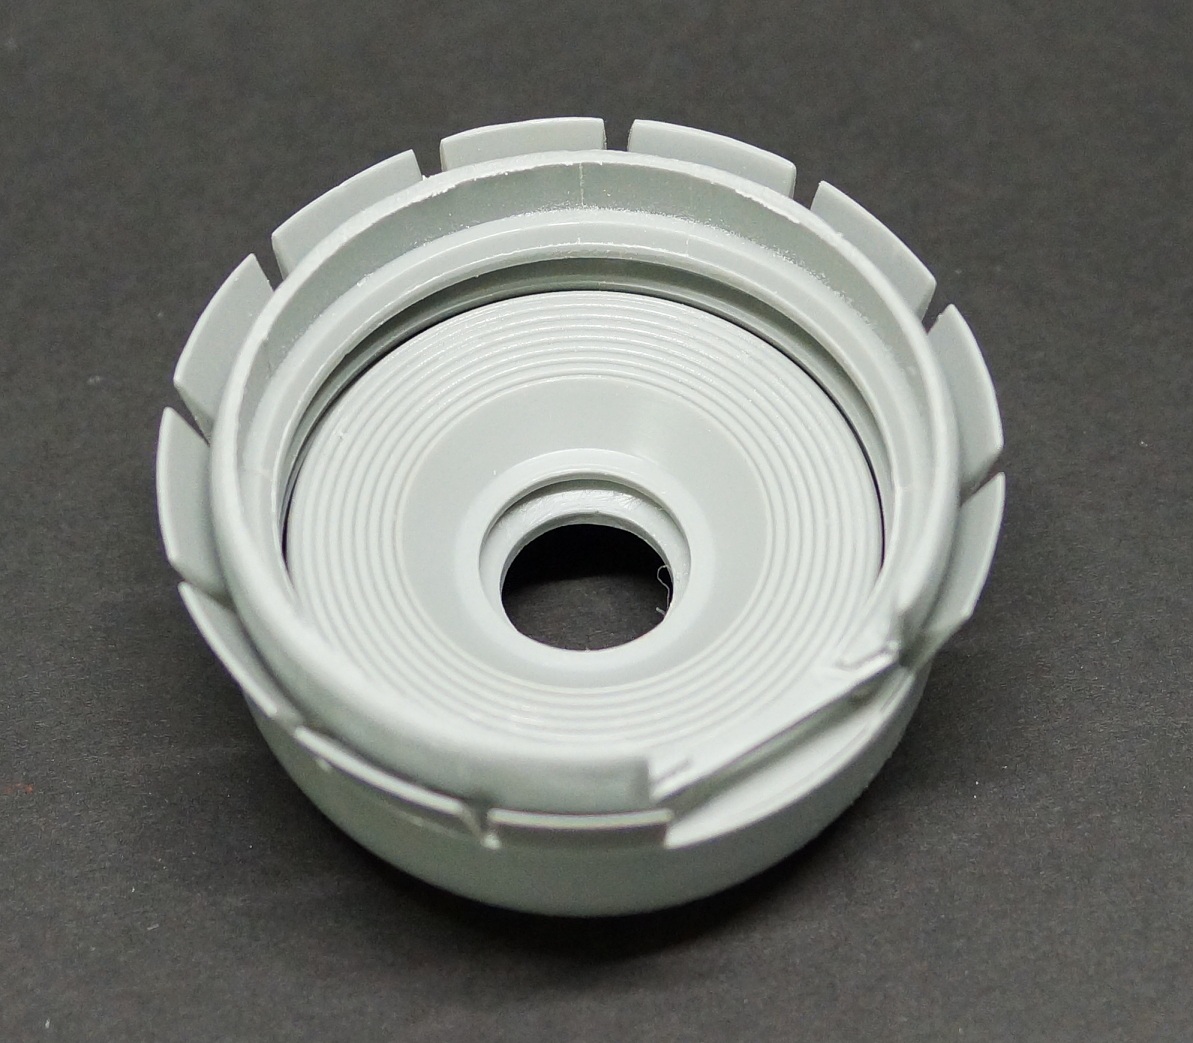
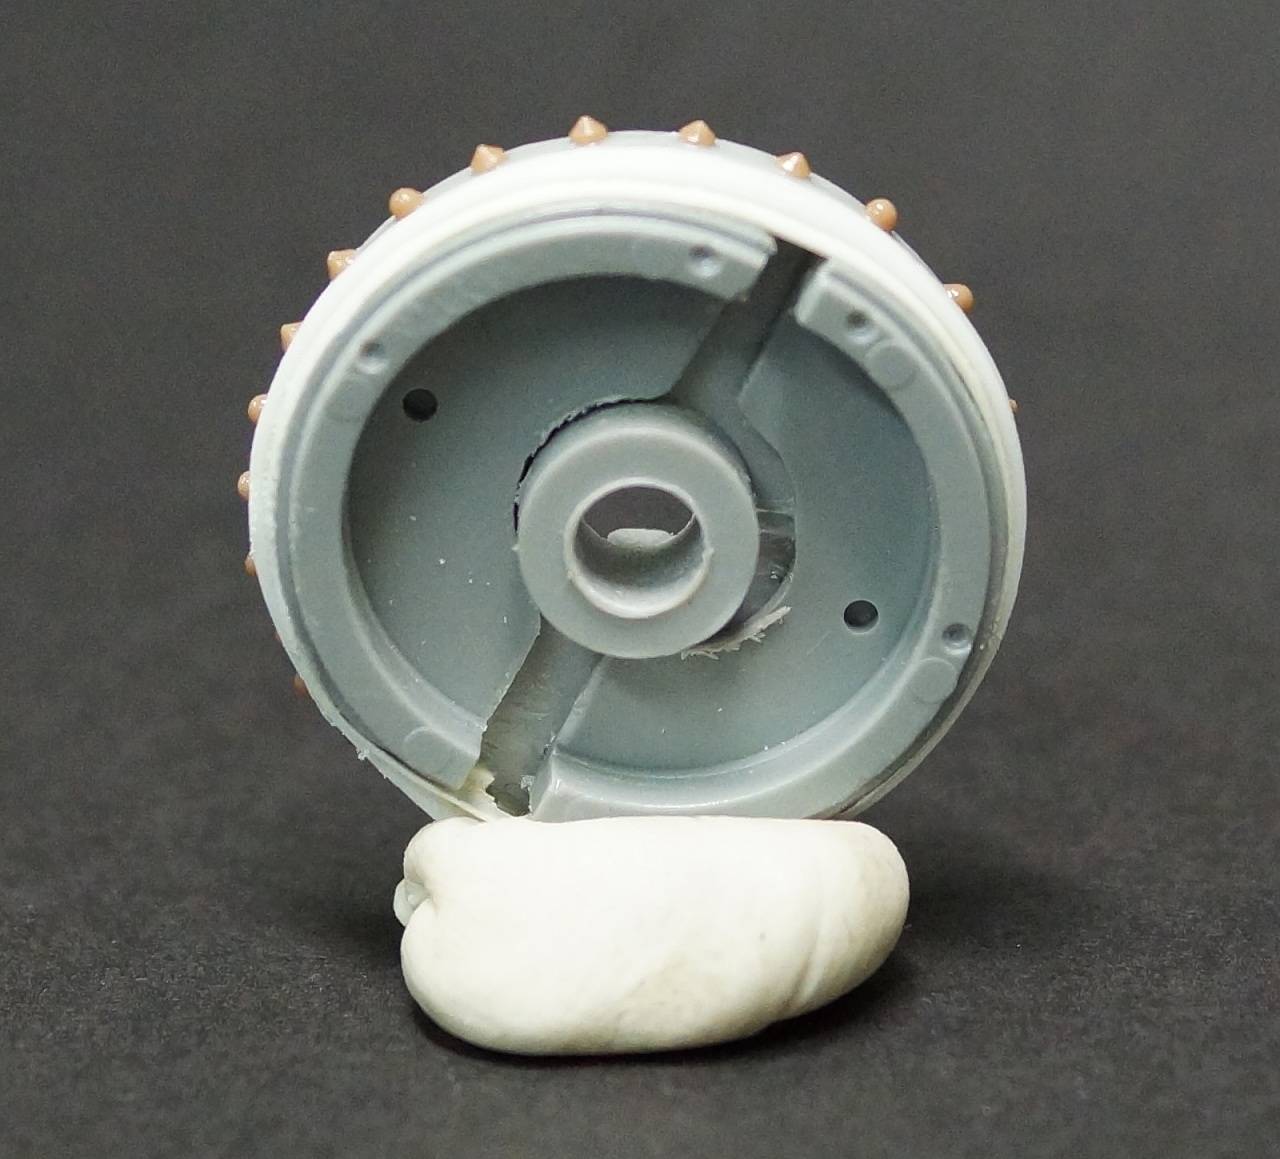
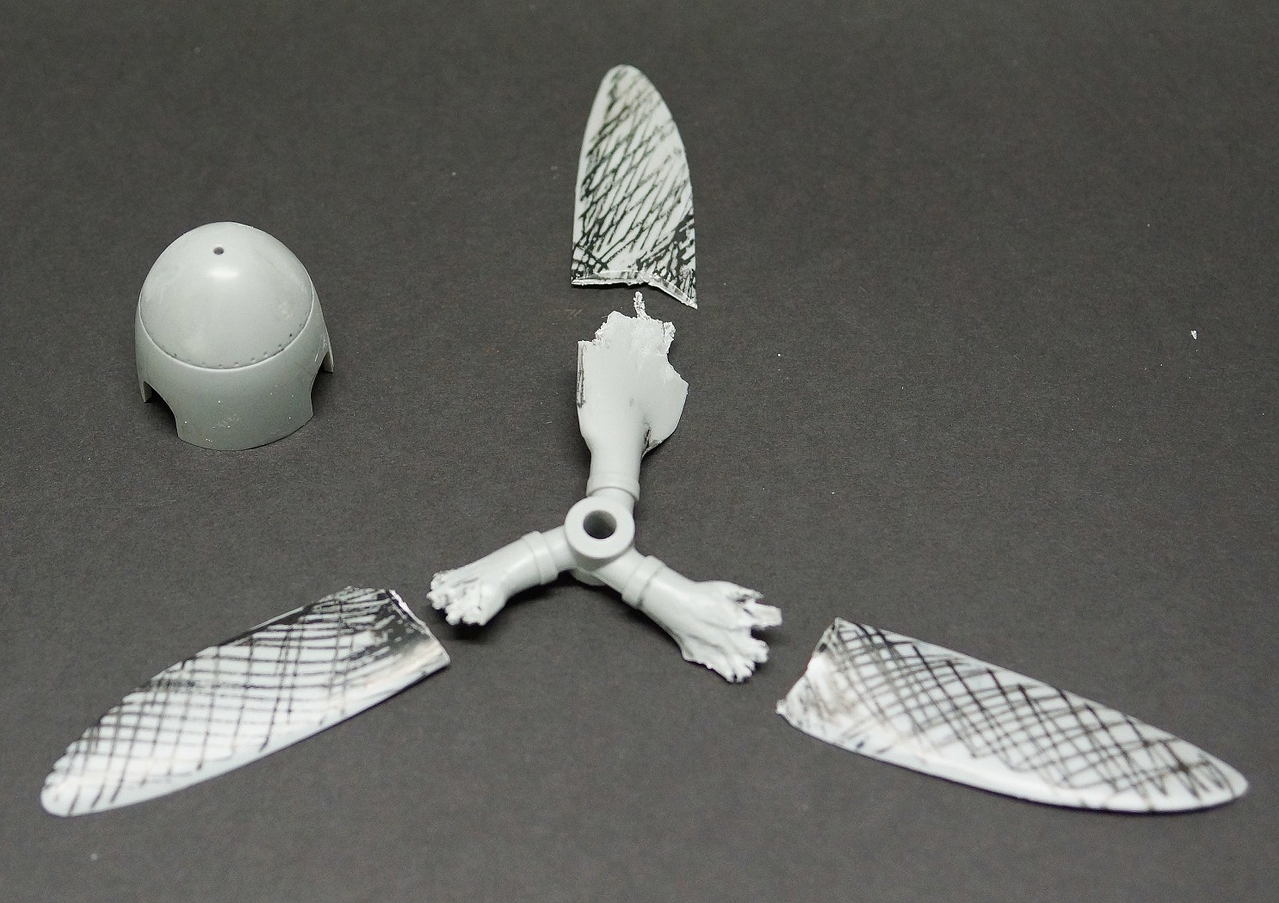
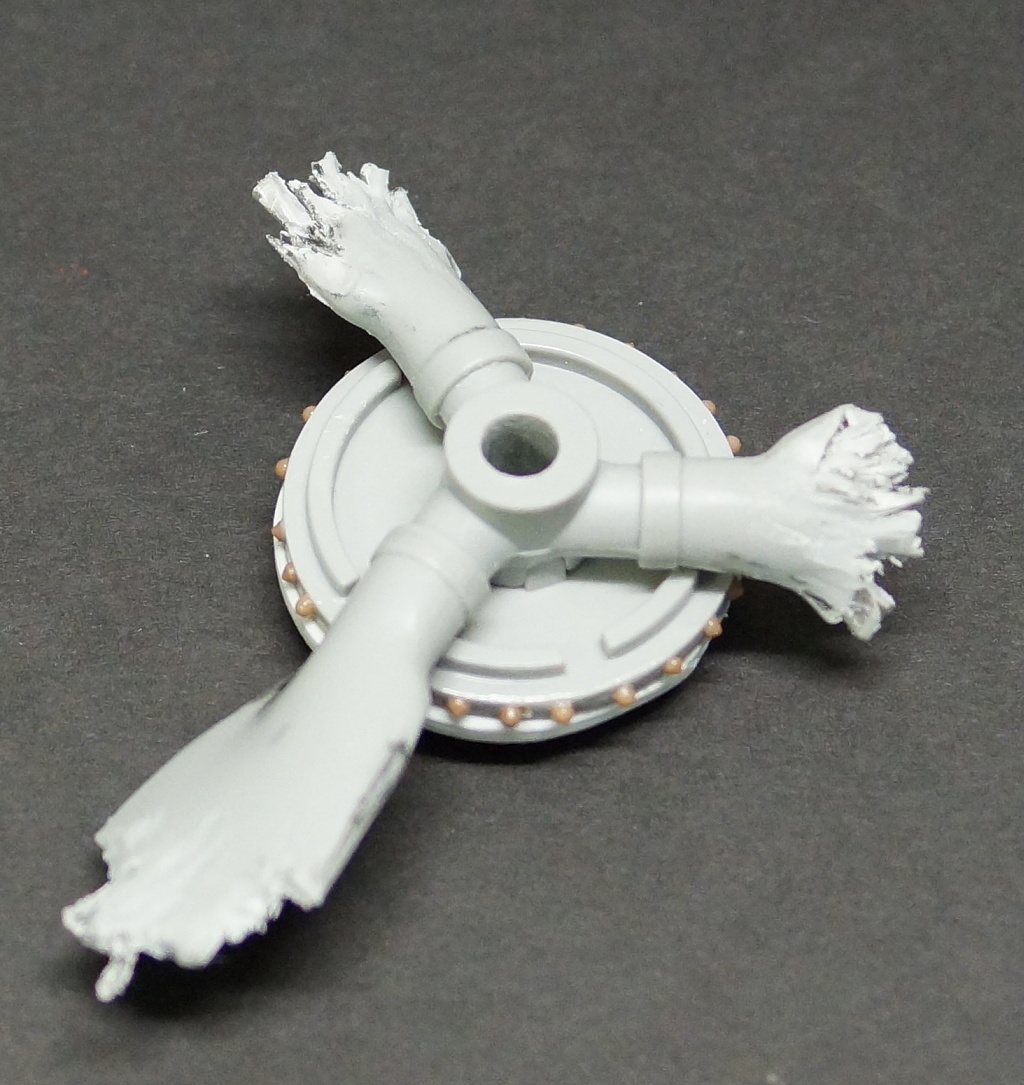
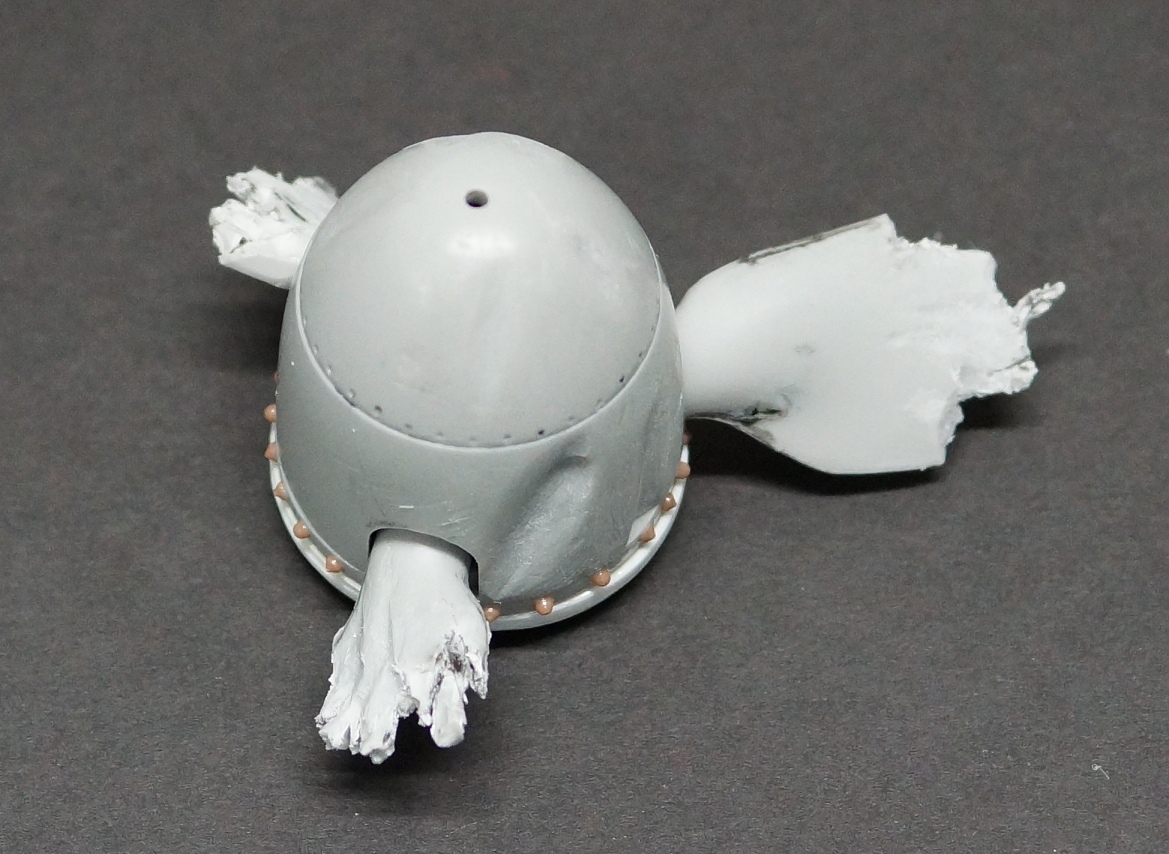
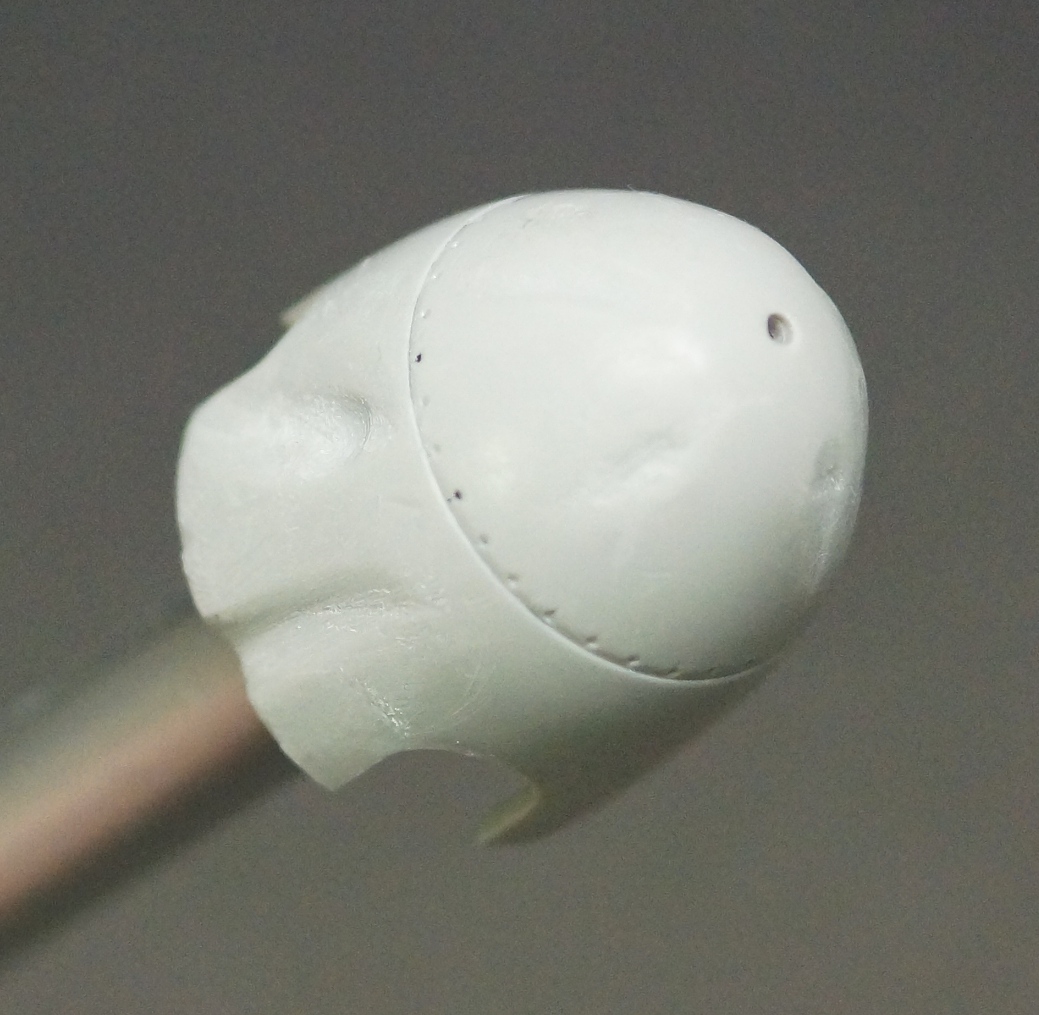
I have also started a fair bit of work on the spinner and its base as well as damaging the blades as per the photo - keep in mind that the real blades were wooden.The spinner has been damaged with a round file and very fine grade sandpaper so far but more finishing work is needed. You can also see where I have added a sleeve and bolt heads as these were lacking. The sleeve is not perfect but that is OK as the worst section will be facing the ground and buried ; only the good parts show. The rear of the spinner mod has been supported by 2 halfs of a Tiger 1 front drive mount from the Dragon kit - love those Dragon spare parts.
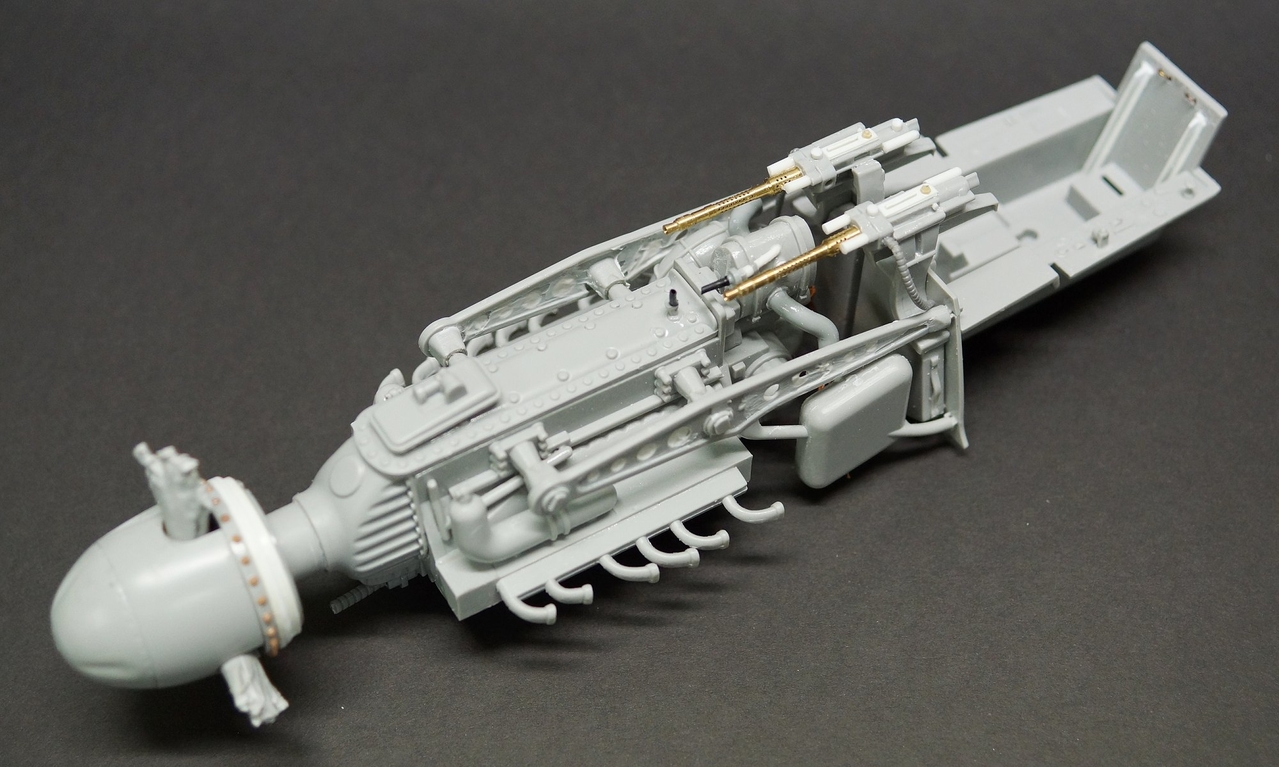
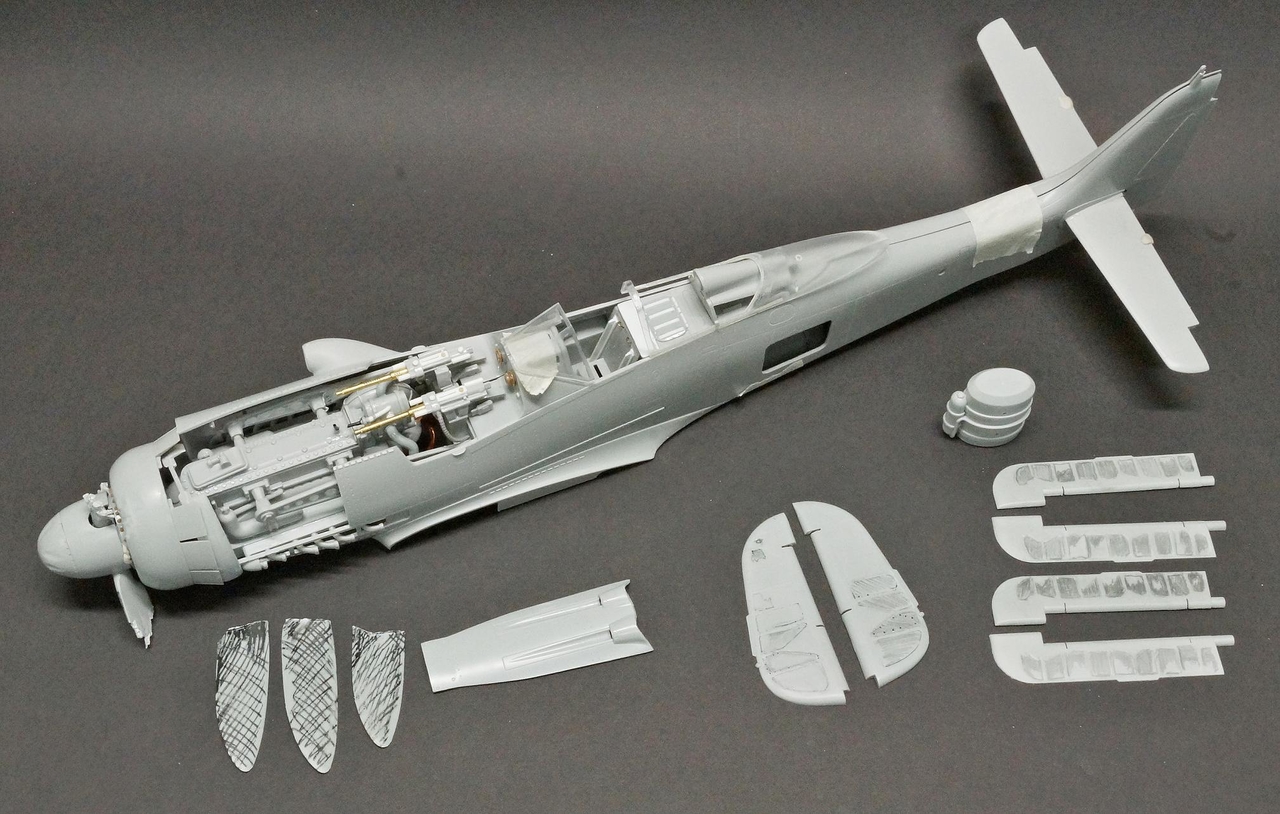
A little more work on the engine mounts and the cockpit - all still in progress.....
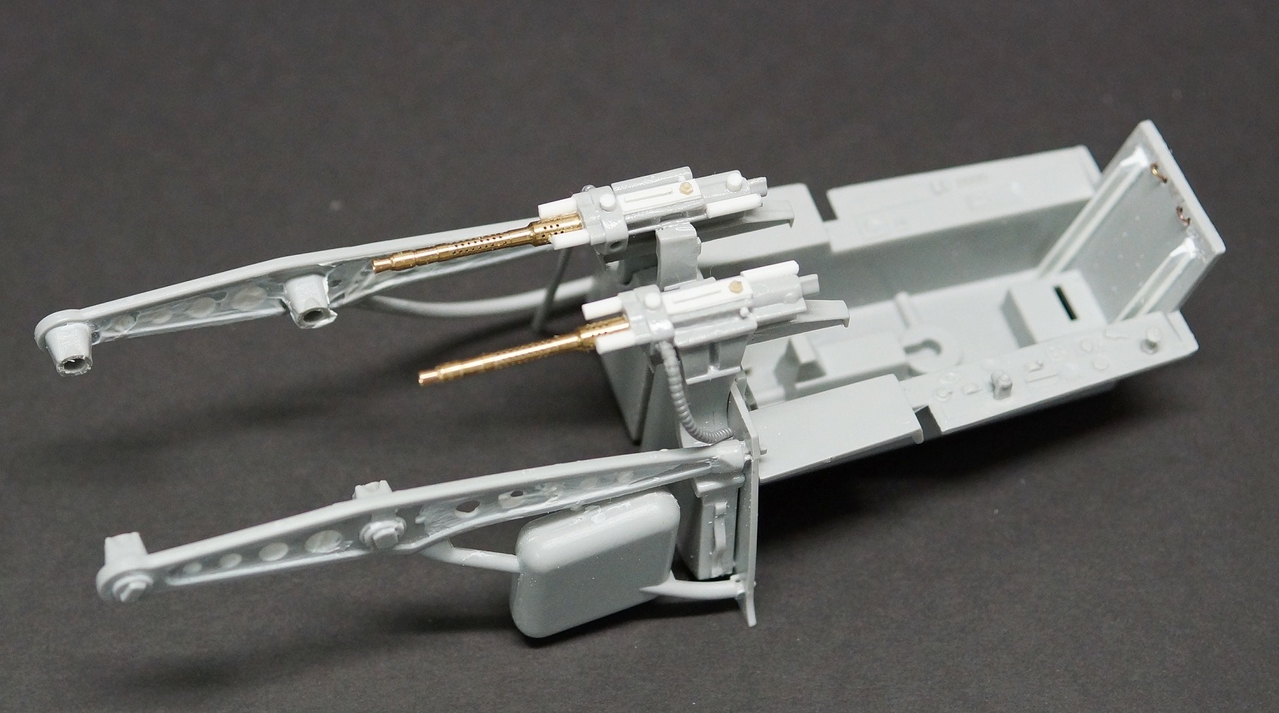
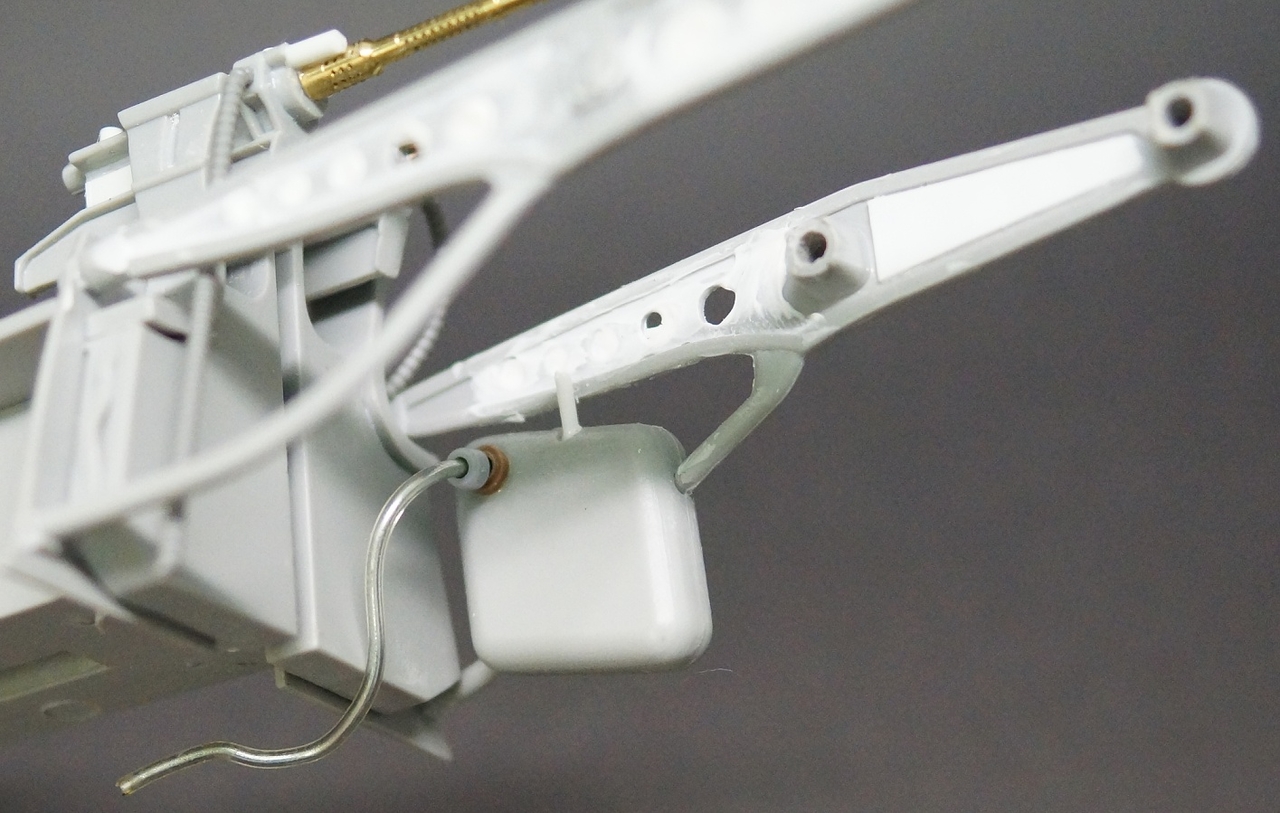
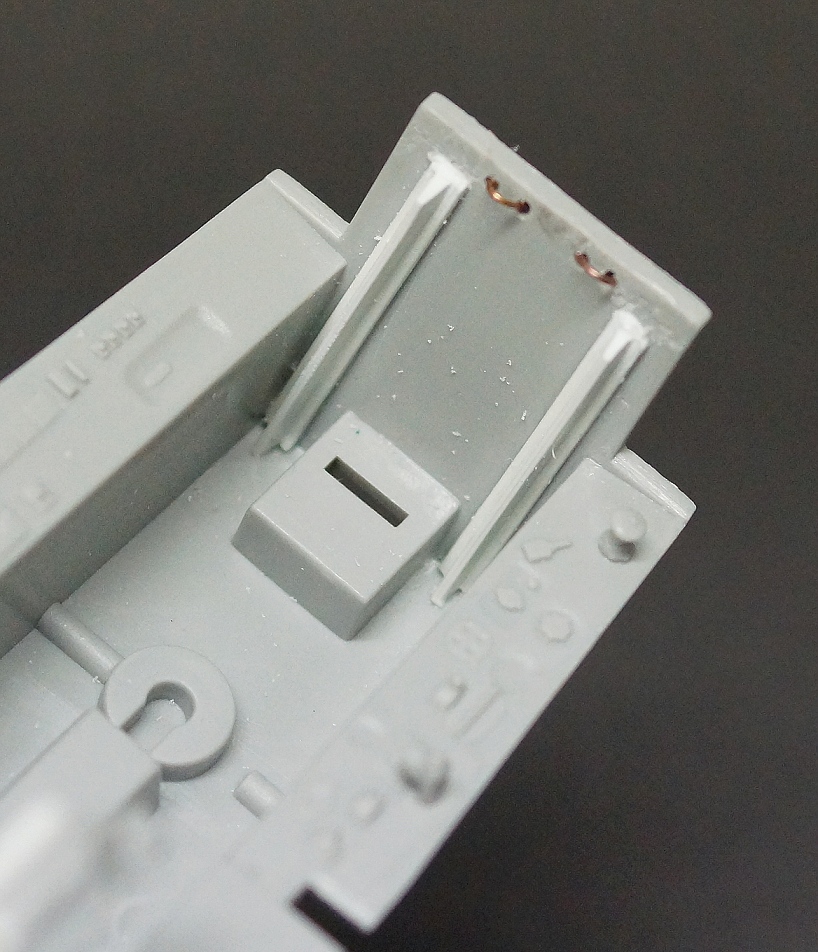
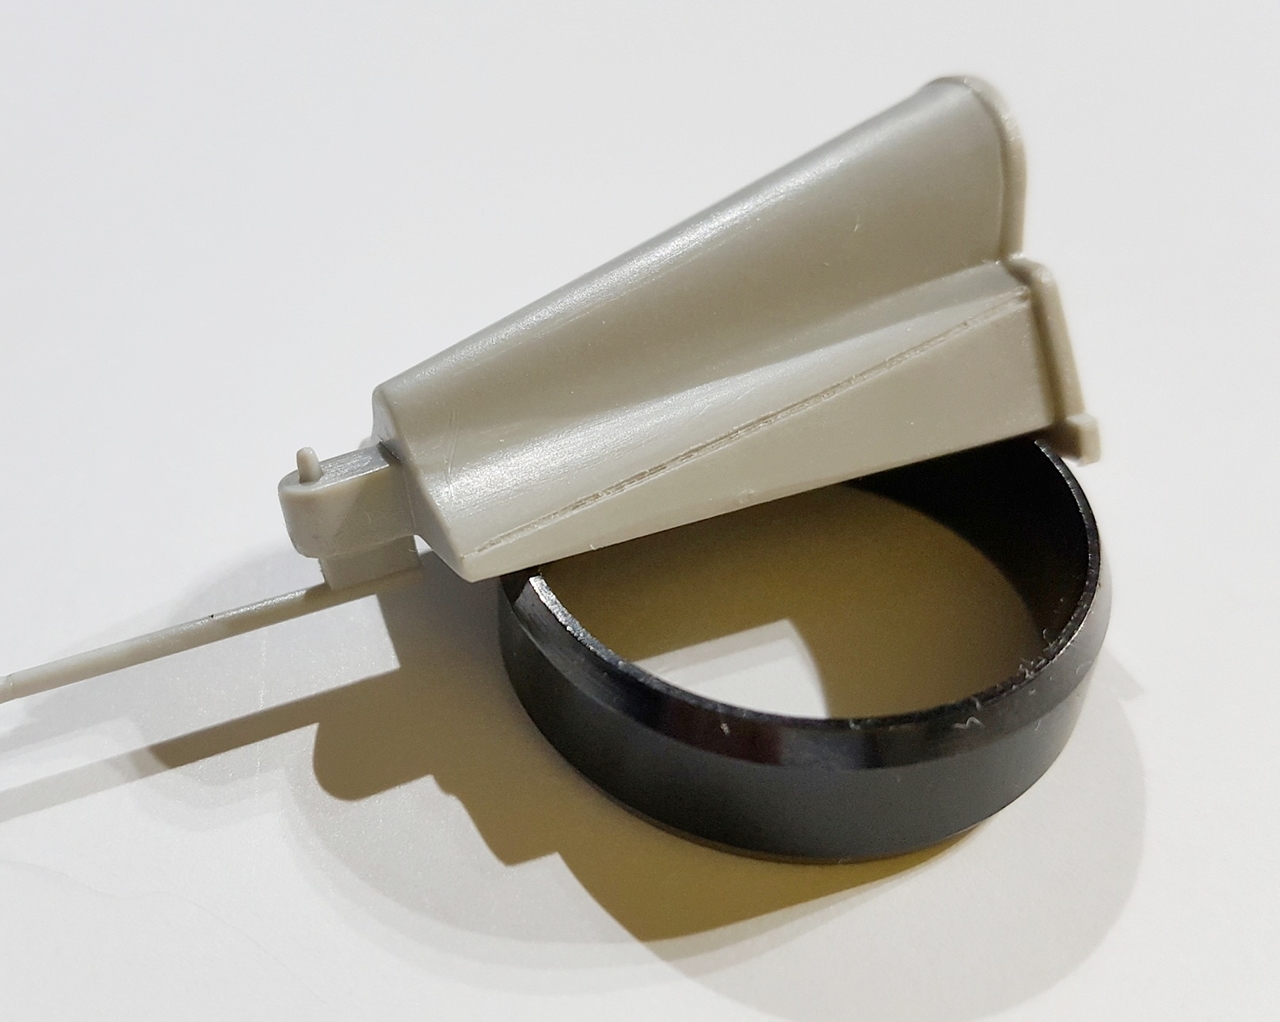
The bracing on the molding for the fuselage had to be removed so that I could get the cockpit to sit correctly with the firewall - please keep this in mind even if you are building OOB.
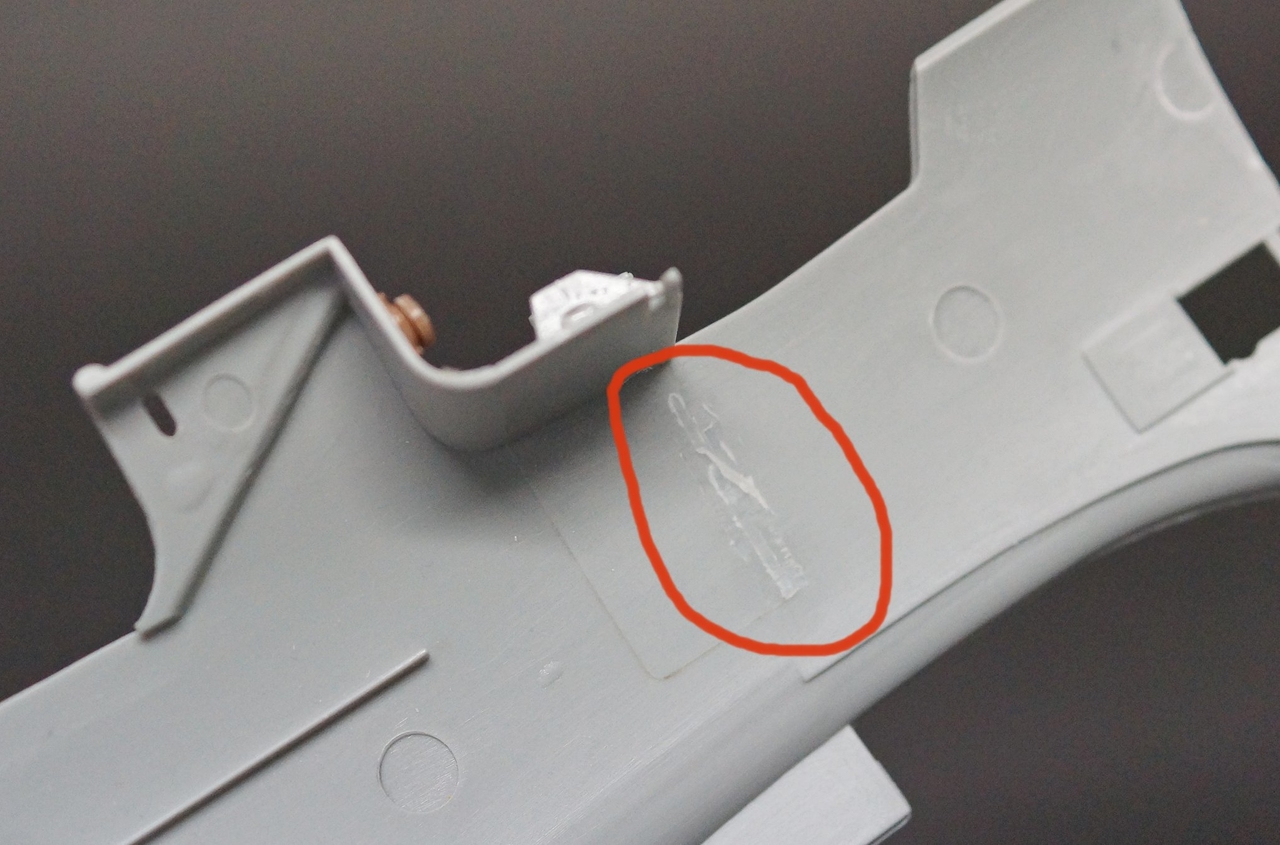
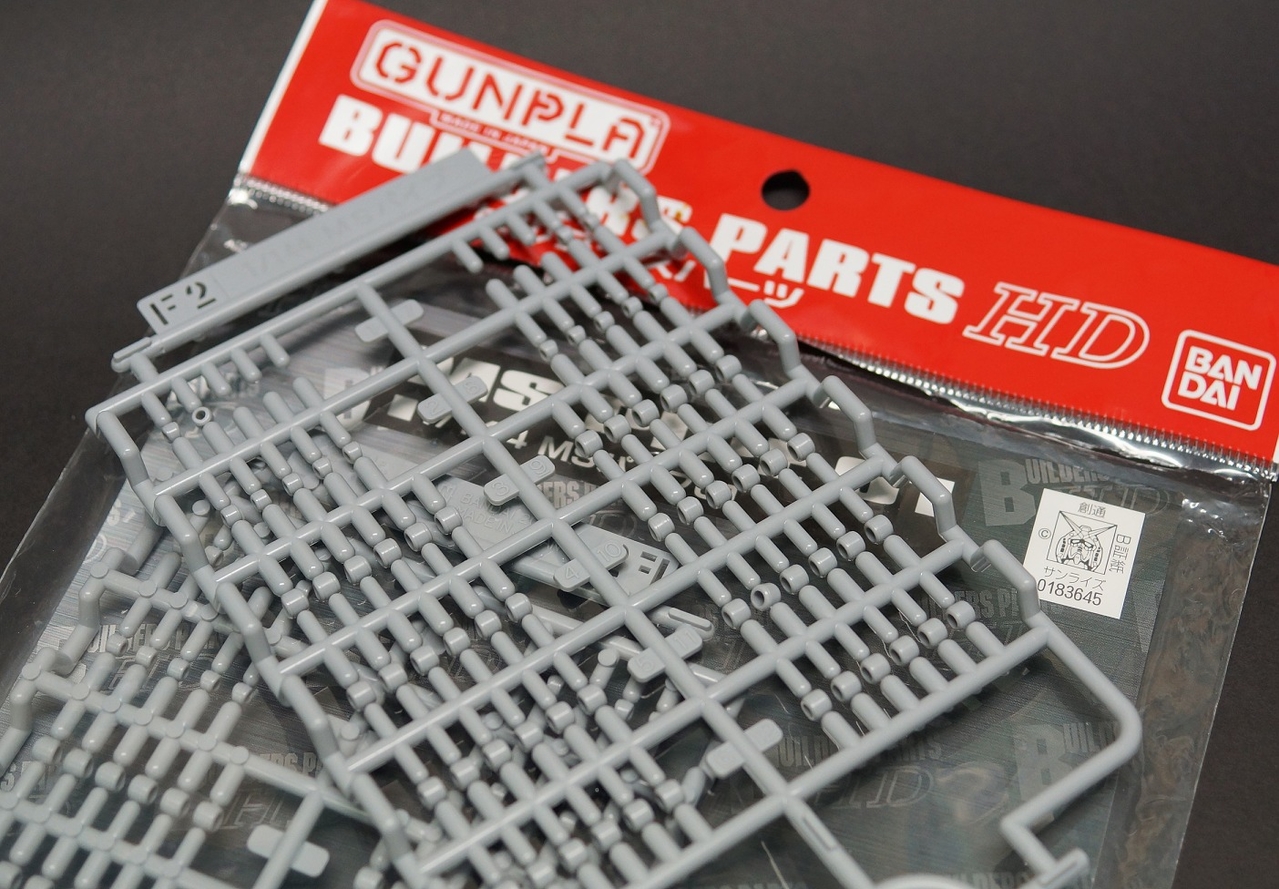
Piping comes from a Japanese robot accessory pack that I bought a heap of on my final business trip to Japan for Toyota.
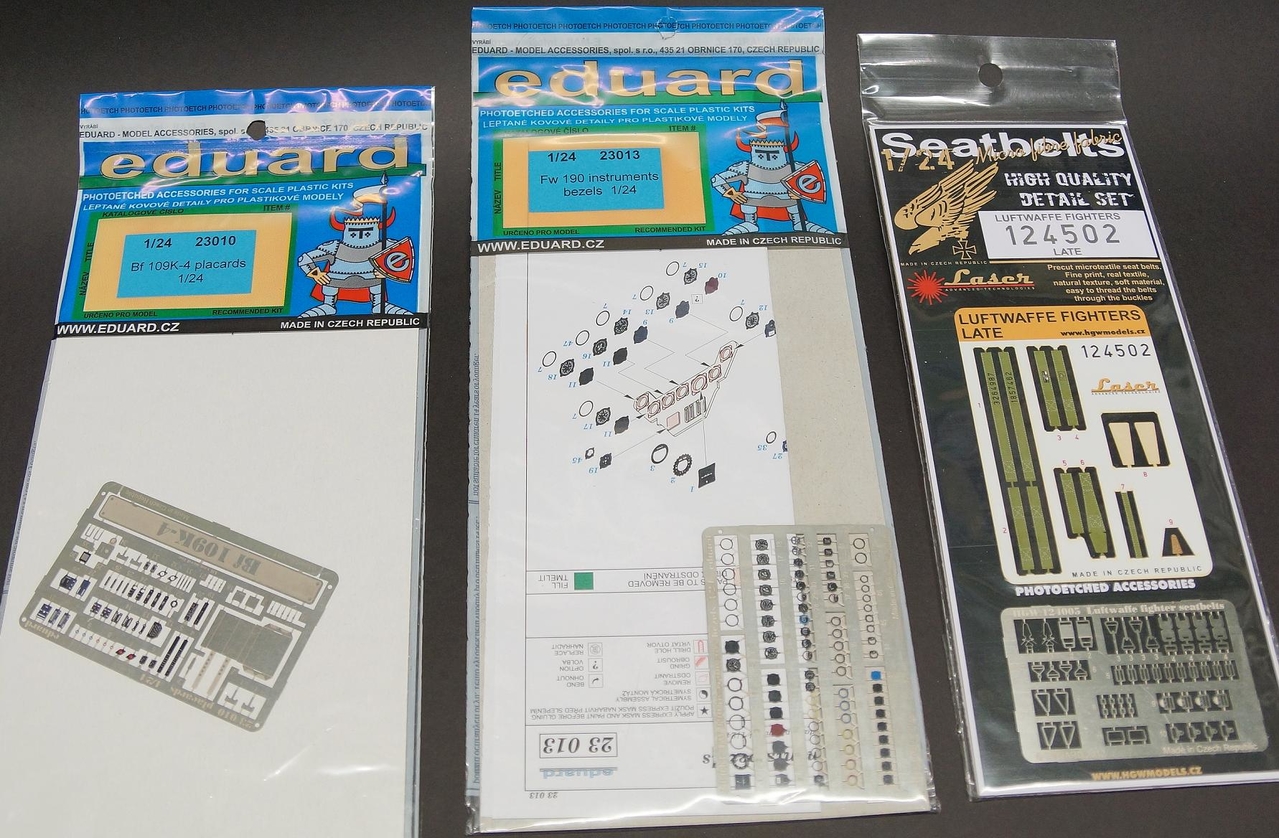
More details to be added - plenty of after market stuff....
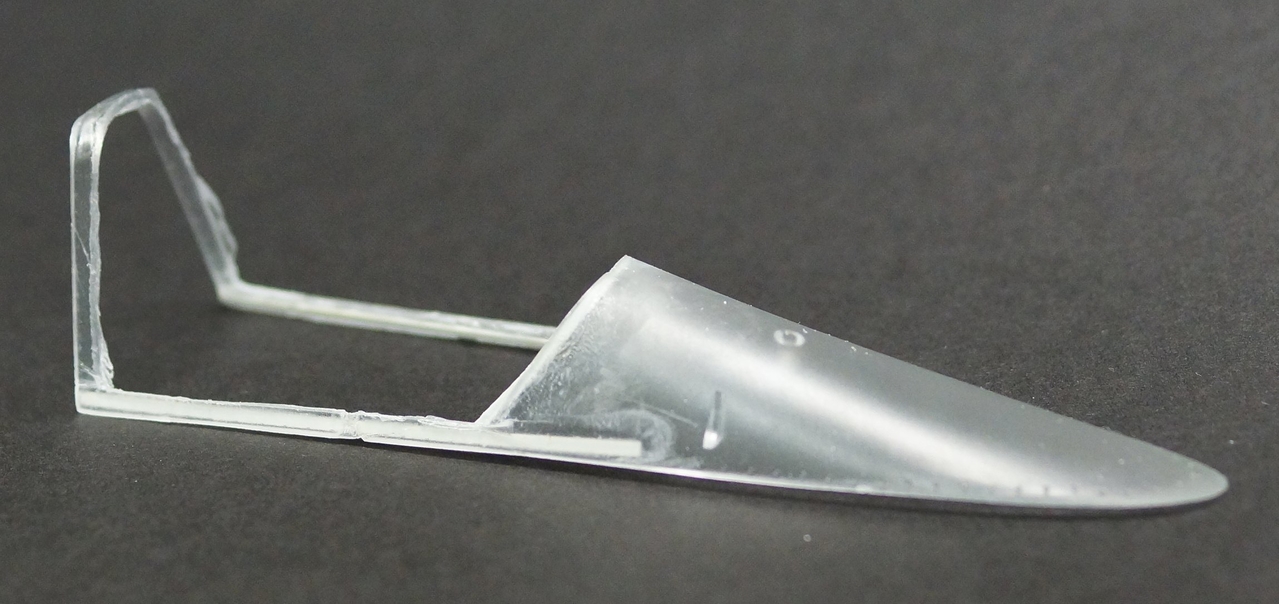
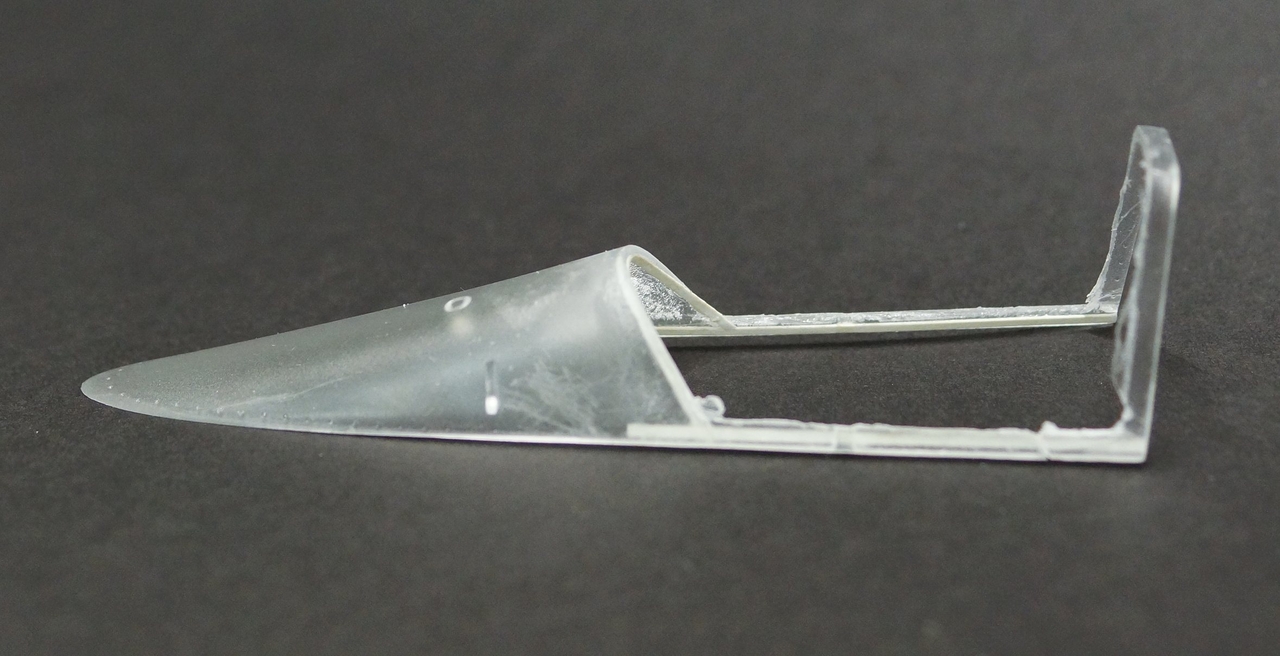
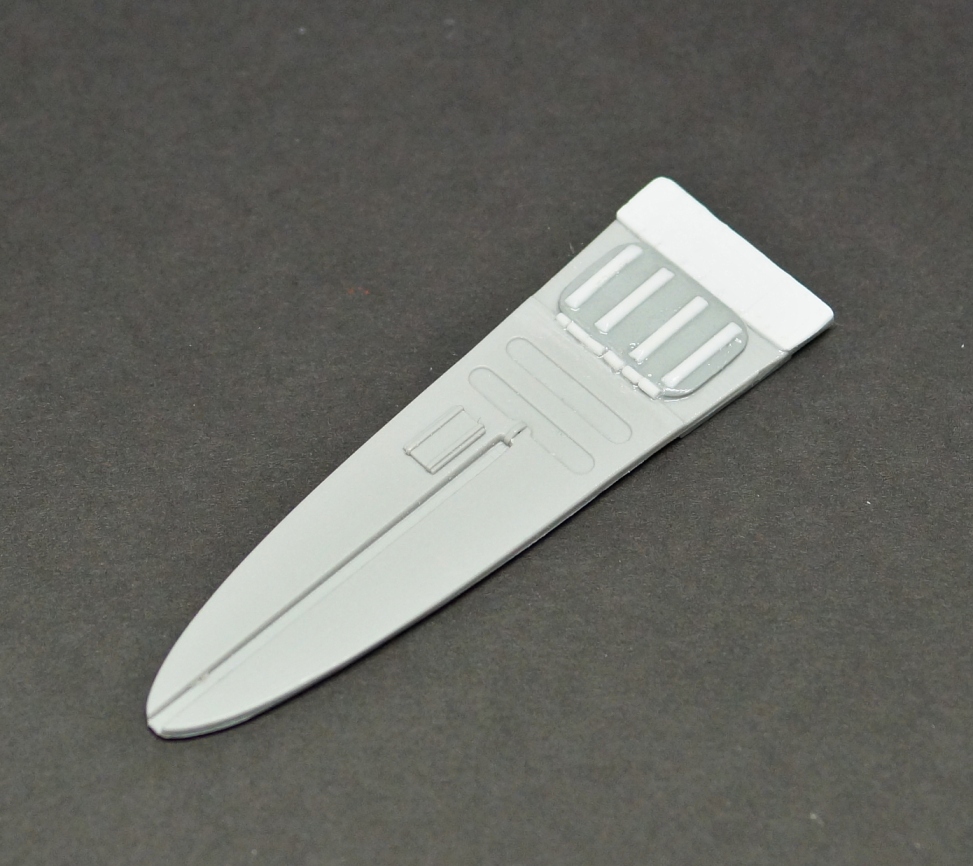
A little work on destroying the perspex of the canopy....this was difficult as the contour was obviously rounded and I did not want to snap it in the process. Still more clean-up needed.I have started to add extra plastic strip for strength and detail. The parcel shelf has had a little detail plus the rivets have been added to the white card area but you can't see it because of the exposure. Also 'moding' the shape of the head armour mounting - it's incorrect.
The Engine
Some wiring started but a long way to go yet.
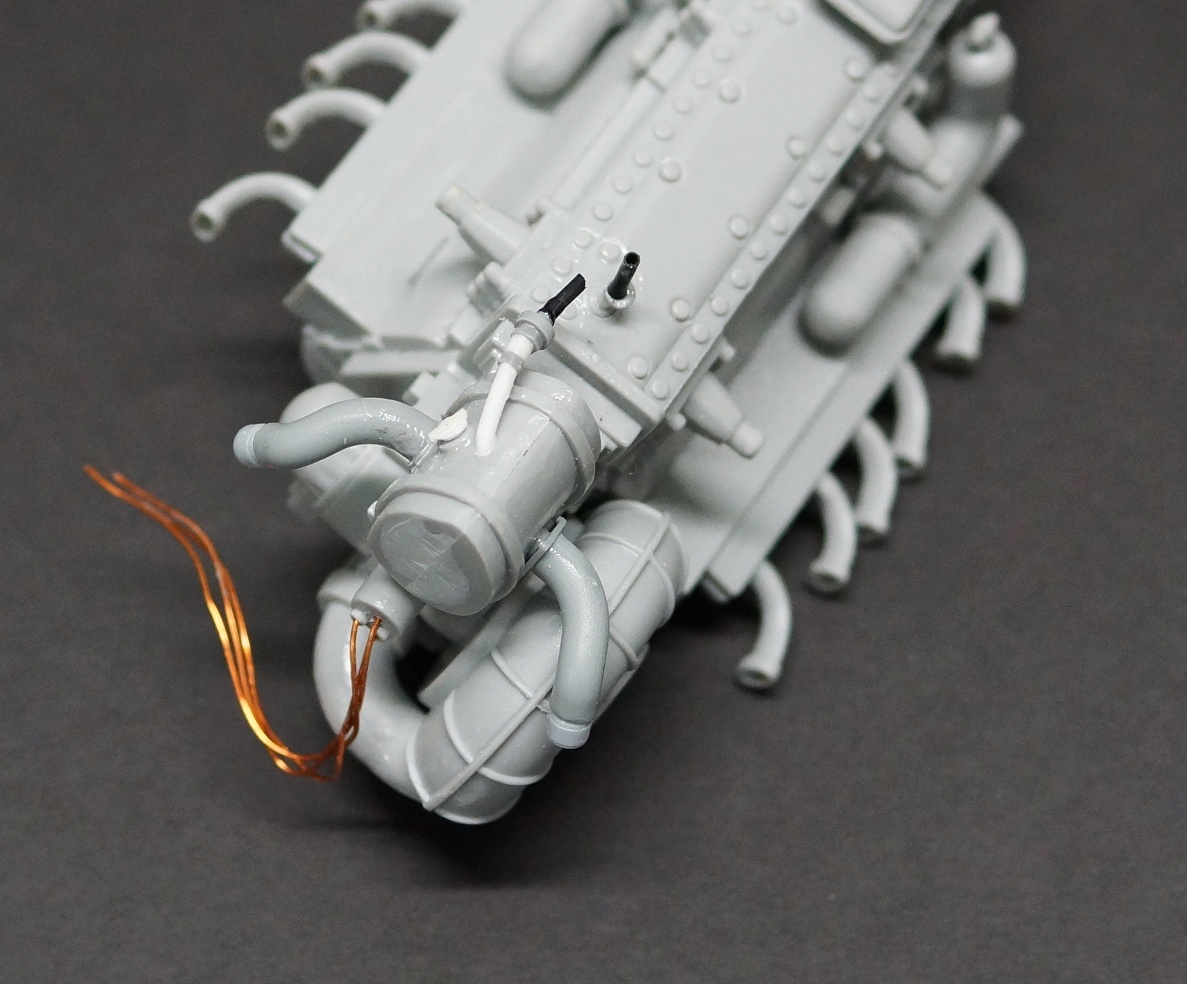
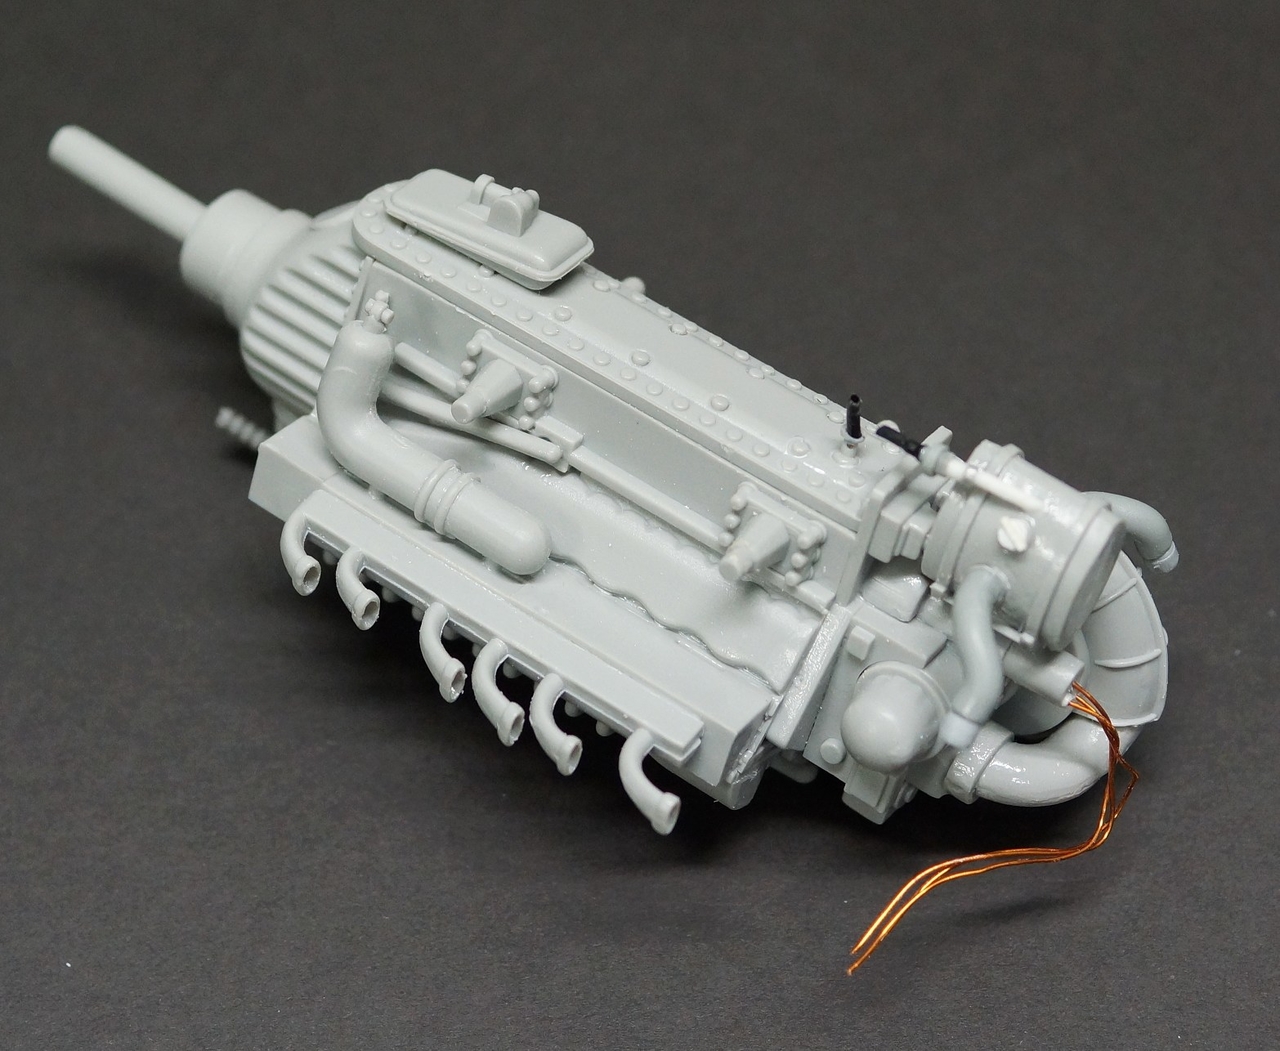
Overall......
....and thanks for the extra help with the engine detail Christian.

A few more details as work progresses.
Please remember while looking at these photos that they are taken at a macro level and highlight the 'ugliness of the build process that would normally not be seen by the eye at this close a magnification. In other words it's not as bad as it looks and I will continue to clean and finish these parts as the build progresses.
I have started working on the rear wings and I thought that i would include a photo of the metal rod approach that Trumpeter uses for attaching the flaps.

More progress on the engine cowling - the first shot shows a deformity straight out of the box where the plastic hasn't filled the mold correctly. I used this to my advantage and made it part of the damage from the landing.

Here you can start to see the beating the metal around the nose has taken on the forced landing..... that missing tear has become a bent metal tear

The kit supplies you with an inner ring, which is missing a ton of detail and does not fit properly either once you start adding the mods needed for the detail under the adjusting slats behind the nose cowl. I have started modifying it for the mods needed.


I have also started a fair bit of work on the spinner and its base as well as damaging the blades as per the photo - keep in mind that the real blades were wooden.The spinner has been damaged with a round file and very fine grade sandpaper so far but more finishing work is needed. You can also see where I have added a sleeve and bolt heads as these were lacking. The sleeve is not perfect but that is OK as the worst section will be facing the ground and buried ; only the good parts show. The rear of the spinner mod has been supported by 2 halfs of a Tiger 1 front drive mount from the Dragon kit - love those Dragon spare parts.


A little more work on the engine mounts and the cockpit - all still in progress.....


The bracing on the molding for the fuselage had to be removed so that I could get the cockpit to sit correctly with the firewall - please keep this in mind even if you are building OOB.

Piping comes from a Japanese robot accessory pack that I bought a heap of on my final business trip to Japan for Toyota.

More details to be added - plenty of after market stuff....

A little work on destroying the perspex of the canopy....this was difficult as the contour was obviously rounded and I did not want to snap it in the process. Still more clean-up needed.I have started to add extra plastic strip for strength and detail. The parcel shelf has had a little detail plus the rivets have been added to the white card area but you can't see it because of the exposure. Also 'moding' the shape of the head armour mounting - it's incorrect.


The Engine
Some wiring started but a long way to go yet.


Overall......


1/24 Fw 190 D9 Frankfurt 1945 4 March update


1/24 Fw 190 D9 Frankfurt 1945 27 Feb update
Cool stuff Ian,
When you wrote about the magnification thing; I had to grin! I mention that every time I post new figures. I know exactly what you mean! You're off to a good start, Mate!


Bob
Cool stuff Ian,
When you wrote about the magnification thing; I had to grin! I mention that every time I post new figures. I know exactly what you mean! You're off to a good start, Mate!
Bob
phantom II
Master at Arms
1/24 Fw 190 D9 Frankfurt 1945 27 Feb update
Fantastic detail Ian . I was wondering how you would replicate the shattered wooden blades


Keep up the good work Cheers, Christian B)
Fantastic detail Ian . I was wondering how you would replicate the shattered wooden blades
Keep up the good work
 Cheers, Christian B)
Brokeneagle
Master at Arms
1/24 Fw 190 D9 Frankfurt 1945 4 March update
Ian.
Thanks Mike, stay tuned.....there is a lot more to come.That is just killer,Ian! The damaged prop (what is left of it) is fantastic!

:drinks
Ian.
Brokeneagle
Master at Arms
1/24 Fw 190 D9 Frankfurt 1945 4th March update
MP, thanks mate. I will be getting to those control surfaces soon.
Bob, glad its not just me!
Piet, thank you.
Luiz & Christian, thanks and I appreciate everyone's feedback on the props, they seem to be going the right way.
Back again shortly,
Ian.
MP, thanks mate. I will be getting to those control surfaces soon.
Bob, glad its not just me!
Piet, thank you.
Luiz & Christian, thanks and I appreciate everyone's feedback on the props, they seem to be going the right way.
Back again shortly,
Ian.
White_Wolf
Master at Arms
1/24 Fw 190 D9 Frankfurt 1945 4th March update
Looking forward to this Ian, following with interest
Had a look at the article in ModelArt - awesome stuff, congrats
Laurence
Looking forward to this Ian, following with interest
Had a look at the article in ModelArt - awesome stuff, congrats
Laurence
jose pedro
Member
1/24 Fw 190 D9 Frankfurt 1945 4th March update
Hi!
Great work!
The prop job is extremely interesting!
Hi!
Great work!
The prop job is extremely interesting!

Brokeneagle
Master at Arms
1/24 Fw 190 D9 Frankfurt 1945 4th March update
Thanks Laurence, I'm working on the 2nd part as we speak.
Ian.
Looking forward to this Ian, following with interest
Had a look at the article in ModelArt - awesome stuff, congrats
Laurence
Thanks Laurence, I'm working on the 2nd part as we speak.
Ian.
Brokeneagle
Master at Arms
1/24 Fw 190 D9 Frankfurt 1945 4th March update
 Thanks Jose, the prop was a challenge texture wise but I was happy with the results. I ended up just using a pair of sprue cutters very carefully!
Ian.
Hi!
Great work!
The prop job is extremely interesting!
Ian.
Brokeneagle
Master at Arms
1/24 Fw 190 D9 Frankfurt 1945 4th March update
Hello Guys - back again with another update on this fw190 build.
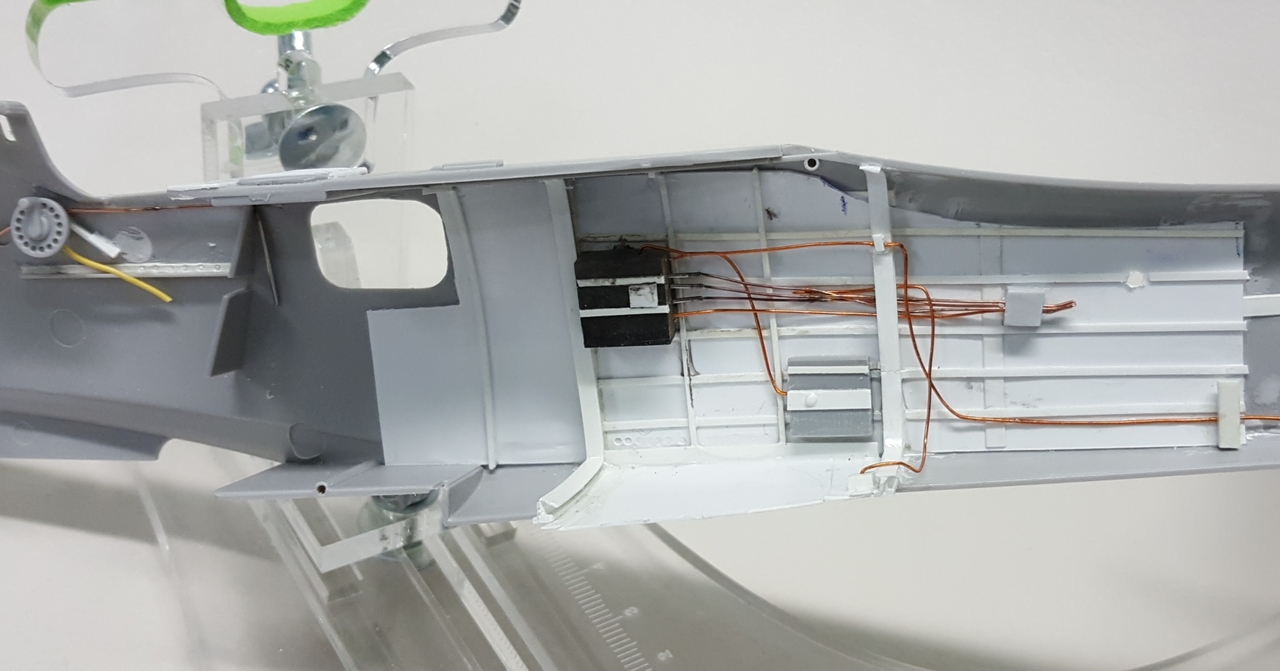
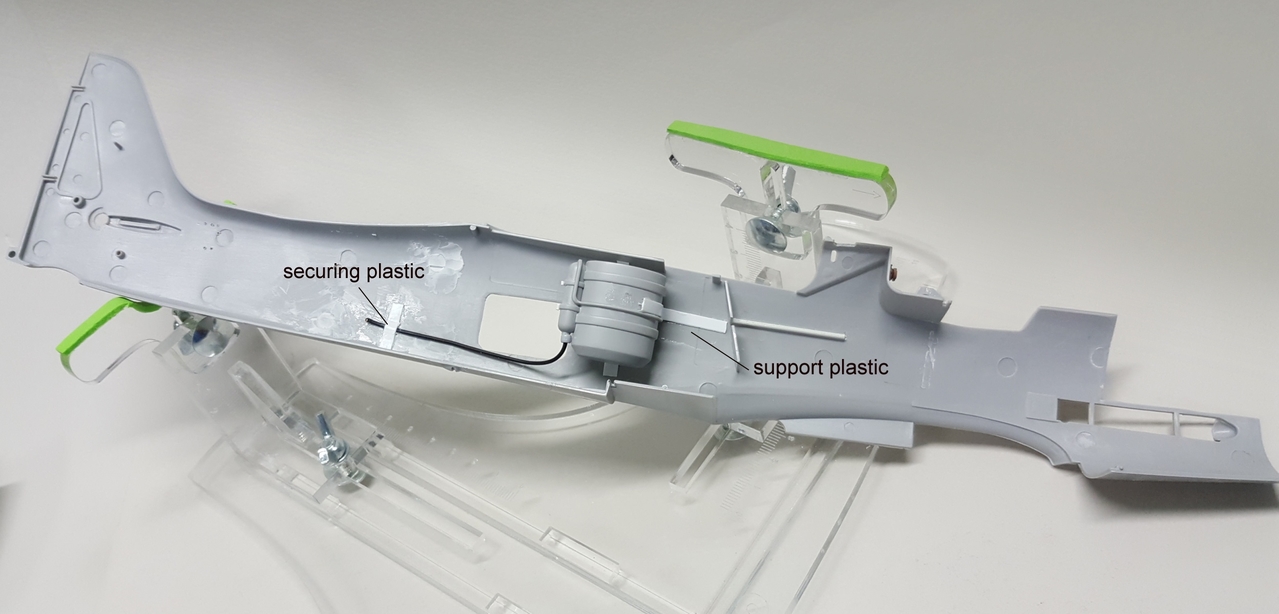
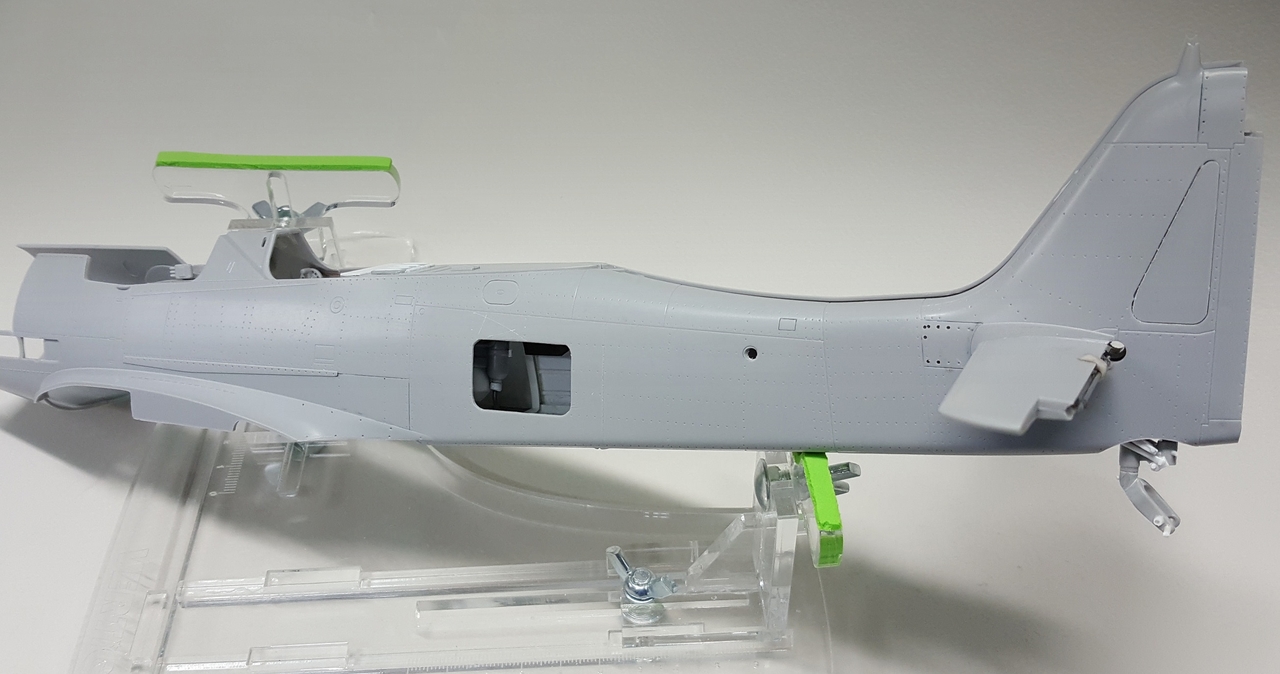
I have done further work on the inner fuselage detail which can be seen through the open access hatch but there is still a little more to do.
I have built a replacement gunsight stand as the kit had nothing - still need to add a couple of little details here.
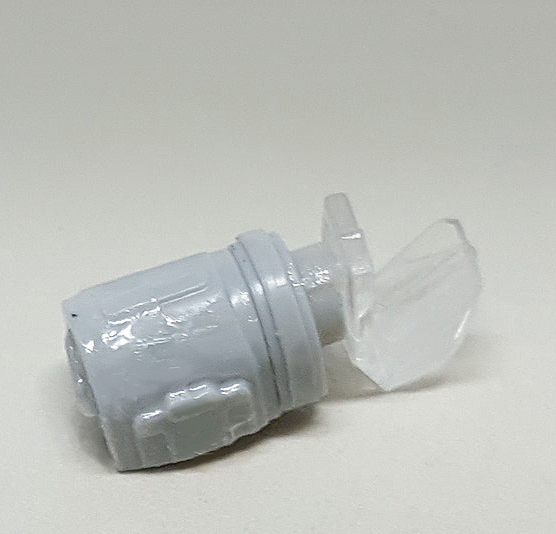
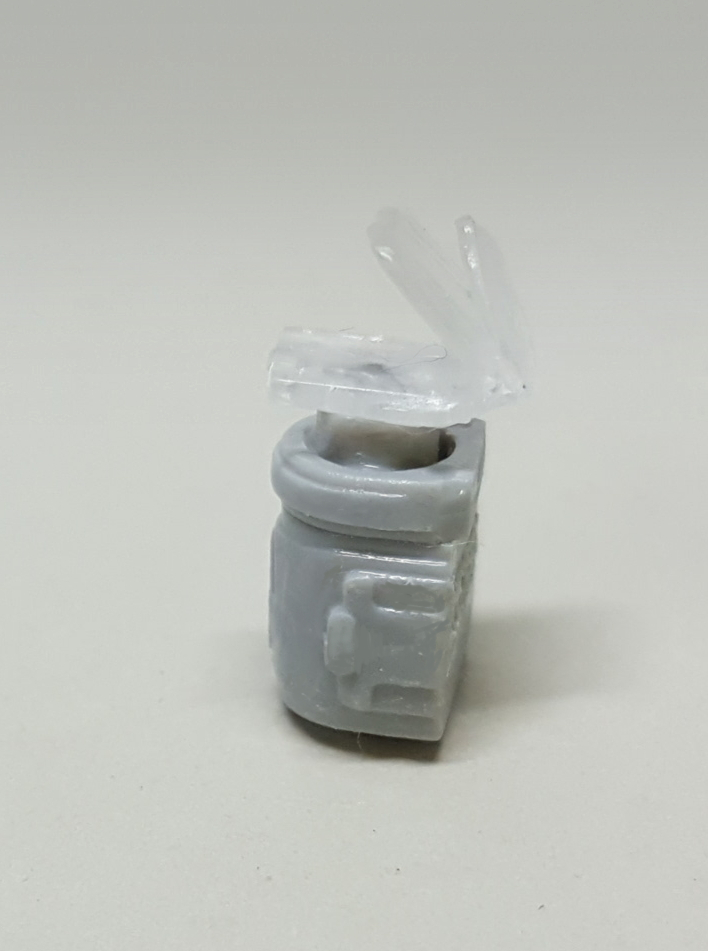
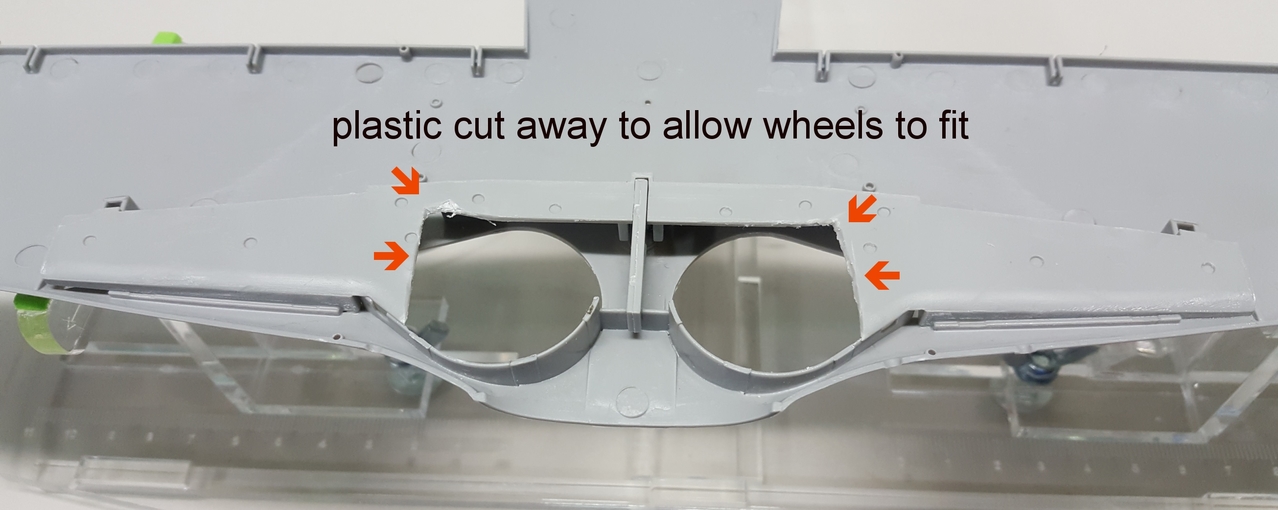
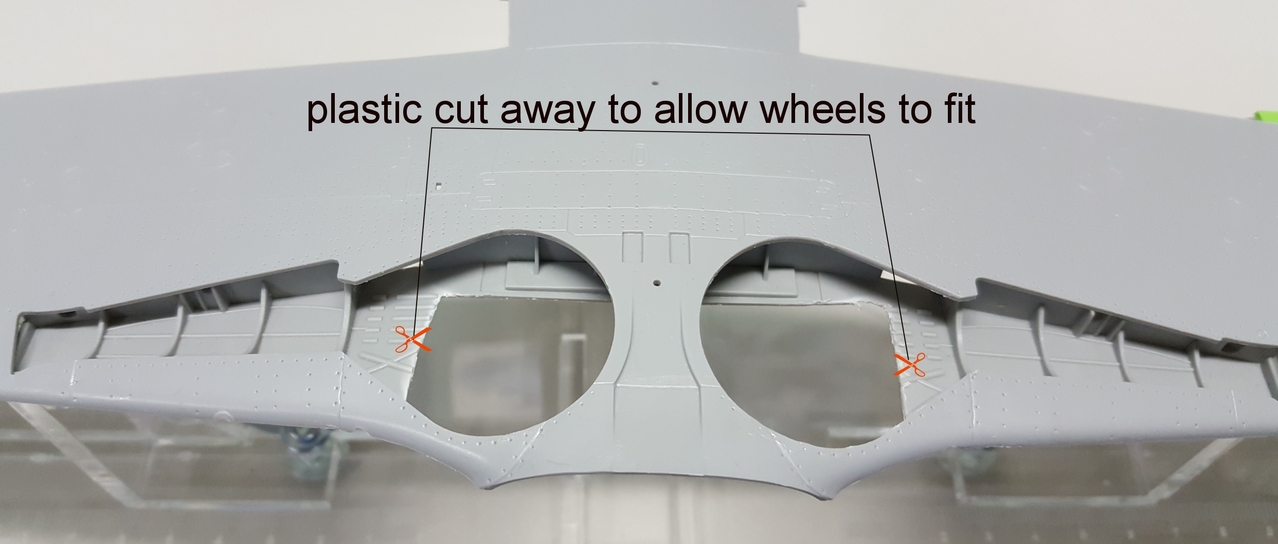
The wheels needed to be set in the folded position so as at least the dark form can be seen when you look under the plane in the dio. They will also support the plane to sit correctly into the ground work. They would not fit with the wheels and lower axle arms so i left the axle section out and glued the wheels to the covers. The wheel wells also had to be cut to allow the wheels to fit.
The strange black plastic that Trumpeter uses for the landing gear does not seem to take to super glue or liquid poly securely, so I used some additional plastic strips to help.
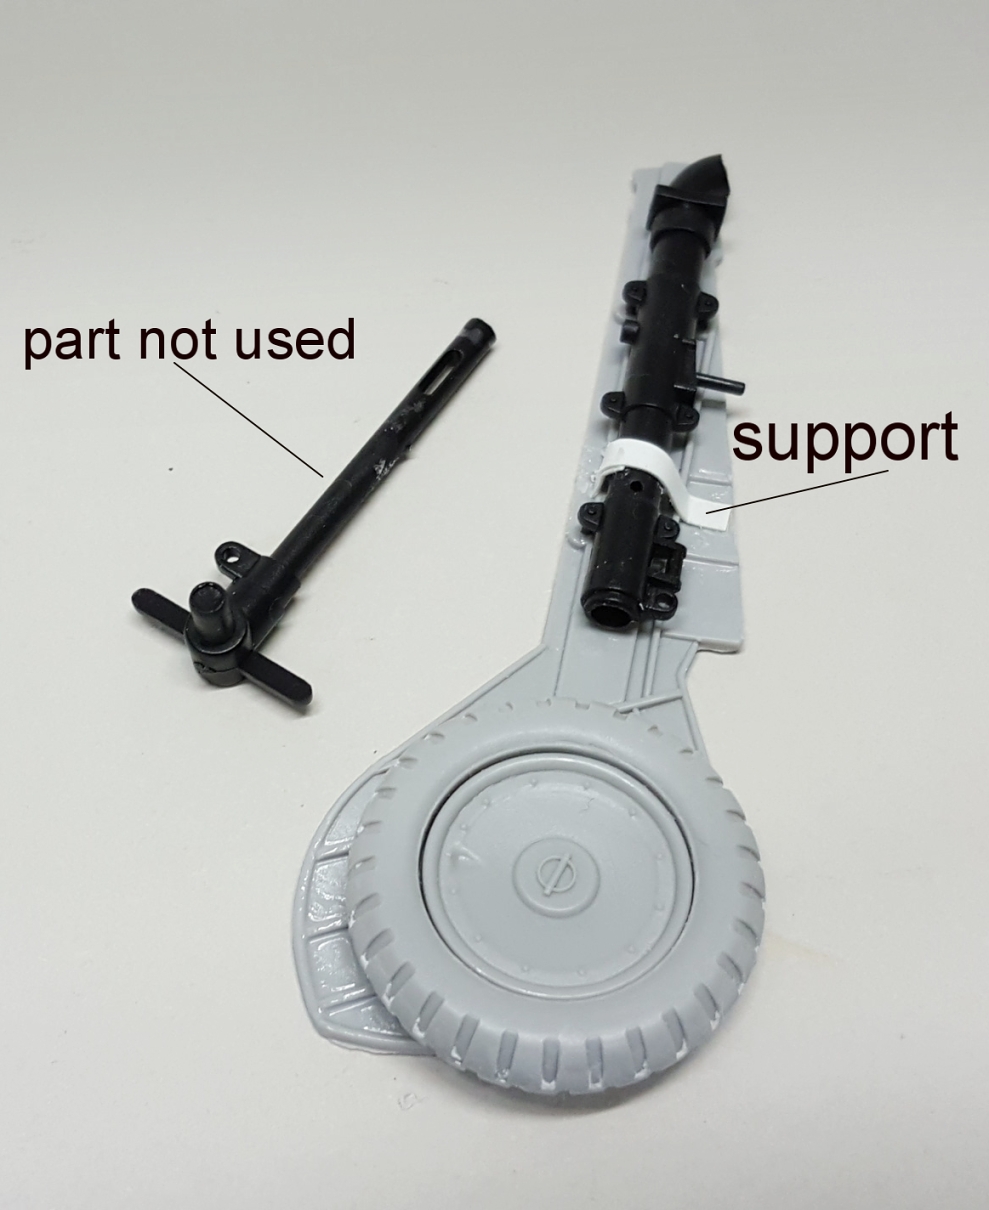
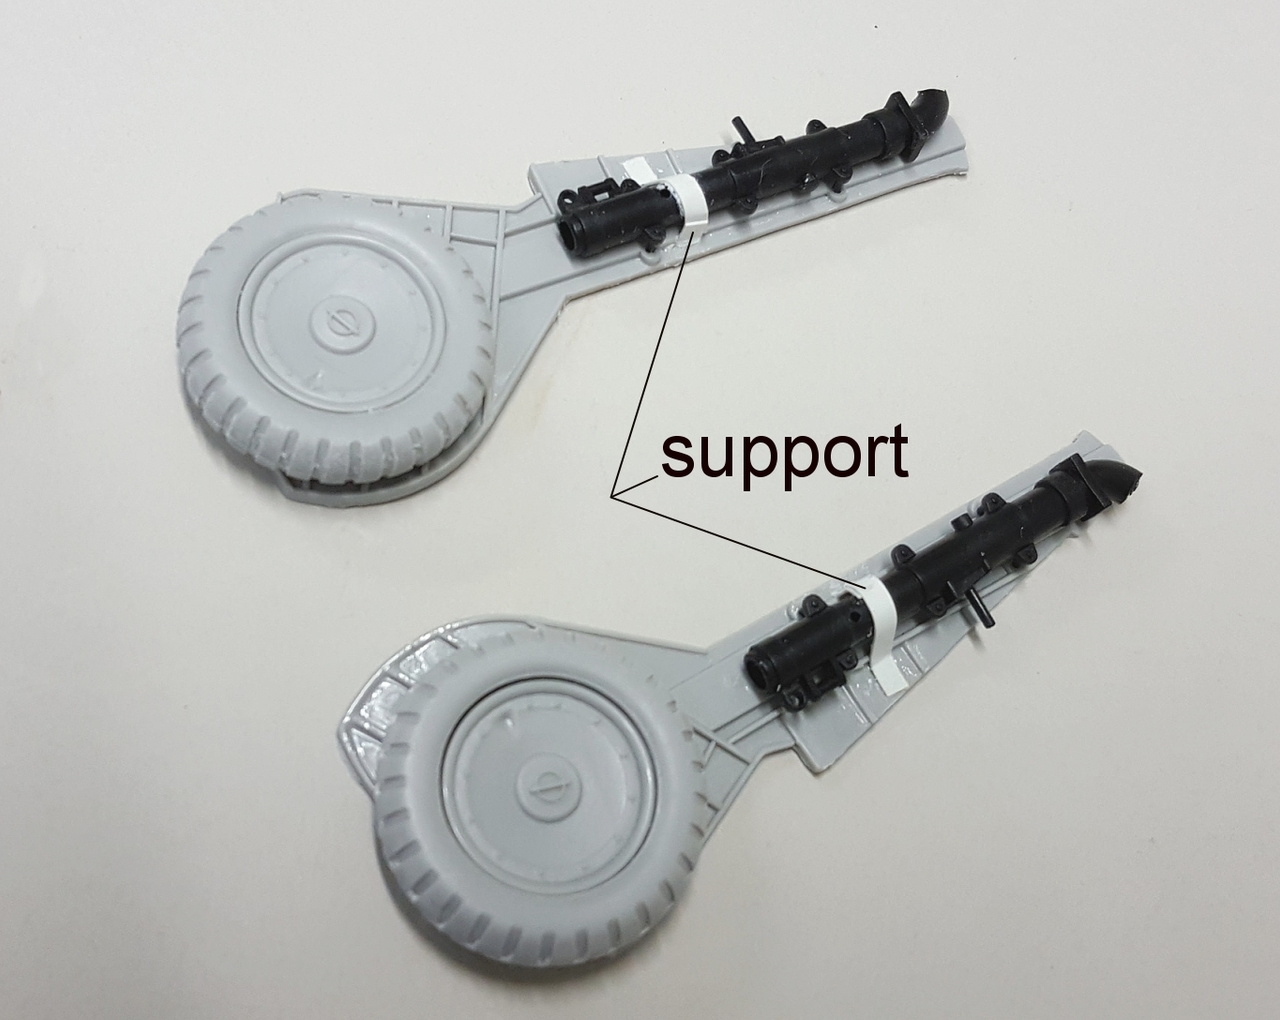
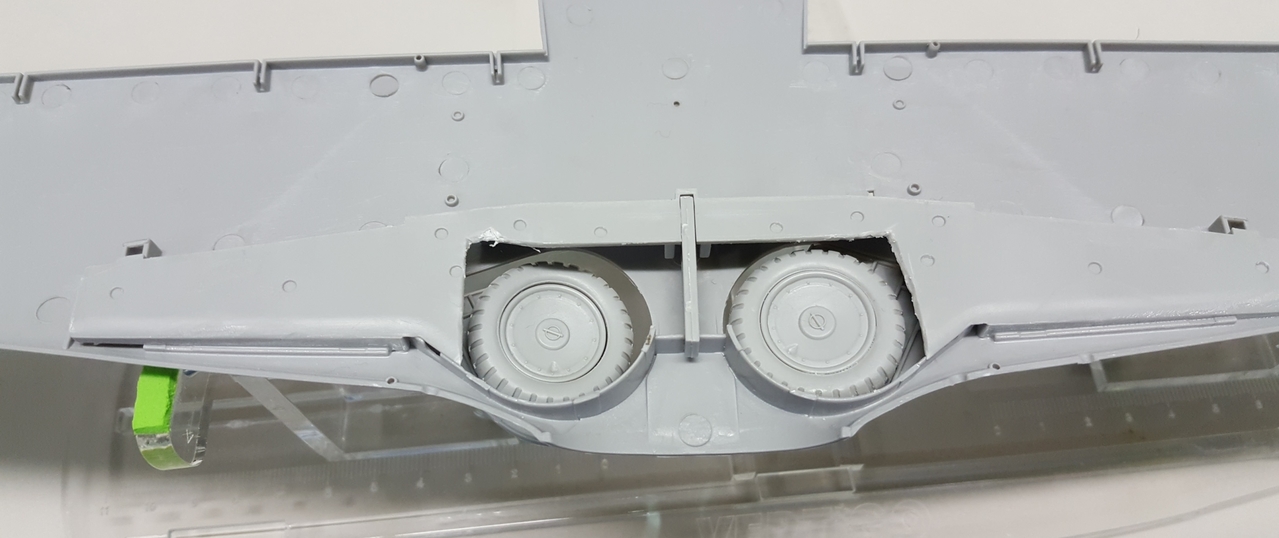
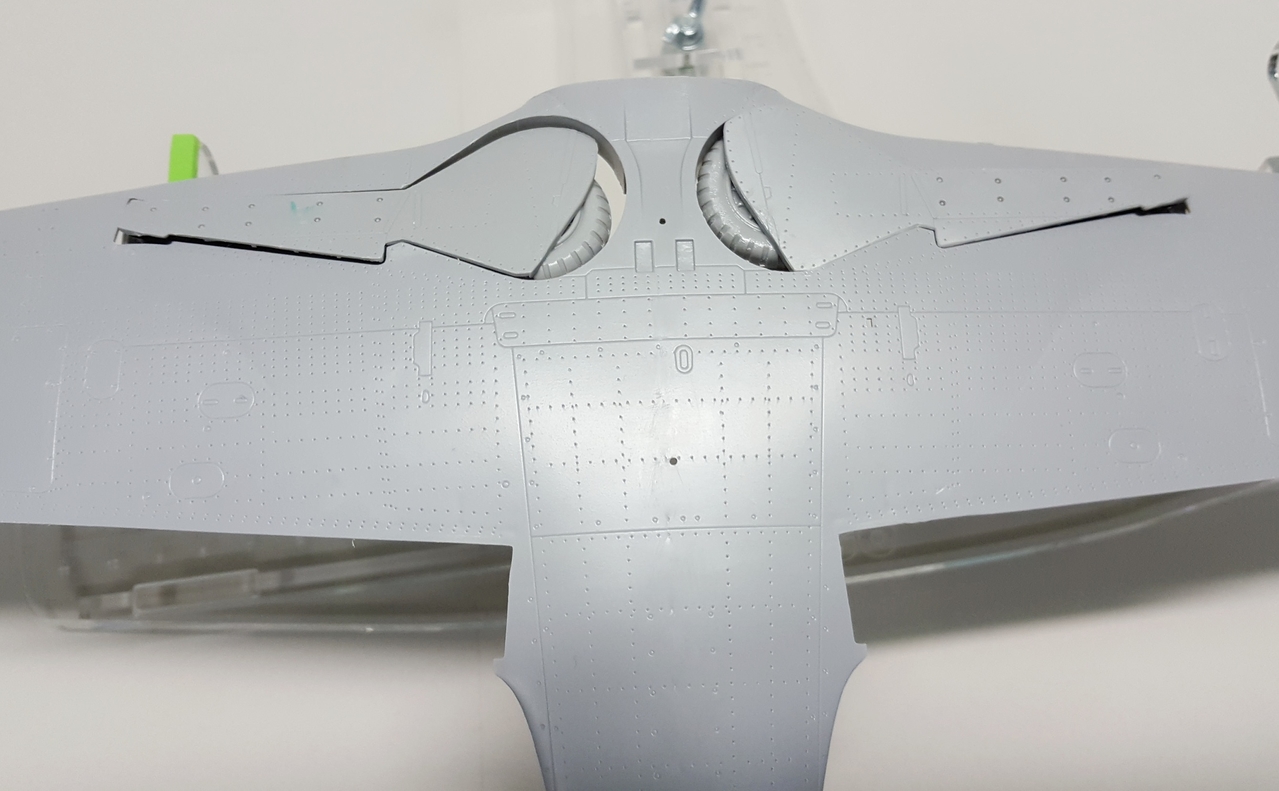
The're not glued in yet but will be positioned like this approx. with the right side down a touch like the gear failed- remember they will be under the aircraft basically hidden by dirt and shadow. I will cut a section of rod to add the missing arm piece but nothing fancy.
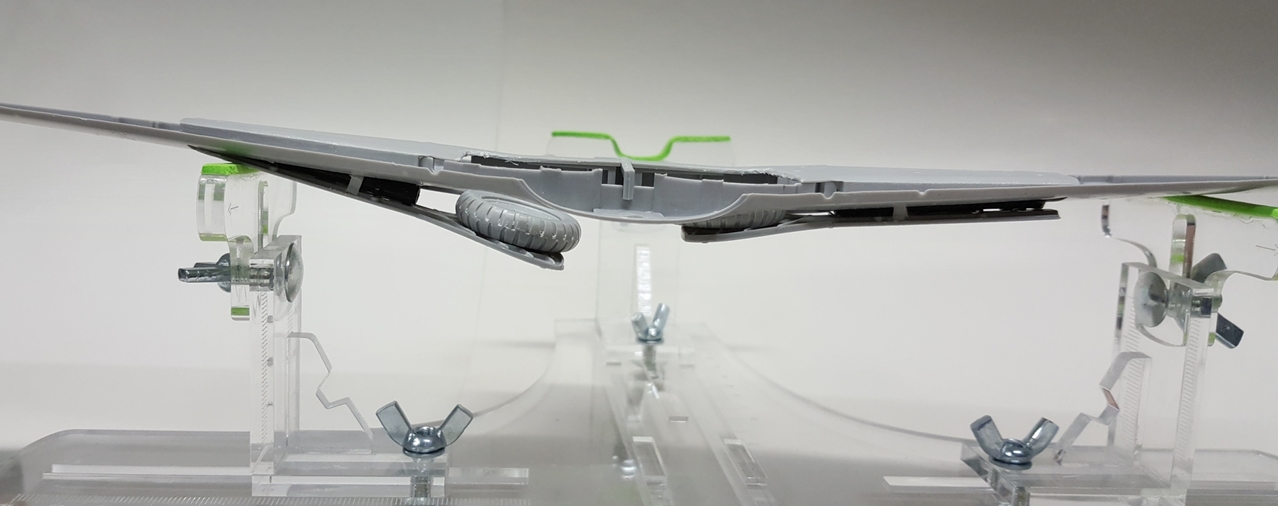
Back again soon!
Hello Guys - back again with another update on this fw190 build.
I have done further work on the inner fuselage detail which can be seen through the open access hatch but there is still a little more to do.


I have built a replacement gunsight stand as the kit had nothing - still need to add a couple of little details here.


The wheels needed to be set in the folded position so as at least the dark form can be seen when you look under the plane in the dio. They will also support the plane to sit correctly into the ground work. They would not fit with the wheels and lower axle arms so i left the axle section out and glued the wheels to the covers. The wheel wells also had to be cut to allow the wheels to fit.
The strange black plastic that Trumpeter uses for the landing gear does not seem to take to super glue or liquid poly securely, so I used some additional plastic strips to help.


The're not glued in yet but will be positioned like this approx. with the right side down a touch like the gear failed- remember they will be under the aircraft basically hidden by dirt and shadow. I will cut a section of rod to add the missing arm piece but nothing fancy.

Back again soon!
1/24 Fw 190 D9 Frankfurt 1945 4th March update
Great tips in here, securing lines with stripes of styrne. Much better than relying on CA or something. Looking good Ian
Great tips in here, securing lines with stripes of styrne. Much better than relying on CA or something. Looking good Ian

Brokeneagle
Master at Arms
thanks MP - i found this method to be more reliable over the long term with wiring especially.
Ian.
Ian.
Some good ideas Ian,


Bob
Bob
Skinny_Mike
Well-known member
Wow Ian, fantastic work. So much fun watching your masterpieces come to life!
Similar threads
- Replies
- 8
- Views
- 2K
- Replies
- 4
- Views
- 1K
- Replies
- 104
- Views
- 16K

